Tips for 3d printing miniatures
The Ultimate Beginners Guide to 3D Printing Miniatures – 40Emperor
I decided to write a blog filled with useful things I wish I knew before I started 3D printing. As someone starting out in 3D printing, you will have a lot of questions. I have set out to answer some of the questions I had and that I get asked a lot.
Welcome to the Ultimate Beginner's Guide to 3D Printing Miniatures.
If you are looking for the best 3D Printer for Miniatures...
You are looking for a Resin 3D Printer. Don't believe any site/person/source that tries to tell you otherwise.
Of course, you will find a lot of people who already own an FDM printer, and they don't want to upgrade to a resin printer.
They will happily claim their prints are of sufficient quality.
They blatantly lie claiming that you can print decent-looking miniatures on an FDM printer.
Either these people have never seen a good mini before or they're just defending their unwillingness to switch to an SLA, DLP/LCD, or MSLA resin printer. To be fair, It could also be that you've found an article that hasn't been updated since 2018.
Don't get me wrong! I don't hate FDM printers.
I have a couple myself. They have their uses.
They are just complete trash at high-detail jobs.
They are perfect for use on projects that require strength.
I only use FDM printers when I want to make tools. And they're also great to make paint racks etc. They just suck terribly hard at making minis.
I also don't like them for terrain and scenery. It's just too slow. And the layer lines irk me wrong. I do use them to create cheap armatures for trees though. FDM prints are also less prone to warping. But I have 0 need for large flat surfaces. And as you learn to cure better and better, you will have less and less warping issues with resin prints.
Resin 3D Printer Prices are dropping like crazy. You can get started with a pretty decent DLP/ SLA printer for around $100.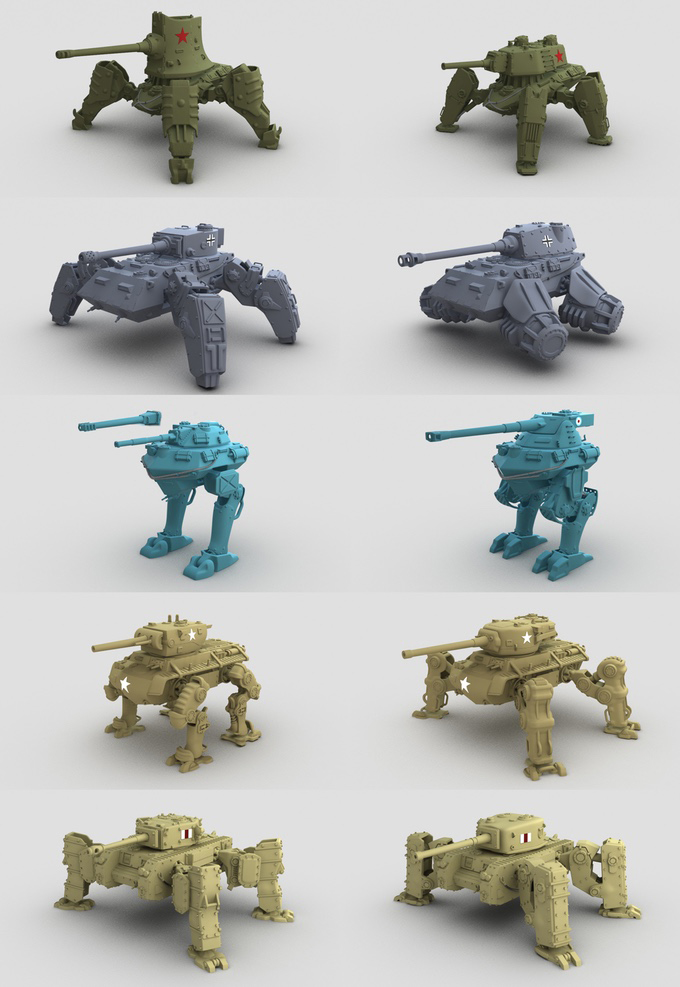 So if you are not sure, resin printing miniatures is for you? Just give one of these entry-level printers a whirl. Once you see what resin prints look like as compared to FDM prints,.. you will never look back.
A normal Resin 3D Printer can print at a layer height of 0.05mm without even breaking a sweat. Most of them can even print at 0,01mm. I really dislike looking at FDM printed miniatures. They are ruined by visible layer lines, and they are a complete nightmare to paint. If you are looking for smooth results on your 3D Printed Models the choice is simple. You need to consider 3D printing miniatures in UV Resin.
Even though the absolute worst resin 3D printer outperforms the absolute best FDM printer by a factor of one-billion, when it comes to 3D printing models and high detailed miniatures, that doesn't mean all 3D Printers are created equally.
Amongst them, there is a world of difference in print quality, user-friendliness, longevity, affordability, and noise-levels.
There are hundreds of different types of Resin Printers out there.
But there are basically just 4 archetype 3D Printers to consider if you are a hobbyist, that wants crisp prints, who enjoys painting, and who loves playing with Minis in their Wargames and RPGs.
- Affordable 2k Printers
- Affordable 4k Printers
- Affordable 8K Printers
- Affordable Printers with a big build-plate
If you are a wargame or an RPG enthusiast, there is no need to get a $1500 + printer.
If you are anything like me, you started because you want to save some money.
Bit-sites are getting more expensive by the day. As are standard model kits and minis in general.
It would make no sense to put your money towards a printer that would cost as much as 3 complete armies.
So how much does a 3D Printer cost?
At the time of writing, the absolute cream of the crop, when it comes to 4k Printers under $1500 is the Phrozen Sonic Mini 4k.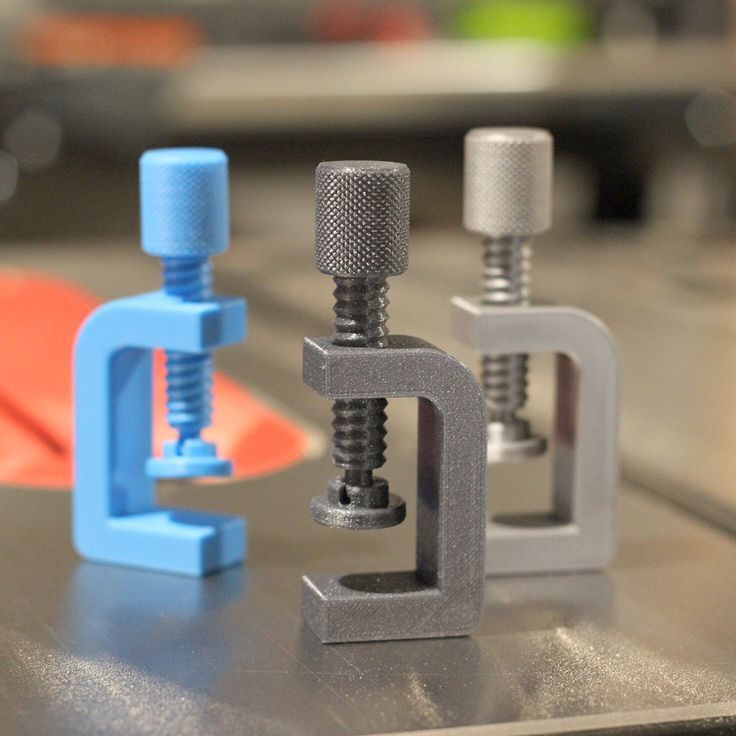 And it comes in under $330. YES, you've read it right. It's actually that cheap.
A lot of people have this misguided idea that 3D resin printers cost north of $9000.
But those printers are for professional commercial casters. They are for Architects and Dentists, for medical purposes. You don't need those for wargaming or playing Dungeons and Dragons.
You need something that can produce complex shapes, smooth surfaces without visible layers, with affordable resins.
The Photon Zero is an EXTREMELY cheap entry level 3D Resin Printer
"2K? I just thought you said entry-level printers start at under $100"
Yes. When 3D Printing enthusiasts talk about 2k/4k/6k/8k printers there are referring to the resolution of the UV screen. The higher the resolution, the more pixels per inch they fit. This directly corresponds to the capacity of a machine to produce crisp minis.
You actually have a lot of douchebag manufacturers who might advertise their printers in a way that takes advantage of people who are new to Resin 3D printing.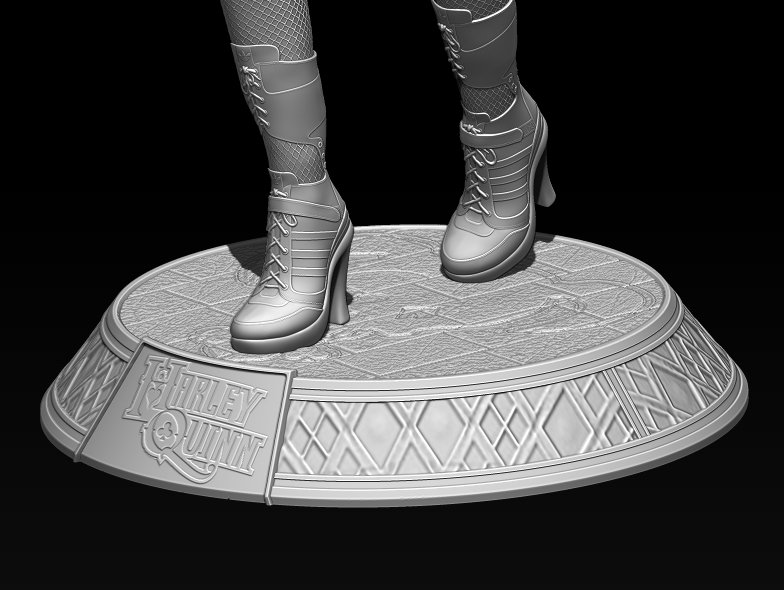 You will see ads and listings out there proudly proclaiming that their printer has a "2K FULL-COLOR UV screen". WOW FULL-COLOR!!!!! that must be good!
No. As far as I can gather, full-color screens have a way shorter lifespan than so-called Monochrome screens. I might be wrong, but what I found was that full-color screens have a life-span of anywhere between 200 and 600 printing hours.
If you are a fanatical printer, that means you have to replace your UV screen every 4 to 6 months.
And if you are unlucky, the replacement screens are extremely expensive. Or imagine, you buy into an older model, and by the time your UV screen burns out. That company no longer produces replacement screens. That would really suck.
I cant look into your wallet. But if you are buying a printer for over $250, I can imagine you don't want to have to toss it after a year when your screen is through. So either buy a $100 printer you don't mind replacing in its entirety or always buy one or two back-up screens when you are purchasing a 3D Printer with a full-color UV screen.
So what makes a 2K 3D Resin Printer affordable?
When you are considering to purchase a specific 2K printer, there are a few things worth considering.
- What size of build-plate do I need?
- Does it have a monochrome or a full-color screen?
- How much does a replacement screen cost?
- What are the costs of 2K printers with similar specs to the one you have your eye on?
- Is there a community of people on Facebook, Reddit, or Youtube I can ask questions about this brand?
- What's the price of 4K printers in comparison to this 2k Printer?
If you exclusively want to print small minis then you can do with the most basic 2k Printer. If you want to print Tanks, Monsters, Angels, Scenery pieces, and whatnot, you might want to look into printers with a larger screen.
Also, make sure to check the user communities of certain brands. Because if you judge a printer solely by its reviews you will not get a good idea about its quality.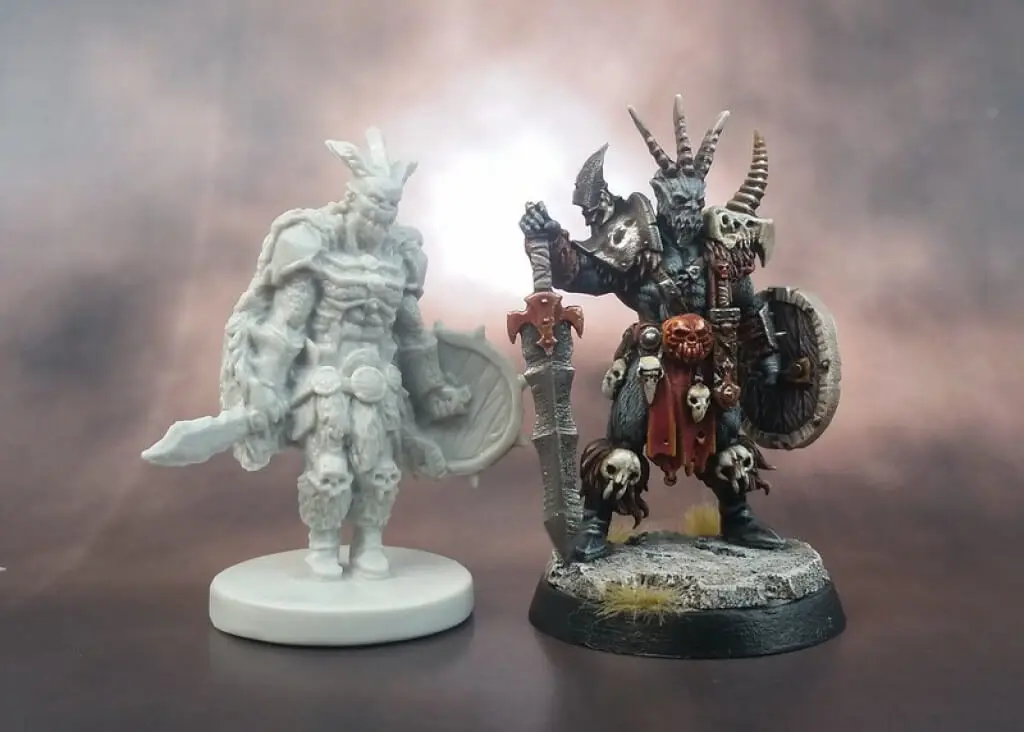 Only people who had a negative experience tend to leave reviews. Positive reviews are often bought. Instead, look at what the people who actually have one of those machines say about it on Facebook for example.
The most important thing to keep in mind when trying to decide what 2K 3D printer you will be getting is whether the 4K printers aren't available in that price range yet. I can imagine you pulling the trigger on a $400 2k printer, only to find out that there are superior 4K Printers available at $330.
The Photon Mono is a very Decent Resin 3D Printer
Affordable 4K Resin 3D Printers
Almost all 4K printers come with a Monochrome Screen.
So that's already something that you don't have to worry about when shopping for a 4K printer.
It is however advised to buy a replacement screen with your 4K Resin Printer.
Especially because the lifespan of those screens is longer.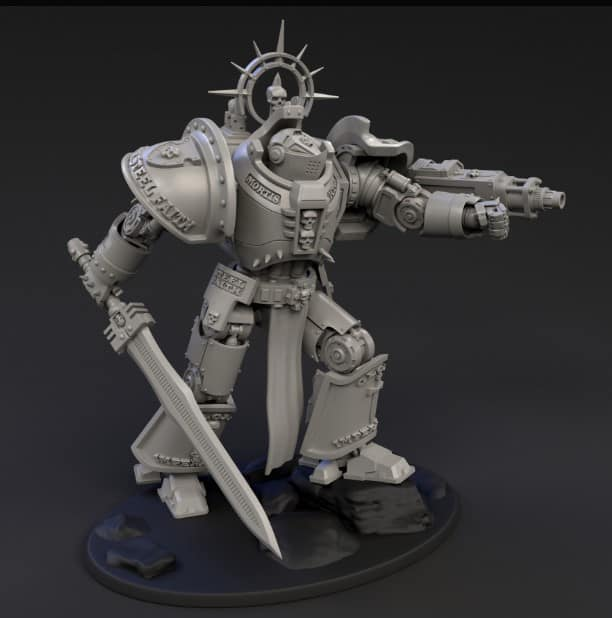 The chances are that by the time you would need a new one, the brand will no longer produce those screens. So get an extra one and save it for a rainy day.
Currently the first generation of Consumer-level Desktop 3D Printers with a 4K screen cost between $330 and $800.
Of course, there are more expensive printers out there. But from a roleplayer or wargamer's perspective, it makes zero sense to look at machines north of $800. We're trying to play some games and have fun painting. Not set up a Casting Master Mould-making imperium.
The Sonic Mini 4K is an extremely good
and affordable 4K Resin 3D Printer
Affordable 8K Resin 3D Printers
All 8K printers come with a Monochrome Screen.
It's advised to buy a replacement screen with your 8K Resin Printer.
Also take in mind that large prints will need a larger curing station.
8K printers like the Phrozen Mega 8K are for people who want extremely large prints and extremely crisp detail.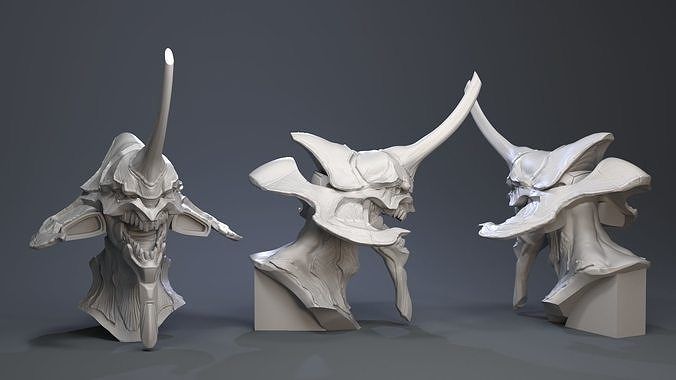
The third thing to be mindful of is how big you need the build plate to be.
If you are a wargamer, chances are you will want to start printing tanks and demons before long. Having to print your models in multiple runs can be annoying.
If you are into adventure RPGs and dungeon crawling games, you will feel the desire to crank out medieval townhouses in no time. You want the next Big Dragon. You want that super rustic Victorian Tavern. Don't even try and deny it.
If you're a competition or semi-pro painter, you will graduate to wanting to bust out busts on your machine sooner or later.
Keep in mind whether you want to buy a Small 4K printer or a Big one.
It's good to note that small 4k printers have more crisp results than large 4k printers.
4k is a fixed resolution. so it's not hard to imagine that the number of pixels per inch is way higher on a small screen than they are on a bigger screen.
The Phrozen Sonic Mighty 4K is one of
The Best Large Resin 3D Printers available right now.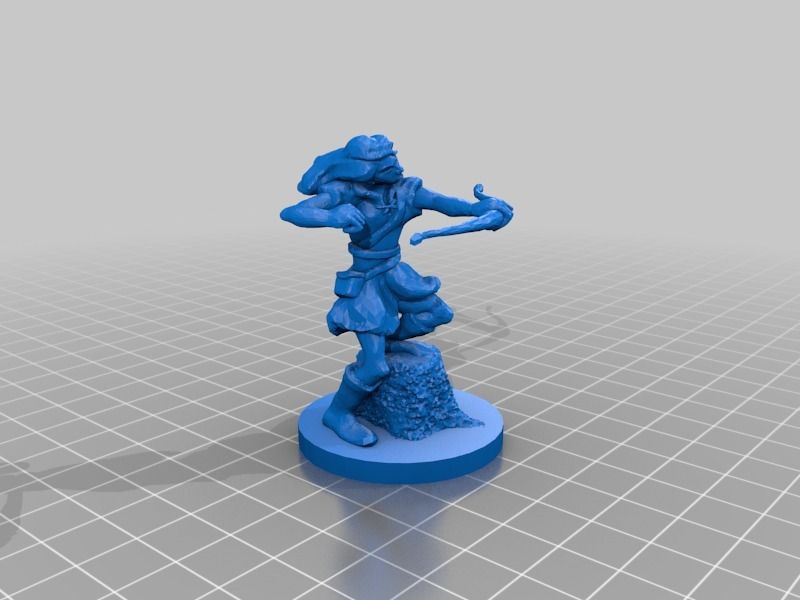
To be able to answer that question you need to know what you need from your printer.
Do you want rough and ready miniatures that don't take too long to print because you care more about gaming than painting?
Or do you want the best possible print quality?
Do you prefer large models?
All these questions are worth taking into mind when finding your ideal first 3D printer.
If I were you I would just find a printer that is A) affordable and B) is billed to match your expectations.
Also, see if you can use Chitubox with your printer of choice. As it is a very intuitive program and free to use.
If you want to find out if you even like 3D printing. Get the cheapest 3D printer you can possibly find. and give it a swing.
Don't expect magnificent usability or a steady learning curve. If you pay a little, you get very little.
If you want to field very decent looking minis, the odd barrel, stack of crates or basic dungeon tiles.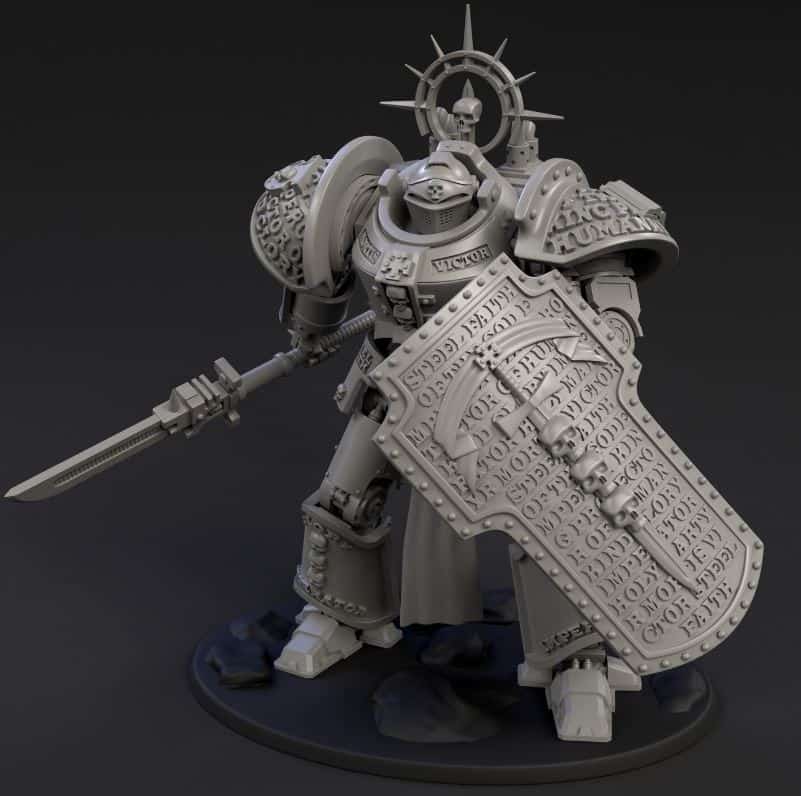 Get yourself anaffordable 2k Printer with a monochrome screen. Have fun with it. Enjoy it. But do not expect to get the highest possible quality from it. Your minis will still look amazing. But there is a whole other level of detail and crispness to explore with 4k machines that 2k machines just can't approach.
Do you want to be able to print minis that are almost indistinguishable from injection molded miniatures?
Do you want slick and crisp results in the highest possible resolution? You need a 4K printer.
4K printers are meant for people who can't stand ugly minis. For Competition painters. For semi-pro commission printers. For people that want the best possible results.
Do you want a machine that can print Dragons, Tanks, Figurines, Busts and Scenery Pieces?
You need a 4K printer with a large build plate.
Even bigger ambitions deserve an 8k 3D resin printer with a 15" buildplate.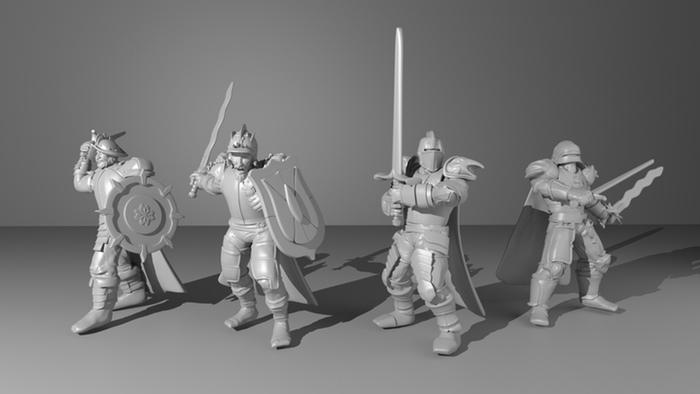
I am going to give it to you straight. There is no such thing as "The Best Resin".
There are loads of awful resins out there. yes.
But what passes as the best is 100% subjective. What do you need from your Resin? Strength? Density? High Detail? Flex?
The awful truth is, that you are going to have to watch some videos. Visit some friends with printers, ask them about their experiences. Talk to people on Reddit and Facebook. Understand that every printer is different, and every resin is too. Experiment.
If you are getting started, there are only 2 Resins worth trying.
They both have a wonderful capacity for detail. But they are not that strong.
They are super ok for painters and Careful Gamers.
But if your cat jumps on your desk or your kid/cousin/drunk neighbour throws your minis on the floor.
They will shatter.
What makes them great is that they are affordable. So you can print a lot, and hone your skills with printing before you graduate to the specialist brands after you learn what it is that you need from your prints.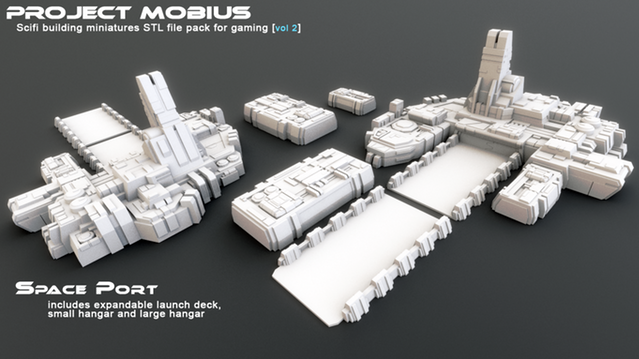
Basic Anycubic Resins come in multiple colors. The Liter bottles are always between $20 and $40 (depending on what geo you are in)
It's a high-detail resin. It's not brittle. But any semblance of strength is not present.
Perfect for painters and careful gamers. All the resins from their range can be mixed. And oddly enough, from experience, I have noticed that when I mix translucent green with grey 50/50 I have the highest success rate in my prints. I don't know if there's any science to it, I just seem to keep hitting the magic spot with it.
It must be noted that I paint my minis. I can't care less what the color of the resin is
The Aqua Gray by Phrozen also comes in Liter bottles.
It price varies from $0 to $30, depending on deals and geo.
I say $0 because Phrozen is known to be very generous during discount campaigns. More often than not, will they add 2 or 3 liter bottles when you buy a new printer. Really depends what season you are buying in.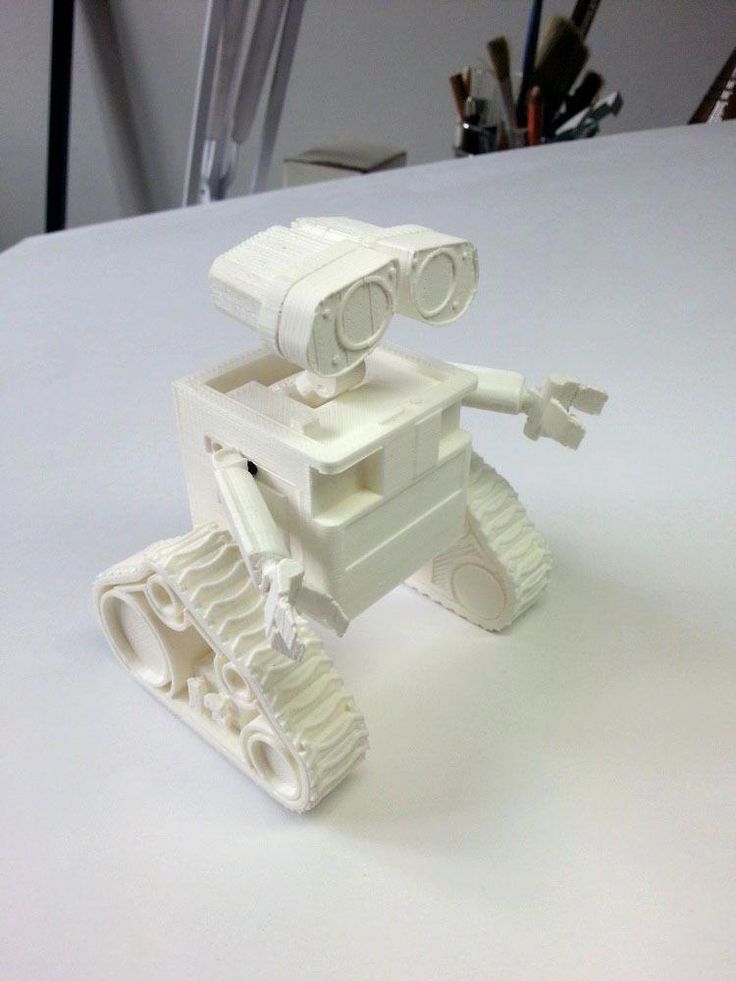 They are also known to add in a free printer sometimes when you buy 20+ bottles at once.
Its worth checking their site from time to time. Especially during singles day, black Friday, and Christmas events. But a regular bottle of 4K resin from Phrozen comes in at around $30.
This is great value. It holds extremely high detail.
Ok so, there is no other way to put this. There are some bullshit marketing agencies out there egging on resin producers to flat out lie. Or....at least be creative about the truth.
All 3D printing resins are toxic gunk.
Even the Bio-Degradable and Plantbased ones.
Yes they are Bio-Degradable. But it will take over 160 years for PLA-like and ABS-like resins to degrade. These brands often make it seem like these resins and the plastics you cure of them are compostable. And they are not.
They are just taking advantage of your desire to buy environmentally-friendly products. And all they're doing is creating a "unique buying reason" so they can beef up their margin.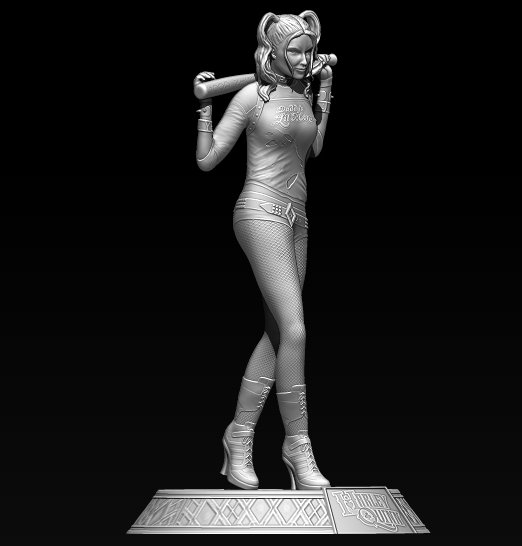
They're flirting with the notion their resins wouldn't be bad for the environment. When In reality, their resins are LESS bad than other resins. But still bad.
I also don't like washable resins not taking the effort to tell you that you shouldn't throw your cleaning water back into the drain or toilet. Yes! the models can be cleaned with water. No, that water is not clean. And it should be disposed of in the same way you would dispose of your other cleaning solutions.
Do not clean washable resins under the running tap.
If you want to know more about the Chemistry involved in Resin check out this insane in-depth 30-minute video by GooberTown Hobbies. Brent is a PhD in Chemistry. And the man knows what he is talking about.
Also, check this video about PLA and ABS prints. It's an eye-opener.
If you are a beginner and you are on your way to starting 3D Printing with Resin for the first time, there are a couple of things you need to realize.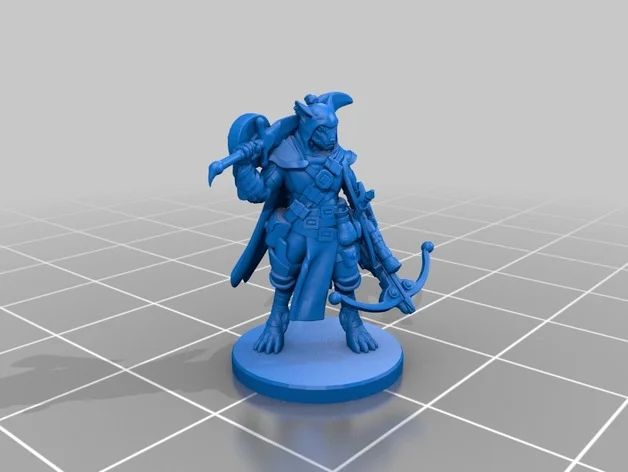
In addition to Resin and a Printer, you will need the following things.
1. A well-ventilated room or enclosure for your permanent set-up
2. A place for you to cure and clean your models
3. Storage for your tools and cleaning equipment
4. Tools to cure and clean your models
5. Personal protection
6. Easy access to a pc or mobile device
7. A USB thumb drive
You can definitely put a desktop 3D printer on a Desk.
I did it for easy access. Works fine. You do how-ever need a place out of direct sunlight that is well ventilated. Having a window open when you print is a good idea.
The stories of resin stinking to high-heavens are greatly exaggerated. Yes. There are resins that smell unpleasant. And there are "odor-free" resins. But the truth is that some people are just "bitch-made" and they will whine just about any smell. If you find you are sensitive to smells, think about getting or building a 3D printer enclosure. I also built a 3D Printer enclosure, but that's because I print a lot. And the sound was getting bothersome to me after a few months. So if you are easily distracted by the sound of cooling fans (comparable to old laptops) then you should also look into creating an enclosure.
You can buy a so-called 3D Printing Hotbox. It's a desk-sized tent to keep your printer warm and can be connected to a ventilation hose to keep the smell down to a minimum. But if the sound is th issue, just stack two Ikea bottom kitchen cabinets on top of each other. Put drawers in the bottom bottom-cabinet, and add doors to the top bottom-cabinet. Put a sheet of multiplex on top and mount a 45 euro kitchen fume-suction hood ontop. Connect that to a ventilation tube that goes outside, and you are done. Well. You do need to add a couple of pieces of XPS foam to the inside and some rubber strips to make it sound and airtight. But I will show you how to do that in a future blog. If you are a creative person it shouldn't be too hard to figure out how to air and soundproof a kitchen cabinet.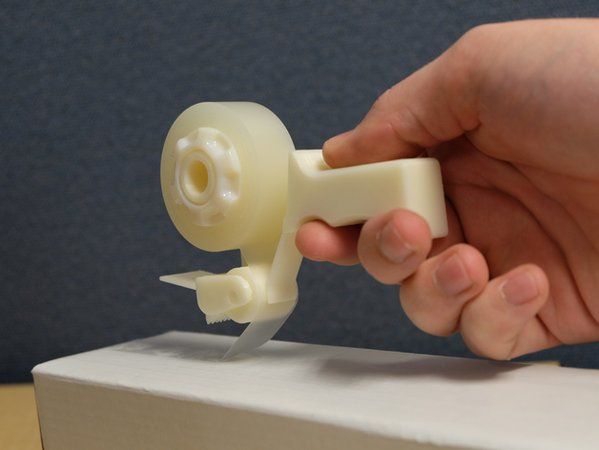
You need some space to put your curing-station. Do you need a curing station? Probably not. You can DIY the f00k out of this if you are frugal. But whatever you build will also require some room in your workspace. Point is.
All Resin Printed Models need to be washed and cured.
By washing, we mean thoroughly cleaned to get excess resin off your model. And with Curing, we mean exposing your model to extra UV light for a couple of minutes to make sure all the resin is properly cured inside and out.
Since it's not healthy for you to expose yourself to UV light for a long time, you will need to buy or create an isolated enclosure where your minis can cure in peace.
A set of drawers, Tupperware, Curver boxes, or a stylist trolley are all excellent ways to properly store your cleaning tools and necessities.
Unless you are a complete slob, you do not want a messy workplace.
Messy workplaces are the number one cause of hobby related accidents.
If you are buying a curing station. You will spend a fair amount of money on a quality of life-enhancing product. But if you are frugal and creative, there is no reason at all to get a curing station.
If you want a curing station..Go for it! Do you need one? probably not.
Will you regret buying one? Probably not.
- A big bucket with a lid or an old Ikea cabinet.
- Reflective foil or cheap mirror tiles.
- A 405nm UV LED light of at least 20Watt
- An alcohol proof Curver box with an airtight lid
- An alcohol proof Tupperware box.
Line your bucket or cabinet with reflective material. Mount the light to the door or lid. and you have yourself a frugal UV curing oven.
Put your Tupperware box inside your Curver box, fill it with alcohol, acetone, Windex, simple green or bio-ethanol. and put the airtight lid on your Curver box when you are not using your cleaning solution.
- A towel to put your printer on.
 If you spill resin you won't fuck up your desk
 - A flat Spackle/Filler knife to remove 3D prints from your build plate
- A Cleaning cloth to wipe your build-plate down after use
- Several micro-fiber cloths to clean your Resin vat's FEP screen
- A dedicated micro-fiber cloth that you keep clean to place your resin vat on when cleaned
- A dedicated micro-fiber cloth to clean your printer's UV screen
- A funnel to put your Resin filters in for when you want to put resin back into its bottle
- Resin or paint filters
- Wet wipes to clean the body of your printer after each use.
- Cleaning solution. Can be Iso Propanol Alcohol of 96% or higher, Bio Ethanol, Acetone, Windex, or Simple green
- Cleaning materials to clean resin from your floor or desk when you spill any
You need to be packing serious heat to protect yourself from the threats of an uncleaned 3D Print. You need a piece with serious stopping power. Sometimes these 3D prints can be savagely predatorial.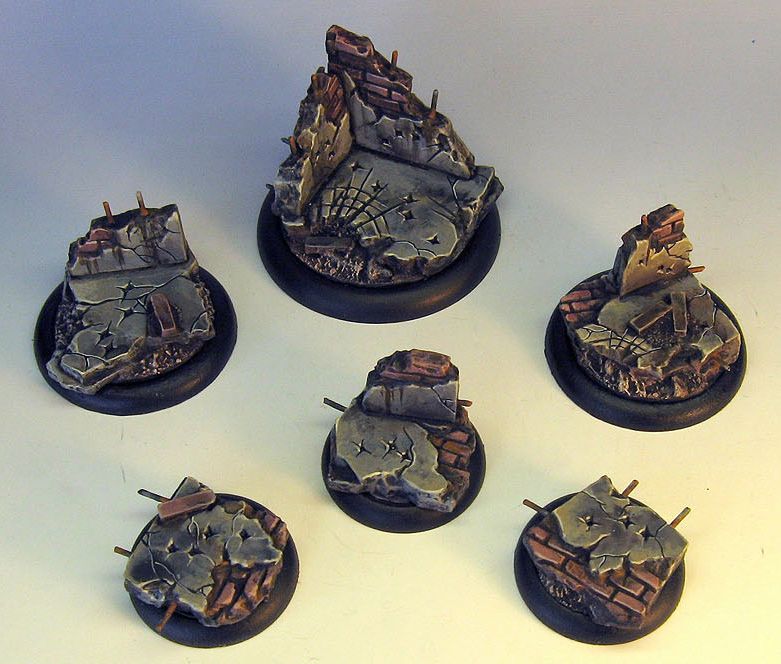
All jokes aside. When you are using a Resin printer, you are exposing yourself t a bunch of chemicals. And it always pays to be safe.
Resin can cause skin irritation. And it can hurt really badly if you have it on your skin and it gets hit with sunlight. So wear Nitrile gloves.
Why not vinyl or latex? Loads of people are allergic to vinyl and latex. AND both Vynil and Latex cant stand being submerged in alcohol or ethanol for long. So just get some Nitrile gloves. and keep your skin safe.
If you are a fan of cleaning with acetone.. get butyl gloves. they are better equipped to keep your claws safe from harm than a nitrile glove would be.
If you are cleaning in Windex or simple green, you don't need need gloves, but I would advise wearing them anyway. People have this weird habit of developing allergies if they use a certain chemical for too long. Best be safe.
When cleaning with Alcohol and Bio Ethanol, you can opt to wear a mouth mask. The fumes can get you drunk.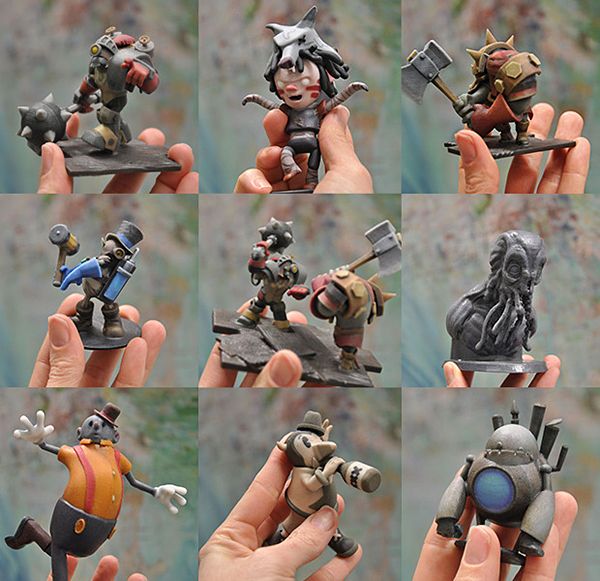 When you are cleaning with Aceton or Windex, wear a fucking mouth-mask. Don't even play. Just do it. You don't want to fry your lungs over some DND characters.
When you are cleaning with Alcohol, Bio Ethanol, Acetone, or Windex, please wear safety glasses.
It's only a matter of time before you drop something in the cleaning solution, and you don't want Windex scorching a hole in your eyeball when that ammonia hits your face.
Please consider that Alcohol, Ethanol, Acetone, and Ammonia are flammable. Don't allow anyone near you that smokes or is a dipshit that likes to whip out the blow torch when you are cleaning prints.
Take it seriously. You don't want to die in a blazing inferno because some stoner offers you a toke while cleaning.
Also Isopropanol, Windex, and Acetone really, really, REALLY stink. That's why a lot of people prefer Bio-Ethanol. at least that smells like Tequila. That doesn't make it any less-flammable though.
Do all your cleaning in a well-ventilated room.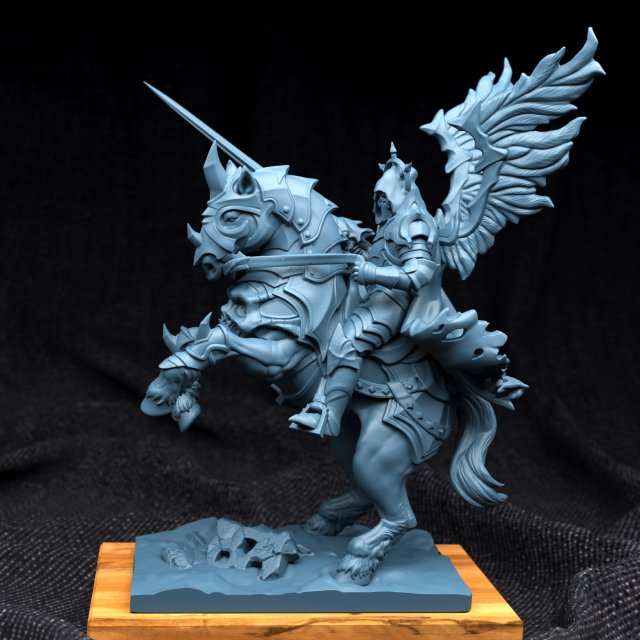
If you are a recovering alcoholic, Muslim, Buddhist, or Rastafari, you might want to seriously consider not using Alcohol or Ethanol at all. Use Acetone, Simplegreen, or Windex instead.
NEVER EVER EVER drink the Alcohol or Ethanol. You will die. They put lethal toxins in there to punish poor alcoholics who can't afford vodka. Or to avoid taxes or some shit.
After you have cleaned your mini put it in your curing station or UV curing oven. Do not directly look into the UV light or the mirrors. A 20Watt lamp is strong enough to damage your sight.
When you take your gloves off, realize that there still might be resin on your gloves. do not touch your skin, your printer's UV screen, or your FEP. Carefully take them off and dispose of them in a responsible way.
Always wash your hands with an alcohol-based disinfectant hand gel to make sure there is no resin left on your hands. Afterward, it's smart to use some hand-lotion, baby-oil, or sunscreen on your hands. With all this covid disinfecting going on at every supermarket, you don't need the added stress to your skin from cleaning your hands after printing.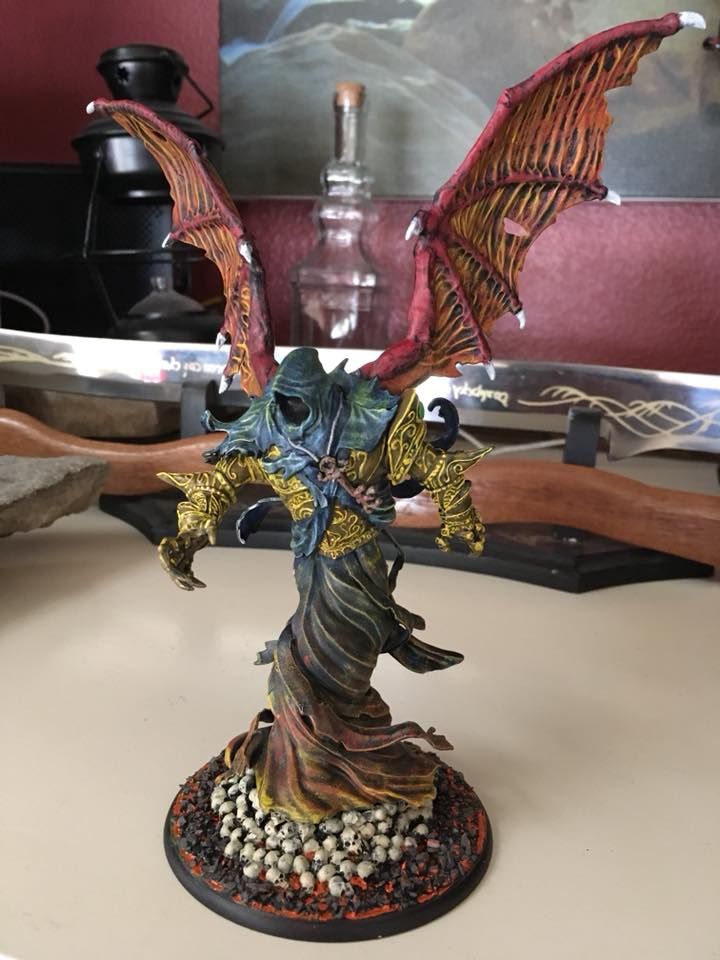 If you print a lot you will wreck your hands in no time from "over-cleaning" your hands. Water and Alcohol dehydrate and destroy all the healthy fats on your hands. So make sure to moisturize after you wash your hands.
You will need a decent pc or laptop to run your slicer. A Slicer is a program that helps you tweak the settings on objects that you want to print. It creates "sliced files" with information that tells your 3D printer what to do during the printing process. Slicers don't take a lot to run, but you'll run into a gangload of trouble if your are using some old crusty laptop from 2007.
You will also need a USB thumb drive or a mobile device. You will need this to send your sliced file to your printer. Older printers only take USB 2.0 so dont get too fancy with your printer. It might just ignore your modern USB stick.
It's pretentious pictures in every-day media like this that make it look
like you need to be some kind of a rocket scientist with a PhD in applied Bullshitonometry to be able to 3D print
No.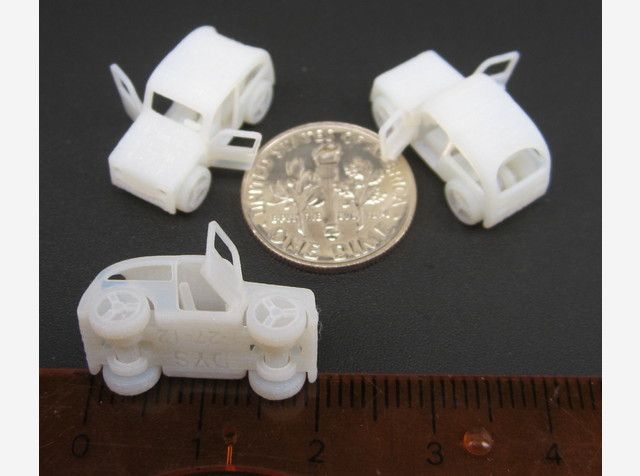 Just like learning to use any other tool. There is some effort involved in getting started. But it doesn't take any rocket science to learn how to successfully print on a Resin Printer.
If you have zero computer skills, have a hard time reading, or if you are poor-sighted, 3D printing can be more difficult than it is rewarding.
You need a basic understanding of either English or Mandarin to be able to read the manuals or to understand articles about your machine.
You also need to know how to work a mouse, how to name and copy files, how to install and run software. Basic understanding of Reddit or Facebook is also a huge plus.
But all the hip kids say it's a Hobby in its own!
A lot of people say that 3D Printing is a hobby in its own because it's fabled to require a huge amount of learning before you can do anything. But as far as I am concerned... that might be true for FDM printers, But resin printers are literally plug and play devices.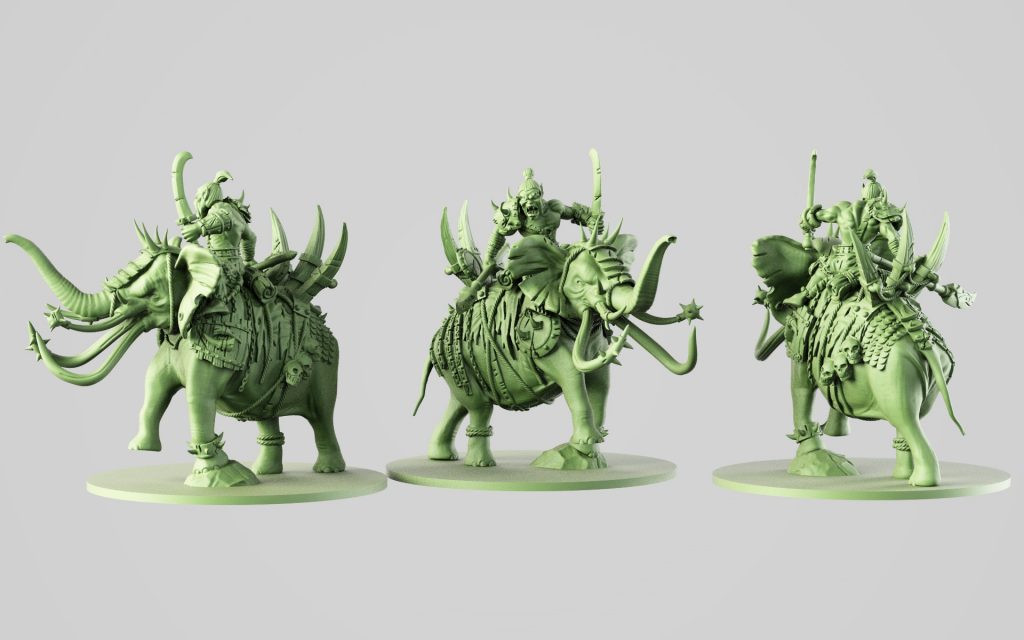
Yes, there is a learning curve. But no. it's not hard.
If you know yourself to be a weakling that cant amount to bring up the required concentration needed to watch a youtube video or google for the answer to a problem. Then yes. 3D printing will prove too difficult for you.
But if you are a creative curious person, you will get the hang of it in no time. It might take you a couple of months to be able to troubleshoot your machine when you have a misprint. But hey. Take a few good pics of your failed projects, take a screenshot of your settings, remember the room temperature, and find a Facebook group filled with friendly people to get you moving along. You can always crowdsource the answer to anything you cant figure out yourself.
3D Printing Models are called STLs after the STL format they are saved in.
Before you can Print your STL you need to place supports. You place supports to make sure the entire model sticks to the build-plate. If you didn't place supports, any overhangs on the sculpt would stick to the bottom of the resin vat (the FEP screen) and they would just float or lay there, totally destroying the rest of your print. Supporting isn't hard. It just takes some effort to learn. It's not super fun. But you can learn to do it yourself, outsource it to someone, or buy pre-supported models (Like Ours :P ).
Once you are done supporting, you save your session and you run it through a free file validator. Those types of programs checks for overhangs you haven't supported. We call those "islands"
Once you have seen the feedback from your file validator, you correct any mistakes you've made, and then you are ready to slice your STL.
If you slice something for the first time on a printer, or when using a new resin, or working with a new set of support settings, you have to dial in your printing settings. That sounds harder than it is. You can watch a few youtube videos and read a few articles and BENG. Before you know it you are murdering at figuring out custom settings!
If you are coming from an FDM background this might give you a migraine. Don't worry, there are roughly 16 settings, this is not FDM printing.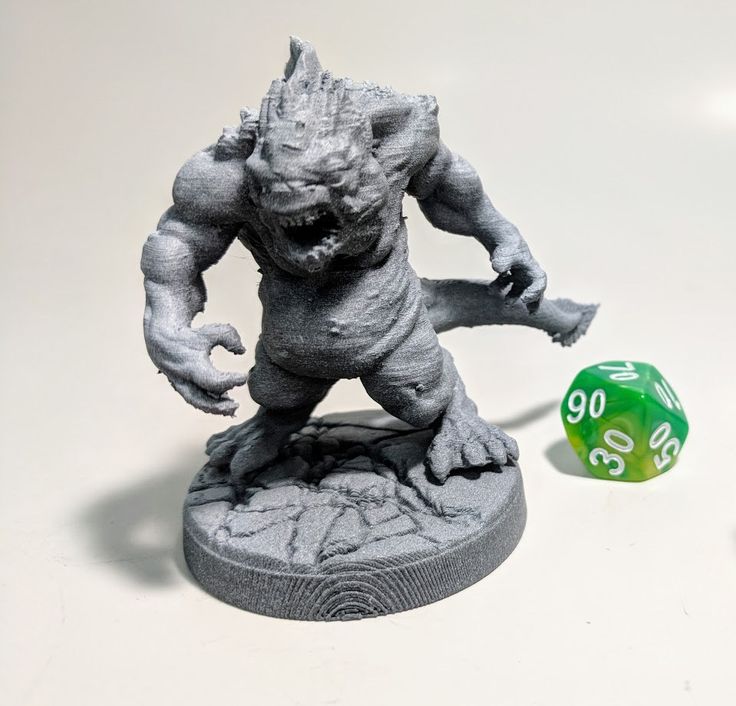 You won't have to go through thousands of minute factors to get your resin printer working. Making the switch to Resin Printing will be a piece of cake.
Once you are done slicing. Save your file and copy it to a USB stick.
Stick the USB stick into your printer. Turn the printer on. Check if you have enough Resin in there. if not, SHAKE yourself some additional resin. Pour it into the vat. Put the hood back on your printer.
This is Greg Kourakos. "The 3D Printing Pro"
The Patron Saint of Resin Printers.
If you want to learn how to Support/Slice/Set/Print you can check out his
Extensive playlist of elite Mast0r lev0l Tutorials
Make sure the room is nice and toasty (Printers hate cold they start behaving very stupidly)
If you are in an extremely cold environment put your closed bottle of resin in a bucket of warm water before you use it.
Select the file on your USB stick on the touch screen of your printer.
WAIT.... once the printer is done (several hours later lol) you remove the hood. You suit up for bio-chemical hazmat warfare.
Take the build-plate off the Z-Axis, use your Spackle Knife to get your print loose from the build-plate.
Throw all your prints in your Bio-Ethanol or cleaning solution. Wash it with water. Throw it back in some clean Bio-Ethanol.
Remove all the supports.
Cure your print.
Clean your printer metuculously.
If you had a misprint, empty the vat through a filter into a funnel back into a resin bottle and clean the FEP
Paint your print.
Field your print!
Remember to dispose of your garbage like a responsible adult.
Do not flush your dirty cleaning liquids down the toilet or drain.
Dispose of them in a responsible fashion.
Remember that bio-resins, and water washable resins are bullshit.
ALL RESINS ARE TOXIC SLUDGE. Just because it's "less" bad for the environment than another resin, doesn't mean it's nature friendly.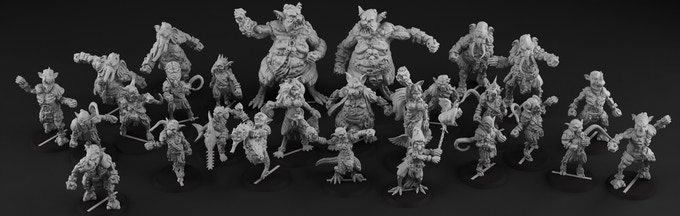 Also, Don't buy into the Bio-Degradable hype. I mean it is bio-degradable. But it takes a good 160 years. So yeah. Don't throw your supports in the garden to compost.
The garbage that comes off of that is still chemical waste. Don't be fooled by lawless madmen.
And I shouldn't even have to say it.
DO NOT LET KIDS UNDER THE AGE OF 16 PRINT UNSUPERVISED.
That's basically all there is to it!
Have fun!
Everything You Need to Know – Clever Creations
It is an exciting time to get into 3D printed miniatures. 3D printers are now more than capable of printing excellent quality minis and the prices of these machines are at an all-time low. You can create, customize, and 3D print your minis right at home.
Because of their small size and detailed features, 3D printing minis can be a difficult task. It could take some while before you get that first perfect print. In this article, we’ll give you all the tips you need to 3D print minis using both FDM and resin 3D printing techniques.
What miniatures can you 3D print?
Miniatures come in all shapes and sizes, ranging from tabletop minis to diorama pieces. They can be used in various settings, like games or educational models. Let’s look at the different types of miniatures that you can 3D print.
Tabletop miniatures
Tabletop minis are tiny (~28mm height) characters from some of the famous tabletop games such as D&D, Warhammer, and Warmachine. They are the most popular kinds of minis available and you can find a wide variety of designs to 3D print.
Action figures
Action figures are articulated models which are figurines of some of the popular movies, TV shows, or comic book characters. These are typically taller than tabletop miniatures and can have complicated joints to facilitate the movement of the model.
Model figures
Model figurines are minis of significant personalities from real-world or fictional games. You can find 3D printed scaled-down models of actual historically significant personalities of movie actors and comic book monsters.
Image: mz4250 via Imgur
A collection of 3D printed and painted minisDioramas
Dioramas are scaled replicas of a particular scene. They are a recreation of a particular scene from a movie, game, or event.
Landscape models
Landscape models are a visual representation of actual or fictional terrains. In the tabletop miniature world, landscape models are used to portray the battlegrounds of the game.
Dollhouse props
Dollhouse props can include customized furniture, lighting accessories, showpieces, and dolls. Depending upon the size and complexity of the models, you can use a resin or FDM printer to 3D print these props.
Educational models
3D printed educational models are a great visual aid for learners of all categories. You can find 3D printed models in scientific, engineering, architectural, civil, safety, and other categories.
3D printing minis: filament vs resin
Out of all 3D printing methods, filament (FDM) and resin 3D printing are the most accessible and cheap options.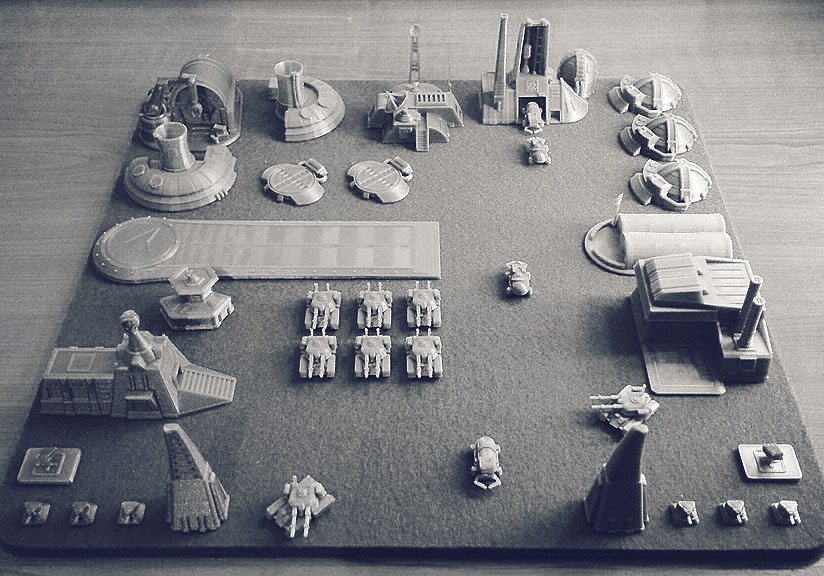 Both methods have their own sets of benefits and drawbacks for miniature 3D printing.
FDM 3D printing
FDM 3D printing uses a spool of a thermoplastic filament as its raw material. This filament is heated using a hotend and extruded via a nozzle to form an object layer by layer. Once molten and extruded, each new layer of filament cools down and fuses to the previous layer.
Because FDM 3D printed minis are printed with relatively thick layers, they tend to have visible layer lines on their surface (before any post-processing). As a result, the visual quality of these figurines is lower than their resin counterpart.
Image: danny_from_miami via Reddit
FDM 3D printed miniaturesHowever, FDM 3D printers are easy to use and safer than resin 3D printers. Because filament is cheaper than 3D printer resin, a FDM printed miniature costs significantly less than resin mini.
You also get a bigger build volume with FDM 3D printers, which lets you print large objects in one piece.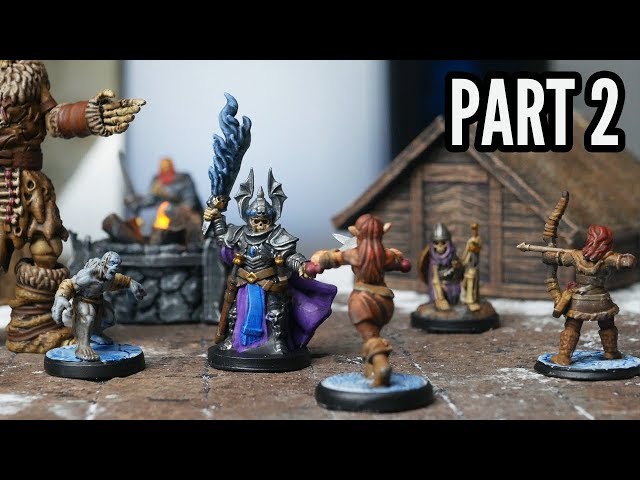 If you are looking to 3D print large miniatures, figurines, action figures, or terrains, a FDM 3D printer is a great option.
Resin 3D printing
In resin 3D printing, a photosensitive resin is cured using a UV or laser light source. SLA 3D printers use a laser to cure the resin, whereas DLP 3D printers use an LCD screen as a light source.
The main benefit of resin 3D printing is the exceptional part quality that you get from it. On minis, you get an excellent surface finish and the finer details of the miniature are reproduced beautifully with a resin printer.
Image: handmadewithashley via Imgur
A resin 3D printed miniResin 3D printing is easy to scale too. No matter if you print a single model or ten at once, the time required is exactly the same. On a FDM printer the total print time increases with every mini you add to the build plate.
The drawbacks of using resin printing for miniatures are the material cost, build volume, and technical expertise that are required to operate resin printers.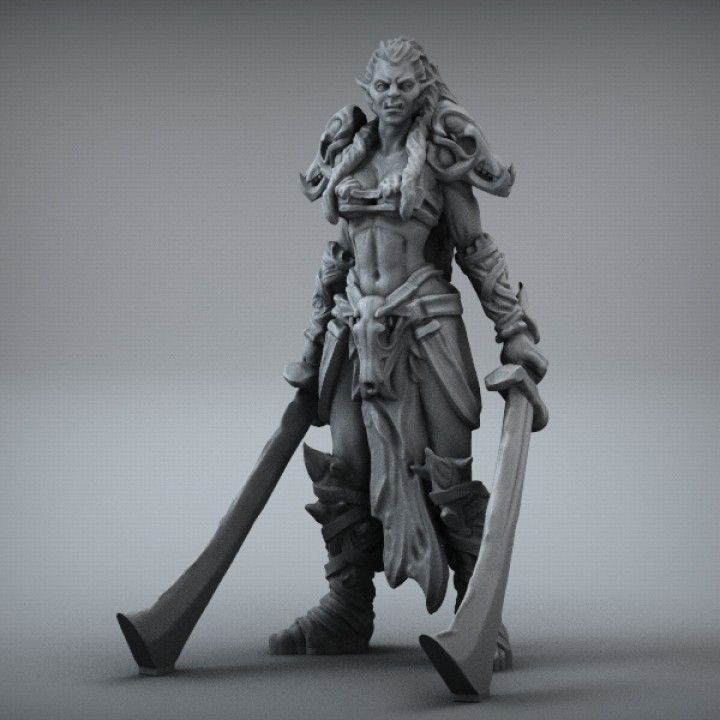 Even though the best resin 3D printers come with features that make their use more streamlined than their budget competitors.
Recommended:
Resin vs Filament 3D Printers: What’s the Difference?
How to 3D print miniatures
3D printing miniatures can be a difficult task if you’re not familiar with the various settings that you need to dial in. We’ve divided this section into two parts. One for printing minis with FDM printers, and one for resin printers.
FDM printing minis
Layer height
A lower layer height means finer layers, which leads to a better surface finish. Most FDM printers have no problem printing down to 0.1 mm (100 micron) layer heights with stock settings. A layer height of 0.08-0.12 mm gives a good balance between time and quality for minis.
Nozzle size
Nozzle size directly correlates to the layer height and the details of the models. A smaller nozzle size will be better able to reproduce the small features of the model.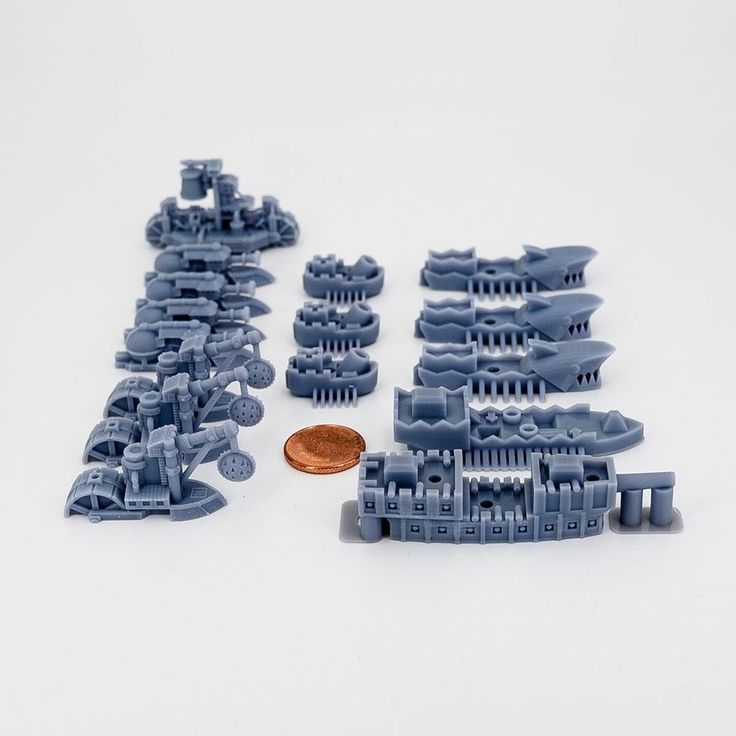 A 0.2 mm or smaller diameter nozzle gives great results 3D printing miniatures.
Temperature
In FDM 3D printing, the hotend temperature is a crucial element to get a good quality 3D print. Especially when working with smaller nozzles. If the temperature is too high, you can end up with filament strings. Too low, and you can suffer from under extrusion.
You need to dial in your filament’s melting temperature perfectly to get the highest quality of minis. Using a temperature tower for calibration is a great way of doing this.
Speed
You need to print minis slowly. Slow speeds let the filament cool down properly and reduces chances of knocking off things from the build plate. A print speed of 20-25 mm/s is a nice starting point.
Retraction
If you want to avoid any zits or blobs on your minis, you should take some time to finely tune your retraction settings. There are many pillar tests available that you can use to fine-tune your retraction settings.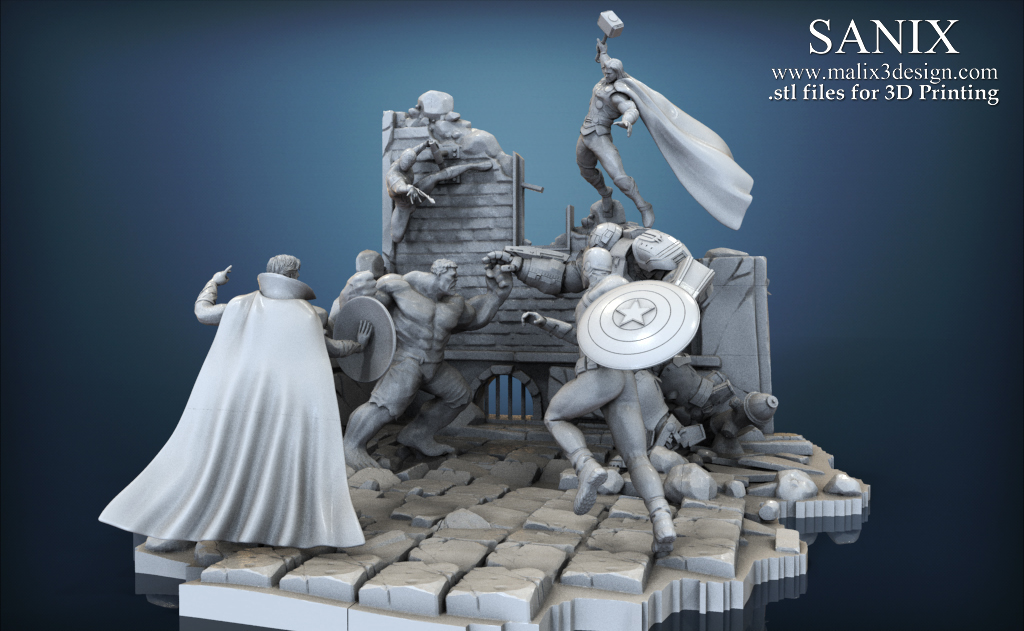 Unfortunately there is no one-size-fits-all retraction setting. Every 3D printer, filament and print settings combination has its own optimal retraction setting.
Supports
Miniatures and figurines tend to have lots of overhangs. To get a high quality 3D printed figurine, you will need to use supports. You should refrain from using slicer-generated supports for minis as they might not provide supports in the crucial areas and are often difficult to remove.
A better alternative to this is to use Meshmixer to generate support. In Meshmixer, you have more options to customize your supports and you can add manual supports to the model as well. Adding manual supports takes some effort, but the end result and time saved in post-processing are well worth the efforts.
Cooling
FDM 3D printers use a cooling fan to cool the molten filament as soon as it has come out of the nozzle. Miniatures can benefit greatly from this. The hotend radiates a lot of heat and spends most of its time around the printed model. As a result, the printed mini can start to overheat and deform.
Running the cooling fan is therefore a good idea, but keep in mind that this is dependant on the filament you use. PLA filament always benefits from cooling, whereas even the best PETG and best ABS run into issues when they are cooled too much.
Resin printing minis
Exposure time
Exposure time denotes the time the resin material is exposed to UV or laser light while 3D printing. This time influences the curing of the resin and ultimately the quality of the model. If you keep the time low, the resin might not cure sufficiently to allow the subsequent layers to build on it. If you set it too high, you risk light scattering and a loss of details.
The optimal exposure time is based on the brand and the quality of the resin. Usually, the manufacturer mentions a range of exposure times for their resins. But these settings also depend on the 3D printer’s light source. You can try out an exposure time calibration test to dial down the exposure settings for your particular resin.
Lifting speed
Lifting speed is the speed at which the build platform lifts the model away from the resin vat at the bottom. In resin 3D printing, the layer is cured near the FEP film at the bottom of the vat. Each time the build platform is raised, suction is created between the FEP film and the cured part.
If the lift speed is too high, you risk damaging the weaker sections of the print. The slower you set it, however, and the more your print times increase. So it is important to find a sweet spot for lifting speed to balance your miniatures’ print speed and quality.
Anti-aliasing
Anti-aliasing reduces the staircase effect in your final 3D printed model. It smooths out the edges of your minis and reduces visible layer lines. The ideal final result has a smooth surface finish with no steps or layers on the model.
Depending upon the size of the model and the slicer you’re using, there are different levels of anti-aliasing settings. There is a great guide on anti-aliasing by Chitubox which you can use to fine-tune your settings.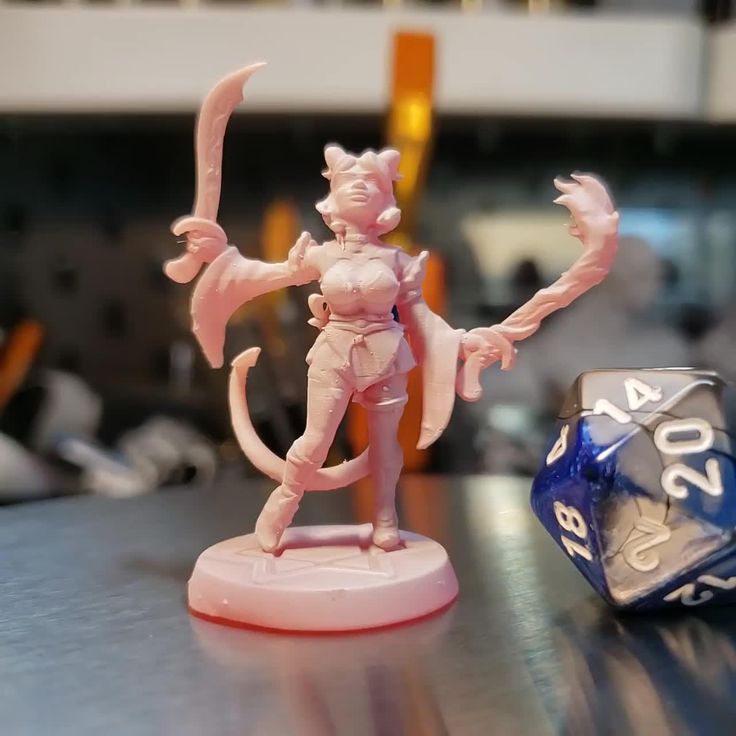
Print orientation
The print orientation of the model is important in resin 3D printing miniatures. A poorly oriented model can result in the use of excessive supports or an increase in print times. A general rule of thumb is to orient your minis at a 45° angle from the build plate. This gives a good balance between printing times and support structures.
It is also important to avoid printing any large flat surfaces at once. This increases the peeling force on the FEP film and can cause print failures.
Post-processing
The final step in 3D printing minis is post-processing. This step can make the difference between a good and a great figurine. You can choose to sand your minis, paint them and make them truly unique in post-processing. FDM and resin 3D printed minis have different steps for post-processing.
FDM post-processing
Minis that were printed on a FDM printer don’t require much post-processing. If your printer settings are dialed in perfectly, all you need to do in this step is remove the supports.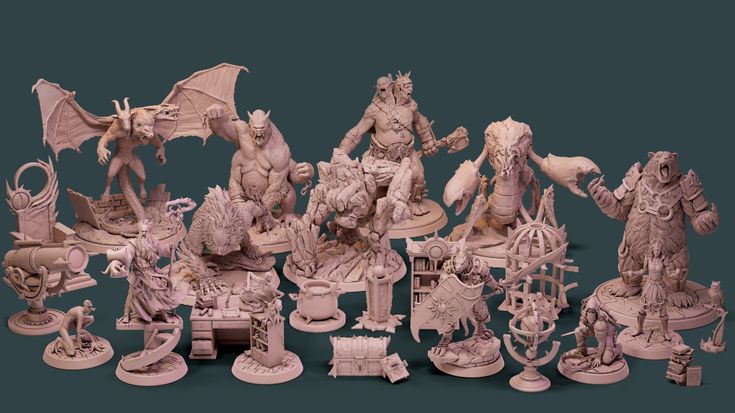 Removing supports takes patience, however, and the small size of minis can make it a challenge to clean leftover support material.
You can decide to paint your minis or leave them as they are. If you do decide to paint them, you can either paint directly onto the model or go into the extensive painting process of sanding and priming the model before the paint.
Painting directly on the miniature requires less effort, but any defects are more likely to show up in the final result.
Sanding and priming help you to cover up any defects and after painting, the part looks like a production-grade mini. Removing too much material through sanding can create a loss of detail in the final model, so be sure to pay attention to that.
Recommended:
PLA Smoothing: How to Get Perfectly Smooth PLA 3D Prints
Resin post-processing
Post-processing resin printed miniatures is a messy task and requires some extra equipment and patience. There are two steps involved in post-processing resin parts – washing and curing.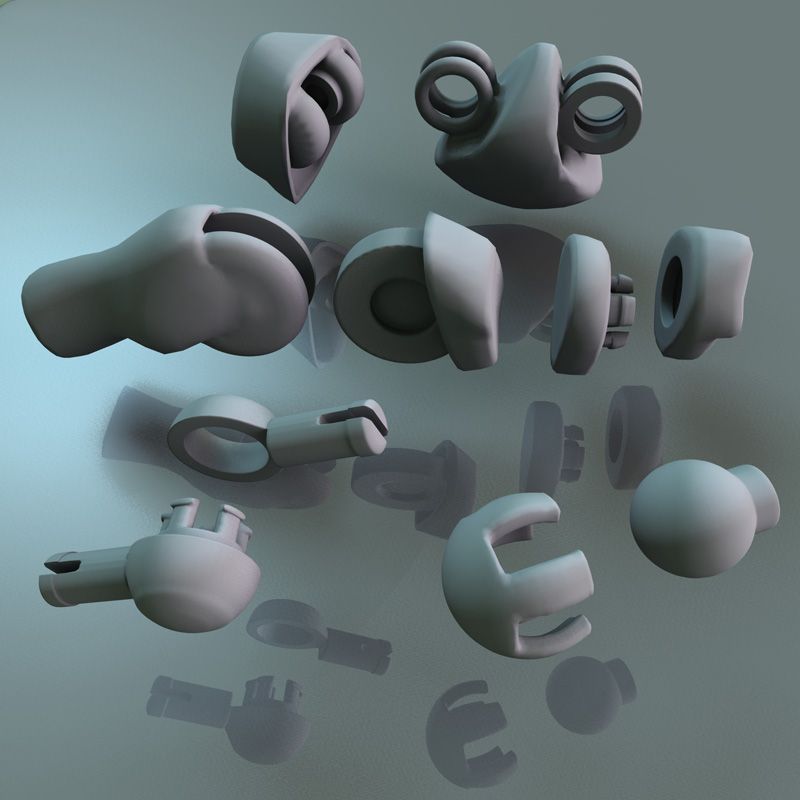
Washing
Once the printing of your mini is completed, there will still be excess resin left on the model. This resin is not cured and must be removed before you can safely handle the mini.
To wash off this excess resin, dip the entire model into a bath of water or isopropyl alcohol and leave it in the bath for some while. You can either build a washing station for this or buy it one directly from the 3D printer manufacturer. The Elegoo Mercury Plus is a popular choice, as it also has a rotary curing turntable built in.
ELEGOO Mercury Plus 2 in 1 3D Printing Washing and Curing Machine V2...
1,642 Reviews
Check PriceCuring
After the excess resin is washed away, you need to cure your mini before you use it. The curing step gives it extra strength, a smooth surface finish, and stops the resin from reacting further to other things.
If the print has any support structures, you need to remove them before the curing process. After curing, supports are difficult to remove and might not separate from the model well.
To fully cure the resin model, you need to expose it to UV light. To do this, you can keep it directly under sunlight or use a UV curing station to cure it quickly and safely.
Once the washing and curing are done, your mini is ready for painting. As the surface of resin printed minis is already very smooth, there is often no need for sanding. You just need to apply a primer coat and then you can paint your 3D printed miniature to your liking.
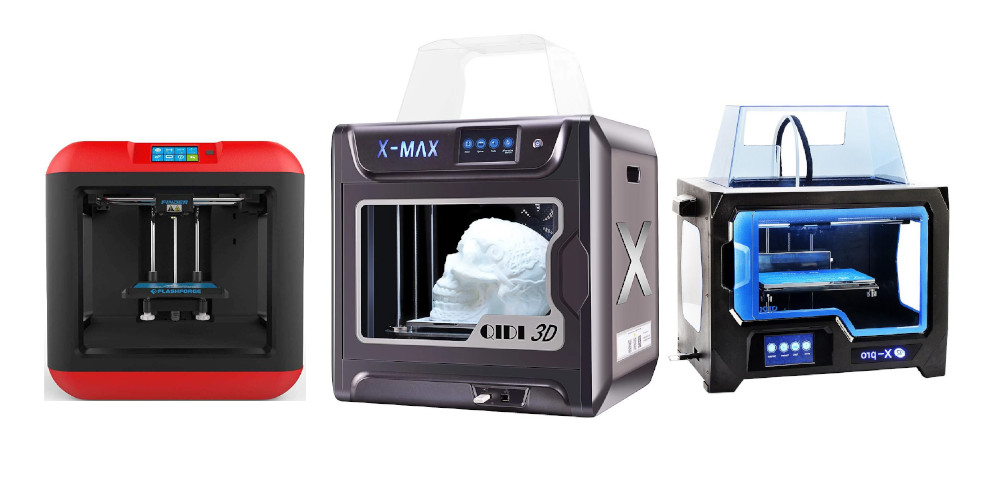
Which 3D printer to use?
The choice of a 3D printer can influence your experience with 3D printed minis. A good 3D printer with a set of advanced features and reliable community support will save you from a lot of hassle. We’ve selected two of the best 3D printers, one FDM and one resin 3D printer, that are best suited for 3D printing minis.
Best resin 3D printer for minis
The Elegoo Saturn combines advanced features at a budget price. It is a DLP 3D printer and is one of the large-size resin 3D printer offerings from Elegoo.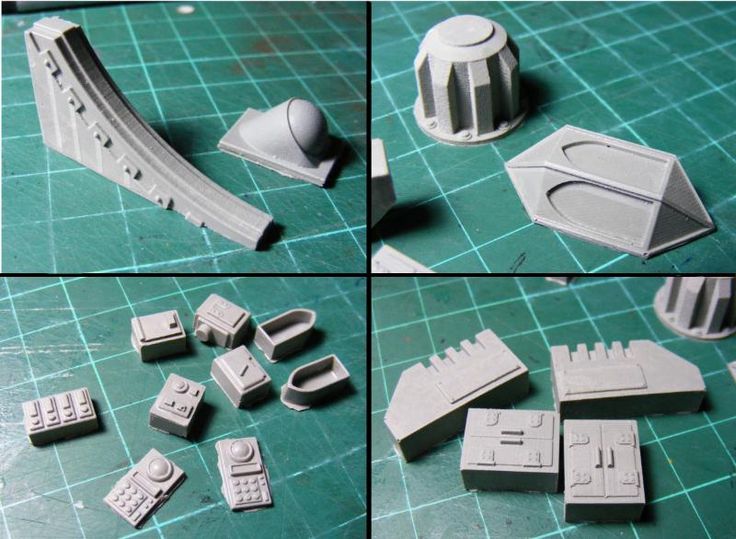 It comes at a price tag of $499.99, cheap considering its wide range of features.
The Saturn features a large build volume of 192x120x200 mm with a 4K resolution monochrome LCD screen. You get a dual Z-axis linear railway, a CNC machined body, and a ball-bearing leveling system to ensure a sturdy build of the 3D printer. Saturn has great community support with lots of forums to help you out with any issues.
The large build volume lets you 3D print many models at a time or you can choose to 3D print miniatures at a large scale. The high-resolution 4K LCD monochrome screen lets you reproduce fine details of your miniature models and lets you print at faster speeds. It is compatible with the Chitubox Slicer, which is one of the best slicers for resin 3D printers.
Considering its cost and features, the Elegoo Saturn offers some of the highest value for 3D printing miniatures. You can use it to 3D print minis, action figures, models, and landscapes. It is an excellent option if you plan to print lots of miniatures for yourself or if you plan to make money with your 3d printer and selling 3D prints.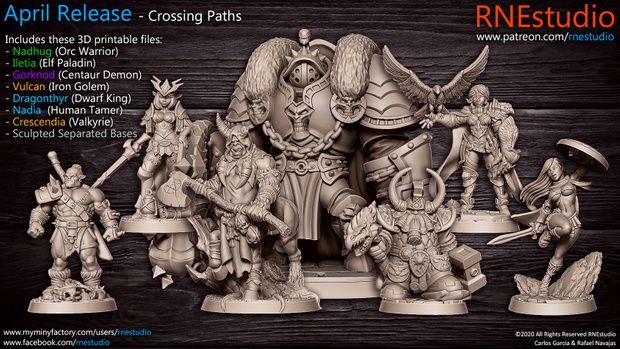
ELEGOO Saturn MSLA 3D Printer UV Photocuring LCD Resin 3D Printer with...
Check PriceBest FDM 3D printer for minis
The Prusa i3 MK3S+ is the latest and the most advanced offering from Prusa 3D. It is their flagship 3D printer and is one of the best hobbyist FDM 3D printers that can currently be found on the market. The i3 MK3S+ comes with a premium build quality and a rich set of features.
It has an open frame design with a build volume of 250x210x210mm. You get a heated build platform that can go up to 100°C and an all-metal hotend that can reach a maximum temperature of 300°C. The i3 MK3S+ also features automatic bed leveling enabled by a SuperPINDA probe, power loss recovery, and a filament sensor, all of which work reliably without hassle.
The heated build plate and the all-metal hotend allow you to print with a wide variety of materials. The automatic bed leveling ensures that your first layers stick perfectly to the build plate.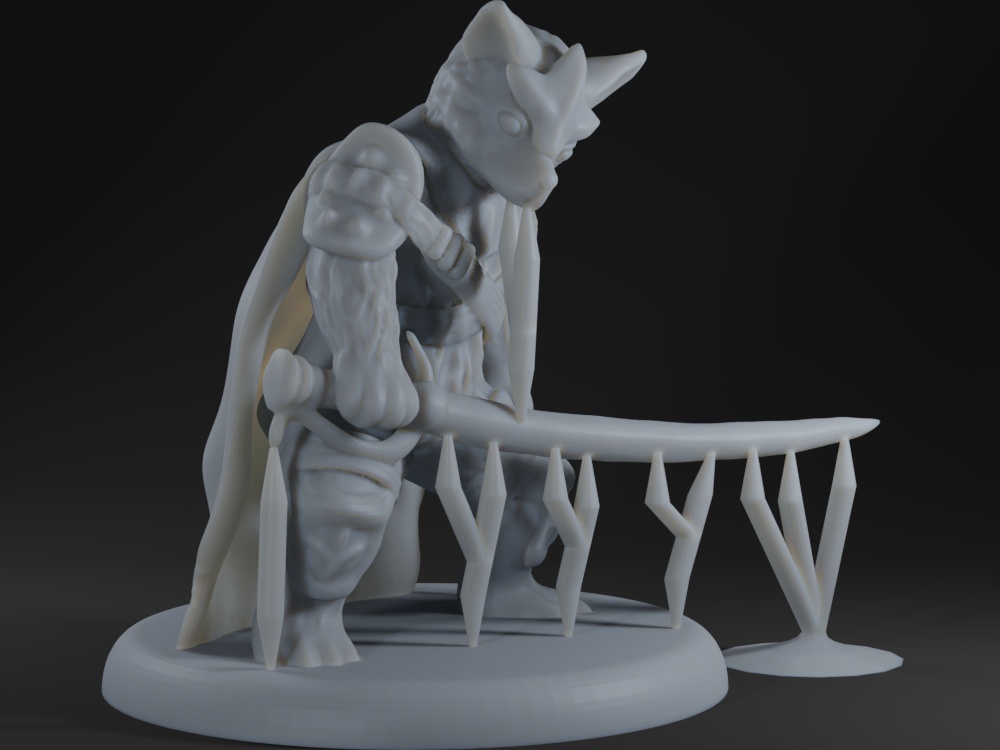 This comes in handy when you want to print multiple figurines at once that will fill up your entire build platform.
Miniatures produced with the i3 MK3S+ are of great quality. The extra build volume lets you print bigger figurines and terrains. You can print dice towers, swords, weapons, and various terrains on this 3D printer. The i3 MK3S+ is compatible with the Multi-Material Upgrade, which you can use to create multi-color parts and minis.
If you want to explore more options, we have an entire article that lists the best 3D printers for miniatures. It has a wider collection of 3D printers for you to choose from in case you feel the two options above don’t quite meet your needs.
Which filament to use?
PLA, PLA+, ABS and PETG are the most popular material choices for FDM 3D printing nowadays. While ABS and PETG have their benefits, PLA and PLA+ are the best-suited materials for 3D printing miniatures. They are cheap, easy to print and post-process, and offer a consistent 3D printing experience.
As for the best brands, here are our recommendations:
Overture filaments
In a short span of 2 years, Overture filaments have established themselves as a leading brand in the FDM filament space. They offer a wide variety of different filaments, such as PLA, PLA Pro, PLA Silk, and Matte PLA.
You can expect a good surface finish and strength from this brand. The cost of these filaments ranges from $20- $24, which makes them accessible for many individuals and lets you bring down the 3D printing cost of your miniature models.
OVERTURE PLA Filament 1.75mm PLA 3D Printer Filament, 1kg Cardboard...
16,004 Reviews
Check PricePrusaments
Prusaments are FDM filaments manufactured by Prusa 3D. They are a highly engineered range of filaments that are fine-tuned to achieve a diameter tolerance of ±0.02mm. Because of the diameter consistency of this filament, 3D-printed minis have a great surface finish.
The models produced using Prusament Galaxy filament have a glittery shine to them. It hides layer lines very well and removes some of the need for post-processing minis.
If you already have a Prusa 3D printer, you can easily load this filament’s optimal settings in PrusaSlicer to get the best print results for your figurines.
Prusament Prusa Galaxy Black, PLA Filament 1.75mm 1kg Spool (2.2...
266 Reviews
Check PriceRecommended:
The 10 Best PLA Filaments for 3D Printing
Which resin to use?
Just like there is a variety of filaments for you to choose from, you have plenty of choice in resins for your 3D printed miniatures as well. There are standard resins, clear resins and tough resins, all in a variety of colors. They all cure the same way, by being exposed to the UV light of the printer.
Our go-to brands for resin for minis are:
Siraya Tech Resins
The Siraya Tech resins are one of the best resins available in the budget resin segment. They are tough, have good strength, and produce very little odor compared to other cheap resins.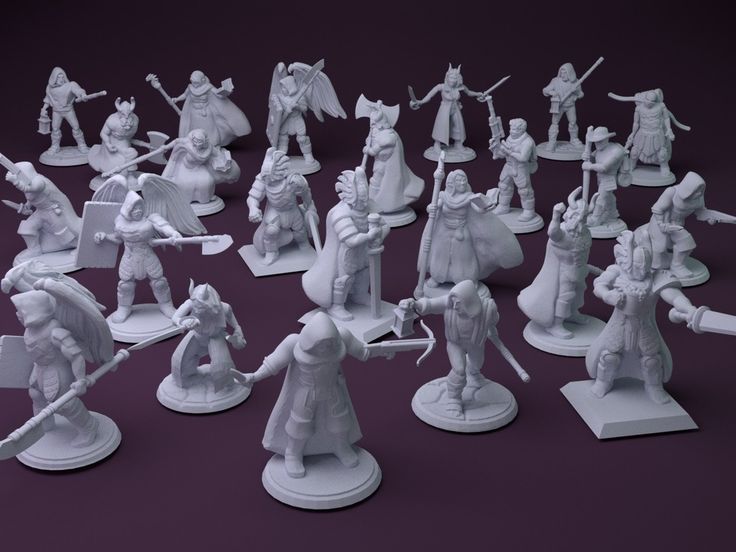 Its prints have a nice surface finish and you can sand the models produced by this resin for painting them later.
Siraya’s Fast and Sculpt resins are best for 3D printing minis. The Fast resin cures faster than others and helps to reduce print times. The Sculpt resin is specifically designed for 3D printing tabletop minis and has a smooth surface finish with higher temperature resistance.
Siraya Tech Fast ABS-Like 3D Printer Resin 405nm UV-Curing Non-Brittle...
2,646 Reviews
Check PriceSiraya Tech Sculpt 3D Printer Resin High Temperature Resolution...
266 Reviews
Check PriceElegoo Water Washable Resins
The typical post-processing steps of resin 3D printing involve rinsing the printed parts in isopropyl alcohol. This increases costs and is a health and fire hazard as well.
Elegoo water washable resins allow you to wash your 3D printed part using just water. This saves you from having to use isopropyl alcohol and is a great choice if you plan on printing in school settings, for example.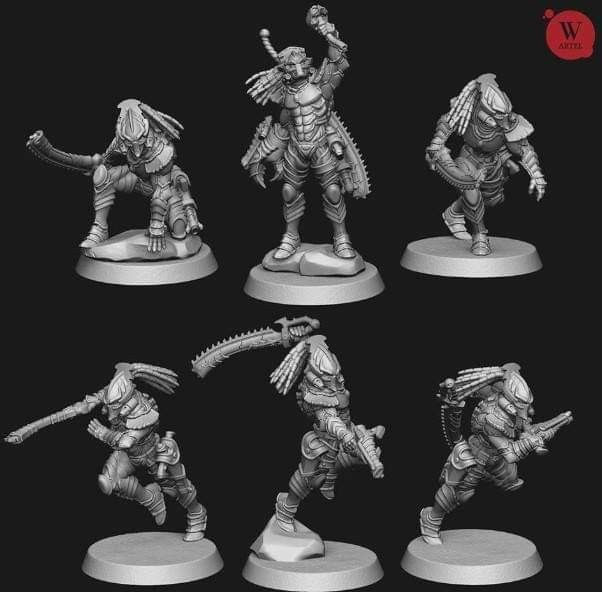
The resin itself is tough and has good fluidity with a nice surface finish. It is available in a wide range of colors and is known to have less odor than other brands.
ELEGOO Water Washable 3D Printer Resin LCD UV-Curing Resin 405nm...
4,063 Reviews
Check PriceWhere to get miniatures for 3D printing?
With everything else sorted, there is only one question left to answer: Where can you download the 3D printable files of miniatures?
There are plenty of sites out there that offer 3D printable STL files. Many of sites offer these files for free, whereas some also offer paid 3D models. In fact, we just published an article with the best websites for 3D printing files.
However, when it comes to downloading 3D printing files for miniatures, we have a clear top three:
MyMiniFactory
MyMiniFactory is a dedicated marketplace for the miniature community. With a database of over 60,000 designs, MyMiniFactory has plenty to offer.
Image: Stormforge Minis via MyMiniFactory
A skeleton warrior setYou can find a lot of high-quality miniature models on the website. Some models are free, whereas others are available for purchase at a small fee. Given the high quality of the models and the ability to support the skillful creators on the site, this fee is (in our opinion) usually worth paying.
Thingiverse
Thingiverse is the biggest STL file repository with a collection of over 2 million free models. Amongst them, there are many D&D minis, terrains, dice towers, and other figurines.
Unlike some other 3D model sharing sites, Thingiverse’s models are all free to download and 3D print. The main benefit of this is that you get a wide variety of models to choose from, but the lack of premium models on the website is definitely noticeable.
Cults3D
Cults 3D is another marketplace for premium 3D printed models. It is a fully independent marketplace with over 4.1 million registered makers and 450,000 designs for you to choose from.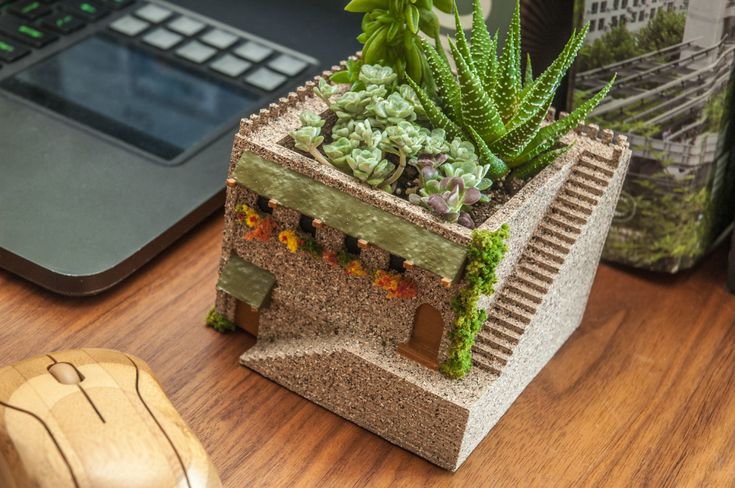 It’s a great place to find unique miniatures of high quality.
Image: Designs4 via Cults3D
The Medium JanitorConclusion
3D printing minis can seem daunting at first. It slightly is, but the results are worth the effort that you put into it. With the currently available 3D printers, designs and guides like the one above, anyone can get into the hobby with good results.
We hope this article has helped you clear up some doubts regarding miniature 3D printing. If you feel like we missed out on something or if you have any questions, let us know in the comments below.
Recommended:
The 7 Best 3D Printers for Miniatures
3D printing of miniatures / Sudo Null IT News
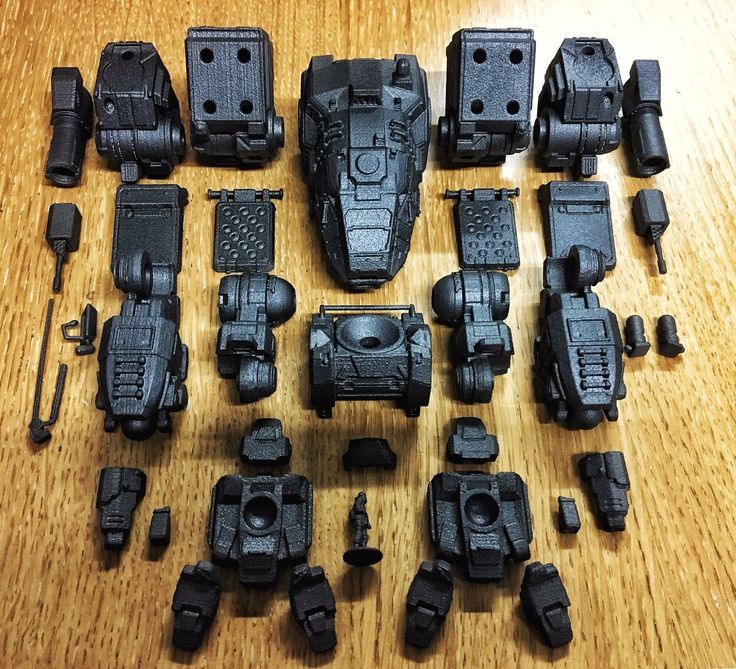
This article will discuss what can be squeezed out of a home desktop printer in the field of printing miniature complex objects. Two weeks ago, on a dare, I undertook to make this little thing on a home FDM printer.
Here are the results:
And larger:
The balls on the surface do not shine with a spherical shape, but in general all the elements are in place and recognizable.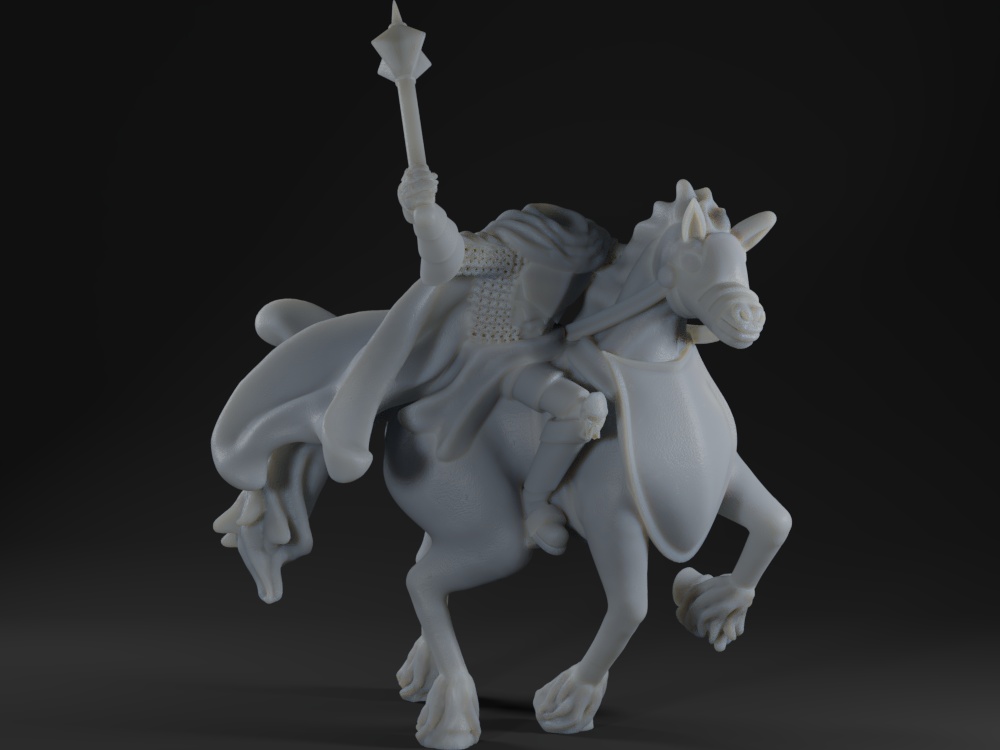 Whether this quality is acceptable depends on the purpose of use. And remember, the size of the balls is less than a millimeter.
- Layer height 0.1 mm for the sample on the left and 0.05 mm for the sample on the right.
- Total print time about 30 minutes for the sample on the left, about an hour for the sample on the right.
- A 0.2 mm nozzle was used.
- Fill 100%.
Both samples were made on the first try, without adjusting the parameters. That is, if you tinker, and even take a 0.1mm nozzle (I don’t have it), then the sphericity of the balls will increase even more. Here is a craft more suitable for my printer:
Miniature “Pirate”, 54 mm:
And larger:
- Layer height 0.1 mm.
- Print time 3 hours.
- Basic speed 50 mm/s.
- 4 outer layers, 0% filling.
Printer selection
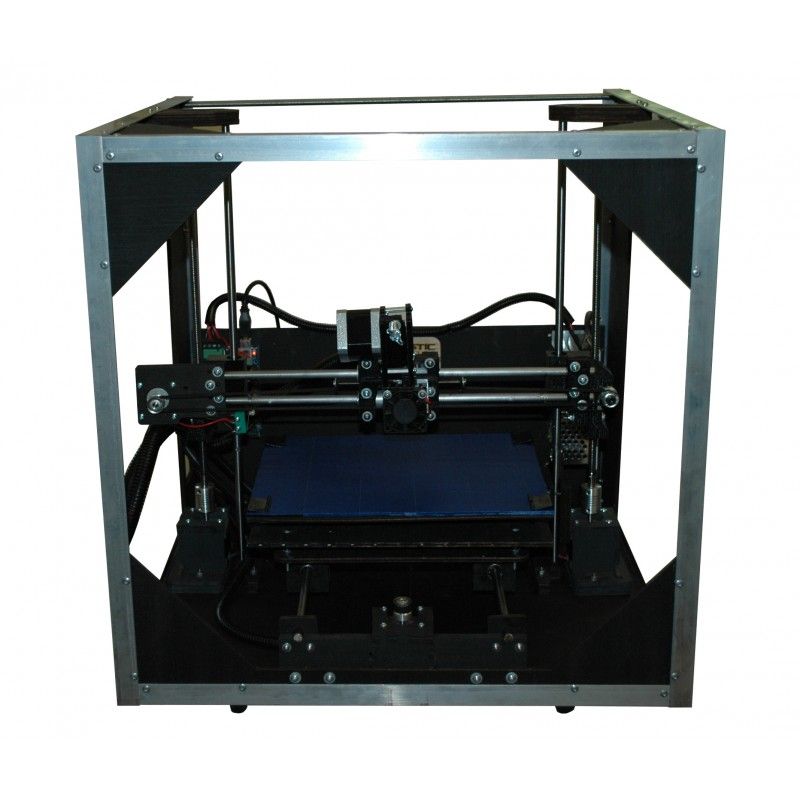
These results are from a $700 printer. I will now list what to look for when choosing.
Hardness
The rigidity of the entire printer design is an extremely important parameter, and at the same time, you can’t write anything useful about it in one paragraph of text. We will have to limit ourselves to general advice without explanation.
Arrangement
The most popular layouts are portal (Reprap, Prusa), console (for example, MasterKit creations), and with independent axes (Ultimaker and clones). All are good if done right. More important materials. The body must be made of metal. Stamped steel or aluminum profile - it doesn't matter anymore. Plywood works well if assembled with glue. Over time, it can lead if poorly processed, but the brains of the printer are able to compensate for this. It is unacceptable to assemble the case from several sheets of plexiglass or plywood, because the steel fasteners in these materials are instantly loosened and the entire unit shakes like jelly. Hi Wanhao. Just as bad is a body in the form of a frame of shafts or studs, unless they are self-tensioned. Self-tensioned design (old reprap) means about 20 nuts that must be tightened before each print.
Mechanical
Tenderly loved by all manufacturers, springs do not give normal belt tension. All belts must have a tension screw or roller. Shafts 6mm — it's not serious. It would be nice to bend (the brains compensate) so they also swing during work. Only from 8 mm and only hardened. The bearing simply eats up unhardened shafts in six months.
When printing miniatures, low-quality mechanics manifest themselves not so much as deformation of parts, but as cracks, non-cohesion of layers, and disappearance of small details.
Working part
An even more vast topic, in which for every rule there are more exceptions than confirmations. In the context of miniature printing, we need a hot end with active cooling. For a rough estimate of a hotend, look at the manufacturer's recommended retract step. If the manufacturer or users yell in red caps “by no means more than a millimeter!” - that's a good sign. Such a hot end has a miniature melt chamber, which provides greater surface accuracy, but at the same time catches a wedge with a retract greater than specified. The Bowdens have their own rules, I don't understand them.
Surprisingly for beginners, the minimum printer layer is determined not by mechanics, but by the design of the extruder. I have not seen mechanics that are not able to work out a layer of 0.05mm. The extruder is made on a stepper motor, which can only rotate to specified positions. Therefore, the extruder can only feed plastic in fixed portions. With normal printing, this is not important, but with miniature printing, the portion size may be too large. Therefore only direct-drive extruder and only microstep support. (Support for microstepping is more often in the form of a “folk” patch to the firmware.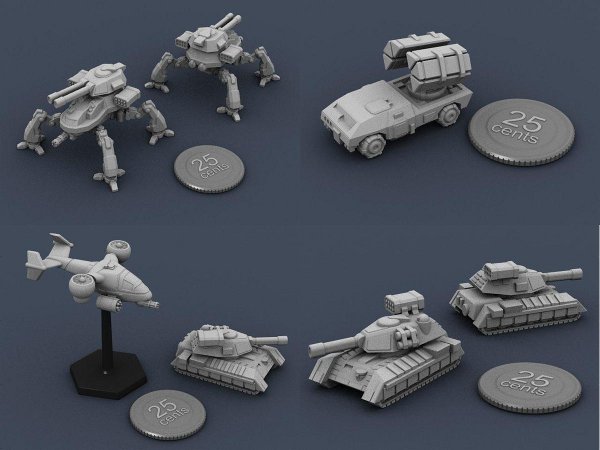 But the main thing is to have it.) On my printer, with a layer of 0.05 and a nozzle of 0.2, the lack of steps begins to appear already at a speed of 40 mm / sec. What is sad - the speed of the outer surface should be 10-20.
Nozzles should be wide rimmed to spread, not shave, fresh melt. This applies to all sizes and speeds.
Functionality
Now I will list the functions of the printer in order of their need for printing thumbnails. The list is hierarchical, that is, if you do not have item 1, then items 2-5 also lose their value.
- Workbench instrument calibration.
- Heated work table.
- Spot blow directly under the nozzle (PLA only).
- Closed chamber.
- Any solution that allows you to control the printer directly by standing next to it. The screen on the printer, WebUI on a mobile phone, just a printer near the computer - it doesn't matter.
Work table calibration
Table calibration means that the position of the table is adjusted so that the gap between the extruder nozzle and the surface below it is always the same.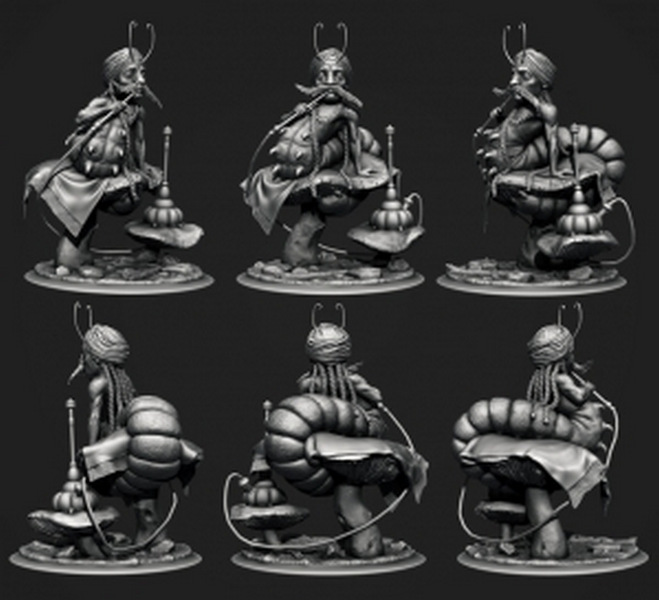 As with everything in 3D printing, there are two ways to do calibration - popular and correct. Popular consists in slipping various bills, cards and other virtues under the nozzle. Normal accuracy cannot be achieved this way, but bending the table is elementary. The correct one is to use a measuring tool.
The smartest option is automatic calibration using sensors connected to the printer. It is she who allows not only to calibrate only 1 time after changing the nozzle, but also to compensate for distortions in the mechanics and the unevenness of the table. The printer simply modifies the program in memory to match the actual table. Personally, I don’t consider printers without this option at all, although it can be attached to many.
If there is no auto-calibration, this is the best way to proceed. Approximately, “by eye”, set the values and print a cube the size of almost the entire table. When the printer draws an outer square on the table, stop printing and measure the line width in all places with a caliper.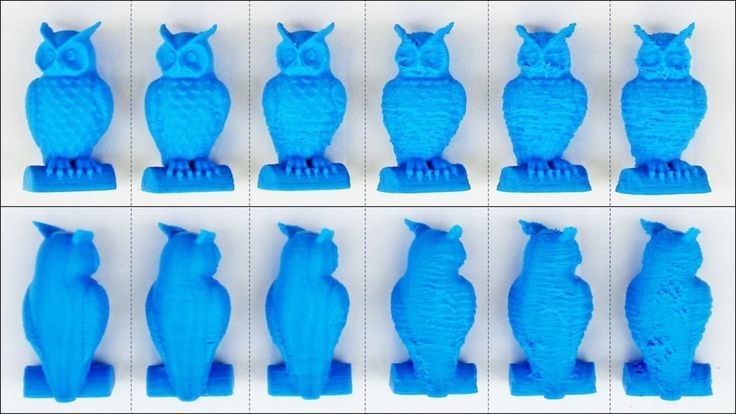 Adjust the table so as to achieve the same line width throughout. Tear off the old line and repeat. And so on until the result is achieved. The final width must be equal to the extrusion width set in the slicer.
And yet, for manual calibration, the table must be fixed with three screws. If there are four of them, then in order not to bend the table, you need to completely unscrew 2 adjacent ones before turning the screw. In short, it is impossible to properly calibrate the table on four screws. It is impossible to manually calibrate even a slightly bent table. But automatically - you can.
Table heating
The thing is necessary, the main thing is not to overestimate it. If you read the forums, you can see that people are constantly struggling with the problem of sticking. They smear tables with all sorts of filth - they print on hairspray, PVA glue, ABC solution, beer and fish soup. These are all unnecessary crutches. If the plastic does not stick to the kapton, then the table calibration is incorrect.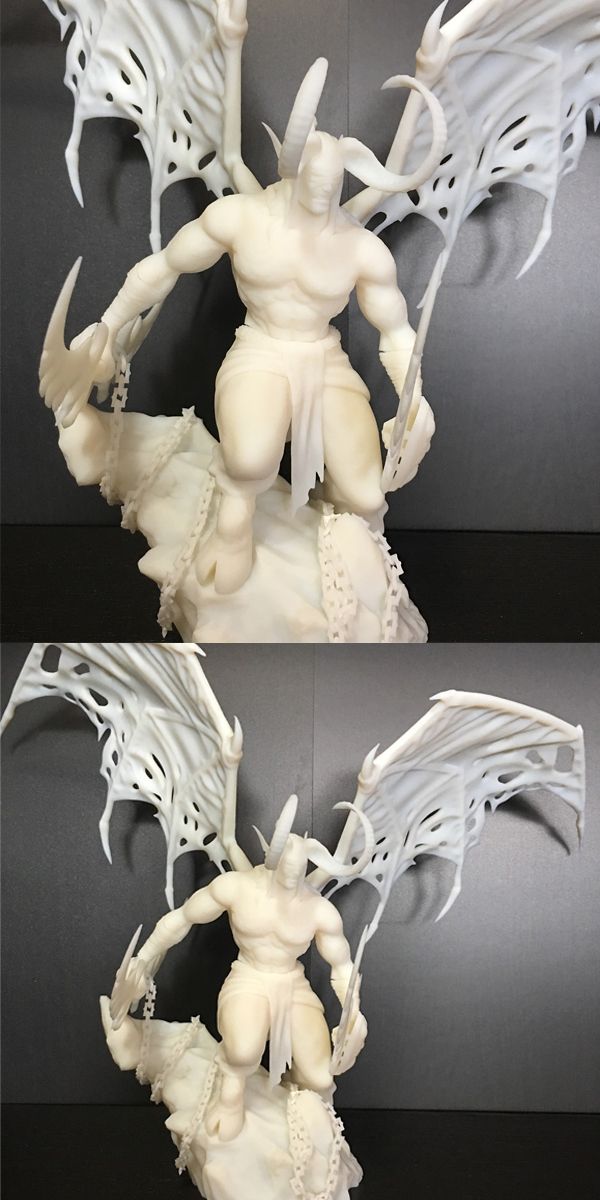 Or the rod was saturated with water. There are no other reasons. I've been printing materials far more finicky than ABC on a table that barely reaches 80 degrees on pure Kapton for a long time and see no problems. Table calibration. So there should be heating, but how much, how much, it doesn’t matter.
Closed chamber
To print not only PLA, you need to protect the work area from drafts. Some printers are protected by themselves, while others can be covered with a rag or a large box during operation. If you buy the printer assembled, then its native box may be suitable. You can simply put the printer in a cabinet and close the door.
If all this is not available, then there is a half measure. Good slicers allow you to print the part “in the shell”, with an additional outer outline around the part. In my slicer it is called Ooze Shield. Although its main purpose is for two-color printing, it also helps against drafts.
Bar calibration
It's also an important thing.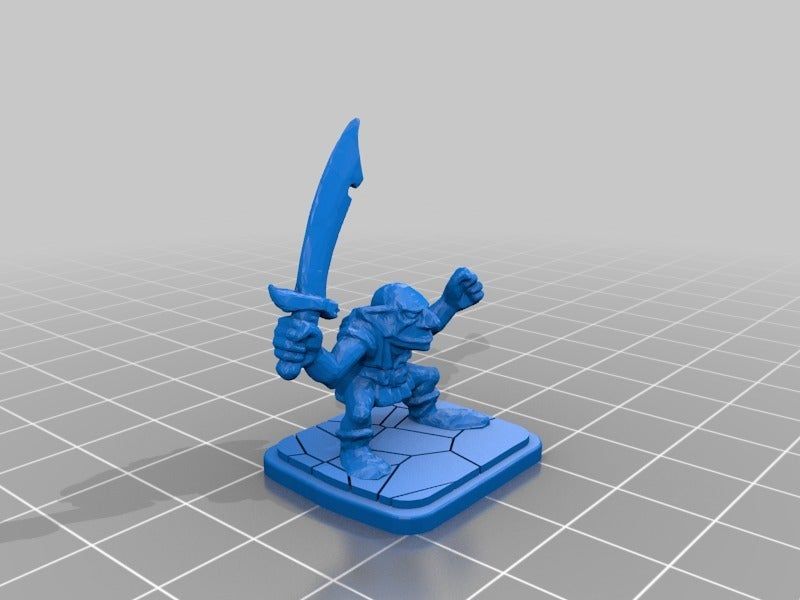 Take a micrometer and measure the diameter of the bar in 5-6 places at different angles, calculate the average and enter it into the slicer settings. If the diameter varies by as much as 0.1 mm, such a rod is not suitable for miniatures.
Miniature printing
For printing miniatures, I picked up the following rules.
- The print speed of the outer ring should be 20mm/s, the rest should be 40mm/s.
- Layer 0.1 mm. A smaller size in practice does little, and even the minimum speed of the extruder can be rested.
- Filling - either 0 or 80-100%. Typical values of 15-30% in miniatures are meaningless, because many elements will end up without a single strut, while the strongest parts will receive additional reinforcement. To create a solid part, it is better to set not infill = 100%, but bottom layers = 100500.
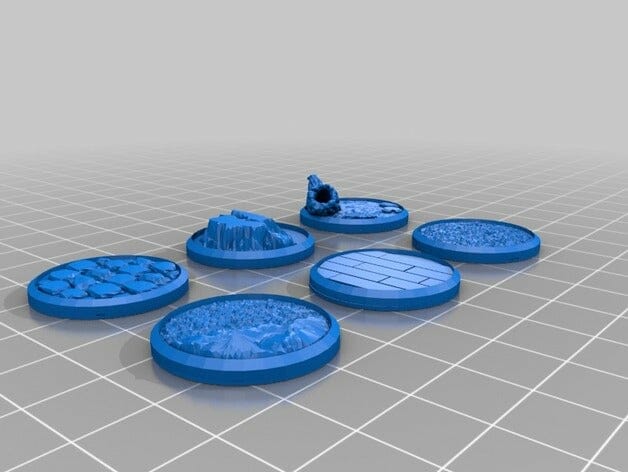
- For figurines with a height much higher than the base, use a raft.
- It would be nice to reduce the acceleration limit.
 This is a printer firmware setting, not a slicer, each printer does it differently. Decrease 20% from factory setting for more stable printing. And, by the way, quieter.
 - If you are printing a decorative miniature without smooth parts, you can add an extrusion multiplier 10% higher than the norm. In some places, extra tubercles will appear on the miniature, but the strength will increase, according to sensations, by 2 times.
- If the table was manually calibrated, place the miniature not in the middle, but above the calibration screw. If automatically, then where the printer measures the table (usually in the middle).
Well, so. Someone surprised by something - ask questions. This text was written in September 2016. Why is it important? Because 3D printing is developing so fast that most of the materials on the web on it are already outdated. Three years from now, we will look at this article and smile nostalgically.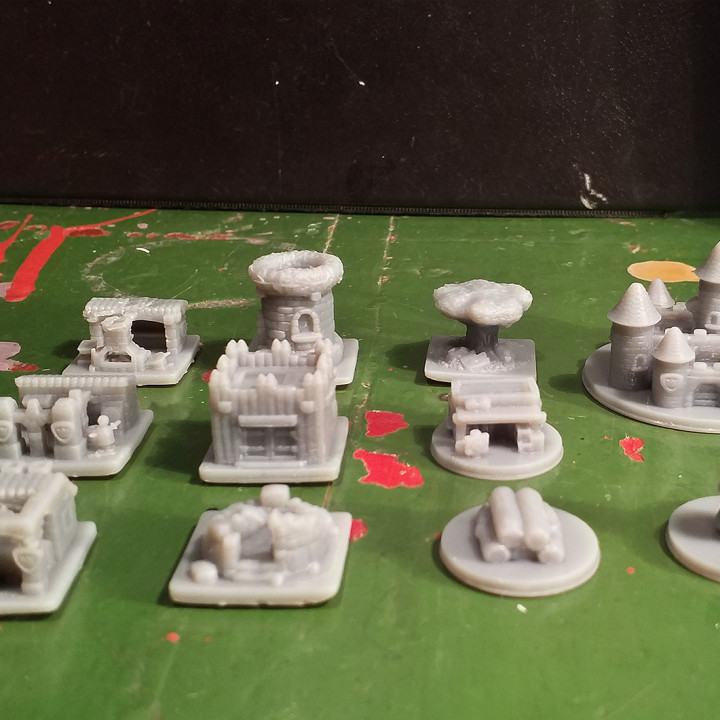
Choosing the best 3D printer for printing miniatures
3DPrintStory Reviews Choosing the best 3D printer for printing miniatures
The use of 3D printers for printing game miniatures is gaining more and more popularity today. As the price of 3D printers continues to fall, it is likely that the demand for 3D printed game miniatures will only continue to rise.
If you pick the right 3D printer, you can get amazing 3D models for your board games or to put an inspirational figurine from your favorite game on your desktop.
Today's desktop 3D printers have become reliable, easy to use and provide decent quality finished products.
How to choose a 3D miniature printer?
There is a wide range of desktop 3D printers that can be used to print miniatures in 3D at home.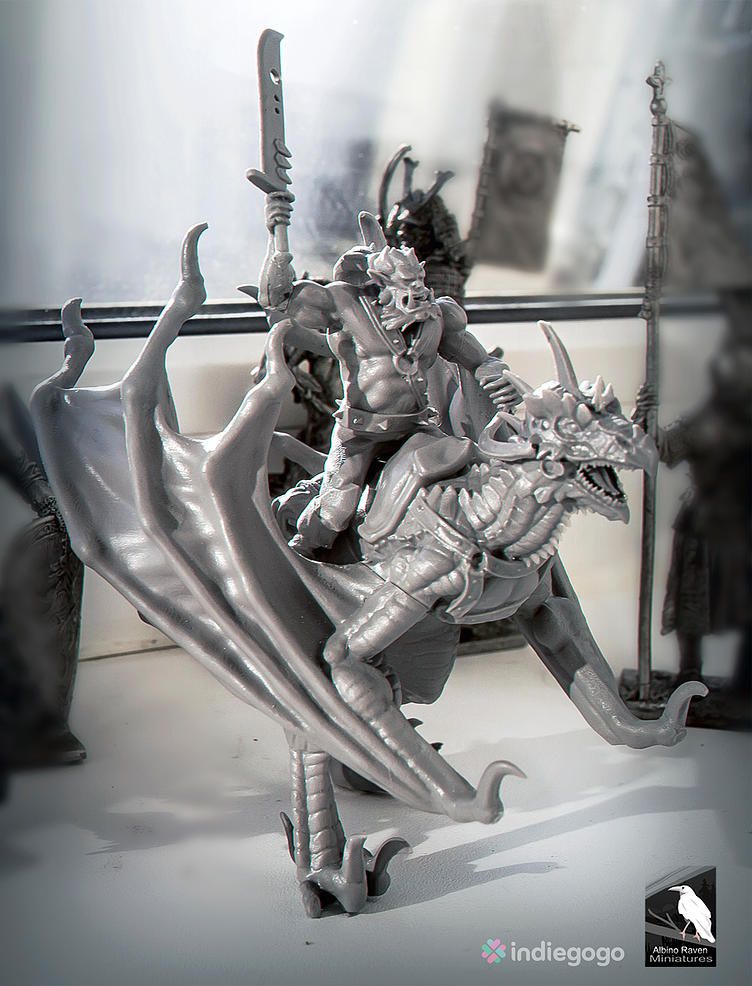 And if you study the market a bit, or at least the options below, you can get great detailed 3D models.
With the right 3D printer, you can print your own figurines and even create your own board games.
If you don't want to develop 3D models of figurines from scratch (and this will really require some skills and time from you), then you can find interesting 3D models on sites with free 3D printable models. After downloading the model, you can immediately print it or edit it before 3D printing for your own needs. We also recommend that you familiarize yourself with interesting 3D models from Dutchmogul. Perhaps in his wonderful collection you will find something interesting for yourself.
To get the same level of detail as the thumbnails above, your 3D printer must meet certain criteria. The most important feature of a 3D printer to consider is the level of detail it can reproduce. This criterion is formed based on the following parameters:
Nozzle diameter
To create a 3D miniature, heated plastic is extruded through a hole.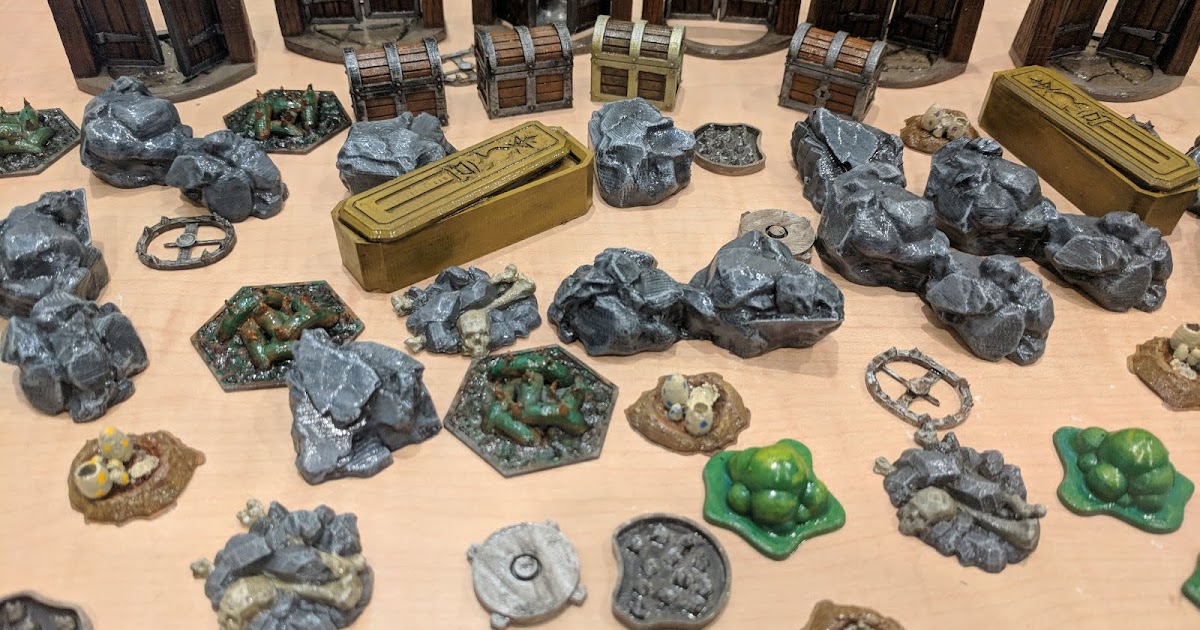 Orifice is the diameter of the nozzle. Make sure the 3D printer nozzle size is less than 0.4mm.
XY Movement Accuracy
The X and Y axis movement accuracy of the 3D printer head must be taken into account.
Layer Thickness
Layer Thickness is the height of each layer of heated plastic that is used to create a 3D figure or miniature. To get a more detailed model, you need to reduce the layer thickness. However, the low thickness means that 3D printing will take longer. In order to print a detailed miniature, you will most likely need a 3D printer that can print with layer thicknesses of 100 microns (0.1 mm) or less.
Material type
The most common materials used in 3D printers are ABS or PLA. To get a good surface, after 3D printing, it should be post-processed. If you are using ABS plastic, you can sand the miniature and steam it in acetone to get a smooth surface. It is also worth paying attention to PETG plastics, which are gaining more and more attention and positive user reviews.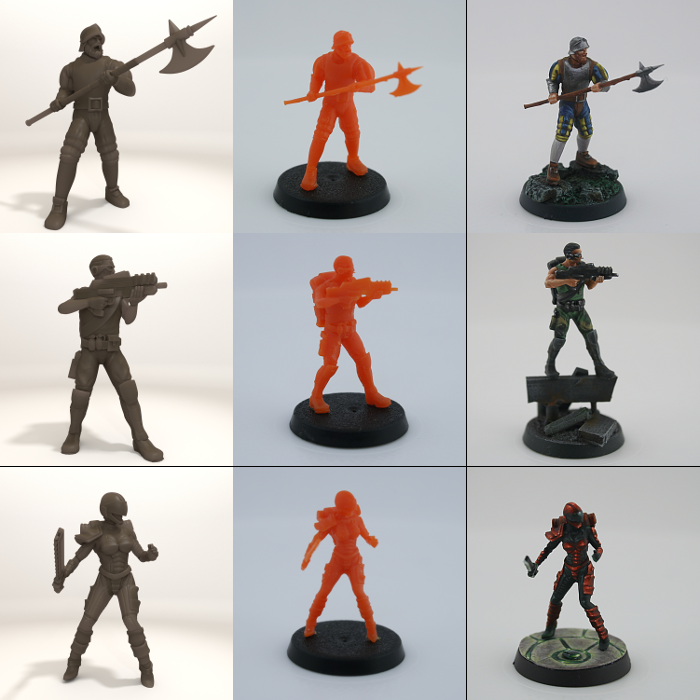
Thumbnail size (scale)
If you want to start 3D printing game miniatures, think about the size you would like to get.
A 28 mm (scale ~ 1:58) or 54 mm (scale ~ 1:32) miniature can be made with a standard desktop 3D printer that melts plastic filament. To make a smaller miniature, you will need an SLA Resin printer, which uses liquid resin and strengthens it.
In addition to the figurine, you can also print larger models. 3D printing large models such as houses, huts, castles, trees, and tanks will require more expensive 3D printers that provide faster speeds with good 3D print quality. But there is an important point in the choice. It is better to choose high-quality 3D printing than a large one. You can always separate larger models for printing and then join them together using the same adhesive. The result will be much better than lower quality 3D printing on a 3D printer with a large workspace.
HICTOP CR-10S 3D printer
Value for money, the Hictop CR-10S is one of the best and most affordable budget 3D printers on the market. The Prusa i3 3D printer was taken as the basis for the design.
The Hictop printer uses quality materials for the power supply, motherboard and motion control systems. The metal framework is a rigid and strong design.
The Hictop printer will arrive unassembled, but assembly is easy. You will have to essentially screw in four bolts and connect the necessary wires. That is, you can proceed directly to 3D printing almost immediately after purchase.
The "S" at the end of the CR-10S stands for two Z-axis lead screws and stepper motors.
Dual axis system improves extruder movement accuracy. As a result, you naturally get more accurate 3D printing overall. This is an excellent inexpensive 3D printer that is suitable for 3D printing miniatures and figurines for board games.
The Hictop 3D printer has a mechanism to control the remaining amount of plastic. If the plastic runs out, the printer will go into pause mode and after feeding new material, you can continue printing from the area where you left off.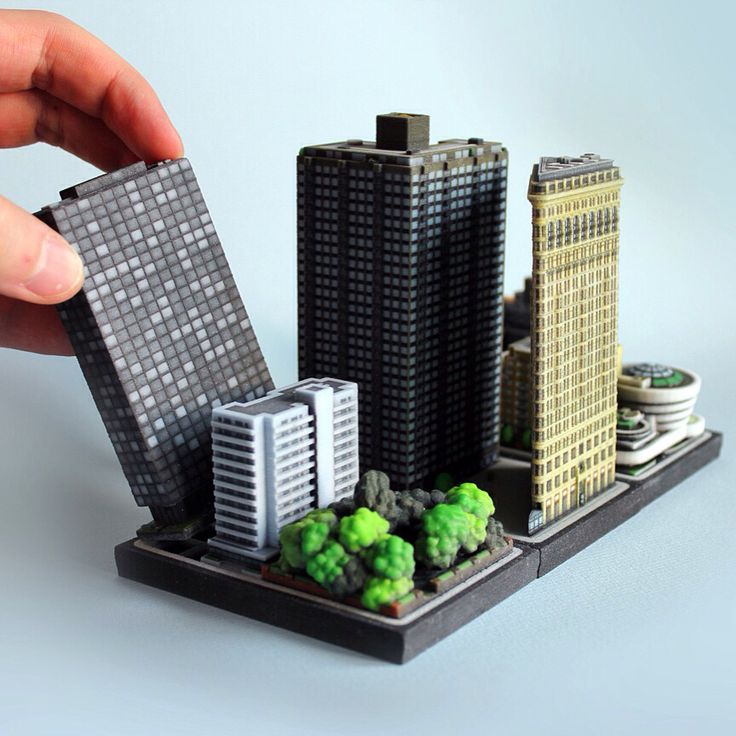 This is a particularly relevant feature for printing large-scale 3D models.
These 3D printers are quite popular, so you will find a lot of information and tips on how to use them online. In addition, thanks to an active community, the Hictop CR-10S has a large number of modifications and upgrades that you can implement yourself and improve its already decent 3D printing quality.
Hictop CR-10S is a quality and affordable 3D printer, which is definitely suitable for 3D printing miniatures and figures of characters from your favorite games or movies.
FLASHFORGE CREATOR PRO 3D printer
FlashForge 3D Printer Creator Pro took inspiration from Makerbot Replica.
A nice feature of the FlashForge 3D printer is that it includes all the custom enhancements from Makerbot. These upgrades include:
- Metal desktop supports. Thus, the working table became more stable during heating and assembling.
- Plastic-coated knobs for easy workbench calibration.
- The Central Processing Unit (CPU) supports Sailfish firmware which allows automatic calibration. In addition, the CPU helps regulate heat and delivers higher quality 3D prints.
The above features make the Creator Pro an excellent miniature 3D printer.
In addition, this 3D printer is made in a closed housing, which allows you to print ABS plastic with much less difficulty.
With Creator Pro, you can print two colors at the same time. If you plan to paint the finished model in the future, then you don’t really need this feature, but in general it gives you much more options than the standard analogues with one extruder.
Since the Creator Pro is based on the Makerbot Replica, there is a lot of information available on the internet about this 3D printer.
3D printer SINDOH DP200 3DWOX
If you are looking for a reliable miniature 3D printer, then you should pay attention to Sindoh DP200 3DWOX. This is the best choice if you want to make 3D mini figures.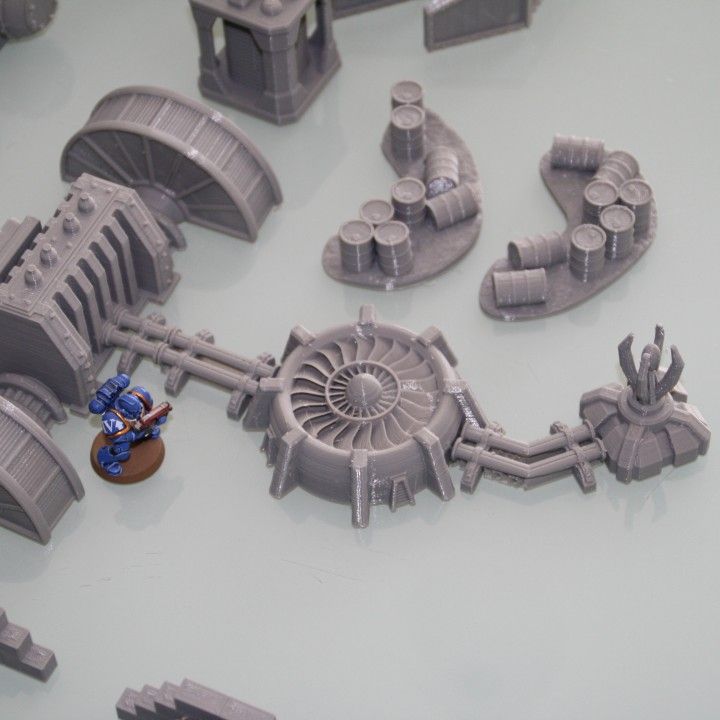
This 3D printer is easy to use, suitable even for beginners in the world of 3D printing. Below are some of its features:
- 3D printing table covered with aluminum PTFE.
- 3D printing resolution is 50 microns (0.05 mm).
- Equipped with a high efficiency particulate air filter and a closed chamber for 3D printing, which is especially good when using ABS plastics.
- Easy to use material cartridge chamber.
- Sindoh does an excellent job of printing minifigures in high detail.
One of the disadvantages of the Sindoh DP200 printer is that it can only use manufacturer's filament. Consequently, you will pay more money for cartridges because you will not be able to use materials from other manufacturers. The price of these cartridges, of course, is higher than analogues.
Otherwise, the Sindoh DP200 3DWOX 3D printer is a great option for high quality 3D printing of detailed models.
DREMEL DIGILAB 3D Printer
The use of SLA technology for 3D printing helps to obtain miniature products of very high quality.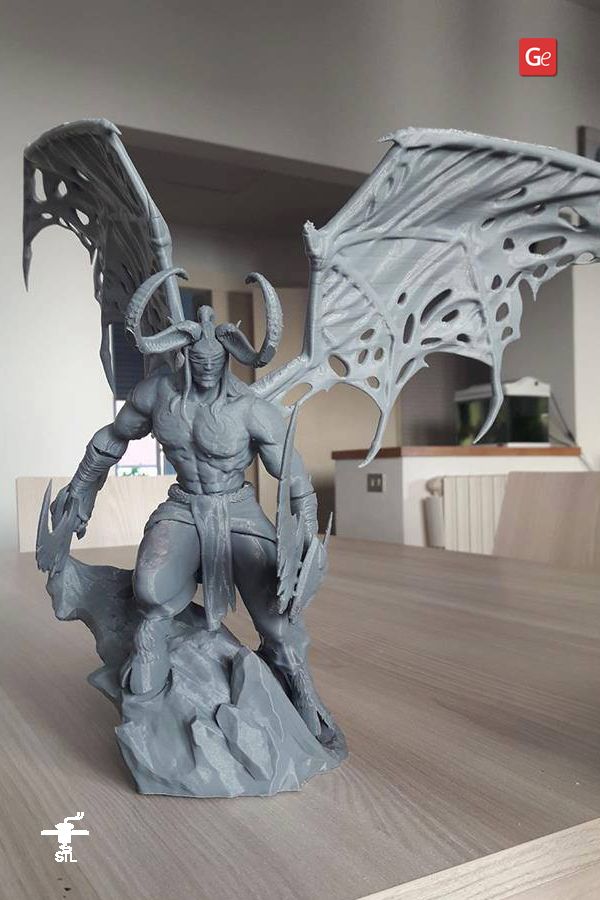 SLA also helps print miniature parts as small as 28mm. The price of this wonderful 3D printer is comparable to the cost of a laptop.
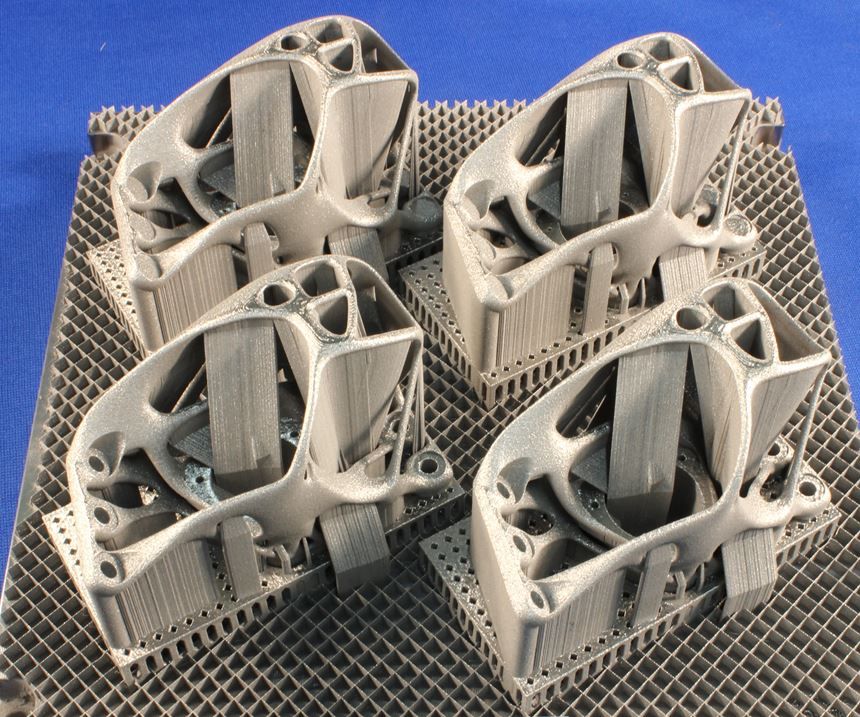
SLA printing differs from FFF printing in the very essence of the processes. During SLA 3D printing, liquid resin is baked using a UV laser. The formation of the part looks like a gradual lifting of the finished model and a bath with liquid material.
Industry-intensive stereolithographic 3D printers are now available at home! The Dremel Digilab 3D printer has proven itself as a hobby printer, which differs from expensive industrial analogues in its exceptionally smaller workspace.
Key features of the Dremel Digilab 3D printer:
- The minimum wall thickness of the 3D model is 25 microns (0.025mm).
- Faster 3D printing compared to FFF 3D printers.
- Excellent surface quality of the finished 3D model.
Digilab is an excellent SLA 3D printer. It is easy to use and, according to user reviews, reliable.
With this 3D printer, you can use resins to make investment casting molds. It can also be used to make jewelry by casting metals.
Some disadvantages of using SLA for 3D printing:
- It's expensive. The resin needs to be updated, as over time it ages and loses the necessary properties.
- Resins require maintenance. Make sure you start 3D printing only after the balloons created by adding resin to the tank are gone. When you're done printing, you should clean the tank thoroughly to remove cured resin, which can affect the quality of subsequent 3D prints.
- When cleaning this 3D printer, be careful to use latex gloves and alcohol.
Conclusions
This article is designed to help you choose a desktop 3D printer to print board game models or just beautiful fantasy characters and landscapes. 3D printers and board games are a very good combination, and the models listed above are a good choice if you want to create your own game miniatures.