Tiko 3d printer update
The Tiko Printer: What Happens When You Innovate Too Much
Sometime in the very distant future, the Universe will become the domain of black holes. Energy and entropy will be compressed into minuscule quantum fluctuations. Even in this domain of nothingness, there will still be one unassailable truth: you should not buy a 3D printer on Kickstarter.
We’re no strangers to failed 3D printer crowdfunding campaigns. Around this time last year, backers for the Peachy Printer, an inordinately innovative resin printer, found out they were getting a timeshare in Canada instead of a printer. This was unusual not because a crowdfunding campaign failed, but because we know what actually happened. It’s rare to get the inside story, and the Peachy Printer did not disappoint.
For the last few months, we’ve been watching another crowdfunding campaign on its long walk to the gallows. The Tiko 3D printer is another 3D printer that looks innovative, and at the time of the crowdfunding campaign, the price couldn’t be beat. For just $179 USD, the backers of the Tiko printer would receive a 3D printer. Keep in mind the Tiko launched nearly two years ago, when a bargain-basement printer still cost about $400. Fools and money, or something like that, and the Tiko 3D printer campaign garnered almost three million dollars in pledges.
Now, after almost two years of development, Tiko is closing up shop. In an update posted to the Tiko Kickstarter this week, Tiko announced they are laying off their team and winding down operations. It’s a sad but almost predictable end to a project that could have been cool. Unlike so many other failed crowdfunding campaigns, Tiko has given us a post-mortum on their campaign. This is how the Tiko became a standout success on Kickstarter, how it failed, and is an excellent example of the difference between building one of something and building ten thousand.
Why the Tiko Was a Hit
The Tiko printer was an easy sell. All you had to do was look at your favorite tech blog and see someone was selling a 3D printer for less than one hundred dollars. Yes, that was the super early bird price, but that’s cheap for a 3D printer. In 2015, unimaginably so. The regular price, and what non-early bird Kickstarter backers paid, was only $179 USD. Even today, with the machinations of dozens of factories in China, this is a very inexpensive price point. In fact, only with the upcoming release of Monoprice’s $150 delta printer will we see a printer that is as capable while still being this inexpensive.
The astonishing economy of the Tiko leads to an obvious question. How did the Tiko team plan to build a 3D printer and send it out the door for less than $200? Even today, sourcing and building the most bare bones i3 clone will cost more than that. In 2015, the costs were even higher.
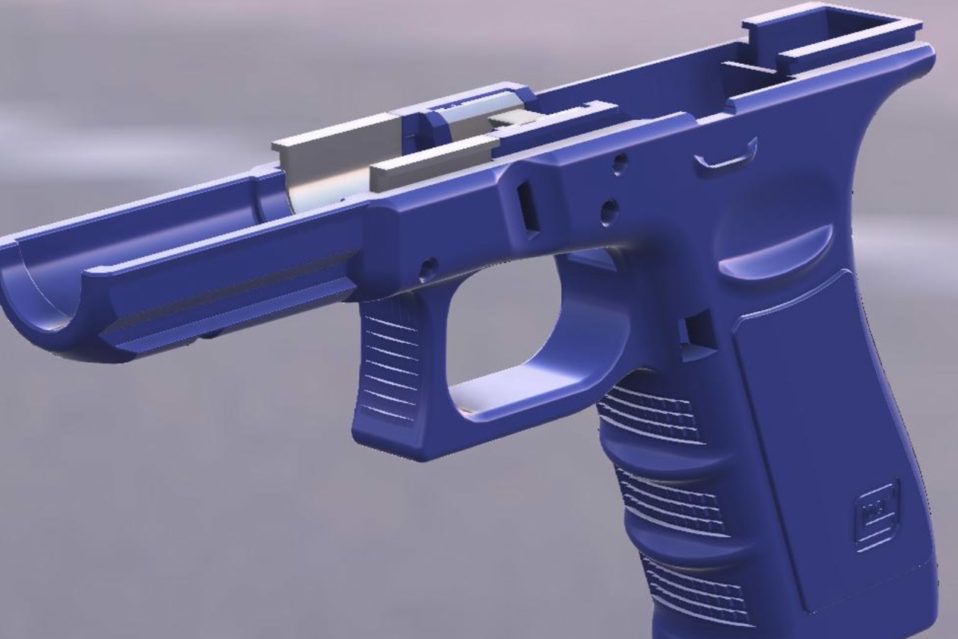
Tiko’s unibody construction. By building a linear motion system into the enclosure, Tiko significantly reduced the cost of their bill of materials.The answer comes from something that sounds like it’s glomming onto Apple ad copy: unibody construction. The body of the Tiko is a single part with an integrated c-channel used as the linear rails of this delta bot. This unibody construction is, quite simply, ingenious. If you’ve ever assembled a RepRap Mendel, or any of the other threaded rod printer monstrosities from back in the day, you know the frame of a 3D printer is what makes or breaks the build. By using an extrusion with integrated rails, the Tiko team brought the cost of a frame down while making their assembly easier. From a manufacturing standpoint, Tiko’s unibody construction is brilliant, and we won’t be surprised when we see another delta bot with the same sort of enclosure.
At its very core, Tiko was innovative. This is a 3D printer that was built around standardized manufacturing processes. Yes, building a ‘unibody’ 3D printer will require a significant capital investment to get the first printer off the assembly line. Once that’s done, though, the creators of the Tiko printer would have a viable product that could be manufactured for far less than their competitors.
Why the Tiko Failed
Tiko put a lot of innovation into their unibody frame. Unfortunately, they decided to extend that innovation to the rest of the printer. Even before the Tiko Kickstarter was a week old, the 3D printer forumheads had questions about the Tiko printer.
The usual method for linear motion in a 3D printer is a stepper motor. NEMA 17 stepper motors are par for the course. The historical pricing of NEMA 17 motors is itself interesting: back in 2008, before the RepRap project came to fruition, it wasn’t unrealistic to spend $40 on a single NEMA 17 motor with a driver. Now, you can pick up the same parts for less than half that cost.
Instead of relying on the ecosystem that has enabled very inexpensive printers, Tiko chose to go their own way. They used cheaper but much lower torque stepper motors on their printer. This would cause severe issues with the printer. Of the over four thousand units Tiko shipped, there were far too many reports of layer shifting and missed steps than you would expect.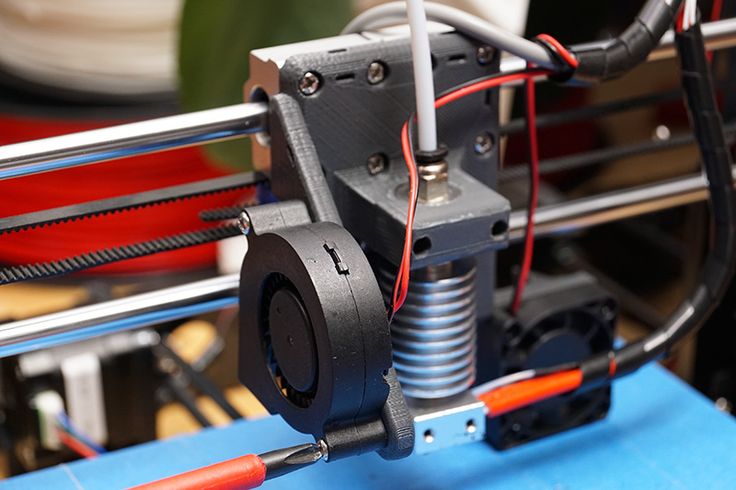 In the most severe cases, the Tiko printer could not print a simple cube.
Even in the electronics, Tiko strove for innovation.
Right now, the state of electronics for 3D printers is heavily derived from the original RepRap projects. Derivatives of the Arduino Mega, using the ATmega2560 and ATmega32u2 microcontrollers, are the norm. The new LulzBot Brain Box uses a RAMBo board with this microcontroller. The electronics for the vast majority of 3D printers is derived from those initial 3D printer experiments, and that means a decade of technical debt.
Tiko advertised WiFi printing during their Kickstarter campaign. Right now, the easy way to do a WiFi printer would be a standard ATmega-based controller board with an ESP8266 WiFi module. This would be easy, but it wouldn’t be cheap. Instead of the easy solution, Tiko turned to a neat WiFi-enabled microcontroller released by Texas Instruments. The CC3200 gave the Tiko a powerful ARM Cortex-M4 microcontroller and WiFi. Given the smooth acceleration found in even the cheapest ARM controller boards, this is a win.
But there’s a reason everyone keeps using older Arduino-based controller boards. Nearly all the firmware for 3D printers is built around the Arduino Mega. Building a printer controller board around a relatively new part means building everything from scratch. This is development time Tiko didn’t have, and engineering time Tiko couldn’t afford.
Despite this, Tiko actually managed to build and ship over four thousand printers. Given Tiko took in nearly three million dollars from 16,000 Kickstarter backers, this doesn’t sound like much. Consider the decisions Tiko made, and it’s remarkable. They had ordered their complete BOM before a prototype was finalized. The decision to use cheap stepper motors led directly to the very poor performance of the finalized design. The efforts to fix hardware problems in software were not effective. Eventually, Tiko had too much technical debt to pay off. It certainly didn’t help that this was a 3D printer selling for a bargain-basement price, either. There’s only so much margin on a $200 printer, and from the start there wasn’t much left over for the engineering needed to make a good, cheap 3D printer.
The Future of Tiko
By the end of 2016, Tiko was effectively dead. Last week, they gave up, shutting down production, and refusing to refund backers. Tiko has even refused refunds on shipping costs, a move that led to an online petition and — get this — a Kickstarter campaign to start a class action lawsuit against Tiko. Tiko is dead, although they are actively pursuing additional investors.
Far too often we look at Kickstarters from an engineering perspective. What’s missing in these discussions is a look at Kickstarters from a business perspective. What Tiko has done is out-innovated themselves. They came up with a rather remarkable system for the frame of a 3D printer, but one that isn’t quite right for a hardware startup.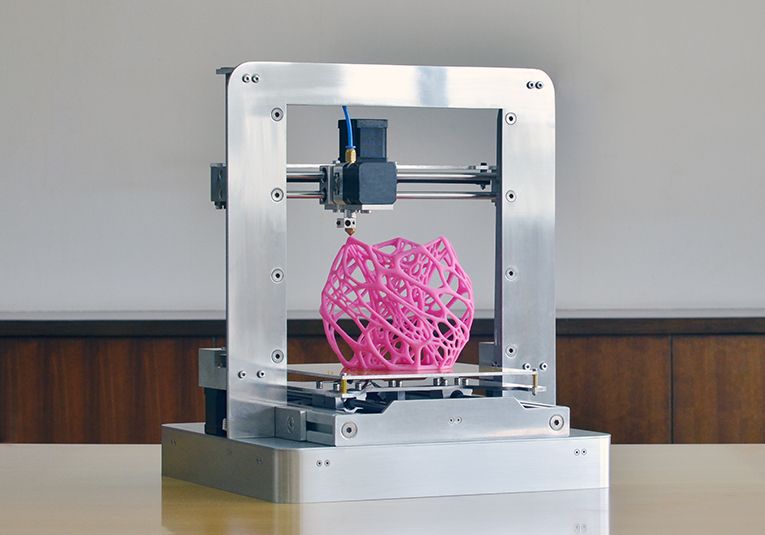 They developed brand new hardware for the 3D printer community but backed themselves into a corner when their engineering team couldn’t keep up. They spent all their money buying components before their design was finalized. These aren’t poor engineering decisions, they’re poor business decisions.
Twelve thousand people have spent $200 (plus about $60 in shipping) on a printer they won’t receive. Four thousand people have a printer that doesn’t live up to their expectations. The Tiko team has a three million dollar failure hanging over their heads. No one is happy with this situation. Yet it can all be traced back to a single problem. This is what you get when you innovate too much.
5 Best Tiko 3D Printer Review – Alternatives 2023
On March 30, 2015, a Kickstarter project was opened to create a revolutionary new 3D printer. One month later, in April 2015, the Kickstarter had raised $2,950,874 from 16,538 backers who put up at least $179 each. Shipping was estimated to start in November 2015, approximately seven months later. The printer was going to be known as the Tiko Unibody 3D Printer.
The designers of this printer were visionaries in every sense of the word. The Tiko 3D printer what the creators of the term "state-of-the-art" had in mind when they coined the phrase. Here are some of the planned specifications.
- The maximum print volume was supposed to be 138.3 cubic inches.
- The shape of the print area wouldn't have been the usual rectangle or circle. Instead, it would have been triangular but with rounded corners. The height would have been 4.9 inches. If you were printing something with a cylindrical shape, the diameter of that cylinder could have been as large as 4.9 inches.
- The layer resolution was supposed to be 50 to 250 microns.
- The printing zone would have been enclosed.
- The print bed would have been made of a flexible plastic. That would have made it easy to pop off the printed item without damaging it.
- Tiko would have been able to connect to Wi-Fi so that you could print from virtually anywhere, including a smartphone.
 If Wi-Fi was not available, you could have used the printer to create a wireless access point. This would have let you print directly from your computer to the printer.
 - If the unit was ever jarred or moved while printing, a built-in accelerometer would have sensed this and shut the Tiko down automatically.
- The accelerometer would have also had a role in the automatic calibration process.
This was your big chance to participate in the development of cutting-edge technology. For a mere $179, you could have contributed to a Kickstarter project and gotten a new type of 3D printer, one that would have made IT history.
The first shipment (from Hong Kong) went out in December 2016. That was 13 months after the initial expected ship date. Those units, once they were set up by the new owners, had problems. By February 22, 2017, the project was over. The Tiko 3D printer became someone’s broken dream. There were subsequent efforts to revive the brand, but nothing came of them. In the end, the biggest problem was probably not the design or planning. It was probably that the project was underfunded and couldn’t survive the bad times.
Even though their $179 investment was gone, those who contributed to the Tiko Kickstarter project were offered an inexpensive way to acquire a 3D printer. The CEO of M3D offered anyone who lost money on the Tiko Kickstarter the opportunity to purchase a Micro 3D Printer for a discounted price of $199. It was a good deal for anyone who accepted the offer and a smart way for M3D to expand its customer base.
There are plenty of other options available for those who were hoping to purchase a Tiko 3D printer. We will list some of those alternatives for you. But first, here is some background information on 3D printers.
| Preview | Product | Price | |
|---|---|---|---|
Monoprice Mini Delta v2 3D Printer (110 x 120mm) Heated Build Plate,. .. .. | $244.56 | Buy on Amazon | |
| M3D Micro+ Desktop 3D Printer for Home, Work, and School Use, Includes... | Buy on Amazon | ||
| Promotion! Print-Rite CoLiDo Delta 3D Printer Kossel Kit D1315 Plus... | Buy on Amazon |
Image by Karolina Grabowska from Pixabay
The printers we reviewed were chosen based on price. We were looking for printers at a price close to the $179 that would have been spent on the Tiko. Quite a bit of time has passed since the beginning of the Tiko project. In that time, technology has marched on. It is reasonable to expect that since then, prices have dropped, and functionality has increased. It is interesting to see how some of the ideas in the Tiko design have made it into currently available printers.
All the printers reviewed here are delivered completely assembled. There are many more available in this price range that require assembly. Some even come in the form of a kit, which sounds like an extreme form of assembly. If you are good with your hands, have a sense of adventure and have the patience of a saint, you might do well to find a kit. This will give you lot more printer for the money.
Overall Price Range of This ProductImage by Lutz Peter from Pixabay
In general, the cost of filament-based 3D printers ranges from the low hundreds to many thousands of dollars. Because we are looking to replace a $179 Tiko printer, we have decided to limit our price range to between $150 and $350.
Monoprice Mini Delta 3D Printer
Monoprice Mini Delta v2 3D Printer (110 x 120mm) Heated Build Plate,...
- Touchscreen Control, Updated Firmware and UI: You spoke and we listened. Larger icons, clear and concise instructions,...
- Fully assembled: the mp mini delta 3D printer comes fully assembled, ready to print out of the box
- PoloPrint Pro Wi-Fi Connection: Connect to the printer over Wi Fi using the updated PoloPrint Pro app for iOS or...
Price | $159 |
Setup | Assembled |
Interface | Wi-Fi, USB, microSD |
Display | LCD |
Technology | FFF |
Print Area | 4. |
Enclosed | No |
Heated Bed | Yes |
Bed Leveling | Auto |
Nozzle Size | .04 mm |
Extruders | 1 |
Software Inc. | Cura, supports Windows XP or later, Mac OS X (10. |
Resolution | 50 micron |
Dimensions | 14.2” x 10.4” x 16.9” |
Weight | 30.6 lbs |
Includes | USB cable, microSD card, power adapter, cord |
Where To Buy | Monoprice, Amazon |
Warranty | 30-day money back guarantee, one year for repair of manufacturer’s defects |
 3” x 4.3” x 4.7”
 6 64-bit)
This low-end printer has it all. It works right out of the box and, except for its lack of enclosure, it has all the great features of higher-end systems. Wi-Fi connectivity allows you to cut the leash to your computer. It only addresses smaller print projects, but if you can work with that limitation, this printer is for you. This model is also worth considering if you are looking to buy your first 3D printer.
- Wi-Fi interface
- SD card
- Excellent features at a low cost
- Heated bed
M3D Micro+ Desktop 3D Printer for Home, Work, and School Use, Includes...
Price | $349 |
Setup | Assembled |
Interface | USB |
Display | No |
Technology | FFF |
Print Area | 4. |
Enclosed | No |
Heated Bed | No |
Bed Leveling | Auto |
Nozzle Size | 0.35 mm |
Extruders | 1 |
Software Inc. | M3D |
Resolution | 50 to 350 microns |
Dimensions | 7. |
Weight | 4.4 lbs |
Includes | M3D software, USB cable, power adapter |
Where To Buy | Amazon, M3D website |
Warranty | Three months for manufacturer’s defects |
 3” x 4.5” x 4.6”
 3” x 7.3” x 7.3”
- Lightweight
- No Display
da Vinci Mini Wireless 3D Printer
No products found.
Price | $200 |
Setup | Assembled |
Interface | USB, Wi-Fi |
Display | No |
Technology | FFF |
Print Area | 5. |
Enclosed | No |
Heated Bed | No |
Bed Leveling | Auto |
Nozzle Size | .04 mm |
Extruders | 1 |
Software Inc. | XYZware, supports Windows 7 and above, Mac OSX 10. above |
Resolution | 100 microns |
Dimensions | 15.4” x 13.2” x 14.2” |
Weight | 18 lbs |
Includes | Starter filament |
Where To Buy | XYZ Printing, Amazon |
Warranty | Undetermined |
 9” x 5.9” x 5.9”
  8 and
8 andThis is another excellent entry-level printer that works right out of the box.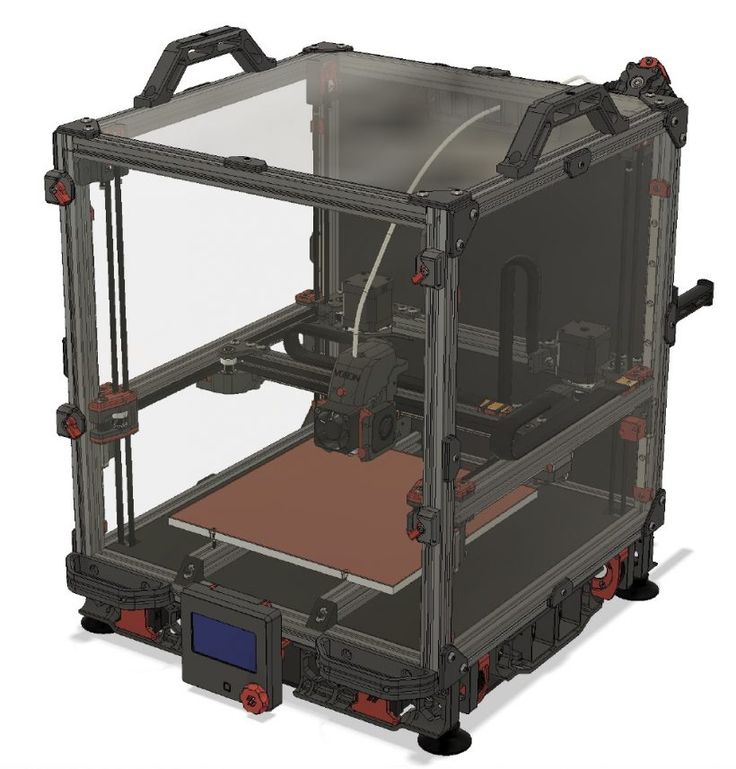 Wi-Fi connectivity is a big plus, as is that automatic bed-leveling feature. The resolution of 100 microns is good, but not great. It only runs filaments available from XYZ Printers. The proprietary XYZware software is provided.
- Wi-Fi interface
- Uses only XYZ Printing filaments
- Resolution
HopeWant Desktop 3D Printer
No products found.
This seems to be a good entry-level printer. Remove it from the shipping carton, and it’s ready to go. It prints either from the computer or the SD card (TF card).
- SD Card
- Price
- No Display
- Resolution
Print-Rite CoLiDo Delta 3D Printer
Promotion! Print-Rite CoLiDo Delta 3D Printer Kossel Kit D1315 Plus...
- Fast print: Delta design, 3 axles moving at the same time, 30% faster than XYZ printing technology
- 0.
 05 mm layer resolution printing quality, two times more precise than other low cost 3d printers, which usually print...
 - Ready to print, fully assembled and calibrated. Compact design with premium quality parts, portable machine with...
Price | $269 |
Setup | Assembled |
Interface | USB |
Display | No |
Technology | FDM |
Print Area | 5” diameter x 5. |
Enclosed | No |
Heated Bed | No |
Bed Leveling | No |
Nozzle Size | .04 mm |
Extruders | 1 |
Software Inc. | Repetier-Host, supports Windows 7 and above, Mac |
Resolution | 50 microns |
Dimensions | 9. |
Weight | 12 lbs |
Includes | Flash drive, USB cable, adapter, filament |
Where To Buy | Amazon, CoLiDo |
Warranty | 30-day return policy, one-year international warranty |
 9” high
 9” diameter x 17.5 high
The price of this unit is at the high end of our range but, as always, you get what you pay for. This printer is different from the others in that it is configured for a circular print area. It is easy to set up, and it prints quickly due to its three-axis parallel movement system. This is an excellent printer for a beginner, but the quality and consistency are good enough for professional applications. At 30 watts, it is economical to operate.
- Fast printing
- Low power
- No Display
- Resolution
The Monoprice Mini Delta 3D printer was the clear winner here. For a printer with its features, the price is almost unbelievable. Wi-Fi connectivity and use of SD cards to store print files make it very user friendly. The heated bed also makes this the only printer on the list that could be comfortably used in a professional setting.
Featured Image: Image by ZMorph4D from Pixabay
Last update on 2021-12-12 at 04:27 / Affiliate links / Images from Amazon Product Advertising API
Tiko 3D Printer - A Kickstarter project that almost took off
Probably someone followed this odious project on the Kickstarter site. Someone heard about this printer from third-party sources, and even on this portal it was mentioned several times: tiko 3d. And in the comments, even someone wrote that he was a baker and was waiting for this printer ... But this is all a prelude, and then the real story begins. One day, I accumulated a few extra bucks in my PayPal account and, out of habit, I went to the e-bay site in search of something interesting. I soon found some interesting used 3D printers for very little money. And I thought, why not? I'll take a small printer and put it side by side with a computer on the loggia, there are just 30 centimeters on the side. And began to consider the available options. They offered cubes from M3D in large quantities, I heard about their problems and understood why they were sold so much, but this, in principle, did not frighten me. Almost anything can be brought to mind :) And then I came across an advertisement for the sale of a Tiko 3D printer. The seller wrote that he is the exclusive baker among the first who ordered this printer, its number is 6 or 9... He received it, but on the second print, the extruder stopped feeding plastic and he sells everything as is for half the price. For $100. I wrote to him that I was ready to buy for $ 80, he replied that he would give in for 95. They agreed on that. :)
By the time I paid for the purchase, I already knew what problems this device has and how to solve them. Thanks to Walter of Thingiverse who also bought it and posted a ton of info on how to get it up to par. The failure of the extruder did not scare me either, since most parts can be replaced. Although now I understand that if the problems were in the control board, then nothing could be done. And the fee here is very interesting ... In general, the package arrived by express delivery to the parcel post warehouse, since I have been using this service for a long time and everything has always been on top. But not this time)0003
Having ordered fast delivery and paid the approximate cost in a parcel in a day, they answered me that they could not send it by express, since this is a 3D printer and it does not fit the household appliances section. Although I did not specifically write that this is a 3D printer, but indicated that this is a used Tico printer. It's funny that a small printer with dimensions not exceeding 25cm in a triangular base is considered industrial equipment. Well, okay, I had to send it by plane to Germany and then by regular Russian Post. For an overabundance of funds introduced, I ordered improved packaging and increased insurance. And now the package has arrived...
Enhanced packaging usually includes additional rigid cardboard and full tape with reinforced tape. Here, alas, I did not notice additional cardboard, but at least they wrapped it with adhesive tape ...
The box is most likely native and it is good that the original TIKO packaging has been preserved and it turned out to be very vandal-resistant. (The sweets were put in a parcel, as usual).
Inside lay the printer itself, the power supply, a magnet-gift from the package and an envelope as if under a disk. But in fact, there was a postcard from the manufacturer, where there were special words of gratitude for the premium bakers from the kickstarter.
The same branded TIKO packaging. by the way, the caring seller also put all the printouts that he could do on this printer))
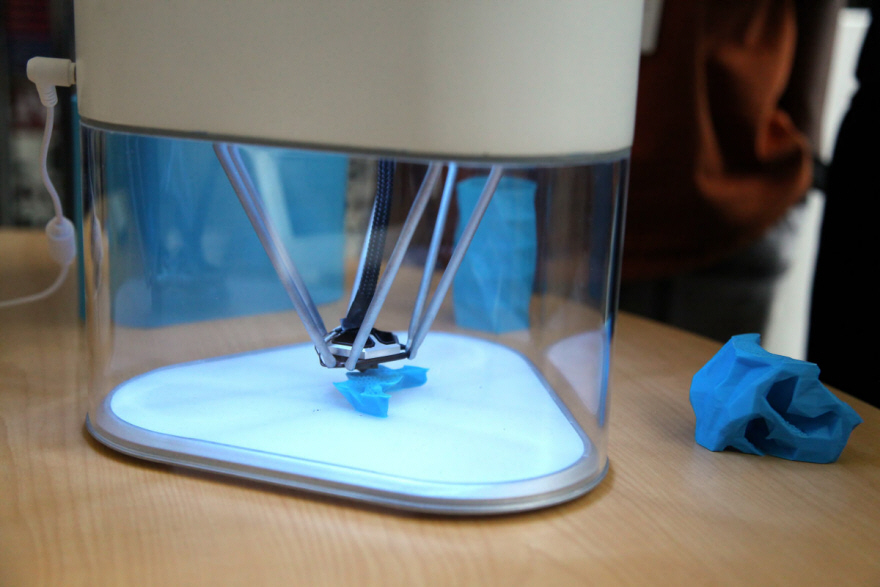
The TIKO printer looks chic, which bribed me) Fully aluminum case in the upper part and a transparent base. The bottom is removable, it is also a table for printing. A type of rubber mat with an interesting texture is glued on the table. The rug is soft and easy to squeeze through with your fingers. The table itself also bends, but not much. Most likely it is made of nylon or plastic of similar properties.
The printer was immediately with a branded PLA plastic spool. She's a little smaller than anyone I know. Possibly comparable in size to Taulman coils.
But a standard FD coil won't fit in there.
Starting the printer... The hardest part of this process at first was... Finding where to insert the power cord. The hole is small and inconspicuous located at the bottom end, next to the transparent base. I was looking for him for two minutes exactly.
After the power is connected, the printer starts blinking smoothly with the backlight, at this moment it has already created a WiFi host to which you need to connect by typing www. tiko.print in the browser or 192.168.1.1 In my case, the first option did not work in any way, but the second one immediately picked up.
When you first turn on the printer, it offers to connect to your WiFi network, this is necessary to download updates and it was also intended that it would work with a cloud print service, but alas, this will never be implemented. It's good that all the updates have arrived, judging by the firmware version, it was updated 3 times. If you read the Tiko printer forum, then there are many complaining about terrible printing and hoping that the next firmware update will fix this and the printer will start printing well. Alas, guys, the problem here is not in the software part.
After all the simple settings, the print window opens.
Yes, it's that simple. I took it out of the box, plugged it into a power outlet, connected via WiFi, and after 3 minutes you can already print. It is enough just to throw STL into the browser. This is the perfect printer for beginners. I took the STL, threw it into the printer and pressed the print, that's it. No more manipulation is needed. But alas, the chic idea was not 100% finalized. Despite the Unibody aluminum body with built-in rails. The carriages are made of the same plastic as the base. That is, something like nylon, and since BYJ-48 motors are based on 12 volts, the carriages are as light as possible, which is why the nylon guides sliding along the rails are very flimsy and the whole structure has backlash. The head of the printer is made of metal, but again the guides are plastic. Also, there is no blowout. The kickstarter video says that an innovative convection system is used here, when hot air itself rises and airflow is not required ... Yeah, of course, only the rise of this air is so insignificant that it is clearly not enough to remove heat from PLA plastic. Okay, let's try to print.
The demo model is already built into the printer, you just need to press the print button.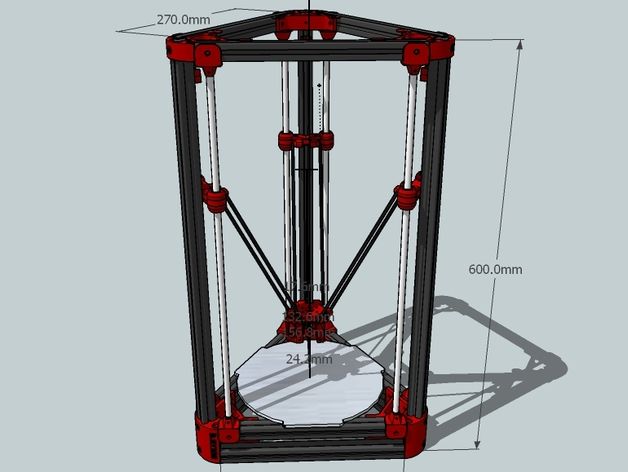
All settings are default to start with.
Temperature set to 210, layer 0.2, infill 25%.
We press the button and the printing starts... The interest runs... But no, the printer does not move.
Trying to load and unload the filament. It seems to be doing something. The brightness changes. But when you press print, it does not print. Ok, let's deal with the filament first. Why is there no submission?
Everything turned out to be banal. The bar crumbled and stood somewhere in the spacer.
I unscrewed the tube clamp and inserted my bar from the back side and pushed out all the pieces of the crushed bar.
This is what TIKO looks like from the inside. The yellow cable is an interesting feature of this printer. An accelerometer is built into the head and the auto level is implemented on this sensor.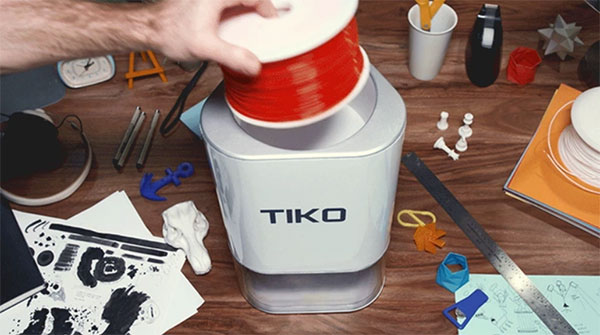
The head drives up from the surface of the table from the edge and rests on the table with a nozzle, while the head tilts, then the printer slowly raises the head up and at the moment when the head becomes parallel to the horizon, it fixes this value, lifts it up until the limit switches are activated and repeats the procedure on the next two corners. The process is funny. True, the table cover from this at three points deteriorates a little.
Video of the calibration process: TIKO auto calibrate And a piece of video of the start of printing a simple cube 20x20mm:
Link if the video is not inserted: Tiko printing And Timelapse video of printing the cube:
the print button, you can disconnect from the printer's network and it will continue to print completely autonomously. In general, this is a great idea: a printer with a built-in print server and a slicer, fully automatic. And spoils this idea only one, but a very significant omission.
Print quality.
It prints disgustingly out of the box. Moreover, it turns out even more or less with a native filament, as soon as you insert a non-native one, it already becomes critical how the temperature, retract, etc. are set. Yes, it needs to be configured on all printers. But all that I had before allowed me to fit into fairly wide ranges so as not to change the settings 10 times for each plastic manufacturer.
This is the test cube 20x20x10mm. A pair of sides are curved, one outward, the other inward. There are some gaps in the center of the layers, the filling does not reach the walls. Raft is required and is not disabled. The surface above the raft turns out to be nasty))) Not smooth, but nasty.
Lower corners turned up because the layer above the raft lay poorly. raft by the way does not turn off and is not configured.
This is the very first print, when there was some native plastic left in the bowden tube after the extruder.
Due to a poorly adjusted first layer gap and raft, the model was torn off the platform and it was not finished printing. but the next white figure was printed out and came out so-so.
there are displacements of layers and hairiness, in general, the whole thing is some kind of curve))) In general, there is room to grow and something to tweak.
Finally, a couple more photos of the cube and the miracle table.
This is how the printer turned out, and in principle it is clear why the project did not take off, the printer had too many problems out of the box, and there were not enough resources for improvements.
Although in general there are quite a lot of interesting solutions, just look at the nozzle. Titanium nozzle with a ceramic annular compact heater, this is a fairy tale. Heats up in a couple of seconds! A fully cast aluminum body with built-in rails, such a solution should have given amazing accuracy, but alas, the backlash due to the lighter weight of the bottom brackets ruined everything. By the way, one solution to this problem is just to add weights to each carriage. Paradox)
Well, for me, a big plus is the dimensions.
Fits perfectly in my temporary mess :)
Well, a bonus, if you are a happy owner of this printer and you are not satisfied with its print quality, then you can pay attention to Walter's improvements: My collection for TIKO.
Overview of the budget 3D printer Monoprice Select Mini
3DPrintStory Reviews Overview of the budget 3D printer Monoprice Select Mini
Prices for desktop 3D printers continue to fall. There were times when a $600 3D printer was a delight and a desire to order it as soon as possible, but technology does not stand still, and developers and manufacturers are looking for new options to lower the price even lower. This review is dedicated to one of the budget 3D printers costing about $200 - Monoprice Select Mini.
It is worth noting that this inexpensive model breaks established traditions and did not start with Kickstarter, unlike others like M3D Micro, Tiko, OLO / ONO and Trinus, which attracted the attention of consumers and investors thanks to crowdfunding platforms (by the way, this is really an effective development strategy for small startups, but there is often a mismatch between expectations and the final product).
Monoprice is different. This is an American company that did not particularly bother with the development and production of its own 3D printer, but simply imported the Malyan M200 from China, hung its logo on it and put an attractive price of $199. What if you got a defective 3D printer? No problem, send it back and they will replace it for you.
A reasonable question arises: can such a cheap 3D printer compete with Ultimakers or Printrbots? And is it even worth comparing? We will try to answer these and other questions in the review below.
Features Monoprice Select Mini
- Affordable;
- Robust design;
- Easy to use;
- Predictable 3D printing at low speed;
- Works with any slicing software and standard 3D printing materials;
- Amenable to improvements and upgrades;
- I think we already mentioned the price?
Disadvantages Monoprice Select Mini
- Difficult to calibrate;
- Prints poorly at high speeds;
- Print table unprotected;
- Faulty power supply;
- WiFi module not active;
- Unstable nozzle temperature;
- Strange quirks.
 ..
..
Short Verdict
The Monoprice Select Mini is a great 3D printer for the price. There is a heated table, easy to operate if you do not use high speeds, stable 3D printing quality.
Naturally, there are disadvantages. During operation, the temperature of the nozzle may change, and at high speeds, 3D printing errors occur. The calibration process takes a lot of time and the first time you have to tinker. Well, the most interesting thing is that the power supply burned out after 12 hours. But the latter, incorrect, can be attributed to an accidental marriage.
Despite all the shortcomings, the Monoprice Select Mini is a wonderful little 3D printer with many great features. In general, it performs in accordance with the information in the technical specifications, and the quality of the 3D printing even exceeded our expectations.
If you are not afraid to take it apart / put it back together, then you can do a few upgrades. The first thing to do is to replace the hotend and update the firmware to activate the WiFi module ( be careful! These upgrades have not been tested as part of this review and may damage your 3D printer! ).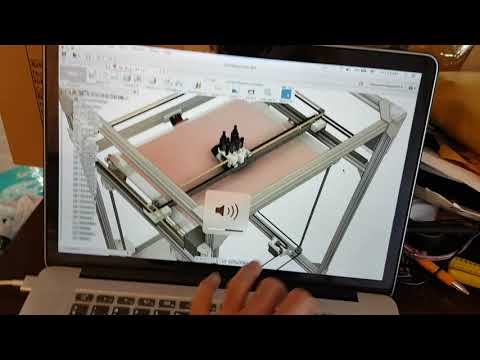 You can install the glass on the print table. Even with these upgrades, the price will still remain acceptable.
Would you recommend the Monoprice Select Mini as your first 3D printer? Yes, definitely.
Specifications and features Monoprice Select Mini
Monoprice Select Mini workspace 120 x 120 x 120 mm. The maximum resolution of 3D printing is 100 microns. Heated table. The 3D printing speed is 55 mm/s.
You can upload your 3D model via micro SD card or USB. The manual states that compatible slicing programs are Cura, Repetier-Host, ReplicatorG, and Simplify3D. This means that the Monoprice Select Mini recognizes the standard G-code, and this 3D printer is not tied to any particular software. Cura was used during testing for this review.
Monoprice Select Mini doesn't limit you in the media you use. You can print with any standard 1.75 filament using PLA or ABS thermoplastics. In our case, PLA plastic from ColorFabb was used.
These two things - freedom to choose software and filament - are very important in this price range, because manufacturers like M3D Micro and XYZprinting, which are Monoprice's main competitors in this niche, tend to use proprietary software and their own materials for 3D printing .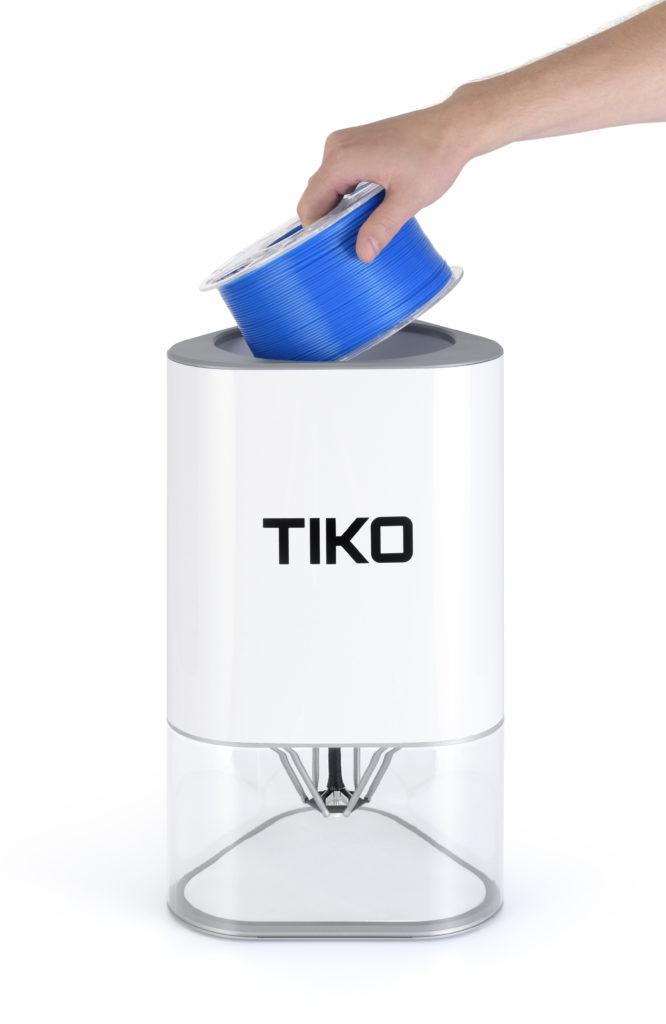
Unpacking and installation of the Monoprice Select Mini
Installation of the Monoprice Select Mini is quite simple. You can start typing within 20 minutes.
Inside the box you will find a 3D printer, a power supply, an imbus wrench for calibrating the table, a plastic spatula for scraping off the rest of the material from the table after printing, a 256 mb micro SD card and a micro USB cable.
One piece of paper contains basic instructions and a link to a website where you can download the full version.
You will also find a rectangular steel sheet, the purpose of which is not clear at first. It turns out that this is a coil holder that is attached to the side of the main unit.
It is important to note that the Monoprice Select Mini kit does not include media test samples. So stock up on filament with a diameter of 1.75 mm.
You can use the wheel to adjust. The menu is well structured and easy to understand. You can start the calibration process, preheat the extruder and feed the filament.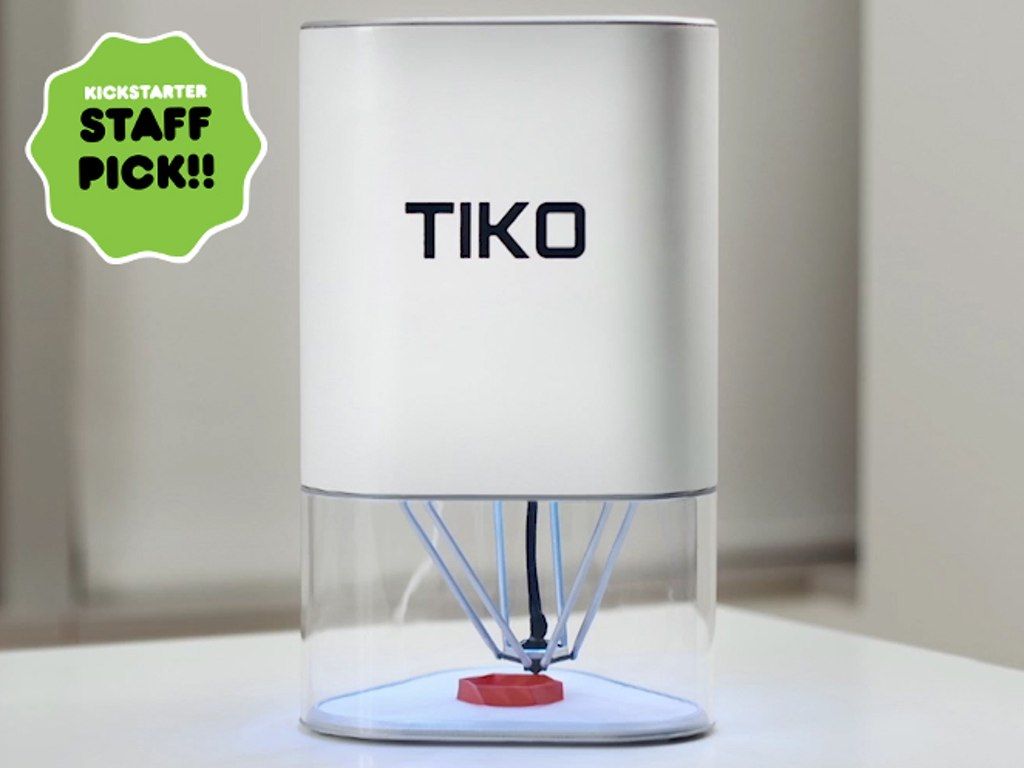
Calibration can be somewhat difficult. In theory, it should be carried out even before shipment, in production, and you should have a piece of paper between the nozzle and the printing table. If it doesn’t work, then hex keys will come in handy here. It will be necessary to try and tighten the screws at the corners of the table so that the sheet still passes.
At this stage, the first important shortcoming of this model becomes clear. The printing table is made of aluminum and does not have a special protective film or coating on it. So stock up on blue 3D printing tape or install glass right away. Otherwise, the table will wear out very quickly and you will have to change it.
Well, one more bug that got out in our particular case. The power supply burned out after 12 hours of use. Foaming it was not difficult, but it was very unpleasant. You can probably throw it off for marriage, but in any case, be prepared for a similar turn of events.
Construction and build quality of the Monoprice Select Mini
Very pleased with the build quality of the Monoprice Select Mini.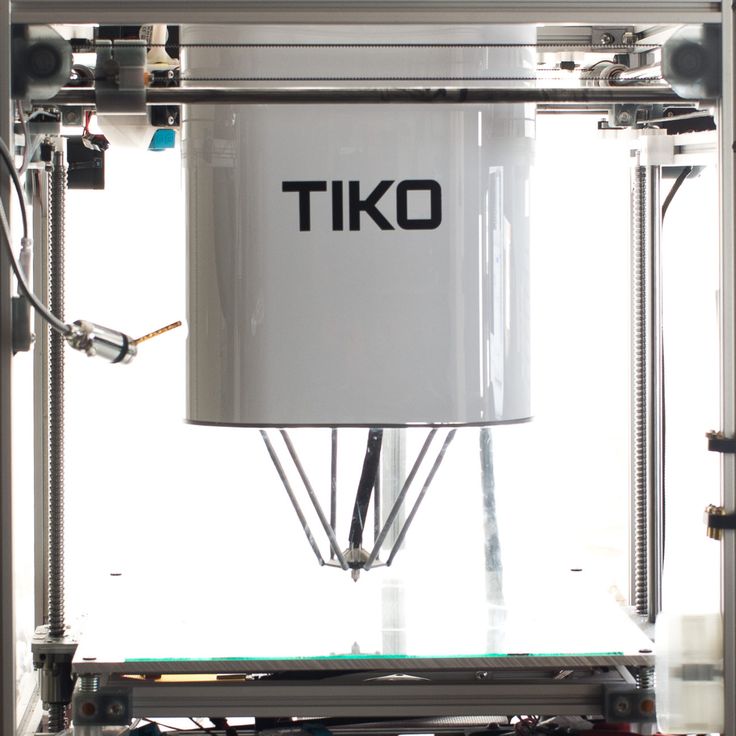 The construction is strong, reliable, with a steel sheet metal case that hides all the electronics. So don't worry about shipping damage.
This 3D printer uses deposition modeling technology. The classical Cartesian coordinate system is used. The design is similar to Printrbot Simple. One cooler is used to cool the nozzle. It is likely that problems may arise during 3D printing with unusual materials.
The extruder has a diameter of 0.4 mm and can be heated up to 230°C. We have not been able to test how easy it is to change, but in the long run this is an important factor as the nozzle will still need to be changed over time.
Monoprice Select Mini Print Quality
Models will already be preloaded on the micro SD card. They are supposed to be optimized for 3D printing on the Monoprice Select Mini. So before uploading our own models, we printed test ones.
The cat was printed first. The resolution was 200 microns. Everything went well until the last layers.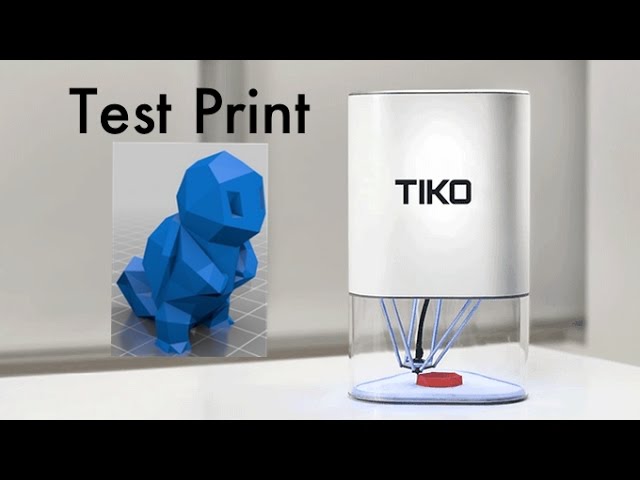 The upper part of the paw and ears could not be printed even once. There were 3 attempts in total.
G-code analysis in Simlify3D shows that the table accelerates up to 55mm/s during the last layers. That is why the error was repeated. Quite a strange decision of the company - to provide a test model, which a priori will be printed with errors...
The second model that we printed is a test elephant. The resolution was also 200 microns and 10% infill. There were no problems! The result is excellent and you can see it in the photo below.
Next we moved on to our own models. We used Cura for slicing. This article reveals the excellent Cura settings for 3D printing on the Monoprice Select Mini and we used them.
We printed a classic 3DBenchy and Graphica model: a MEGA Ghost with 200 micron resolution and 10% infill, a V29 whistle with 200 micron resolution and 100% infill, and another 3DBenchy model with 100 micron resolution and 10% infill.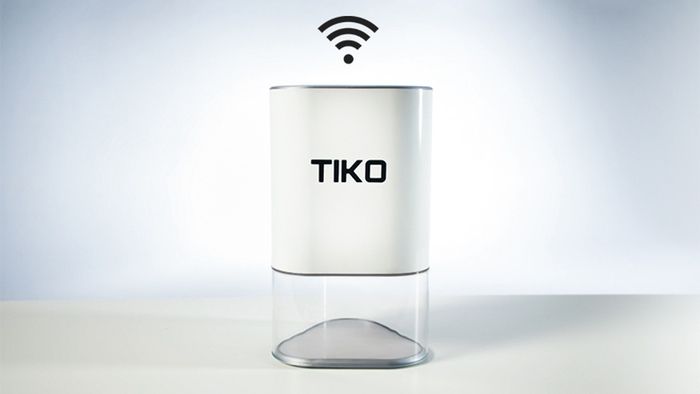
The simple 200 micron models worked out well. There are no special problems with small protrusions and holes, although there are sagging. The layers are laid evenly along the X and Y axes.
The V29 whistle sounds as loud as intended, which means the partitions were printed correctly. The Graphica Mega Ghost with its long tongue also printed correctly. The hinge glided smoothly. The
3DBenchy at 100 microns worked well too. When you look at the photo, don't forget that this is a $19 3D printer.9.
We have noticed that most errors in 3D printing occur when the spool of filament clings or there is not enough adhesive coating on the printing table. This cannot be attributed to the shortcomings of the Monoprice Select Mini itself, since this is a global problem for all FFF printers.
During operation, the print table may block access to the control wheel. This point is implemented in the design is not very ergonomic.
Another disadvantage is that the nozzle temperature has an error in the region of 5°C.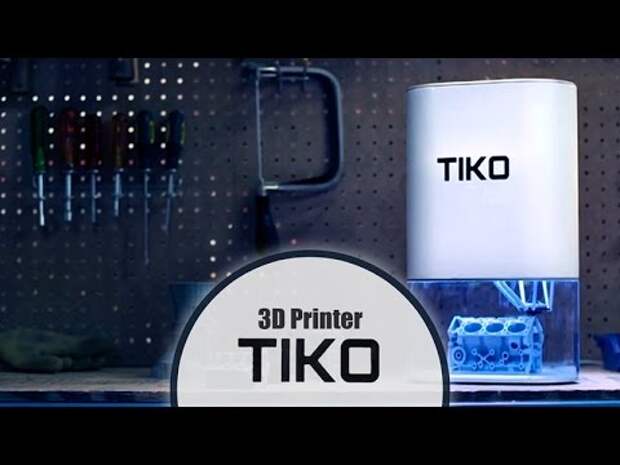 For example, when the 3D printing temperature is set to 215°C, it jumps between 213°C and 217°C on the control panel.
This does not particularly affect printing with PLA plastics, but may have a negative effect during 3D printing with materials that are more sensitive to temperature changes.
Finally, we printed a Low Poly Moai bust. We scaled the model by 50% and printed with 100 micron settings and 30% infill. It turned out well on the whole, the only small marriage is the influx of material on the chin. By the way, we observed the same effect when printing 3DBenchy with resolution settings of 100 microns.
Life hacks and upgrades Monoprice Select Mini
A few words about upgrading the Monoprice Select Mini 3D printer. There are no official upgrades! But here are a few options that you can try to implement on your own.
In our opinion, it is necessary to deal with the temperature of the extruder, make it more stable. For example, you can implement a PID temperature controller.