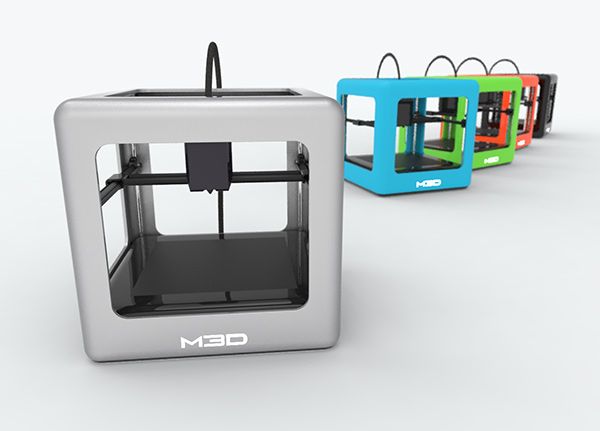
Starter 3d printers
Best 3D Printer for Beginners 2022 [The Ultimate 3D Printer Guide]
3D printing is a particularly difficult hobby to get into; there are confusing terms thrown around left and right, a million printers available, and enough specifications for each to make your head spin. It doesn’t have to be this, way, though!
Today’s article is dedicated to finding the 3D printers with the easiest operation and simplest configuration. We’ll examine each individually, highlight its strengths and weaknesses, and ultimately, say why it’s a good choice for novices. Take a look at the best 3D printers for beginners below:
Table of ContentsShow
The 10 Best 3D Printers For Beginners In 2022
Buyer’s Guide
Before we jump right into our reviews, it’s important for beginners to know what to look for in a 3D printer. That’s why we’ve created a short guide to some of the things that will have a large impact on your printing.
Build Area
The build area of your printer refers to the maximum allowable space for printing. You might see it listed as a series of dimensions (for instance, 5 x 5 x 5”) or it might be provided as a volume (such as 5”3 or five cubic inches). In these examples, both printers would have the exact same build area size.
Now, bear in mind that this doesn’t refer to the biggest items you can build. By including clips or other attachment mechanisms, you can combine several individual prints to create something far larger.
Printing Materials
While most basic, beginner-level 3D printers use PLA and ABS filament, more expensive models usually allow you to use a wider range of materials. For instance, you may be able to print with carbon-fiber or wooden filaments, water-soluble support materials, or even glass.
The problem is that these coarser materials can damage your extruder. That’s why if your printer supports these filaments, you’ll likely need to upgrade to a metal extruder head. These are available relatively cheaply, and help guarantee an identical print every time.
You may also want to consider different support materials. Some, like PVA, dissolve in water, leaving clean edges without any further processing. If your printer only supports PLA or ABS, however, you’ll be stuck using simple snap-off supports like those found in plastic model kits. For general printing, this isn’t an issue, but if you want a more professional end product, we recommend a printer with support for more filament types.
Print Speed
Often, you’ll see print head speed listed in millimeters (mm). This number lets you know how far the print head can move in a single second. Higher speeds are better, but this isn’t a true depiction of how quickly you’ll be able to print. For this, you’ll have to find the “print speed” listing.
Now, it’s worth noting that the print speed listed will be the fastest that your printer allows. There are usually two settings: speed and quality. As you might expect, the faster you print, the lower the overall quality of the item. If precision and fine details are your number one priority, you’d be better off with a slower speed.
Layer Height
Usually, the printer’s supported layer heights will be listed in microns. The thinner the layer, the less obvious it will be, and the smoother the finish. On the other hand, with the thinnest layers, you can expect a print to take a lot longer to finish.
You’ll usually find the layer height that best allows you to compromise between speed and print quality early on. Afterward, you’ll know which setting works best for more detailed objects and which is best for everyday printing.
Calibration
Usually, before you can begin printing, you first have to calibrate the machine. There are various different components that require your attention: the print bed has to be leveled to ensure a perfectly flat surface, the print arm has to be perfectly positioned, and the step distance has to be set to avoid printing a far larger (or smaller) item than intended.
In recent years, printers have begun to automate these processes so you don’t have to. Some include automatic-leveling functionality, while others come pre-configured out of the box. Generally, you can expect to pay a little more such models, but as we’ll show below, it’s still possible to find them at a reasonable price.
Entry Level 3D Printers
In this section, we’ll be discussing low-cost 3D printers that are excellent for beginners. Without further ado, let’s begin with the XYZPrinting da Vinci Mini.
At around $180, the XYZPrinting da Vinci Mini as among the cheapest 3D printers on the market. This doesn’t mean it’s low-quality, though! In fact, it boasts wifi connectivity, a generous build area, and even an auto-leveling bed. You are limited to using PLA and PETG filaments but we think that’s a reasonable trade-off considering this model’s low price point.
This is about as simple as 3D printers come. You’ll find modeling software and starter filament included in the box, and since the da Vinci Mini calibrates itself, you can go from unpacking to printing in as little as 20 minutes. XYZPrinting even offers 30 free printing tutorials on their website to help novices out.
Even the interface is easy to use. Printing is performed with a single button, and various colored LEDs alert you to any errors as they occur. This product is designed for beginners, and it shows.
This printer retails for about $190 but has the smallest build area of any on our list. What gives? Well, the Monoprice Select Mini offers more freedom than most: thanks to its heated plate, you’re free to print with almost any material be it PLA, ABS, PVA, or even wood.
Sounds complicated right? It’s really not. This printer ships fully assembled and ready to go. It works with any PC or Mac, and even includes an SD card (and wifi support) so you can move your models across effortlessly. Sure, it’s a little slower than most, but it’s also far smaller, meaning you don’t need a dedicated space for it on your desk.
The only real problem with this printer is that some materials need an enclosure to print well, which this model doesn’t have. That said, it’s easy enough to create your own and in a pinch, even a plastic tub will work.
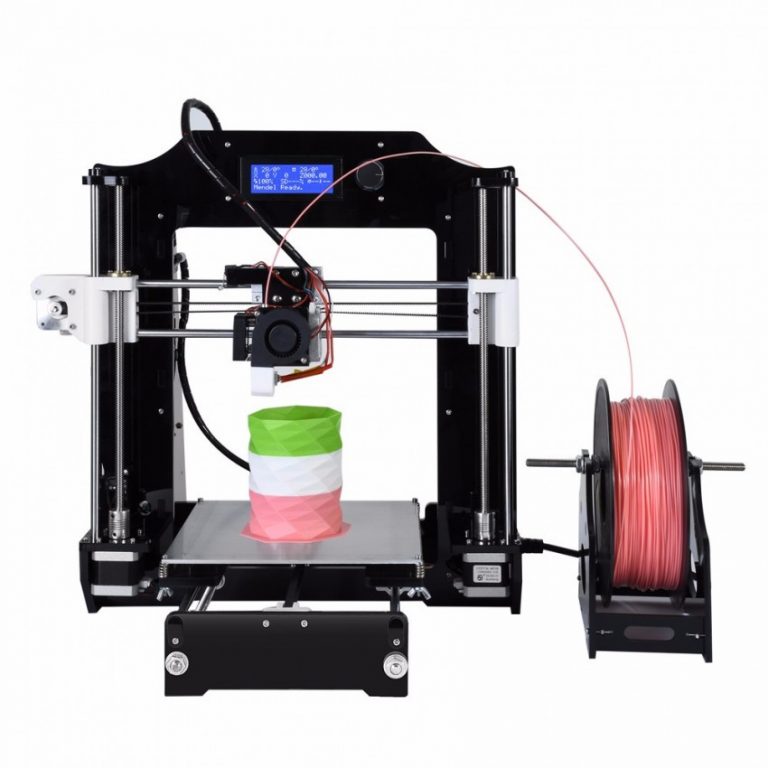
The Comgrow Creality Ender 3 is a printer that you build yourself. Wait, don’t leave! This model only takes about half an hour to assemble, and this is a large part of why such a high-quality printer can retail for about $239. This is a surprise in itself since the Ender 3 includes many traits most printers don’t, like the ability to resume a print after a power cut.
This printer has it all: wifi support, fast travel speeds, a colossal build area, and even a fast heat up time (around five minutes to reach 110°C). The downside is that you’re limited to using PLA filament, but this is the most beginner-friendly material of all, so it’s not really an issue.
There’s an advantage here too. By building your printer piece-by-piece, you’ll have a greater understanding of what exactly each component does. This makes maintenance easier in the long term, so while there’s undoubtedly a bit of a learning curve, the Creality Ender 3 might not be such a bad idea.
The Kossel Mini is another DIY printer, one that retails for about $260. Notice its unique shape: the circular build plate is perfect for those looking to build larger models like figurines or interlocking parts. Better still, it’s incredibly easy to upgrade thanks to its simplistic design.
Although it looks a little basic, there’s actually a good amount of functionality here. The bed is heated, so you won’t have issues with material sticking to it. It’s even capable of leveling itself, which means that there’s very little fuss or configuration required when you’d like to get started.
Again, you’re limited to using PLA filament. That said, with a little tweaking and upgrading, there’s no reason you shouldn’t be able to use other materials too. As a result, the Kossel Mini is an extraordinary choice not only for 3D printing newcomers but also those looking for a long-term project.
One of the great things about this printer is that it’s so modular. This means that if one part stops working, it’s a simple matter to order and install a replacement. This prevents lengthy warranty processes, and ensures your printer is never out of action for more than a few days at a time.
Mid-Range 3D Printers
If you’re willing to spend a little more, you can greatly increase the functionality and ease of use that your 3D printer provides. Don’t believe us? Check out the products below to see for yourself!
The FlashForge Finder is one of the most popular 3D printers around, and for good reason. It offers a decent build volume, wifi connectivity, and even runs quieter than most, at around 50dB. You can only print with PLA, but as this is a beginner-friendly model, that’s to be expected.
Don’t understand calibration? No problem! The Finder makes it as easy as can be by simply telling you to tighten various screws until you hear a beep. This takes all the guesswork out of getting ready to print and allows you to focus on the fun part – the actual creation process.
This printer can be controlled via its 2.5” touchscreen or remotely on your PC. The menus are simplistic and easily understandable, written in plain English, so anyone can use them. Also included are various tools you might need, such as an unclogging tool and Allen wrenches.
There’s no need to worry about safety, either. The non-heated build plate relies on adhesive surfaces to prevent sticking, and means you can’t burn yourself my mistake. With wifi compatibility, SD card and USB support, and even the ability to send models from cloud storage, the FlashForge Finder has everything you’ll ever need.
You’d be forgiven for thinking that this futuristic-looking printer cost more than it does! At around $230, the MOD-t is reasonably priced, but better yet, it’s also pretty strong. For instance, it boasts a 50-micron print layer; that’s half the size of numerous similarly-priced printers!
We really liked that this model can start printing right out of the box. Just import a model via wifi or SD card, add some PLA filament, and you’re good to go. The build area is a good size, although not cubic in shape. On the plus side, it is enclosed, meaning you’re less likely to see prints ruined by temperature fluctuation.
The print speed doesn’t seem that fast at first glance, but remember: this is an entry-level machine. Since you won’t be building massive items, the speed is less crucial. What really matters is getting the nicest finish, and luckily, the MOD-t makes this as easy as possible, even for inexperienced users.
If the previous products seem a little too simplistic, the Anycubic I3 Mega might be just what you need. It requires you to connect a couple of cables before use, striking a balance between full-DIY printers and ready-to-go models. It includes additional helpful features too, like filament detection, print-resume tech, and a non-stick build plate.
You’re not limited to PLA either. This printer can use PLA, ABS, HIPS, and wood-based filaments, allowing you to plan and create far more imaginative pieces than most other beginner-oriented models. With 50 micron layers and a print speed of about 60mm/s, the I3 Mega offers the best of both worlds.
Note the massive build area: it absolutely dwarfs that of many of this printer’s rivals. For less than $400, you can find a 3D printer capable of printing almost anything you can imagine. Sure, the upfront cost is a little higher, but you won’t have to upgrade for several years at least.
If you want the most options, you want the Wanhao Duplicator i3 Plus. It supports more than 15 different filament types, offers a gargantuan build area, and features a 3.25” touchscreen for easy operation. The best part? This printer retails for around $420, far less than most models with similar functionality.
Most of the common stumbling blocks are already taken care of. For instance, the heated bed prevents sticking, the fan prevents overheating, and the steel frame provides more than enough stability. You’re limited to transferring files via USB or SD card, but that’s nothing too unusual, particularly in a mid-budget printer.
So what makes this a good choice for beginners? Simply, it makes printing as easy as possible. There’s very little manual configuration required, and as this is a popular model, you can easily find help on a Wanhao-dedicated forum. There’s no mess, no stress – just high-quality 3D prints.
We were pleased to see that this printer comes with a one-year warranty. After all, while relatively inexpensive, it’s still a significant investment. Wanhao’s support affords you peace of mind, and if anything goes wrong, you can consult their FAQs or contact support via phone, email, or post.
Premium 3D Printers
While not everyone will be able to afford the following products, they offer additional functionality that lower-cost models don’t, while being easily accessible for people who’ve never used a 3D printer before.
Now, we know what you’re thinking: I don’t want to spend around $650 on my first 3D printer. Bear with us, though, because spending a bit more to get a high-quality product the first time means you’ll save money down the road. And believe us, the QIDI TECHNOLOGY 3DP is absolutely a high-quality printer.
The first thing which sets it apart is there are two extruders. This means you can either print twice as fast or use two different materials for a striking contrast. You could even mix ABS and PLA if you like since this model supports both.
Models not quite right? With this printer, you don’t necessarily need to fire up the CAD software. Instead, you can slice and edit your models directly using this printer’s minimalistic, easy-to-use onboard controls. With a heat-resistant, warp-resistant frame, you’ll get exceptional prints every time.
Finally, because you can choose an enclosed or ventilated build area, you’ll find that fewer prints fail. This, in turn, saves you money as you’re not wasting as much filament. Sure, these materials are fairly inexpensive, but the costs definitely start to build up, particularly if you plan to use the QIDI for several years.
The Dremel Digilab 3D20 puts user safety above everthing else. This model costs under $600 and features a fully-enclosed build area (which is particularly spacious), as well as a non-heated bed and third-party certification. Best of all, though, it places particular emphasis on consistency.
In practice, this means that you’re limited to using proprietary PLA filament. You might be a little disappointed by this, but it does essentially guarantee that prints only fail very infrequently. Plus, this filament is guaranteed to be non-toxic, plant-based, and recyclable, so it’s safe for kids and pets.
There’s no assembly required, either. In fact, the Digilab 3D20 is ready to print straight out of the box. It even comes with a small spool of filament, although only enough for a couple of prints at most. Model manipulation is as simple as can be, thanks to this printer’s compatibility with popular software like Cura.
As if this wasn’t enough, the 3D20 also includes a one-year warranty and access to a responsive, US-based customer support line. Reliable, high-quality prints, safety as a top priority, and exceptional customer support? What more could you ask for? How about a full-color touchscreen? Oh wait, that’s included too.
Best 3D Printer for Beginners: The Verdict
While all of the printers mentioned above are excellent for beginners, you’re probably wondering which is the best overall, especially since you’ve seen how advanced some 3D printers can be. Well, it wasn’t easy but we finally came to the decision that the FlashForge Finder is better for most users.
Our reasoning is simple: it’s an inexpensive, reliable printer that offers a good degree of freedom without being overwhelming to novices. Not only that but with automatic calibration, it takes the busywork out of printing. This makes it more appealing to kids, but also helps prevent user frustration, which is never a bad thing.
Best 3D Printer for Beginners in 2022
While 3D printing has been around for a while, it’s only recently become more accessible to the mainstream consumer market. Desktop 3D printers make it simple for hobbyists to take advantage of this innovative technology, but those dipping their toes in for the first time may be wary. There’s an enormous variety of 3D printers for beginners, making the process of setting up, printing, and finishing your models a simpler, more digestible process.
3D printers use a process called additive manufacturing to turn digital models into three-dimensional objects. Most often, 3D printers use small nozzles and materials like plastic, resin, polymers, or metal, depositing the material layer by layer, then fusing them with an adhesive or ultraviolet light to create a 3D model.
The things you can create with a 3D printer are almost endless. These desktop devices give you the power to harness your creativity and turn digital prototypes, 3D doodles, and much more into physical objects — all from the comfort of home. The best 3D printers for beginners will bring your digital dreams to life.
— Best Overall: Creality Ender 3 Pro 3D Printer
— Best on a Budget: Monoprice Select Mini 3D Printer v2
— Best Resin: ELEGOO Saturn MSLA 3D Printer
— Best Multifunction: Snapmaker 2. 0 Modular 3-in-1 A350T 3D Printer
— Most User-Friendly: Monoprice Voxel 3D Printer
— Best Premium Pick: Robo E3 3D Printer
How 3D Printing Works
3D printers use a process called additive manufacturing (or more colloquially known as 3D printing) to turn digital models into three-dimensional objects. Most often using small nozzles and materials like plastic, resin, polymers, or metal, the printer deposits the material layer by layer, then fuses them with an adhesive or ultraviolet light to create a 3D model.
The things you can create with a 3D printer are almost endless. These desktop devices give you the power to harness your creativity and turn digital prototypes, 3D doodles, and much more into physical objects—all from the comfort of home. The best 3D printer for beginners will bring your digital dreams to life.
How We Selected the Best 3D Printers for BeginnersAs with any new consumer technology, 3D printing isn’t exactly cheap, so you’ll have to spend some money for a decent pick. We narrowed down our picks for the best 3D printer for beginners from dozens of 3D printers, paying attention to price, ease of use, and print quality.
Price: 3D printers start at a couple of hundred dollars and can range up to thousands of dollars. Most beginner hobbyists will want a budget-friendly option for testing the waters. We included several printers in a modest price range, skewing towards more affordable prices to appeal to novices.
Ease of Use: User friendliness is one of the most important features when it comes to picking the best 3D printer for beginners. We prioritized features like straightforward assembly and print material refilling, as well as a simple-to-use interface with less of a learning curve required to get started.
Print Quality: Through reviewing product specifications and consumer reviews, we chose 3D printers that create high-quality models, so your design looks exactly as intended. We prioritized 3D printers with good specifications and high user satisfaction. Get started with the best 3D printing software.
Why It Made The Cut: This beginner-friendly 3D printer is affordable, simple to use, and creates quality prints.
Specs:
— Build Volume: 8.7 inches L x 8.7 inches W x 9.8 inches H
— Weight: 19 pounds
— Compatible Materials: PLA (polylactic acid), ABS (acrylonitrile butadiene styrene), PETG (polyethylene terephthalate glycol) plastic
— Print Speed: Up to 180 mm/s (millimeters per second)
Pros:
— Easy to assemble
— Removable, flexible, and magnetic print bed
— Great print quality
Cons:
— Printing bed can be tricky to level
The Creality Ender 3 Pro 3D Printer is a popular 3D printer model for hobbyists, and for good reason. This printer is affordable, easy to use, and comes with several attractive features.
The printer arrives partially assembled with all the necessary tools included for easy setup. Loading the plastic filament is simple. Once assembled and switched on, the device is ready to print almost immediately, with a rapid heating feature that gets the printer ready to go in only five minutes. In case of any pauses in printing, it also has a handy ‘resume print’ function, which restarts the job where it left off.
The heated, removable, and flexible magnetic print bed makes it easier to remove completed models after they’re finished printing, although users will need to take care when re-installing the bed to make sure it’s level. Overall, this 3D printer delivers great print quality, and for its reasonable asking price, it’s our choice for the best 3D printer for beginners looking to dip their toes into 3D printing. For another great option, read out review of the Anycubic Vyper 3D Printer.
Why It Made The Cut: This printer may not have the fancy features of more expensive models, but it offers excellent value and versatility for its price.
Specs:
— Build Volume: 4.7 inches L x 4.7 inches W x 4.7 inches H
— Weight: 10 pounds
— Compatible Materials: All filament types including ABS, PLA, and wood and metal composites
— Print Speed: Up to 55 mm/s
Pros:
— Affordable
— Refurbished model cuts down on electronic waste
— Supports all filament types
Cons:
— Small build volume
— Relatively slow printing speed
The Monoprice Select Mini 3D Printer v2 is the best budget 3D printer available today. It’s also extremely easy to use for beginners. And since this model is refurbished, you can save even more money.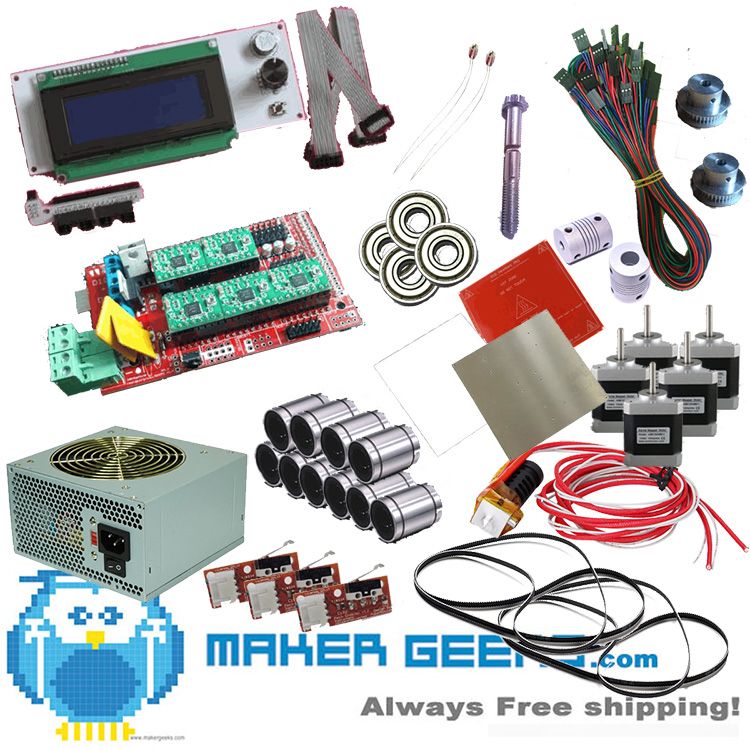
Once you have your first project off the ground, it’s easy to get more creative. With a heated build plate and wide extruder temperature range (maxing out at 482°F), this 3D printer can work with any 1.75mm filament type, including ABS, PLA, conductive PLA, wood and metal composites, and dissolvable PVA. This flexibility opens the door to a range of exciting new projects.
3D printer size is usually directly related to price, so this budget-friendly printer has a small build volume (about 4.7 inches cubed)—but that also means a compact enough size to fit on just about any desktop. Find other affordable options in our guide to the best budget 3D printers.
Best Resin: ELEGOO Saturn MSLA 3D Printer Resin Details. ELEGOOWhy It Made The Cut: This is the best resin 3D printer because it has a relatively large build volume and an accurate printing process to create detailed, sizable resin models.
Specs:
— Build Volume: 7. 6 inches L x 4.7 inches W x 7.9 inches H
— Weight: 30 pounds
— Compatible Materials: DLP photopolymer resin
— Print Speed: Up to 40mm/s
Pros:
— Accurate printing results
— Simple to assemble and easy to calibrate
— Large build volume for printer type and price
— Can print multiple miniature models simultaneously
Cons:
— Test model is difficult to remove from the build plate
Compared to FDM (fused deposition modeling) 3D printers, resin printers can print higher levels of detail, which is especially ideal for printing smaller models. Instead of injecting melted materials like plastic layer by layer, resin printers use light (like ultraviolet lights) to cure liquid resin into thin layers. This method allows for finer printing details and a smoother surface. Beginners who want to take advantage of resin 3D printing should consider the ELEGOO Saturn MSLA 3D Printer, a relatively affordable choice with several attractive features.
Resin printers tend to be smaller than FDM printers. For its entry-level price, this printer has a large build volume at 7.6 inches long by 4.7 inches wide by 7.8 inches high. This larger size gives the flexibility to create larger, but still very detailed models and miniatures. The ELEGOO also prints 60 percent faster than its predecessor (the smaller Elegoo Mars 2 Pro), while still delivering excellent printing results.
Setup is simple with this printer (although beginners should keep in mind that resin printing requires more post-processing than FDM printing). An easy-to-calibrate build plate and a uniform light source create great print results with few adjustments needed.
Best Multifunction: Snapmaker 2.0 Modular 3-in-1 A350T 3D PrinterPowerful Times Three. SnapmakerWhy It Made the Cut: This multifunction 3D printer lets you get everything done with one device, from printing, to laser engraving, cutting, and carving.
Specs:
— Build Volume: 12. 59 inches x 13.77 inches x 12.99 inches
— Weight: 61.73 pounds
— Compatible Materials: PLA, Wood PLA, PTG, TPU
Pros:
— Several functions all in one machine
— Compatible with many materials
— Can create larger models with its bigger surface area
— Innovative, sturdy design that’s built to last
Cons:
— Incredibly heavy
— Not a very beginner-friendly price
With a wide array of uses, the Snapmaker 2.0 Modular 3-in-1 3D Printer is a fantastic machine to learn the basics of 3D printing on, and then keep around for the long haul as you master each function. An upgrade to Snapmaker’s previous models, the 2.0 A350T encompasses noise reduction for quieter printing, faster speeds, and precision down to .005 millimeters for a smoother finish.
This 3D printer is an absolute beast when it comes to material compatibility. Whether you’re printing with PLA, PTG, or TPU; engraving or cutting into plywood, paper, acrylic, fabric, or leather; or carving out shapes and textures with hardwood, PCB, acrylic, POM, carbon fiber sheets, or many more, the Snapmaker can handle the task. This is likely beyond the scope of what you’d be getting into as a beginner, but it opens up the possibilities as you broaden your knowledge and get more comfortable in the realm of 3D printing.
There’s a lot to applaud Snapmaker for, including its incorporation of auto-leveling, filament runout and power loss recovery, WiFi connectivity, and an all-metal, high-strength build that’s designed to last.
Most User-Friendly: Monoprice Voxel 3D Printer Smart and Easy to Use. MonopriceWhy It Made The Cut: A fully-enclosed design, auto-leveling platform, and auto-feeding filament feature make this printer an extra user-friendly choice.
Specs:
— Build Volume: 5.9 inches L x 5.9 inches W x 5.9 inches H
— Weight: 20 pounds
— Compatible Materials: ABS, PLA, wood fill, copper fill, steel fill, and bronze fill filaments
— Print Speed: Up to 100mm/s
Pros:
— Auto-levelling platform
— Full enclosure
— WiFi-enabled
— Built-in camera for print monitoring
Cons:
— Relatively small build volume
If you want to get into 3D printing without the steep learning curve, consider the Monoprice Voxel 3D Printer. This 3D printer features several automated functions that make it extra simple to use.
The printer arrives fully calibrated and ready to print, right out of the box. An auto-leveling feature ensures that the build platform is in the right position, while an auto-feeding filament feature makes loading filament easy. The built-in filament sensor also recognizes low filament levels and pauses prints to notify you that it needs reloading. Once your creation is done printing, lift the heated, flexible, and removable build plate. With a bit of flexing, the model should pop off with ease.
This 3D printer features a closed design to keep hands (or paws) away from hot and moving parts while it’s printing. It is also Wi-Fi-enabled; its functions are controlled and monitored through its color touch screen or through your smartphone (through the Polar Cloud cloud-based platform), and you can check on printing progress through the window or with your phone via the built-in camera. If you're into making miniatures, you may also want to consider the best resin 3D printers.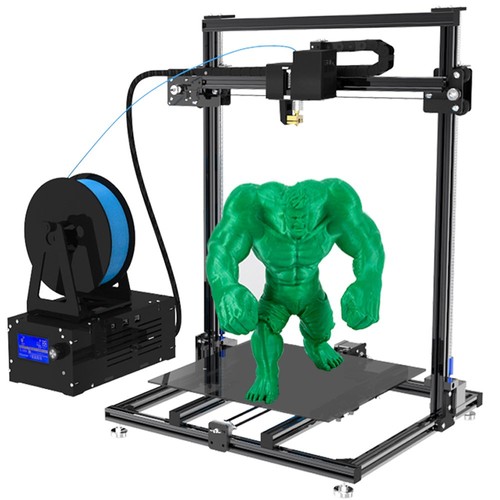
Why It Made The Cut: Robo's E3 is the perfect 3D printer to get if you want to jump into making complex projects right away. It's compatible with over 20 materials, ranging from wood to metal to glass.
Specs:
— Build Volume: 5.9 inches L x 5.9 inches W x 5.9 inches H
— Weight: 19.8 pounds
— Compatible Materials: ABS, PLA, wood fill, copper fill, steel fill, brass fill, carbon fiber fill, magnetic iron, glass fill, bronze fill filaments, and more.
— Print Speed: Up to 100mm/s
Pros:
— Auto-calibrated print bed
— Can store up to 1,000 models on its internal storage
— WiFi-enabled
— Includes two spools of PLA filament.
Cons:
— Expensive
If you're serious about getting into 3D printing, and don't want to go through the process of buying an entry-level printer and then upgrading it in a year or two, Robo's E3 is the one to get.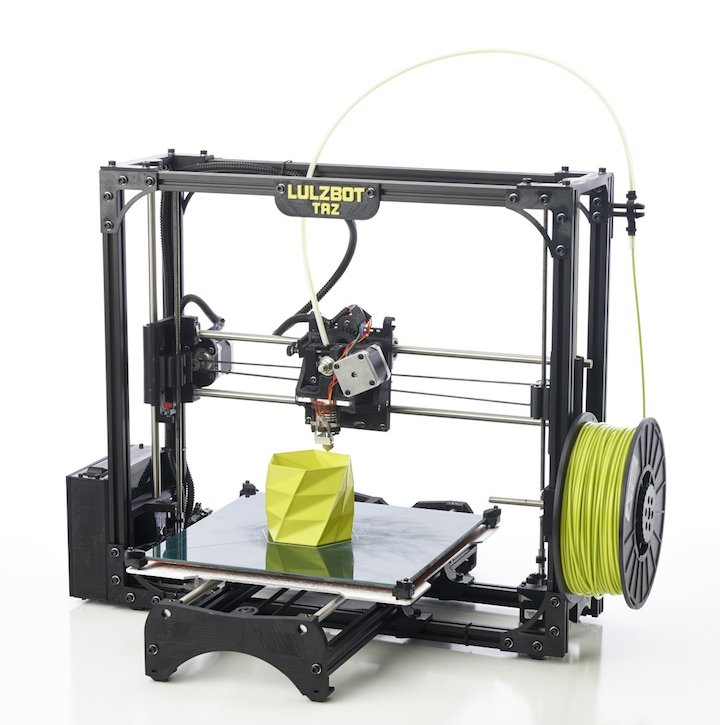 It's roughly the same size and weight as our other 3D printer recommendations, but it can work with a lot more materials.
This gives you the freedom to create 3D prints that wouldn't be possible otherwise, especially if you're making objects that require different elements, like glass and metal. If you plan on printing the same objects over and over again, the E3's built-in storage will come in handy. That's doubly true if you accidentally delete a model on your computer.
While these features add to the E3's cost, but it's still a good machine for beginners because of its auto-calibrating print bed, which improves the odds of you ending up with a satisfying print rather than one that's lopsided. By reducing the number of prints you have to discard due to quality issues, the Robo E3 is more forgiving for new 3D printer users, and a lot less wasteful. Novice 3D printers will also benefit from the two-hour online training course that comes with this printer.
It's hard to overlook the Robo E3's up-front cost, but again, it's so capable relative to the other 3D printers we're recommending for beginners that it's well worth the price.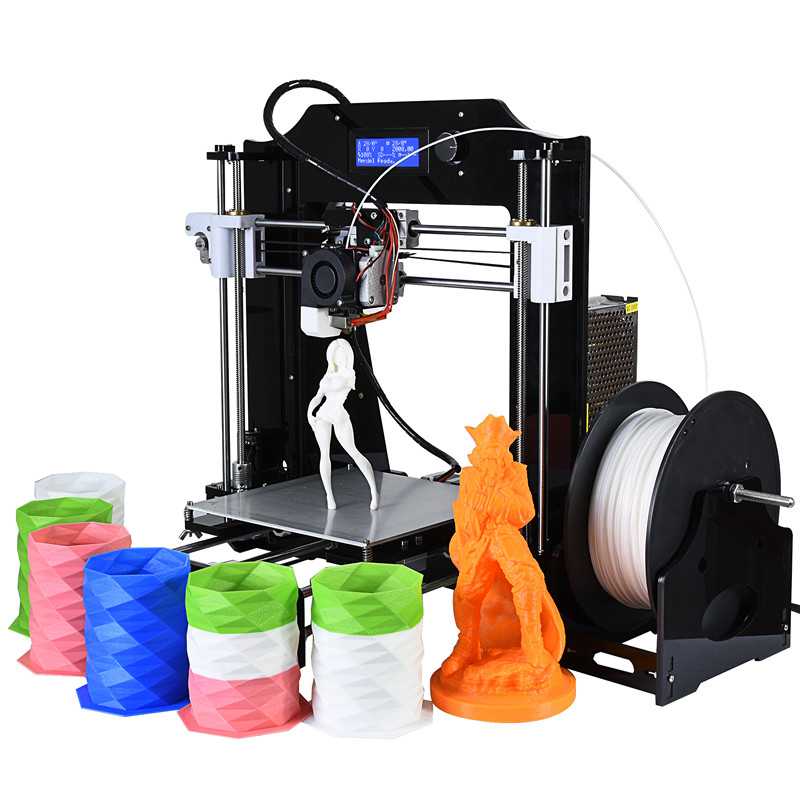 This should be the only 3D printer you'll ever get, unless you start needing one for commercial use.
The best 3D printers for beginners give you the power to create on-demand. But as more 3D printers flood the market, it can be hard to choose the best one for your needs. When shopping for the best beginner-friendly 3D printer, consider the printer dimensions, build volume, compatible materials, and ease of use.
Printer Size and WeightWhile consumer 3D printers are heavier than your standard all-purpose printer, they’re still a reasonably small size. Since they’re made for at-home use, most have a compact footprint to fit on a desktop or counter.
Consider the printer size and weight and how it will fit in your space. Keep in mind that the size of the printer is related to the build volume the printer is trying to accommodate; a larger printer will be able to create larger items, and a smaller one will be limited to smaller items.
3D printers can be used to create just about anything, from giant 3D models to tiny trinkets, but at-home 3D printers are much smaller than the ones you might find in a design studio.
To help shoppers make a suitable choice, consumer 3D printers include a build volume measurement that describes the maximum width, height, and length of the print area. The build volume roughly determines the maximum size model that the printer can create. Consider the type of items you are hoping to print and choose an appropriate build volume from there.
Compatible MaterialsMost consumer 3D printers available today use fused deposition modeling (FDM), where material (usually plastic filament) is melted and extruded through a nozzle to create thin layers that make up a model. Other 3D printers, like resin printers, use curing processes, like UV light, to harden materials by layer.
The compatible materials vary by 3D printing method, but can include plastics, metals, polymers, resin, ceramics, plaster, and glass. When shopping for a 3D printer, check whether the ones you’re considering allow you to build creations with your preferred materials.
3D printing can get overwhelming for those who aren’t tech-savvy, so as a beginner, it’s important to find a 3D printer that is simple to use. A beginner-friendly 3D printer should have a simple setup process, easy refilling process, and intuitive controls.
Features like a touchscreen interface, print resume functions, robust safety features, and a heated bed (which can ensure a well-made model foundation) can make a 3D printer more user-friendly. Some printers also come with included printing materials, so you can get started right away.
3D printers can include other convenient perks, like quiet operation, built-in cameras to monitor printing, and Wi-Fi connectivity so you can print and monitor progress from anywhere. Buying from a company with easy-to-reach customer support or an active online community is also a nice perk, in case you need to do any troubleshooting down the road.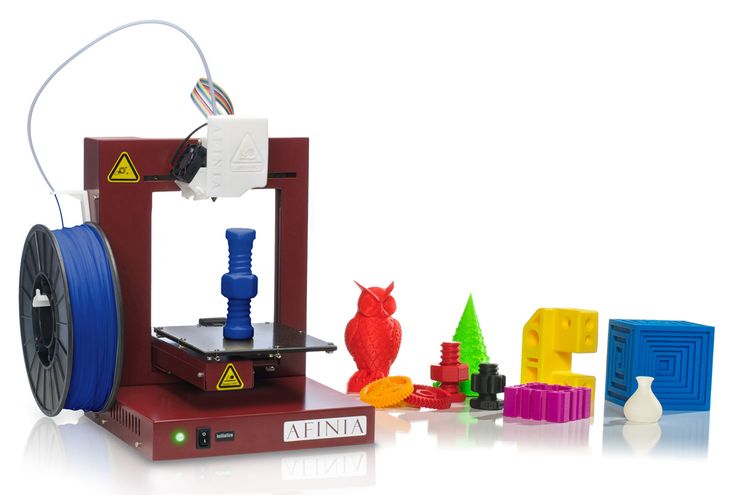
There’s no singular best brand when it comes to 3D printers. We’ve selected our top picks from several reputable brands in the 3D printing industry. The brands on this list create quality 3D printers with user-friendly features that will appeal to beginners.
Q: Does 3D printer size matter?Yes. On a basic level, you’ll want a 3D printer that fits in your space. More specifically, you’ll want a 3D printer with a suitable build volume (the maximum print area) for your needs. Of course, as build volume increases, so does the printer size (and price).
Q: How much does a 3d printer cost?3D printers start at around $200 and can range up to many thousands of dollars. For a decent entry-level 3D printer for beginners, expect to spend between $200 to $400 for a good printer with some user-friendly features. For newbies, it’s best to start with a more basic and budget-friendly printer and you can always upgrade down the line if you decide you need more features.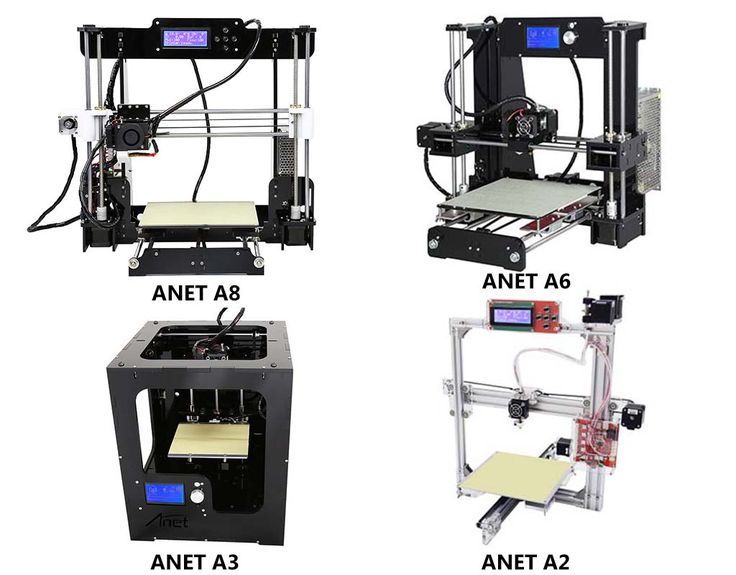
Compared to many hobbies, 3D printing is a relatively expensive one (although it is much more affordable than it once was). Budget-friendly 3D printers still come in at a couple hundred dollars, which is a somewhat high upfront cost for testing out a new pastime. Ongoing costs include refill printer materials and possible replacements or repairs when something goes amiss. That said, you’ll be able to make some pretty cool and useful stuff, so the hobby is often well worth the price.
Q: What is a good size 3D printer?It depends. Do you plan to print industrial-size parts or small baubles? A good printer size is subjective and will depend on your needs. Most at-home 3D printers are small enough to fit on a desk or counter, and so are often best for smaller projects. When shopping for a 3D printer, consider its build volume, which will give you a better idea of what size models the printer can produce.
Related: Looking for more options? Here's our roundup of the best 3D printers for every kind of project.
Final Thoughts on the Best 3D Printer for BeginnersThe Creality Ender 3 Pro 3D Printer is one of the most highly-rated and popular picks for beginners. It’s a solid, budget-friendly printer that is user-friendly and creates high-quality models.
This post was created by a non-news editorial team at Recurrent Media, Futurism’s owner. Futurism may receive a portion of sales on products linked within this post.
Share This Article
A small guide for choosing a 3D printer for beginners / Sudo Null IT News
The reason for writing this article was the article “ I wanted to buy an inexpensive 3D printer, but I looked at YouTube and got sick of ”, at the end of which the author asks to answer a few questions. I will try to answer from the point of view of my seven years of experience as a 3D modeler and 3D printer. First, a few caveats.
This article will not contain advice: “Buy a printer from manufacturer X - it is good, and manufacturer Y - do not take it in any case”, only general recommendations.
Informal classification of printers, adopted in the domestic segment of printers.
Everything written is based on the personal experience of the author and is his personal opinion.
If these warnings do not scare you - welcome under cat.
First, let me introduce myself: my name is Maxim and I bought the first printer back in 2013. It was a Chinese clone of Makerbot 2 with the hilarious name "Migce Cuble".
Photo from the personal archive There was almost no information on 3D printing on RuNet, only one topic on the “Roboforum” and several scattered articles about what a cool thing it is - 3D printing, so to master it, I had to google a lot in English, come up with their crutches and delve deeply into the physics and technology of the printer. We must pay tribute, in the English-speaking segment, then there was an active development of this technology and interesting articles such as “Selection of the type of notches of the extruder feed gear for a specific type of plastic” or “Determination of the optimal printing temperature using a strain gauge installed on the extruder” came across. Since then, 7 years have passed. I managed to master modeling, assemble a printer from scratch, be a moderator of “3D Today” for a while, work as a freelancer in the field of modeling and printing, organize a prototyping circle for children and bring it to the Russian level. Recent achievements: volunteered as a coordinator for the supply of plastic in the project “ Anti covid makers ”. A lot has changed during this time, including printers in my home zoo. One thing has remained unchanged - the question: "What should I buy as my first printer?".
Currently, two types of printers are mainly used at home: printing using FDM (FFF) technology - layer-by-layer plastic fusion, which is fed in the form of a rod and SLA (LCD) - printing with a photocuring polymer. FDM technology is more common, due to the lower cost of equipment and consumables, but in recent years, the prices of LCD printers and printing resins have decreased significantly and photopolymer printing has almost caught up with FDM printing in terms of cost and entry level.
To be honest, I almost never did SLA printing and I still don’t have an LCD printer in my home zoo (but it may appear soon), so I will mainly talk about FDM printers. They can be divided into 3 main categories according to the type of mechanics:
Dried tables - printers with a table that moves horizontally. Perhaps the most common printer model. It is distinguished by low cost of components, ease of assembly and adjustment, for which it is loved by the Chinese and printers. The disadvantages include the difficulty of creating a closed body and printing thin, tall parts that begin to wobble as the height increases, especially if the part is printed from flexible plastic such as TPU.
Typical drygosts Cubes - printers in which the table travels vertically. The cost of such printers is higher, as are the requirements for straightness of hands during assembly and setup. But a properly designed die delivers faster print speeds while maintaining print quality. At the same time, the design of the printer is very easy to make closed, which allows printing with engineering plastics such as ABS and Nylon. This type of design is often used in semi-industrial and industrial grade printers. Some manufacturers manage to shove the drygost into the body of the cube, but this does not bring any special advantages for printers.
Delta - printers with the so-called delta kinematics, when the print head is attached to the carriages moving along vertical guides using a system of rods. The cost of the mechanics of such printers is comparable to the cost of dry-tables. Can print at very high speeds. But they are very demanding on the correctness of keeping the dimensions, the straightness of the hands during assembly and adjustment, and the speed of the “brains” due to the complex mathematical calculations of the trajectory of the head movement.
Strongly not recommended as a first printer, although the widespread use of the table level sensor somewhat reduces the requirements for straight hands during setup and operation.
By availability on the market, 3 main categories can also be distinguished:
Chinese (cheap Chinese printers) are almost always designers, even if they come assembled.
-
The advantages include low cost, wide distribution and uniformity, which allows you to buy failed parts in the nearest radio shop or on well-known Chinese sites. Popular models gather around a relatively large number of users who actively share their experience in the field of self-repair and improvement of this type of printer. The most popular models will most likely be printed right out of the box, but will require improvements during more or less long-term operation.
-
The disadvantages include the quality of components / assembly and the need to refine these printers to obtain acceptable quality / print speed. It is recommended to take models that have already formed a large community around them. This means that most of the shortcomings have already been identified and there are standard inexpensive methods to solve them.
Kits (assembly kits, mainly domestic production) - google for the words “ ZAV ”, “ UlTi ”, “ UlTi ”, etc. Usually they are a set for assembling a plywood cube. Recently, options with metal cases have appeared. Supplied in different versions - from a kit for building a case with printed parts, ending with completely finished assembled products.
-
The pluses include a fairly good engineering study, the ability to choose the components for the mechanical and electronic parts and make the printer completely to your requirements. With good components, they provide fast, stable and high-quality printing. The price is somewhat more expensive than Chinese printers, but cheaper than semi-professional printers of domestic or European / American manufacturers.
-
The disadvantages include a decent amount of time spent on assembly and waiting for components if you decide to save money and order these components yourself from different sellers and assemble a printer from them.
 When assembling, direct hands are required.
Factory Printers (Semi-professional printers from domestic or American/European manufacturers). There are a lot of models, the designs are very different.
-
The advantage of this class of printers is printing with acceptable quality out of the box. In addition, you get operational reliability and warranty support from the manufacturer.
-
The main disadvantage is the price. It is often not clear what factors it depends on. You can buy a high-quality printer relatively inexpensively, or you can take something incomprehensible for a high price. The second disadvantage is the presence of specific solutions that are incompatible with popular solutions on the market: these can be nozzles with their own thread pitch, special fans, electronics, belts, and even slicers. Some are demanding on the quality of plastic, there are models that work only on chipped coils.
Now that we have decided on the classification of printers, we can proceed to the procedure for choosing a printer for yourself, your loved one. If you are on fire with the purchase of a 3D printer, first decide what you are going to take it for, the type and configuration of the printer depends on it. Let's analyze several typical situations:
I want to do something for myself and my family - if you don't plan to print products from engineering plastics that can withstand decent loads and temperatures, a Chinese drygostol or a cube will suffice. If you have a budget and want to figure out how the printer works before starting, and not during printing, you can look in the direction of domestic assembly kits - with them you can get the best quality and painlessly switch to engineering plastics.
I can't do anything with my hands, but I have to. Therefore, I want a printer that will do everything for me - in this case it is better to look at semi-professional printers. If the budget is not enough, you can look at used ones or order an assembly of a domestic set - usually manufacturers offer this service through intermediaries.![]() When ordering an assembly - look for experience and positive reviews, there are nuances.
When ordering an assembly - look for experience and positive reviews, there are nuances.
I want to print for sale - a farm of the same type of printers, depending on the budget. If there is no budget, but there are resources for regular tuning / repair - you can even from Chinese drygosts. Additionally - a printer with a large print area, a printer with a closed case and a heated table for printing engineering plastics, an SLA / LCD printer for printing products with a high degree of detail.
Whether at work or at home, the need arises to design and print enclosures and parts. If only small prototypes are planned - an LCD printer, if functional products - a closed cube with the ability to print with engineering plastics.
Kids are growing up and this is the technology of the future, I want you to master - see what printers are used in prototyping competitions in your area. Take the same one. May be used.
I want to make figurines for desktops, beautiful little things for home - LCD printer.
I want to figure out what kind of technology and how it works in general - a kit for assembling a domestic manufacturer. By the time you collect it, you will understand.
There is no money at all, but I want to print, I will collect it myself from scratch - it will turn out better and cheaper than the Chinese. Strange as it may seem, no. The cost of components with Ali will be more expensive than a printer with Ali. Of course, if there is a machine park, the ability to use it, a set of iron, shafts and electronics lying around in the corner of the workshop, it can burn out. There are options for building printers from boards and furniture rails, but their print quality is, to put it mildly, lame. For example, the construction of the printer shown below cost its author 80-9, according to him.0 dollars.
If you want to completely build your printer from scratch, then it's better to treat it as a separate hobby and accept that it will not turn out very cheap.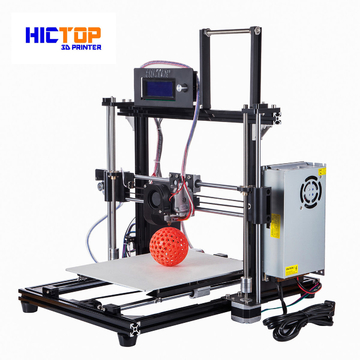 Well, or look in the direction of used printers.
I don’t know why I need a printer, but I want to try - a Chinese or a domestic assembly kit. Can be used. If it doesn't work, you can always resell.
Decided on the type of printer - what to look for first of all when buying ?
-
First of all - on the rigidity of the structure - the accuracy and speed of printing depend on it. It is in the direction of strengthening the rigidity that your first modifications of the Chinese printer will be directed, since the material “steel plasticine 3 (c)” is considered an unaffordable luxury for the Chinese. In the case of the purchase of domestic kits, the situation is slightly better.
-
Secondly - if the printer will be in the apartment - "silent" drivers for stepper motors. 3D printing is not a fast process, and having a constant loud enough buzzer under your ear is annoying.
-
Third - the presence of a heated table and ease of modification to a closed case.
 Over time, the desire (need) to print ABS will come, and it is problematic to do this on an open drygost.
 -
Fourthly, the presence of a good plastic blowing system is also important.
-
Fifthly, when choosing printers with CoreXY, H-Bot or Delta mechanics, it is highly desirable to have a 32-bit control board, or you will encounter fading (freezes) at high print speeds.
-
In the sixth, seventh, etc. - there are many nuances in the design of printers. If something is unclear, feel free to ask the community.
In any case, if you are going to buy or have already bought a 3D printer, start learning some 3D editor. The easiest, in my opinion - https://www.tinkercad.com . You can simulate a washer in it or the well-known plate changer without much effort.
Over time, its capabilities will no longer be enough - then you can switch to more serious CAD systems. In my opinion, a printer should own two types of editors - a solid state for modeling technical products (CAD) and a polygonal tool (Blender, etc.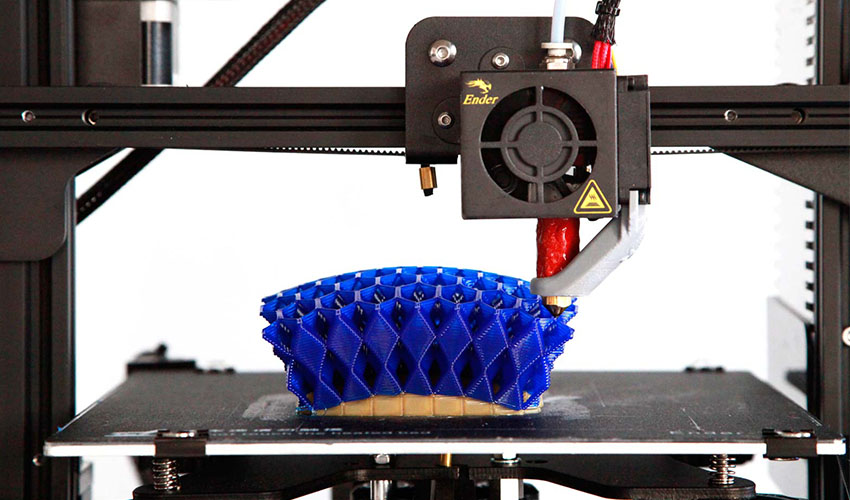 ) - for modeling artistic ones, but many printers consider this redundant and master only one.
On this, perhaps, I will round off - the article has already turned out to be quite voluminous, if you have questions, I will be happy to answer them in the comments or in a separate article. I’ll say right away - I won’t answer questions like: “ which is better: flying bear 5 or ender 3 ” - a lot of copies have already been broken on this topic on specialized resources, I don’t see the point in repeating.
Best regards, Maxim.
FDM 3D printing guide for beginners. Understanding Basic Terms
Getting started with 3D printers doesn't have to be intimidating. We have created this simple 3D printing guide for beginners to help all beginners understand the basic terms.
3D printing is a very general term. The media, especially mainstream marketing, portray 3D printing as the magical technology of the future, capable of reproducing complex objects.
But this approach makes it difficult to understand what 3D printing is from a technical point of view.
In reality, there are many different 3D printing technologies, but the most common for beginners is the layer-by-layer modeling method (FDM or FFF), which is the focus of this article.
Ender 3 V2 is one of the most popular hobbyist 3D printers.
FDM prints parts using thermoplastic, which is basically a filament of a material that can melt, cool and solidify. Details are built by stacking layers on top of each other.
This technology was created because people needed a way to quickly prototype parts. Even today, rapid prototyping is one of the biggest advantages of FDM and 3D printing in general. Not surprisingly, 3D printing is also gradually becoming a powerful manufacturing solution.
Before we get into the details of how FDM works, there is one more thing worth mentioning. If you have done some research on FDM, you may have noticed that some sources use the term "FFF" instead of FDM when referring to the technology.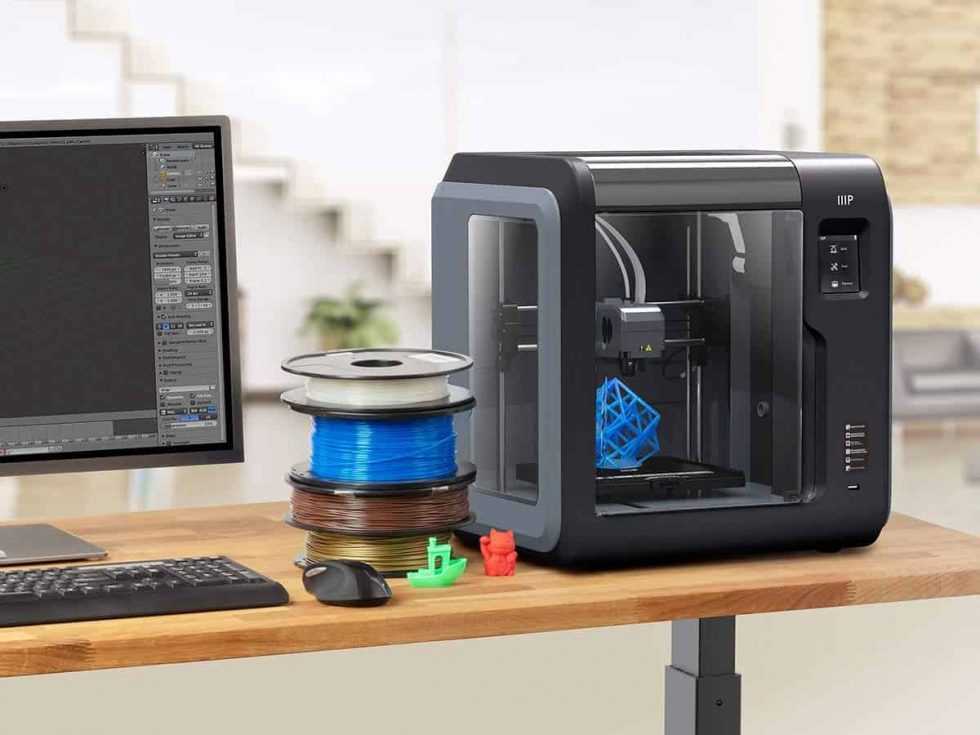 This is because FDM is a term originally patented by Stratasys and FFF is a non-proprietary generic abbreviation. Remember, this is the same technology, only the names are different. Today, most people use the term FDM.
FDM 3D printing. How it works?
- 3D printer control interface
- 3D printing plastic (filament)
- Extruder
- Hotend (hot end)
- Fan (cooler)
- Print platform (table)
- 3D printing
The easiest way to understand how FDM works is to study the details of an FDM 3D printer. However, before we get into the specifics, it's worth mentioning that most 3D printers can move in three axes: X, Y, and Z. The X and Y axes are responsible for moving left, right, forward, and backward, while the Z is responsible for vertical movement.
Now let's look at the main components of a 3D printer:
Control interface : Some modern 3D printers have a touch screen that is used to control the 3D printer. On older printers, a simple LCD with physical scrolling and a click wheel may be present instead of a touch interface. Depending on the model, an SD card slot and a USB port may also be present.
Print Bed : The bed or table of a 3D printer is essentially the surface on which parts are made. Platforms are most often made with heating to improve the adhesion of the part, but more on that later.
Extruder(s) : The extruder is the component responsible for melting and progressively depositing the plastic filament to build the model.
The extruder actually consists of two subcomponents: hot and cold. The hot end or hot end contains a heater and nozzle that actually melts the filament, while the cold end consists of a motor, drive gears and other small components that push the filament into the hot end to melt.
There is a heatsink and fan between the hot and cold ends because it is necessary that the cold end stays cold to avoid jamming.
In addition to the heatsink fan, there is usually at least one other fan designed to cool the molten filament after it exits the extruder - this is commonly referred to as the parts cooling fan.
Print head : one or more extruders are installed on the print head (standard 3D printers have one extruder). At the top of the print head is a tube that feeds filament into the print head.
How a 3D printer prints.
The process starts when you send the 3D model file to the printer. After starting a print job, the nozzle starts to heat up. When the nozzle reaches the temperature required to melt the filament, the extruder draws the filament into the hot end in preparation for deposition modeling.
The printer is now ready to 3D print the part. The print head descends onto the build surface (platform) and begins to fuse the filament, which cools and solidifies shortly after exiting the nozzle thanks to the part cooling fans.
Plastic is applied one layer at a time, and after one layer is completed, the printhead moves up the Z-axis a short distance and the process is repeated until the part is completed.
Create, download and purchase 3D models.
Naturally, if you want to 3D print a part, you must have a 3D model of that part. 3D models are created using 3D modeling software commonly referred to as CAD (computer-aided design) software. Here are some examples of popular 3D modeling software:
- Autodesk's Fusion 360 (Free for non-commercial use)
- Blender (Free)
- ZBrush (paid, but free trial available)
However, most newcomers to 3D printing do not have the skills required to use such software. If so, don't worry because there are other solutions.
First, there are simpler CAD software options like Tinkercad, a program that almost anyone can use without any prior experience. This is an online application developed by Autodesk, one of the leading developers of CAD software.
File downloads
With so many people having access to 3D printers in recent years, several sites have become repositories for 3D models.
Some of the most popular are:
- Thingiverse (free)
- MyMiniFactory (many free, some paid)
- Cults3D (free and paid)
- CGTrader (some free and most paid)
- PrusaPrinters (all free)
So anyone can get their hands on a model without any modeling skills.
Model preparation.
3D models must be prepared for 3D printing using special software that translates the model into machine instructions. This is done using slicing software, also called a slicer. 3D models are imported into a slicer, which then actually "cuts" the model into layers. The resulting files consist of a G-code, which is essentially a long list of instructions that a 3D printer follows to build a model.
G-code is the "language" of 3D printers and CNC machines. These files contain important parameters needed to create a model, such as print speed and temperature, wall thickness, infill percentage, layer height, and many others. In other words, 3D printing is impossible without G-code files!
Supports (support structures)
Another of the main functions of the slicer is the generation of support structures (supports). In particular, supports are needed for parts with attachments.
9The 0002 Slicer allows you to choose where to place the supports and how tight you want them to be. Some slicers even offer users the ability to select different types of support structures for easier removal or strength.Printer preparation.
Before you start printing on a 3D printer, there are a few mandatory steps to take:
Plastic loading: The extruder must be ready to extrude the filament before printing begins. The loading process begins with heating the hot end to the melt temperature, and then the filament is directly loaded into the heated extruder.
Platform Leveling: For the printer to successfully print an object, the table must be as level as possible.
Depending on the printer, platform calibration can be performed manually, semi-automatically or automatically.
Platform leveling is very important because, for example, if the nozzle is too far from the table, the first and most important layer will not adhere to the surface, resulting in you not being able to print your object.
Materials for FDM 3D printing.
As we have already mentioned, FDM 3D printers use spools of plastic as part material. Filament is basically a thermoplastic specifically designed to melt and cool while maintaining its structural integrity.
3D printing filaments usually come in two diameters: 1.75mm and 3mm (or 2.85mm). Most 3D printers use 1.75 diameter plastic, which is why the variety of types and shades of 1.75 filament significantly exceeds 2.85.
We recommend that before you buy a 3D printer, be sure to clarify which filament it works with.
Converting the extruder from 2.85 to 1.75 is possible, but requires fiddling, time and additional accessories.
One of the best things about FDM 3D printers is that they can handle a wide range of plastics.
Here are just a few of the different types that are used in FDM 3D printing:
Standard:
- PLA
- ABS
- PETG
Engineering:
- Flexible (TPU, TPE)
- Nylon
- With additives (wood, metal, etc.)
- Polycarbonate (PC)
For supports:
- HIPS
- PVA
Among other things, FDM filament is one of the cheapest materials used in the world of 3D printing.
Post-processing of printed products.
Post-processing is the final steps you must take to complete your object.
Below we have listed some of the post-processing steps for a 3D printed part. You don't necessarily need to complete each of these steps.
Most often, post-processing is completed at the stage of removing supports.
Support Removal : After printing, support structures are mechanically removed by simply breaking them off.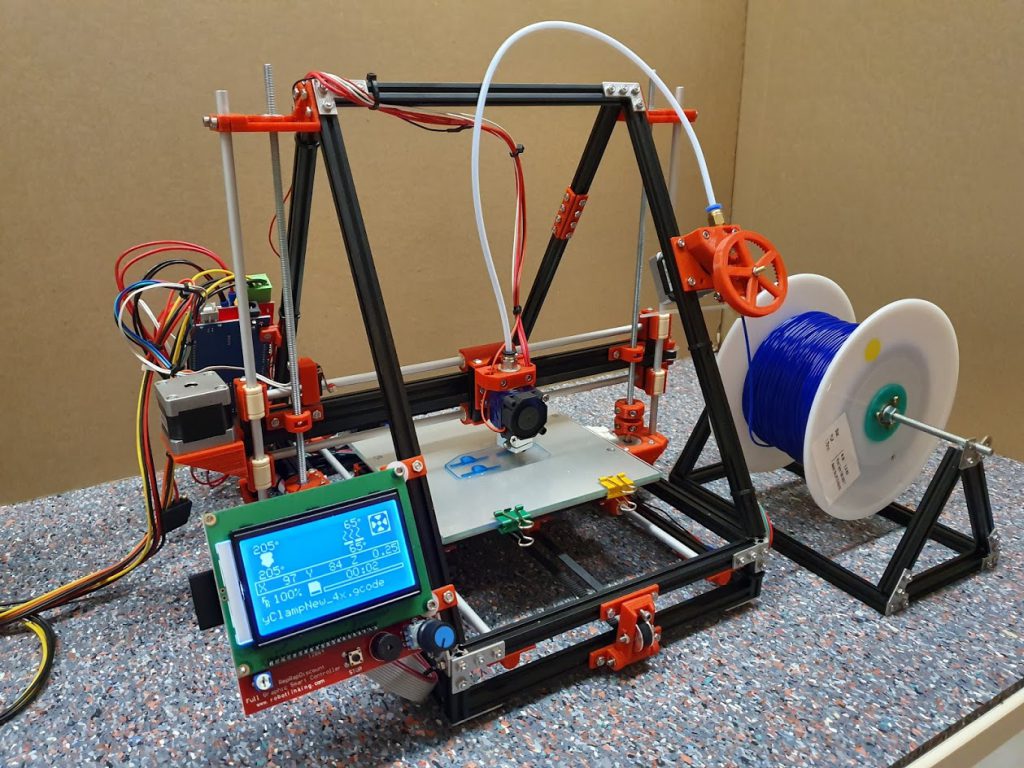 As a result, you can see marks left on the surface of the part.
If you have bought a 3D printer with two extruders, you can use special soluble plastics to print supports. In this case, you just need to place the object in water if you printed with PLA+PVA or in limonene if you printed with ABS+HIPS.
Sanding : Your part may have imperfections (for example, after removing supports). In this case, grinding comes into play. Light sanding of 3D printed parts can make the surface smoother.
Coloring : You will often print in one color. To add more colors, details or protection, you can paint your model!
Polishing or Smoothing : Epoxy is one way to smooth the surface of a printed part. For ABS, an acetone steam bath is often used. Under the influence of acetone vapors, ABS begins to dissolve and, if this process is stopped in time, you will get a smooth and glossy part.
Gluing : If you want to print a large 3D model that won't fit in your printer's build chamber, you can print a part in two or more parts and then glue them together.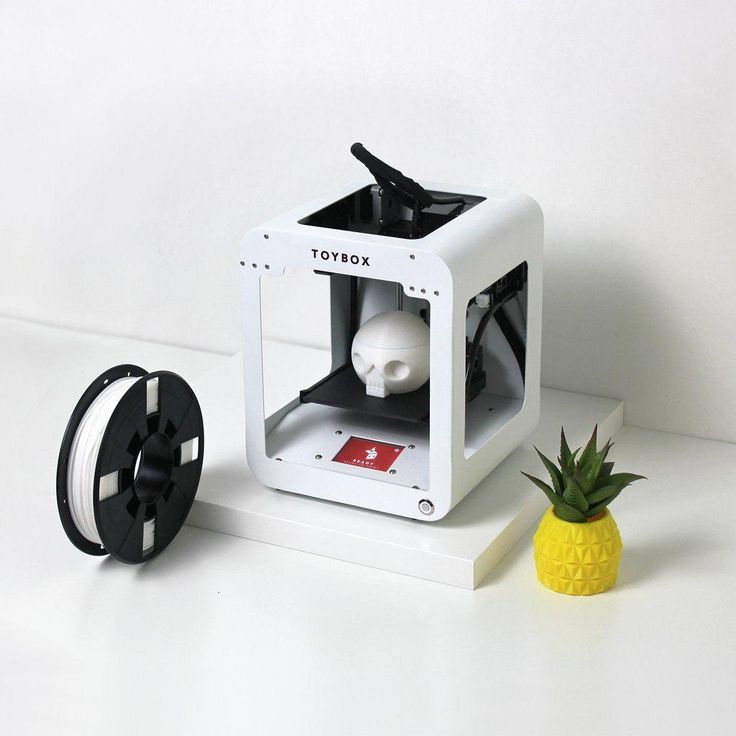
Common 3D printer problems.
Let's discuss some of the most common problems beginners may encounter when using a 3D printer.
Warp : This problem occurs due to temperature differences during the 3D printing process. 3D Print Delamination - 5 Tips and Tricks to Avoid Delamination.
Plastic bleed (snot) : Thin extra filaments of plastic on your model may be caused by incorrect temperature or retraction settings. Some types of plastic, such as PETG, are more prone to free flow from the nozzle.
Nozzle Clog : Nozzle clogging is one of the most annoying problems of FDM 3D printers.
If you hear a strange printhead sound and no plastic comes out of the nozzle, the nozzle may be clogged. This can be caused, for example, by poor filament quality or incorrect temperature settings.
Layer Offset : This problem can be caused by vibrations and wobbles in your printer, insufficient X and Y belt tension, or excessively high print speeds.