Skillshare 3d printing
Introduction to 3D Printing: An Easy Start to Your First 3D Design | Lauren Slowik
Transcripts
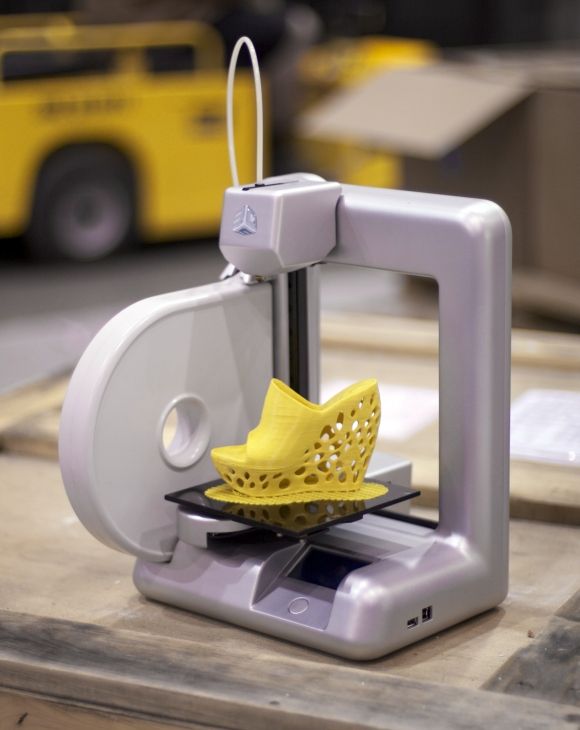
1. Trailer: I'm Lauren, designer evangelist for education here at Shapeways in New City. Shapeways is the world's leading 3-D marketplace, where you can buy, sell, design, and print, have some objects of your own making. The class I'd be leading you through today is called From Concept to Product: An Introduction to 3-D printing. We'll be learning a brief history of 3-D printing, materials and processes, design workflow, and a simple project to help you turn a 2-D drawing into a 3-D printed object. We can print designs in 30 plus different materials including, gold-plated brass, ceramic, full-color sandstone, and our most popular material, white, strong, and flexible nylon made right here in New York City. This class is for people who have been curious about 3-D printing, but don't know where to begin. There's a lot of options and a lot of different ways to make stuff, and we're going to show you some simple tools to get you started with simple ideas. 2. Intro to 3D Printing: Hey, welcome to the Skillshare class with Shapeways. My name is Lauren Slowik. I'm the Designer Evangelist for Education and I'm going to take you through some steps on how to get started designing for 3D printing even if you've never picked up a pencil to design something in 3D, let alone some software. I want to go over a few things you're going to need for this class. There are some givens, but I'm going to cover them anyways. For example, you'll need a computer, and most importantly, you'll need a computer with an updated browser. The reason for this is that 3D design software tools are found online, but you need the most recent software in order to use them. You'll also need a digital camera. I use my cell phone, but a regular digital camera is fine. It's a little easier to get the images off of the phone. You'll need sketchbook paper, some sort, pen, obviously, and an idea for your 3D design. So, I bet you're wondering what 3D printing is, and it's a lot of things.
 For one, the term 3D printing is actually a term coined by, as my colleague says, lazy journalists, and much as we love them, 3D printing is a really inaccurate description of what it is that we're doing. Traditionally, it was actually called additive manufacturing, and this name is a better descriptor of what you're doing when you're actually making a 3D object with this manufacturing process. What you do is you have a 3-dimensional file, it's a mathematic description of the 3-dimensional object that you're creating. Don't get too worried about what that means, trust me, there's very little to no math in this class, but the computer is doing all of the hard stuff. Once you have the file, there are several file formats that are universal to 3D printers and 3D design software. So, when you send an image up from your phone as a jpeg, you can pretty much assume that anyone can open that file. The same goes for 3D printing design files, you have things like a.stl which stands for Stereolithography.
 It's one of the oldest formats of 3D printing files. You also have others like OBJ, VRML, et cetera. Shapeways accepts all of these, so we won't have to get too much into it, but we're going to be sticking with the traditional old school STL file format. Once you have your STL, the mathematical description of the shape of your object or your design, you can take this file and give it to a 3D printer. Now, I'm sure you're saying I don't have a 3D printer, most people don't, that's what Shapeways is here for. We offer so many different materials, it's kind of the best way to do it, I think. So, we're going to be designing for something called laser sintered nylon. On Shapeways, we call it white, strong and flexible, comes in a couple different colors, but it's the most flexible material both literally and from a design perspective. Laser sintered nylon is a material that is incredibly flexible. It starts off as a powder and it uses a large bit of powder and the machine takes your file and understands it layer by layer.
 So, when we say additive manufacturing, what we're talking about is building up a design from the bottom to the top, slowly but surely. A lot of people are surprised that how long some things actually take to 3D print. While there's no proscribed time, we can pretty much assume that depending on how tall something is, it'll take a couple hours relative to each inch or centimeter. More about that later that you add to the object. The powder is a plastic, surgical grade plastic, it's very safe for use, it's actually found in cosmetics and other things that come in contact with human beings all the time. So, it's a great material to use. Additive manufacturing through laser sintered nylon means that the nylon is melted together. Sintered is what the term, sintering means to melt together. So, a bed of lase of powdered nylon is heated to just below melting point and then the laser in the 3D printing machine slices up the object, very fine layers, some of the layers are as small as a quarter of a millimeter or 25 microns if you want to get really technical.
 What the laser does is it finishes the job. So, as you can see in the video, you'll see the outline appear and it's just one sliver of a layer of that part. Once the full object is printed, the whole chunk of nylon has to be cooled down which takes a couple hours, almost 24 hours actually, because it's quite hot. Then all of the objects are removed from the powder and pretty much ready to use. That's the coolest part about the nylon is that your print will come out of the machine ready to go. In some cases, if we get really adventurous towards the end of the video, we're going to cover how to make something with an interlocking part and that's something that laser sintered nylon is special. It can do fully assembled interlocking parts directly out of the machine, so no assembly required unless you design it that way. I bet some of you are wondering why you're seeing 3D printing so much right now. There's a couple of reasons for it. One, the patents for innovative technology that were filed 17 years ago or less are becoming available for people to innovate on.
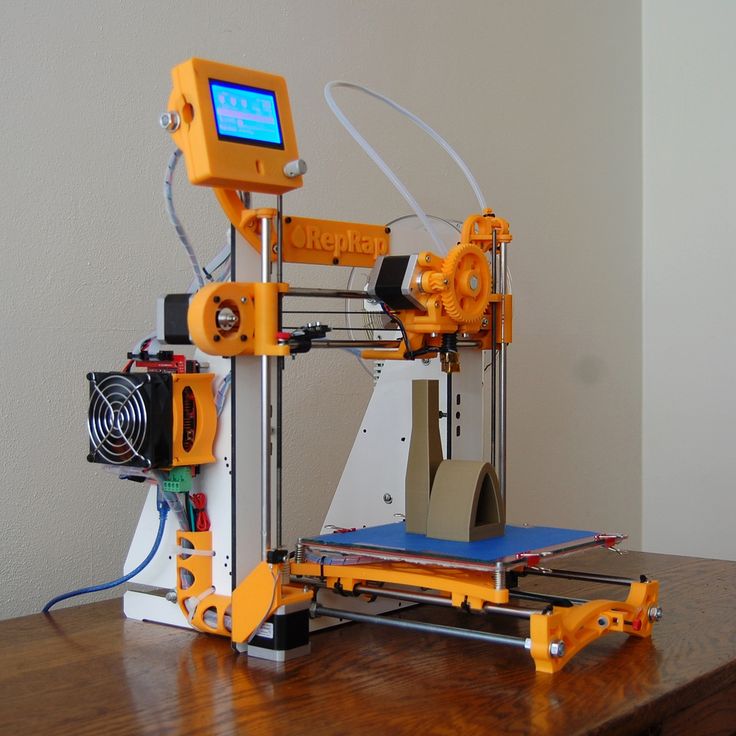
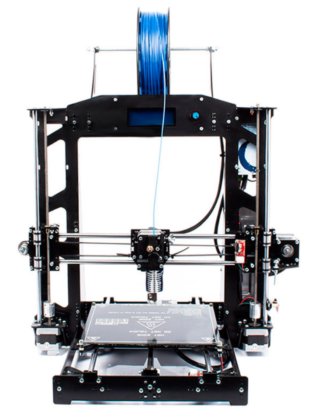
 So people who want to make their own machine and think they can improve on the process are now able to do so without a licensing fee, so that's why you're seeing home use printers and home brewed designs popping up everywhere. It's a really exciting time and it's only going to get more exciting as more of this technology becomes available. At the same time, computers have gotten much faster and the processing power available in even an iPhone or an iPad is far greater than it was in say the mid-90s when additive manufacturing and rapid prototyping, another name for 3D printing, we're being used. So, the amount of processing energy or power that a computer needs to describe a 3D object is now found in almost every baseline computer and handheld device. So, the design tools are far more accessible than they used to be in addition to the actual printers being available. On top of that, you have, or perhaps at the same time, I don't know, they're probably not separate, but you have the Maker Movement, things like Arduino open source, DIY.
 The exciting thing about 3D printing conceptually is that you can make anything, and when I say anything, I mean that you can develop anything, so your first idea might not come out exactly as you planned it and that's part of the process, that's why 3D printing was also called rapid prototyping. You're able to have an idea, sketch it up, pull it together in a couple hours, like we will today, print it out and see how it's going to break, so that you can fix it and make it better the next time in much less time than it used to take. 3. Sketching Design on Paper: In this unit, we're going to talk about how to translate an idea into a digital design. I'm starting you off with a method that requires little to no software knowledge. I'll walk you through the important steps, but really, all you need to know is how to doodle on paper with a black ink pen, and you need to have an idea. So, we're going to get started by sketching a concept. Now, if you want to follow the steps of the project directly, feel free to copy the little design that I'm going to make.
 If you have your own plan, go ahead and follow along, but the most important steps with the sketch is to keep it clean, and keep it very black and white. So, if you need to sketch it out in pencil first, I recommend that. Then you'll be able to draw it confidently with very clear lines when you finally are ready to sketch. So, I'm starting off with a pencil sketch. I saw this really beautiful design in my friend's jewelry, my friend Danielle. So, I'm making a variation on it. I want to show it to her, see what she thinks. So, I'm just drawing a simple outline. I'm not worrying about whether my sketch conveys any sort of three-dimensionality. That's not the point here. What we're trying to do is get an idea out of our brain and onto the paper. So, making my lines nice and thick, so I have a lot of material to work with. This is the really creative part, and don't overthink the design. If you have something that's on your mind that you want to make, try it. This is a design process that includes a little bit of failure from time to time.
 So, anything we come across in my design or you come across in your design, I hope I address. But just remember that it's called rapid prototyping for a reason. So, your first one might not be perfect. But it should look great. So, now I'm done with my pencil sketch, and it's pretty clear but I'm going to redo it in a nice dark ink pen. The only reason for this is it saves us time in the softer after the fact if you have a very light pencil sketch, sometimes it can be difficult to take that and turn it into what we need it to be, which is a vector graphic. I'll talk about vectors in a minute. So, I'm going to redo my sketch. Like I said, the sketch doesn't need to be perfect. You can always fix stuff in the computer. But if you want to spend as little time fiddling with it in Photoshop as you can, then the best thing to do is to make it as clean and accurate as you can on the paper. So, I'm going to fatten these lines up a little. I'm going to go ahead and assume that you have a mobile phone that has a camera in which case we're going to use that camera to snap a quick but clear photo of our design.
 So, I've got my iPhone here, and I'm going line up and try to cut out as much stuff that I don't need as possible. Make sure that it's focused nicely on my design, then I'm going to snap a photo. Oops, you know what? I'm glad that happened. Don't use a flash. Just get some weird colors and lighting when that happens and I think daylight is sufficient. There we go. Perfect. So, now I've got that image. It's roughly the same size as in reality, which doesn't matter by the way. But we're going to clean this up once we get the file into the computer and start turning it into something that Tinkercad, our design software, will recognize. 4. Importing Paper Image to Software: We're getting closer, we've got a digitized file. So now, we're going to open this image in Photoshop. This is unfortunately the one place I couldn't really find a good solution for turning something from a JPEG to something called SVG without using a paid software. I'm trying to stick with free software here just so you guys can experiment without committing to platform.
 But Photoshop is usually a part of most workflows just in an imaging in general, and there's some exciting developments around 3D printing coming to Photoshop in the near future. So, something to keep an eye on. Yeah, keep an eye on Photoshop in 2014. I'm going to be talking to 3D printers before you know it. I'm going to open my file in Photoshop. Go to file, open, hop onto my desktop, and open my JPEG, there it is. So, there's a couple of preliminary things we'll want to do before we get to highlighting our shape, and one of them is to get rid of all of the color information in this photograph. I know it doesn't seem like a very colorful image, but by cleaning up and making it only black or white or gray, you'll give yourself a better success rate when you use these images to convert them into vectors. So, the first step is you're going to head up to mode and change it to grayscale, and Photoshop will always ask you, "Are you sure you want to discard the color information?" In this case, we absolutely do.
 So, click discard. Not that exciting of a change, but it is important. The next step is we're going to crop out everything in this image that we don't need, which is the vast majority of it, including my drawing mistake earlier. So, I'm going to head over to the toolbar and grab the crop tool, and I'm pressing command and the plus sign to zoom in so I can get a clear image of what I'm highlighting here. The crop tool lets you crop in a square, and that's what we're going to go for. I'm going to adjust this side a little bit more, and then I'm going to press return, and there's my image. I'm going to zoom out, make it actual size or somewhat. It's looking pretty good so far. So, you can see I've got some spots where I wasn't too clear with my pen and I've missed some. The thing about what we're going to do is we're going to use a tool that highlights contrast. I'm going to use the magic wand tool, and I want to show you what that's going to look like before I fix this piece of it. So, the magic wand tool is old school tool in Photoshop.
 Most people, if you use Photoshop before, you've used the magic wand. There's some more advanced selection tools that they've come up with, but I don't know, I'm still stuck on you. I can't quit you magic wand tool. So, if you give a click on the tone that you want to highlight, in this case, a very clear definition of black and white as compared to our black as compared to the white of the paper behind it. Notice that even though I have lined paper because of the color of the ink I chose, which is a clear black, it gave us a pretty decent selection. Actually, what I wanted to show you has happened and it's too accurate. So, all of those gaps where I didn't fill in with my pen just quite enough, it's acknowledging them, which is cool and very useful if that's part of your design. But for my purposes, in this case, I just want a clear outline just of the edges of the line that I've drawn. So there's a couple ways to fix this. If you're not comfortable using Photoshop, you can go back to your sketch and fill in those spaces so that you have a perfectly dark black line contrasting with the paper.
 There is a way to fix it on screen, and I'm going to do that now with you. So you can do one or the other. This is a useful skill to have just in general for cleaning up images. So, why not cover it. So, right over here, I'm going to switch over to the quick mask mode, and what it does is it shows me everything that's not selected is covered in a nice pink glaze. That's a holdover from back in the day when everything was drawn on paper. They used to use pink masking to delineate prints. So now, I'm going to come in here and take a good look, and again I'm pressing command and the plus sign to zoom in. You can also always go to view, zoom in or zoom out, and you'll notice that the commands for those are located on the side. This is a really useful thing just in general when you're learning a softwares to pay attention to what the key commands are for common tools that you're going to be using. So, I won't talk about that anymore. Just assume when I'm zooming, you know what I'm doing. So, I want to get rid of some of these patches of pink in the middle here.
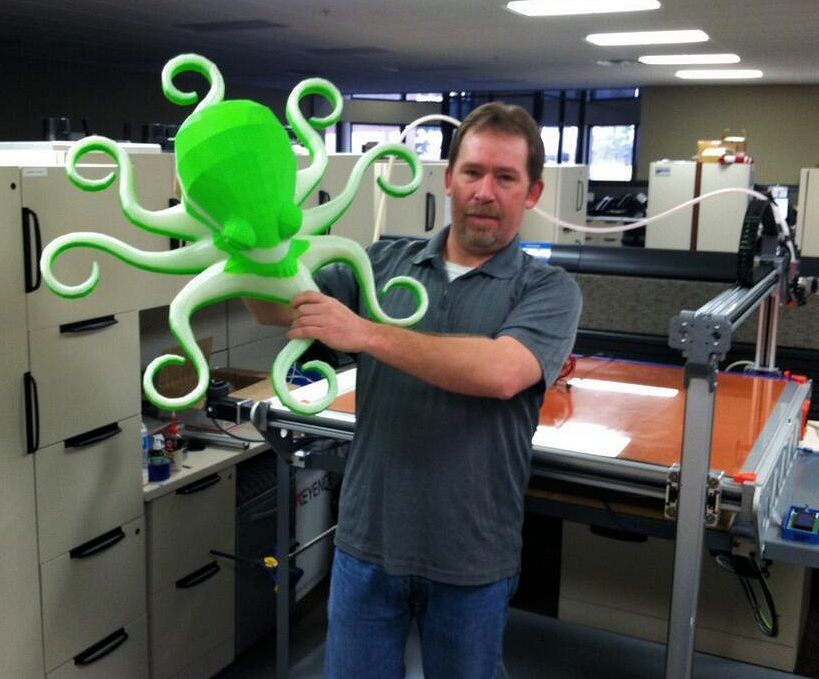 So, I'm going to grab the erase tool. They have two opposing tools in the quick mask mode, the erase tool and the paintbrush tool. The paintbrush tool will add mask, so the pink, and the erase tool will erase the pink. So, it doesn't look very special right now, but what I'm doing is cleaning up my selection. Really, you can think of this as the equivalent of what I suggested you do if you don't want to fix this up in Photoshop, and that is going in and basically filling in those spots with your pen. So now, I'm going to zoom back out and I'm going to turn off the quick mask mode, and we should see a slightly different selection. Now, we could get very nitpicky, but if we zoom in, we see that we've got a simple outline and none of those little islands of marching ants, that's not what we want. This is looking pretty good. So, all of these spaces and gaps here are cleaned up, and I'm trying to zoom like I do in 3D modeling software and it's not working. So now, we've got our selection. One more piece of the vector graphic puzzle is cleaning up these edges.
 So, you'll notice that when you zoom in, my pen wasn't super smooth and straight. What defines vectors from pixels is that they typically are smooth and straight. But when you're converting pixels like we are from a JPEG into a vector, which is a mathematical description of the shape, it's going to acknowledge all those little crunchy foibles and edges you have where you drew. So, there's another tool in Photoshop that I love in the select menu called refine edge, and this gives you a nice clear idea of what your selection is going to look like once you cut it out from the background. So, what I'm going to do is smooth my edge. Sorry, where's the preview, there we go. So, you'll notice as I increase smoothing, here's what we started with. I'm going to zoom in so you can really see it especially down here. So, I've got all these crunchy gross pixely edges and I grabbed the smooth slider here, and you'll see it start to fix that up. That's really what we want because when you're talking math and when you're talking 3D design, every little curl and edge is going to be picked up.
 So, the smoother we make it, the better. So I'm going to click okay, and now I've got a really beautiful clean selection that I can turn into a pictographic. So now, we're ready to make the big conversion from pixels to vectors, and it's really just a matter of creating a new layer in your file. So if you're familiar with the layers menu over here, I've just got one layer right now, the background, which is our image file. As part of the layers window, there's a section called paths to the right in the tabs up here. The paths is empty when you first open it, but there's a small menu over here and I'm going to open it up and say make work path. I'm not going to go too much into what this means, but essentially it's taking our selected edges and turning them into the vectors that we need. I wouldn't worry too much about tolerance. Although if the number is crazy like a thousand, I would maybe shrink it down to a one or two. Click okay, and now we've got a layer in our paths window describing our vector, and I'm going to zoom in and show you that it has simplified our selection.
 So, it's given us an approximation of the design, which is actually perfect, it's exactly what we need. We don't need every little crevice in detail, we want things to be smooth and look good when they're three-dimensional. So now, we've got a work path and we've got one more step to get this ready to bring into our 3D software. Now, we're going to do a export path to Illustrator. So, we're going to head up to the file menu and choose export, paths to Illustrator. We've made our work path so that's the path we're going to use. We click okay, we give it a name, I'm going to call it 3D design, and I'm going to save it on the desktop. 5. Importing Design to 3D Software: So, we've exported our work path, we've got an Illustrator file on our desktop here ready to use. I am going to save my Photoshop file as is just in case you need to, for whatever reason, start fresh from your Photoshop image. So, I'm going to say file, save. Don't worry about those settings too much. So, it's simply just saved those pads to the image file that I have on my desktop.
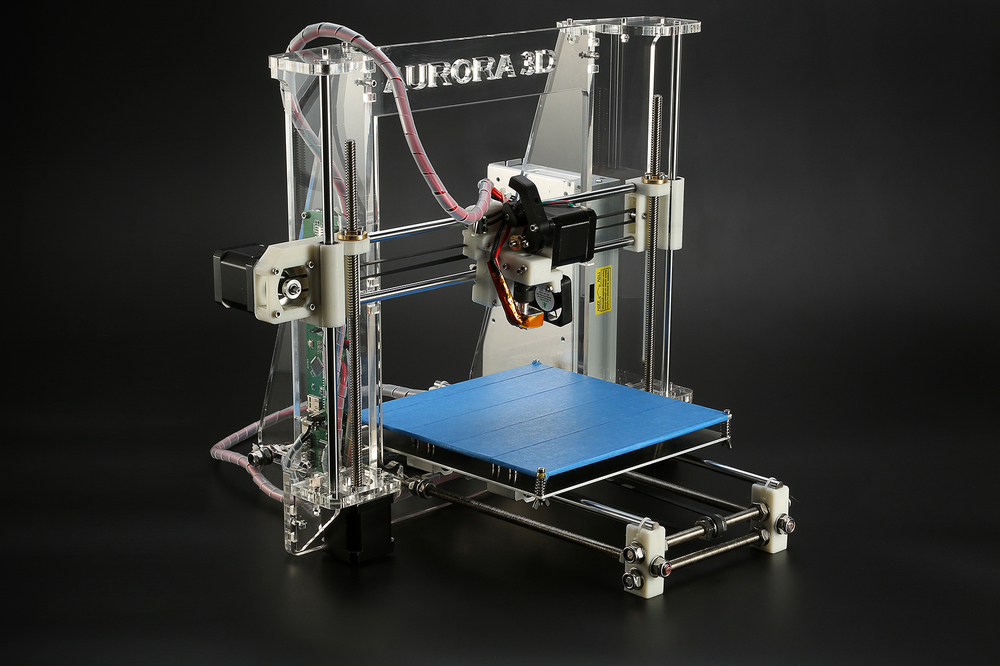 Now, I'm going to close Photoshop and I'm going to open my Illustrator file. The mysterious Illustrator, doesn't appear that we have anything, but if you hover your mouse over, you're going to see our vector pads. I'm going to select all of them. So, there's our image, our paths from Photoshop. We got our vector lines selected and now, the only reason we're using Illustrator is to literally save it as a different file format. We're going to go to the file menu, go to save as, we can keep our name. I'm going to delete the word converted out of the file name, and I'm going to change it as an SVG. Then that will conclude our sojourn with Adobe. Again, don't worry about all this stuff, there's lots of options but we really just need the most basic, SVG information. Okay. We're all done with Illustrator, and now we're going to move on to the next step, which is bringing our SVG vector file into our 3D design software. So, now we're going to start using TinkerCAD. TinkerCAD, is a really wonderful, like I said, online browser based 3D design software.
 I think the name TinkerCAD is meant to imply that even kids can use it, but it's actually a really great tool. What I like most about it is that it teaches you the basics of how to interact with a 3D design software. There's some really key mouse gestures and keyboard gestures that will translate to any software you end up converting to once you become a more advanced 3D designer. So, I'm going to go over some of those skills right now. I'm going to assume that you are comfortable signing up for TinkerCAD and making an account. They require it, and it's a really great resource. What I like about it here, is that it's a Cloud based resource. So, no matter what computer you're using, you can log in and start designing or working on a design that you already have. In this case, I'm logged in. Shapeways right now has a space in the Museum of Arts and Design. So we've been showing TinkerCAD as one of the tools. So, my account is called Shapeways at mad. I'm going to create a new design. You may enlarge my browser window.
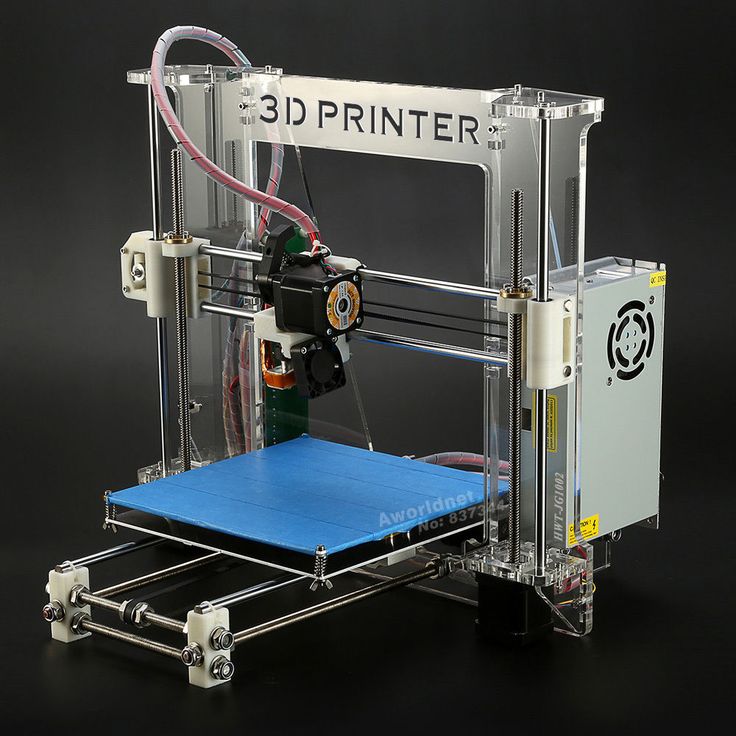 Take advantage of this nice big screen I have. Here is our work plan and they're very clear on what that means. Navigating through the three dimensional space requires a couple of gestures that might be new to you. One of which is the most important. I think, panorama. So, you're going to take your mouse now, a little aside here for those of you who use a laptop. Trackpads are awesome. I really think that it's nice to be able to be on the go. That being said to avoid frustration when you're designing with 3D, I highly recommend using a mouse. It is just so much easier, so much less finger gymnastics to try to do the right movements all in that tiny little trackpad. So, even just the plug in USB mouse, I really do recommend. It will make your designing life that much easier. So, all of the recommendations I'm making are for a two button mouse, with scroll wheel. If you don't have that, there are adjustments for it, but I'm not going to be covering those. So, to navigate our space, first, I'm going to talk about TinkerCAD itself.
 So, here's your workspace. You've got the toolbar along here. Some menus that we're going talk about in a second, and some navigation buttons here as well. TinkerCAD has some great really simple videos on basic manipulations and use of the space. I'm only going to cover the things we're going to use in this activity. If you want to get a more in-depth lesson in TinkerCAD, take a look at their YouTube channel. So, I'm going to head over here and take a look at the menus that they provide you with four basic shapes. This is probably my favorite part of TinkerCAD is they assume that, you just want to customize and you want to start with what we call primitives or solids. They don't have the correct names. For example, this should be a cube, they call it a box. I'm going to grab a box, and I'm going to drag it on to the work plane. Doesn't look like much right now but that's because we need to navigate this three dimensional space. The first step to that is taking your mouse and right clicking and dragging.
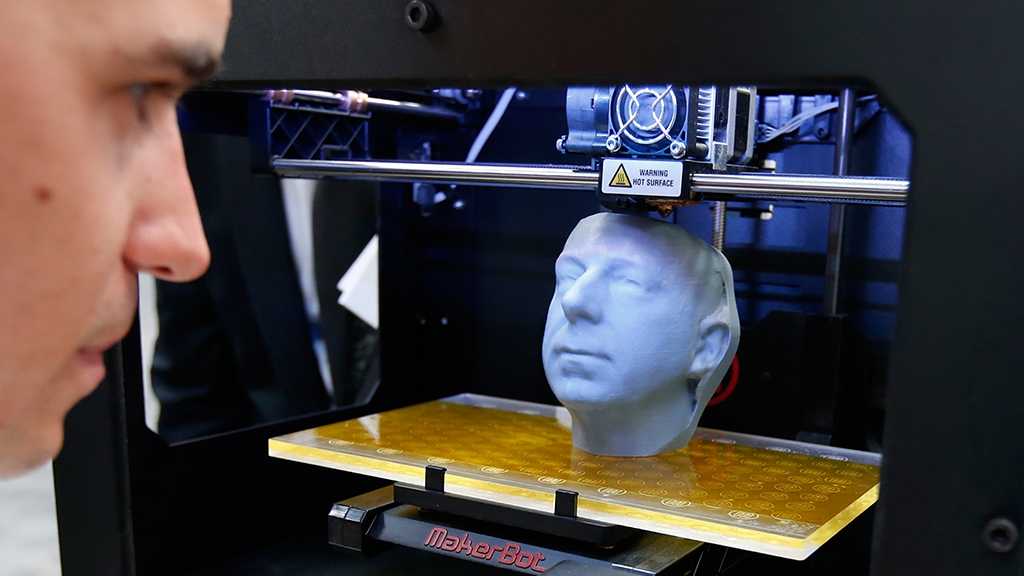 What that allows you to do, is rotate and pan along the three axis, that a three dimensional space has. So, when you're designing for two dimensional space, you have an X and Y-axis 3D. Exponentially, it adds a third axis, the Z-axis which allows us to go back and zoom in. Now, I'm rotating along the Y-axis, and now I'm rotating along the X-axis. I bet you're wondering this cube looks really quite large. How big is it exactly? Well, TinkerCAD lets you set your scale of your grid. Down here in the bottom right corner, there's a button that says edit grid. There we go. Your default grid properties when you open TinkerCAD are 200 millimetres by 200 millimetres, which is 20 centimetres. So, each of these large grid lines on the work plane represent a centimeter. So, our box or cube is about two and a half centimetres, by two and a half centimeters, by two and a half centimetres. You can change your work plane two inches, and I won't fault you for it but, I highly recommend sticking with metric.
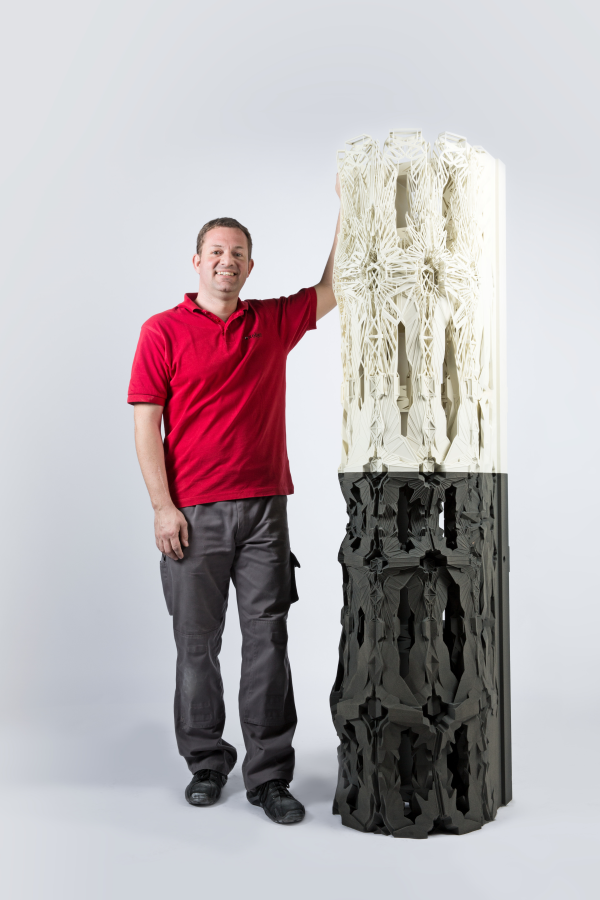 Because, most 3D design software, 3D printers, 3D printer software, are all default baseline metric from the start. So, to avoid confusion on the scale of your object, I would always stick with metric and just try to start to learn what the translation is. One of the objects I mentioned having is a ruler. Most of you probably have a ruler with inches on it. I'm guilty of the same thing, but I do happen to have a measuring tape that has metric. It helps too with the conversion as well. So, for example, two and a half centimeters is roughly an inch. Keep that in mind. But it's important to know what the scale of what you're designing is, because, if you're working on this tiny little object and you try to print it and you get it, and it's the size of a pinhead, you'll be a little disappointed. So, keep in mind the scale that you want as you're working. So, for example, we want to make a handheld object like a pendant or a key chain. So, I'm going to take a look at my hand, and say that it's about three inches across in diameter, which means roughly eight centimeters.
 So, that's a measurement I'm going to keep in the back of my head as I'm working. You can also change the size of your grid, your work grids. So, for example, if we wanted to make it exactly. Our workspace size, I'm going to make it 80 millimeters by 80 millimeters which is eight centimeters. That way you won't lose perspective on what size you're making your object. So, move out here with this cube around. So, another piece of working with TinkerCAD is changing the aspect ratios of your shape. There's a couple of buttons that hopefully will look a little familiar, but just notice as we look at our form on the screen, there's some boxes that look familiar. For example, if you've ever used a cropped tool, which we just did in Photoshop. You should recognize these little square handles on the corners of the object that allow you to change the parameters of those two axis. So, in this case, I'm stretching it out, I can make my cube the exact size of my project. These handles indicate what pieces you'll be changing.
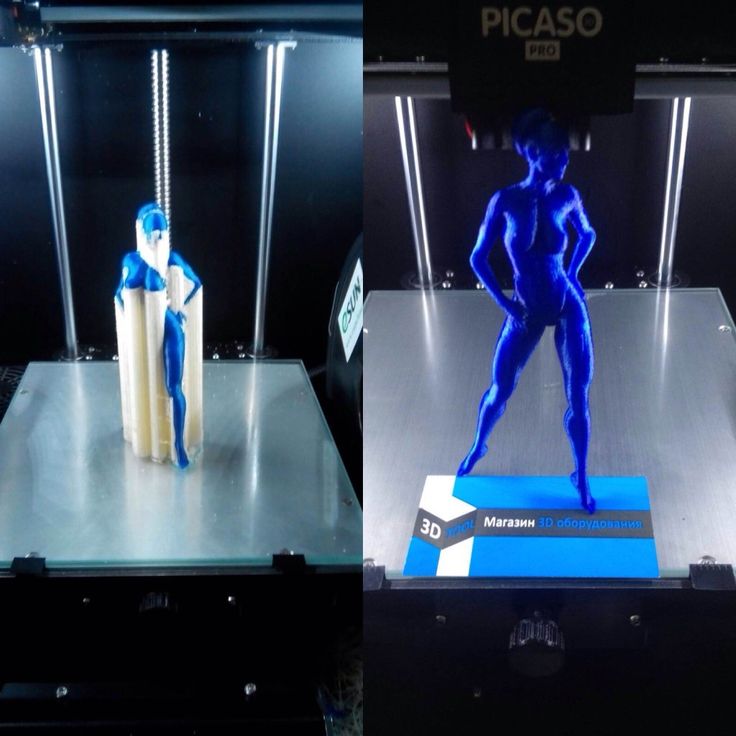 So, for example, if I grab a corner, I'm going to be changing both sides of my cube. If I grab the middle of the handle, it's only going to be moving in one axis, in one direction. Then, how about a Y-axis, we can float it up off the work plane, which I actually don't want to do, but I just wanted to show you what this button means. It will snap right to your grid. If you notice when you're dragging here on the right hand side, it's telling you just how many millimeters you're moving your object, and where it's starting from. So, I'm at zero millimeters. But, then there's another handle that's similar to the corner handles and that allows me to change the Y-axis of this object. So, this is useful to know this is about the thickness of what we're designing. So, when you're thinking about how it's going to look in real life, if we think about a millimeter, a millimeter is really skinny and some of our materials, specifically, white, strong, and flexible nylon, what we're designing for have some parameters that you have to stick with in order for the print to be realistic.
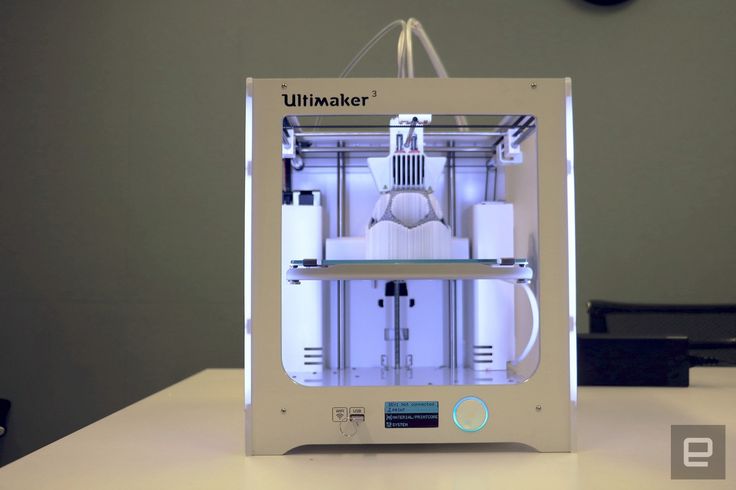 We're going to cover that a little bit later when we bring in our shape, but just keep that in mind that this grid is there to help you visualize just how big and what scale your object is going to be? We can go to design. So, always make sure to save your project, especially with a Web based, browser based editing software. If your Internet cuts out suddenly and you didn't save it will save automatically, but it's a good habit to get into. I recommend that for all Skillshare classes actually. Okay. So, I'm going to delete this object. Pretty simple, you select it and hit the delete key and we've still got our eight millimeter, I'm sorry, your eight centimeter work plane. Now, we're going to bring in our design. Over here in the Import menu, we're going to open up Import, and we want to import a 2D file. So, we have a file chosen here, going to click Choose File, and we're going to grab our 3D design as VG. We're going to scale it at 100 percent, and then this is really important, the height it actually, TinkerCAD understands that you're working in that space because you want a 3D object.
 So, it automatically gives you a base thickness for your design, which is really great. So, you don't have to worry about whether or not it's 2D or 3D. It automatically understands that's what you're going for. So, it's going to give us a starting thickness of 10 millimeters, which is one centimeter, which is perfect. I want to click Import. Okay. So, it was really helpful. The important shape is too big to be placed on the work plane. Try adjusting the scale down to less than 88 percent. So, I'm going to do that. I'm glad that happened. I'm going to make it 80 percent because why not? It's uploading and we're probably going to have to zoom out. Oh, there it is, a lot, maybe not. There it is. So, it's way bigger than our work plane, but that's fine. We know how to adjust it, so that it's the right shape. So, there's our design, nice and clean, little wonky. So, you can see there's still some handmade aspects to it, which I like. It's really easy to make things clean and perfect in a computer.
 It's much harder to make them look like they are organic. So, this is a nice exchange between hand drawn and digital. So, I'm going to grab this corner and we'll to shrink. Now, you'll see that it doesn't stop me from doing some crazy stuff to my design. This is cool, if you need to squeeze it in with another piece of your design that maybe it didn't quite fit the way you drew it. But, for our purposes right now, I'm not really that interested in changing what's called the aspect ratio of this shape. So, I'm going to undo that change. TinkerCAD's a little slow with undo. So, just give it a minute. But, it will do it eventually. So, what I'm going to do is select this and this is the case for most editing softwares. But, it also stands in 3D design software as well is when you hold down the shift key on a keyboard and you grab one of the handles in the corner, it maintains the aspect ratio that you started with. So, no matter where I move my mouse, it's keeping the aspect ratio relatives.
 I'm going to move it back on to our work plane, it's still too big. Okay. So, now we're really zoom down, we're going to zoom back in. Awesome. So, there's our shape. Now, we kept the aspect ratio as is, so if we want our shape to have that one centimeter thickness that it started with, we'll have to change that here. So, remember, a centimeter is about that big. I'm going to make it a little bit less. I'm going to make it seven millimeters and now we've got a shape that believe it or not, if you're happy with your design, we're ready to export and upload to Shapeways. 6. Customizing Your 3D Object: One of the advantages of 3D printing is customization. So, I can make one of these prints for everyone in my family by putting their name onto the bottom of it. So, that's what I'm going to do. I'm going to make one for my mom. She's the best. So, I'm going to make it a bit bigger. The reason for this is that text can be tricky. You want to make sure it's readable. So, remember we're looking at the thickness of this.
 Which is about 11 millimeters and 1.1 centimeters, which is fine. But that's tiny for texts but we're going to give it a shot nonetheless. No, actually I'm going to make it 15 millimeters why not do that gives us a nice work space. So, I'm going to put her name along the bottom here. So, in Tinkercad, there's these awesome little letters. So, you've got some base letters here. You could draw these. Like we did with the design, draw them by hand and reimport them as SVGs, if you wanted some more practice with that and be fully handmade on the computer. But for now, we're just going to use these little letters that Tinkercad provides us. So, I've got mom here. It's just a drag and drop situation. Now the one navigation piece that I didn't show you the last time is panning without rotating. So, right now when I left-click, I can see my whole shape. But then when I went to see my letters above, I could zoom out. But I want to be closer to it. So, if you hold down the Shift key and drag, you can pan without rotation.
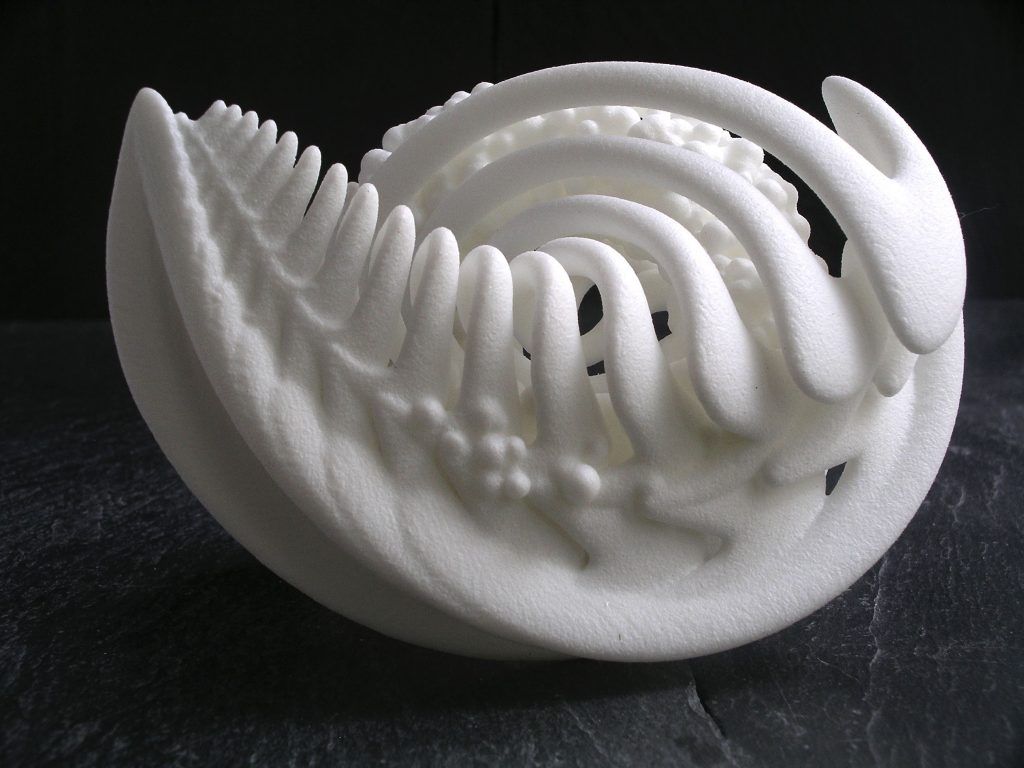 Which is nice. So, now I'm going to line these up, get them pretty much how I want them. Now, we've got a problem here. I've got these letters which are lying face down, but I want them to be upright. So, there's a couple steps we're going to take. One, is we're going to make this a group. So, if you draw a crop box or some people call it a lasso around the three of those, you can actually click up here in the toolbar and group them together. So, now they're all one thing. It's not separate letters anymore. So, if I click on one letter, I'm going to grab the whole piece. The other tool I didn't talk about last time is the rotation adjustment. So, panning here, I going to get closer so you can really see these arrows. So, you can rotate your shape in the three different axes that are in your design software. So, we wanted to, for example rotate mom. This way we can, but really what we want to do is rotate it along the x-axis so that we can set it against the bottom of our design. So, that's this arrow right here.
 I can rotate an eyeball and it will tell you the degrees that you're rotating. So, for example, I can get close to 90, which is what we want. But again, that shift key that we used to keep the aspect ratio is also going to let us snap to standard sections of rotation. So, if I hold down the Shift key, it's only going to let me snapped to 45,90 degrees and all of the iteration's there off. So, snap right to 90, there we are. Now, I'm going to use my overhead view to line this up on my shape. Now, because I drew this by hand, it's not super perfect. In fact, we need to rotate it a little bit. Without using the shift key, I'm going to rotate it a little bit this way. So, it's my mom. There we go. Now, I know it looks big and crazy like this, but actually these are just very slightly what we call embossed letters on an object. Now, you can also treat these as voids and subtract or engrave. We're just going to cover embossing today. So, we're done adding the letters and now one last step, that's very important actually, is we have to tell the software that these are in fact all one thing and that's where that group buttons going to come in.
 So, now Tinkercad understands this as one solid object not two, 3-dimensional objects mushed together. So, this is an important step before you export this to bring in to print in Shapeways. So, again, you go through download for 3D printing and upload that same file. Now, you've got a customized personalized design. The very last thing we're going to talk about and one of the coolest things about nylon like I said is, interlocking parts. You're able to create chains and functional objects that can move around. On a really basic function for something like this, would be perhaps turning it into a key chain. We can add a key ring to the design and Tinkercad has some basics that are available for you to grab it without having to do complicated subtraction. So, there's two tools we could use, either something called the torus or the tube. Since my design, this is just an aesthetic choice. But since my designs kind of blocky and has square edges, I'm going to stick with the tube and I'm going to drag it to over here.
 Now, it's really important that we take a look at this and make sure that it is going to follow along with the minimum thickness requirements for the material we're printing in. So, for example, right now it's two millimeters thick. Too small for our purposes. We have to make it at least seven millimeters thick. We're also going to enlarge it a little bit. What that does is, increase the wall thickness of this piece as well. Now, I want to make this a ring that's going to loop through the top of my object. Again, we're going to use that Rotate tool. I'm going to hold down shift almost there. So, an important thing to make sure of is that none of these two pieces are intersecting with each other in any way. So, we have to check from all angles and make sure that this ring which will be printed in place. I advise compacting it as much as possible to reduce the bounding box. So, by printing it this way so that the ring is as close to the object as possible. You're reducing your bounding box size which is partly what determines the cost of your prints out.
 A little difficulty here. All right. Again, we want to group this. Hear we are. So, when you get this, you will have a Trinkets with an attaching loop. You can turn it into a necklace or key chain, and then same process of download for 3D printing and uploading to Shapeways. 7. Preparing for 3D Printing: So, now we're at the exciting part where your sketch turn into a digital object or a digital file. Now it's a 3D object and now we're going to talk about what we're going to do with it when we finally send it to Shapeways to get it printed. So, hopefully you have checked out the Shapeways website and made an account. Everyone who makes an account has the ability to upload a design and print it for themselves. Once you get more advanced and you're happy with your designs and maybe you want to share them with the world, you can actually start, excuse me, you can actually open a shop on it on Shapeways and sell your designs to anyone who wants to buy them. So, I've started an account. I'm going to take a look at some of the materials on the website that explain how printing works and what I need to have a successful print.
 If you look at the website, you've got a Shop tab which is of course a huge time suck because there's lots of cool stuff on Shapeways and you can get really sucked in to all the cool stuff. But we're going to actually jump over to the Make and Sell tab. We make it pretty simple. Select a 3D file to upload. We'll get there in just a second. But I just want to make sure that I have acknowledged all of the material constraints for white strong and flexible nylon, the material that we're designing for. So, if you take a look here there's a Materials menu and specifically a section called Material Portfolio. This is a highly detailed page that gives you all of the lowdown on every material that Shapeways prints in, including cool stuff like brass, bronze, ceramics, full-color, sandstone, stainless steel. All of those have their own specific design constraints. Like I said, we're going to be working with strong and flexible plastic. So, I'm going to click on that information here. There are several available finishes, including different dyed colors.
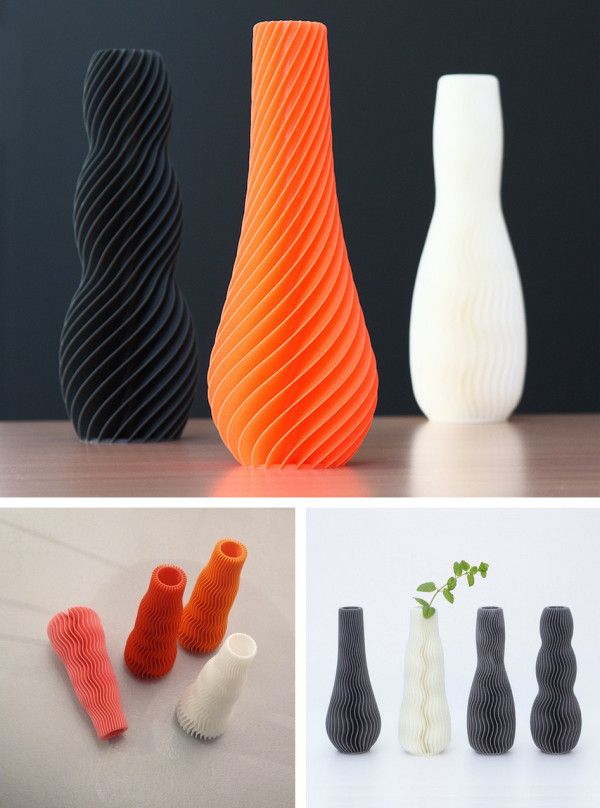 It also gives you an idea of what the process will look like once you place your order and upload your design. Strong and flexible ships the fastest. You will have it in your hand in just under a week, six days. If you add any finishes to it it extends the amount of time. But the reason for this is that when you order something with Shapeways, and that's whether you order something that you designed or something that someone else designed, it is printed just for you. It is printed on demand. That's a really special feature of 3D printing is that there's no minimum order. We say this a lot to people and it's hard to wrap your head around. But if you want to convince someone that you're making a design that is going to be a great product, sometimes in traditional manufacturing the process is very drawn out. You have to get a lot of buy-in, and you have to place a minimum order of say 10,000 to make the production of this object worth the effort of making a mould for it. There's no moulds in 3D printing.
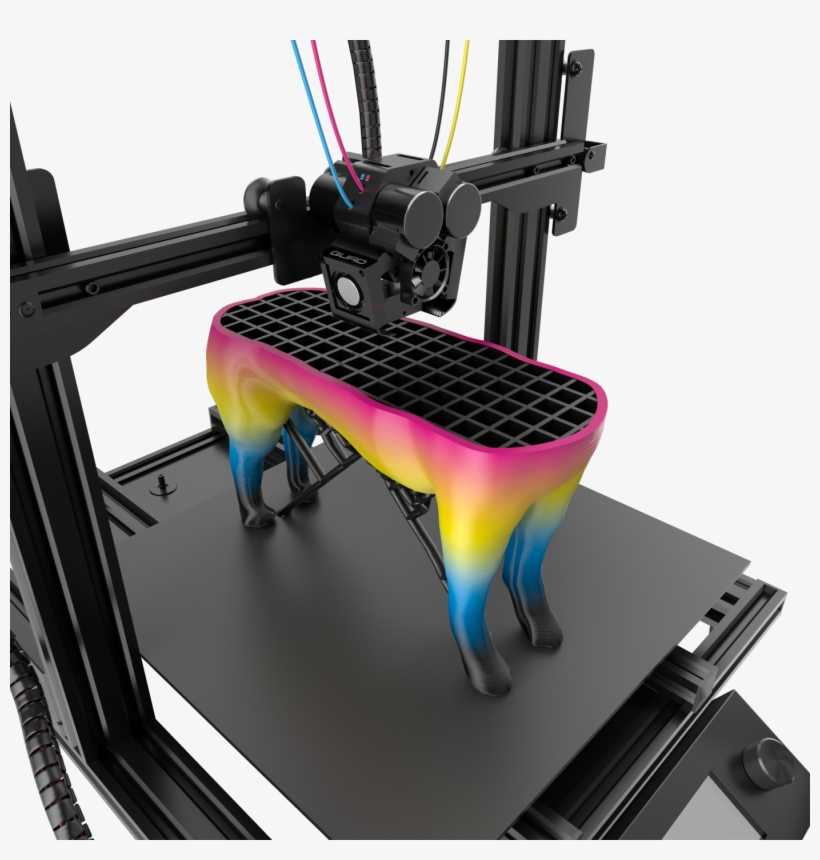 So, if you order a one-off and it's okay but not perfect, you didn't make a mould to make 10,000 of those imperfect objects. You can keep working on it. Hence the name rapid proto-typing. White strong and flexible nylon is high in strength, high in detail, relatively smooth, very flexible, not very glossy, and not at all transparent. Sometimes depends on how it's lit. You can do cool stuff with lighting in it. It's definitely our most popular. But there's some really important design tips. I don't think we're going to come across any of these just yet but it's something to think about. The minimum thickness of an object is 0.7 millimeters. That's really thin. We made our design in Tinkercad. I think it was eight millimeters thick. So, we're more than safe. But if your design is very thin or spider your skeletal, you'll just want to make sure you eye all of those different areas. We're going to talk about that in Tinkercad in a minute. But just give it a once-over and make sure that the scale is appropriate for the material that you're printing for.
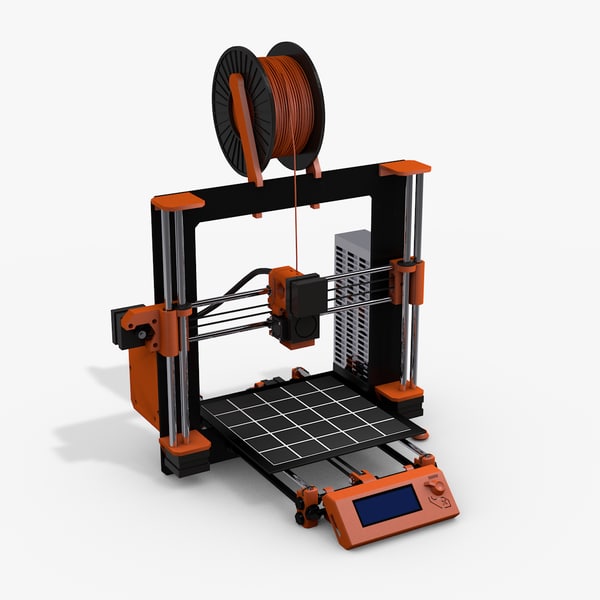 Another aspect of 3D printing that becomes apparent when you get your object back is something called stepping. I think it's cool. It shows the material process, the way that the object was built up layer by layer. Sometimes if you have high detail the stepping can interfere, but for the most part, it usually looks pretty great. A 0.7 millimeters thickness is pretty tiny, so you better have a good eye if you're going to find these mistakes. Yeah. I highly recommend scoping the materials page out before you design for a particular material. They're all very different. It's a big challenge for everyone who 3D prints to translate sort of the consequence lists aspects of pixels and data into physical objects. So, what you're doing is really ahead of the curve. So, give yourself some time to do some experiments. So, I'm going to head back to Tinkercad now. We've got our object. I want to have both of these pages up so I can compare you can take measurements. There's a ruler feature in Tinkercad.
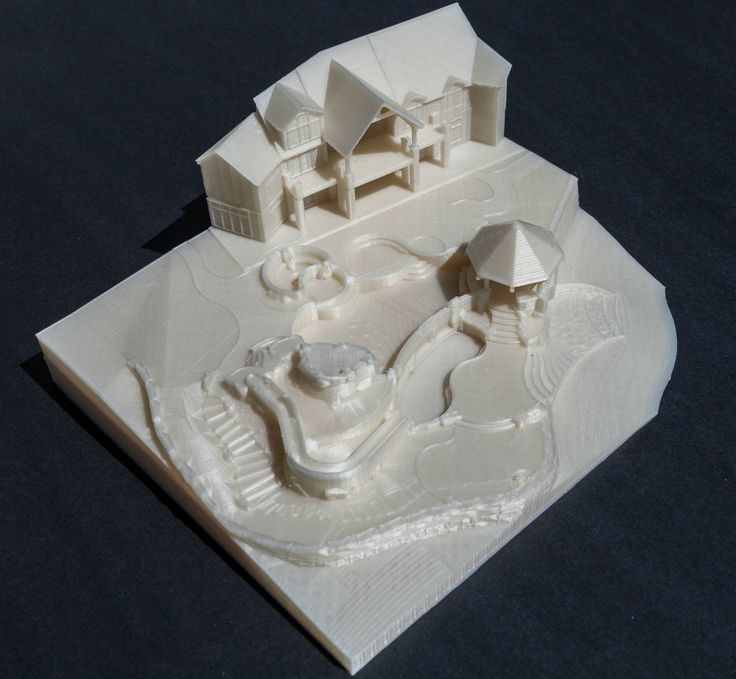 You can actually measure the exact object that you're making. This is going to be I mean, we have a grid and we resized our grid. But in case you're working in a larger grid you can use a ruler feature to measure. So, we're looking at a bounding box which is a square box that your object fits in. It's a common term you'll hear in 3D printing. The bounding box of this triangle, which is not a square, is roughly five centimeters by five centimeters by eight millimeters. That was our bounding box. It fits within the minimum and maximum bounding box description for white flexible. The max is 650 millimeters et cetera. We are just fine. But it is something to pay attention to. Now we're going to make some investigations on where things can go wrong. So, if you didn't get a chance to clean up your selection for example, there may be pieces where you have holes in your design. I highly recommend clearing these up before you export your file. That can prevent a file from being a successful print.
 In this unit, we're going to talk about how to bring your model out of Tinkercad and upload it to Shapeways and place an order for your first 3D print. Tinkercad has a built-in option menu for creating a file that you can upload to Shapeways. The very first Export option in the Design menu is download for 3D printing. I'm going to click that menu. Now, you have lots of options here. It's nice to know about X3D and VRMLs. If you design something with color that you're going to be printing for example in our full-color sandstone, these are the file formats you would want to use. But for our purposes today, like I said, we're going to be sticking with an STL file which stands for stereolithography. It doesn't have any color information but it describes our design very specifically. Now, Tinkercad gives these hilarious nonsensical names to your file. If you like it you can keep that. I find them a bit confusing. Fantabulus Kieran snagit doesn't mean much to me, so I'm going to call this 3D Design Final, and save it on my desktop.
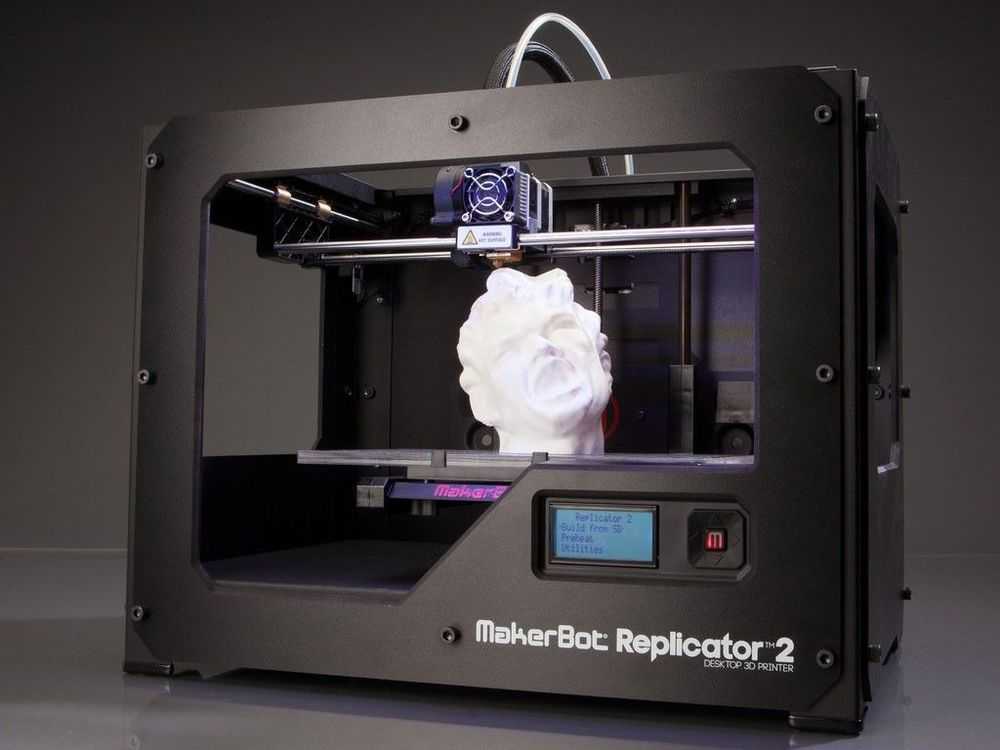 I'm going to tuck away Tinkercad. We're now done with Tinkercad for now. So, I've saved my design to the desktop. I have a software, it's a free software, called MeshLab, it's a great thing to have if you're doing designs that may or may not need some tweaking to make them watertight. So, that's why the symbol is this green eyeball. But yours may look a little different so keep an eye for the file extension.STL instead. We're going to head over to Shapeways. Anytime you're in the Make and Sell tab, you can see that nice big pink Upload button. This is fairly painless. I'm going to select the 3D file. I've got my 3D Designfinal.STL. Let's select that, open it. Now, remember the default for 3D printing is metrics. So, we've got millimeters, inches, and meters. We'd keep it in millimeters. That's what the file space that we designed in was set to, so we're going to keep it that way. We've automated some of the checks to make sure that your design is printable. You'll get an email when your design is finished uploading and everything is ready to order or print.
 So, this is a really useful page to take a look at. For example, it tells me in very general terms what materials are even possible and then how much it's going to cost to print them in that material. So, like I said, we're going to stick with basic strong and flexible plastic. It's going to cost me $8.63 to print a file that size. There's a preview of my design. I'm going to call this something else. I'm going to call it Triangle. All right, so I've changed the name of my file as it shows up on Shapeways. It's going to give me some really useful information, for example in inches and centimeters the original bounding box is 5.2 by 4.6 by 0.7. So, we're right on the mark, and our volume, which helps determine the costs. So, 3D printing is challenging to predict exactly how much things are going to cost and how long things are going to take to print just by describing it in words. The best way to find out how much material you're going to use and how long it will take is to upload the file and go to the Edit Model page to get your estimation of all the materials.
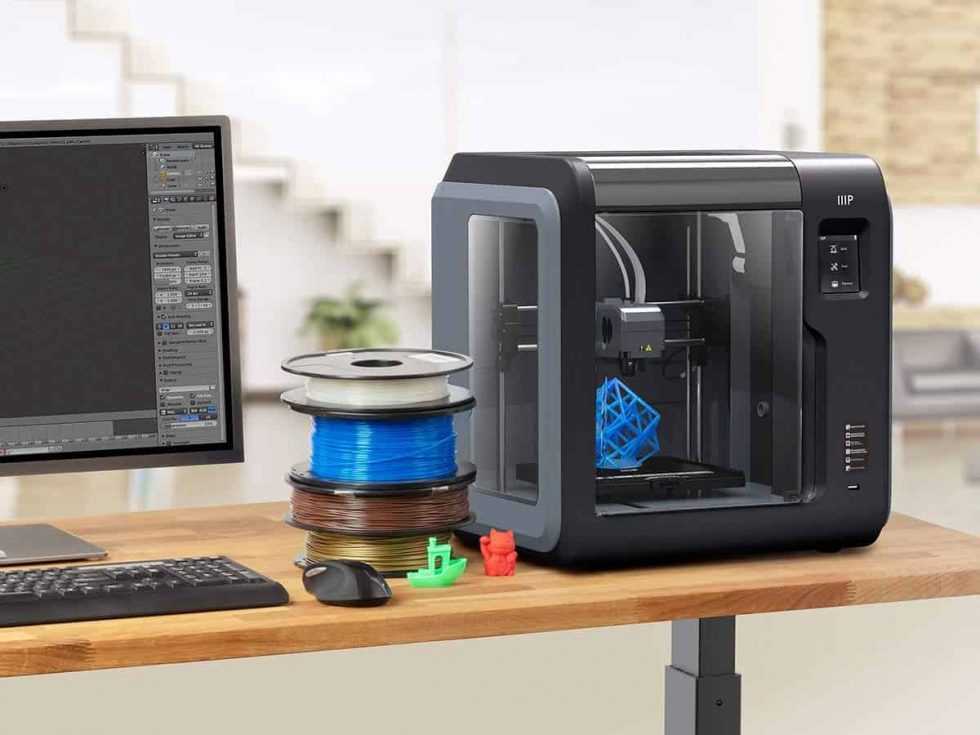 Now, if we want to view the product, there's a button here. This is what it will look like to anyone who we'll make this file available to. By default, designs that you upload to Shapeways are private and you retain all intellectual property rights to your design, provided that it is your original design. One of the caveats when you click upload is you're saying I made this myself. So, it's important to at least put that work in. The cool thing is if you choose to sell your designs with us, you still retain your intellectual property rights. In fact, Shapeways is essentially licensing your design anytime we print copy that you're going to sell to a customer through our Shapeways site. Right, so, we're pretty much done with all the hard stuff. We're going to talk about some additional things you can do to your model. But from here you are ready to place an order. So, I'm going to go back to my Make and Sell tab. I'm going to see all of my models I have uploaded right now. I just have triangle, in which strong and flexible is $8.
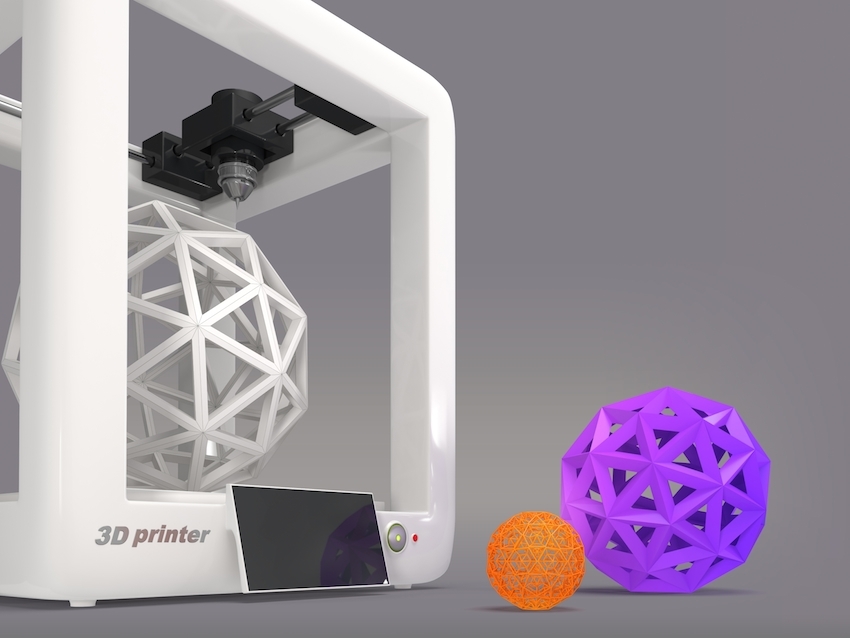 63. If I want to order a print I click "Buy Now," and it adds my design to my cart. It's a pretty typical checkout system from there. Although you will get updates because it's being manufactured in real time. So, you'll get updates about how that manufacturing is going and when you'll receive your package. 8. Explore Design on Skillshare: way.
3ders.org - Teach or learn 3D design and 3D printing on Skillshare
<< 3D printed ExoHand - a solution for future human-machine cooperation
Arkitypo project - 3D printed alphabet shows typographic history >>
April 26, 2012
Do you ever think like this: "hey, I can teach others how to do this." This is exactly why Skillshare was started. Everyone has something valuable to teach. Skillshare is a community marketplace that provides valuable tools and information to help career development or expand technical skills, and it enables users to learn anything from anyone.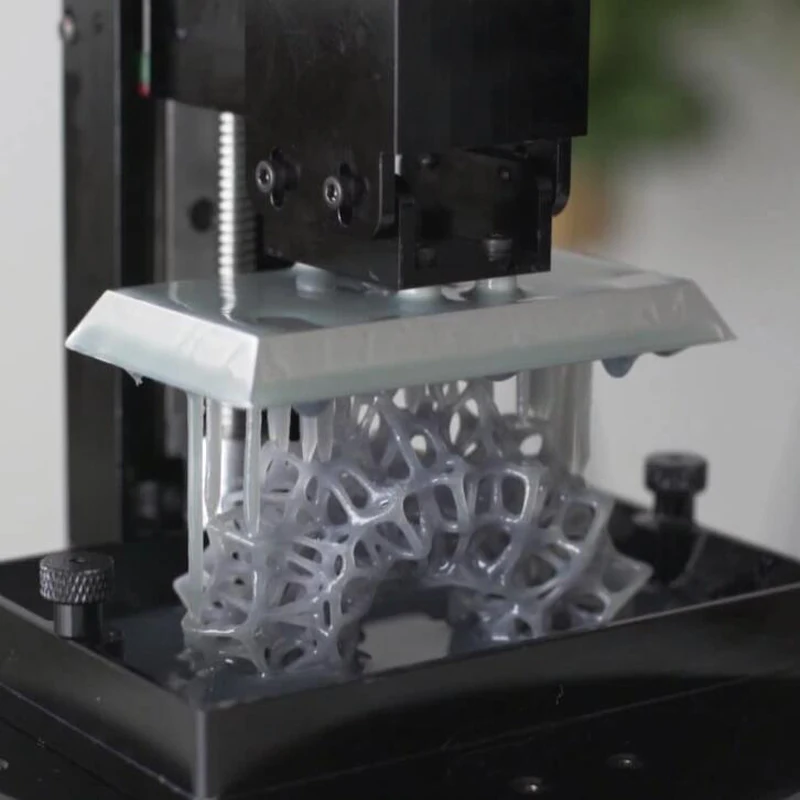
A good news from Shapeways that they have opened a 3D printing design school on Skillshare - Shapeways Skillshare School. For a start, they offers seven classes by Aaron Trocola(Owner/Industrial Designer at 40WestID), Natalia Krasnodebska(jeweler and educator), Kevin Wei(Teacher and Artist) and Duann Scott(Education at Shapeways) ranging from beginner to more advanced tutorials, including:
- Intro to Parametric Design & 3D-Printed Jewelry
- Intro to Parametric Design & 3D-Printed Building Block Sculptures
- Intro to Design for 3D Printing with Shapeways
- Design Your Own iPhone Case to be 3D Printed with Shapeways
- Intro to Parametric Design & 3D-Printed Wall Art
- Design for 3D Printing with Shapeways
- How to design your own ring and 3D print it with Shapeways
So far "Design for 3D Printing with Shapeways" course is scheduled on Mon, Aug 6th, 2012 (5:30 PM – 7:30 PM) and it costs $30.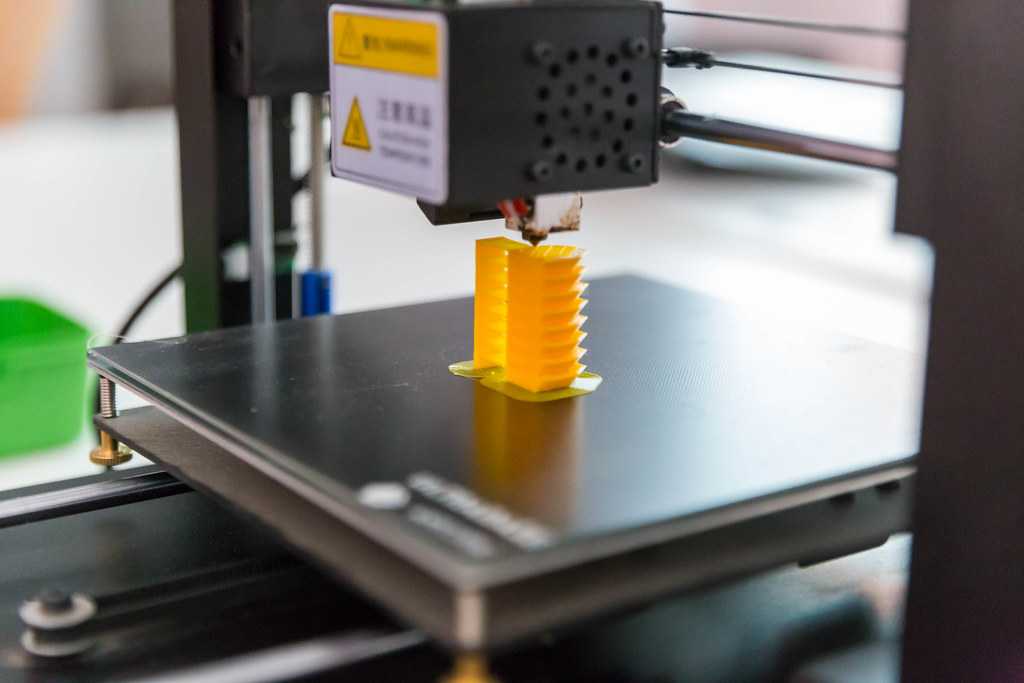
If you are a 3D designer and interested in teaching a class in 3D printing maybe it is time to join the internet and make money doing what you love.
Shapeways is not the only company in 3D printing world which opens its school on Skillshare. GE Garage, a high-tech, hands-on lab loaded with laser cutters, 3D printers, and other high-tech tools will also provide you the chance to get your hands dirty and discover modern manufacturing processes.
Their "Hands On with Autodesk 123D Catch" course is open from Apr.25 through May.1, 2012 and anyone can subscribe to the school or class on Skillshare for free.
For an inspiration Programmer Avi Flombaum (video below) shared his story of his teaching experience on Skillshare. He ended up quitting his job and become a full time teacher. Internet has become a platform that designers can build their shops and professionals become educators - more and more people can fulfil their dreams while connecting to a larger audience than was ever before possible.
Posted in 3D Design
Maybe you also like:
- Anarkik3D launches Cloud9 - a 3D modeling platform with 3D touch feedback
- Join the first 3DTin Challenge to win a Makerbot 3D printer
- Big chance to win prizes in ceramic 3D printing design competition
- Autodesk 123D gallery created and designed for 3D models sharing
- The Pirate Bay goes 3D digital designs sharing
- When mathematics meets 3D printing
- Stratasys to merge with Objet - key facts
- From Chocolate to Ceramics 3D printing
- 3D-Printing custom labware for chemical synthesis and analysis
- Stratasys and Objet agree to merge - Combined company valued at about $1.4 billion
- Filabot's new website is on line now
- Young student builds hexapod robot with Dimension 3D Printer
- 3D printed metal - twin rail Mobius pendant with ball-bearings
- Landre expands capacities in 3D printing through acquisition
- Anarkik3D launches Cloud9 - a 3D modeling platform with 3D touch feedback
- Progress on 3D Printed circuit board
Duann wrote at 4/26/2012 5:57:16 PM:
Thanks for mentioning the Shapeways Skillshare School. .
We are super excited about the potential..
.
We are super excited about the potential..
What is 3D printing and how it can be used! Interesting!
What is 3D printing
3D printing technology was patented in the 80s of the last century, but gained popularity relatively recently. New, promising techniques have been developed and the possibilities of 3D technologies have reached a completely new level. However, to this day, the technique is not known in all circles, and not everyone is aware of what 3D printing is. In today's article, we will try to explain in detail and in an accessible way what 3D printing is and where it is used.
In short, 3D printing is a technique for manufacturing three-dimensional products based on digital models. Regardless of the specific technology, the essence of the process is the gradual layer-by-layer reproduction of objects.
This process uses a special device - a 3D printer, which prints certain types of materials. More details about it are written here. Other names for the technology are rapid prototyping or additive manufacturing. Often the phrase "additive technologies" is used in the meaning of "3D technologies".
3D printing steps
To make it clearer what 3D printing is, let's take a look at the playback process step by step. Below are the specific stages of 3D printing. How it works:
- 3D modeling of the required object is performed according to certain rules;
- The file with the digital model is loaded into the slicer program, which generates the control code for the 3D printer;
- Sets required 3D printing options;
- The code is written to a removable memory that connects to the 3D printer;
- 3D model reproduced.
Objects are reproduced gradually. According to the required shape, the selected material is applied layer by layer, forming the finished product. It is worth noting that the possibilities of 3D printing are almost limitless, that is, anything can be made.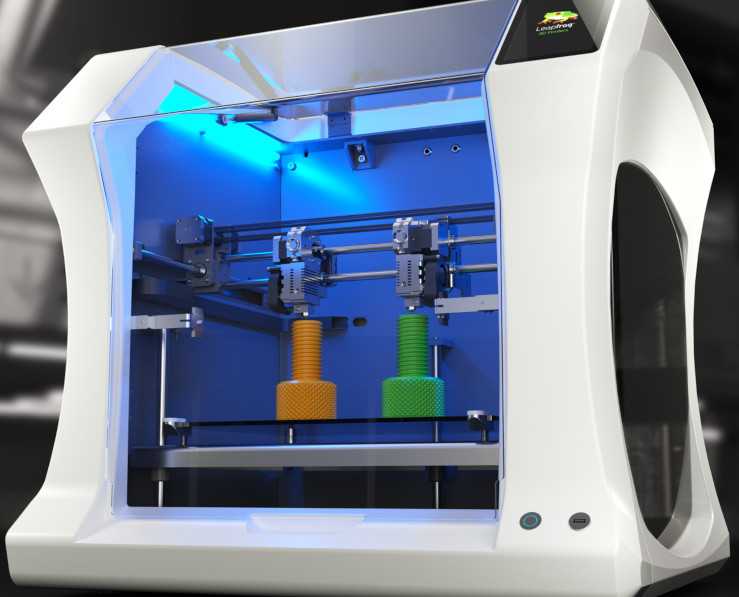 In some technologies, very thin overhanging elements are provided with supports, thanks to which they can be avoided from sagging.
Naturally, this is a very simplified description of the stages of 3D printing, but they give a very clear idea of the essence of the technique.
Other questions and answers about 3D printers and 3D printing:
- Basics What is 3D scanning?
- Basics What is a 3D model?
3D Printing Technologies
Different 3D printing technologies are used to reproduce different objects. They differ both in the consumables used, and in the speed and accuracy of printing. Here are the main 3D printing technologies:
- Fused deposition modeling (FDM) . One of the most common 3D printing technologies, used in most desktop 3D printers, and represents an ideal price / quality ratio. Printing occurs by layer-by-layer supply of a thread of molten plastic;
- Laser stereolithography (SLA) .
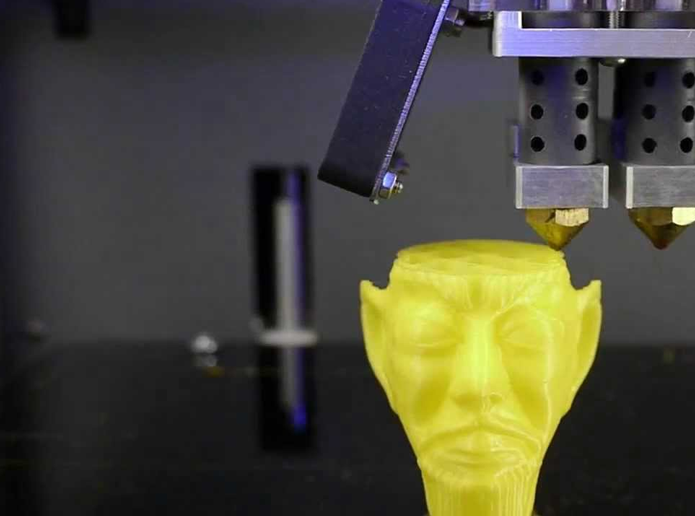 The formation of the object occurs due to the layer-by-layer illumination of a liquid photopolymer resin by a laser, which hardens under the influence of radiation. One of the variations of this technology is DLP 3D printing. It uses a special projector instead of a laser. Both 3D printing methods are used to create objects with a high degree of detail. In the case of DLP printing, speed is also an added advantage;
 - Selective laser sintering (SLS) . Reproduction is performed by layer-by-layer melting of a special powder under the action of laser radiation. This 3D printing method is widely used in the industry for the manufacture of durable metal elements
3D Printing Applications
As you may have guessed by now, 3D printing is extremely versatile. The second name of the technology - rapid prototyping - speaks for itself. In the manufacture of prototypes and models of models, 3D printing can be simply indispensable. It is also a very cost-effective solution for small-scale production. In the aerospace and automotive industries, 3D technologies are already being used with might and main due to the high profitability and speed of manufacturing components. Culinary professionals are working on the development of 3D food printers, and in medicine, 3D printing has become something of a technology of the future. With the help of 3D bioprinting, it is planned to produce bones, organs and living tissues, but for now, implants and full-fledged medicines are printed on 3D printers. Desktop 3D printers can be used for domestic purposes: for repairs, making various household items, and so on. And designers, fashion designers, sculptors and artists appreciate the possibilities of 3D printing and 3D modeling as an unusual way to realize their talent.
Well, that was a brief description of what 3D printing is. We hope we were able to provide the necessary information in an accessible way. If you have additional questions that we have not covered, write to us by e-mail and we, if necessary, will add your questions! Best regards, 3DDevice team.
We also want to remind you about the possibility to order 3D printing, 3D scanning, 3D modeling services or purchase of related equipment and consumables with delivery throughout Ukraine in 3DDevice. If you have any questions, please contact us at one of the phone numbers listed here. We look forward to collaborating!
Return to the main page
3D printing on order in Nizhny Novgorod, cost of services
The cost of printing on a 3d printer allows you to use the service not only for commercial and state enterprises, but also for individuals - innovative production technologies have become widely available. Prototyping of 3d models is the reading of information from a computer program by special equipment and translation into a real object by successive building up layer by layer until the formation of a finished product. ProPlast-NN LLC carries out 3d printing to order - the price of is calculated individually depending on the size of the object, the number of ordered samples, the material from which they will be made and the method of prototyping.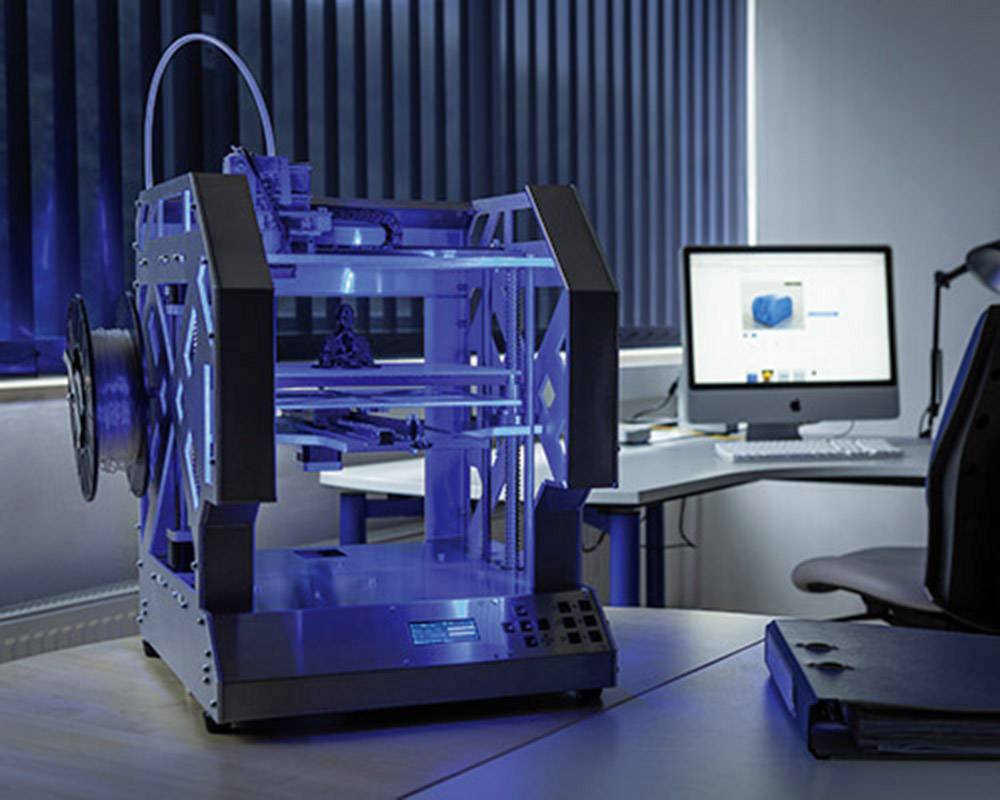
3d printing and prototyping - the latest technologies in practice
The combination of computer technology with production allows you to multiply the speed of production, reduce the cost of creating the necessary items. Volumetric printing is developing at a rapid pace, from the realm of fantasy, it has become a familiar production process, which can be carried out using various methods. Order 3d printing in Nizhny Novgorod for one model or batch of products, just call Pro Plast-NN LLC at the numbers listed on the site. The customer will receive a three-dimensional plastic part, made with a high degree of accuracy according to the drawings or based on a real analogue. Small-scale production of products by 3D printing and prototyping is possible.
Where created 3d models and prototypes are used
Prototyping on 3d printers allows you to quickly and at low cost get a sample of the desired part from a polymer material, made with a high degree of accuracy, without roughness or distortion.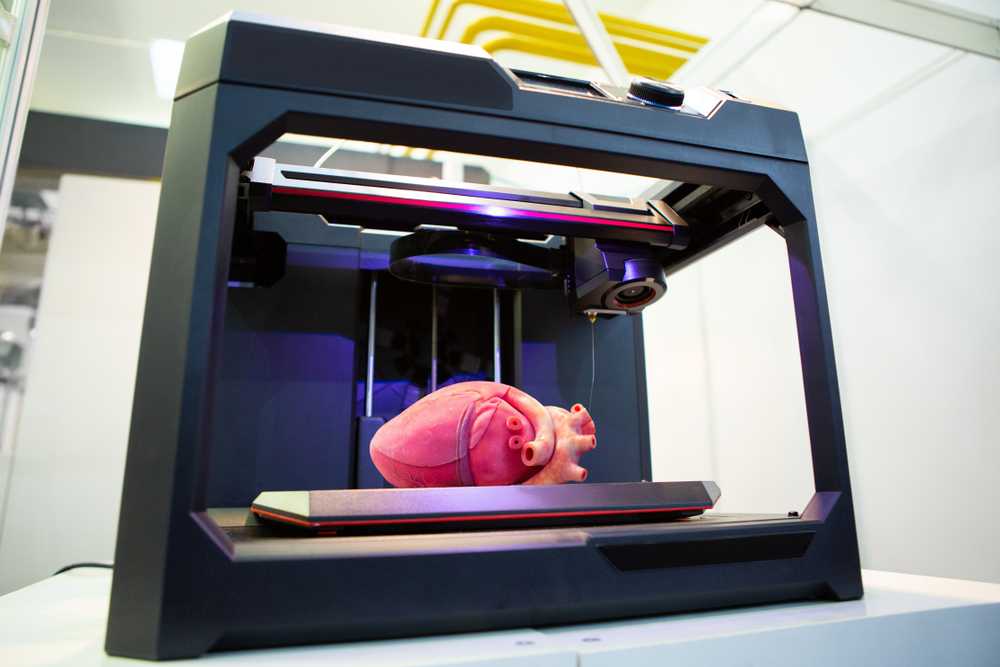 Depending on the technology used and the material from which the sample is made, the product acquires high-tech properties: ideal shape, strength, plasticity, temperature stability. Models have found application in many areas, so they make custom 3d printing companies of different specializations:
- medicine;
- automotive;
- serial industrial production: mechanical engineering, instrumentation, metallurgy;
- architecture - when creating models of buildings and complexes;
- designs;
- souvenir production.
How 3d prototyping is carried out
The basis for prototyping is a 3d image of an object, compiled by a computer program with three-dimensional modeling functions. 3d custom prototyping is performed with high accuracy of transferring an image into a physical object using one of several possible methods:
- FDM (Fused Deposition Modeling). A moving molten polymer thread forms an object of complex geometric shape in layers, which can subsequently withstand high mechanical and thermal loads.

- SLS (Eng. Selective Laser Sintering). This is the sintering of a powder in a container under the targeted action of a laser beam.
- MJM (from the English. Multi Jet Modeling - modeling with many nozzles). Multi-nozzle 3d printer prototyping , applying molten material with multiple inkjet heads, based on the principle of a laser printer.
- LOM (from the English Laminated Object Manufacturing - the production of an object by lamination). Bonding layer by layer of thin films, as is done with lamination. After reaching the desired volume with a laser tool, an object of the desired shape is cut out of the mass.
- SLM (from English Selective Laser Melting - selective laser melting). Selective fusion of metal with a targeted laser beam, resulting in a solid object.
- EBM (from the English Electron Beam Melting - electron beam melting). Creation of a product from a powder that is melted by a directed electron beam.
- STL (from English stereolithography - stereolithography).
 Purposeful formation of a solid object by a laser beam directed into a container with liquid polymer rubber.
Benefits of 3d printing and prototyping
What are the advantages and benefits for a customer who decides to order a 3D printing with a printer?
Before launching a new product into mass production, an enterprise can purchase a prototype, test it, make changes to avoid errors in the design development of the product, and reduce the cost of production.
If a private or public enterprise needs to produce a small batch of products, it is more profitable for him to apply for a small-scale prototyping service than to carry out design and engineering development and testing of prototypes, reconfigure production, use labor resources and equipment. Printing on a 3D printer at affordable prices will save businesses a significant amount, reduce production costs.
The desired samples can be obtained in a short period, regardless of the degree of complexity of the object being created. Typically, the prototyping process lasts from one to ten days, depending on the specifics of the chosen manufacturing method. You can place an order for 3D printing at Pro Plast-NN LLC - we will answer your questions, calculate the cost, conclude an agreement and print products in a short time.
The cost of 3d printing with the printer is low, which allows customers to reduce their own costs for design development, testing and sample production. LLC "Pro Plast-NN" makes high-quality 3D printing - the price is calculated by managers individually, depending on the volume, complexity of the work, the chosen manufacturing method and the material from which the sample is printed.
The cost of prototyping and creating 3d models
Answer to question how much it costs to print on a 3d printer depends primarily on the number of ordered products, the material from which the product is made, the size of the object, and the technology of its manufacture.