Sketchup for 3d printing tutorial
3D Printing a Model | SketchUp Help
SketchUp
Before you print a model on a 3D printer, you need to make sure your 3D printer can understand your model data. Here’s a quick overview of how to set up your SketchUp model for 3D printing:
- Orient your model so that the 3D printer has a base on which to build your model. Your 3D printer prints your model one layer at a time. If your model juts out at the top, the 3D printer has nothing to build upon. For example, if you want to 3D-print a gear, rather than orient the gear vertically, place the gear on its side, as shown in the following figure.
- Make sure your model is a solid group. With your group or component selected, choose Window > Entity Info. If your model is a solid group, the Entity Info window tells you so in the upper left, also shown in the following figure. If your group or component isn’t solid, download and install the Solid Inspector 2 extension created by Thomas Thomassen and available via the Extension Warehouse.
(In SketchUp, select Window > Extension Warehouse, search for the extension, and click the red Install button.) This extension helps you analyze why your model isn’t solid and repair and holes or issues. For example, if your model contains internal geometry, then your model is not a solid.
- Check that the fronts of faces point outward. (And thus, the backs of faces need to face inward.) Technically, making sure all your faces are oriented the correct way is called checking the normals. To check that the face fronts point outward in SketchUp, select View > Face Style > Monochrome to see whether the back sides of a any faces point outward. By default, the face fronts are white and face backs are dark gray. To reverse a face, context-click it and select Reverse Faces. If you use Solid Inspector 2, the extension can find and fix the reversed faces for you.
- Your model needs to have a volume.
 For example, if you want to print a box that’s hollow in the middle, the faces along the outside of the box need to have a thickness, as shown in the following figure.
After you check that your model is ready to be 3D printed, you need to output your model to a format your 3D printer understands, also known as the STL format. To export your model as an STL file, see Importing and Exporting STL Files for 3D Printing
Note: As 3D printing technology improves, SketchUp users are sharing new tips and tricks for great 3D-printed models all the time. To connect with other SketchUp users, check out the SketchUp User Forum.
- SketchUp
Feedback
3D Printing with SketchUp: 10 Tricks | 3D Printing Blog
3D Printing with SketchUp: 10 Tips and Tricks
by Fabian | March 30, 2017
SketchUp is one of the most popular 3D modeling & design programs for 3D printing, as we found out from our analysis. However, preparing a SketchUp model for 3D printing can be a little tricky. That’s why we put together a list of 10 simple yet effective tips and tricks to make your SketchUp design 3D printable.
Some simple clicks before getting started will make your life easier: you may want to set your SketchUp template to metric or imperial units. This way, you won’t need to re-scale the printing size of your model later.
You can change the template by clicking on Window > Preferences > Template and selecting ‘3D Printing – Millimeters’ or ‘3D Printing – Inches’.
2: Install the SketchUp STL ExtensionTypically you can save your 3D model as a SketchUp file (SKP). Even though our online 3D printing service accepts these files, you might want to get SketchUp’s free STL Extension. The STL file format is the most commonly used in the 3D printing community and will make it easier to share, print, and edit your design in other software.
With the SketchUp STL extension installed you can export your model as an STL file. Make sure to select the same unit type that you chose in your template (millimeters or inches) when exporting, and choose the binary file format to reduce the size of your file.
3: Avoid Paper-Thin Surfaces & Set Wall ThicknessesIn order to make your SketchUp model printable, you need to ensure that each and every surface has a wall thickness. Without setting a wall thickness, a 3D printer has no information about how thick or how thin it is supposed to print your part.
The picture below shows a model with paper-thin surfaces (not printable, left) and a solid object with thick walls (printable, right). If you want to learn more about how thick your walls need to be exactly, make sure to read this blog post.
4: Make Your Model Watertight (Manifold)A printable model must not feature any holes in its surface. Ask yourself the question: if I were to put water inside my model, would it flow out? If that’s the case you need to find these holes and close them. This is one of the trickiest parts of creating 3D printable models in SketchUp.
The design below is an example of a model that is not watertight. You can clearly see that there is one big hole on its surface.
Once this hole is closed (for example by drawing new lines), SketchUp recognizes that the object is solid on the inside and ready for the printer! You can see such a watertight (also referred to as manifold) object below.
5: Avoid Internal OverlappingIntersections and walls within your design can make your life difficult since your model needs to have one continuous ‘outer shell’. That’s why it makes sense to think about your model in a 2-dimensional space first.
In the case below, the left shape will not be printable once it is pulled into a 3-dimensional object since it will feature paper-thin walls within the object. The shape on the right, however, won’t be a problem to print once it is pulled into a 3D object because it will only have one ‘shell’.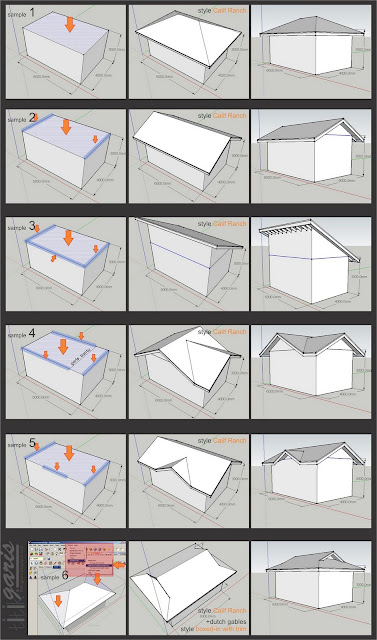 It doesn’t feature paper-thin walls on the inside. We’ll look at an automatic way to create one outer shell later.
Creating watertight models with one continuous outside can be tough sometimes. Luckily SketchUp lets you check if you made any mistakes.
Here’s how it works:
- Triple-click on your model with the select tool (this will select everything).
- Right-click on your object and select ‘Make Group’.
- Right-click on your object again and select ‘Entity Info’.
If you designed an object with holes (not watertight) and internal intersection (not in one shell) the Entity Info window will say ‘Group’. This means that your model is not printable and you’ll have to check it again. Right-click on it and select ‘Explode’ to re-edit the components.
If you designed a watertight model in one shell, the Entity Info window will say ‘Solid Group’ and then you know that your model is ready to be 3D printed (in the next steps we’ll tell you how to fix this).
Looking at your model from the outside means that the inside is a ‘black box’ for you. However, even the inside of your model could feature many modeling mistakes that would make your object unprintable. In the example below, the ‘Entity Info’ window indicates that the object is not solid.
Since it looks solid from the outside, it makes sense to take a look at what’s going on inside. Select a surface (face) you want to hide and select ‘Edit’ > ‘Hide’. And voila: you can find the trouble-making mistake. Alternatively, you can switch into x-ray-mode by clicking on ‘View’ > ‘Face Style’ > ‘X-ray’.
8: Create an ‘Outer Shell’We already pointed out that designs with overlapping objects create problems for 3D printers. The good news: there’s an automated solution for creating one ‘outer shell’ around the overlapping objects, deleting all internal overlapping parts.
To start with, we have these two solid blocks. Each of these blocks was ‘grouped’ separately (Select > Right click > Make Group). We also selected the x-ray view to make things easier.
We then move one block into the other. We now have overlapping areas in the interior of this object.
To get rid of these, we select one block, click on ‘Tools’ and choose ‘Outer Shell’.
The last thing to do is to click on the second block. SketchUp automatically created one solid group out of these blocks. As you can see, the internal overlapping parts are gone. The result is a new solid object that is ready to be 3D printed!
9: Fix Reversed Faces (Inverted Normals)Another problem that can occur is so-called inward-facing or reversed faces. This means that a surface of your model is facing in the wrong direction (typically this means that it is facing the inside of the object instead of the outside). These surfaces are automatically colored in light blue.
To fix this, right-click on the inward-facing surface (face) and select ‘Reverse Faces’. You can see an example of this in the image below (left). On the right, you can see the object how it is supposed to be: all faces point to the outside again.
10: Increase Circle/Arc Segments to Getting Smooth CurvesSketchUp ‘smoothens’ arcs and circles in its visual presentation. Even though circles might look perfectly spherical in SketchUp, they are actually only made of 24 sides. Click on ‘View’ > ‘Hidden Geometry’ to see theses sides. When being printed, this circle might come out quite edged.
When you select the arc or curve tool, SketchUp will show you their default sides in the bottom right corner. You can then enter a higher number to increase the number of sides. Validate your entry by hitting the ‘Enter’ key and then draw your arc or circle.
The image below shows a comparison between the default 24 sides (left) and 150 sides (right).
Sometimes problems are tiny and hard to see with the naked eye. There are SketchUp extensions like the Solid Inspector 2 that find problems automatically and point them out to you. Simply select a group or component and activate the Solid Inspector tool for an analysis of what would prevent it from being a solid manifold.
Another handy extension is CleanUp 3. It allows you to cleans up and optimize your SketchUp model with handy tools like “Erase hidden geometry” and “Erase duplicate faces”.
Also, SketchUp added a cool feature to their 3D Warehouse that was developed by Materialise. When uploading a model to the 3D Warehouse, you can check the “I want this to be 3D printable” button (see video below) to get modeling errors fixed instantly. This tool will make your 3D model watertight and allow you to download it as an STL file. While it might lead to somewhat less accurate results, it’s a very fast way to get a printable file.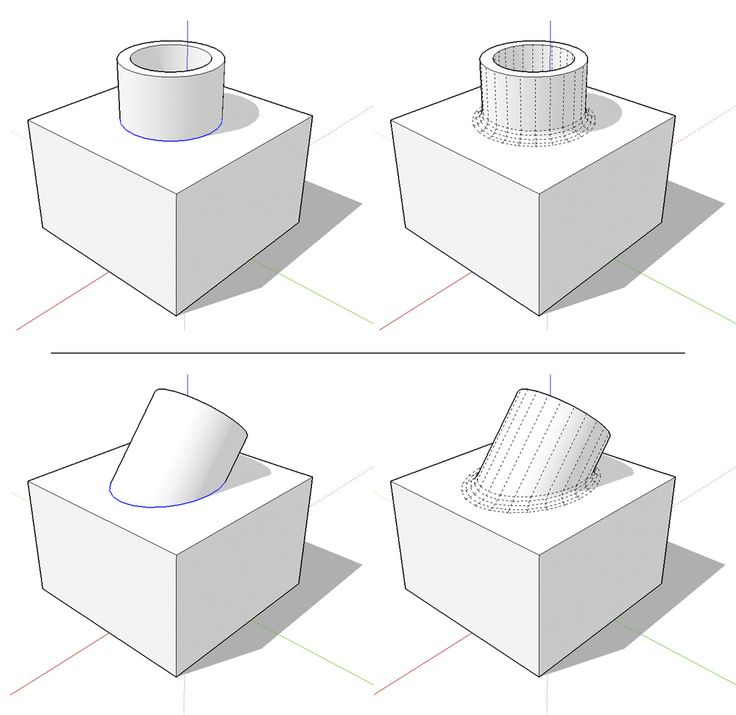 So if you’re searching for an easy-to-use tool that will save you a lot of time and effort (no more searching for file issues, no more exhausting fixing sessions), this is the tool for you.
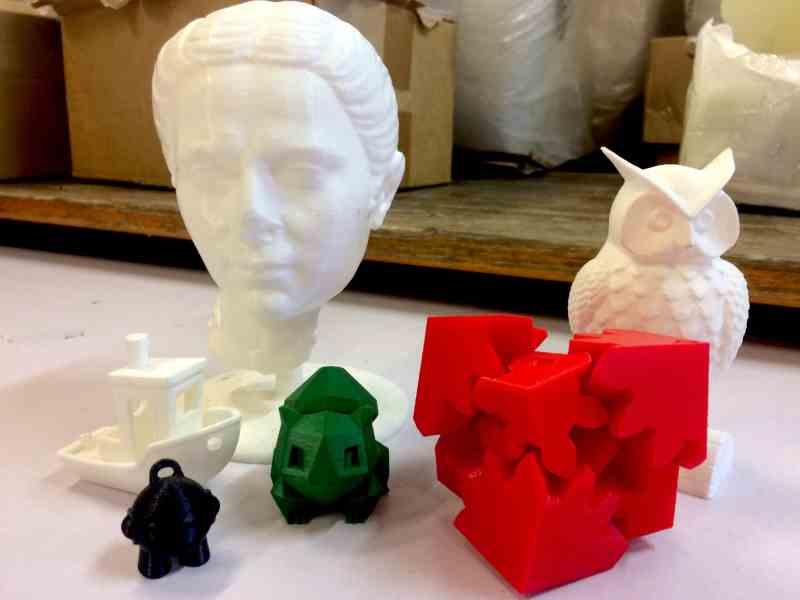
Did you manage to follow our tips and tricks and create a printable SketchUp file? In order to send it to our printers, download the SketchUp 3D print service plugin. Alternatively, you can upload your models here and choose from hundreds of material options.
Get high-quality 3D prints like these with i.materialise’s online 3D printing service.
SketchUp for Schools 2021 - Curriculum - In App
- Filter by Year -201720182019202020212022
Medium
Designing your dream home. Part 1: 2D floor plan modeling
Create your dream home! Part 1 of this series shows you how to model a 2D plan.
- Start simulation
- Video playback
- ⋮
Medium
Design your dream home.
 Part 2: Turning 2D into 3D
 In Part 2, let's turn your 2D floor plan into a 3D house with furniture and decor.
- Start simulation
- Video playback
- ⋮
Advanced
Design your dream home. Part 3: Preparing the Model for Printing
In Part 3, you will prepare your house for printing and then assemble it in real life!
- Start simulation
- Video playback
- ⋮
Beginner
SketchUp Obstacle Course
Navigate in space, create and move geometry - with this lesson you will quickly become a pro in SketchUp!
- Start simulation
- Video playback
- ⋮
Medium
Create your own template
Break down your favorite items into basic shapes and then incorporate them into your template.
- Start simulation
- Video playback
- ⋮
Introduction
Getting Started with SketchUp for Schools
Are you new to SketchUp for Schools? Get the basics you need before learning the SketchUp for Schools tutorials.
- Start simulation
- Video playback
- ⋮
Beginner
3D Modeling for Geometry Class
Learn to model basic shapes and calculate their surface area and volume. Then use SketchUp to check your work!
- Start simulation
- Open in Google Slides
Intermediate
Model
Create the perfect 3D classroom, then get creative and label it in your first, second or third language!
- Start simulation
- Open in Google Slides
Advanced
Playground Design
Learn how to design a unique playground using components as custom building blocks.
- Start simulation
- Open in Google Slides
Beginner level
3D modeling for math lessons
Learn how general math principles apply in the real world.
- Start simulation
- Open in Google Slides
- ⋮
Intermediate
3D maps for geography lessons
Atlas comes to life before your eyes! Create a 3D model of your country and significant local landmarks.
- Start simulation
- Open in Google Slides
- ⋮
Advanced
Visual context for literature lessons
Tell a story in 3D. Learn how to create models for essays based on books you've read using scenes from The Hobbit.
- Start simulation
- Open in Google Slides
- ⋮
Beginner Level
Science Cell Model
Learn how to draw and represent cell membrane and organelles in 3D!
- Start simulation
- Open in Google Slides
Intermediate
Theater Design
Learn how to design a stage using scenes from The Wizard of Oz.
- Start simulation
- Open in Google Slides
Advanced
Building a Workshop Birdhouse
Design and Build: Design a birdhouse in SketchUp and then reproduce your 3D model in real life.
- Start simulation
- Open in Google Slides
Introduction
SketchUp for Schools 3D Printing Guide.
Complete guide to 3D printing in SketchUp for Schools.
- Start simulation
- Open in Google Slides
Introductory
SketchUp Logo
Model a SketchUp staircase logo and learn the basics of building a model for 3D printing.
- Start simulation
- Open in Google Slides
Intermediate
Name tag
Personalize your ordinary backpack with a name tag.
- Start simulation
- Open in Google Slides
Advanced
Custom Lock
Who can make the best 3D lock? Use the basic blanks and all the features of SketchUp to make your own unique castle.
- Start simulation
- Open in Google Slides
Introduction
Introduction to SketchUp for Schools
Are you new to SketchUp for Schools? Get the basics you need before learning the SketchUp for Schools tutorials.
- Start simulation
Entry level
Turtle sandbox
Create 3D shapes, add colors and (most importantly) have fun creating a turtle sandbox.
- Start simulation
- Open in Google Slides
Intermediate
Play Pirate Ship
Create the playground every school wants! Explore SketchUp's drawing tools, material library, and 3D Warehouse as you build your playable pirate ship.
- Start simulation
- Open in Google Slides
Advanced
Mike's Malt Shop
Learn the ins and outs of SketchUp for Schools modeling when you create Mike's Malt Shop. You will become a SketchUp pro in no time!
- Start simulation
- Open in Google Slides
3D Modeling with SKETCHUP
Research Project:
3D Modeling with SKETCHUP
Introduction
It is simply impossible to imagine life without information technology in today's world. They have firmly entered our lives, information technologies are used in all spheres of human life.
I am interested in programs that are used in computers, telephones. I love making cartoons. I am also interested in 3D models, so I decided to study the program for creating a 3D model, to create a model of the Syuyumbike tower.
Project problem: how easy and simple it is to create a 3D model, what program is better to use for this?
The theme of my project is "3D modeling in SKETCHUP".
Purpose of the work: to make a 3D model in the SKETCHUP program.
Tasks:
- collect information from various sources;
- to study the history of 3D modeling and 3D printing;
- consider programs for making 3D models;
- find out the benefits of the SKETCHUP program;
- make a 3D model in the SKETCHUP program;
- draw conclusions on the project.
Hypothesis: I think I can create a 3D model using the SKETCHUP program.
Relevance of the work - every year the use of three-dimensional modeling is widely used in various fields.
The novelty of the project I will learn how to create models in the SKETCHUP program.
The practical significance of the project I will be able to create a three-dimensional model.
Object of study: SKETCHUP program, 3D model.
The following methods were used in the research work:
- Collection and processing of information;
- Survey
- Modeling.
Equipment:
For this I used a netbook, Internet connection, 3D printer.
Project stages.
- Preparatory stage. Identification of the problem.
- Main stage. theoretical stage.
Practical step. Model making.
Self-assessment
- Conclusion
Main stage
1. Theoretical material
- History of 3D model creation.
The first computer programs that generate simple three-dimensional models based on sketches were created in the 1960s at the University of Utah (USA) by Ivan Sutherland and David Evans (Appendix 1).
The premiere of the first film using separate elements of three-dimensional graphics (Futureworld) took place in 1976. The first 3D cartoon "Toy Story" was released at 1995 (Appendix 2).
The first 3D printer was invented by the American Charles Hull in 1986 (Appendix 3)
The most famous and widespread 3D printing method today is layer-by-layer direction (FDM). The idea of technology belongs to Scott Crump, dates back to 1988 (Appendix 4).
Computer three-dimensional modeling in Russia begins with the KOMPAS 5 program in 2000 at the ASCON company (Appendix 5).
1.2. Where 3D modeling is used today.
- Creation of various character models. This is commonly used in the creation of cartoons and computer video games.
- For creating building models.
- For building cars.
- Creation of 3D models of interior items.
- For advertising.
- For jewelry making.
- For making furniture.
- For creating parts in production.
- In medicine. (Three-dimensional graphics are used to visually demonstrate what the result will be.) (Appendix 6)
1.3 Programs for 3D modeling
Programs that allow you to create three-dimensional graphics are very diverse.
Consider some programs (Appendix 7):
- Autodesk 3D Studio Max (for animation)
- Autodesk Maya (for 3D character modeling and animation)
- Maxon Computer Cinema 4D (film and advertising)
- Blender (animation)
- SketchUP (design and architecture)
Fig.1
10
10
10
10
I chose the three -time models from all programs, since it was possible to create three. to use and has a simple interface.
SketchUp is a program for 3D modeling of simple three-dimensional objects - buildings, furniture, interiors. It was acquired by Google in 2006 and sold in 2012. There are two versions of the program - free for non-commercial use, limited in functionality SketchUp Make, and paid SketchUp Pro.
I conducted a survey among classmates and found out that this topic is of interest to many, but it is not very familiar to them. 70% of classmates wrote that they are interested in 3D modeling, but the programs I reviewed are not familiar to them, although I chose the most famous programs for three-dimensional modeling. 80% of students believe that 3D modeling is in demand mainly in industry for design. Only half of the students in my class are familiar with 3D modeling. (Appendix 8).
2. Practical stage
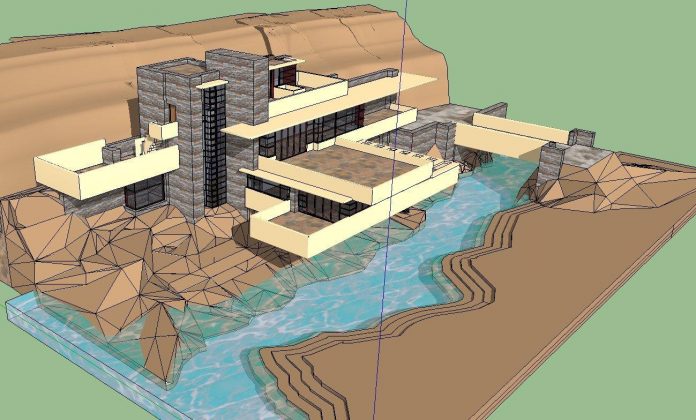
I decided to create a model of the Syuyumbike tower, which is a historical heritage of the Republic of Tatarstan. This observation tower is located on the territory of the Kazan Kremlin. Attached 9 is a photograph.
First I had to install the free version of SketchUp, I chose 2016 because it's easier. After learning the basic steps in SketchUp Make 2016, I was able to create a 3D model of the Syuyumbike tower.
| The tower dome is performed by connecting the tops of the hexagon with a point of | 0
| |
| 10 | Build the windows and the tower of the tower (2) and of the tools to be extended (3) to extend (3) of the tools (3 9000) | |
| 11 | Using the fill command, we paint the Syuyumbike tower
|
|
\
Conclusion: My hypothesis that I will be able to create a three-dimensional model using the SKETCHUP program came true.
Self-assessment
It turned out an interesting model of the Syuyumbike tower, I learned how to create simple models quite well.
Conclusion
We live in an era of new technologies and every year the application of three-dimensional modeling is widely used in various fields. Now IT specialists are most in demand and therefore the work I have done is very relevant.
My design work is called “3D modeling in SKETCHUP”.
During the project work, I got acquainted with the theoretical material, the history of 3D modeling and 3D printing. I found out the areas of application of three-dimensional models and got acquainted with some programs for creating 3D models. My topic turned out to be rather complicated. The Internet and my project manager helped me understand the variety of programs. I chose to study the most convenient program that is used to teach children - SKETCHUP.
By doing this work, I got an idea about the purpose of 3D graphics programs, how to work with them, and if necessary, I can start mastering other similar applications.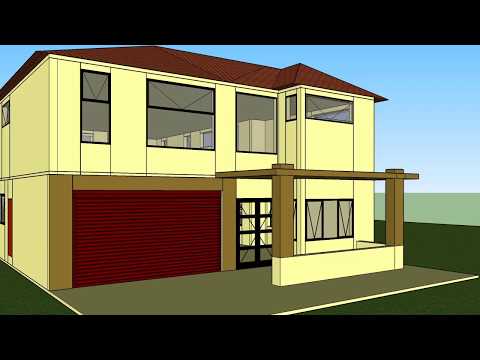 I learned the basics of working with SketchUp Make 2016, and import/export objects between SketchUp Make and Blender, as 3D printing requires the .stl file extension, which is not supported by SketchUp Make 2016.
My hypothesis is that I will be able to create a 3D model using the SKETCHUP program was confirmed, I was able to create a three-dimensional model of the Syuyumbike tower. But I realized that the program has many features and it will take more time to study in more detail. Since our school does not have a 3D printer, I have not yet been able to implement a real model of the tower. But I deepened my knowledge in this direction and I know how it is done.
To match my interests with my classmates, I conducted a survey. The survey showed that many people are interested in this topic, but they are poorly aware of it. 70% of classmates wrote that they were interested in 3D modeling, but the programs I reviewed were not familiar to them, although I chose the most famous programs for three-dimensional modeling.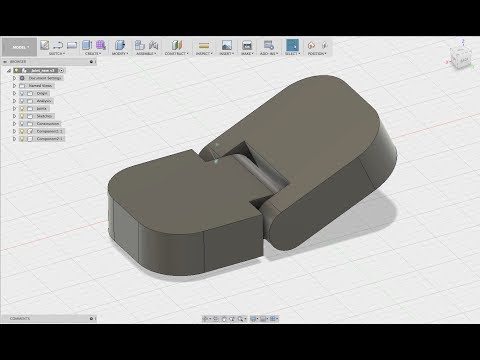 Everyone understands the need for 3D models in modern life. 80% of students believe that 3D modeling is in demand mainly in industry for design. But I think the area of culture and art is no less in demand in 3D models. In the modern world, not only cartoons, but also movies are created using three-dimensional images. And only half of the students in my class are familiar with 3D printing.
I was very interested in working on this project, and I think I achieved my goals and objectives. There was a desire to learn more about three-dimensional modeling.
In the future, I'm going to deepen my theoretical and practical skills in creating three-dimensional models.
Used source
- https://render.ru/ru/articles/post/10046
- http://masters.donntu.org/2009/fema/platonov/library/article3.htm
- https://yandex.ru/images
- https://videozayac.ru/blog/programmy-dlya-3d-modelirovaniya-i-animacii/
- https:/ /ru.
Learn more