Plug and play 3d printers
Buy a plug-and-play 3D printer in USA | 3D printing experts
Creality 3D
CR-200B
Enclosed 3D printer with virtually no assembly required
- Build volume: 200x200x200mm
- Heated bed: Yes
- LCD+SD card: Yes
- Materials: PLA, PETG
- Filament diameter: 1.75mm
$ 288.75
In stock
Compare
FlashForge
Adventurer 3 Wifi
Very feature complete 3D printer with WIFI, network and a camera
- Build volume: 150x150x150mm
- Heated bed: Yes
- LCD+SD card: Yes
- Network: Ethernet and WIFI
- Camera: Yes
$ 329. 50
In stock
Compare
FlashForge
Creator Pro
Dual extruder 3D printer for creative designing and prototyping!
- Build volume: 227x148x150mm
- Extruders: 2
- LCD+SD: Yes
- Filament diameter: 1.75mm
- Auto bed leveling: Yes
$ 500.50
In stock
Compare
FlashForge
Creator Pro 2
Dual extruder 3D printer for creative designing and prototyping!
- 3.
 5” touchscreen
 - Four 3D printing modes
- Spacious build volume
- Anti-scrape dual extruders
- Print a range of filament
$ 575.50
In stock
Compare
FlashForge
Adventurer 4
The 3D printer for material experimentation and high productivity
- HEPA 13 air filter
- 3 nozzle options
- Resume printing
- Magnetic build plate
- Monitor your prints
$ 617. 50
50
In stock
Compare
FlashForge
Inventor
The 3D printer for personal and professional prototyping
- Dual-extrusion
- 3.5” touch screen
- Wi-Fi connectivity
- 240°C nozzles
- Flexible build plate
$ 792.50
In stock
Compare
Creality 3D
CR-5 Pro H
High-temperature version
Impressive plug-and-play high-temperature 3D printer for professional and at-home use.
- High printing temperature of 300°C
- Maximum bed temperature 110°C
- Ultra silent motherboard
- BLTouch auto bed leveling
- Superior master chip
$ 875.75
In stock
Compare
FlashForge
Guider II
Professional 3D printer with a spectacular sized build volume for small production
- Huge build space
- Auto-bed leveling
- Resume 3D printing
- Wireless 3D printing
- Touchscreen display
$ 1,076
In stock
Compare
Zaxe
X3
Innovative compact and enclosed machine for industrial-grade 3D printing
- Heated chamber
- Flexible build plate
- 7” color touch screen
- E3D V6 titanium hot end
- Max.
 temperature of 280°C
$ 2,168.50
In stock
Compare
Zaxe
Z3
Innovative enclosed 3D printer with a large build volume
- Heated chamber
- Flexible build plate
- 7” color touch screen
- E3D V6 titanium hot end
- Printing speed of 300 mm/sec
$ 3,836. 50
50
In stock
Compare
FlashForge
Finder Wifi
Low cost plug and play 3D printer
- Build volume: 140x140x140mm
- Heated bed: No
- LCD+SD card: Yes
- Materials: PLA, PETG, FLEX
- Filament diameter: 1.75mm
- Auto bed leveling: No
Creality 3D
CR-5 Pro
Trustworthy plug-and-print 3D printer, ideal for both personal as professional use
- Print volume: 300x225x380mm
- Warmed bed: Yes
- LCD+SD Card: Yes
- Materials: PLA, PETG, ABS
- Filament diameter: 1.
 75mm
75mm
$ 892.50
Compare
View our selection of plug-and-play 3D printers. We have chosen high-quality 3D printers from the best brands that offer great printing results. With the 3D printers in this selection, you will be able to print right away. There is no assembly or setup required, and this will save time allowing you to focus on 3D printing. This collection of 3D printers is dedicated to all beginners and makers of all levels!
Features of the plug-and-play DIY printer kits
We would like to highlight the different features and attributes of the plug-and-play 3D printers of this assortment. All the 3D printers have their own advantages and unique benefits. Select a 3D printer with the printing temperature and filament material options that you prefer most. This will be based on what kind of properties you would like your 3D objects to have. Be sure to also choose a print volume that will match your printing needs. The build volume is the full space available for the 3D model itself, which will determine the size of the parts that you will be able to create. If you are looking to create more complex prints with a combination of colors or support filament, have a look at the Flashforge Creator Pro 3D printer. Consider if you will find a wifi connection useful and whether you would prefer to have the auto-bed leveling feature. All our plug-and-play 3D printers are enclosed, providing safety and sound reduction. Use the left filter menu to easily select your plug-and-play 3D printer or the compare feature at the bottom of all 3D printers to place all specifications beside one another.
Printing with a plug-and-play 3D printer
Print immediately with the literal plug-and-play 3D printers. From the moment you plug in your 3D printer, you should be able to print models straightaway. Make sure that you will be ready to print as soon as your plug-and-play 3D printer arrives.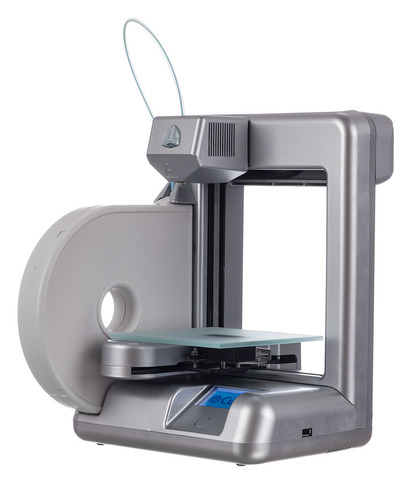 Have your filament material stored and prepared. To ensure a successful print, arrange to have sprays or Kapton tape ready for the foundation and adhesion of the 3D model. We also provide a series of tools to support you along the way. For some more guidance, view the tutorials online where you can perform 3D printing step-by-step with fellow makers.
Plug-and-play 3D printers software
The plug-and-play 3D printers are delivered with software so that you can immediately start printing. The FlashForge 3D printers will come with the software FlashPrint and the Creality 3D printers will have the Creality Slicer Software. FlashPrint is easy to use and is great for both beginners and professional makers. The Crealtiy Slicer offers numerous settings and 3D printing features, however, it will only run on Windows. Both brands’ plug-and-play 3D printers are also compatible with alternative software that can easily be downloaded online.
Would you like to have more information about plug-and-play 3D printers? Feel free to reach out to our customer service, we are happy to be of assistance!
Ten 3D Printers that are Near Click-and-Print-Capable Right from the Box
We have coffee makers that can make a cup of joe right out of the box.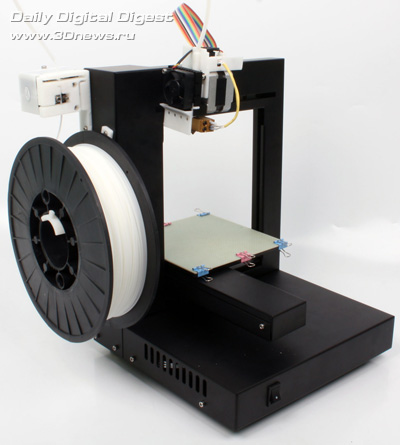 We have smartphones that require little to no setup when bought new. We have printers that are plug-and-play, needing only a simple driver install before churning out print after print. So, why is it so tough to get 3D printers to do the same—function right out of the box with little to no setup beyond connecting to your device of choice and simply uploading your CAD model?
Granted, many variables differ for each print—size, resolution dynamics, and choice of material all come into play for each print. However, there should be a standard when it comes to plug-and-play for these machines. Auto-find my file type and just print the object using the CAD data therein…is that so difficult? Can we not have a civilization? Certainly, technology has come a long way to be able to handle such a feat, and in this roundup, we’ll look at ten 3D printers that come close to the notion of “click-and-print” with minimal setup.
TierTime Upbox+ $1,899 (Courtesy of TierTime)
Metal frame? Check. Enclosed casing? Check. Heat print bed? Check. All three of those features make for a decent 3D printer, allowing for a more consistent print, and TierTime’s Upbox has them and more. It comes with a closed plastic casing, a modularized melted-extrusion-modeling (MEM) print head and has a build volume of 10 × 8 × 8 in. As far as filaments go, it can take advantage of ABS, ABS+, and PLA, but will support others in the near future.
On the software side, the Upbox uses Up Studio, which is straightforward and supports STL and UP3, although others can be converted using third-party platforms. Setup is easy as well by connecting to your PC, Mac, or iOS device via USB or Wi-Fi.
Once the initial setup routine is complete, you can then upload your 3D file, manipulate the parameters needed (if required), and the Upbox does the rest. While it isn’t a simple plug-and-play machine, it does come pretty close, and with the myriad of features that come packed with it (blackout recovery, filament run-out recovery, HEPA filter, and more), it’s hard to pass this one up.
If you work for a company that needs a 3D printer or wants to try one, get this first. Printing parts in ABS will change how you prototype forever.
MakerGear M2 $1,825 (Courtesy of MakerGear)
The MakerGear M2 is similar to the Upbox in that it features a metal frame, heated print bed (110°C and up), and a build area of 8 × 8 × 10 in. However, it doesn’t have an enclosed case (although you could build your own) and comes with no software. Although they do recommend Simplify3D, you can use the modeling platform of your choice, such as Slic3er, Simplify3D, Blender, or SketchUp. Beyond the specs mentioned above, the M2 features 4-point leveling, single/dual extruder, and aluminum construction.
As far as filaments go, it can handle PLA, ABS, PET, HIPS, Poly and metal, wood, and carbon-fiber composites. When it comes to simplicity of use, MakerGear states, “open box, follow instructions, and beautiful prints will soon follow.” The M2 is probably the only 3D printer on this list that manages to get as close to plug-and-play or set-and-forget as possible—connect via USB (or use SD card), run initial setup, and upload your 3D model.
This is the printer used at my shop, to be honest. After much deliberation and searching models, this printer was found to produce amazing results… if everything is set just right. The metal frame was the first requirement, coming off of a plastic unibody printer I had before it. Since getting the MakerGear M2, an enclosure was built for it, one of those Ikea end-table mod enclosures. It consists of two end tables stacked on top of each other. The software driving it is Simplify3D. So far, the results are the best I have seen outside a quarter-million-dollar Objet printer.
TEVO Tarantula I3 $237 and up (Courtesy of TEVO 3D Technologies)
The bare minimum is the phrase that best describes TEVO’s Tarantula I3 3D printer. This machine comes as a kit, and it’s a great platform for beginners (or even experts for that matter) as a starter printer for its ease of use and ultra-low cost.
Ease of use and low cost don’t make a great 3D printer by no means, nope. It must meet the criteria stated previously, and it does—it comes with a solid metal frame and heated bed with self-leveling capability, but it doesn’t have an enclosure, thereby negating consistent heat and allowing for ambient airflow (bad for repeated print consistency). That doesn’t mean it’s not worth of building your own.
Regardless of that drawback, the Tarantula I3 features (depending on the additional extras) an 8- × 8- × 8-in. build area, dual-color metal extruder, and can take advantage of ABS, PLA, PETG, wood and PVS filaments. It uses a TF card or USB port for connecting to a PC or Mac, and like the MakerGear M2, you can use your software of choice for uploading G-code.
This is another instance where an enclosure built around it is a must. Prepare for a little project before using this printer.
Prusa Research Prusa i3 $699 (Courtesy of Prusa Research)
Like the Tarantula, the Prusa i3 is based on the RepRap Project to produce a low-cost 3D printer that can make its own components. As such, this machine also comes in kit form. However the design is a little more refined than the Tarantula, and includes an aluminum frame, heated bed with auto-leveling, and integrated LCD and SD card controller. Nope, no case with this one as well; however, with most open platforms, you can make your own thermal-controlled box to keep things consistent.
The Prusa i3 also features an 8- × 8- × 8-in. build area, RepRap-based open-source electronics, and comes with the company’s version of Slic3r to get things up and running. It also runs the entire gamut of filaments, ranging from ABS, PLA, and PET to NinjaFlex, nylon, and bamboofill—all of which pass through an E3D V6 extruder.
Makerbot Replicator+ $2,499 (Courtesy of Makerbot)
Makerbot is known for its quality 3D printers, and the Replicator+ is a testament to that reputation, considering it has been around forever. Surprisingly, this 3D printer meets only two of the desirable qualities wanted for great prints: A powder-coated metal frame with an ABS case, but there’s no heated print bed! Instead, the Replicator+ features the company’s bendable Flexible Build Plate with kung-fu grip, which keeps prints from moving and pop off when done.
With that caveat in mind, the machine boasts many good features, and it’s easy to use. The printer comes with a hot-swap Smart Extruder+, which can be replaced quickly if problems arise. It also includes an internal camera that allows you to view your prints remotely to monitor progress, as well as an intuitive LCD display that lets you change settings, view files, and access cloud-based models.
The main feature, though, is its connectivity options, being able to connect over USB, Wi-Fi, Ethernet, and even remotely over the Makerbot app. As for software, it uses Makerbot Print, which lets you easily upload your own 3D models or imported from those taken from the cloud. You can even control a series of Makerbot prints through other connected machines if there’s a need. The only real drawback (besides the heated bed issue) is you’re limited on what filaments can be used, in this case only PLA.
Community is a huge draw for this printer. Their library of 3D models, prints, etc. is hard to ignore.
Ultimaker 3 $3,495-$4,295 (Courtesy of Ultimaker)
If you can afford it, the Ultimaker 3 (standard and extended versions) is an easy-to-use 3D printer that produces consistent quality prints and exceeds the requirements for a solid machine. Solid metal frame, heated glass print bed, and case are all present on this machine. What’s more, it features dual extrusion so that you can print in different colors and with the different filament at the same time.
Like the Replicator+, it features an internal camera for monitoring prints and has swappable print heads. It also features active leveling, which alters the bed automatically, depending on the job. Build volume measures-out at 8.5 × 8.5 × 7.8 in. (for the standard version), and it uses all standard filaments—ABS, PLA, PVA, Nylon, and CPE. What’s interesting is that the 3D printer utilizes NFC tags that read what the filament is when installed, and then adjusts the settings accordingly.
Connection options include USB and Wi-Fi and files can be uploaded with a flash drive. On the software end, the Ultimaker 3 uses the company’s version of Cura to get prints optimized and ready for manufacturing, utilizing both basic and advanced settings. Turn on, connect, and print; it doesn’t get any easier than this.
Flashforge Creator Pro $899 (Courtesy of Flashforge)
It’s not the cheapest or most expensive 3D printer on the market, but the Flashforge Creator Pro is easy to use and built like a tank, making it perfect for this roundup. Beyond its solid steel frame, heated aluminum auto-leveling print bed, and PVC case are a dual extruder print head, an 8.9- × 5.9- × 5.7-in. build area and front-mounted LCD display for changing settings.
ABS, PLA, Nylon, composites (metal and wood), and dissolvable filaments can all be used with the Creator Pro. The company states that the extruders can be modified to handle flexible materials if they decide to release them in the near future. For software, Flashforge ships this with an SD card pre-loaded with the ReplicatorG open-source platform, which is easy to use, even for beginners. The card also contains the manual as well as design ideas if you get stuck on what to print.
XYZprinting da Vinci 1.0 Pro $699 (Courtesy of XYZprinting)
XYZprinting also offers a sturdy 3D printer with its da Vinci 1. 0 Pro and comes complete with solid metal frame, heated bed, and plastic enclosure. What makes this printer different from the others is that it has a unique calibration system that’s adjusted using knobs and onboard software that guides you using the printer’s LCD display.
Like some of the other models mentioned previously, the printer utilizes Wi-Fi, USB, and a mobile app to upload models as well as accessing other cloud-based designs. While you can only use either ABS or PLA filament, you are not restricted to the in-house material. That means you can use your filament of choice regardless of manufacturer.
Another interesting feature of the da Vinci 1.0 Pro is that you can swap out the print head with a laser engraver for etching designs on almost anything, including wood, leather, and cardboard. XYZware rolls the software show and is easy to use to manipulate models, although you can simply upload an STL file and hit print.
Qidi Technology X-One $499 (Courtesy of Qidi Technology)
There’s nothing overtly exceptional to Qidi Technology’s X-One 3D printer; it’s not going to win an award for being flashy as simplicity is the name of the game here.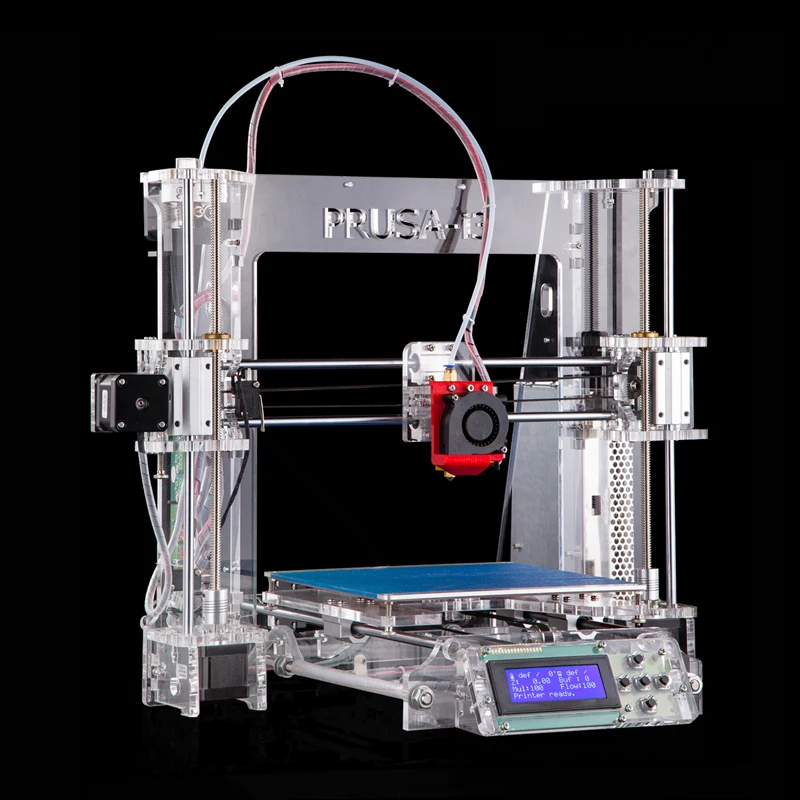 It is solidly built, though, with an all-metal design, and uses the same FDM manufacturing method like most other entries in this list. Beyond its construction, it was designed more as a child-friendly teaching tool and features a single fan-cooled extruder, able to print objects from 100 to 500 microns with a volume up to 5.5 × 5.5 × 5.5 in.
PLA and ABS are the only options here for filament choices, but as a learning tool, that’s all you really need. Like some of the other 3D printers here, it features an intuitive touchscreen for adjusting settings—resolution, temperature, material, etc. It is also pretty limited regarding connecting options, which include USB and SD card only with no Wi-Fi support.
The SD card comes pre-loaded with Cura, but others can be used depending on your preferred platform. While X-One may seem underwhelming on all fronts, it is really well constructed and a great option for those looking for a “set it and forget it” option.
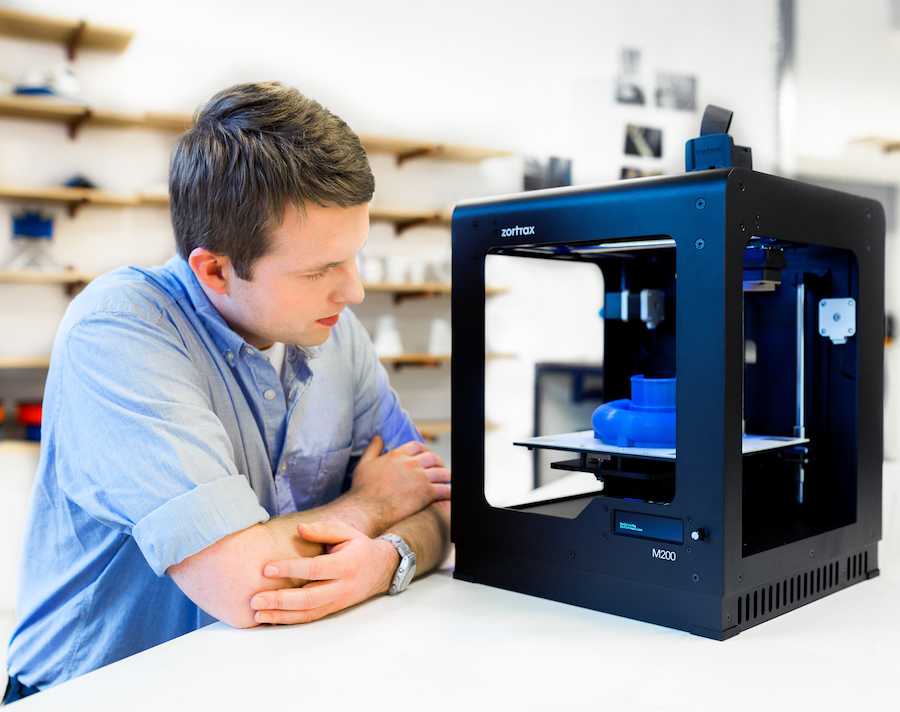
Zortrax M200 $1,800 (Courtesy of Zortrax)
The last entry in this roundup was voted best plug-and-play 3D printer by 3D Hubs last year in 2016, and for good reason. Zortrax’s M200 has a great build quality with a full-metal frame encased in an all-aluminum housing, providing great stability while printing. Good looks aside, it features a perforated heated, auto-leveling bed with a build area of 8 × 8 × 7.2 in.
While it only uses a single direct-feed extruder, it makes up for it with a detailed resolution of up to 400 microns, providing a high level of detail to any print. Like most of the others, this 3D printer can either tether to your PC or Mac via USB or access files from an SD card. Sadly, there is no Wi-Fi option, but no printer is perfect.
It does feature a small LED screen for navigating settings as well as a myriad of filament options, including ABS, PLA, Nylon, and many others. Zortrax’s Z-Suite software is easy to use and offers settings for beginner to advanced users, or you can simply upload an STL, OBJ, DXF, or 3MF file and hit print, then walk away.
Conclusion
There are a ton of 3D printers on the market that will cover just about any project aspect you have—some with high resolutions, others capable of using nearly any material, and still more offering a myriad of connection options and easy-to-use software packages. When it comes to plug-and-play or “set it and forget it” options, the list dwindles down. Still, they can be found, and at nearly every price-point. However, there really should be “standards” across all of them that makes them as easy to use as a PC-connected laser printer. Onward, to a 3D printer-in-every-garage world.
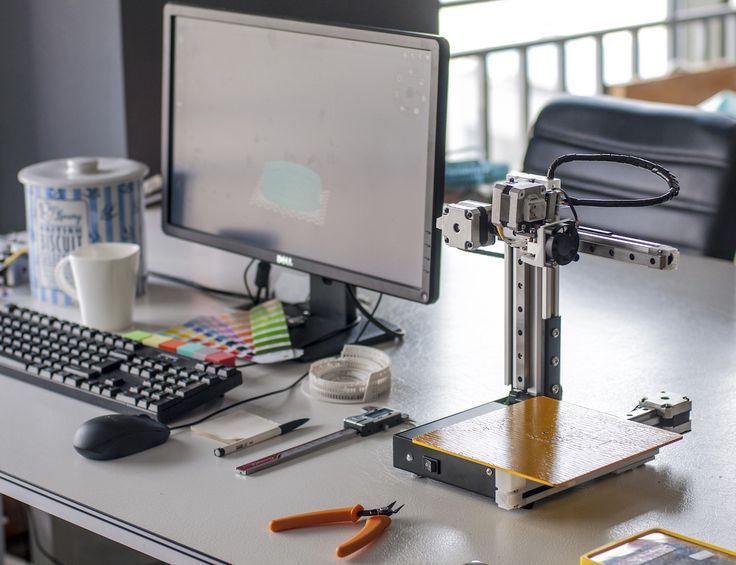
How a 3D printer works, what can be printed on a 3D printer
The 3D printer is a technology that allows you to create real objects from a digital model. It all started in the 80s under the name "rapid prototyping", which was the goal of the technology: to create a prototype faster and cheaper. A lot has changed since then, and today 3D printers allow you to create anything you can imagine.
Contents:
- What is 3D printing?
- How does a 3D printer work?
- What can be printed?
The 3D printer allows you to create objects that are almost identical to their virtual models. That is why the scope of these technologies is so wide.
What is 3D printing?
3D printing is an additive manufacturing process because, unlike traditional subtractive manufacturing, 3D printing does not remove material, but adds it, layer by layer—that is, it builds or grows.
- In the first step of printing, the data from the drawing or 3D model is read by the printer.
- Next is the sequential overlay of layers.
- These layers, consisting of sheet material, liquid or powder, are combined with each other, turning into the final form.
With limited production of parts, 3D printing will be faster and cheaper. The world of 3D printing does not stand still and therefore there are more and more different technologies competing with each other on the market. The difference lies in the printing process itself. Some technologies create layers by softening or melting the material, then they provide layer-by-layer application of this same material. Other technologies involve the use of liquid materials, which acquire a solid form in the process under the influence of various factors.
In order to print something , you first need a 3D model of the object, which you can create in a 3D modeling program (CAD - Computer Aided Design), or use a 3D scanner to scan the object you want print. There are also easier options, such as looking for models on the internet that have been created and made available to other people.
Once your design is ready, all you need to do is import it into the Slicer, a program that converts the model into codes and instructions for a 3D printer, most of the programs are open source and free. The slicer will convert your project into a gcode file ready to be printed as a physical object. Simply save the file to the included SD card and insert it into your 3D printer and hit print.
The whole process can take several hours and sometimes several days.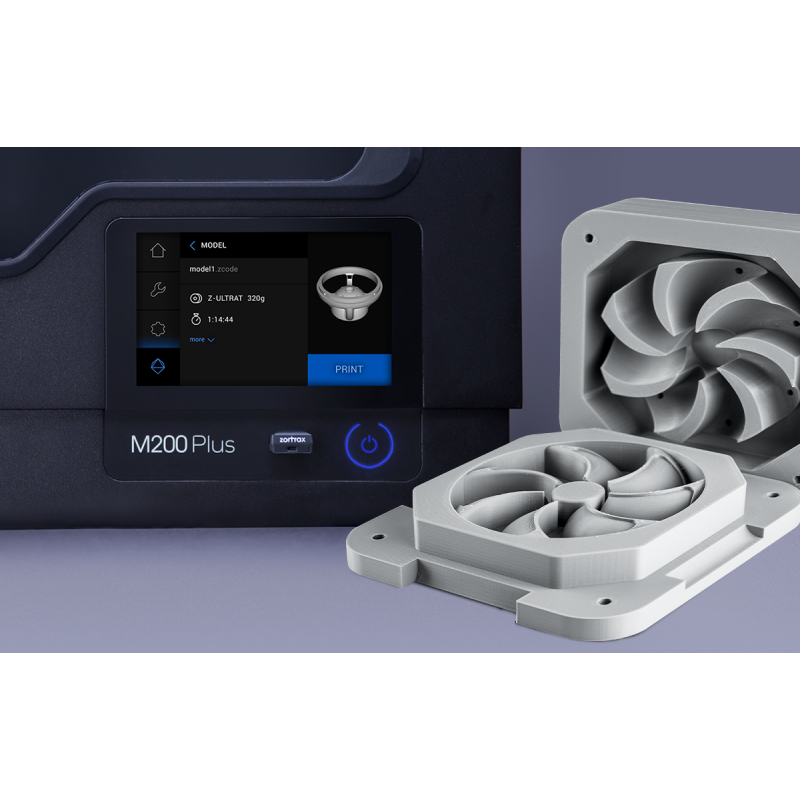 It all depends on the size, material and complexity of the model. Some 3D printers use two different materials. One of them is part of the model itself, the other acts as a prop that supports parts of the model hanging in the air. The second material is subsequently removed.
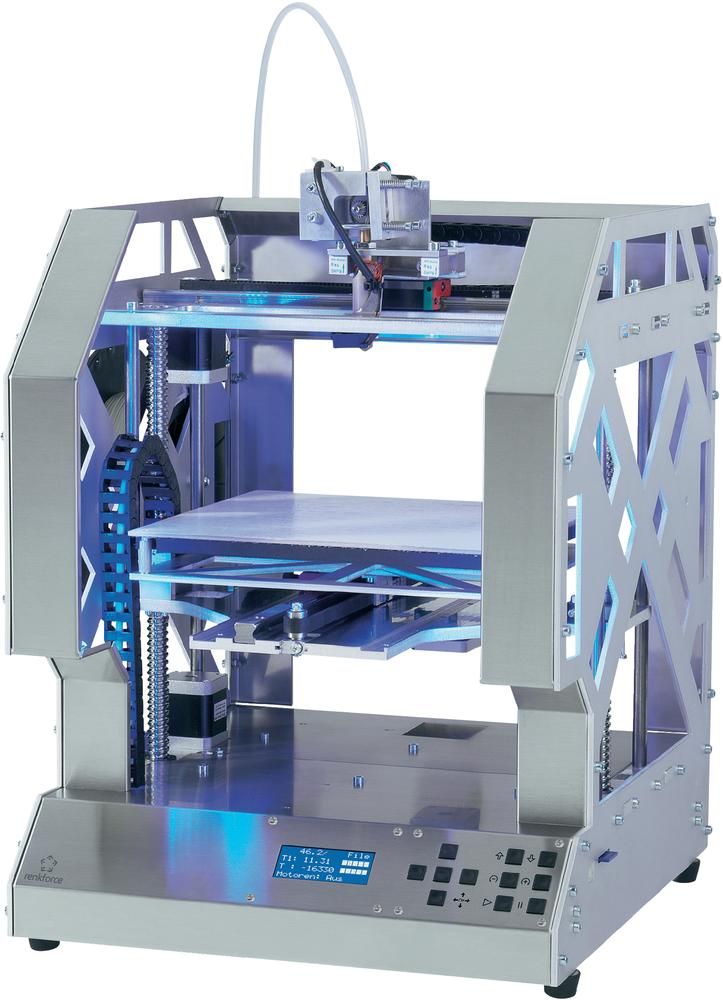
How does a 3D printer work?
Although there are several 3D printing technologies, most create an object by building up many successive thin layers of material. Typically desktop 3D printers use plastic filaments (1) which are fed into the printer by the feeder (2) . The filament melts in the print head (3) which extrudes the material onto the platform (4) creating the object layer by layer. Once the printer starts printing, all you have to do is wait - it's easy.
Of course, as you become an advanced user, playing with the settings and tweaking your printer can lead to even better results.
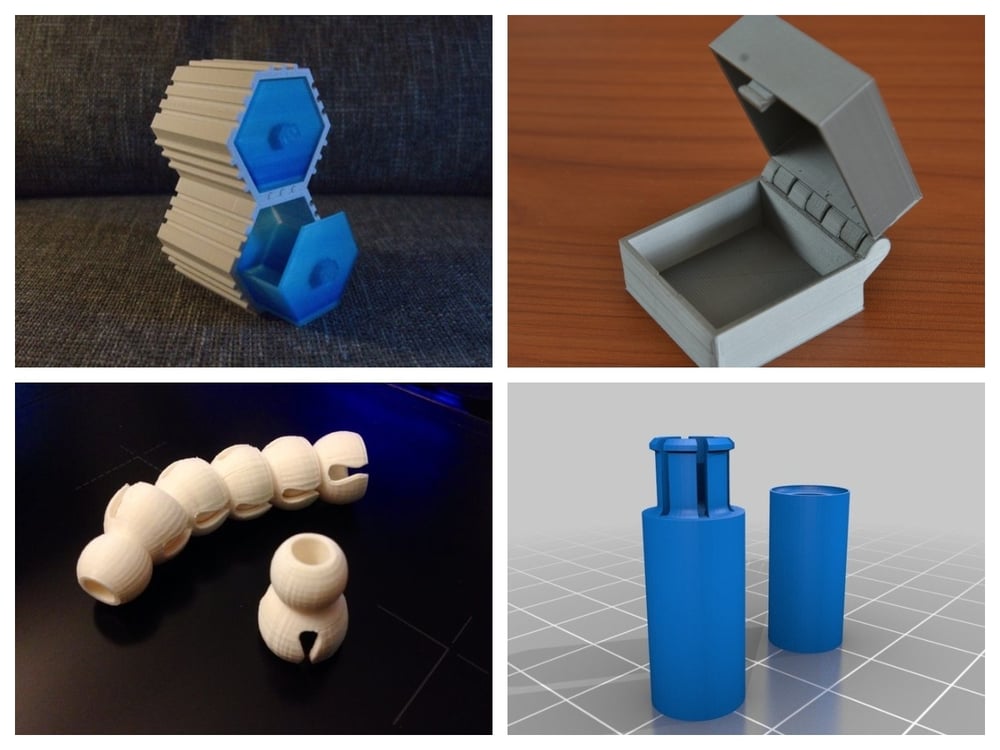
What can be 3D printed?
The possibilities of 3D printers are endless and they are now becoming a common tool in fields such as engineering, industrial design, manufacturing and architecture.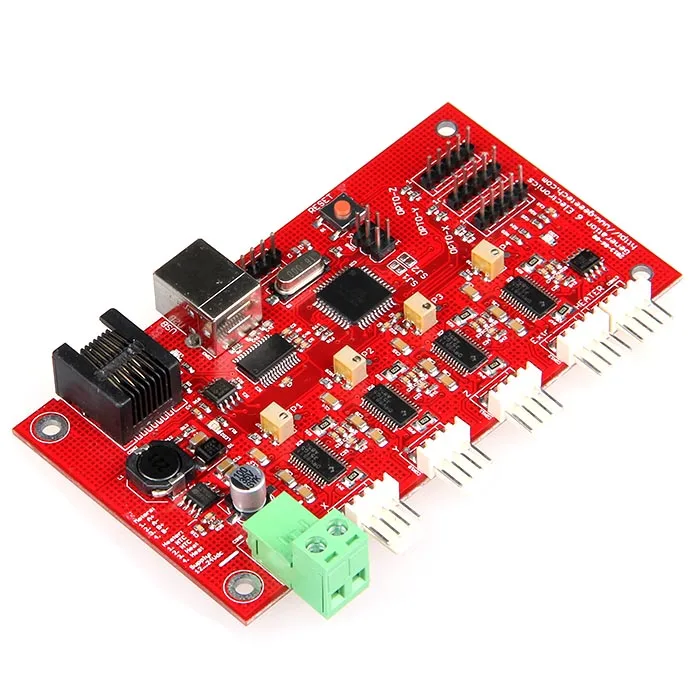 Here are some typical usage examples:
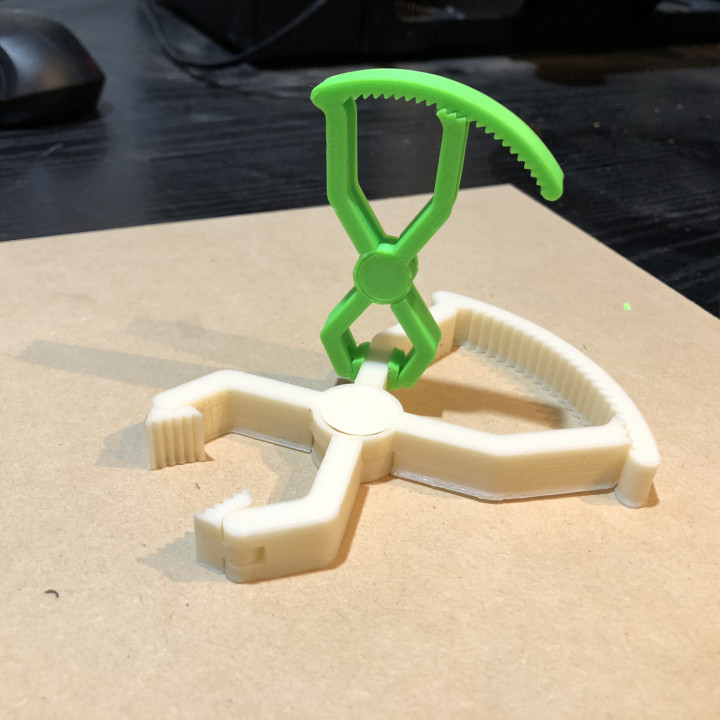
Custom Models
Create custom products that perfectly match your needs in terms of size and shape. Do something that would be impossible with any other technology.
Rapid Prototyping
3D printing allows you to quickly create a model or prototype, helping engineers, designers and companies get feedback on their projects in a short time.
Complex geometry
Models that are hard to imagine can be easily created with a 3D printer. These models are good for teaching others about complex geometry in a fun and useful way.
Cost reduction
The cost of 3D printing end-use parts and prototypes is low due to the materials and technology used. Reduced production time and material consumption as you can print models multiple times using only the material you need.
How to choose and buy a 3D printer? →
instruction how to work from scratch for beginners and dummies, what it looks like
Three-dimensional printing has become increasingly introduced into our daily lives. Thanks to new technologies, it has become possible to easily print from a small detail to a large building. The range of products is also pleasing - today you can find a lineup that includes both affordable devices and more expensive ones. But how to work with a 3D printer? This is a completely normal question that any beginner will have, it is for this reason that we will try to answer it as simply and accessible as possible.
What is a 3D printer and how does it work?
The 3D device consists of the printer itself and a computer that controls all processes. The principle of operation of such a design is to create 3D models by superimposing layers of liquid material. There are a large number of printer models - from large industrial ones to compact ones, but they all have the same principle of operation and component parts:
- Extruder - the print head through which the thread passes. The head heats the thread to a semi-liquid state and evenly supplies the material to the working surface.
- Work surface - a printing platform on which a 3D model is formed.
- Motors - mechanisms responsible for the accuracy of movement and speed of printing.
- Sensors are electronic devices that limit moving parts to specified coordinates.
- The frame is the structure that connects all parts of the printer.
How a 3D printer works: features
Work with the aim of building a three-dimensional model begins with a sketch, which is created in a special program. After that, the software independently generates a plan for the movement of the print head and a print sequence. The 3D model is reproduced by strongly heating the plastic and distributing it evenly.
3D printers are used in many areas. Let's list some of them:
- Architecture - creation of models of buildings.
- Medicine - dental prosthetics, making models of organs for study.
- Construction - production of houses using 3D printing technology.

- Education is a visual aid for learning 3D printing.
- Automotive - creation of tuning parts, prototype layouts and other products.
This is a small list of industries where 3D printing is actively used. Today, almost every entrepreneur and just an enthusiastic person can afford a printer.
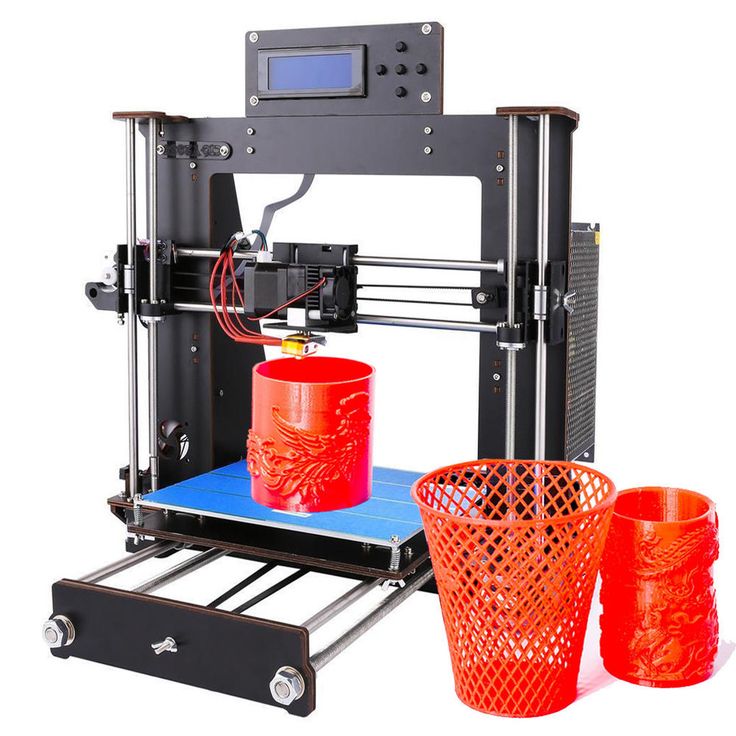
The following printers are distinguished by design features:
- RepRap - self-reproducing printers that can create their own copies.
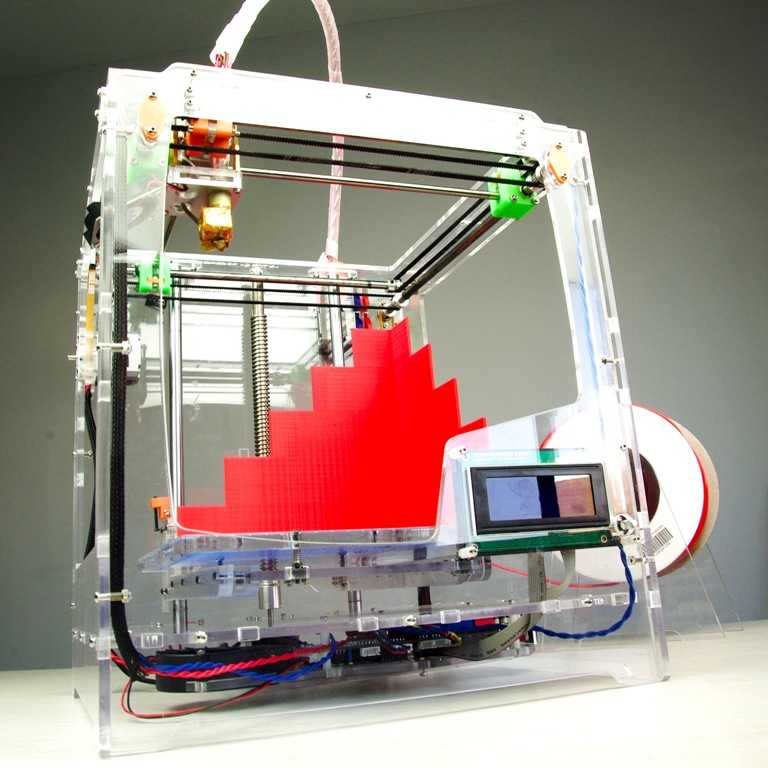
- DIY-kit - the device comes disassembled with instructions, the assembly of which will take a sufficient amount of time.
- Completed - Models are delivered assembled and ready to use.
- Commercial and industrial - devices capable of printing metal, concrete, polymers and other materials.
How to use a 3D printer: tips for beginners, where to start
Mastering the technique of 3D printing is not difficult if you follow the recommendations and tips. Especially for those who plan to learn the basics of 3D modeling, an up-to-date list of questions and detailed answers to them has been prepared.
Printer Installation
To begin, you will need to carefully unpack the box and remove any stops. The next step is to install the printer on the surface using the building level. This will allow you to place the device as evenly as possible, which will provide better printing.
Note. Some 3D printers come with a level for installation.
Next, you will need to connect the printer to your computer and install the necessary drivers. The software disc comes with the 3D device.
Preparation for work
To get started, you need to calibrate the working surface - without this, printing quality products is impossible. This process is carried out automatically or manually. The attached instructions have detailed information on how to perform manual calibration.
Extruder patency test
The next important step is setting up the extruder. First of all, you will need to check its nozzle. If the printer has already been used, the nozzle should be cleaned of solidified particles that will interfere with the throughput of the material. Refueling the 3D printer The thread is fed into the extruder directly from the spool. But there is one caveat - for this you must first warm it up. To thread the thread, you will have to make a small effort in order to loosen the presser mechanism.
Working with models
Models can be created using a variety of 3D modeling programs. The process of manufacturing three-dimensional parts is creative, requiring careful preparation. The better and more detailed the model is drawn, the better the 3D layout will be at the output.
Start printing
After creating the model in the program and preparing the printer for work, you need to send the file for printing and wait for the result. The print speed varies depending on the printer model and specifications, as well as the media used.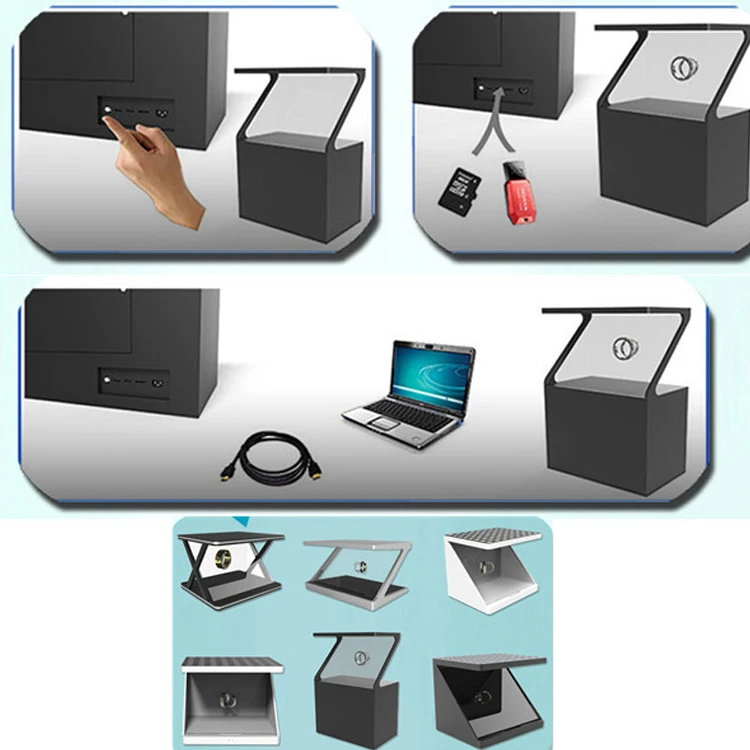
Processing the finished product
3D products obtained from a printer usually do not please the user with an ideal appearance: the parts have an uneven surface. But this is typical for models of 3D printers on FDM, SLA and DLP devices, which are distinguished by higher print quality. Owners of FDM printers should not despair - a simple processing of products will give products an attractive appearance and make the surface smooth.
Several powerful ways to post-process 3D printed parts:
- Mechanical - carried out by sanding the surface with sandpaper or a special sponge for grinding.
- Chemical - surface treatment with aggressive solvents such as acetone and dichloroethane.
- Mixed - In this case, the above two processing methods are used.
What are the possible errors and how to avoid them?
3D printing technology can be mastered even by a beginner, but despite this, the production of the first products causes excitement for the user. Simple operation, detailed instructions and recommendations on the Internet will allow everyone to deal with almost any printer model. But there are a few useful life hacks, the knowledge of which will help you avoid typical beginner mistakes:
- Calibrate and test the 3D printer before starting work.
- Be sure to use the correct file extension for quality printing.
- Do not remove the finished product from the printer immediately after it has been processed: this may damage the part and cause defects.
- If errors occur during the 3D printing process, try restarting the device - this usually helps.
- If restarting the printer still does not help, try changing the settings or re-entering the model.
- When assembling 3D printers, please follow the enclosed instructions carefully.
- Use only the correct materials for your 3D printer.
- Subscribe to useful 3D printing channels and read articles.
Following the tips above will allow you to set up your 3D printer, get it ready to run and, most importantly, print your first 3D products.