Open source dlp 3d printer
Project PAM by ProjectPAM
Welcome to Project PAM.
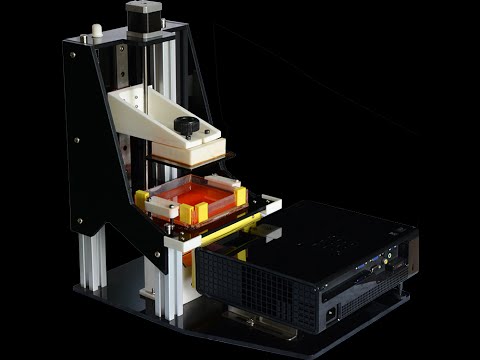
PAM stands for Photoresin Additive Manufacturing. This type of 3D printing gets away from the extruded plastic spaghetti machines that we're all familiar with and instead uses light-curing resins to build your models. This means higher resolutions, fewer moving parts, and faster build times and the only jam to worry about is the kind you eat with peanut butter.
Project PAM is seeking to take DLP 3D printing in a new direction of higher build volumes and lower costs without sacrificing resolution. The goal for this project is to produce a high resolution DLP printer that is fully open sourced using off-the-shelf hardware and that is well documented. All design material can be found in either the Hardware Repo or the Software Repo.
If you would like to donate to Project PAM visit our Indiegogo campaign. Any and all donations would be greatly appreciated.
Why Open Source?
We at Project PAM believe that open source is the future. Open source allows people to freely share ideas and information and concentrate on improving the world around us. We are not driven in any way by money, profit margins; but instead motivated by the desire to better the open source and 3D printing community.
There have been many attempts at an open source DLP 3D printer, yet many of those attempts have patents associated to the design, non-commercial licensing, or do not properly host and share their designs. Our first priority when starting out was to keep everything open-source; this includes both hardware and software. To ensure this, we have followed the Open Source Hardware (OSHW) Definition set by the Open Source Hardware Association (OSHA).
Open Source Hardware (OSHW) Statement of Principles 1.0:
Open source hardware is hardware whose design is made publicly available so that anyone can study, modify, distribute, make, and sell the design or hardware based on that design. The hardware’s source, the design from which it is made, is available in the preferred format for making modifications to it. Ideally, open source hardware uses readily-available components and materials, standard processes, open infrastructure, unrestricted content, and open-source design tools to maximize the ability of individuals to make and use hardware. Open source hardware gives people the freedom to control their technology while sharing knowledge and encouraging commerce through the open exchange of designs.
The licenses Project PAM uses are:
- Hardware: CERN OHL v1.2
- Software: GNU GPL 3.0
- Documentation: CC BY-SA 4.0
Tired of Those Stupid Spaghetti Machines?
Photoresin additive manufacturing printers have many advantages over fused deposition manufacturing (FDM) printers. There are fewer moving parts, faster build times, and no jams. Currently there are DLP 3D printers on the market; however, most have either high cost or small build volumes.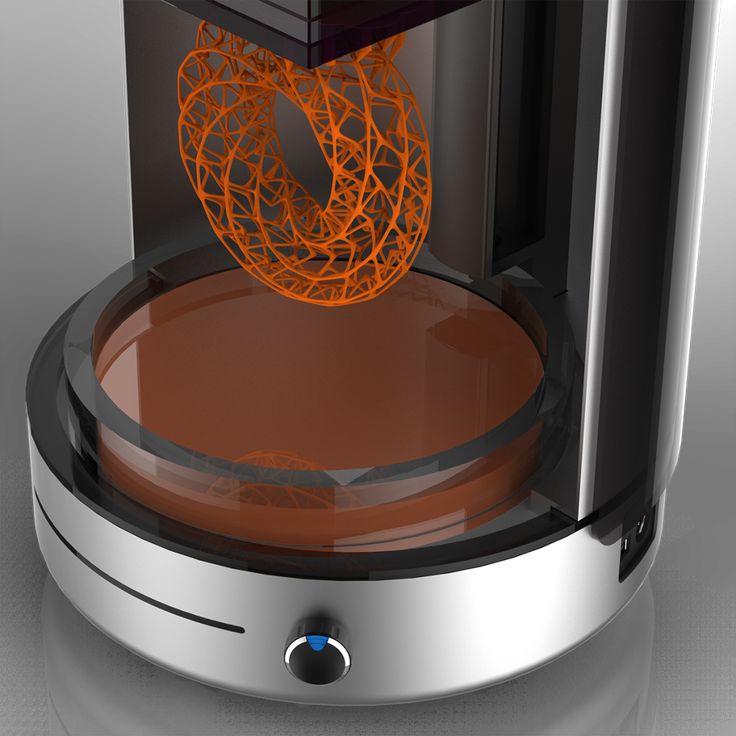 Our design is low cost ($1000) and also features a build volume comparable to leading FDM printers.
How is our design more flexible?
Project PAM has a build volume of just under 9 liters. We are able to accomplish this by supporting dual 1080p projectors; however, the system is designed to be compatible with projectors of any resolution and also a single projector.
We have designed Project PAM to use mostly off-the-shelf parts that can be bought through Adafruit, Amazon, and industrial supply warehouses. An advantage to using off-the-shelf parts is that the design can be easily modified to suit any needs. We have also used the off-the-self mentality when it comes to the resins we use through the use of Maker Juice G+ resin.
The software Project PAM will be using is based off of the software for the B9 Creator. The software will be modified to be compatible with all projectors and resins. Project PAM will be using Grbl firmware, which unlike the software does not need to be modified to increase compatibility.
Releases
First Release Coming Soon!
Who We Are
We are a team of undergraduate engineering students working on a Senior Design Project at Southern Illinois University Carbondale. We have great passion for advancing the open source and 3D printing community.
- Jeffery Burdick (@burdickjp): Mechanical Engineer, Project Manager
- Nathaniel Tyler (@ntyler): Mechanical Engineer
- Chance Baker (@MrBaker452): Electrical Engineer
- Casey Spencer (@cspence182): Electrical Engineer
- Nicholas Lowman (@namwol): Computer Engineer
- Daniel Olsen (@dan-olsen): Computer Engineer
Contact Us
For general correspondence please email us at projectpam. [email protected]
Questions and comments can be posted on our mailing list or you can email them to [email protected]
Please report all bugs and feature requests through GitHub issues either on the Software Repo or the Hardware Repo respectably.
Follow us on GitHub, Twitter, Facebook, Google+, and YouTube.
Introducing Original Prusa SL1 - Open Source SLA 3D Printer by Josef Prusa
I am in the FFF filament based printers industry for quite some time, almost 10 years since I started to play with RepRaps and later joined the project as a core developer. That is more than ⅓ of my life and if I think about it like this I get butterflies in my stomach. Over that time I gained an incredible amount of experience and built a huge team of 320 people working with me in Prusa Research. With this in mind, I got an itch last year: it would be a shame not to use our experience in additional projects. First was the filament. Oh… sorry, Prusament 😉 which we launched just two days ago to an incredible response. Quite frankly, I will have to start looking for second building just for extra filament lines pretty soon. 😀 And today, I will show you our second project that came out of that itch, a new resin-based printer Original Prusa SL1!
To help us with this huge undertaking, earlier this year I acquired a Czech company Futur3D specializing in resin printing – and their exceptional team joined us at Prusa HQ, bringing over 5 years of experience in this field with them, so we can make the SL1 really awesome right from the start. It is also great news for the 3D printing world, because with this acquisition we will be open-sourcing all the designs starting with SL1! Resin 3D printing was always done at premium prices and by big corporations.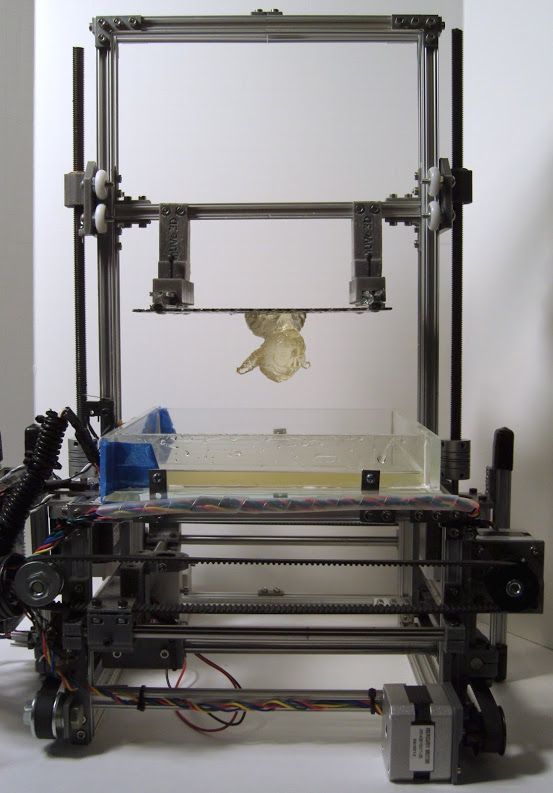 We may not wear suits, but we have an incredible amount of new ideas and we are willing to work our asses off, which is something corporations usually lack.
But before we start talking about SL1, let’s take a brief look at the difference between FFF/FDM and SLA printers. FFF/FDM technology is based on extruding melted thermoplastics – you know them as ‘filaments’. SLA, on the other hand, is based on curing photosensitive resin into thin layers using an LCD screen and a light source. And it can reach the insane layer height of just 0.01 mm! However, the recommended values are between 0.025 and 0.1 mm.
The SL1 isn’t trying to compete with the flimsy Photon or with the ultra-pricey Form but instead I want it to be the MK3 of the resin world – have the best print quality, convenient design and features, ease of use and other things, while keep a price accessible for an everyday hobby maker.
SLA technology explained
There are three main categories of SLA processes: laser-based stereolithography (laser SLA), digital light processing stereolithography (DLP-SLA), and masked SLA (MSLA). For all these processes, a tank of photo-reactive liquid resin is selectively exposed to light in order to form very thin solid layers that stack up to create one solid object. Even though laser-based SLA, DLP-SLA, and MSLA are all types of stereolithography and utilize similar technology, they can produce significantly different outputs.
Original Prusa SL1 uses MSLA, which means that there is an LED array as it’s light source in combination with an LCD photomask to shape the light image. Like with DLP printers, the LCD photomask is digitally displayed and it is composed of square pixels. The pixel size varies based on how the LCD photomask is manufactured, and individual pixels are deactivated on the LCD to allow the LED light to pass through to form the resulting layer. Thus, the XY accuracy is fixed (it’s the physical resolution of the LCD) and it does not depend on how well you can zoom/scale the lens as is the case with DLP. And that’s the reason why MSLA is more accurate.
In the other words, let’s say that the LCD displays layer shapes as transparent images and the rest of the image (beyond the outlines of the layer) is black, so the light passes only through the transparent layer shape 🙂
Original Prusa SL1 Tech Specs
Alright, that was the boring part – now for some cool hardware specifications! The SL1 is using a 5.5’’ high-resolution LCD display with the physical resolution of 2560×1440p, resulting in 0.047mm per pixel, that’s the fixed XY resolution. A high-performance UV light will cure one layer at a time, which takes about 6 seconds and then the printing platform is lifted, so the printer can start creating another layer. This configuration gives us a maximum print area size of 120 × 68 × 150 mm (or 4.7 × 2.6 × 5.9 in.).
By the way, we are using a pretty smart design for the printer: its core is a rigid dural frame with a separate body, which greatly improves stability and reliability.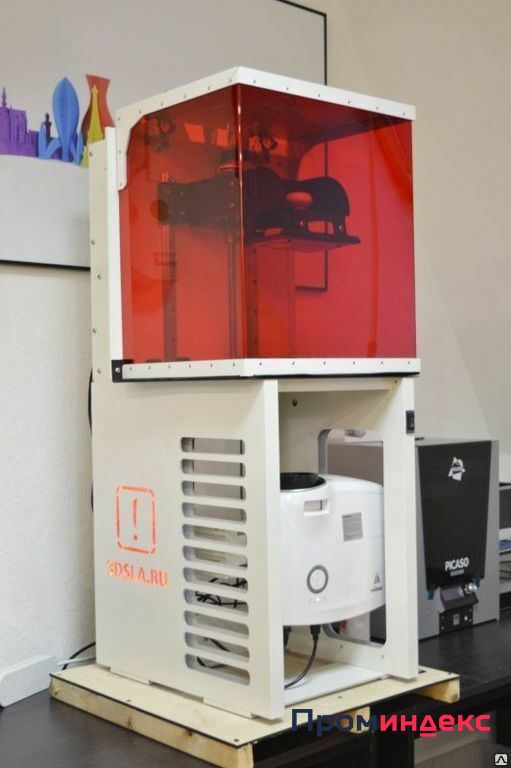 To put it simply, it’s not another wobbly plastic thing. This thing is HEAVY! 🙂
As already mentioned, thanks to Trinamic drivers and rigid dural frame, the SL1 can reach a layer height of just 0.01 mm. But most users should stay within the recommended range of 0.025 – 0.1 mm per layer. And yes, we will also give you the option to enable variable layer height. And rest assured that our printer is open to third-party resins.
Original Prusa i3 MK3 was a major step forward in terms of reliability and ease of use thanks to its many sensors and smart features. I actually said that MK3 is ‘bloody smart’. And SL1 will be no different. You can expect smart features, safety mechanisms, detailed manuals and handbooks, 24/7 live support, perfectly described functions, easy maintenance and cheap spare parts… things that are usually not found in cheap Chinese 3D printers.
Tilt bed and resin level sensor
SL1 features a unique resin level sensor, which is located in the resin bed (also called ‘tank’). It helps you to pour the optimal amount of polymer into the tank and it also notifies you when the resin is running low and needs a refill This prevents the situation when you would run out of resin mid-print. Also, even in case you decide to ignore the sensor and pour too much liquid into the tank, there is a special membrane protecting the electronics, so the insides of your printer will stay safe. This is a pretty unique feature which will save you a lot of prints and makes resin printing sooo much easier!
Speaking of the resin tank, it’s another major feature of this printer. What we have here is a removable tank with a flexible transparent FEP film on the bottom. Right underneath it is the LCD display (cooled to improve its lifetime) and the UV light. So, first of all, the resin tank has a motorized tilt function, which means that after curing a single layer, the print is not lifted vertically from the bottom of the tank. Instead, the tank tilts – This is huge, it drastically improves the surface finish of the models and reduces the stress on the model which is less likely to detach from the base. We can do this thanks to our extremely rigid aluminum build of the printer. If the core would be cheap and flimsy, this would just flex the whole printer frame.
Next, by tilting the tank, we also stir the resin – which has a noticeable impact on print quality. And also, it makes printing faster, allowing us to reach around 6 seconds per layer because with MSLA it doesn’t matter how many objects are placed on the print platform.
Sounds complicated? It’s actually the opposite! FEP material is cheap and we will have spare parts available through our e-shop. In case you scratch or damage the FEP film in any way, the replacement is actually pretty easy – just unscrew a couple of screws, remove the damaged film and insert a new one. It will automatically stretch as you tighten the screws again.
To compare, Form 2 is using resin tanks with silicone instead of FEP and even the resin tank for “high volume” printing “may last 2 liters+” at a price of $99. You have to bin the whole tank after it stops working.
Automatic calibration
We have put a lot of thought into creating a simple and reliable printing platform, that doesn’t need to be calibrated after every print.
Since we have a great experience with the Trinamic drivers in our MK3, we use them here as well. Trinamic drivers ensure silent printing and also enable an automatic calibration. How does it work? The printing platform is connected to the main arm by a ball joint so if you loosen it and start the automatic calibration, the Z-axis will lower the printing platform until it gently hits the bottom of the resin tank. Once it’s there, it’s perfectly level, so just tighten the ball joint and move the platform up. From that moment, the printer is perfectly calibrated and allows you to remove only the printing platform using a quick-release mechanism without affecting the calibration.
Connectivity options and smart functions
We will offer a wide range of connectivity options for the SL1. The whole device is controlled by a full-color LCD touchscreen and the print files can be uploaded via a USB flashdrive. However, there is also LAN and Wi-fi connectivity, which allows us to do some cool things apart from uploading print files – like enabling you to control the printer via a web browser.
Everything is, of course, connected. Which means, that if the resin level sensor detects that you are running out of ‘fuel’, it will send a notification to your phone.
Another function that was inspired by the MK3 is the Power Panic mode. In short: in case of a power outage, the printer can save the last known position of the printing platform and once the power is restored, the machine can continue with the print job.
Vapor extraction
This may be a minor function for some users, but it’s important to mention it nevertheless: SL1 features a sophisticated cooling system and also a vapor extraction system. If you didn’t know, printing with SLA produces various fumes, so that’s also why the printer has a lid. However, a good airflow is also important, so the printer has a fan with a high-quality filter at the back of the machine.
Actually, the part with the fan is removable, so you can e.g. mount a hose onto the printer to push the fumes out of a window.
Slice and dice!
There are many different slicing software solutions out there, some even go as far as being only cloud-based. That’s not our case! Our goal is to deliver an open-source printer, and that’s what we’re going to do! 🙂 We will expand the features of our current Slic3r PE and integrate SLA slicing directly into the existing software.
This brings a number of advantages, one of them is the simple fact that Slic3r PE has an incredible amount of features and new ones are appearing quite often, plus we have big plans how to improve and redesign our Slic3rPE.
Curing and washing machine
And we’re not done yet! There will be an optional accessory for the SL1. Basically, when you print something from resin, it is incredibly messy, because you have to rinse the model with isopropyl alcohol and ideally finish the curing. You can wear gloves and make a mess in your sink and then place the model outside in the sun to finish the curing.
Or better, you can get our 2-in-1 curing and washing machine (or CurWa, if you want ;-). Insert a tank with isopropyl alcohol, put a 3D printed object inside and the magnet-driven propeller will stir the IPA and wash the printed object. It uses standard food prep containers, so you can easily switch them out or replace. Once you remove the tank and place only the printed object inside the machine, it will start curing it with UV light.
BTW we are open for better naming suggestions before the machine goes on sale 😉
Availability and shipping
And that’s it! I hope that you learned everything you wanted to know about our new SLA 3D printer and I hope you like it.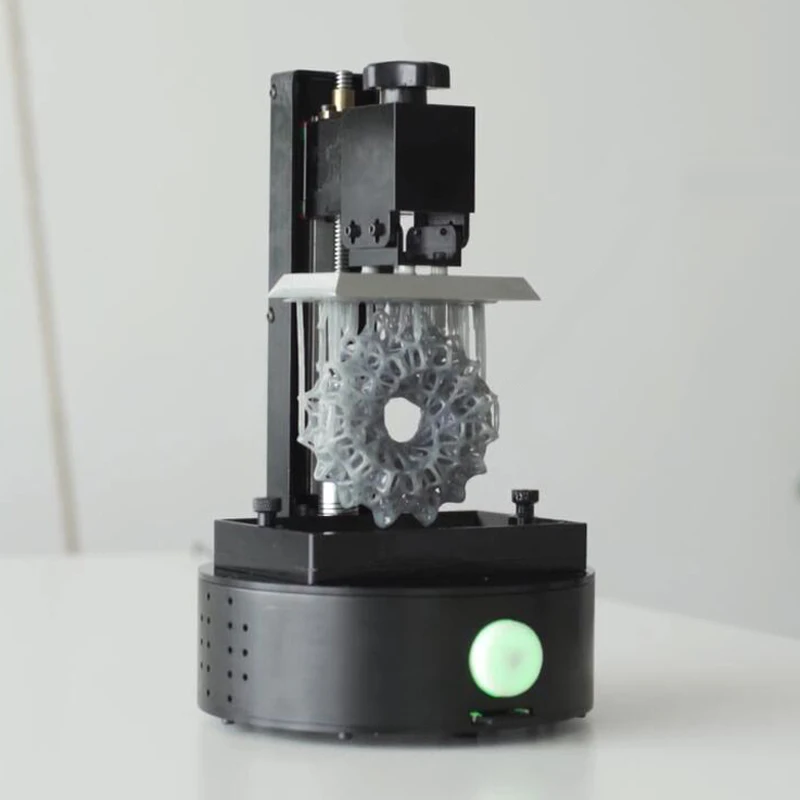 For us, it’s an expansion to a brand new territory and it’s very, very exciting! But I should once again point out that we don’t have to learn things from scratch! The team behind SL1 has over 5 years of experience in resin printer design and manufacturing, so we know what we’re doing! 🙂
We are launching pre-orders right now, and we’re throwing in a special discounted price for early adopters. You can pre-order a pre-assembled SL1 3D printer from our e-shop for 1.599 USD / 1.599 EUR (VAT incl.) and these printers will start shipping in December this year. Another option is to pre-order the kit (assembly required), which is priced at 1.299 USD /1.299 EUR (VAT incl.) and it will start shipping in January 2019. There are also special bundles of both printer variations with Curing and Washing Machine. You will save $200 / 200 € (VAT incl.) when you buy these bundles (assembled printer bundle or kit bundle) instead of buying both items separately.
We will, of course, also start selling resins, spare parts, FEP films, and other accessories later.
If you want to learn more about the SL1, check out the product page, our e-shop or ask us directly via e-mail. And you can also visit our booths at the World Maker Faire in New York (September, 22-23) and TCT Show in Birmingham (September, 25-27) – we have the SL1 with us. 🙂
Happy printing!
Jo Prusa
History of 3D printing | iGo3D.ru
05.10.2022
Although 3D printing is a relatively new technology, its history is deep, varied and interesting - and, of course, continues to develop to this day. Let's take a look at the technology's origins, its growth in popularity and use, and what the future might hold.
The first 3D printers
The 3D printer began in 1981 when Dr. Hideo Kodama invented one of the first rapid prototyping machines that built parts layer by layer using a resin cured by UV light. At 19In 1986, the first patent for stereolithography (SLA) was filed by Chuck Hull, who is considered the "inventor of 3D printing" for creating and commercializing SLA and the .stl format, the most common file type used for 3D printing.
In 1988, Carl Deckard, a student at the University of Texas, licensed selective laser sintering (SLS), another form of 3D printing that uses a laser to sinter powdered material into solid structures. Shortly thereafter, at 19In 89, Scott Crump patented Fused Deposition Modeling (FDM), also known as FFF, and founded Stratasys, one of the major players in the 3D printing industry to this day. That same year, Chuck Hull's company, 3D Systems Corporation, released the SLA-1 3D printer.
The 1990s: The growth of the 3D printing industry
The 1990s saw the rapid growth of the 3D printing industry, the founding of new companies and the exploration of new additive manufacturing technologies. However, it wasn't until 2006 that the first SLS 3D printer became commercially available.
The RepRap Project
The year 2005 marked a milestone for 3D printing technology with the emergence of an open source initiative called the RepRap Project founded by Dr. Adrian Bower.
The original goal of the project was to rethink additive manufacturing, starting with FDM/FFF, as a low cost technology that can replicate itself. The result was the RepRap 3D printer, which has been the inspiration for virtually every successful low-cost 3D printer since then.
The RepRap 3D printer consists of many plastic parts that can be printed by RepRap itself. This means that any RepRap owner can print another 3D printer - hence "self-replicating" - along with other parts, tools or designs.
2000s: Open Source Opens Its Doors
Thanks to open source, which makes 3D printing technology available to virtually every PC user, RepRap has been named "the most significant 3D printed thing" by 3Dprint.com in 2017.
The success of the RepRap project has catalyzed the growth of commercial 3D printers. Many of the patents filed in the 80s for FDM also went into the public domain in 2006. This caused an even greater tide of 3D printer manufacturers to enter the market - one notable example is Makerbot, founded in 2009. Makerbot has been instrumental in bringing 3D printing to the marketplace and has opened doors for both professional users and hobbyists, or "makers". The company sold open-source DIY (do-it-yourself) kits that allowed customers to build their own 3D printers. Its Thingiverse online file repository also hosts hundreds of thousands of free and paid 3D printing files. The site soon became the largest online 3D printing community in the world.
Founding of Ultimaker
Ultimaker grew out of the Protospace FabLab in Utrecht, The Netherlands in 2011. It started as a project of a few friends trying to build a 3D printer that could produce accurate and useful parts without the expense and hassle of large industrial additive machines.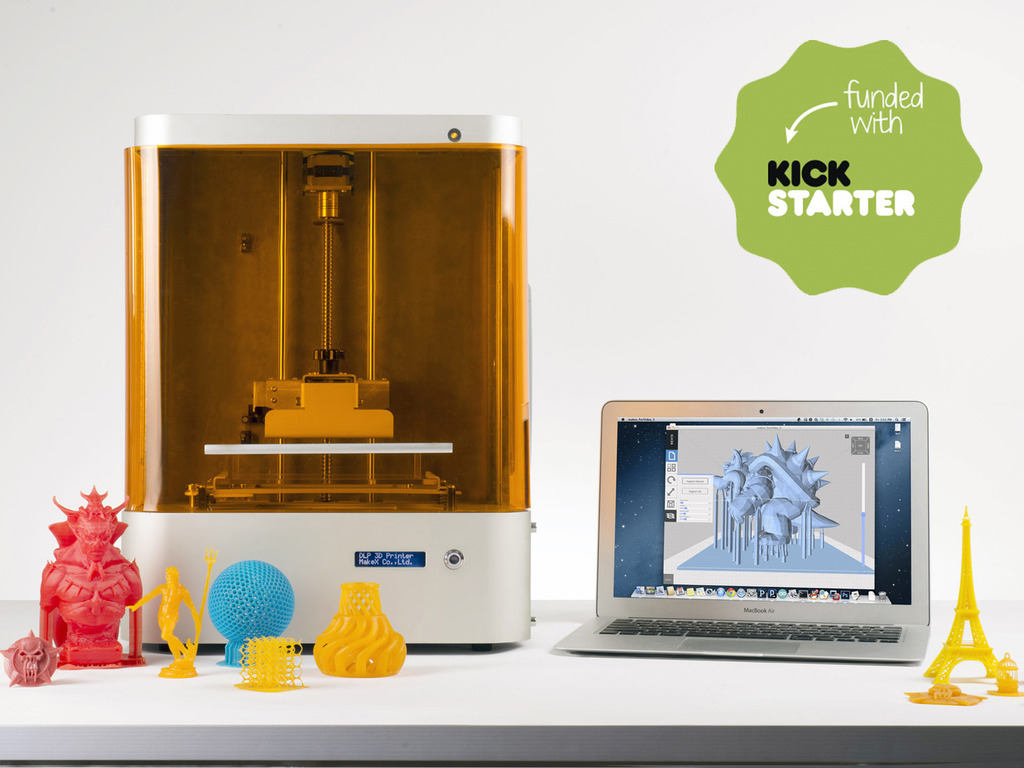
This was inspired by the RepRap project. After spending many evenings building an open source machine that could replicate most of its own components, they had a working 3D printer. But they noticed that it took too long to maintain it in working condition, and began to study design improvements that could make it better. Over time, Ultimaker has evolved from a DIY kit to a complete ecosystem providing hardware, software, and industrial-grade materials.
3D printing today
The industry has changed dramatically since the advent of commercial 3D printers. Now 3D printers are used in industries and sections such as aerospace, architecture, manufacturing, automotive, healthcare, construction and many others.
Examples of modern 3D printing
For example, in 2018, the International Space Station printed the first tool in space using a low-gravity 3D printer. This allowed the astronauts to access the tools needed for maintenance much faster, instead of waiting for them to be brought from Earth.
3D printing technology is also enabling many companies to change the way they work by creating "digital warehouses" of parts and tools that can be printed on demand by both manufacturers and their customers.
State-of-the-art 3D printing materials
In addition, manufacturers can use an ever-growing range of 3D printing materials that allow you to create parts that are resistant to high temperatures and chemicals, flame retardant, ESD safe, and metal , carbon fiber, glass fiber, etc. In 2015, Swedish company Cellink launched "bio-ink" - a seaweed-based material that could be used to print biological tissue - and eventually human organs. This is one of many use cases that 3D printing companies believe could lead to a revolution in various industries. This means that the future of 3D printing has huge potential - a potential that we look forward to realizing.
The future of 3D printing
What exactly the future holds for 3D printing is speculative enough, but adoption of consumer 3D printers is likely to continue to accelerate. It will change the way goods are purchased by providing the means of production, whether it be printing prototypes, tools, or end-use parts. Accelerating the development of technology will also serve to decentralize production in general - preventing problems with the supply chain, reducing transport and delivery costs, and dramatically reducing the time and money spent on acquiring goods.
Materials used in 3D printing will also continue to expand and develop. For example, the growth of metal printing is already opening up opportunities for applications and materials that were previously considered impossible with other traditional production methods. The use of metal in 3D printing could lead organizations to use 3D printers to mass-produce metal parts, making them faster and cheaper than ever before.
Check out the 3D printing success stories on our website to see how companies around the world are using the technology to achieve high-impact results.
Read
Previous article 3D printing to track oxygen levels at home Next article Advanced Prosthetics Made Affordable: How PSYONIC Developed a Bionic Arm Using Additive Manufacturing3D printer software - 3DPrinter
Export Fusion 360 3D model to stl format
Young 3D printer course, software for 3D printersAuthor: Lilia Zinchenko
Modern technologies allow the average user to create objects of any configuration.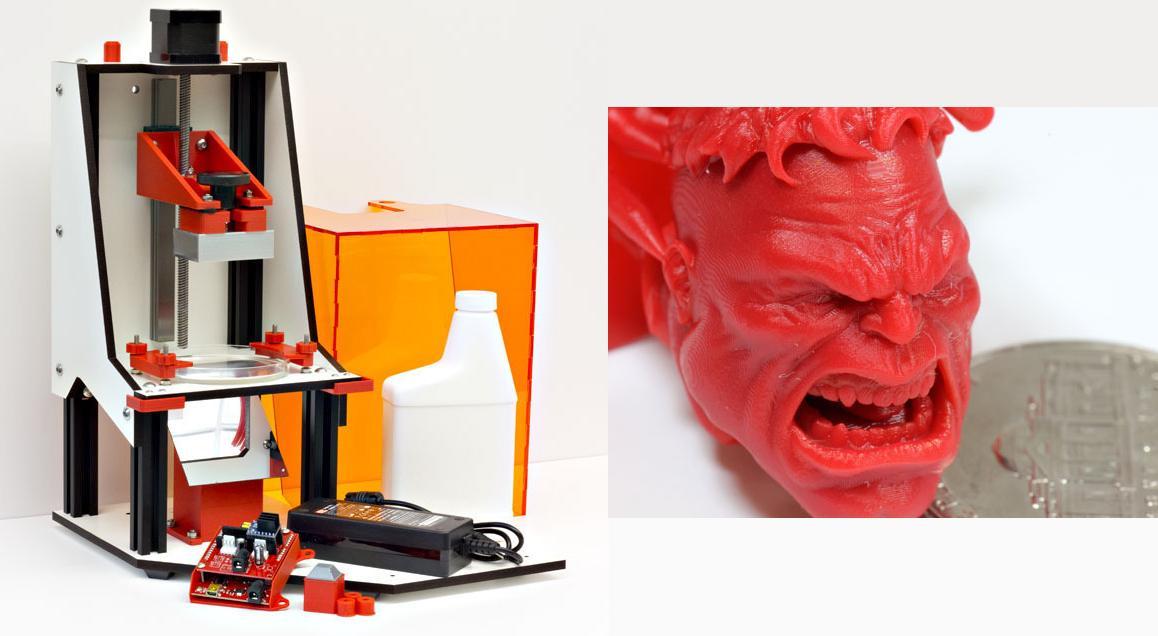 Author's projects, restoration of vintage mechanisms or intricate decor - 10 years ago it seemed like an expensive and long-term adventure. Now it is a reality that is easy to implement with the help of special programs and a 3D printer. Many applications are freely available, and 3D printing on order will save you from ...
Top 10 Best Slicer Software for All Levels
3D Printer SoftwareAuthor: Victoria
Top 10 Best Slicer Software for All Levels What is Slicer Software? A slicer, also called slicing software, acts as an intermediary between the 3D model and the 3D printer. Once you have modeled the object you would like to 3D print, you will receive it in an STL file. The slicer transforms the model into a series of thin layers and creates…
Siemens and Interspectral develop software for visualization of metal additive production
Software for 3D printersAuthor: Victoria an agreement with Interspectral, a Swedish software company, to develop 3D visualization tools for the production of metal additives.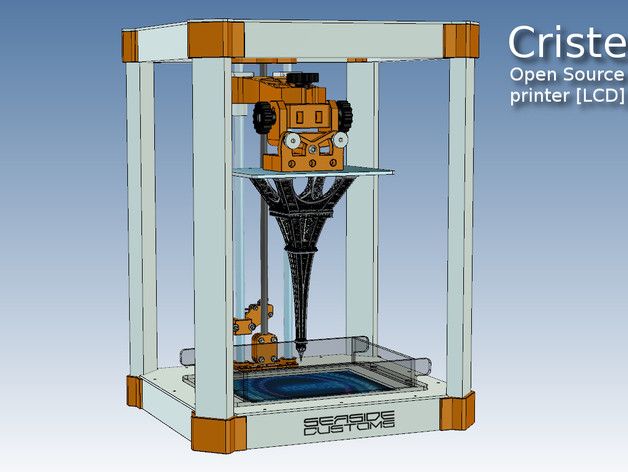 “In order to improve and eventually industrialize the production of metal additives, you need to collect, research and understand large ...
How do I convert .STEP files to .STL? How to convert .STEP files to .STL? From the very beginning of their existence, 3D printers have created spatial structures based on 3D models saved in the .STL format. Although this format was developed in the mid-1980s, it is still the standard in 3D printing today. This, however, does not mean that it is popular among CAD designers - the vast majority of them, ...
TOP 10 3D Printing CAD Software
3D Printer Software, Tests, Comparisons and ReviewsAuthor: Victoria
TOP 10 3D Printing CAD Software The software you should use when designing 3D printing is completely depends on its nature. The complexity of your object will influence your final choice. In general, modeling software can be divided into two categories: CAD software and 3D modeling software.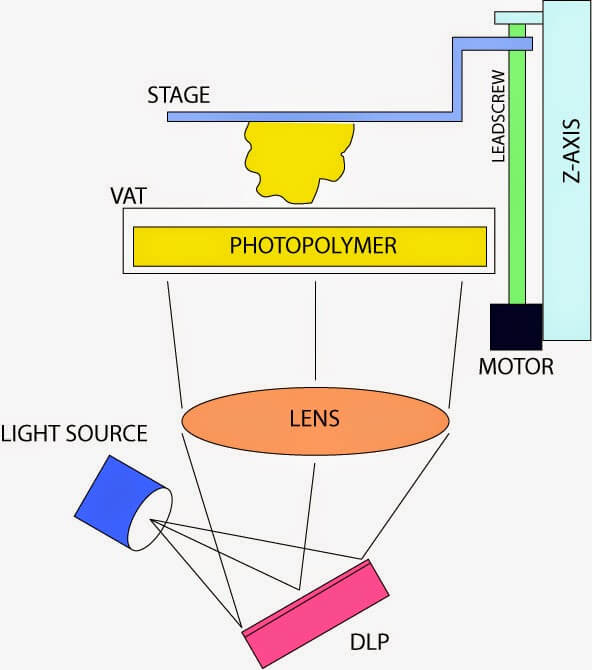 In most cases, CAD software will be used…
Pathio - new slicer for FDM / FFF 3D printers
Software for 3D printersBy Victoria -FDM/FFF printing is quite clear. Among the free programs, the leader is Ultimakera CURA, supported by Joseph Prusa Slic3r, and then KISSlicer or MatterControl. In the commercial segment, the leader (so far) is Simplify3D…
Top 10 Best 3D Software for Beginners
3D Printer SoftwareBy Victoria
Simplify3D Announces Revolutionary Update
3D Printer SoftwareAuthor: Victoria At a time when free and open source programs for preparing models for 3D printing, led by CURA, Slic3r or KISSlicer, reigned among users of desktop 3D printers, its creators decided to charge for their product! Although theoretically this idea was doomed to failure, .