Pla recycling 3d printing
Can PLA 3D Printer Filament be Recycled?
Plastic waste is a global problem that we face today. Every year, millions of tons of plastic waste end up in the ocean, which wreaks havoc on aquatic ecosystems and the communities that rely on them.[1] As a technology that consumes plastic materials, 3D printing plays a role in this global issue and has an environmental impact. It is therefore important that materials such as PLA, one of the most widely used 3D printing thermoplastics, can be reused and recycled.
In this article, we’ll explain how recycling works for 3D printer filaments, take a specific look at PLA as a biodegradable material, and explore ways to cut back on 3D printing plastic waste in the first place.
Can you Recycle 3D Printer Filament?
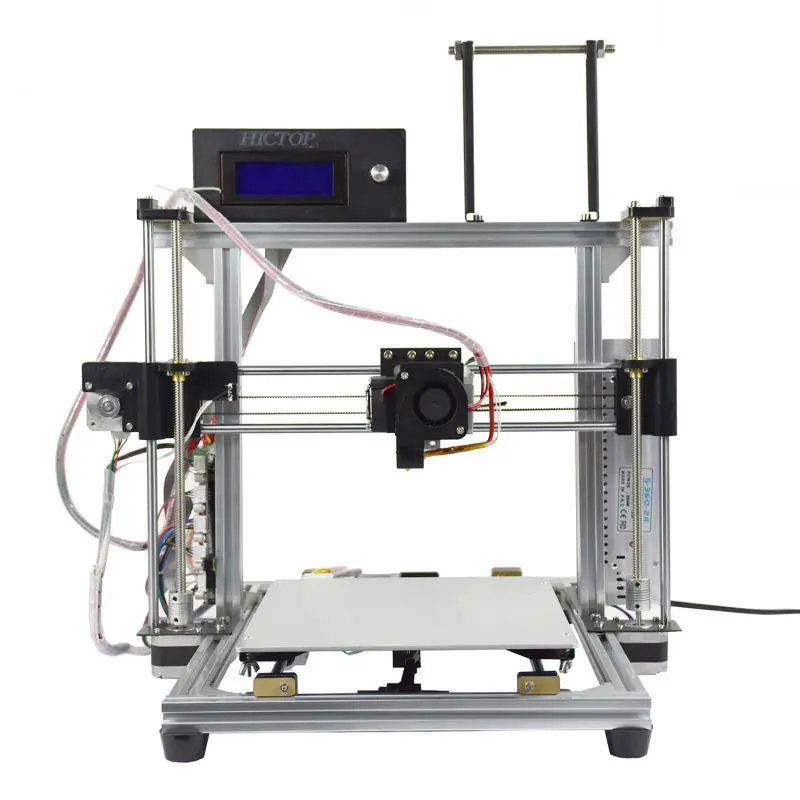
Fused Deposition Modeling (FDM)—also known as Fused Filament Fabrication (FFF)—is today the most widely used 3D printing technology in the world. The process, which comes in various shapes and sizes, essentially relies on the simultaneous extrusion and melting of plastic filament materials onto a print bed. When the layer of melted plastic cools, the material solidifies. This is repeated layer by layer, until a three dimensional object is created.
The entire FDM process is enabled by the fact that 3D printer filaments are made from thermoplastic materials. Thermoplastics are characterized by their ability to melt when exposed to relatively low temperatures and re-solidify when cooled. This material property also means that thermoplastic filaments can be recycled, as material waste can be melted down and reprocessed as pellets or new filament with minimal effects on the material quality or integrity.
3D printer filaments like PLA and ABS are classified as Type 7 plastics, not widely accepted by local recycling centers.
However, while it is technically possible to recycle 3D printer filament, the process is not quite as simple as putting leftover material waste, like supports or failed prints, into the recycling bin to be picked up by your local recycling center. In fact, PLA, ABS, and other common 3D printing filaments are grouped under “Type 7” plastics, which most municipal and community recycling centers do not process.
So how does one go about recycling leftover 3D printing filament? There are a couple of options. First, your town or city may have a specialist recycling center that does process Type 7 materials. If this is the case, you can bring your failed prints and scrap plastic to them to be recycled. Some local maker spaces or 3D printing labs also collect scraps to be sent to a dedicated recycling plant. Alternatively, you can bring your leftover plastic filament and scraps to a material recovery facility, which sorts recyclable plastics and sells them to manufacturers.
If you want to create your own circular economy for 3D printing materials, it is also possible to recycle 3D printer filament at home using a filament extruder. In the simplest terms, this piece of equipment is a machine that melts raw plastic pellets and extrudes the thermoplastic as a filament. If you plan to use failed prototypes and support materials as raw material, you may also need a plastic shredder to turn the parts into pellets that can be processed by the extruder system. With a filament extruder, you can transform your 3D printer waste into new filament, cutting back on waste and saving money in the long term. It should be noted, however, that recycling filament at home can lead to lower quality materials if not done correctly, which increases the risk of part warping.
Is PLA Recyclable?
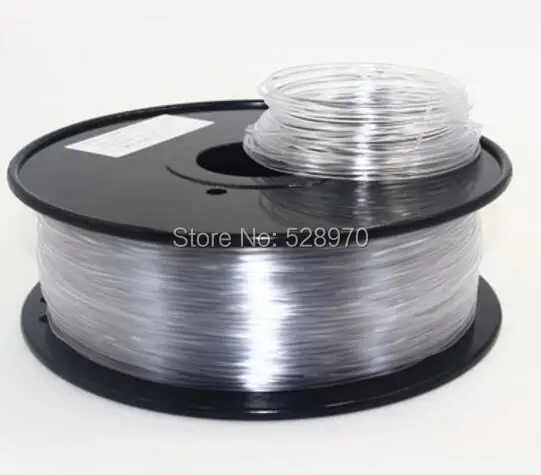
Polylactic Acid (PLA) is among the most commonly used 3D printing filaments today. This is due to a number of factors, including the material’s excellent printability, good dimensional accuracy, and affordability. PLA is also popular because, as a polymer derived from plant starches, it is more eco-friendly than filaments derived from non-renewable resources (such as petroleum-based ABS) and has the benefit of being recyclable and compostable.
If recycled, PLA must be processed on its own to avoid contaminating other plastic materials.
When it comes to recycling PLA filament, the most important thing to know is that it cannot be mixed with other types of plastic and must be processed alone. This is because PLA has a lower melting point than ABS and other common filaments. For example, PLA’s glass transition temperature is 63 ℃, while ABS has a glass transition temperature of 105℃, which can cause PLA to act as a contaminant if combined with ABS.[2] Because PLA must be processed separately from other plastics due to the lower melting temperature, many plastic recycling programs do not accept the material. As an alternative, you can choose to recycle your own PLA waste using a plastic shredder and a filament extruder.
In addition to being recyclable, PLA 3D printer filaments are also biodegradable. Since PLA is made from plant-based materials derived from crops like corn, it is eventually broken down by microorganisms into carbon emissions. That being said, it is not a good idea to simply toss PLA printing scraps into trash in the hopes that they will decompose quickly in a landfill. Without the right composting conditions, it can still take PLA hundreds of years to degrade. If PLA material is disposed of in the right conditions—with controlled temperature, humidity and microorganisms—it can break down in just a few months.[3] It is therefore helpful to think of PLA as only biodegradable if it’s processed at an industrial composting facility.
How to reduce plastic waste
Minimizing the amount of supports can help cut back on plastic waste.
In addition to recycling 3D printing waste, there are many steps you can take to actually reduce the amount of waste your 3D prints generate, resulting in an overall greener 3D printing process.
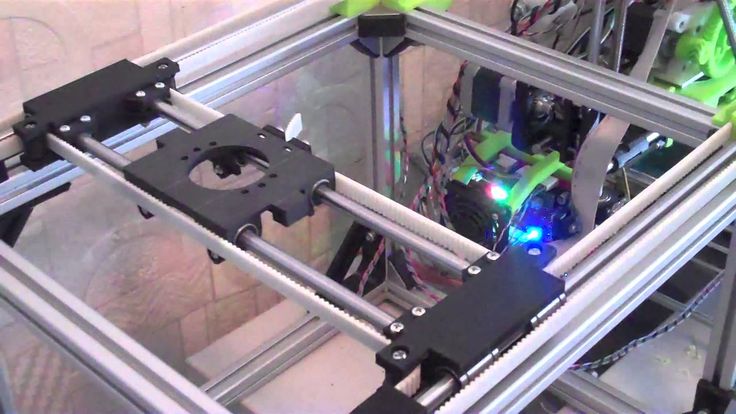
Minimize support materials: support materials play an important role in the FDM 3D printing process, ensuring that parts are stabilized on the print bed. But they are also a significant source of plastic waste. You can minimize the amount of supports by integrating them directly into the 3D model using smart design or by orienting your part strategically on the build platform.
Some slicing software programs will also let you manually adjust the amount of supports.
Ensure proper bed adhesion: If the first layers of your print job are not sticking to the print bed, there is a strong chance your final print will be defective. Minimize the risk of failed prints (and thus wasted material) by encouraging proper first layer adhesion. For example, using an adhesive or integrating a brim into your design can help adhesion without much added waste material. If you do notice your first layers aren’t sticking, stop the print as early as possible to avoid additional wasted material.
3D printer maintenance: Another good way to reduce the risk of failed prints and material waste is to ensure regular 3D printer maintenance. Making sure that your printer’s hardware is up to standard and that settings and calibration are correct can increase the machine’s output and reliability, thus resulting in a better success rate for print jobs.
Opt for recycled filaments: To reduce your environmental impact even further, you can choose to purchase filament from brands that use recycled thermoplastics as raw material. Some companies even provide filament spools made from recycled material or fully recyclable material.
Invest in a filament extruder: To establish your own circular 3D printing economy, it might be worthwhile to invest in a filament extruder. This will allow you to recycle any plastic 3D printing waste you generate and turn it into more filament. The upfront cost of the hardware may be prohibitive, but it can save you money down the line in material costs.
Conclusion
As a 3D printer user, it is important to recognize that the technology has an environmental impact as it both consumes plastic and generates waste. Fortunately, there are ways to make the process more sustainable. Even though many local recycling facilities aren’t equipped to process plastics from PLA prints, you can make the effort to seek out specialized facilities that do, find industrial compost centers that accept bioplastics, or recycle your own filament at home. You can also reduce the amount of waste created in the first place by following the aforementioned steps.
References
[1] The world's plastic pollution crisis explained. [Internet] National Geographic; June 19, 2019 [Cited February 22, 2022] Available from: https://www.nationalgeographic.com/environment/article/plastic-pollution
[2] PLA vs. ABS: Which Filament Should One Use? [Internet] Wevolver; April 23, 2021 [Cited February 23, 2022] Available from: https://www.wevolver.com/article/pla-vs-abs-which-filament-should-one-use
[3] Is PLA Filament Actually Biodegradable? [Internet] 3DNatives; July 23, 2019 [Cited February 22, 2022] Available from: https://www.3dnatives.com/en/pla-filament-230720194/#!
♻️ How can I recycle my 3D printing plastic?
If you’ve been in 3D printing for a while, you’ve certainly gone through all the phases of recycling 3D printing plastic. Over the years, a lot of new projects have appeared that promised to give us the ability to recycle the plastic from our failed prints, media, rafts or purge blocks but, to this day, which of these projects are still standing?
If you want to know the alternatives available in 2020 to recycle the 3D printed plastic, stick around, we’re getting started.
📖 What do you want to read?
What alternatives are there?
There are numerous ways in which we can recycle this plastic, so we are going to explain the main ones and some examples of each one of them so you can delve into the projects that catch your eye.
The two main alternatives we have are: to recycle the plastic from our prints to turn it back into usable material or to use it to make plastic objects using other technologies such as injection molding.
Converting 3D print remainders into new print material
If you want to turn the material left over from your 3D prints back into material you can print on, there are currently three ways to do it: create your own filament, use a special extruder that allows you to print directly using recycled plastic pieces, or buy filament rolls made from recycled material.
Create your own filament
To create your own filament using the remains of other 3D prints there are several machine projects known as filament extruders. Each of these machines works slightly differently, but basically they feed on crushed 3D print debris and melt it down, extruding new filament through a 1.75mm diameter nozzle.
Filastruder
Filastruder is a kit that you can buy for $299 in its most basic version. This product has been releasing new versions and improving for several years, so it is a quite refined equipment and one that can be expected not to give us many problems. If we want to coil this plastic we will also have to buy its filawinder accessory for 169 extra dollars.
Felfil Evo
Felfil Evo is a much more expensive but also more premium and open source kit. It is available in 3 different kits, a fully assembled and functional one for 719€, a kit for you to assemble for 599€, and a “barebone” kit that only contains the mechanical components but does not include chassis or electronics for 299€. This last option, in addition to the fact that it is open source, is an excellent choice for the more professional makers looking to create their own filament extruder adapted to the needs of their workshop.
They also have a premium pack with the assembled version that comes with a plastic coiling accessory for 1199€.
Filabot
Filabot is a brand with a line of products designed to create a complete filament coiling and manufacturing system. These equipments, even in their most basic version, are much more expensive than the previous ones, since they are thought for professionals and not for makers. All equipment comes pre-assembled and tested to ensure a quick and smooth start-up without unexpected complications
There are two product ranges, the Filabot ex2 and the Filabot ex6. The first is the simplest and most affordable, starting from $2699 for the extruder and $4559 for the complete kit including the coiler.
The second one is even more professional and starts at 9899 dollars for the extruder or 10899 dollars for the complete combo.
Buy recycled material
If this sounds a bit complicated to you (which it is) but you still want to contribute to the recycling of plastic for 3D printing, then you can buy filament that has been professionally manufactured using recycled material.
Some examples of filaments you can buy made from recycled material are 3RPLAfil or Sakata RE-850.
Directly extrude recycled material
An intermediate solution is to use special extruders that you can attach to your 3D printer to print directly using recycled print pieces, without having to go through extruding a new filament. In this field, Spain is the world leader, as a Spanish extruder is the best and most popular extruder of pellets and recycled plastic: the Mahor-xyz Pellet extruder.
This is actually an extruder-melter kit that is placed in our 3D printer replacing the traditional extruder and hotend. It is one of the best solutions, if not the best, as it allows direct extrusion of virtually any type of material from shredded failed prints or pellets that we buy made from recycled material. The list of materials includes: PLA, ABS, TPU, TPE, EVA, PC… In addition, we can incorporate additives such as carbon fiber, glass fiber or kevlar to improve the properties of the material.
In a future article we will talk at length about this project, as it is a true masterpiece of engineering that will delight the most professional makers in Bitfab.
Making plastic objects
An alternative option to give a second life to the leftovers of our 3D prints is to manufacture objects using techniques such as mold injection. In this respect there is an initiative that stands out: Precious Plastic.
Precious Plastic manufactures everyday objects such as chairs, benches, carabiners, coasters, socket covers or many other things from plastic left over from 3D printing processes.
In addition to these objects, they also sell kits with machinery so that you can recycle them yourself.
If you want to give a second life to the plastic you print but don’t want to use it to print more things, this is the option that suits you best.
Contact Bitfab
Recycling plastic from 3D printing is a very powerful application and Bitfab can also help you with it.
If you need advice on how to recycle your surplus material or you are thinking of starting a project using recycled plastic, do not hesitate to contact us.
PET plastic recycling and how 3D printing can change the lives of each of us
Before we start, I draw your attention to the fact that several topics will be raised in the article, and for a convenient guide, I will indicate the name of the topics in BIG FONT)
WHERE IT ALL STARTED:
How can 3D printing change not only the lives of those around you, but also yours? Stupid question, but for me it is rather ironic.
It all started many years ago, when I became interested in tank modeling, while playing one well-known game, I accidentally stumbled upon the news about paper modeling, they offered to make a simple MC1 tank out of paper, I immediately liked the idea, because I liked to do it from childhood something with your own hands.
I won't go into details, but I can say that with time the quality of the work increased, the paper hobby ousted everything superfluous from my life, including computer games.
This hobby greatly developed thinking, ingenuity and fine motor skills, because it was necessary to create durable paper structures, to carry out fine work with small details, and this is not quite the same as buying a ready-made assembly kit. (The big challenge was assembling Bismarck out of paper)
Everything about it was perfect, except for one BUT! This time, for 1 tank model, it took from 5 to 9 months, over the years, time became less and less, work, study, family .. And I really wanted to do what I loved.
I found out about 3D printing by accident and immediately the idea appeared that many components and assemblies of tanks can simply be printed, while eliminating the routine, especially for tracks and rollers, making them out of paper is still a pleasure.
An obsessive idea firmly settled in my soul and did not give me rest, but the high cost of the printer cooled my hot ardor. And yet, with confidence, I continued to monitor prices and the situation in general.
After a couple of years, the decisive moment arrived! I decided to buy, spending all the accumulated money! at that time, 22 thousand was a rather large amount for me and many others around me, so when I spent it on such a toy, many condemned me.
This miracle was printer Pryusha ah 4, at that time the top model, but now, of course, it's not the best option.
Printing did not work right away, it took a lot of time to set up, understand the operation of the printer, slicer, and upgrade it. He printed all sorts of little things that were not quite necessary, and then he completely cooled off.
A year later I was asked an important question - You bought a printer for a hobby, but you print anything, but not the target product, Why?
I answered that there are no ready-made models, and to create your own, you need knowledge of 3D modeling.
My opponent said that everything can be learned if you are busy doing what you like and made me promise to make at least one model.
More than one year has passed since then, a lot of effort has been invested, a lot of trial and error, experience gave an understanding of what and how to model, what and how to print better, here are a few examples of printing
And there was one nuance in this whole story, it was plastic. At some point it was expensive, after that I found a place to buy a cheap one.
But walking along the street, and seeing bottles everywhere, thoughts involuntarily began to appear that all the material was underfoot.
In addition, the environmental situation with plastic in our cities, and throughout the world, is quite terrible, which, accordingly, also influenced my idea.
There were attempts to create an extruder for plastic recycling, but the ideas were in vain, the implementation failed.
However, the idea of recycling PEK bottles seemed to me very simple and feasible in practice. As a result, it turned out that I was very mistaken about this.
RECYCLING OF PET BOTTLES (5L BAGS)
I will try to briefly and concisely describe the essence of the work process, there are a lot of articles on this topic, but there is one BUT !!! In my implementation, they unfortunately almost did not help!
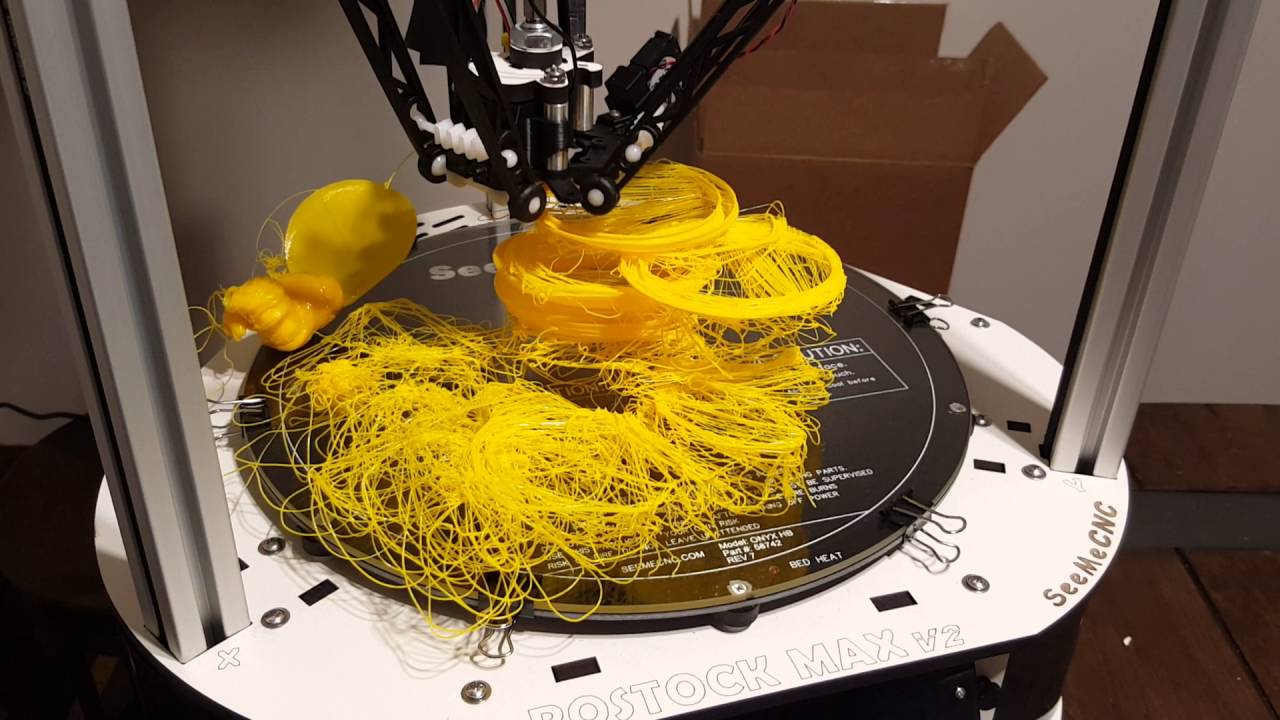
The bottom line is that everyone in the examples of videos and articles printed well, but all my attempts failed ...
There were many reasons for printing failure: plug formation, nozzle clogging, under-extrusion - the printer simply could not push the PET filament or the feed gear simply slid along the bar.
In addition, the length of the rod is always limited, it is necessary to constantly change the filament, but this problem was also solved.
Let's not pull the printer by the bar and start in order:
PREPARATION OF THE BOTTLE
It is very difficult to find an ideally even bottle, and it is not necessary.
First of all, we need:
Plastic plug - we make a hole in it for the valve, the valve is sold at any tire shop or can be ordered on Aliexpress
http://alli. pub/5s0hyt
we get the following: bottle or vial with a cork. Do not forget to add a couple of drops of water to the bottle, then pump it up. You need to pump up quite a bit, without fanaticism, a bicycle pump can do just fine.
Next is the most dangerous and important moment
Our goal is to level the bottle and not to blow it up, there is no need for a lot of pressure!
We heat the bottle on a gas burner or with a building hair dryer (there are a lot of videos on YouTube on this topic, I advise you to read it), do not forget to scroll it, water drops will give steam, which will further expand the walls.
Do not forget about safety, goggles are required!! Breaking a bottle can burn, cotton itself is not very dangerous, but you can get scared from surprise (remove children, old people and a mentally unhealthy cat from the house).
Again!!!! our goal is to align, to align the bottle a little, and not to explode, so without fanaticism!
Let's skip the irony and get down to business. Here is a good example:
And now it’s already dangerous, the bottom of the bottle began to fall out, an early sign of a rupture, but this is not a 100% danger indicator, do not forget about the cork, it may also not withstand, especially for bottles, the walls of the cork are very thin there , strength is low!
After heating, immediately release the pressure, carefully press the valve, for example with a screwdriver, I warn you, a little steam will come out from there, take care of your eyes. And only after that we remove the cork.
Do not leave an inflated and heated bottle, after cooling it will collapse and lose its shape.
Well, we have passed the most dangerous section, let's move on! BOTTLE CUTTER
I must say right away that the bearing bottle cutter is by. Too confused, too complicated and incomprehensible, but the choice is yours.
Printing on a printer is also not an option! The PET tape will cut it like a knife through butter.
Our choice is only metal
or something similar
http://alli.pub/5s0i24
It's very easy to make, in the hardware store, buy a corner, M4 screws, nuts and washers for it. Well, do not forget about the clerical blade.
here is the result:
The number of washers adjusts the width of the PET strip, and the nuts clamp the knife blade. At the bottle, we cut off exactly the bottom, align it with scissors and make a small incision.
Slowly pull and cut, holding the bottle at an angle, keeping the width of the tape constant.
its width should be approximately 0.9 mm, but in the process of work you select individually.
The first time you most likely will not be able to cut as needed, be patient and bottles, everything will come with experience.
Here is the result:
AUTOMATIC FILAMING EXTRUDER
I will say right away that the engine, driver and generator are not the most important, I pulled the bar by hand, it is rather a moment of convenience and for the future. (links to relevant parts are below)
Most important node
example
https://youtu.be/BsdvdI-L3Vo
I think you recognized him, this is a fuser from a printer. We fix it on the corners, insert the heater.
http://alli.pub/5s0igw
I think they also recognized the nozzle, but it needs to be prepared.
At the exit, we drill through a hole with a 1.7-2 mm drill (this will give about 1.7 bars at the exit) , but to a shallower depth of 3 mm.
And at the very entrance 4-5 mm, to a depth even less
As a result, we will get a hole in the form of a cone, this is necessary so that the PET tape is better and easier to roll into a rod, at the entrance it is wide, but moving along the nozzle, it begins to roll up due to the heat shrink and the tapered shape of the nozzle.
If you have a drill, then I advise you to slightly smooth out all the irregularities based on the results of what we have drilled with a cone-shaped cutter.
The power supply regulates the heating temperature. (the blocks are just a super indispensable thing in the household, I advise you to take 2, 1-1 to adjust the heating of the nozzle, the 2nd will go to power the broach motor)
http://alli.pub/5s0ie6
We burn the end of the tape a little with a lighter, the tape will become stronger due to shrinkage, cut it with scissors and pull the rod at the exit with tweezers.
We pull manually or with the help of electronics, I’ll say right away that skill is needed here, it won’t work the first time
and here is the result
If you want to automate the work, then here are the necessary details:
Generator
http://alli.pub/5s0esv
TB6600 stepper motor driver
http://alli.pub/5s0i7k
EXTRUDER
What can I say, I tried the standard version, I tried the titanium extruder - and all in vain ... this does not mean that you will not succeed, it means that I very tired of dealing with the problem for 1 year and found the ideal.
Meet the perfect extruder that eliminated most of my problems! http://alli.pub/5s0i9w
Its advantage is that 2 gears rotate simultaneously and have notches, even a smooth and hard bar will not stand a chance. The same extruder is needed for pulling the filament, at the output the rod will turn out with notches, which will be well displayed during printing
FILEMENT TUBE
http://alli.pub/5s0f6v
The inner diameter must be as large as possible !!
In my case, the inner diameter is 3mm, the outer diameter is 4mm, otherwise the filament will get stuck, due to expansion and variable size
much more, as a result of which, when cooling, a cork forms in the fuser - as a result, a print failure
THERMAL BARRIER (THROAT)
must be taken as in example 1, with a through hole, for the reason described above,
Option 2 will not work - there will be a jam
RADIATOR
Here I advise you to take something larger, here is an example
http://alli. pub/5s0g80
If the heatsink is too small, there is a risk that there will be a filament crease as a result of overheating
COOLING
In my case with a large heatsink, cooling is not needed!
Explain:
The hot radiator dries the bar as it travels to the nozzle, in addition, the bar is already heated and easier to melt.
For the experiment, I decided to install a cooler and here the extruder clicks began, the printer did not have time to melt the bar, as a result - the bar was crumpled and printing failed.
In general - if you decide on cooling - take care of the possibility of its regulation!
NOZZLE
This is no less important moment!!!
We use any, but it needs to be drilled, as I described earlier, but you can immediately use a 3mm drill, not naturally through.
The bottom line is that the plastic will melt, as it were, in the nozzle chamber that you drill, and not in the thermal block, as it was provided for by the design, and there will be no plug during retraction, the molten mass will remain in the nozzle chamber.
PRINT SPEED AND PLASTIC FEED
Change the bar size from 1.7 to 1.4 or 1.5 in the slicer settings. This is due to the fact that the homemade bar inside will not be hollow, so its feed should be greater! Otherwise, the walls of the part will be thin.
The print speed, on the contrary, must be reduced, in addition, the print speed of the supports, and the fill must be equal to the print speed of the walls.
print example
https://youtu.be/jIWRY24LOf8
ALLOYING THE ROD INTO A SINGLE WHOLE
Experience and skill are needed here! Be patient !
Tried a lot of things, all without success. I give you a working method right away
https://www.youtube.com/watch?v=4-nrcfdk44Y
We set it on fire and melt it until it burns, carefully, I got a serious burn!
We extinguish, connect, blow (or better with some water).
I cut off the excess with wire cutters and clean it with sandpaper to the ideal.
Gently twist into a coil, the connection is not perfect and is destroyed when pressed hard, but in general it keeps its shape.
Total
I consider this processing method to be one of the best. Yes, it is not perfect, it is a little confused, there are flaws, not the whole bottle is recycled. But still, as an initial start, this method can and should be applied, just imagine how you can reduce the amount of plastic in the environment if every second person who has a printer uses a similar approach.
Here is an example of printing and here is a preview of the 3D model that I prepared for printing, so to speak - expectation and reality.
As you can see, I am still at the printing stage, I will print all the knots with a bottle as much as possible, I will finish off all the little things that the pryusha cannot handle with a photopolymer printer, and after priming and painting, everything will look no worse than a sketch.
See more photos, follow the complete assembly and my work at the link
https://vk.com/public_model_hends
It will also be important to say that parts made of such plastic are practically indestructible, it is difficult and sometimes impossible to break by hand.
It can be used to print durable parts or children's toys, which is in the plans.
Or collectible toys
You don't want to throw away such a thing, you can also give a toy to another child as you don't need it. (Nemesis does not count, not every child wants this, although I would be very happy about this as a child)
A lot of time has passed since I collected the first paper model and a lot of effort has been spent, since then I have mastered 3D modeling, painting, 3D printing.
Small hobby - gave direction and understanding to what I want to do in life and how to earn a living.
Mastering 3D modeling has opened up the prospects for developing models for Game Dev / but even here 3D printing does not stand apart, because I use the Hipoly model for printing, so to speak - waste-free production in everything.
Here is an example of a model I created for printing, which was ordered by a modeler from Rome
and here is the same model, but already Low Poly and for Game dev.
There is still a lot of work, there are no ideal models yet, but I am working on improving my skills every day.
This is how first paper modeling and then 3D printing changed and continues to change my life for the better.
I hope this story was interesting for you, please rate it with your like and write your thoughts on this in the comments, well, I will go on creating, because there are a lot of plans for the future, but so little has been done yet ... Appreciate the environment around you , recycle plastic, change your life and the lives of others for the better!
Appreciate your time, your hobby and your goals, good luck to everyone, bye everyone!
Post-processing of 3D printed parts (PLA, ABS, SBS, PETG)
Table of Contents
- Remove Supports
- Remove Soluble Supports
- Sanding
- Cold welding
- Filling voids
- Polishing
- Priming and painting
- Steam Smoothing
- Epoxy coating
- Metallization
Introduction
FDM technology is best suited for rapid, low-budget prototyping. Layer lines are usually visible in FDM prints, so post-processing is essential if a smooth surface is to be achieved. Some post-processing techniques can also make a print more durable by changing the degree of its elastic properties, density, structural and textural features.
In this article, we will discuss the most common post-processing techniques in FDM.
Post-processed FDM prints (left to right): cold welded, void filled, raw, sanded, polished, painted and epoxy coated. photo 3dhubs.com
Support removal
Support removal is usually the first step in post-processing for any 3D printing technology that uses them. In general, props can be divided into two categories: standard and soluble. Unlike other post-processing methods discussed in this article, the removal of props is mandatory and does not result in improved surface quality.
Initial printout with props, poor prop removal, good prop removal. photo 3dhubs. com
Removal of standard props
Tools
- Nippers, needle nose pliers, tongs
- Toothbrush, brush
| Finishing | ★ ☆ ☆ ☆ ☆ |
| Approvals | ★ ★ ☆ ☆ ☆ |
| Speed | ★ ★ ★ ★ ☆ |
| Suitable for | all thermoplastics FDM |
Process
Normally, the backups come off the printout without problems, and hard-to-reach places (such as holes or cavities) can be removed from the backup material with an old toothbrush. Proper placement of support structures and correct print orientation can significantly reduce the negative impact of supports on how the final printout will look.
Pluses
- Does not change the overall geometry of the part.
- The process is very fast.
Cons
- Does not remove layer lines, scratches or other surface defects.
- If excess material or marks remain from the support structure, print accuracy and appearance suffer.
Soluble Support Removal
Instrumentation
- Solvent resistant container
- Thinner
- Ultrasonic cleaner (optional)
| Finishing | ★ ★ ★ ☆ ☆ |
| Approvals | ★ ★ ☆ ☆ ☆ |
| Speed | ★ ★ ★ ★ ☆ |
| Suitable for | all thermoplastics FDM |
Process
Soluble support standard materials are removed from the printout by immersing it in a reservoir of the appropriate solvent. Supports are usually printed:
- HIPS (usually with ABS)
- PVA (usually with PLA)
A glass container like a preservation jar is fine. Any non-porous vessel is suitable for water treatment. To quickly remove props from HIPS/ABS printouts, you will need a solution of equal parts D-limonene and isopropyl alcohol. Many other support structure materials such as PVA (with PLA) dissolve in normal water.
Pro Tips
Use an ultrasonic cleaner to shorten the solution time and change the solvent as it becomes saturated. A warm (not hot) solution works faster - heating is useful if there is no cleaner.
Pluses
- Complex geometry is allowed for which the standard method of removing props is not possible.
- Smooth surface at the support points.
Cons
- Improper dissolution of the supports can cause discoloration and skewed printouts.
- Does not remove layer lines, scratches or other surface imperfections.
- May cause small holes or holes if soluble material seeps into the object during printing.
Cleaning with a skin
SHID SHIC ABS ABS ABS ABS PROBECTION
Instrumentation
- ENLACE PREASE with grain
for 150, 220, 400, 600, 1000 and 2000 - Cleaning cloth
- Toothbrush
- Soap
- Face mask
| Finishing | ★ ★ ★ ★ ☆ |
| Approvals | ★ ★ ★ ☆ ☆ |
| Speed | ★ ★ ☆ ☆ ☆ |
| Suitable for | all thermoplastics FDM |
Process
Once the props have been removed or dissolved, sanding can be done to smooth the part and remove any obvious defects such as blots or prop marks. Which sandpaper to start with depends on the thickness of the layer and the quality of the print: for layers of 200 microns or less, or for prints without blotches, you can start with sandpaper at P150. If there are blobs visible to the naked eye, or the object is printed with a layer thickness of 300 microns or more, stripping should begin with P100.
The process can be continued up to P2000 grit (one approach is to go to 220, then 400, 600, 1000 and finally 2000). Wet sanding is recommended from the very beginning to the very end - this will avoid excessive friction, which can lead to an increase in temperature and damage the object, as well as contaminate the sandpaper itself. Between sanding, the printout should be cleaned with a toothbrush and washed with soapy water, then wiped with a cloth to remove dust and prevent it from sticking together. Even P5000 can be sanded to achieve a smooth, shiny FDM part.
Pro Tricks
Always sand in small circular motions - evenly over the entire surface of the part. It may be tempting to sand perpendicular to the layers, or even parallel, but this can lead to gouges. If the part is discolored or has a lot of scratches after sanding, it can be heated a little to soften the surface and allow some defects to smooth out.
Pros
- An exceptionally smooth surface is obtained.
- Further post-processing (painting, polishing, smoothing and epoxy coating) is greatly facilitated.
Cons
- Not recommended for double or single shell parts as sanding may damage the printout.
- The process is difficult in the case of sophisticated surfaces and the presence of small details in the object.
- Grinding too aggressively and removing too much material can affect the appearance of the part. Acetone for ABS. Dichloromethane for PLA, ABS
- Foam Applicator
| Finishing | ★ ★ ☆ ☆ ☆ |
| Approvals | ★ ★ ☆ ☆ ☆ |
| Speed | ★ ★ ★ ★ ★ |
| Suitable for | all thermoplastics FDM |
Process
If the size of the object exceeds the working capacity of the printer, the object is printed in parts and then assembled. In the case of PLA and some other materials, assembly can be done with Dichloromethane or a suitable adhesive (the choice of adhesive depends on the plastic). In the case of ABS, it is possible to "weld" with acetone. The mating surfaces should be slightly moistened with acetone and squeezed tightly or clamped and held until most of the acetone has evaporated. So the parts will be held together by chemical bonds.
Pro Tricks
Increasing the surface area of the acetone contact increases bond strength. Tongue-and-groove to help.
Pros
- Acetone does not change surface color as much as most adhesives.
- After drying, the compound acquires the properties of ABS, which makes further processing easier and more uniform.
Cons
- The bonding of ABS parts by cold "welding" with acetone is not as strong as if the part were printed as a whole.
- Excessive use of acetone can dissolve the part and affect final appearance and tolerances.
Void Fill
Black ABS Print, Filled and Sanded
Tool Kit
- Epoxy (for small voids only)
- Automotive body filler (large voids and joints)
- ABS filament and acetone (only for small voids in ABS printouts)
| Finishing | ★ ★ ☆ ☆ ☆ |
| Approvals | ★ ★ ★ ☆ ☆ |
| Speed | ★ ★ ★ ☆ ☆ |
| Suitable for | all thermoplastics FDM |
Process
Unusual voids may come out after the part has been ground or the soluble props have been dissolved. These voids are formed during printing when the layers are incomplete due to any restrictions on the trajectory of the print head, which is often inevitable. Small gaps and voids can be easily filled with epoxy and no additional treatment is required in this case. Larger gaps or voids left by assembling a multi-part object can be filled with automotive bodywork filler, but the printout will then need to be re-sanded. Putty works great, is easy to process with sandpaper and can be painted. Moreover, the parts connected by such a filler, or voids filled with it, turn out to be stronger than the original plastic.
Slots in ABS printouts can also be filled with ABS thinned with acetone, which reacts chemically with the ABS object and seeps into existing voids. It is recommended to make such a putty from 1 part ABS and 2 parts acetone, then it will not spoil the surface if used correctly.
Dichloromethane works on all plastics: ABS, PLA, HIPS, SBS, etc.
Epoxy is also useful if you want to make your 3D printed part more durable
Pros
- Epoxy filler is easy to sand and prime, resulting in an excellent surface for painting.
- An ABS solution of the same filament will give the same color so nothing will show up on the surface.
Cons
- Auto body filler or other polyester epoxy adhesive is opaque when dry and will leave discolored areas on the printout.
- Additional processing is required to achieve a uniform surface.
- Grinding too aggressively and removing too much material can affect the appearance of the part.
Polished
PLA model, polished. Photo rigid.ink
Tool kit
- Plastic polishing compound
- Sandpaper for P2000
- Cleaning cloth
- Toothbrush
- Polishing pad or microfibre cloth
| Finishing | ★ ★ ★ ★ ★ |
| Approvals | ★ ★ ★ ☆ ☆ |
| Speed | ★ ★ ☆ ☆ ☆ |
| Suitable for | all thermoplastics FDM |
Process
Once the part has been sanded, a plastic polish can be applied to the part to give a standard ABS or PLA object a mirror finish. After the part has been sanded for 2000, it is necessary to remove dust from the printout with a cloth and rinse the printout under warm water using a toothbrush. When the object is completely dry, buff it on a buffing pad or microfiber cloth, adding a polishing compound as you go, such as polishing jewelry. They are designed specifically for plastics and synthetics and give a long-lasting shine. Other plastic polishes, such as those used to polish car headlights, also work well, but some of them contain chemicals that can damage the printout.
Pro Tricks
To polish small parts, place the polishing wheel on your Dremel (or other rotary tool such as a power drill). For larger and stronger parts, you can use a grinder, just make sure that the part does not stay in one place for too long, otherwise the plastic may melt from friction.
Pros
- The part is polished without solvents that can warp it or change its tolerances.
- When properly ground and polished, a mirror-smooth surface is obtained, very similar to cast.
- Polishing and deburring plastics is extremely economical, making this a very cost-effective method of achieving a quality finish.
Cons
- If you want to achieve a mirror-smooth surface, the part must be carefully ground before polishing, which may affect tolerances.
- After polishing, the primer or paint no longer sticks.
Primer and paint
Gray PLA FDM print spray painted black. 3dhubs.com
Tools
- Cleaning Cloth
- Toothbrush
- 150, 220, 400 and 600 grit sandpaper
- Aerosol Primer for Plastics
- Finish paint
- Polishing sticks
- Polishing paper
- Masking tape (only if multiple colors are expected)
- Nitrile gloves and matching face mask
| Finishing | ★ ★ ★ ★ ★ |
| Approvals | ★ ★ ★ ☆ ☆ |
| Speed | ★ ☆ ☆ ☆ ☆ |
| Suitable for | all thermoplastics FDM |
Process
Once the printout has been properly sanded (it is enough to reach P600 when painting), it can be primed. Aerosol plastic primer should be applied in two coats. This primer is intended for subsequent painting of models, provides an even coating and at the same time thin enough not to hide small elements. Thick primer, which is sold in hardware stores, can clump, and then you have to seriously work with sandpaper. Apply the first spray coat with short pressures from a distance of 15-20 cm from the object, trying to do it evenly. Let the primer dry and smooth out the unevenness with 600 grit sandpaper. Apply a second coat of spray with light, quick pressures, also very gently and evenly.
When the priming is completed, you can start painting. You can paint with artistic acrylic paints and brushes, but a spray gun will provide a smoother surface. Hardware store spray paints are thick and viscous and difficult to control, so use paints that are designed specifically for modeling. The primed surface must be sanded and polished (sanding and polishing sticks, which are used in nail salons, can be purchased online, they are great for our task), and then wiped with a cloth. The paint should be applied to the model in very thin layers, the first layers should be transparent. When the paint finish becomes opaque (usually 2-4 coats), let the model rest for 30 minutes to allow the paint to dry completely. Carefully polish the paint layer with manicure sticks, repeat the procedure for each of the colors (between each applied paint).
Separate parts of the model can be covered with masking tape so that the colors, if there are several, do not mix. When painting is complete, remove the masking tape and polish the object with polishing paper. Polishing paper, such as 3M or Zona, comes in a variety of grits and is a relatively new product. It is sold in packs in various online stores, and after processing with this paper, the ink layer or topcoat will literally shine - and nothing else can achieve this effect. Apply 1-2 coats of top coat to protect the paint and let it dry completely. The top coat is selected in accordance with the recommendations of the paint manufacturer. If the topcoat and paint are incompatible, it can render your entire painting job meaningless, so compatibility is very important here.
Pro Tips
Don't shake the can when spraying! It is important not to mix the pigment or primer with the propellant (propellant gas), which will cause bubbles to form in the spray. Instead, the can must be rotated for 2-3 minutes so that the mixing ball rolls like a pearl, and does not strum.
Pros
- Excellent result, if you take into account all the nuances of the process and practice.
- You can do anything with the final look of the object, no matter what material it is printed on.
Cons
- Primer and paint increase the volume of the model, which affects tolerances and can be a problem when it comes to a part of a larger object.
- A high quality spray paint or spray gun adds to the cost.
Vapor smoothed
Vapor smoothed black ABS printed hemisphere
Tools
- Cleaning cloth
- Solvent resistant sealed container
- Thinner
- Paper towels
- Aluminum foil (or other solvent resistant material)
- Face mask and chemical resistant gloves
| Finishing | ★ ★ ★ ★ ☆ |
| Approvals | ★ ★ ☆ ☆ ☆ |
| Speed | ★ ★ ★ ☆ ☆ |
| Suitable for | all thermoplastics FDM |
Process
Line the bottom of the container with paper towels, if possible along the sides. It is critical that the vapors cannot damage the container and that the container itself is sealed. It is recommended to use a glass or metal container. Apply enough thinner to the paper towels so that they are wet but not soaked - this will also help them adhere better to the walls. Acetone is famous for its ability to smooth out ABS. PLA can be smoothed with a variety of other solvents (dichloromethane works well), but this plastic tends to be much harder to smooth than ABS. When working with any solvents, please follow the safety precautions for handling chemicals and always take appropriate precautions. Place a small "raft" of aluminum foil or other solvent-resistant material in the center of the paper towel-lined container. Place the printout on the "raft" (either side of your choice) and close the lid of the container. Steam polishing can take varying amounts of time, so check your printout periodically. To increase the speed of polishing, the container can be heated, but this must be done carefully so as not to cause an explosion.
When removing the printout from the container, try not to touch it in any way, leave it on the “raft”, take them out together. In all those places where the printout has come into contact with something, there will be defects, since the outer layer will be under-dissolved. Before working with it, let the printout completely “breathe” so that all solvent vapors have evaporated.
Many aerosols and/or solvent sprays are flammable or explosive and their vapors can be harmful to humans. Be extremely careful when heating solvents, always handle them and store them in a well ventilated area.
Pluses
- Many small blotches, as well as many layer lines, are smoothed out without additional processing.
- The printout surface becomes exceptionally smooth.
- The procedure is very fast and can be performed using commonly available materials.
Cons
- Doesn't "heal" gaps, doesn't completely hide layer lines.
- During the smoothing process, the outer layer of the printout dissolves, which greatly affects the tolerances.
- Negatively affects the strength of the printout due to changes in the properties of its material.
Immersion
PLA model immersed in dichloromethane. Photo 3dpt.ru
Tools
- Solvent resistant container
- Thinner
- Eye hook or screw
- Heavy wire for sculpture or landscaping
- Dryer or drying frame
- Face mask and chemical resistant gloves
| Finishing | ★ ★ ★ ★ ☆ |
| Approvals | ★ ☆ ☆ ☆ ☆ |
| Speed | ★ ★ ★ ★ ☆ |
| Suitable for | all thermoplastics FDM |
Process
Make sure the container you are using is wide and deep enough to completely submerge the printout in the solution. Fill the container with the appropriate amount of solvent - be careful not to splash. As with vapor smoothing, ABS dip smoothing can be done with acetone, which is easy to find in the store, and for PLA, dichloromethane can also work well with ABS, HIPS, SBS, PETG, and many other materials. PLA is quite resistant to solvent smoothing, so it may take several passes to achieve the desired result. Prepare the printout for dipping by screwing a hook or eye screw into it in an inconspicuous place. Pass the wire through the eyelet or wrap the wire around the screw so that the printout can be immersed in the solvent. If the wire is too thin, it will not be able to withstand the buoyant force on the printout, and it will be difficult to sink the object.
Once the printout is ready, use a wire to completely immerse it in the solvent for a few seconds. Remove the printout and hang it by the wire in a dryer or on a drying frame to allow the solvent to completely evaporate from the surface. After ejection, the printout can be gently shaken to facilitate the drying process and ensure that no solvent has accumulated in the depressions.
Pro Tricks
If an opaque whitish coating appears on the print after drying, this can be corrected by holding the object over a solvent bath for a while so that its vapor slightly dissolves the surface. This restores the original color of the printout and achieves a shiny outer layer.
Pros
- The printed surface is smoothed much faster than steam polishing.
- Significantly less fumes are generated than other solvent polishing methods, so this method is less hazardous.
Cons
- The surface is smoothed very aggressively, so you can forget about tolerances.
- Immersion for too long can result in complete deformation of the object and a significant change in material properties.
Epoxy
Black ABS printout, half epoxy coated, half uncoated
Toolbox
- two part epoxy resin
- Foam Applicator
- Mixing container
- Sandpaper P1000 or finer
| Finishing | ★ ★ ★ ★ ☆ |
| Approvals | ★ ☆ ☆ ☆ ☆ |
| Speed | ★ ★ ★ ★ ☆ |
| Suitable for | all thermoplastics FDM |
Process
After the printout has been cleaned (preliminary cleaning gives the best end result), wipe it thoroughly with a cloth. Mix the resin and hardener in the proportion indicated in the instructions, accurately measuring all volumes. The curing process of epoxy resin is exothermic, so glass containers and containers made of materials with a low melting point should be avoided. It is recommended to use containers that are specifically designed for mixing epoxy resins. Incorrect ratio of resin and hardener can result in longer curing time or no curing at all and result in a permanently sticky substance. Mix the resin and thinner as directed in the instructions - carefully, in smooth movements to minimize the amount of air bubbles remaining inside the mixture. Very little epoxy is needed, and most of these resins only work for 10-15 minutes, so plan accordingly.
Apply the first coat of epoxy with a sponge applicator, being careful not to build up in crevices and small parts. When the printout is sufficiently coated, allow the resin to fully cure - as described in the instructions that came with it. One coat may be sufficient, but for optimum results it is best to lightly sand the printout with fine sandpaper (on P1000 and above) to eliminate any imperfections. Wipe off the dust with a cloth and, in the same way as before, apply a second layer of epoxy.
Pros
- A very thin layer of epoxy won't affect tolerance too much (unless the printout has been sanded too hard first).
- A protective shell forms around the object.
Cons
- The layer lines will remain visible, they will only be covered by a smooth shell.
- If too much epoxy is used, it can flood details and edges, and the surface can appear greasy.
Plating
FDM-printed structural element nickel-plated with Repliform RepliKote
Tools (for home use)
- Sacrificial anode. The anode material must match the metal of the solution: for example, if copper sulfate is used in the solution (with water it is copper sulfate), then the anode must also be copper. Any object made of the appropriate metal will do (for example, copper wire for copper plating), or you can buy special strips of metal for galvanization.
- Conductive paint or acetone with graphite. Electroplating requires the print surface to be electrically conductive, and this can be achieved with a conductive ink or a solution of equal parts graphite and acetone. Conductive paint will work with any material, but acetone with graphite will only work with ABS.
- Power rectifier. A simple battery can be used as this element, only it will not be as efficient and will not give a fast enough result than the rectifier itself (household current).
The rectifier is safer in the sense that it can simply be turned off and thus cut off the current during the galvanization process.
- Conductive screw or eye hook
- Non-conductive container
- Contacts
- Non-conductive gloves and goggles. Electroplating solutions are acidic and can cause injury if splashed into the eyes, so wearing goggles is very important. Solutions also irritate the skin and conduct electricity, so insulating gloves are needed.
- A galvanizing solution can be obtained by mixing a metal salt, acid and water, but if the proportions are inaccurate and the substances are of insufficient quality, one cannot count on a professional result.
| Finishing | ★ ★ ★ ★ ☆ |
| Approvals | ★ ★ ★ ☆ ☆ |
| Speed | ★ ★ ★ ★ ☆ |
| Suitable for | all thermoplastics FDM |
Process
Electroplating can be carried out at home or in a professional workshop. To do everything right, you need to be well versed in the materials, in what is actually happening - and at home these opportunities are usually limited. In order to achieve excellent surface quality and to have more plating options, including chrome plating, it is best to use the services of professional workshops. The copper galvanization process will be described below as an example.
At home, you can galvanize with copper or nickel, and this coating will then serve as the basis for galvanizing with other metals. It is critically important that the printout surface be as smooth as possible before it is galvanized. Any bumps and lines in the layers will be enhanced as a result of the process. Prepare the sanded and cleaned object for plating by coating the plastic with a thin coat of high quality conductive paint, or with a graphite and acetone solution for ABS printouts. Allow the conductive coating to dry completely, sand if necessary to ensure a smooth surface. At this stage, it is extremely important not to touch the printout with bare hands or to wear gloves, because sweat marks on the object will certainly affect the quality of the galvanization.
Insert a screw or eyelet in an inconspicuous place on the printout and connect it to the negative terminal of the rectifier. This will be the cathode. Connect the copper anode to the positive contact of the rectifier. Fill the container with enough copper plating solution so that the printout is completely covered with it. Immerse the anode in the container and turn on the power. After the rectifier is turned on, immerse the printout in the container, making sure that it does not touch the anode anywhere. Beware! When the object is already in the bath, the galvanization system is active, and contact with the solution, cathode or anode can be traumatic. Set the voltage on the rectifier to 1-3 Volts, and the process will go to full metallization. To speed things up, the voltage can be increased, but not more than 5 volts. When enough metal has deposited on the printout, simply turn off the power and dry the object with microfiber towels. When it's dry, varnish the object to protect it from corrosion.


.jpg)