Recycled plastic into 3d printer filament
Open-source machine Polyformer turns bottles into 3D printing filament
Ali Morris | Leave a comment
California-based industrial designer Reiten Cheng has developed a recycling machine that can be 3D printed using open-source instructions and used to turn PET bottles into filament for additive manufacturing.
Polyformer was designed to make it cheaper and easier for independent makers to create products from repurposed waste materials instead of relying on virgin plastic.
Polyformer is an open-source recycling machineThe design is open source, meaning that a step-by-step manual detailing its construction is freely available online so that it may be used and adapted by others.
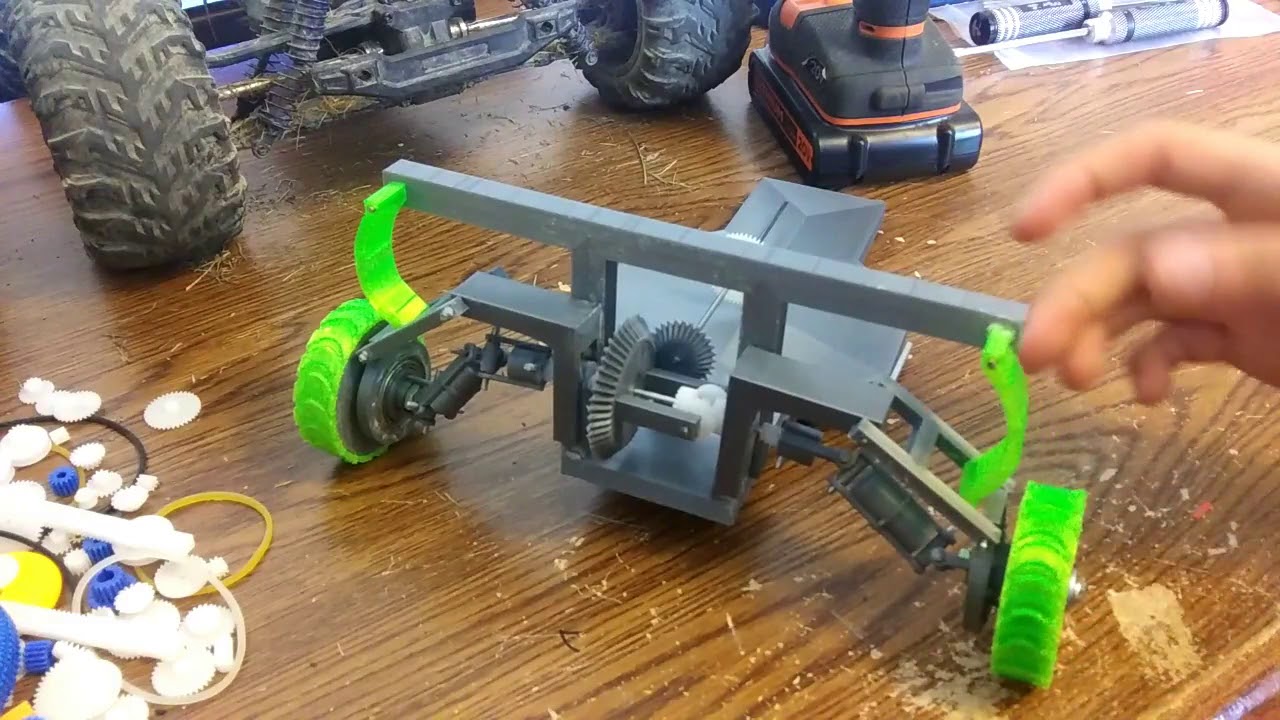
The L-shaped gadget is made from 3D-printed parts combined with a few off-the-shelf components found in traditional 3D printers.
"The entire machine was printed using recycled PET bottles, which gives a nice translucent look to it," Cheng said.
Polyformer is equipped with a slicing tool with stacked bearings that can cut plastic bottles into long, continuous ribbons.
Users can feed these ribbons into a so-called hot end, which heats, melts and feeds the thermoplastic through a brass nozzle to create a filament with a diameter of 1.75 millimetres.
The end of this filament can then be mounted onto a motorised red spool, which will pull the rest of the ribbon through the hot end and wind up the filament as it is created. Once the spool is full, it can be taken off to be mounted and used in a 3D printer.
The thermoplastic is fed through a brass nozzlePolyformer has a modular design that allows users to easily swap out parts and modify the machine to their liking.
Since making the project public last month, Cheng said there are now around 130 people in Polyformer's community on social media platform Discord, who have machines under construction.
Some users have proposed adding grinders so that the machine can recycle different kinds of plastic waste, while others have suggested recycling cassette tapes and fabrics.
Mobile AI-powered recycling plant Trashpresso wins World Design Impact Prize
Polyformer follows on from a number of other open-source projects, such as VoronDesign's 3D-printed 3D printer and the Recreator3D pultrusion kit.
Together, Cheng says these kinds of machines could eventually help to forge a decentralised system of manufacturing and recycling.
"I am imagining a future where products can be manufactured at home or in a community centre and be recycled into things at the end of their life that can be used again to manufacture new products right on-site," Cheng told Dezeen.
"The technology might not be there yet but I believe it's not far from possible if we keep developing and implementing it as a community."
The filament is wound onto a motorised spoolLast year, a number of architects including Bjarke Ingels collaborated on an open-source project to make 3D-printed coronavirus face shields for hospital workers.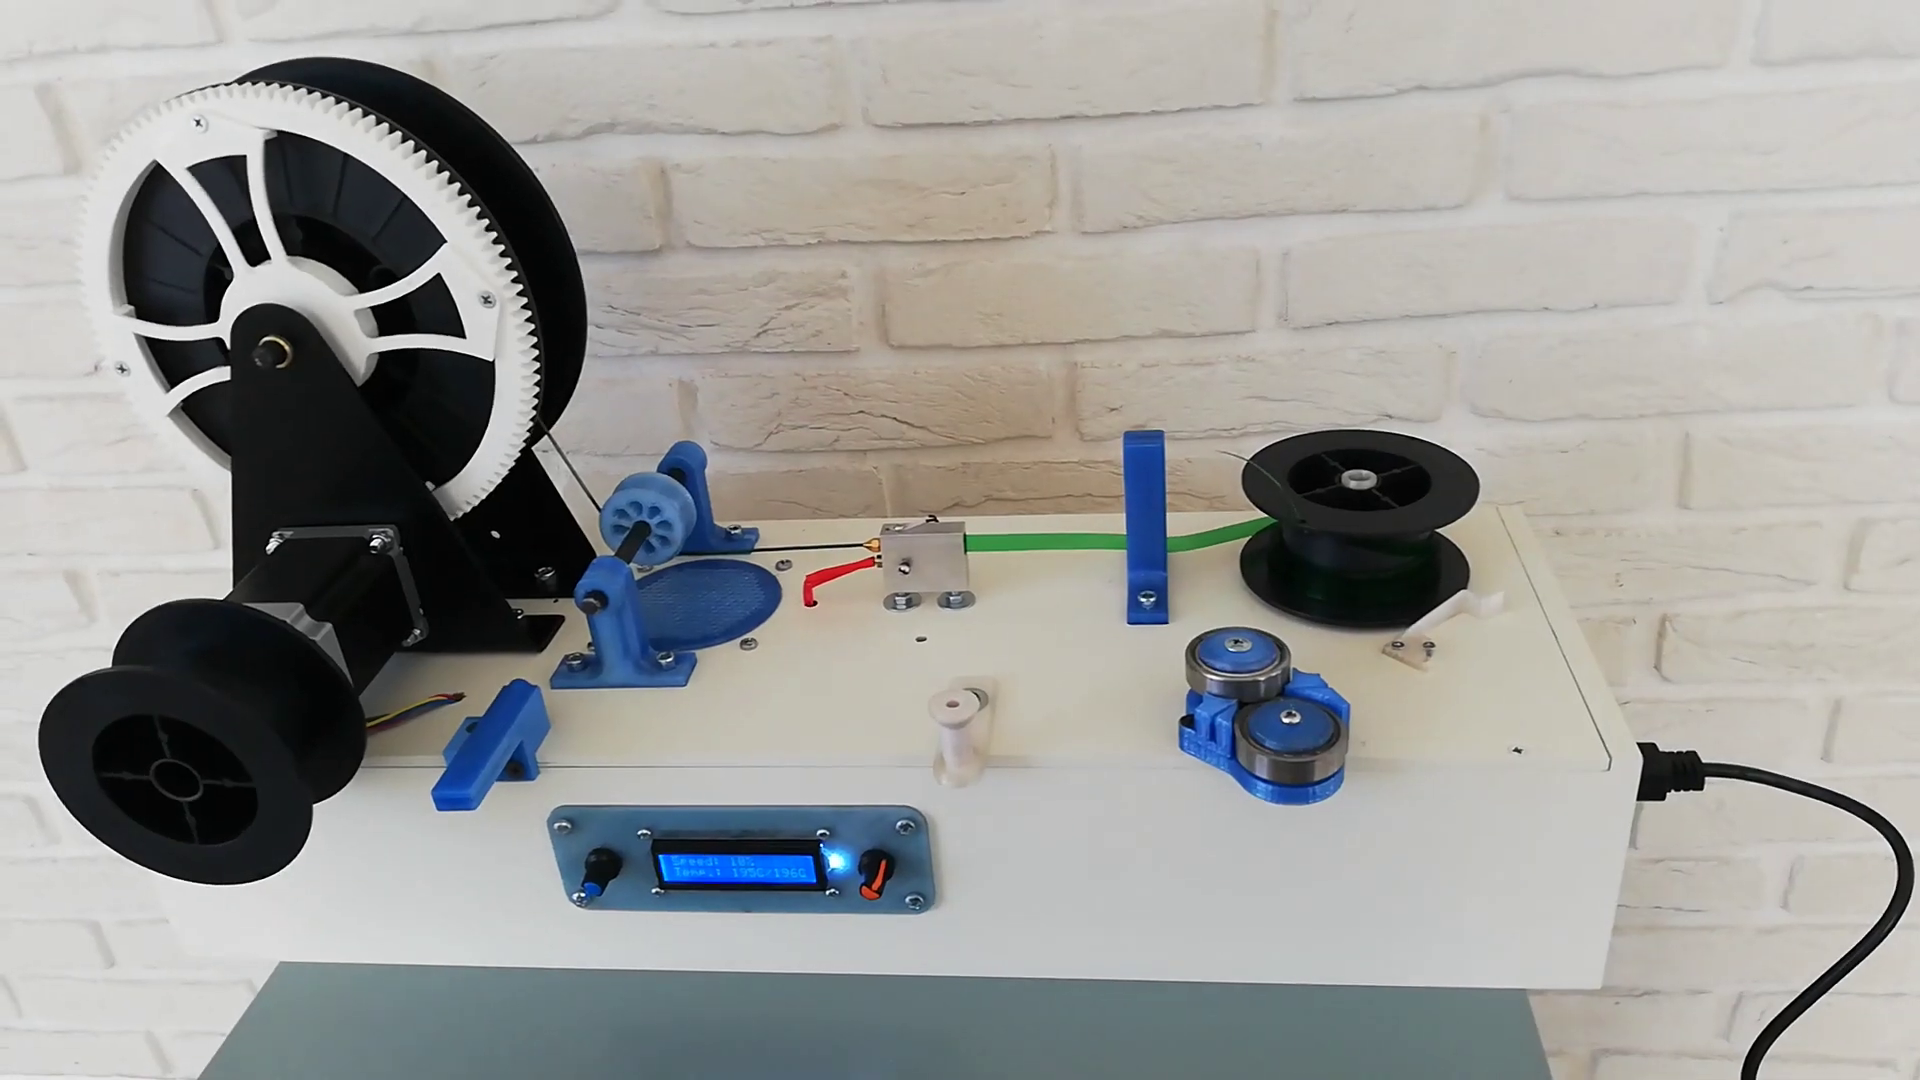
Ingels argued that the pandemic has revealed "the shortcomings of the traditional supply chain" and that decentralised local manufacturing could replace global supply chains.
The photography is by James Chou.
Subscribe to our newsletters
Your email addressDezeen Debate
Our most popular newsletter, formerly known as Dezeen Weekly. Sent every Thursday and featuring a selection of the best reader comments and most talked-about stories. Plus occasional updates on Dezeen’s services and breaking news.
Dezeen AgendaSent every Tuesday and containing a selection of the most important news highlights. Plus occasional updates on Dezeen’s services and breaking news.
Dezeen DailyA daily newsletter containing the latest stories from Dezeen.
New! Dezeen In DepthSent on the last Friday of every month, Dezeen in Depth features original feature articles, interviews and opinion pieces that delve deeper into the major stories shaping architecture and design.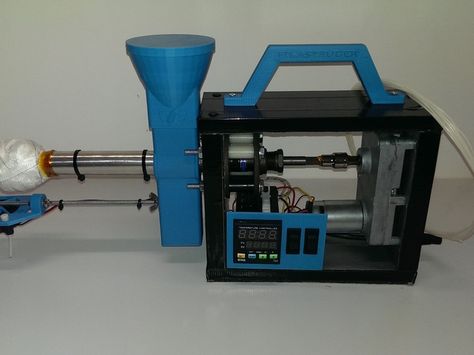
Daily updates on the latest design and architecture vacancies advertised on Dezeen Jobs. Plus occasional news.
Dezeen AwardsNews about our Dezeen Awards programme, including entry deadlines and announcements. Plus occasional updates.
Dezeen Events GuideNews from Dezeen Events Guide, a listings guide covering the leading design-related events taking place around the world. Plus occasional updates.
We will only use your email address to send you the newsletters you have requested. We will never give your details to anyone else without your consent. You can unsubscribe at any time by clicking on the unsubscribe link at the bottom of every email, or by emailing us at [email protected].
For more details, please see our privacy notice.
Thank you!
You will shortly receive a welcome email so please check your inbox.
You can unsubscribe at any time by clicking the link at the bottom of every newsletter.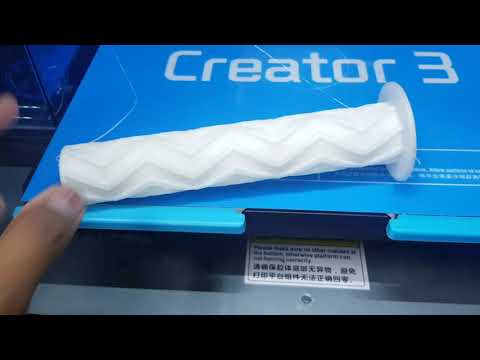
More images
How to Recycle PET Plastic into 3D Printing Filament
Recycling PET is a great way to create 3D printing filament. PET, or Polyethylene Terephthalate, is a rigid and hard material with interlayer bonding. You might know this material by its common name, Polyester. This material is best known for its use in bottles for drinks and clothing items. The main advantages of PET are that it is light (compared to glass, tin or aluminum), it is safe to use for various food items, it is cheap, and it is recyclable. This guide will explain all you need to know about recycling a plastic that has been alarming the global community of climate activists for years.
PET is the most recycled plastic, having a recycling rate of 58.2% After it is recycled, it is called rPET, or recycled PET. Many companies thefefore are now aiming to reuse it and recycle it as new packaging. For example, some shoemakers have been turning rPET into sneakers.
VIVOBAREFOOT Recycled PET Shoe Collection
Sneakers and packaging aren’t the only products you can recycle PET into; by turning it into 3D printing filament and 3D printing, you can produce unique designs and new products!
We’ve been able to extrude rPET into filament and print with it successfully and have collected all the steps into the step-by-step guide below so that you can too!
PET Preparation Guide
Collect the Required Tools, Materials and Equipment
Below you’ll find everything that you need in order to recycle your own PET.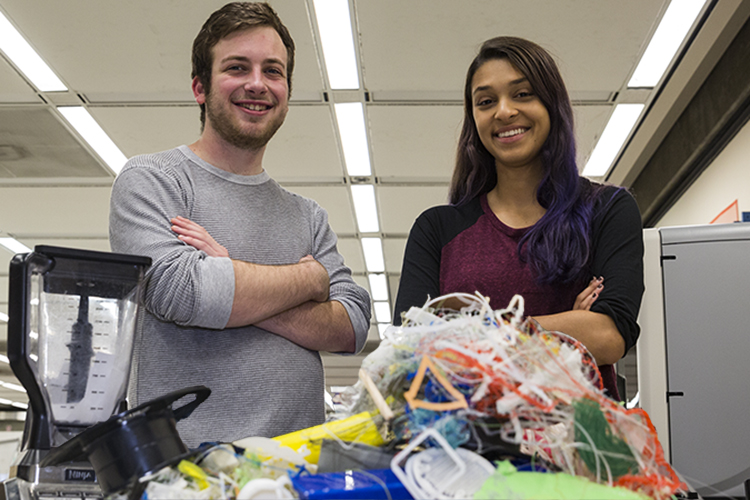
Tools
| Side Cutter |
| Scissor |
| 2.5 mm Allen Key (Hex Key) |
| Cleaning Cloth |
| Empty Spool |
Materials
| PET Bottles |
| Acetone |
| Dishwashing Soap |
| Water |
| 400g of Devoclean MidTemp |
Equipment
| A plastic shredder |
| Airid Polymer Dryer |
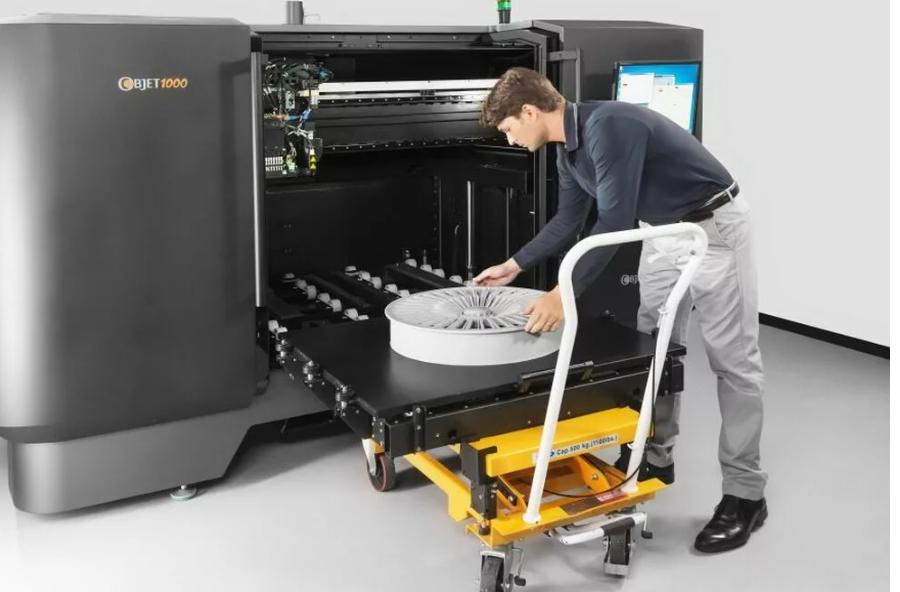
| Precision 350 Filament Maker |
| 3devo Feeder |
| 3D Printer |
We had our own equipment available for this project, but you can use what you have on hand. Just be mindful that different machines may require different settings.
Step 1 – Prepare the PET Bottles
The first step to recycling your bottles is to prepare them by cleaning and shredding them to the appropriate size. To get them ready for shredding we have to clean them from any residue, contamination and extra materials. The steps for this are:
- Unscrew the caps from the bottles and cut off the security rings using a cutter or knife. Be careful as the hard plastic might be challenging to cut with cutters.
- Remove the labels from the bottles using scissors or cutters. There might be residue glue leftover. We suggest removing it using a piece of cloth or cotton swab and Acetone. Acetone dissolves the glue, and thus it becomes easy to remove it.
- Clean the internal of the bottle using dishwasher soap (or any soap available at hand, we are generous here) and brush.
- Ensure that you have removed all the solid residue (in milk bottles), liquid, or any dust contamination. Contamination can cause inconsistencies and flaws in the recycled product.
- Dry the bottles by placing them upside down. You can put them in the sun for a speedy drying process but make sure the place is free from dust.
- Once dried, reduce the bottles in size. We advise you to do so using one of the following methods:
- Crushing the bottles flat by hand,
- Using a vacuum cleaner to shrink the bottles by removing the air,
- Using scissors to cut the bottles into small pieces (be careful as the sharp edges of the bottles can hurt you).
Step 2 – Shredding the Bottles
Now that the bottles are clean and cut into smaller pieces, they are ready to be placed into a plastic shredder. Our aim is to get them into smaller chunks no bigger than 4mm. When you’ve put them through your shredder, check the size of your pieces using Vernier Calipers or a ruler.
If after the first feeding the sizes are bigger than 4mm, feed the regrinds through the shredder once again.
Step 3 – Dehumidifying the Shredded PET
PET is hygroscopic, meaning that it absorbs water from the environment. This water can impact the quality and integrity of your final product. Thus, it is vital to remove this excess water.
The recommended method is to use a dryer such as the Airid Dryer. This dryer allows you to change settings which include: airflow, temperature, duration, and stirring speed. The process to dry the regrind of PET bottles consists of the following steps:
- Fill the hopper of your Airid Dryer with your regrind.
- Close the hopper by screwing it tightly.
- On the control panel, rotate the knob to set the ‘drying temperature’ to 140oC or (284oF) and duration to 5 hours.
If you do not have a designated dryer like Airid, you can use your conventional oven for drying the regrind. Be careful with your settings though, as too high of a temperature can melt the regrind.
Heads Up!
Once you have dried the regrind, use it for extrusion immediately to prevent it from reabsorbing moisture. If you plan to use it later, we recommend to store the regrind in an airtight container or using other filament storing methods to prevent moisture from ruining your regrind.
The top filament was extruded without drying the regrind and the bottom after drying the regrind.
Step 4 – Preheat the Filament Maker
Typically, new filament makers come preloaded with pellets of materials like PLA. If the filament maker is already in use, it can have previously used material in the machine. In either case, to obtain the pure extrusion of PET, it is necessary to remove that material. These materials can have the same or different melting points than PET. For example, our filament makers have PLA pellets by default.
PLA has a working temperature of 60-190oC, whereas PET’s temperature range is between 350 to 490oC. So, if PLA gets heated to the working temperature of PET, the PLA will degrade or decompose, both of which we do not want. That’s why a transition material which is workable between the temperature ranges of PLA and PET is used. In our case, we used Devoclean EZ MidTemp, which works for both the cleaning and transitioning process.
How Transitional Material Works.
To preheat and remove the existing material from the machine, follow these guidelines;
- If the current material in the filament maker is PLA, the recommended settings are:
- Heater Temperature to 200oC,
- Extruder speed to 15RPM,
- Filament fans to 30%.
- Start the machine and wait until the hopper gets emptied from all the existing material. To speed up the process, you can use a vacuum cleaner to remove the current PLA pellets from the hopper. (Usually, there is protection gauze on top. Unscrew the screws and slide to remove the gauze).
- Pour the Devoclean EZ MidTemp or HDPE Flush into the hopper. The recommended amount is 250g.
- Wait until all the Devoclean from the hopper has been extruded, the output of Devoclean is white, bubbly, and foamy.
- Once you observe the hopper becoming empty, change the machine settings for PET. We recommend:
- Heater Temperature to 270oC,
- Extruder speed to 7RPM,
- Filament fans to 30%.
- Continuously check for the hopper to prevent it from becoming empty. The machines have a built-in feature to turn them off if the hopper is empty for more than 10 minutes. However, you can turn this feature off in the settings.
- Observe the temperature of all the heaters; there are four of them. To reach 270oC, let all the pellets in the hopper get emptied.
- Now, feed in the PET regrind in the hopper. Use a small amount of PET at a time, as overloading can cause blockage and slow down the process.
- If you have already opened the safety grid, you can plug in the feeder and place it in the hopper. The feeder generates vibratory motions that help move the regrind through the extruder easily, as its sharp edges can make this difficult.
- During the extrusion, keep an eye on the contents of the hopper. Make sure that it stays filled to avoid any obstruction in the extrusion. Once the output is no longer foamy or bubbly, you’ll know that all the Devoclean has been extruded, and we are now extruding rPET.
The next step is to tune the settings for getting the perfect extruded filament.
Step 5 – Tune the Settings for a Perfect Extrusion
Now that we are getting pure PET at the output, it is time to set the proper settings for the mixture. Every PET bottle is made from a different batch, and it is vital to fine-tune the settings to get a perfect filament as output. The aim is to achieve a round filament which has no air bubbles and has a consistent diameter. Below are the various settings which you are able to modify.
Temperatures of heaters
Try to change the temperature of each heater in the interval step of 5oC. Check the filament for the required product.
The RPM of Extruder
The RPM of the Extruder is essential. Usually, the key to quality is lower RPM. However, a much slower extruder can result in a slower process, product build-up at the nozzle, and premature hardening at the nozzle end. Therefore, the optimum value lies in the middle of the RPM range of the extrusion machine.
The speed of Filament Cooling Fan
The Filament Fan serves the purpose of cooling the filament/product coming out of the nozzle. A higher speed will cause speedy hardening blocking the process. A slower fan can cause the filament temperature to rise and thus forming a liquid-like form.
The recommended settings, during our experimentation, were:
- The Heater Temperature to 245oC,
- Extruder speed to 7 RPM,
- Filament fans to 15%.
But again, these are the settings well suited to our batch of PET and environmental conditions, and yours can vary accordingly.
Spool the Filament
After you begin to observe a continuous filament of desired quality, it is time to wind the filament on the spool.
- Take the empty spool and tighten the spool holder on this empty spool.
- Go to the settings, start the spooling wizard, and follow the instructions as indicated on the screen.
- Cut the filament off the product and attach it to the spool by guiding it through the positioner.

- Place the spool on the winder shaft, tighten the winder and start the winding.
- Close the safety door.
- During the process of spooling, keep an eye on the regrind quantity in the hopper. Fill the hopper with more regrind as needed.
- When the spool is wounded, cut the filament using scissors and remove the full spool by untightening the screw.
- As stated earlier, PET absorbs water. So, either uses the filament directly after spooling or store the spool in an airtight environment.
Purge the Filament Maker
Since there is molten material inside the Filament Maker, it is necessary to remove it before turning it off to prevent hardening in the Filament Maker and clogging the machine. You can do this by:
- Allowing the materials in the hopper to completely use or vacuuming the regrind out of the hopper.
- Add Devoclean EZ MidTemp in the hopper. We recommend using 50 grams of these pellets.
- Turn up the RPM to 15 to speed up the process.
- Remember, the output of Devoclean EZ MidTemp should be foamy and bubbly.
- Once all the Devoclean pellets are used, stop the extrusion, and turn off the machine.
Extrusion Trouble Shooting
During the extrusion, you may encounter several faults and product flaws. Below you’ll find the most common issues you may encounter and how to troubleshoot them.
1. Weak Flow Out of Nozzle
The possible causes of weak flow out of nozzles are ratholing or bridging the regrind, making it hard to pass from the hopper to the extruder.
Troubleshoot: The troubleshoot includes stirring the regrind in the hopper using the feeder or a spatula.
2. Solid Bumps Appearing in the Filament
Solid bumps in the filament indicate the presence of contamination or impurities in the regrind.
Troubleshoot: Make sure to clean your PET bottles properly and protect your regrind from dust (storing it in a container until use can help).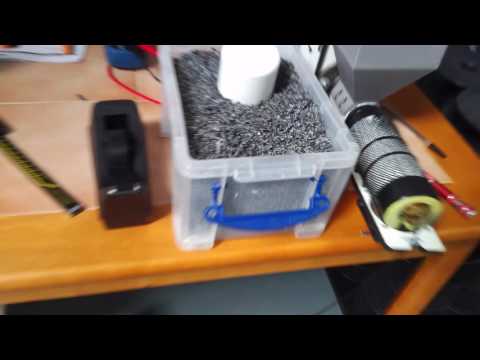
3. There is Build-up in the Nozzle
Nozzle build-up is due to the premature hardening of the product coming out of the nozzle. The possible reason for these faults can be the cold nozzle.
Troubleshoot: We recommend increasing the temperature settings of Heater h2, decreasing the filament cooling fan speed, lowering the fan orientation from the nozzle, or having proper insulation of the nozzle area through a magnetic plate.
4. The Molten Filament is Collapsing
Nozzle build-up is due to the premature hardening of the product coming out of the nozzle. The possible reason for these faults can be the cold nozzle.
Troubleshoot: The troubleshooting involves lowering the heating by decreasing the temperature of the heaters. In addition, we recommend reducing the fan cooling. During the troubleshooting, make sure that you do not reduce the temperatures too much, or nozzle build-up may occur.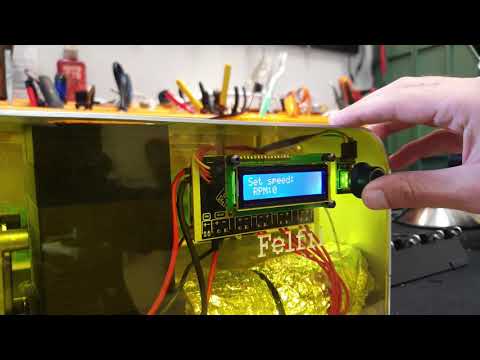
Tips for 3D Printing Your Dream Design
Now that you have your spool full of PET filament, you can use it to 3D print your dream design. These are the steps we took to make it happen:
- Open the slicer software on your computer. We used Cura, but you can use any of the ones you are comfortable with and upload the STL file.
- In the printing settings, set the settings to the following temperatures:
- Printing temperature to 255oC,
- Bed temperature to 70oC.
- For better adhesion between the subsequent layer, we suggest you turn print cooling off.
- You can decrease the print speed to compensate for the lack of cooling. We recommend the settings to be 20mm/s.
- Start the printing and be mesmerized by the process.
Recycling PET bottles is about science, but luckily, it’s not rocket science. With patience, the proper technique, and finding the correct settings for your PET bottles, you can turn your waste into valuable products.
Are you interested in learning more about this plastic? Then, head over to our Ultimate Guide to PET, where more details and information are available!
Sustainability in 3D Printing: Recycled Filament Without Sacrificing Quality
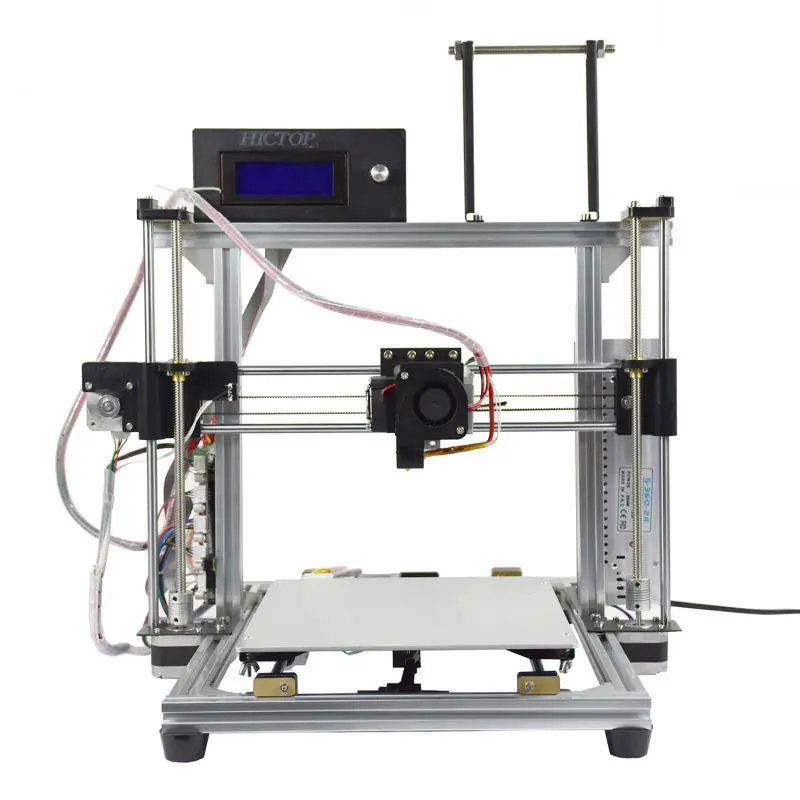
As an environmental engineer, high school teacher, and co-founder of Closed Loop Plastics (CLP), Will Amos, along with co-founders Aldrin Lupisan and Sharon To, became innovators in the field 3D printing and additive manufacturing, just a few years after graduation.
“We started in 2018, right out of college, by finding a way to recycle red “party” plastic cups into 3D printing filament. That idea has now grown into a pretty cool company that takes plastic waste and turns it into 3D printable material.”
For 4 years, Closed Loop Plastics has been creating new materials, new colors and enabling anyone with access to a 3D printer to participate in the circular economy by printing with their products.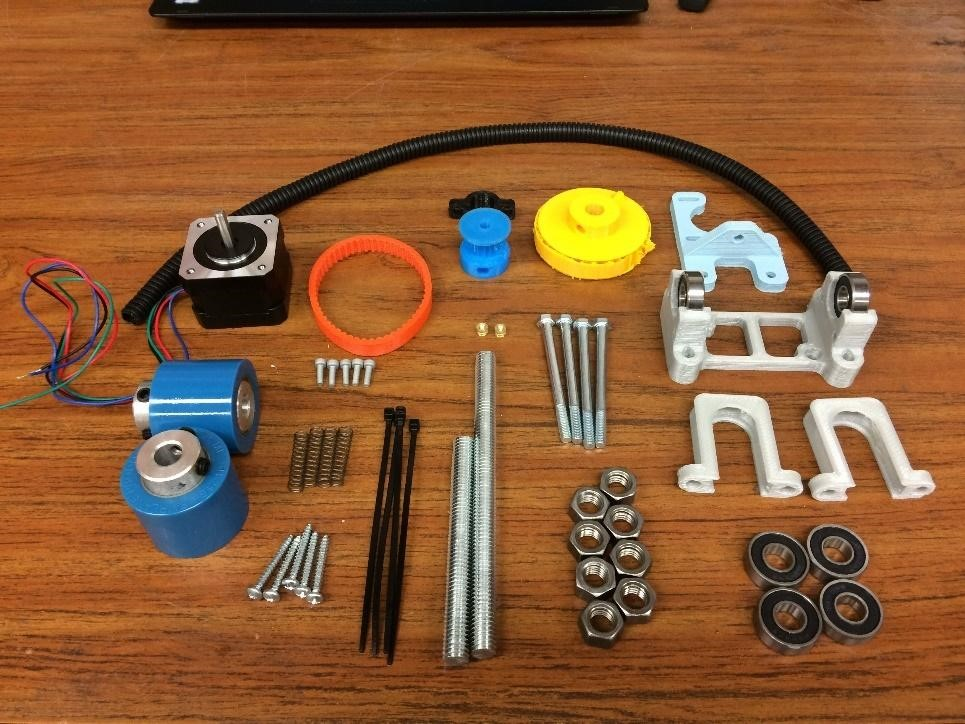
"We give people access to certified and fully sustainable materials right in their printers without any major adjustments or changes to their process."
Will tells the story of how CLP started:
“I started 3D printing in 2015 as part of the UC Irvine team for the Solar Decathlon, which is a competition for building solar-powered houses. I was put in charge of the tool room of the future, mostly because I was a sophomore engineer and didn't know much, so I took Aldrin and a few other college buddies with me and created this tool room. As a prize, we were presented with a 3D printer, and then for the first time we thought: “Well, we are environmental engineers, and this is an environmentally friendly economy. How can we make 3D printing sustainable? It was a neat prototype tool, but it used a lot of plastic, so we wanted to find a solution to recycle the plastic that goes back into the 3D printer.”
“The first thing we did was think about recycling. At first we recycled printed plastic, but then we realized that we do not have a critical mass of plastic waste from 3D printing alone. We figured out how to use waste from other sources, such as food containers, to really solve this problem and create a high performance polystyrene (HIPS) recycling element. We made it possible for people to use material for really interesting purposes, instead of sending it to the landfill. So we started thinking about how to make 3D printing green, and then it became clear that our job was to figure out how to make the use of plastic generally green on our planet.
Our ideas have definitely gone big. To give you an idea, our first product we were going to sell as a company was a recycling cart (similar to an audio visual cart) and the idea was that it could be rolled around a plastic waste recycling lab. It's been a few years, and now we've reached the point where we're applying for municipal bonds to build county-level infrastructure so CLP can build these businesses that recycle hundreds of thousands of people's plastic waste every day. When we think about it, it's amazing.
We have moved from a decentralized lab-based approach to a wastewater infrastructure-based approach. I think that's cool, and it reflects the education that Aldrin and I received as environmental engineers, combined with our other co-founder, Sharon To, with a computer engineer background. Aldrin and I can think in terms of large-scale infrastructure, and Sharon can think in terms of focused control systems, and all this has led to successful team dynamics. We trust each other and our skills, which allows us to change direction as needed and expand our scope.”
Closed Loop Plastics originally focused on high impact polystyrene (HIPS) material (as Will explains later), but its use opens up endless possibilities for almost all plastics.
“We chose HIPS because we needed a recycled plastic that was not so specific that it could only be used in 3D printing. We wanted something that could be used in 3D printing, but not only in it. . HIPS plastic is a widely used material for supports or for rough 3D printing. We wanted to try recycling it because it's a great thermoplastic and very easy to recycle in its original state.
After we settled on HIPS, we needed to focus on getting it clean and ready for 3D printing. We first offered it in Party Pink, which was an unpigmented color, essentially a mix of all the different HIPS plastics we put in our system. As our clients grew, they were interested in additional colors, and then we added Nebula Black. This was our first experience of introducing any additives into the process. It was a great experience that made us learn a lot. There were blockages here, there were running out of machine parts, but we realized that we could create a new, differentiated product. We are still testing for other colors and even new materials. We are going to test 3D products with new plastics like PLA, PETG and ABS. We are constantly thinking about making something more accessible to the market, because HIPS is not as widely used as other types of plastic. ” .
” .
CLP ensures the quality of its filament by monitoring the diameter and dynamically controlling the yield. Diameter tolerance is a key point of failure for any filament, as Will explains: “We knew that if our filament had poor diameter tolerance (getting wider, smaller, changing shape, etc.) then it would be difficult for users to print with it. help. So we've built a system that monitors the ovality and diameter of the filament about a thousand times per second. Tons and tons of samples are required, then we can adjust the speed of extrusion and material drawing. We can change it in the process. Many plastic manufacturers produce a low-quality batch and have to throw it away, so our ability to correct during the printing process is really useful.
We are seeing an amazing expansion of our product. Since our U-HIPS is a highly durable material that does not get dirty (after processing), printing on it is easy and does not require additional surface treatment. It is easy to print from and does not require surface treatment. It can even be used on a system that is not closed. There are many things about our U-HIPS product that make it truly unique, allowing manufacturers of any experience level to participate in the circular economy at any level right now. We have a client, Leviathan 3D Printing on the East Coast, who reported receiving our product from Matterhackers and is delighted with the print results. They used it to create student projects for accessibility reasons. The students designed things to be used by other people with limited hand capabilities. It is the epitome of recyclability and the circular economy and it is great to see our product being used in this way.”
CLP has built a solid fan base that enjoys using its products, and manufacturers have found some really innovative uses for it. The company recently featured on their blog some fantastic handheld body surf planes made by an Orange County High School teacher. He surfaced and painted them, and they look like a finished product.
“We had a lot of people in the early days who thought it wouldn't get accepted because it was too hard stuff to use,” Will explains. “As our product has grown and improved in quality, we have seen many people adopt it and dedicate themselves to making it work on their systems. We have people prototyping in their labs, students using it for various projects, and even a few professional prototyping agencies using it to create all sorts of cool things."0008 .
We have made great strides in raising funds this year and continue to gain momentum in yarn production as we continue to expand our rapid production capabilities and explore new materials in this area. Expanding our material portfolio and expanding our workforce in Long Beach, California are some of the goals we continue to work towards. Over the next 5 years, we hope to expand and open three new facilities that can process 2,000 to 10,000 pounds of plastic per hour and really start recycling plastic so we can get more recycled material into the hands of more manufacturers and manufacturers. In the short term, we also hope to expand our reach into the injection molding world to demonstrate the versatility of our products. We want to let people know that in addition to 3D printing, we can make an impact on the plastics world as a whole through our process to give plastic waste a new life in the form of recycled filaments, pellets.” .
3D printing plastic recycling, PET.
Reviews
Follow author
Follow
Don't want
15
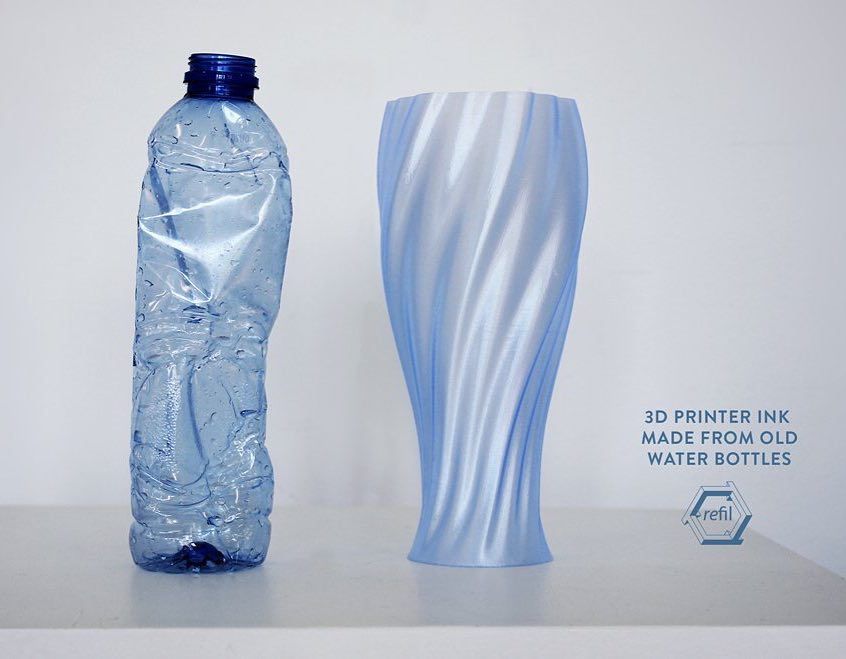
The article refers to Re-fill (recycled PET plastic for 3D printing).
This time we're looking at converting plastic into 3D printing filament.
Recycling is not as easy as it sounds, and many companies have tried before and now to start using recycled filament for their 3D printers. Anyone who has tried to make their own filament on a small scale will understand how difficult it is, even with the newer plastic pellets.
Last year I was very lucky: I got 3DFilaprint and it was a big recycling project, it taught me that making quality filament is very, very difficult.
I produced several batches of recycled ABS for a local shop. I have even tried to recycle some polypropylene and PET, with limited success.
Of course, the easiest way is to use ready-made PET, PLA and WoodFill granules. Making my own colored WoodFill yarn was a lot of fun and exciting. Doing it professionally - for your home 3d printer, to make it from plastic scrap, having previously cleaned it, melted it and squeezed it out, is not at all an easy task.
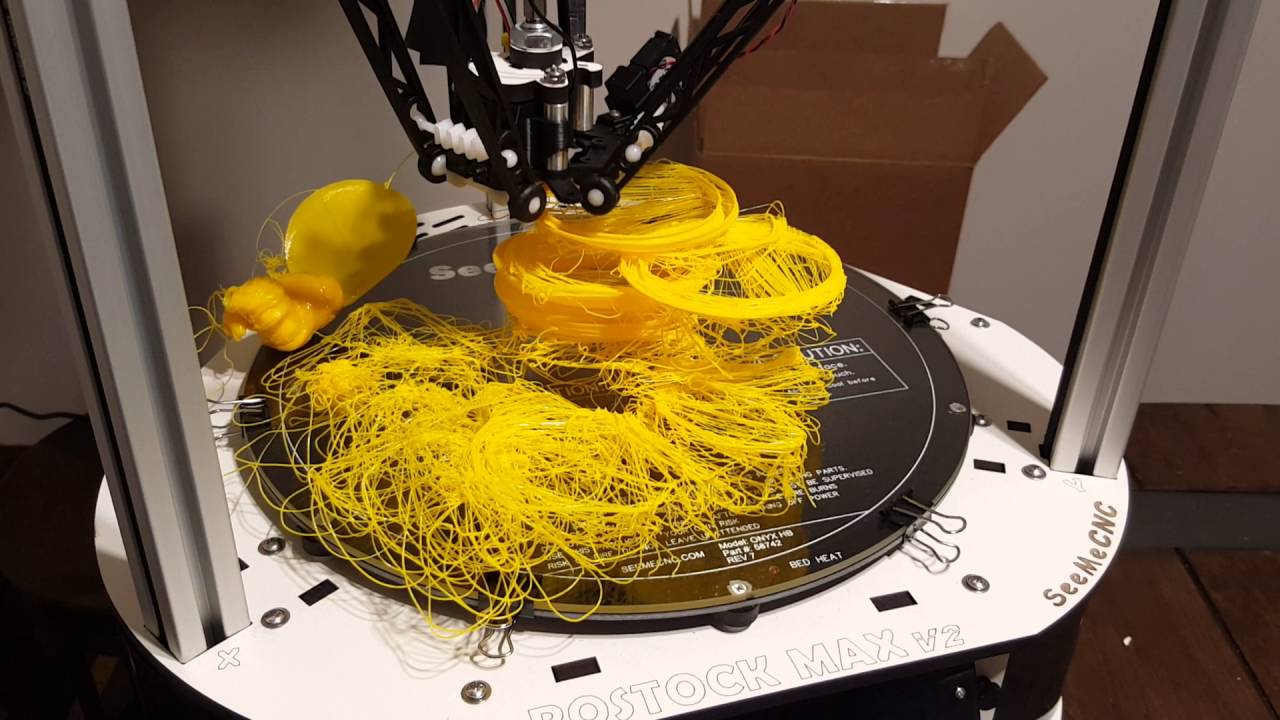
I posted this photo of the failed print above - the print failed due to a mechanical printer error - it's not the fault of the bad filament.
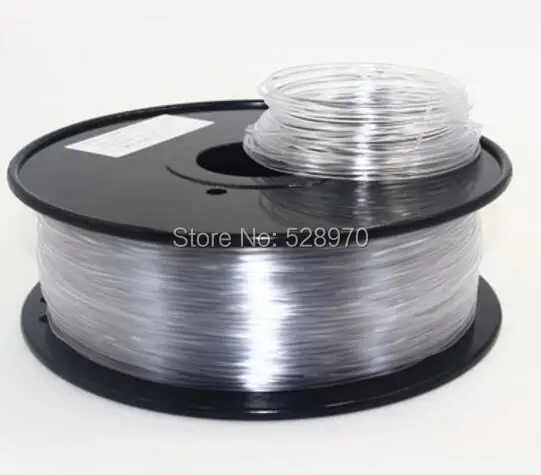
I was very happy to win a Refil PET reel. It contains up to 90% recycled plastic bottles. The team has been working on this plastic for the last 3 years. How much you get is 750 grams of thread, while the total weight including packaging is about 900 grams.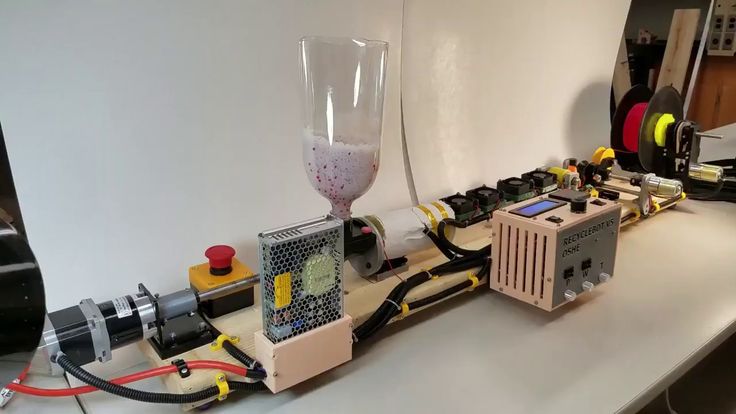 What it looks like -
I had a full roll of clear PET and a sample of black ABS filament, which is made from recycled car panels. PET is indeed very transparent. It's so transparent, in fact, that I'm even a little concerned that it's really recycled material and not new. I was expecting bubbles and maybe even a few slight color casts or a slight opacity.
PET plastic bottles and recycling symbol.
The most important aspect is dimensional accuracy. My spool was 1.75mm and I'm more picky about it than 2.85mm thread. I measured about 50 times at the beginning, middle and end. The whole spool was 1.76mm - almost negligible deviation. How do they print? I started printing at a normal PET temperature of 230 degrees C and printed a simple single layer vase for optical clarity testing.
Singvers classic bottle.
Printed in actual size - for comparison - glass on the left, PET on the middle and white PLA on the right. It was once a PET bottle, and now, after being recycled and 3D printed, it's a PET bottle again :) But printing at 230 is not very good for this particular type of PET material -
Bubbles as far as I can tell not moisture content.
.jpg)