Open source 3d printers
6 Best Open Source 3D Printers 2022 (With Links To Designs)
Open source previously meant users had permission to use and modify software code, and improve it however they wished. Today, the open source philosophy and community has grown immensely to include physical products, and open source software powers billions of devices worldwide.
Open source 3D printers helped launch the affordable 3D printer range we have now, starting from the RepRap movement more than a decade ago. Therefore, we ranked our favorite open source 3D printers, with links to the 3D printer source files, and where to buy them.
What is open source?
Open source encourages collaboration and the sharing of improvements with the community, leading to faster innovation and better technology for everyone. Without any IP holding people back from experimenting and improving open source 3D printer designs, fantastic new developments can occur.
- A number of open source software feature in our best free 3D software guide.
- Open source 3D printer software also feature in our best 3D printer software guide.
How can open source improve 3D printers?
An example of this is the development of the Olsson Block. Anders Olsson, in trying to get his Ultimaker 3D printer to print boron carbide, accidentally created a block that made switching a 3D printer’s nozzle far quicker. Now, Olsson Blocks are used by thousands of 3D printers to reduce nozzle switching time.
Best Open Source 3D Printers for all price ranges
| Name | Build Volume (mm) | Price | Best price available at: | Alternative purchase option: |
|---|---|---|---|---|
| Monoprice Mini Delta | 110 x 110 x 120 | $169 | Amazon here | |
| Anet A8 | 220 x 220 x 240 | $160 | Amazon here | |
| Creality CR-10 / V3 | 300 x 300 x 400 | $499 | Creality Store here | Amazon here |
| Prusa i3 MK3S+ | 250 x 210 x 200 | $749 / $999 | Kit available on Prusa store here | Fully assembled on Prusa store here |
| BCN3D Sigma D25 | 420 x 300 x 200 | $3,995 | Dynamism Store here | Matterhackers here |
| Ultimaker 3 / S3 | 215 x 215 x 210 | $4,080 | Dynamism Store here | Matterhackers here |
At the start of the consumer printing revolution, courtesy of RepRap 3D printers, open source 3D printers were the norm. Passionate makers across the world modified existing open source 3D printer designs or created their own for others to improve. They were effective yet cheap, costing just a few hundred dollars back when an equivalent 3D printer would cost thousands.
Open Source vs Closed Source 3D Printers
Makerbot, Printrbot, Lulzbot (by Aleph Objects), Ultimaker, BCN3D and several other 3D printer companies were formed championing the open source 3D printer movement. However, some have since struggled.
Printrbot closed down in July 2018 citing low sales, while Lulzbot laid off the majority of their staff in October 2019, facing closure before they were rescued and bought out. Makerbot, perhaps the most successful 3D printer company to emerge from the DIY 3D printer revolution, famously turned their back on the open source philosophy, and now their 3D printers are closed source and IP-protected. The company was acquired for $400M by Stratasys.Makerbot printers are now closed source and IP-protected.
However, some open source 3D printer companies continue to show strong growth and prove that open source is not only well-loved, but also a profitable strategy. BCN3D continue to produce high-quality printers including the Sigma D25 and Epsilon, while Ultimaker have grown to become one of the most respected 3D printer companies in the world.
We have a full list of open source 3D printers at the end of this article. First however, we have our recommendations of the best open source 3D printers with links for purchasing. We also include links to the open source 3D printer designs on GitHub.
3DSourced is reader-supported. When you buy through links on our site, we may earn an affiliate commission. Learn more
Best Desktop Open Source 3D Printers
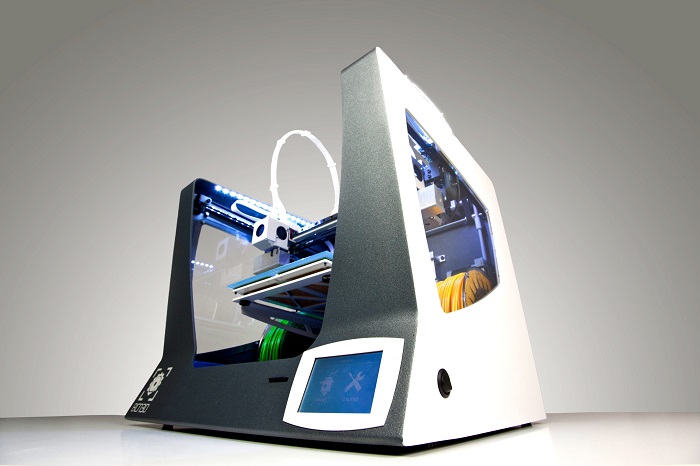
Monoprice Mini Delta — Introductory open source printer
- Price: $169 — Available on Amazon here
- Maximum print volume: 110 x 110 x 120 mm
- Accuracy: up to 50 microns
The Monoprice Mini Delta is known for being one of the best budget 3D printers around, with great precision (up to 50 microns), speed (up to 150 mm/s) — and it’s open source!
An open source delta 3D printer, this differing type of 3D printer allows for faster print speed, as with less weight on the print head, faster speeds and quicker acceleration can occur without overshooting.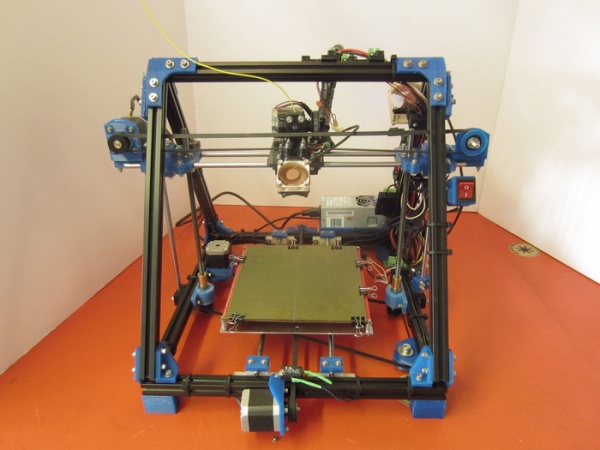 Higher print speeds can therefore be maintained without any loss of accuracy.
- We also have a ranking of the fastest 3D printers.
Unlike many delta printers, the Monoprice Mini Delta comes fully assembled, so you can get printing in less than an hour from opening the box. The heated bed means you can print ABS and other trickier 3D printer filaments, and you can print via WiFi as well as by USB or SD card. The sturdy metal frame improves part print quality by anchoring the printer down so external factors like vibrations don’t impact quality, and overall it’s a fantastic open source 3D printer for a low price.
Anet A8 – Low cost open source 3D printer
- Price: $180 — Available on Amazon here
- Size: 220 x 220 x 240 mm
- Minimum layer thickness: 100 microns
A low-cost open source 3D printer, the Anet A8 is a 3D printer kit that you will have to build yourself. It will take a few hours (up to six, actually), but once it’s up and running, not only will you be able to print magnificent 3D models, but you’ll also feel accomplished and appreciate it more having built it yourself.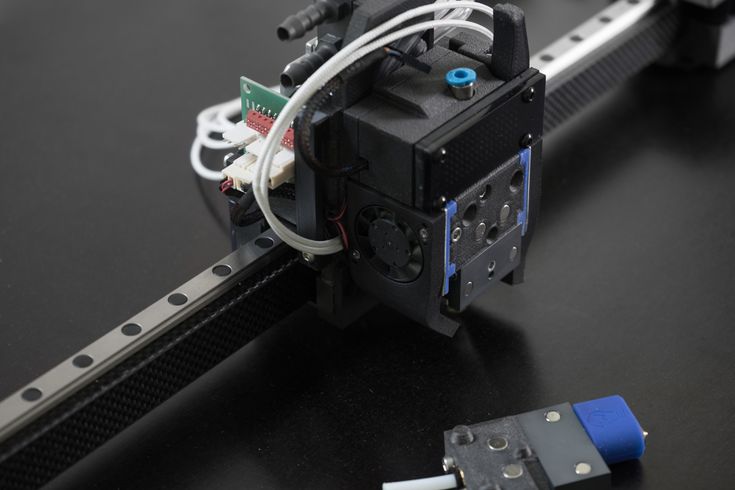
Since it requires some tech know-how, this may not be the ideal 3D printer for beginners. But for those with enough experience to handle any issues and who can modify their open source 3D printer based on what they want to print, it’s fantastic for such a low price.
Once it’s up and running, it’s a fairly large 3D printer, able to print 220 x 220 x 240 mm parts without issue. It can print standard PLA and ABS, as well as wood-filled filaments and others including Nylon.
Overall, it’s reasonably reliable, accurate, and does everything you could possibly expect for such an affordable 3D printer. And with the open source firmware, you can unleash your creativity and change anything you want to improve.
Creality CR-10 / V3 — Great Open Source 3D Printer Kit
- Price: $369 for standard CR-10 / $459 for CR-10 V3 — Available on Amazon here / Available on Creality Store here
- Build volume: 300 x 300 x 400 mm
- Minimum layer thickness: 100 microns
The Creality CR-10 has been one of the best-selling and highest-rated 3D printers under $500 of the last few years, with many iterations and updates continuing to build on the original CR-10’s success.
The original CR-10 is now fully open source, with Creality 3D having released all the files on their GitHub for anyone to view. Though this CR-10 is being phased out in favor of the newer CR-10 V2 models, many 3D printer parts will be identical across models, and the CR-10 V2 files are also available.
The open printing area means there is no protection from unpleasant fumes, and this open source 3D printer can also be fairly noisy, so you may want to keep it in a separate room from the one where you work or relax in. The quality and reliability of the Creality CR-10 however shines through and is the main reason for its popularity, and overall it’s a great open source printer.
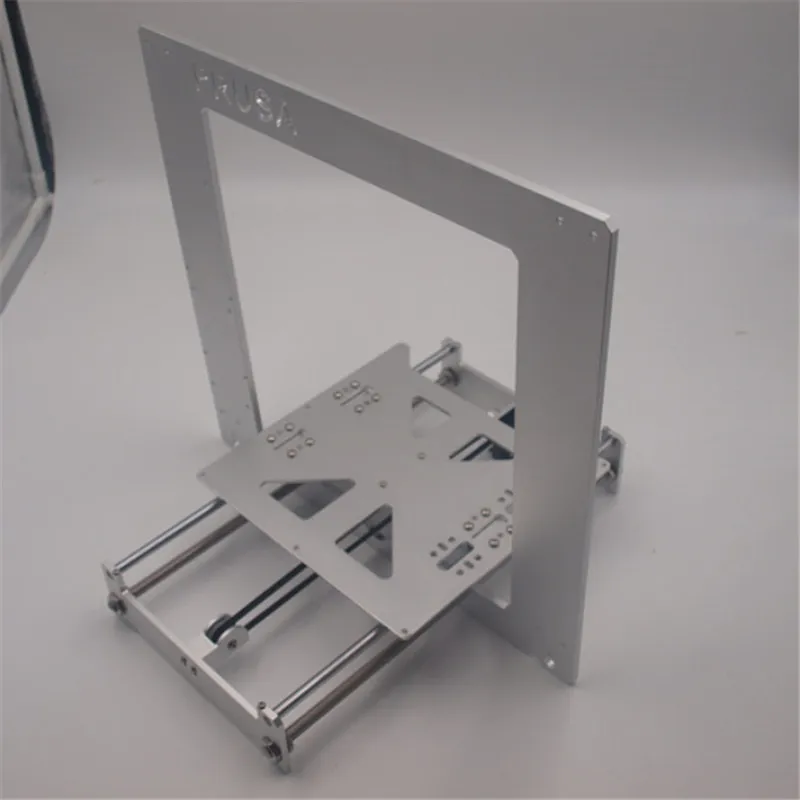
Prusa i3 — best open source 3D printer under $1,000
- Price: $749 as a kit — Available on Prusa store here / $999 fully assembled — Available on Prusa store here
- Build volume: 250 x 210 x 200 mm
- Precision: 50 microns
Whereas some desktop 3D printer brands have turned their backs on open source, Prusa is still committed to the open source 3D printer philosophy, and you can access everything you need on their GitHub.
Known as one of the best 3D printer kits ever made, Prusa 3D printers have won boatloads of awards. Solid printing speed, accuracy, great reliability and compatibility with a variety of filaments (especially with the Multi-Material 2.0 upgrade) make it competitive with printers costing far more.
- The Prusa can be upgraded to print 5 colors simultaneously. You can read more in our color 3D printer ranking.
Designed to save you hassle and time, the Prusa i3 printers will save your current progress in the event of a power outage so you can resume where you left off, it will pause in the event of filament running out so the print doesn’t fail, and can even detect when the filament is clogging. Overall, it’s a fantastic open source 3D printer and we highly recommend it.
Professional Open Source 3D Printers
BCN3D Sigma D25
- Price: $3,995 — Available on Dynamism Store here / Available on Matterhackers here / 3DPrima Europe here
- Build volume: 420 x 300 x 200 mm
Barcelona, Spain-based BCN3D remain committed to open source 3D printing since their inception in 2012. All their printers have open source 3D printer files for firmware, process, software, and more published on the BCN3D GitHub.
BCN3D printers are known for their reliability, and the Sigma D25, their newest printer, is no different. Featuring their signature IDEX dual extruder system which can print in two special modes, Mirror and Duplication, each extruder can function separately, as either a multi color 3D printer, or for printing with a soluble filament for supports that can be easily removed.
Whereas the Sigmax R19 has a completely closed, enclosed build chamber, the Sigma D25 is semi-open. It’s easy to use, reliable, durable with its high-quality stainless steel frame, and prints very consistently and accurately at up to 50-micron layer heights on E3D hot ends. D25 models now have access to WiFi 3D printing, and can automatically install new firmware updates to keep your printer up to date.
Any keen makers or small businesses looking to print fun projects or accurate plastic prototypes, that is also open source, may find the Sigma D25 the perfect 3D printer for you.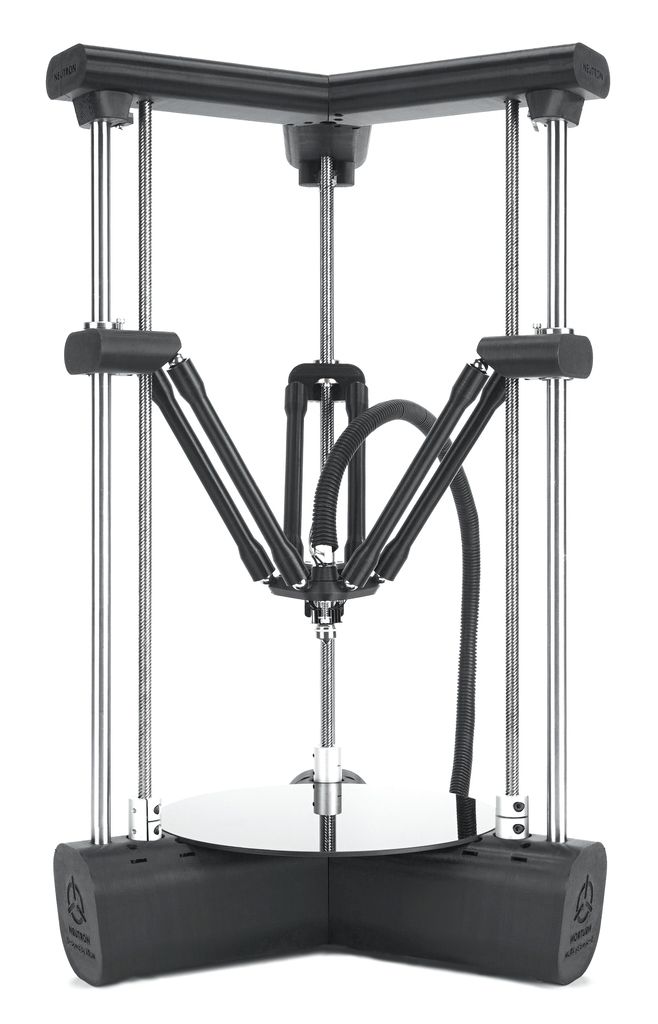
Ultimaker 3 / S3
- Price: $4,080 — Available on Dynamism Store here / Available on Matterhackers here
- Build volume: 215 x 215 x 210 mm
12 months after the Ultimaker 3’s release, the Dutch company released the hardware source files for both the Ultimaker 3 and Ultimaker 3 Extended here. This was no surprise; Ultimaker had previously released the files to other printers including the Ultimaker 2 Go, leading to innovation breakthroughs such as the Olsson Block. Ultimaker also develops Cura, the popular and open source 3D slicer.
Known as one of the best 3D printers of its generation, the Ultimaker 3 is incredibly accurate and widely adopted for rapid prototyping precise plastic parts. It comes fully assembled and almost ready to print; you can get it all started within just a few minutes.
It works with Ultimaker’s open source 3D printer software, Cura, and features a built-in camera for monitoring your print’s progress remotely. It’s not the fastest, but prints with flawless accuracy for an FDM 3D printer, and the dual extruder also adds to its offering.
Ultimaker has not yet (as of August 2021) released any source files for the Ultimaker S5 or S3, but some of the parts are near identical to the Ultimaker 3.
- BCN3D Epsilon
- Lulzbot Mini
- Taz Pro
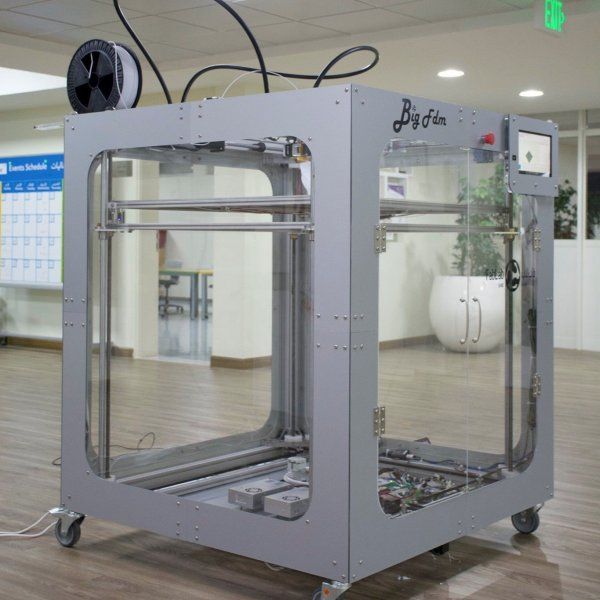
- BigFDM
- Creatable 3D
- Hydra Research Nautilus
Other articles you may be interested in:
- How to get a free 3D printer
- Open source CAD software
Build a reprap - RepRap
This page has been flagged as containing duplicate material that PartsSupplies also attempts to cover.
These pages should be merged such that both pages do not attempt to cover the duplicate topics.
This page has been flagged as containing duplicate material that Darwin/Buyers Guide also attempts to cover.
These pages should be merged such that both pages do not attempt to cover the duplicate topics.
This page has been flagged as containing duplicate material that What Tooling Do You Have also attempts to cover.
These pages should be merged such that both pages do not attempt to cover the duplicate topics.
This page is out of date --Sebastien Bailard 04:34, 31 October 2010 (UTC)
This page is not only out of date, but contains in part simply nonsense - especially the "Software installation" section. For the lack of editors, this page should be removed. --Traumflug 21:18, 13 April 2011 (UTC)
Contents
- 1 Build a RepRap
- 2 Overview
- 2.1 Object Creation Software
- 2.2 System control Software
- 2.3 Installing the Software (experimental)
- 2.4 Thermoplast extruder
- 2.5 Positioning system
- 2.6 Shopping list
There are multiple ways to build a RepRap or RepStrap; the method selected for these instructions has been chosen to minimize skills and tools needed. If you wish to explore other options click Alternative Build Documentation.
The Classic RepRap Design is "Darwin" pictured on the right. There are very full and accurate building instructions in Make Your Own RepRap.
The RepRap was carefully designed to use only parts that can be made on a RepRap and other cheap parts that you can get anywhere. It was also designed to require few skills to assemble. The one snag is you have to find someone to supply you with the parts that must be made on a RepRap.
RepStrap Darwin Clones are RepRap designs which are fairly accurately copies of the Darwin design but the RepRapped parts are replaced by parts created some other way, Perhaps molded plastic or laser cut acrylic or plywood. Generally parts of one of these machines are interchangeable with RepRapped Darwin parts. Here are some Parts Suppliers.
Other RepStraps, these are 3D printers capable of making RepRap (Darwin) parts but are not structurally similar to Darwin. These machines may vary a lot but may be separated into two kinds. Those like Darwin in which the extruder (print head) is moved in the x and y directions and the work is slowly lowered as the print progresses and others where the work is moved in the x and y directions under a stationary head which gradually moves upwards as the print progresses. Here are some references to various RepStrap Machines.
If this is your first RepRap that you are building, here is a basic guide of which build option you should choose:
- If you have a friend nearby that can print out the RepRap part on their RepRap or some other 3D printer. Choose the Classic Darwin
- If you don't have access to a 3d printer then you have 3 options.
- You can build a Classic Darwin, but this means you will have to use a commercial service to print out parts for you; it can easily cost over $1000 for just those parts depending on what deals you can get. This option is probably the most expensive option.
- You can build a RepStrap Darwin Clone. This means you can either buy a lasercut acrylic kit from Bits from Bytes or make some part yourself by machining them. This option is becoming the more common option especially because soon you will be able to buy a lasercut kit from Ponoko which has offices in the US.
 This is also usually cheaper than the first option.
 - The third option is to build non-clone RepStrap that does not have the same frame as a Darwin, such as McWire which uses pipes for the frame. This option is usually the cheapest, but each RepStrap has it own weaknesses. The good thing is that when complete they can print out parts so that you can build a Classic Darwin. The electronics are compatible with Darwin so you only have to buy them once.
A RepRap or RepStrap (A RepRap can build itself, a RepStrap can build something that can build itself) can be divided into several key areas:
- Object creation Software
- System control Software
- Thermoplastic extruder
- Positioning system (the Cartesian Bot)
- The electronics to control the positioning system
Object Creation Software
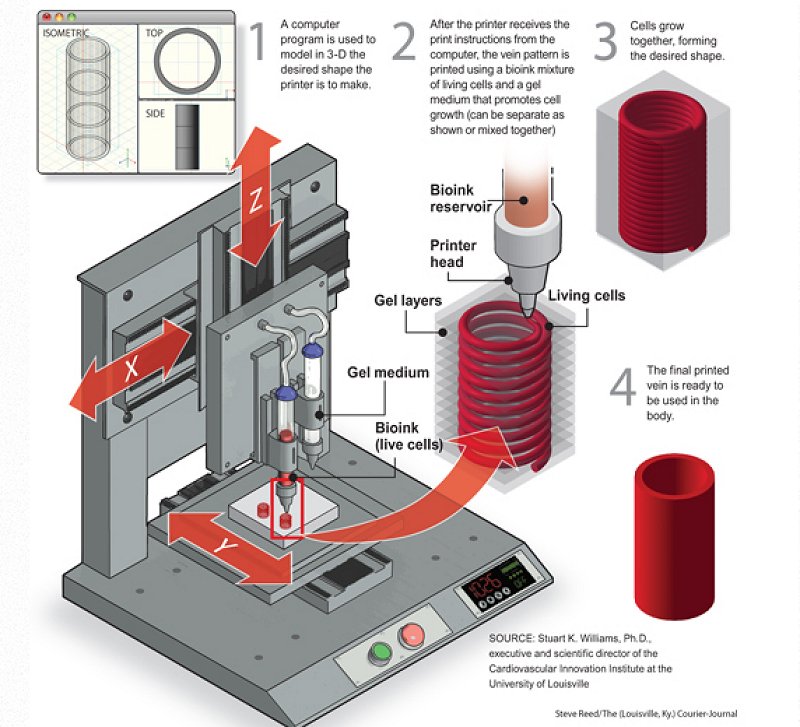
Art of Illusion is currently the software most recommended for designing objects to be printed. It's not a CAD package but it is easy to use. The software allows you to create and manipulate 3D shapes. You can store these shapes in STL file format. STL files are object files that are used in Rapid Prototyping. These STL files can be printed off into real 3D objects using your 3D printer (RepRap).
The software is free (GNU GPL version 2) and it is available for Mac OS X, Windows and Linux. If you want to try it out without installing it's available bundled in the Linux distribution liveCD with the rest of the hosted software for the RepRap project.
System control Software
RepRap is controlled via USB or an RS232 interface. You may find a description or download from RepRap Host Software.
There is a RepRap variant which allows you to print an object from a file saved onto a SD card.
Installing the Software (experimental)
This set of instructions tells you how to set up all the software you need for a Reprap in one big blow under Linux Debian.
It involves 5 steps that anyone should be able to complete in a few hours of his/her spare time.
It's easy.
Really.
Warning: Proceed at your own risk. The instructions are not double checked yet.
Prerequisites
You'll need
- a PC (not too old)
- broadband internet access
- some time
Step 1: If you have Windows, go to [Here], get your copy of the Debian installer with one click and start it.
If you already have Linux: Install Debian Lenny some way or the other (you know how to do that ;-)) and continue with Step 3.
Step 2: Follow the instructions. I suggest installing on a 4GB USB stick - but you can also install it all on your hard disk. Be careful to select "testing" instead of stable - this installs Lenny instead of etch. Otherwise the standard settings should be ok in most cases. Don't say "yes" to things you might regret. After a while, a standard system should be installed. Don't forget to install the GRUB boot loader.
Step 3: Log in and say
sudo apt-get install firefox
on the command line.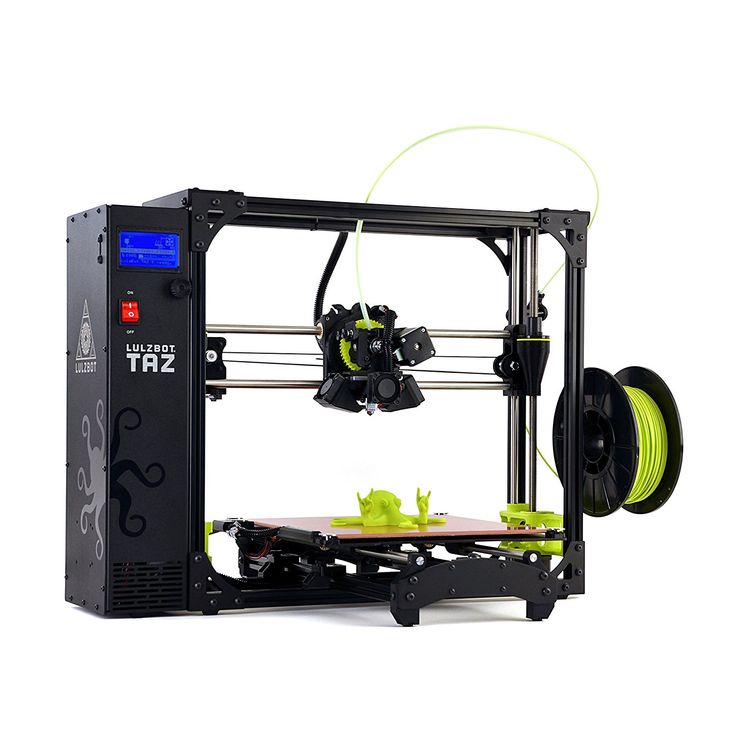
Step 4: Start firefox and download this Media:Reprap_setup.sh script.
Step 5: Run the script from the shell with
sudo ./Reprap_setup.sh"
Now all the software specific to Reprap is retrieved and installed.
This includes the AVR-Tools, Subversion, Java3d, the Reprap-source tree etc. Installing all that will take some time.
Having successfully reached this point you should try to start the software in reprap-host with:
ant run
If you now see the main window of the host software, you're done.
Congrats! You have made it!
You still have to learn how to use it - but that is another story and another tutorial.
Thermoplast extruder
There are three different extruders all of which, in the end, perform the same function. There is the "official" extruder that can be made by another RepRap. Then there are the kits which are mass produced so it is easier to start printing your first parts. Both kits are designed to be interchangeable with the official extruder.
- RepRapable Thermoplast Extuder
Can be made by another RepRap or commercial rapid prototyper. These are not the only ways the parts can be made but are the easiest. Some builders have made them from machining aluminum or plastic. Others by making molds and casting from resin. This is only for the main pieces of the extruder. The drive screw and other mechanics must be bought or machined. - Kit from Bits from Bytes (laser cut acrylic)
There is an extruder kit currently available from Bits from Bytes who are based in the UK. The kit is part of the silver or gold kits and doesn't need ordering separately unless you want a spare. Assembly instructions are available on the Bits from Bytes website in the 'Assembly Instructions' area:
Bits from Bytes Extruder Assembly instructions
Bits from Bytes Extruder 3d Model - the model requires a recent copy of Adobe Acrobat.
There are videos of the construction process, in the 'Tutorials' section of the website.
Bits from Bytes Heater Barrel Assembly
Bits from Bytes Extruder Drive Assembly
- Kit from Ponoko (laser cut plywood)
A kit will soon be available via Ponoko which has offices in the US.
Positioning system
The positioning system is the greatest part of the size of a RepRap. It is what moves the extruder head from place to place. Kits are available from Bits from Bytes, either the FULL Mechanical Kit - Silver or Gold contain all the components necessary to build a positioning system and extruder. Assembly instructions are available on the bits from bytes website in the 'Assembly Instructions' area:
Bits from Bytes Assembly Instructions
Shopping list
The following list contains all the components necessary to build a RepStrap and enough plastic to print a RepRap. Some handtools are required for assembly, but the only power tool used is a soldering iron.
Extruder and Positioning System
Bits from Bytes - FULL Mechanical Kit - Silver or Gold
Ponoko - coming soon
(only one required)
Electronics
Plastic
The extruders all use 3mm diameter plastic filament/wire. ABS is the recommended plastic for its combination of strength, availability and dimensional stability. Suitable plastic is available from RRRF in 5lb reels. It is also available by request from plasticweldingrod.com.
Total
Shipping and tax vary by country of order but $1000 total is a reasonable approximation.
Objects printed on open source 3D printers are stronger than on professional equipment
Archive
and at home, it becomes more and more real. The development of the low-cost RepRap, an open source, self-replicating, high-speed 3D printer, has made 3D printing technology accessible to everyone. Mass-produced versions of the RepRap, such as the Lulzbot TAZ, will cost customers $2,000 for a complete device and $500 for a set of parts that you need to assemble yourself.
It is believed that amateur 3D printers, which can easily reproduce any shape and object, can only create fragile plastic knick-knacks, and it does not matter that the finished products look exactly like objects printed on professional equipment. Interestingly, parts printed on RepRap are not inferior in quality to parts printed on professional 3D printers, because the material for printing is the same?
Most owners of amateur printers simply do not have the opportunity to test the resulting objects for durability. And yet no one thought about the mechanical properties of objects created on RepRaps.
“We were also curious. The printed products seem solid, but we wanted to develop reliable scientific equipment for developing countries, so we needed hard, hard numbers,” said Joshua Pierce, associate professor in the Department of Materials Science, Engineering, Electrical and Computer Engineering, Michigan Technological University.
Pierce and his team conducted a study on the mechanical properties of parts printed on open source 3D printers. Standard testing methods were used during the course of the work, with the exception of changes in operating conditions, which were fully consistent with the domestic environment in which such printers are used.
Today, RepRap 3D printers primarily print objects from acrylonitrile butadiene styrene or ABS (the plastic used to make Lego bricks) and polylactide or PLA, a biodegradable plastic that is made from corn. The study assessed the basic tensile strength and modulus of elasticity of parts printed on a conventional open source 3D printer under realistic working conditions. As a result, it was found that the average strength index is 28.5 MPa for ABS and 56.6 MPa for PLA, and the average modulus of elasticity is 1807 MPa for ABS and 3368 MPa for PLA.
Pierce says: “The results of the study are clear. Parts printed on inexpensive open source RepRap 3D printers can be considered as mechanically functional as parts made on professional printers. In many cases, they are even stronger than reported.”
“We only tested tear strength on a flat print bed. Now we want to study the interlaminar bond strength.” The researchers plan to continue their work and test other polymers, as the makers of the RecycleBot and commercial open-source printers such as the Filastruder are encouraging consumers to use recycled plastic as a printing fiber.
“The results of our work prove that digital mass production using free 3D printers is technically possible,” concludes Pearce.
You can view the results of the study "Mechanical Properties of Open Source 3D Printed Parts under Realistic Working Conditions" by B. M. Timrak, M. Kreiger and J. M. Pierce.
Article prepared for 3Dtoday.ru
Follow the author
Subscribe
Don't want
More interesting articles
7
Subscribe to the author
Subscribe
Don't want
Mikhail Kozenko, a schoolboy from Volgograd, joined the ranks of 3D makers by designing his own 3D...
Read more
four
Subscribe to the author
Subscribe
Don't want
Alexander Gessler wrote a small handy program to convert 40+ 3D file formats (OBJ, S. ..
..
Read more
3
Follow author
Follow
Don't want to
Not so long ago, we talked about an interesting engineering and architectural project that is directly related to the app...
Read more
Created a budget open source 3D printer for work with metal
Navigation
Sergey Skladny 03.12.2013 News 0
Despite the fact that the technology of ultra-precise 3D printing of metal products has existed for several years, and is even actively used by many progressive manufacturing enterprises in the heavy industry, its cost until recently was so high that private users could not even dream of working with it . Only the printers themselves cost more than half a million dollars, and not everyone was suitable for raw materials.
However, those times seem to be over, as a group of young experimental scientists from the University of Michigan, led by engineering professor Joshua Preece, have been able to create their own 3D printer capable of printing metal products. The best part is that talented developers spent no more than one and a half thousand dollars on their creation. It is worth noting that their invention is open source, which will allow hundreds of enthusiasts from all over the world to create a lot of projects, which then each person with a similar printer can download and recreate at home in a matter of minutes.
According to the authors of the project, this breakthrough will bring humanity as close as possible to a futuristic future, which science fiction writers could only dream of a few years ago. Using inexpensive but effective 3D printers, every person will eventually be able to make almost any item at home. And the benefit of this invention for the leaders of small and medium-sized businesses cannot be overestimated. For example, the owner of a car repair shop will no longer have to order some rare parts, and make his own customers wait, it will be enough for him to print them on his printer.
At the moment, the development team is still finishing their project, because, despite the successful testing, they still have a lot of work to set up.