Afinibot update a1 reprap delta 3d printer
Rostock - RepRap
Rostock Documentation
Main page | Rostock Buyer's Guide | Rostock Build Manual | Rostock User Manual | Rostock improvements
Rostock
Release status: working
| Description | Rostock is a delta robot 3D printer prototype. |
| License | GPL |
| Author | User:Johann |
| Contributors | |
| Based-on | Helium Frog Delta Robot |
| Categories | Delta, Tall |
| CAD Models | GitHub |
| External Link | Thingiverse |
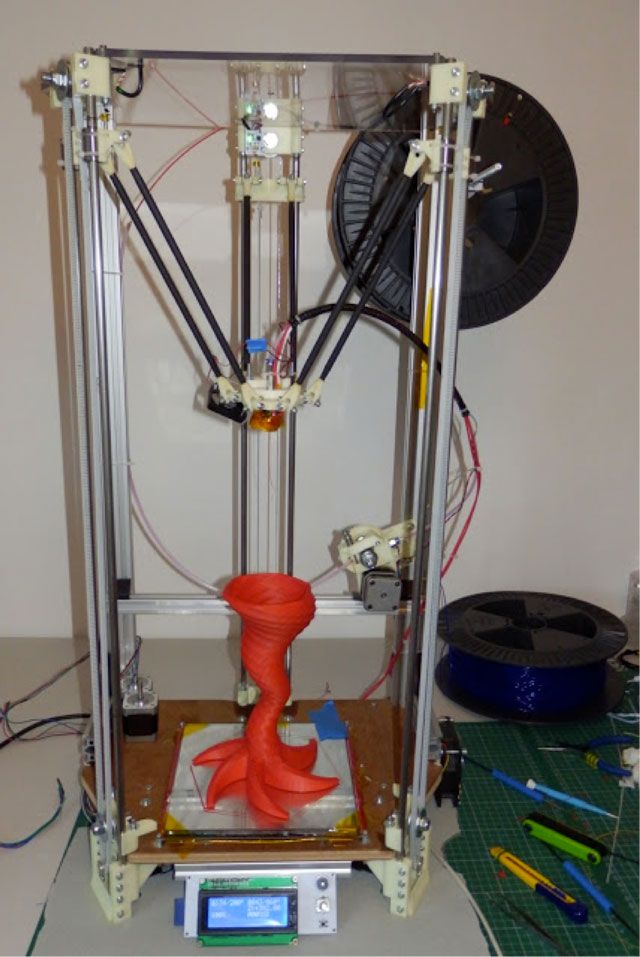
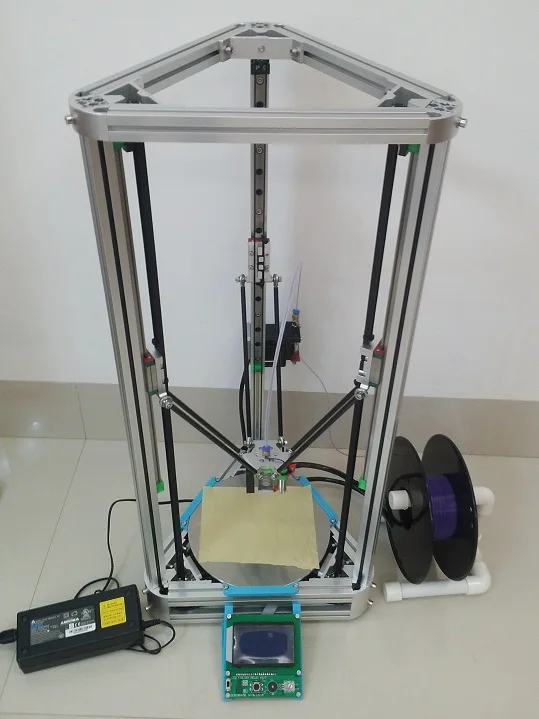
Rostock is a linear delta robot 3D printer prototype, built in 2012 by Johann in Seattle, USA.
Several variations have taken root, including: Kossel, Rostock mini, Rostock MAX, Rostock-Montpellier, Rostock Prisma, Delta-Pi, Cerberus, cOssel, Cherry Pi and ProStock. Both the MOST delta and their Open Source Metal 3D Printer also uses an inverted form of this design.
Contents
- 1 Design Goals
- 2 Videos
- 3 Firmware
- 4 Frequently Asked Questions
- 5 Future
- 6 Links
Design Goals
- Build volume: 200x200x400 mm (8x8x16 inches).
- Footprint: 300x350 mm (12x14 inches).
- Print surface: 200x200 mm heated glass which never moves.
- Mass of end effector with hotend: less than 50 grams.
- Positioning speed: up to 800 mm/s in all 3 directions.
- Positioning accuracy: at least 30 steps/mm in all 3 directions.
- Simplicity: fewer than 200 parts.
- Hardware cost: less than $500 USD.
Videos
http://youtube.com/user/jcrocholl/videos?query=rostock
<videoflash>3UOq-CQsbNo|640|360</videoflash>
<videoflash>nkAwOxA0lq8|640|360</videoflash>
Firmware
Many firmwares support Delta printers out of the box.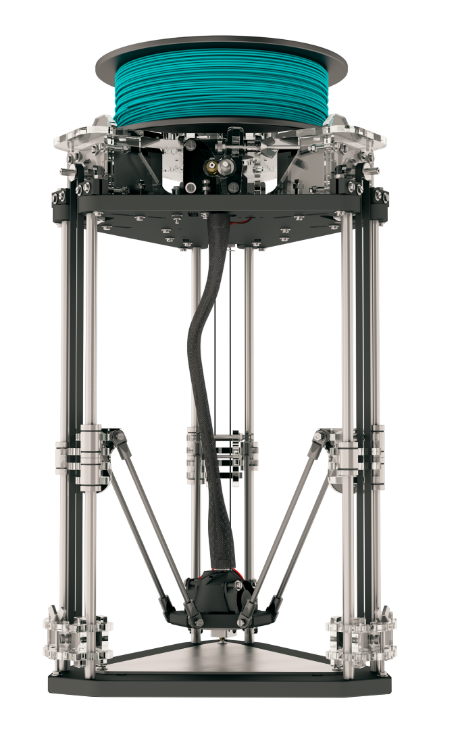 See their individual instructions on how to configure them.
Frequently Asked Questions
- How do you adjust the height of the print surface ?
You can adjust the following line in Configuration.h and then recompile and upload the firmware:
// The home position of the print head. // For Rostock this means top and center of the cartesian print volume. #define Z_HOME_POS 402 // Distance between nozzle and print surface after homing.
For micro-calibration, use the adjustable endstop screws in the vertical carriages, see #Calibration above.
- Should the heat bed be mounted on top of a piece of insulation or cork ?
Yes, it's definitely a good idea. Cork or another kind of thermal insulation under the heatbed has two benefits:
- It lowers the times required for the heatbed to reach the PLA (around 60C) or ABS (around 100C) ideal heatbed temperatures.
- It protects whatever material is under the heatbed from excessive heat radiated by the hot heatbed.
See Heated Bed Insulation for further details.
- Is your heat bed mounted element side up ?
Yes, the etched copper side is in direct contact with the glass. You can see the LEDs and contacts in the front just next to the glass edge. But I have not actually connected my heated bed wires yet, because I print only PLA and it sticks perfectly to blue painters tape, even without heating the platform. I will connect the heated bed wires if I ever have problems with detaching corners, otherwise remove the heated bed completely at some point.
- Should the heat bed be mounted so it can be leveled ?
No, I think the print platform should be attached as tightly as possible to the frame, with full surface contact, possibly with cork insulation between bed heater and plywood. Then you can level the first print layer with the three micro-adjustable endstops, see #Calibration. Also make sure that the vertical smooth rods are orthogonal to the bottom plywood, otherwise your printed objects will be slightly skewed.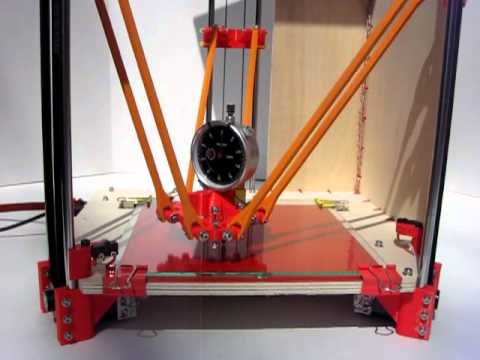
- Will it matter if the hot end is not centered in the platform opening ?
It might work okay but there are some minor issues:
- You may need to design and print a special asymmetric attachment for the bowden tube.
- The nearest inside of the moving platform may get soft because of the heat from the hotend.
- Your prints will not be centered on the print surface (closer to one edge) but this may be adjusted in your Slicer settings.
- Why does the printer pause sometimes ?
Print with pronsole.py instead of pronterface.py if your prints have warts. They may be caused by Pronterface redrawing the G-code view while printing, which creates significant delay between segments. My modified Marlin firmware generates many shorter lines for each G1 command, so the Marlin look-ahead buffer will run empty if you don't send the next G1 command ASAP. This can also be solved by printing directly from SD card.
- If Rostock loses power, does the print head fall down ?
No.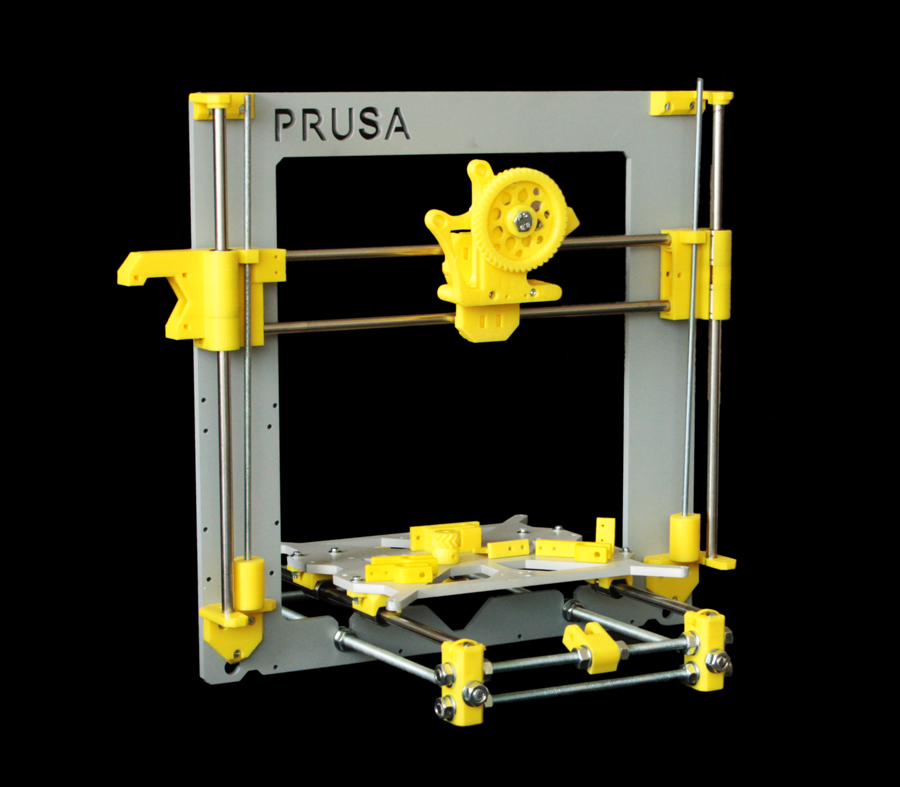 The print head weighs less than 50 grams, and the three stepper motors have significant holding torque even when they are turned off (permanent magnets). You can move the print head around with your hand when the motors are turned off, but it's not very easy, and it will stay where you put it.
- How do I calibrate axis_steps_per_unit ?
You don't need to "move and measure" if you know the pitch and number of teeth on your pulleys. Simply enter your pulley size on http://calculator.josefprusa.cz/#MotorStuffSPMB and it will do the math and show you the result. The firmware takes care of all the non-linear math so you don't have to include that in this number. If you do want to "move and measure", use Z movement, because X and Y are non-linear.
- What's the resolution in X/Y direction ?
The steps per mm for X and Y is not constant across the print area. In the middle it is around 30 steps per mm, and near the edge it's more than 300 steps per mm because the push rods will be nearly horizontal.
- Is it possible to mount a cooling fan on the print head carriage ?
It is possible but I was trying to reduce the weight of the moving parts. So I'm using a large oscillating desk fan sitting next to the printer. You can see the fan in this picture: http://thingiverse.com/image:150904
- How many bearings are actually used ?
3x 608ZZ and 3x F608ZZ (F = flanged) for the timing belt idlers at the top. If you can't find flanged bearings, you can try using normal 608ZZ with a printed plastic flange. If you want to use smaller timing belt pulleys on the motors (which might be a good idea) you could also replace 608 (8x22x7 mm) with 688 (8x16x6 mm) or similar.
Also 1x 608ZZ and 1x MR105ZZ for Airtripper's direct drive bowden extruder.
- How do you pronounce "Rostock"? Roe-stock, Raw-stock, Roz-talk ?
It's open source, you can pronounce it how you want. ;)
I say Ross-tock but your other pronunciations are fine too.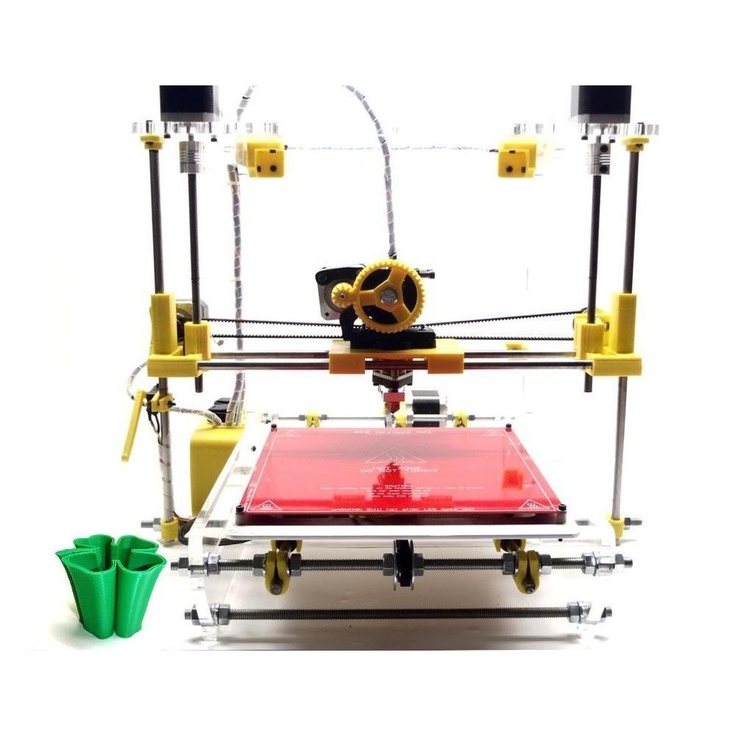
- Would you recommend 0.9 degree per step or 1.8 degree per step motors ?
Use whatever you have in your workshop. If you are buying new motors, I think 1.8 degree per step (200 full steps per rotation) is more common for RepRap printers these days. Modern electronics (e.g. the RAMPS 1.4 which I currently use) support 16x micro stepping, so there are 3200 micro steps per rotation which is plenty.
- Can you publish a schematic diagram of the electronic connections ?
The wiring is very similar to Prusa Mendel for example. I wired my endstops "normally connected" so the circuit is interrupted when the endstop is hit. But that's easy to change in the firmware configuration.
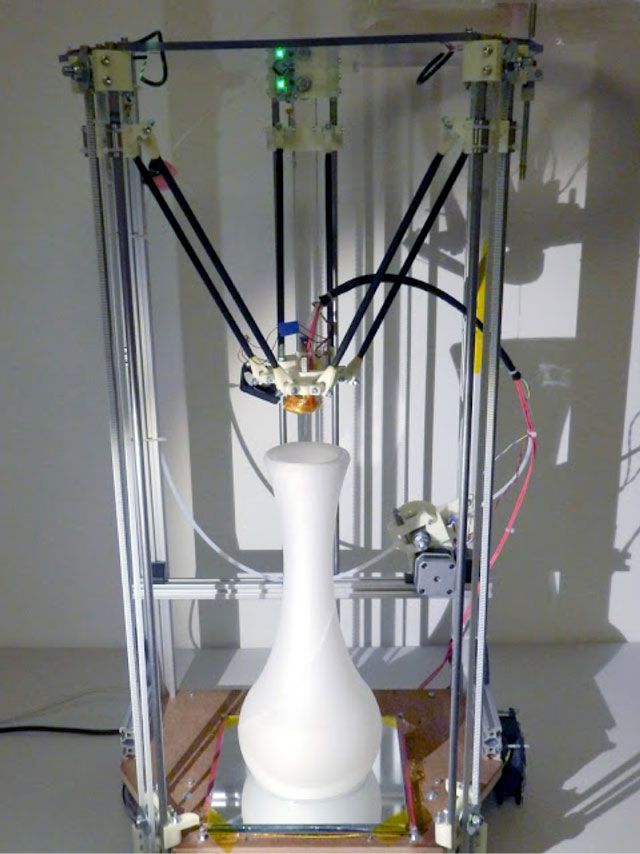
- Can Rostock print a full 11.31" diameter circle ?
The current prototype can't really print the full 8x8inch (20.32cm) heated bed. It's closer to a 9 inch (22.86cm) circle. But yes you can print a vase with overhang that is wider than the print surface.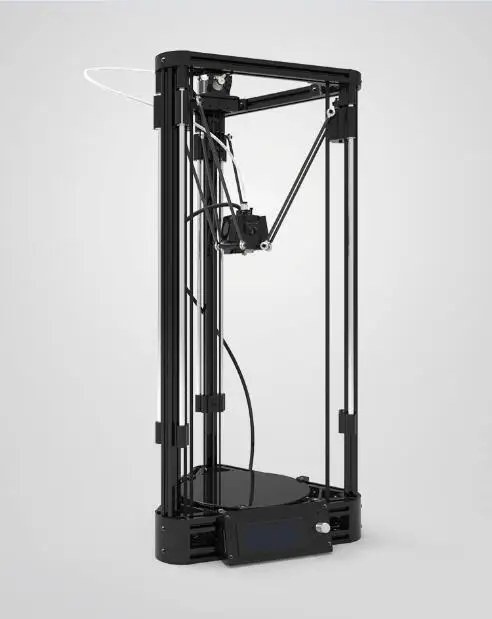
- Where can I buy a kit with parts to build my own Rostock ?
Sorry, not yet. This is really still a prototype. I'm pretty sure that the first beta testers are going to find several problems and make improvements. We are working on a new frame called Kossel to replace the plywood frame with OpenBeam, and so far it's looking pretty good. Stay tuned!
In Europe you can find a full kit from Reprap Austria
- Do you have any backlash problems with the metal-on-plastic universal joints ?
In an earlier version some of these screws unscrewed themselves after a while, but I think that is completely solved by the inside counter nuts. My prototype has only printed about 1 kg of PLA, but so far there is no sign of wear and very little backlash.
- Why do you have longer than "standard" LM8UU bearings on some of the rods ?
The longer LM8LUU was just an experiment to see if it would keep the carriage more horizontal. It doesn't seem to make a difference, except for added cost and weight, so it's not recommended.
- How low do the carriages need to slide on the rods during the printing/operation ?
The diagonal suspension rods are 250 mm long so the max required carriage travel for printing the first layer is somewhere around 200 mm (they go from vertical to almost horizontal). You need to add the build height to the first layer travel: 200 mm + 200 mm = 400 mm carriage travel required if you want to print objects up to 200 mm tall.
- What length are the belt loops ?
My prototype currently uses 762 mm smooth rods and GT2 timing belt loops with 2 mm pitch and 762 grooves. This gives me 8x8x16 inches (20x20x40 cm) build volume. You can make your Rostock taller or shorter simply by adjusting the length of the smooth rod and timing belts. If you already have shorter belts, you can use them with longer smooth rod too. The extra smooth rod may stick out the top of your printer, but that's okay. A shorter printer may be more rigid / stable and may not need the extra plywood frame on the back and side.
- Why did you build three towers instead of four ?
I decided to start with three towers, to build the simplest design that could possibly work. Four towers might improve precision, but it also needs 33% more parts and it would be over-constrained. This means the mechanics might jam if the four sides are not coordinated exactly right.
Future
The following improvements are planned for future versions:
- Use smaller timing belt pulleys and idler bearings.
- Find cheaper timing belts and pulleys, e.g. T2.5 / HTD-3M / GT3?
- Replace timing belts with Spectra fishing line.
- Write a new clean delta firmware based on Grbl.
- Create a Mini Rostock variation with 120x120x120 mm build volume.
- Replace metal binder clips with printed plastic clips to hold the glass platform.
- Use OpenBeam aluminum extrusion instead of plywood frame: Kossel.
- Use OpenRail (or hybrid roller slide directly on OpenBeam) instead of LM8UU and smooth rods.
- Experiment with dual extruders.
Links
- Rostock blog on Tumblr
- Videos on YouTube
- Pictures on Flickr
- Rostock parts on Thingiverse
- Mailing list for questions and answers
- OpenSCAD source files on GitHub for printed plastic parts.
- Modified Marlin firmware on GitHub for delta geometry on Arduino.
- Bill of materials / BOM / parts list on Google Docs (work in progress)
Rostock - RepRap
Rostock Documentation
Main page | Rostock Buyer's Guide | Rostock Build Manual | Rostock User Manual | Rostock improvements
Rostock
Release status: working
| Description | Rostock is a delta robot 3D printer prototype. |
| License | GPL |
| Author | User:Johann |
| Contributors | |
| Based-on | Helium Frog Delta Robot |
| Categories | Delta, Tall |
| CAD Models | GitHub |
| External Link | Thingiverse |
Rostock is a linear delta robot 3D printer prototype, built in 2012 by Johann in Seattle, USA.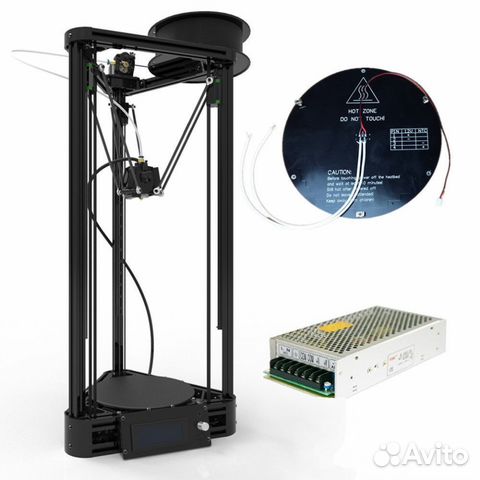
Several variations have taken root, including: Kossel, Rostock mini, Rostock MAX, Rostock-Montpellier, Rostock Prisma, Delta-Pi, Cerberus, cOssel, Cherry Pi and ProStock. Both the MOST delta and their Open Source Metal 3D Printer also uses an inverted form of this design.
Contents
- 1 Design Goals
- 2 Videos
- 3 Firmware
- 4 Frequently Asked Questions
- 5 Future
- 6 Links
Design Goals
- Build volume: 200x200x400 mm (8x8x16 inches).
- Footprint: 300x350 mm (12x14 inches).
- Print surface: 200x200 mm heated glass which never moves.
- Mass of end effector with hotend: less than 50 grams.
- Positioning speed: up to 800 mm/s in all 3 directions.
- Positioning accuracy: at least 30 steps/mm in all 3 directions.
- Simplicity: fewer than 200 parts.
- Hardware cost: less than $500 USD.
Videos
http://youtube.com/user/jcrocholl/videos?query=rostock
<videoflash>3UOq-CQsbNo|640|360</videoflash>
<videoflash>nkAwOxA0lq8|640|360</videoflash>
Firmware
Many firmwares support Delta printers out of the box. See their individual instructions on how to configure them.
Frequently Asked Questions
- How do you adjust the height of the print surface ?
You can adjust the following line in Configuration.h and then recompile and upload the firmware:
// The home position of the print head. // For Rostock this means top and center of the cartesian print volume. #define Z_HOME_POS 402 // Distance between nozzle and print surface after homing.
For micro-calibration, use the adjustable endstop screws in the vertical carriages, see #Calibration above.
- Should the heat bed be mounted on top of a piece of insulation or cork ?
Yes, it's definitely a good idea. Cork or another kind of thermal insulation under the heatbed has two benefits:
- It lowers the times required for the heatbed to reach the PLA (around 60C) or ABS (around 100C) ideal heatbed temperatures.
- It protects whatever material is under the heatbed from excessive heat radiated by the hot heatbed.

See Heated Bed Insulation for further details.
- Is your heat bed mounted element side up ?
Yes, the etched copper side is in direct contact with the glass. You can see the LEDs and contacts in the front just next to the glass edge. But I have not actually connected my heated bed wires yet, because I print only PLA and it sticks perfectly to blue painters tape, even without heating the platform. I will connect the heated bed wires if I ever have problems with detaching corners, otherwise remove the heated bed completely at some point.
- Should the heat bed be mounted so it can be leveled ?
No, I think the print platform should be attached as tightly as possible to the frame, with full surface contact, possibly with cork insulation between bed heater and plywood. Then you can level the first print layer with the three micro-adjustable endstops, see #Calibration. Also make sure that the vertical smooth rods are orthogonal to the bottom plywood, otherwise your printed objects will be slightly skewed.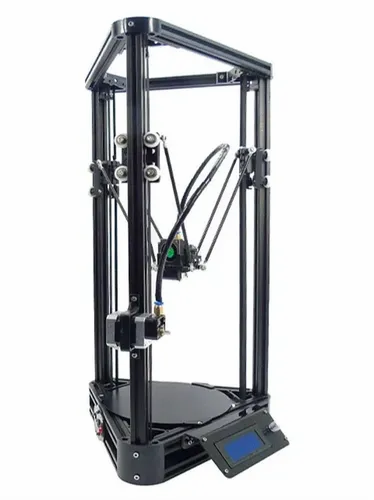
- Will it matter if the hot end is not centered in the platform opening ?
It might work okay but there are some minor issues:
- You may need to design and print a special asymmetric attachment for the bowden tube.
- The nearest inside of the moving platform may get soft because of the heat from the hotend.
- Your prints will not be centered on the print surface (closer to one edge) but this may be adjusted in your Slicer settings.
- Why does the printer pause sometimes ?
Print with pronsole.py instead of pronterface.py if your prints have warts. They may be caused by Pronterface redrawing the G-code view while printing, which creates significant delay between segments. My modified Marlin firmware generates many shorter lines for each G1 command, so the Marlin look-ahead buffer will run empty if you don't send the next G1 command ASAP. This can also be solved by printing directly from SD card.
- If Rostock loses power, does the print head fall down ?
No. The print head weighs less than 50 grams, and the three stepper motors have significant holding torque even when they are turned off (permanent magnets). You can move the print head around with your hand when the motors are turned off, but it's not very easy, and it will stay where you put it.
- How do I calibrate axis_steps_per_unit ?
You don't need to "move and measure" if you know the pitch and number of teeth on your pulleys. Simply enter your pulley size on http://calculator.josefprusa.cz/#MotorStuffSPMB and it will do the math and show you the result. The firmware takes care of all the non-linear math so you don't have to include that in this number. If you do want to "move and measure", use Z movement, because X and Y are non-linear.
- What's the resolution in X/Y direction ?
The steps per mm for X and Y is not constant across the print area. In the middle it is around 30 steps per mm, and near the edge it's more than 300 steps per mm because the push rods will be nearly horizontal.
- Is it possible to mount a cooling fan on the print head carriage ?
It is possible but I was trying to reduce the weight of the moving parts. So I'm using a large oscillating desk fan sitting next to the printer. You can see the fan in this picture: http://thingiverse.com/image:150904
- How many bearings are actually used ?
3x 608ZZ and 3x F608ZZ (F = flanged) for the timing belt idlers at the top. If you can't find flanged bearings, you can try using normal 608ZZ with a printed plastic flange. If you want to use smaller timing belt pulleys on the motors (which might be a good idea) you could also replace 608 (8x22x7 mm) with 688 (8x16x6 mm) or similar.
Also 1x 608ZZ and 1x MR105ZZ for Airtripper's direct drive bowden extruder.
- How do you pronounce "Rostock"? Roe-stock, Raw-stock, Roz-talk ?
It's open source, you can pronounce it how you want. ;)
I say Ross-tock but your other pronunciations are fine too.
- Would you recommend 0.9 degree per step or 1.8 degree per step motors ?
Use whatever you have in your workshop. If you are buying new motors, I think 1.8 degree per step (200 full steps per rotation) is more common for RepRap printers these days. Modern electronics (e.g. the RAMPS 1.4 which I currently use) support 16x micro stepping, so there are 3200 micro steps per rotation which is plenty.
- Can you publish a schematic diagram of the electronic connections ?
The wiring is very similar to Prusa Mendel for example. I wired my endstops "normally connected" so the circuit is interrupted when the endstop is hit. But that's easy to change in the firmware configuration.
- Can Rostock print a full 11.31" diameter circle ?
The current prototype can't really print the full 8x8inch (20.32cm) heated bed. It's closer to a 9 inch (22.86cm) circle. But yes you can print a vase with overhang that is wider than the print surface.
- Where can I buy a kit with parts to build my own Rostock ?
Sorry, not yet. This is really still a prototype. I'm pretty sure that the first beta testers are going to find several problems and make improvements. We are working on a new frame called Kossel to replace the plywood frame with OpenBeam, and so far it's looking pretty good. Stay tuned!
In Europe you can find a full kit from Reprap Austria
- Do you have any backlash problems with the metal-on-plastic universal joints ?
In an earlier version some of these screws unscrewed themselves after a while, but I think that is completely solved by the inside counter nuts. My prototype has only printed about 1 kg of PLA, but so far there is no sign of wear and very little backlash.
- Why do you have longer than "standard" LM8UU bearings on some of the rods ?
The longer LM8LUU was just an experiment to see if it would keep the carriage more horizontal. It doesn't seem to make a difference, except for added cost and weight, so it's not recommended.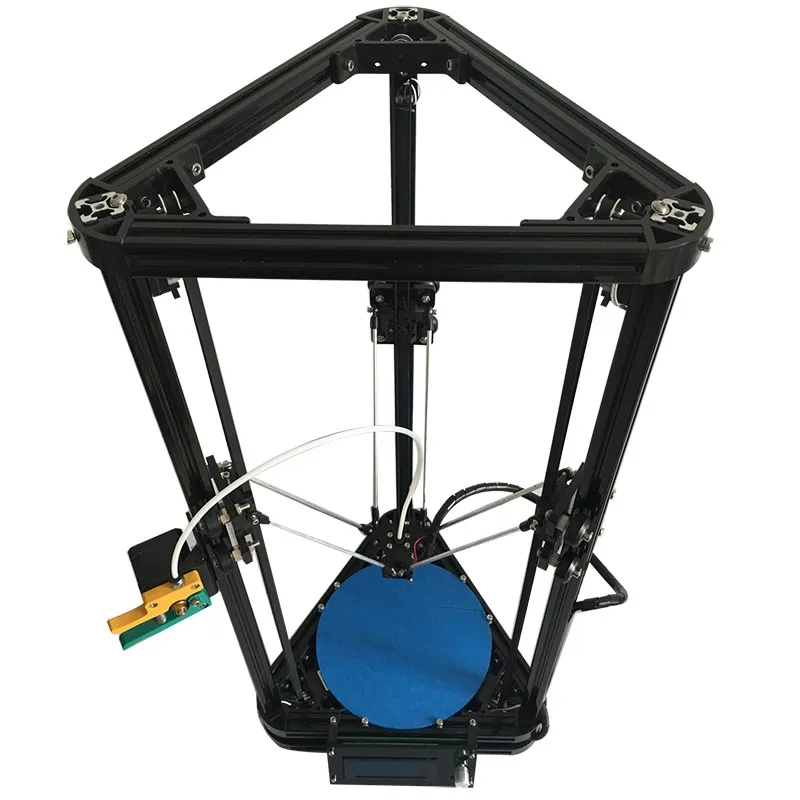
- How low do the carriages need to slide on the rods during the printing/operation ?
The diagonal suspension rods are 250 mm long so the max required carriage travel for printing the first layer is somewhere around 200 mm (they go from vertical to almost horizontal). You need to add the build height to the first layer travel: 200 mm + 200 mm = 400 mm carriage travel required if you want to print objects up to 200 mm tall.
- What length are the belt loops ?
My prototype currently uses 762 mm smooth rods and GT2 timing belt loops with 2 mm pitch and 762 grooves. This gives me 8x8x16 inches (20x20x40 cm) build volume. You can make your Rostock taller or shorter simply by adjusting the length of the smooth rod and timing belts. If you already have shorter belts, you can use them with longer smooth rod too. The extra smooth rod may stick out the top of your printer, but that's okay. A shorter printer may be more rigid / stable and may not need the extra plywood frame on the back and side.
- Why did you build three towers instead of four ?
I decided to start with three towers, to build the simplest design that could possibly work. Four towers might improve precision, but it also needs 33% more parts and it would be over-constrained. This means the mechanics might jam if the four sides are not coordinated exactly right.
Future
The following improvements are planned for future versions:
- Use smaller timing belt pulleys and idler bearings.
- Find cheaper timing belts and pulleys, e.g. T2.5 / HTD-3M / GT3?
- Replace timing belts with Spectra fishing line.
- Write a new clean delta firmware based on Grbl.
- Create a Mini Rostock variation with 120x120x120 mm build volume.
- Replace metal binder clips with printed plastic clips to hold the glass platform.
- Use OpenBeam aluminum extrusion instead of plywood frame: Kossel.
- Use OpenRail (or hybrid roller slide directly on OpenBeam) instead of LM8UU and smooth rods.
- Experiment with dual extruders.
Links
- Rostock blog on Tumblr
- Videos on YouTube
- Pictures on Flickr
- Rostock parts on Thingiverse
- Mailing list for questions and answers
- OpenSCAD source files on GitHub for printed plastic parts.
- Modified Marlin firmware on GitHub for delta geometry on Arduino.
- Bill of materials / BOM / parts list on Google Docs (work in progress)
Ensuring safe operation of the printer on RepRap Firmware 3.4.
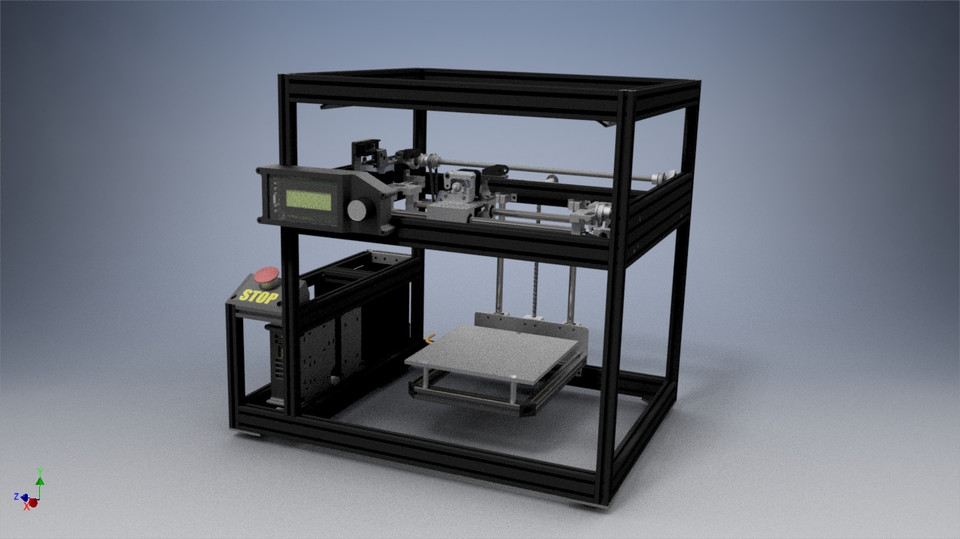
About the fire safety of heating devices, which include a printer, who just did not write. My opinion is that any printer should be provided with an automatic shutdown system in case of emergency. For this, a variety of devices are used that allow you to turn off the 220V power supply of the printer. Devices can be both self-assembled and factory-made (Lerdge, BTT, MKS). The principle of operation is the same for everyone - by the loss of the control signal from the board (PS_On). My choice - PWC MKS - simple, functional, not expensive.
But the conversation is not about hardware, but about software.
Everything that will be said applies to RRF 3.4. Earlier versions may differ (for example, in the names of macro files), in new versions there will definitely be changes. This is stated in the release notes.
The first line of defense is handling heater faults. Team M570. When a heater fault occurs, an event is generated, which is handled by the heater-fault.g macro file. If this file is found in /sys, then the event will be processed exactly as it is written there, without first pausing printing. Those. if the file is empty, then printing will continue, with the heating turned off, because. the heater will crash.
If heater-fault.g. is not detected, printing is suspended and the user is notified. RRF does not currently attempt to turn off power to the entire machine if the user does not respond to a heater failure notification. The developers promise to come up with something in the release of RRF3.5
Second line of defense is the configuration of the heater by command M143 with parameters "A", "C" and "P".
Parameter "P" - enables monitoring of the occurrence of a certain event described by parameters "A", "C". It is possible to monitor up to three events per heater - P0 (default), P1 and P2
Parameter "A" controls what will be done when the event occurs. There are 3 options
- A0 (default) - generate heater fault handling. See above for "heater-fault.g"
- A1 - permanently turn off the heater (Switch off permanently)
- A2 - temporarily turn off the heater (Switch off temporarily)
- A3 - turn off the printer.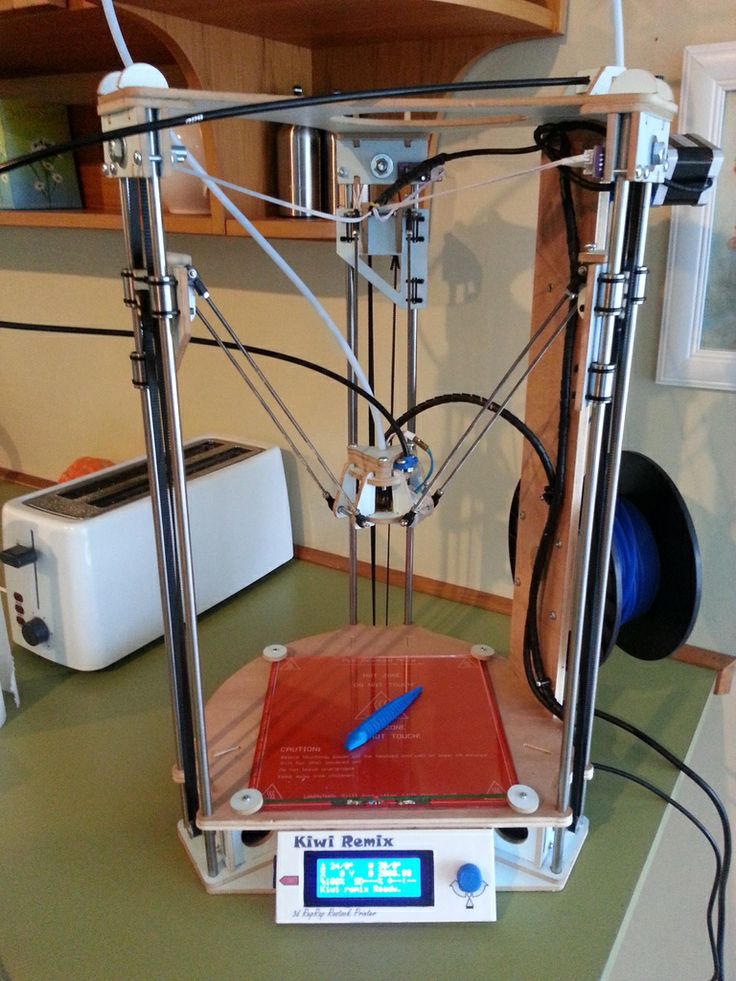
I haven't used A1 and A2 and can't say exactly how they work.
Parameter "C" event generation condition
- C0 (default) - temperature too high (Temperature too high)
- C1 - temperature too low (Temperature too low)
- C-1 - Monitor is disabled
What is "temperature too low" is not clear to me. Below what value? Perhaps the parameter "S" (Maximum permitted temperature) can be used not only as a maximum, but also as a minimum. Didn't check.
Now how all this can and should be used, especially with the auto-off module .
In config.g we configure the heater as follows.
M80 C"pson" ; We indicate which pin is used for auto-shutdown and set it to "1"
M950 h2 C"e0heat" T1;create a nozzle heater on port "e0heat" connected to sensor 1
M143 h2 P0 S280; when the temperature exceeds 280 degrees, generate a heater error
M143 h2 P1 S300 A3
M570 h2 ; turn on the processing of heater faults"fault!" ;message line
M291 P{var.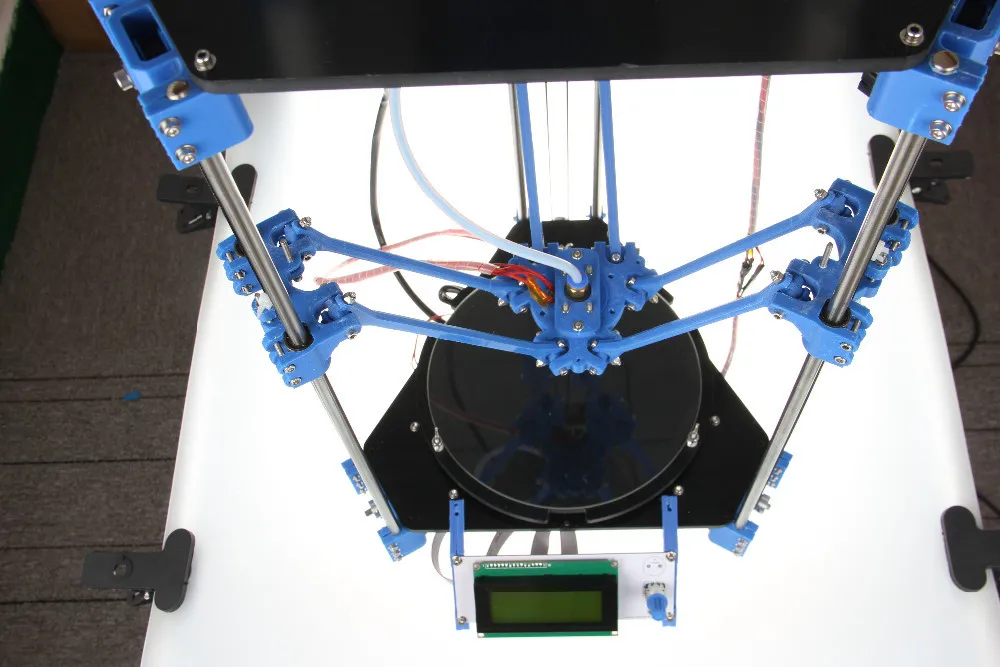 msg_str} S1 T0 ; message output
M0 ; stop printing
M106 S0 ; turning off model blowing
M568 A0 ; heating off
M140 S-273.1 ; shutting off the M140 S0 table is not a shutdown.
G91 ; relative displacement
G1 h3 Z1 F7200 ; forcefully increase Z
G28 XY ; parking by X and Y
M18 X Y E0 ; turn off all engines except Z0003
This is just an example of how you can do it. You can move everything after "M0" to "stop.g", then you don't have to write all this final code in the slicer. It's just as simple as "M0". There's a lot of room for creativity here. You can, for example, make the encoder key or the backlight of the screen 12864 with Neopixel red.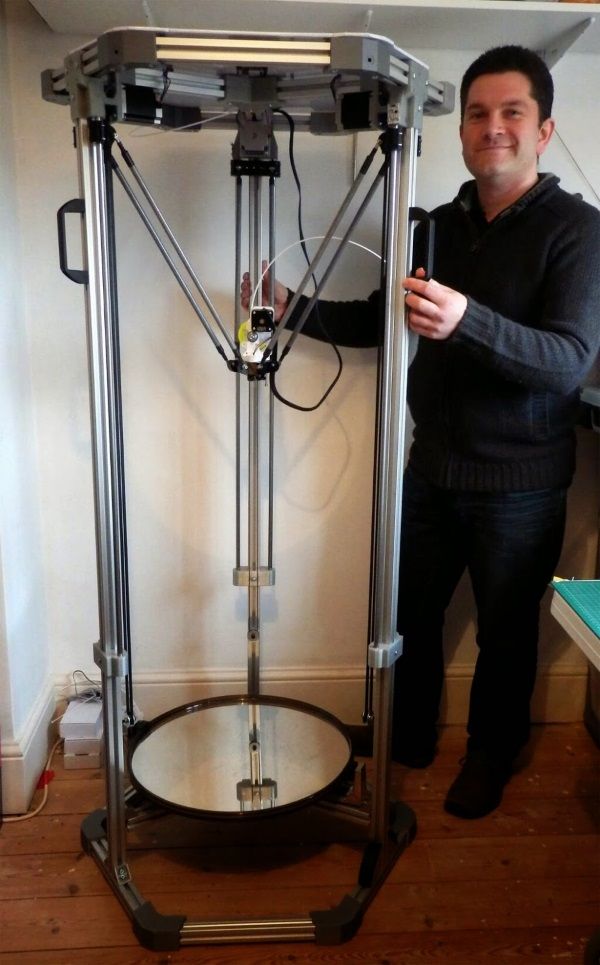
Video uses settings
M143 h2 P0 S104 ; or S106 for different scenarios
M143 h2 P1 S110 A3
At S104, the inertia of the disabled heater is not enough to throw the temperature beyond the critical value of 110 degrees and the printer does not turn off. With S106 - inertia is enough for the second temperature limit protection to work.
Of the observed features: error of the table heater and hotend "0" (Tool0) is passed to heater-fault.g with the same parameter param.D = 0. If passed at all. The same zero is written in the messages that the system itself generates in the absence of heating, or a strong deviation of the temperature from the set one 9"fault!" ;message string
M291 P{var.msg_str} S1 T0 ; message output
>>>>>>>>>>>>>>>>>>>>>>>>>>>>>>>>>>>>>>>>
can be replaced by
M291 P "Heater fault!" S1 T0 ; message output
but suddenly they will fix it.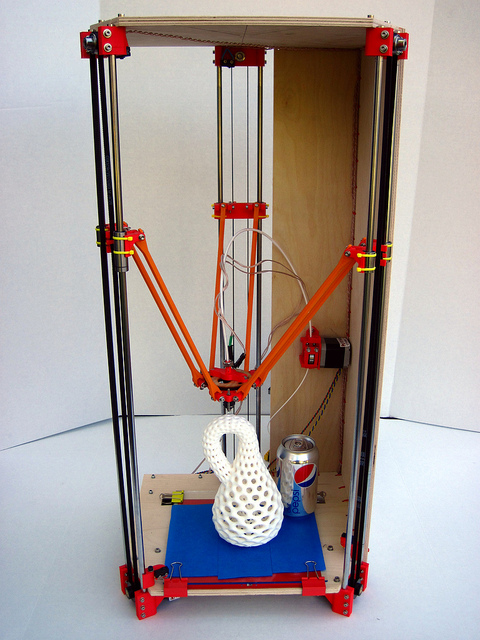
Can you tell me about the possible options for the third defense echelon (for the paranoid)? 😊
- In board.txt, bind the diagnostic signal leds.diagnostic to one of the outputs of the motherboard and hang an electronic timer on it, capable of detecting the absence of pulses at both the lower and upper signal levels. Put the timer output in series with the PS_On signal from the board.
- Install a thermal fuse in the heating block, connect in series with the PS_On signal from the board. For PWC MKS it is possible to use reusable fuses (thermal relay).
- If the chickens do not peck money, then you can make a safety chain based on certified safety integrity level (SIL) devices, such as PhoenixContact PSR-M-B2-SDI8-SDO4-DO4-SC. But then both the temperature sensor and the normalizing transducer must be certified for UPB, otherwise it is not according to the rules of functional safety.
PS. Why PWC MKS - simple, functional? Because it allows you to do this (for some reason, the video block is no longer inserted): https://youtube. com/shorts/wOAIImrZh9o?feature=share
Delta
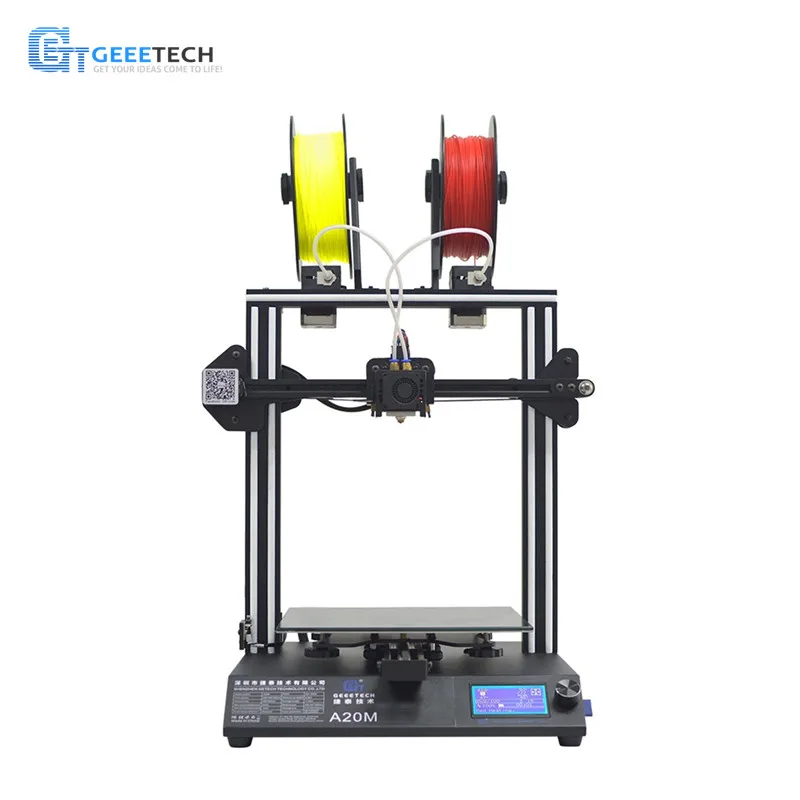
| RepRap Delta (Kossel, MAX, Micro, Mini, Rostock, Simpson, Wood-D) is an original version of a 3D printer with futuristic mechanics. Unusual and at the same time simple design allows you to quickly create large figures of the ring structure, which is quite important for hollow printing. However, delta printers are designed to work with only one extruder, while XZ printers can print multiple colors at the same time. |
|
Typically used to assemble a delta printer:
|
|
Smart controllers are optionally connected for operation without a computer.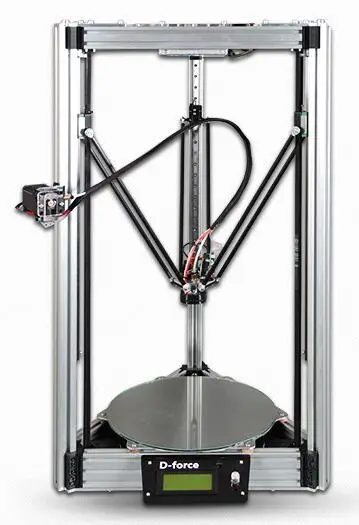
Sort by
Product Name +/-
Product Price
Featured Products
Product Availability
Showing 1 - 60 of 79
153060150
Double printhead 1.75mm 0.4mm
2500.00 RUB
Notify me when available
Product description
Long
RUB 750.00
Product description
Heat block v6
RUB 150.00
Item description
cartridge type thermistor
Heat block Volcano
12V 20A
RUB 1550.00
Product description
12V 30A
RUB 1950.00
Notify me when available
Product description
Price per 10mm (free cutting)
RUB 13.00
Product description
Price per 10mm (free cutting)
RUB 17.00
Product description
Price per 10mm (free cutting)
RUB 10.00
Item description
30x30x10mm
RUB 150.00
Product description
30x30x10mm
RUB 150. 00
00
Product description
On board with connector
RUB 150.00
Notify me when available
Product description
On board with connector
RUB 150.00
Notify me when available
Product description
On board with connector
RUB 150.00
Product description
NEMA17
RUB 950.00
Item description
12864 LCD, SD, encoder
RUB 1500.00
Item description
2004 LCD, SD, encoder
RUB 1300.00
Item description
12864 LCD, SD, encoder
RUB 1500.00
Item description
RUB 1700.00
Notify me when available
Product description
RUB 2550.00
Notify me when available
Product description
stepper motor
RUB 180.00
Item description
DRV 8825
RUB 300.00
Item description
RUB 750.00
Report Admission
Product description
RUB 50. 00
00
Product description
∅19cm 4mm
RUB 150.00
Notify me when available
Product description
40 poles-100cm flexible female-female dupont 2.54
380.00 RUB
Notify me when available
Product description
1 set
RUB 1700.00
Product description
1 set
RUB 2100.00
Item description
R3, compatible ch440
RUB 1900.00
Item description
micromake 3d printer control board
RUB 1700.00
Notify me when available
Product description
RUB 1900.00
Report Admission
Product description
RUB 2250.00
Notify me when available
Product description
RUB 3750.00
Notify me when available
Product description
RUB 1750.00
Notify me when available
Product description
k800 Ø10mm
RUB 70.00
Item description
Rostock mini
RUB 1500.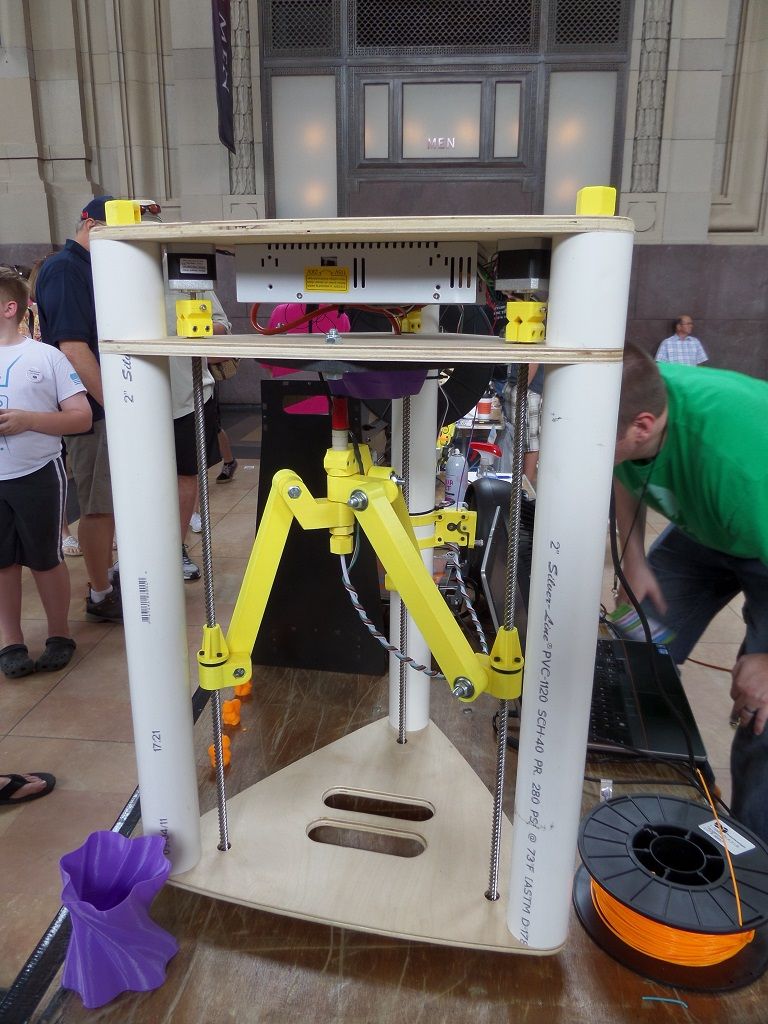 00
00
Notify me when available
Product description
RUB 30.00
Product description
RUB 750.00
Product description
8x22x7mm
RUB 70.00
Product description
3x10x4mm
RUB 50.00
Product description
4x13x5mm
RUB 50.00
Product description
4x11x4mm
RUB 70.00
Product description
4x13x4mm
RUB 70.00
Product description
RUB 130.00
Notify me when available
Product description
RUB 150.00
Product description
RUB 250.00
Product description
RUB 90.00
Product description
Price per centimeter, free cutting
RUB 4.50
Product description
1.0-9-22
RUB 20.00
Product description
Ultimaker
RUB 70.00
Notify me when available
Product description
20x7.5mm
RUB 20.