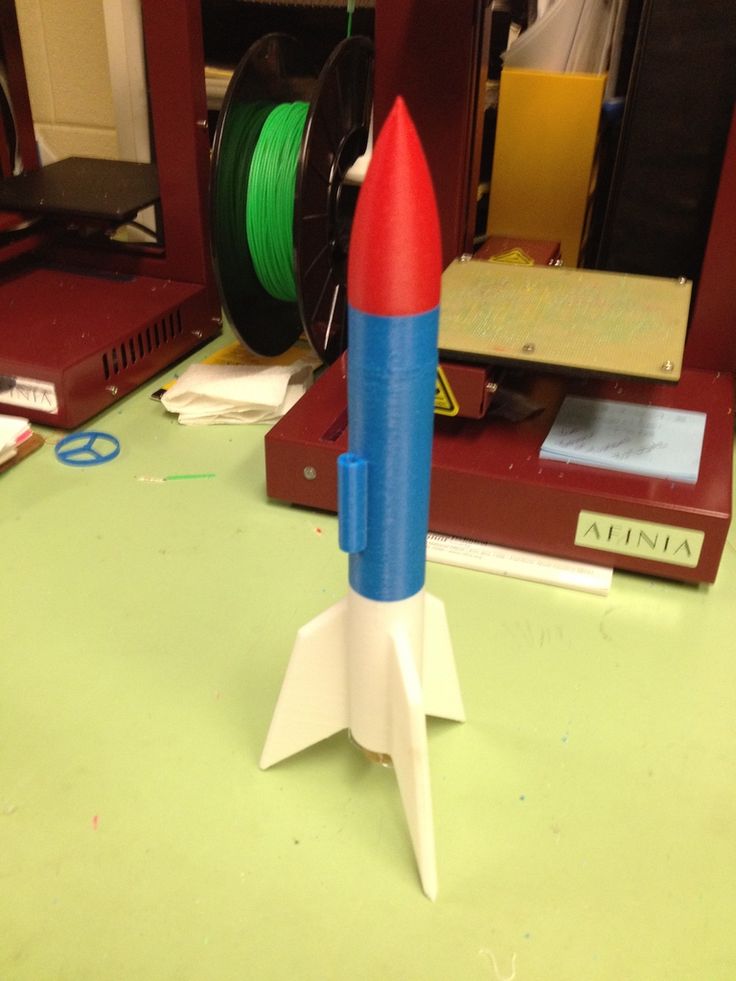
Model rocket 3d print
Apogee Rockets, Model Rocketry Excitement Starts Here
By Tim Van Milligan
I think the technology of 3D printing is still in its infancy, and it has a long way to go. But it has been around a long time. I remember seeing my first 3D printed part when I was working for Estes in the 1992-93 time frame. Back then it was a technology of using an ink-jet printer head that squirted out a starch that was then later impregnated with some type of resin to help solidify it.
The one question that has always been plaguing my mind since then, and it always comes up when people come to me when they want to write an article for the Peak-of-Flight newsletter is this: “What are you going to print?” and “Why do you want to print it instead of using some other technique to create it?” The authors always seem want to describe the technology and how to fiddle around with different 3D printers and in particular the software that drives the printers, so that the parts are printed correctly. 3D printers are so cheap now, that selecting one is an arduous process of comparing features versus cost.
I’m really not interested in those things and articles that talk about them, because it is not evergreen content. In other words, it becomes dated almost as soon as it is written because technology is improving and software always is superseded by a new software. My point is this: “HOW you are printing parts is going to change in the future.” So writing about that isn’t something that would be good for my newsletter archives because it will be irrelevant tomorrow.
So I don’t care how it is printed. What is more important to me is what you are going to have 3D printed, and why you would do it.
Figure 2: Gary Crowell’s fin can, with the break-off support on the rear that allows the printer to build up the base of the fins.When I ask that question, the first answer that pops out of the typical person is: “I want to make a nose cone and some fins.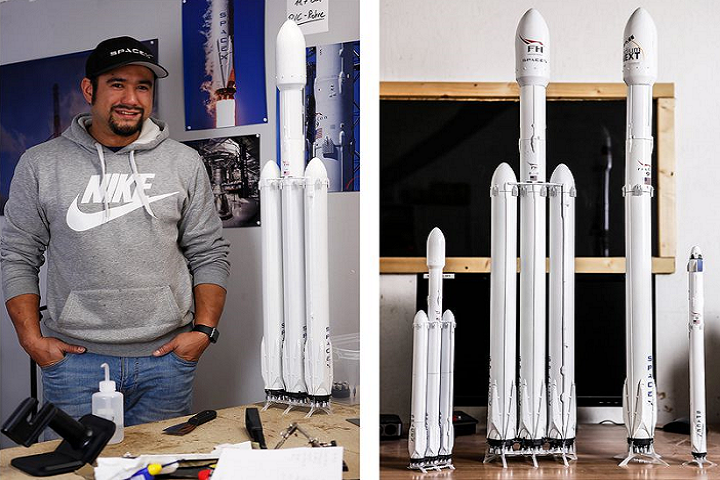 ” Ho hum. Is that all you can come up with? When I ask them why those items, the answer is usually something like, “because I have this cheap printer, and now I can make rocket parts.” That didn’t answer my question. So I’ll ask it again, “why those parts?” This is the why question.
When they try answering that question, it seems to come back to “it is cheaper than buying them.” But is it really cheaper than making them using some other technique? Give me a hobby knife and some scrap balsa wood, and I can cut and carve both fins and nose cones really fast and really cheap. I have a video to prove it; see the CD Video Book.
If you just want to make simple nose cones and fins for your rocket, you’re missing the real benefit of 3D printing. So enough of my ranting. I’m here to encourage you to do better and push the envelope of what can be done with 3D printing technology.
The real benefit of 3D printing is to make parts that you couldn’t otherwise make using other construction techniques. And the second benefit is to make precise parts that would be really expensive to make using other techniques.
What I’m saying is that simple nose cone shapes and simple fins don’t excite me because they can be made using other construction techniques. Additionally, they don’t have to be all that precise for the rocket to work correctly.
The downside of 3D printing is the process of designing the part to be printed. You will have to invest a lot of time learning CAD software before you even think about sending it to the printer. It is a huge investment of time, and also money to buy the software. And remember, the software changes constantly, so what you learn now may not be usable later.
I want you to do really cool things that advance the hobby. So if you are going to put in the time and effort to learn the CAD software, I hope that you do other things than just being able to make some simple nose cone shapes.
What Cool Things Can You Do?
This past summer, as I was walking around the NARAM contest range, someone came up to me and said, “Tim, you have to see the models that Gary Crowell has made for the contest. They are all 3D printed.” I’m really glad when people say this stuff to me, because that means they know me and know that I love things that are unique and different.
Figure 4: Gary Crowell - a true pioneer in 3D printed rocketsWhen I walked over to Gary’s prep area, I was not disappointed. Spread out in many little boxes, Gary brought out one after another 3D printed models.
What I liked was that Gary had obviously thought about each contest event in great depth, and tried to solve the engineering challenges that arise with 3D printed models.
For example, when it comes to weight, plastic models are heavy. There is no way that they can compete on lightness because the density of plastic is higher than paper and wood. The only thing you can do is to minimize the wall thickness of the parts. That is what I do when I make competition fiberglass parts (Newsletter434). I make the thickness as thin as possible because glass is dense and makes heavy parts. And the rockets that Gary showed me were as thin as he could get them on the 3D printer he was using. He even wrote a paper just on how to make them thin on an FDM printer by using a corkscrew printing method.
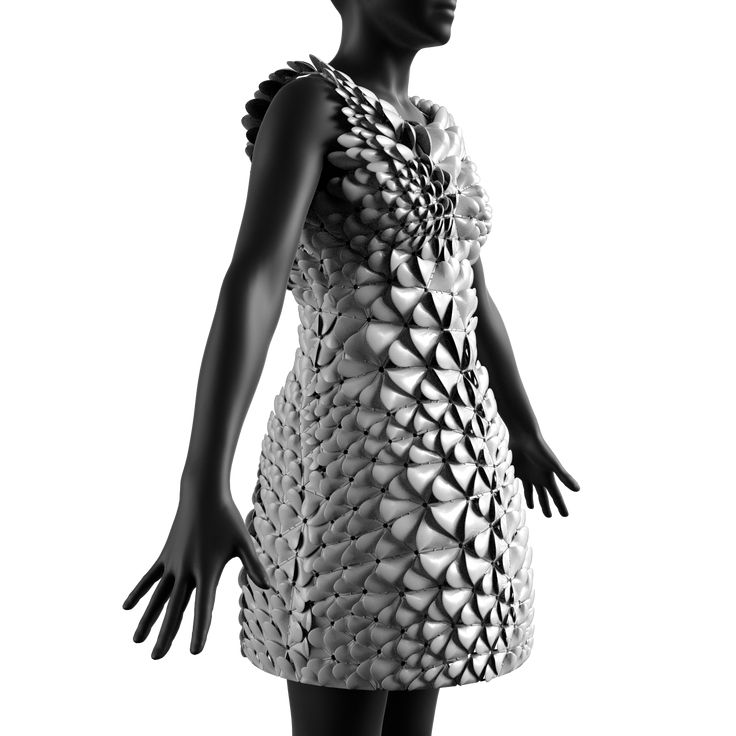
But the challenge of paper and wood is that you can’t easily make complex curvatures. This plays to the advantage of 3D printed parts. They can easily be streamlined to make them have those swoopy organic shapes that are more aerodynamic (see Figure 3). So while you lose a little bit of performance due to the extra weight of plastic, you can pick up extra altitude by making them more streamlined. To know how much altitude you’d gain/lose by using a 3D printed rocket, you’ll have to do some testing.
Gary’s egglofter rocket is really a thing of beauty. It just looks cool even as a static model. But there is a lot of technology in the rocket besides the swoopy shape. And this is the stuff that gets me really excited, because you’re doing two or more tasks at once. That saves time and effort after the rocket is printed. It is really harnessing the potential of additive manufacturing (the term that is used for 3D printing).
First are the fins. They have an elliptical shape (see Figure 2), which is has the lowest induced drag of any shape (Newsletter 442). But they are molded into the fin can, along with the necessary fin fillets that help reduce interference drag on the model.
Next, there are internal stiffeners inside the tube. The part, according to Gary, is very fragile, so the stiffeners help give it some extra strength. And remember, this is an egglofting model, so there is a heavy egg sitting on top. The ribs helps transfer the load of the egg down and prevent it from splitting. These molded ribs would be difficult to add to the rocket after it was printed because of the curved shape of the transition. So putting them in during the printing process is really taking advantage of the technology.
The other neat feature that I liked in this model was the little altimeter box that he put on the base of the egg capsule (see Figure 6). It was designed around the MicroPeak altimeter. The altimeter is securely held in the rocket because it was designed into the rocket from the get-go. But he did mold in some little tabs that are used as anchor points to tie a little lanyard onto the altimeter so that it couldn’t fall away free, just in case the rocket did come apart during launch or landing.
Now the capsule on the top didn’t really excite me. It is after all, a simple nose cone shape. And you could get an Apogee egg capsule that is smoother and lighter weight.
Figure 7: Music wire bonded into the nose acts as a shock cord anchor.But the way he solved the issue of attaching the nose to the shock cord was neat. It doesn’t have much to do with 3D printing, other than thin-wall parts don’t make good anchor points. Because of that, you have to have some sort of way to keep everything attached. What Gary did was to run a thin music wire leader over the egg, and attach the shock cord to that instead of trying to attach to plastic.
The one drawback that Gary has yet to solve is the heat issue. Because of the hot ejection charge gases from the motor, the plastic gets soft and deforms after the flight reaches apogee. It isn’t so bad if you’re using the rocket just once. But on each subsequent flight, the rippled plastic reduces the aerodynamic efficiency of the rocket. My suggestion is to make a tube made out of Quest wadding, and use that as a liner inside the transition. In effect, the ejection charge blows through this wadding tube, which takes the brunt of the heat. You have to put wadding in the rocket anyway, so why not have it protect the delicate plastic? Incidentally, this is the technique used in FAI competition rockets to protect the fiberglass tubes.
Streamer Duration Rocket Technology
Figure 9: Break apart rocket to eject the streamer and make extra dragAnother rocket Gary showed me was his break-apart streamer duration rocket. I’ve had this similar idea for a long time, but Gary beat me to it when it came to actually building it. It is a break-apart rocket! Why make a break-apart rocket?
Figure 10: Close-up of how the tube section engages into the nose cone.The problem with streamer duration models is that the rocket really doesn’t add much drag during descent. But if you could break it into several parts (keeping them attached with string), then you could greatly increase the drag of the descending rocket. You don’t have to just depend on the streamer to provide all the drag. The individual parts increase the surface area and the parts tumble and flutter to the ground creating a lot of drag.
The problem with paper tubes is that once you split them into sections, they lose all their strength. They won’t function well as a tube during the upward portion of the flight.
By 3D printing the sections of tube, you get the stiffness of plastic, so the rocket has the strength it needs to stay together during launch. And you can build in stiffeners in the parts in case you need them, like Gary did with this egg-lofting rocket.
However, the weight of the plastic is the issue. Excess weight kills your altitude. And you have to answer the question of can you keep the weight down enough to make sure that it still is high enough in the air to get a long descent time?
Figure 12: Fin can with helicopter blade hold-down hooks already built into the part.Another model that Gary showed me was a fin can for a helicopter model. The fin can was ordinary enough, but it has built in hooks that engaged the tips of the rotor blades to hold them flat against the rocket body. Again, when you can build-in a feature like that into another part, it saves a lot of assembly time.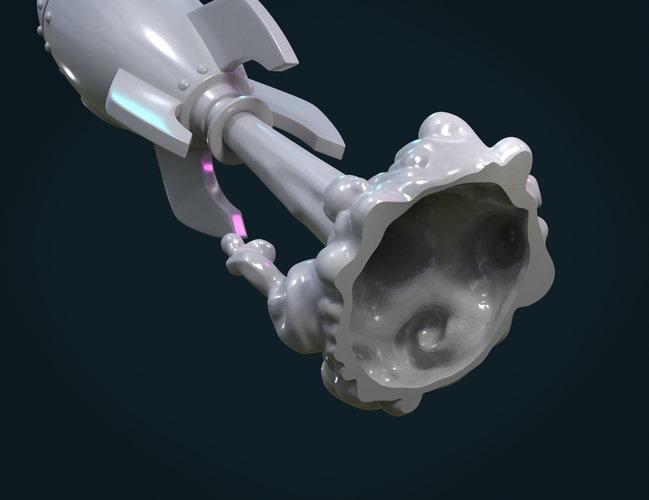 It also has the effect of a stronger part, and ensures that everything is aligned correctly for the flight. Precision is a wonderful thing in rocketry, because it promotes proper function of the parts, which increases the reliability of the rocket.
Gary’s Payload Altitude Rocket is somewhat similar to his egglofter, with the obvious difference being that it is a different shape and smaller. But again, it is designed to minimize the drag.
And like the egglofter, he uses a music wire loop to wrap over the top of the payload to act as an anchor for the shock cord (see Figure 13).
Figure 14: The 3D printed tube coupler function as an altimeter bay.What intrigues me though, is the little 3D printed coupler in the middle of the rocket (Figure 14). As before, Gary had the part do three tasks at once. The obvious thing it is a coupler to join the sections of the rocket together.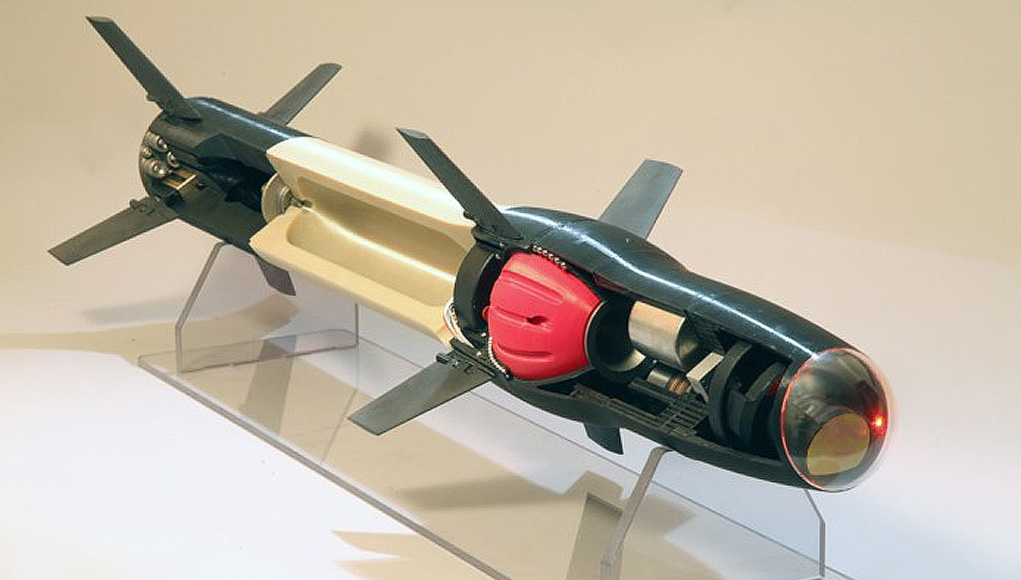 Then it houses the MicroPeak altimeter. Again, it was sized so that the altimeter fits perfectly inside of it so you don’t need much padding around it. And finally, it has anchor attachment points built into it so that shock cord can be attached to keep the rocket together. By 3D printing this part, you don’t have to build those extra features by hand, which saves you a lot of time. And the more models you assemble of the same design, the more time and effort you save.
Precision Parts - Where Fit is Important
This was mentioned before, but one of the advantages of 3D printing is the precision of the parts that are created. This is especially important when two parts mate together. You want things straight and even, so that they function correctly.
As I was doing research for this article, I came across Newsletter #435 that talks about creating a transition for boosted darts. This is a complex part, because the inside shape is just as important as the outside surface shape.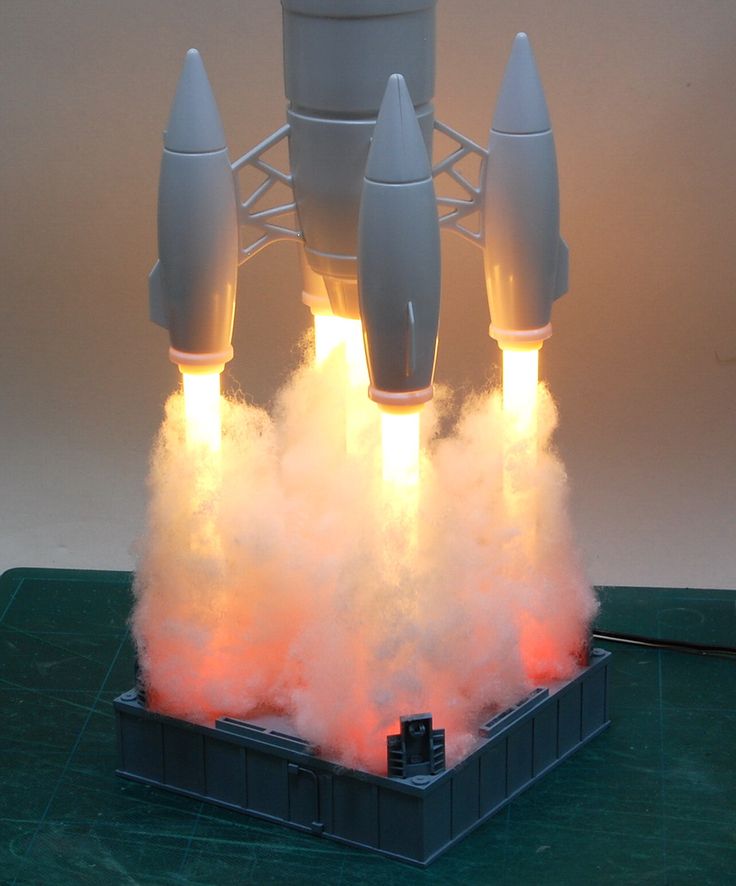 If the tailcone of the dart doesn’t nest properly into the transition, it will either wobble during ascent, or it won’t separate properly at motor burn out. I think that this would be a great project to do in 3D printing, because you could match the tail cone perfectly to the inside of the transition. And as a preview of what kit I’m working on, I’m building a transition for a Nike Hercules rocket, where I have this exact problem. The way I’m solving it is to build the 3D printed parts and test fly them to make sure they work properly. Yes, I’m planning on this being a 2-stage rocket!
Other parts where the fit is important are canopies that make the rocket look like an airplane. You can build them by hand, following the techniques described in Newsletter #443, or you can print them as shown in Newsletter #408. Both are great, but the advantage of 3D printing is you can easily make multiple copies at the press of a button.
Bob Zurek had some really cool Fly-Away Rail Guides at NARAM that were different from any other 3D printed designs that I have ever seen. They were a combination of a flexible plastic (actually some plastic-backed sandpaper) and the 3D printed part that engaged the runners on a launch rail. This is some serious “outside-the-box” thinking when it comes to problem solving that is enhanced with the ability to 3D print parts.
But what I hope this inspires is that you should think about what tools and fixtures you might use to build a rocket or to launch them that could be made using the process of 3D printing them. I think this area could be a huge opportunity for modelers to explore.
Transforming Rockets
The other area where 3D printing will advance rocketry is in the area of what I call transformer rockets (Advanced Construction Video 56). These are rockets like helicopters that change shape during the flight. This is where I think you can get really innovative.
An example of this would Gary’s streamer duration model which we discussed above, that breaks apart in flight to increase the surface area. Another example is his helicopter model with the 3D printed fin can that has the built in hooks to hold down the blades during launch.
Figure 17: A rendering of Chris Flannigan’s helicopter hub that is made with 3D printed parts.Chris Flannigan as well as I have printed some different hubs for helicopters. These are the mounting posts that the blades attach into. The advantage of a 3D printed hub is again the precision of the parts. All the blades are attached at the exact same angle.
The sky's the limit when it comes to designing and printing models that transform. You can do swing wing gliders, and all types of landers. You might even try designing some of the other recovery categories that are only found in the book Model Rocket Design and Construction.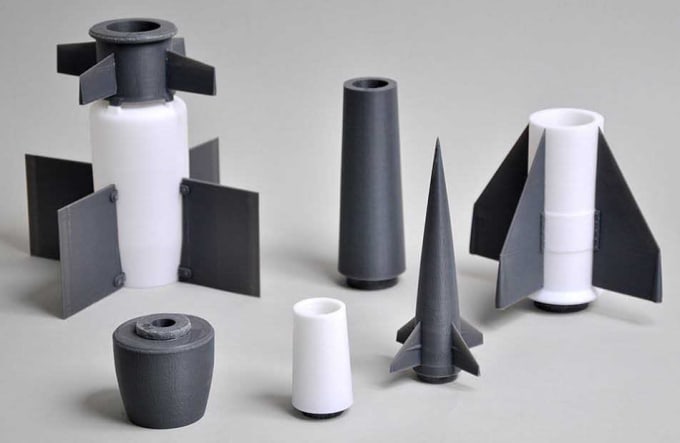 I’d love to see some magnus rotors and drag brake recovery rockets.
Scale Models
Figure 18: John Boren shows off his scale model of the Russian SA-5 Gammon missile that used 3D parts for the nose cones and the nozzles on the rear.Making transforming rockets, I’ll have to admit, requires a lot of engineering. It may not be for everyone. But where 3D printing will really shine is in the area of scale rockets. With scale rockets, there are always some parts attached to the rocket that are hard to hand carve or build up in paper or wood. Think of all the extra details on a Saturn V model, if you want some examples. With 3D printing, you can design these parts, and then you can scale them up or down to make rockets of any size.
There were numerous examples of rockets at NARAM with 3D printed parts. Tim Doll displayed a gorgeous Saturn 1B (it was actually the Apogee 1/70th scale version - https://www.apogeerockets.com/Rocket-Kits/Skill-Level-5-Model-Rocket-Kits/Saturn-1B-1-70th-Scale) that he had enhanced with extra parts that didn’t come with the kit, like the hold-down supports that hang down from the bottom of the eight fins (see Figure 19).
For the first timer to the world of 3D printed parts, you may want to start with some easier projects. Some examples are simulated nozzles on the aft end of the rocket, or a nose cone like a Gemini capsule that has a special shape.
The one thing that I do worry about though, is that we may end up with entire scale models that are 3D printed. Would that take away some of the joy of actually building the model? But then again, if you remove the tedious part of assembly, you can devote more time to performing some visually stunning flight events. Staging, clustering, and airstarts would make for a better spectator sport.
The Disadvantages of 3D Printing
Figure 20: This nicely built Gemini Titan model has a 3D printed nose cone and nozzles.Before you think that 3D printing will solve all your problems, there are some issues that you have to be concerned with.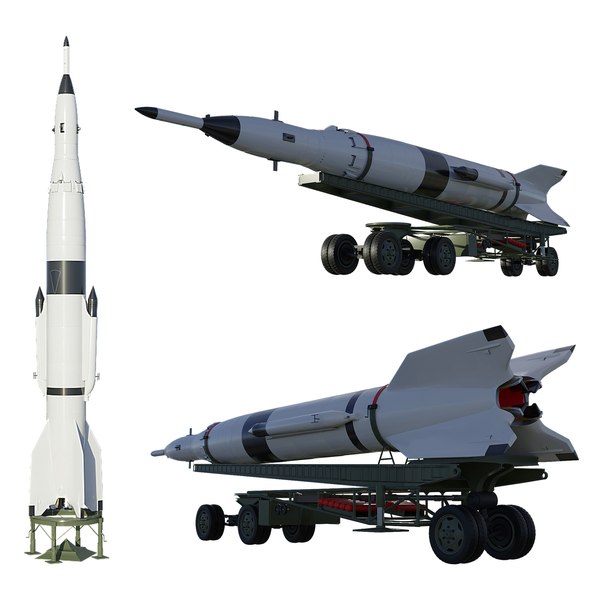
- Weight - Plastic is always going to be heavier than a paper and balsa wood rocket. So your designs may not fly as high.
- Heat Tolerance - Because it is plastic, you do have to worry about high temperatures melting or deforming the plastic. Maybe in the future we’ll have new resins, but for now this is a legitimate concern.
- Strength - You do have to watch out what resin you’re using when you 3D print a model. Some common resins are low strength or brittle.
- Cost - While the plastic can be cheap, a lot of times you can build models much more cheaply using other construction techniques. Especially simple rockets with just a nose cone and three fins.
- Time Investment - Designing parts on a computer involves a time investment. It is really high at the beginning when you don’t know your way around the computer software. It gets better as you gain experience, but you need to recognize that you will need a lot of time to get educated in the process.
- Post processing - Current 3D printers make parts that have many layers that create ridges on the surface of the parts. These will have to be sanded off or filled to make the surface smooth if you want optimum performance from your rocket. There are also build supports that have to be removed. Hopefully as 3D printer technology progresses, that these post processing issues can be removed. Sometimes it can take hours to get a 3D printed part into flight worthy condition.
Conclusion
The purpose of this article was to inspire you about what you can do with 3D printer technology. Making simple shapes like nose cones and fins is probably where you’ll start your first project. But getting other people excited about joining in on the 3D printer revolution will be hard if all you are doing are projects that any good modeler could replicate with some decent carving and cutting skills. I want you to step up and really utilize the benefits you can get by leveraging the benefits of what 3D printed parts real give you:
- Organic (swoopy or streamlined) shapes.
 These shapes are very difficult to produce by hand, but are easy to make by printing them.
 - Precision - parts fit together better, leading to better flight characteristics.
- Repeatability - You get the same results time and again.
- Scale Models - You can make some intricate parts that would be difficult and expensive to make by hand. Once designed, you can also increase or decrease their size to make different scales of the same rocket.
- Functionality - The parts you make can incorporate multiple tasks in a single part. You can also make transforming rockets that change shape during the flight.
Now I’d like to see what you’re doing with your 3D printer. Please post pictures of your cool 3D printed rocket parts on our Facebook page so we can all get inspired by what things you’ve done.
About The Author:
Tim Van Milligan (a.k.a. “Mr. Rocket”) is a real rocket scientist who likes helping out other rocketeers.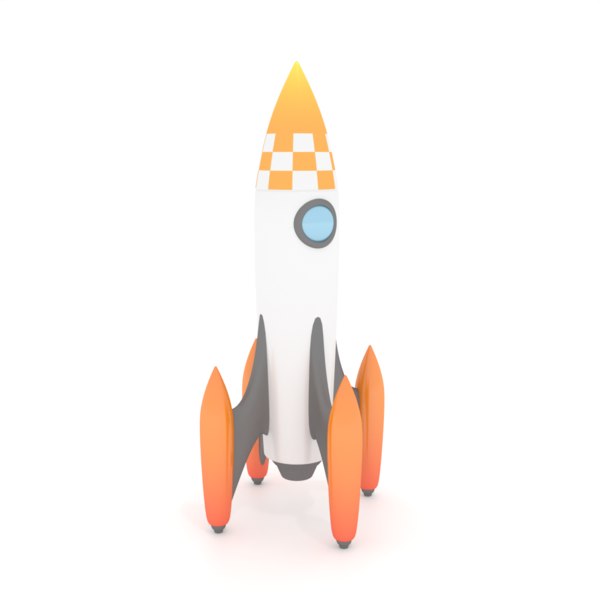 He is an avid rocketry competitor and is Level 3 high power certified. He is often asked what is the biggest rocket he’s ever launched. His answer is that before he started writing articles and books about rocketry, he worked on the Delta II rocket that launched satellites into orbit. He has a B.S. in Aeronautical Engineering from Embry-Riddle Aeronautical University in Daytona Beach, Florida, and has worked toward an M.S. in Space Technology from the Florida Institute of Technology in Melbourne, Florida.
Currently, he is the owner of Apogee Components and also the author of the books: Model Rocket Design and Construction, 69 Simple Science Fair Projects with Model Rockets: Aeronautics and publisher of the “Peak-of-Flight” newsletter, a FREE ezine newsletter about model rockets. You can email him by using the Apogee Rockets Contact Form.
Reader Comment:
I was very interested in Tim's article in the current newsletter on 3D printing.
One thing that I was looking for but didn't see was a discussion on 3D printing internal components (altimeter sleds, mounting hardware, spacers) or construction aids like alignment and drill guides.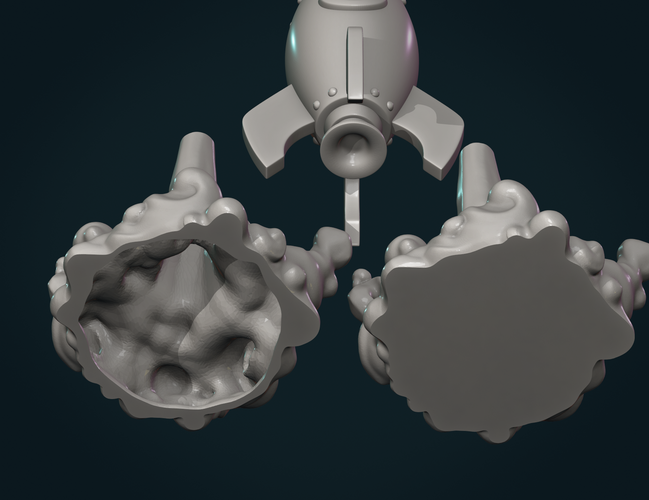 I know you can buy such things online, but "rolling your own" is part of the fun.
Could you 3D print a centering ring? It would have to look different than existing rings since you would presumably need to add ribs for stiffening. Or maybe you don't need centering rings at all -- could you do a 1-piece centering sleeve with slots for fins? Could you 3D print a bulkhead with mounting points for ejection charge cups?
As Tim noted, for a lot of applications, it's probably still easier and cheaper to do things the old-fashioned way, but it's still useful to think about how to use 3D printing technology to do things differently. This could lead to new product lines.
Thanks for all that you do for rocketry!
Bill Hanson
Rocket best 3D printing models・Cults
Desolation conversion kit
€1.60
rocket league key ring
€0.50
STARSHIP - SUPER HEAVY
Free
Guardians Of The Galaxy Iphone 14 Case
€5
Astronaut
€1.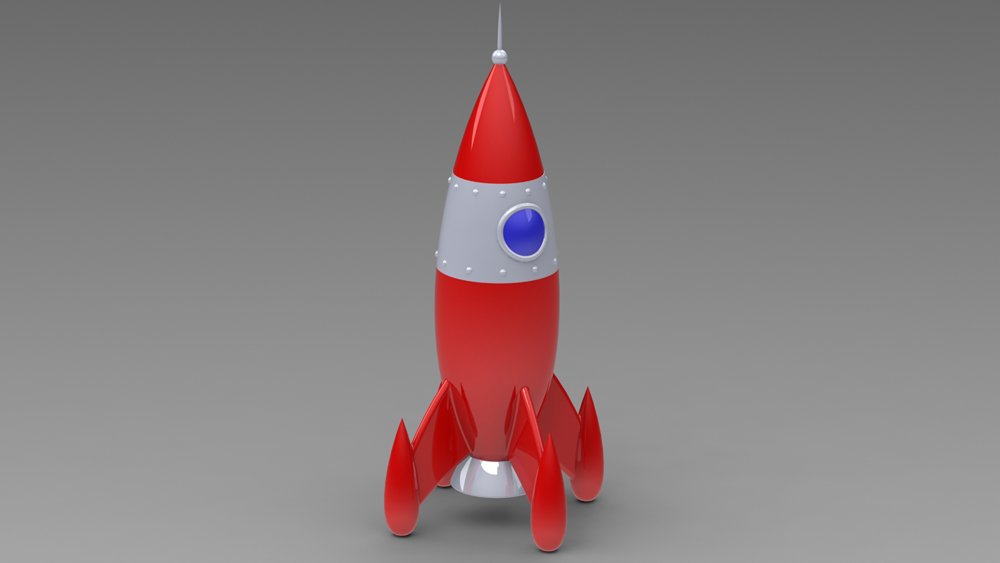 30
30
Rocket factory
€3
Hunter Killer Missile
€0.60
Starship SpaceX - Screw Container
€9.99
MATERA COHETE
€1.41
astronaut cookie cutters, rocket, planet, earth, star, leak (astronaut cookie cutters, rocket, planet, earth, star, leak)
€3.50
Rocket League Ball - Statue with Lamp option
€10
Rocket League Badges - FREE
Free
Retro Storm Goblin
Free
ROCKET GOTG
€2.35
STL WHEEL FERRARI ROCKET 4 AND 5 HOLES
€2.73
lion sword
€12
Military watchtower
€9
GoalKeeper cannon turret
€14
Thermonuclear missile - Astra Large missile - on rail
Free
Missle Luncher
€18
PANZERSHREK rocket launcher
€9
Mortar
€9
ROCKET
€5
Minigun
€8
MILITARY Mortar
€16
Military Guard Tower
€8
machine gun
€12
machine gun
€12
45 mm Divisional Gun
€16
76-mm divisional gun
€16
bomb
€4
gatling gun
€8
gatling gun
€8
ROCKET
€4
gatling gun
€8
cannon turret
€6
bomb
€5
barrel
€5
balista
€15
military canon
€16
AGS-17 automatic grenade launcher
€14
Bofors 40 mm Automatic Gun
€13
military canon
€9
Machine gun high quality
€14
rapier missile system
€12
M1903 Springfield sniper rifle
€8
F-1 grenade
€8
skorpion
€8
How Relativity Space prints rockets on a 3D printer
Relativity Space co-founder, CEO Tim Ellis / Relativity Space / AFP
Relativity Space is printing a metal space rocket on a 3D printer that it invented specifically for this purpose.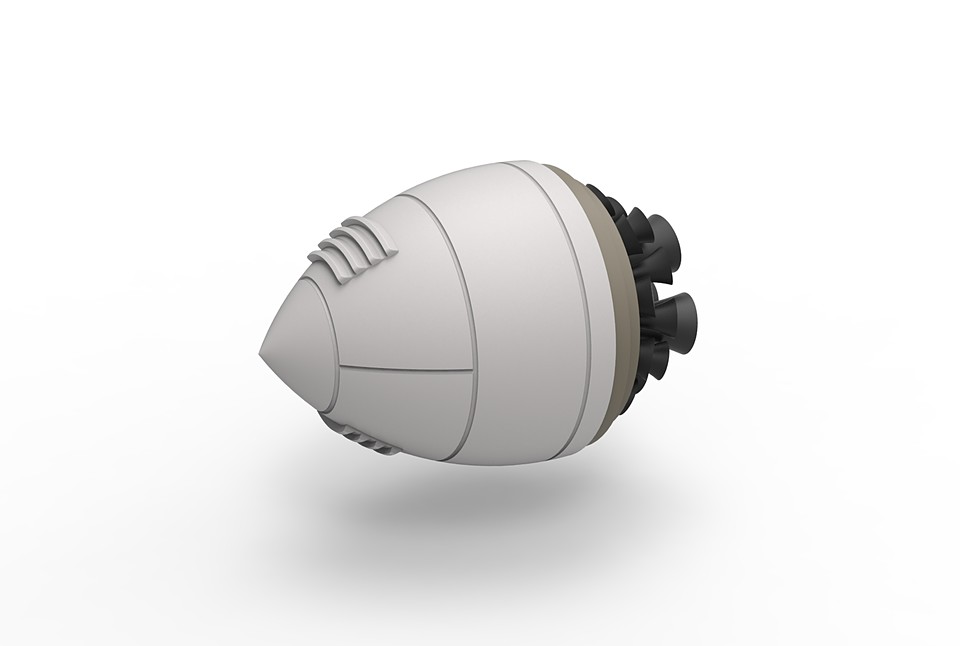 Almost all: 95% is printed, and the remaining 5% falls on electronics, seals and some other elements. 3D printing has many advantages. She's cheaper. She's faster. It is made on the spot, no need to wait until the parts are brought from another factory. It is stronger: fewer places for fastening parts. “The Shuttle had 2.5 million parts,” says Relativity Space co-founder Tim Ellis. “According to our estimates, SpaceX and Blue Origin have reduced this number to 100,000 per rocket. We have a thousand - less than in your car.
Many space companies use 3D printing, but only for individual components. Skeptics insist that no one knows how the printed rocket will behave during takeoff and in space. So far, the startup's first rocket, Terran 1, has successfully passed all ground tests. The first copy for a real flight is collected slowly and carefully checked. Now it is ready for 85%. A test flight is scheduled for the end of this year. But investors believe in the idea. Last November, Relativity Space completed a series funding round and raised $500 million.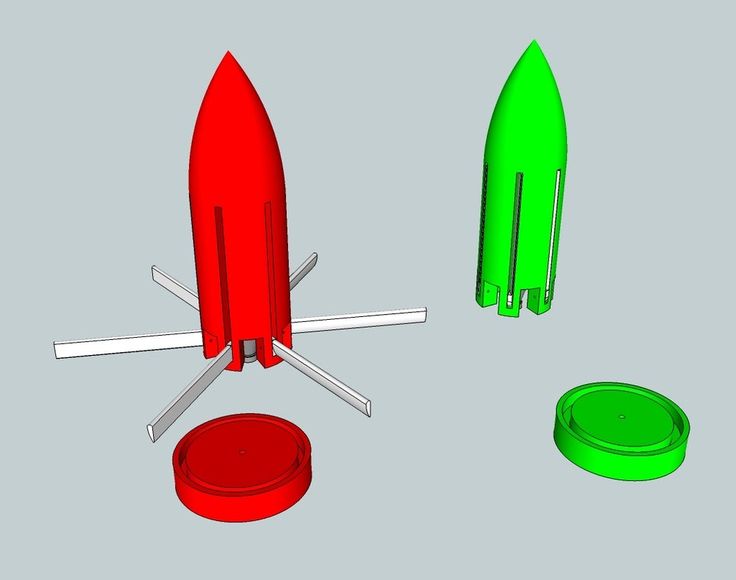 After that, according to research company Pitchbook, with a business valuation of $2.3 billion, Relativity Space became the second most valuable venture capital-funded space company in the world. In 1st place, of course, SpaceX (however, Pitchbook does not include Blue Origin in the rating, which is fully funded by Jeff Bezos).
Relativity Space has since raised another round, raising $650 million, based on a company-wide valuation of $4.2 billion. reusable. After all, competitors do not sleep. Relativity Space is just one of more than a dozen rocket companies created in the last 10 years.
Launch from Mojave
Ellis was born in 1990 in Texas. He is the eldest of three children of an architect father and a dentist mother. As a child, Ellis was fond of Lego and persuaded his parents to buy about 200 sets. He immediately threw away the instructions from them and collected the spaceships he invented himself. Until now, the thumb of his right hand, when at rest, arched back more than his left - Ellis assured the Los Angeles Times that this was the result of long hours when he assembled and disassembled the parts of the designer.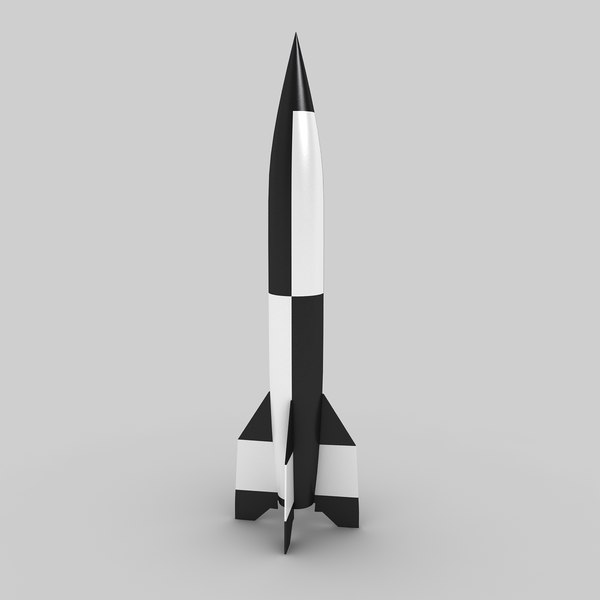
As Ellis got older, he began making amateur films with his friends, mostly action movies, where the characters were often confronted by zombies. He entered the University of Southern California to become a screenwriter. But already in his first year, he became interested in the profession of an aerospace engineer and joined the Rocket Propulsion Lab at the university, which was engaged in the development of rockets.
The University of Southern California is known for its space program. Its alumni include Apollo 11 commander Neil Armstrong, astronaut and former head of NASA Charles Bolden, and Dana Rohrabaker, chairman of the House Space and Aeronautics Subcommittee. There are several laboratories where students create real rockets and satellites. “I was amazed,” Ellis recalled in an interview with the university website about the first time he went to test the rocket engine he designed and built with his comrades in the Mojave Desert. – I always advise students: take part in practical classes. So you will understand why you need to study this or that differential equation, scheme or line of code.
They wanted to be the first student group to launch a rocket into space. But, having carried out dozens of successful launches, they did not even achieve a suborbital flight - this was done by their successors in 2019, having developed more powerful engines.
Why leave Bezos and Musk
At Rocket Propulsion Lab, Ellis met and became friends with classmate Jordan Noone. Then their paths diverged for a while. Noon went to SpaceX, where he worked, among other things, on the Dragon 2 spacecraft. His emergency rescue system uses a 3D printed SuperDraco engine.
Ellis interned for three summers at Bezos' Blue Origin, and after graduation he was accepted full-time. He convinced Bezos to create a metal 3D printing division (by then many competitors, including Boeing, were doing it). He also created it from scratch. The traditional way of producing parts is turning on a lathe, stamping or casting with a mold.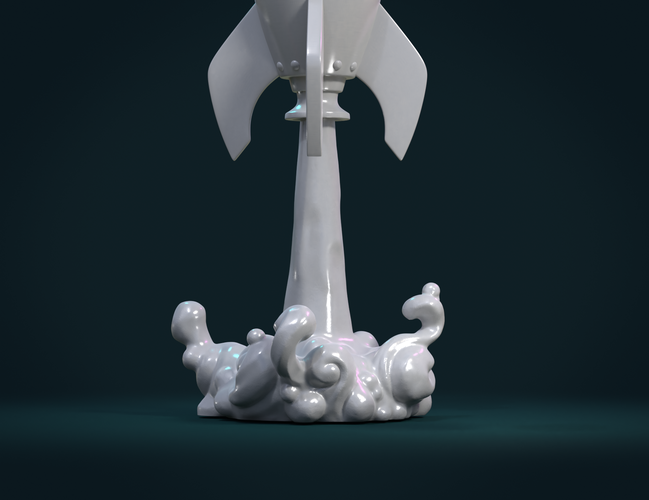 In 3D printing, robotic arms deposit layer upon layer of molten metal. A printed rocket has fewer parts, and therefore, places to connect them using welding, rivets, etc., and therefore fewer vulnerabilities. Skeptics object that if defects are found, the entire part has to be discarded and its manufacture must be started anew. But Ellis says that Relativity Space has developed a way to restart the printing process from the right place. “3D printed rockets are the future of rocketry and space exploration,” he told Inc. magazine.
Ellis and Noon often called each other and talked about rockets, although they worked for different space companies. They put together a rough cost structure to understand why rockets are so expensive. “80 to 90% goes to wages,” Noon told Bloomberg. 3D printing can dramatically reduce these costs.
Ellis once mentioned that he was going to start a startup to 3D print entire rockets. He later admitted to Inc. that he tried to get Bezos to print more parts for the rocket, but his suggestions were never fully implemented.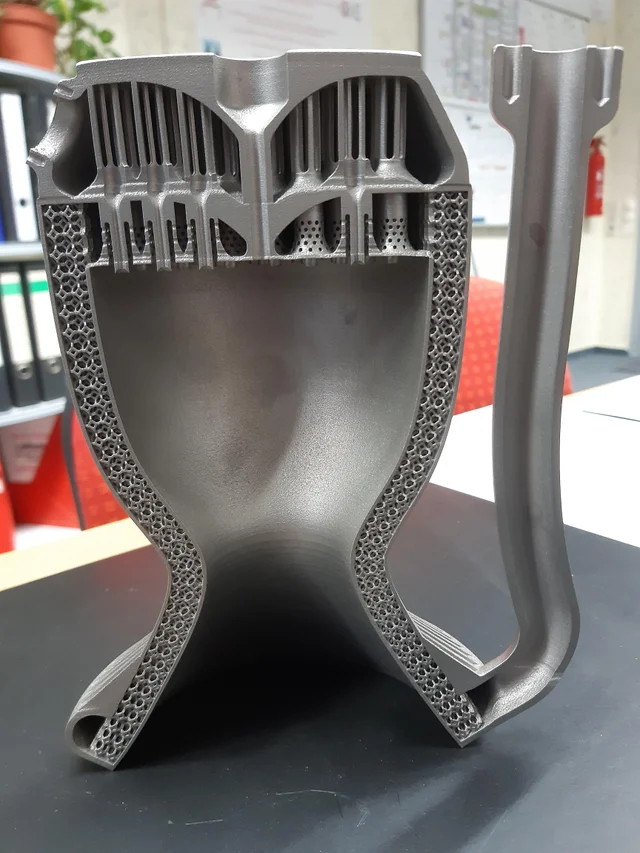 Then he decided to take up rocket science himself. Noon liked the idea. Both left in December 2015 to create startup Relativity Space.
“I never saw him give up, give up, or fail to solve a problem, even a really difficult one,” Ellis told the Los Angeles Times of Noon. “I knew our startup was going to have a lot of problems, and he was the right person to make it all work.” And Noon noted: “I am strong in technical and practical aspects, and Ellis is strong in creative thinking and non-standard solutions.”
For 1 kg of satellite
Relativity Space received its first money from venture investor Mark Cuban. Ellis and Noon made about 20 attempts to guess Cuban's email address, as Cuban preferred texting to other forms of communication. Some of the letters were returned with a note that such an address does not exist, some got to other people. But one of the addresses turned out to be correct, and Cuban read the letter with the headline "Space Is Sexy: 3D Printing of an Entire Rocket.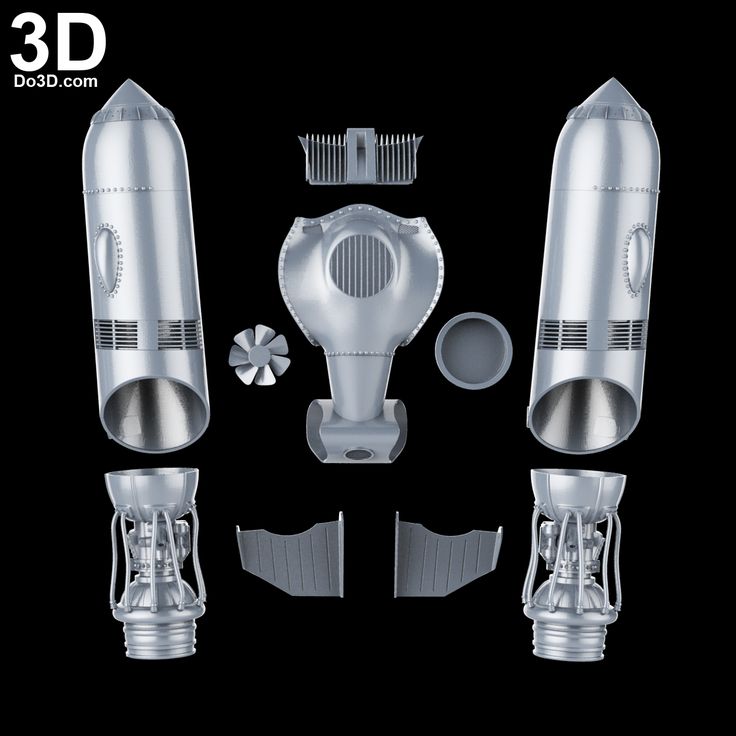 " Ellis and Noon asked for $100,000. Cuban, after five minutes of texting them, agreed to invest $500,000 (although they had to wait two months to check if they were fraudsters). “They are smart, resourceful, driven and always learning,” Cuban wrote in an email to The Times. “These are exactly the traits I look for in innovators.”
First, the startup needed to create a huge 3D printer - there were no models on the market suitable for their purposes. A lot of effort was put into this. But now the latest generation printer is able to print a part up to 32 feet (almost 10 m) high, while the height of the Terran 1 rocket is 115 feet (35 m). Ellis and Noon say that even if the rocket venture fails, they can always cash in on the sale of industrial 3D printers.
Terran 1 /Relativity Space
Created with Cuban's money, the first printer could print parts half the size of the last generation. But the working rocket engine printed on it made an impression on investors. First, they invested almost $10 million in the startup, then another $35 million, and in October 2019d.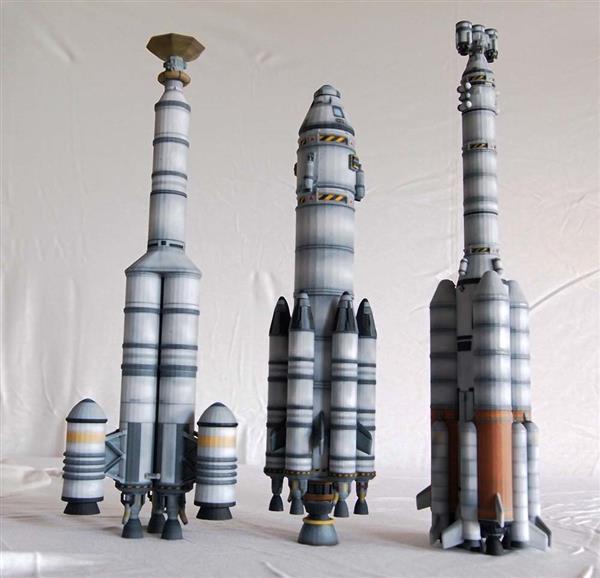 - another $ 140 million. Ellis and Noon planned to stop there. They did not want to dilute their share, and the funds raised should have been enough for the time before the first commercial launch, if they worked without haste. But in November 2020, another $500 million round of funding was raised. As Ellis explained to CNBC, “the development and scaling of the project needs to be accelerated.” That summer, the startup moved to a new 11,000-square-meter headquarters in Long Beach, California. m, where there will be a site for the production of rockets (the most important thing is that their new printer climbed there in height). Over the past year and a half, the company has more than doubled the number of employees. She now has 400+ people and plans to hire 200 more this year.
Ellis told Inc. that they already have $1 billion in launch contracts from government and commercial entities. Terran 1 can carry up to 1250 kg of payload. This is smaller than SpaceX's Falcon 9, but larger than Rocket Lab's Electron.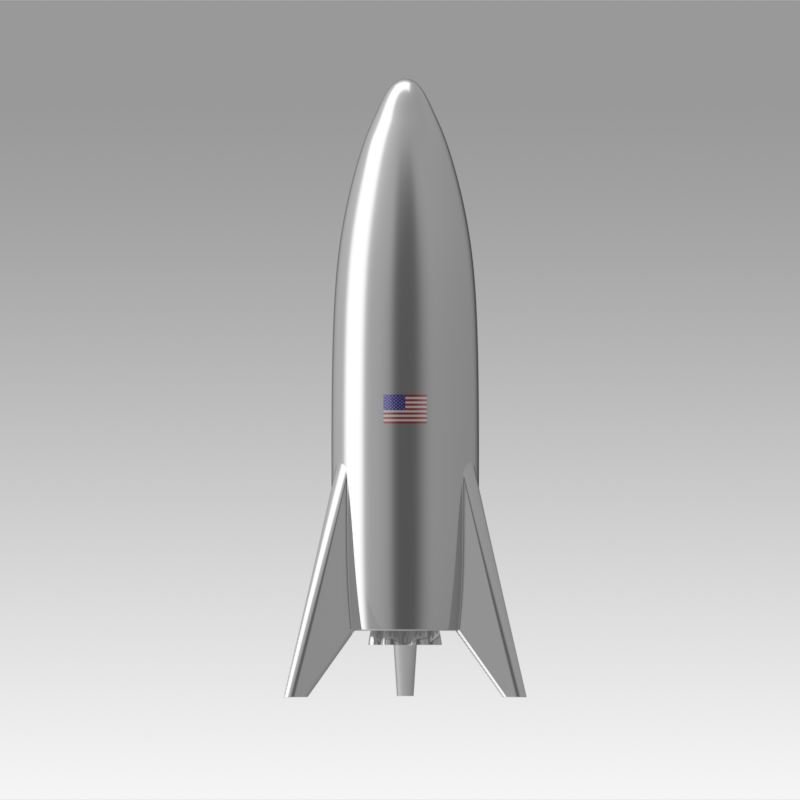 Relativity Space is targeting a mid-sized satellite niche, much like a car, Ellis said. Its competitors are the Russian Soyuz-2-1V and the European Vega. Or the same Electron, if Terran 1 displays several small satellites at once.
The launch cost of Terran 1 is $12 million, i.e. slightly less than $10,000 per 1 kg. Last year, Roscosmos CEO Dmitry Rogozin announced a more than 30% reduction in the price of launch services for a number of satellites to the level of SpaceX: to $15,000–17,000 per 1 kg instead of $20,000–30,000.
Target Mars
The competitive advantage of Relativity Space is not only in cost, but also in the fact that it can print a rocket to customer requirements, changing both the diameter of the rocket and the shape of the fairing for the satellite - of course, within the limits allowed by aerodynamics, Forbes explained. And she can do it quickly. Once the technology has been proven in practice, Relativity Space is going to print the rocket in 30 days and take another 30 days for pre-launch tests, Ellis told Scientific American.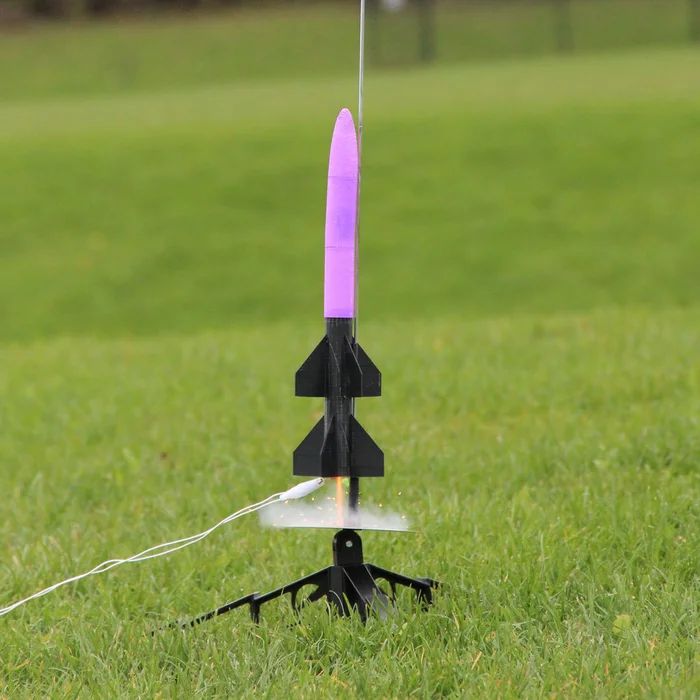 According to him, even SpaceX takes 12 to 18 months to build a conventional rocket. But Musk claims that his reusable rocket is ready for a new flight 51 days after the previous launch.
So in June, Relativity Space raised another $650 million from investors to accelerate the development of its own reusable Terran R rocket (of course, also almost completely printed on a printer). Its first launch is scheduled for 2024. It will be larger than the first one - 216 feet (66 m) high and designed for 20 tons of payload.
For Ellis and Noon, the main thing is that this project is another step towards interplanetary flights. Musk is looking for a way to get colonists to Mars, and Ellis and Noon are hoping to help them settle on the Red Planet. "If you believe - and I believe - that Elon [Musk] and NASA will send people to Mars, then <...> they will need a whole bunch of things," Ellis told CNBC. “Our printers are reducing the amount of infrastructure that would need to be transported from Earth to Mars in order to establish a colony there,” explained Noon Inc. – Traditionally, you need to send tons of equipment for a factory that will be able to produce factories that, in turn, will produce cars, houses, warehouses ... In our vision of the future, you simply send a 3D printer to Mars that prints everything using Martian raw materials This". In a speech to the students of his alma mater, Ellis added: “We are going to 3D print the first rocket made in Mars <...> I don’t see a future in 50 years in which rockets will not be 3D printed. It just doesn't make sense otherwise, because printing is much easier and cheaper."
Media news2
Do you want to hide ads? Subscribe and read without distractionHow to print a rocket
We decided to test the popular MakerBot Replicator 2 3D printer in the equally popular hobby of rocket modeling. With the help of a printer, we managed to make a whole arsenal of small rockets, and at the same time we made sure that 3D printing is a very difficult craft with many pitfalls.
Lee Goldberg
I fell ill with the idea of 3D printers back in those years when I worked for space. As an electrical engineer at RCA Astro (now part of Lockheed Martin), I was involved in the design, construction and launch of the Mars Observer and other interplanetary probes. In those years, I had a dream to build my own spaceship, my own launch vehicle, but that's bad luck - it turned out to be very difficult and expensive to make even the simplest pieces of iron on my own, from which the rocket is then assembled.
I have seen 3D printers making their way into the aerospace industry. Parts suitable for use in a spacecraft were now incomparably cheaper and took almost no time to manufacture. The path from the first clumsy homemade homemade products to precision machines capable of molding parts of rocket engines and cases was made in a fantastically short time.
But in my home workshop, I decided to limit myself to small things for now - to learn the basics of this craft and make several models using the most popular 3D printer of those that spit hot plastic and are sold at every corner.
Basics of 3D printing
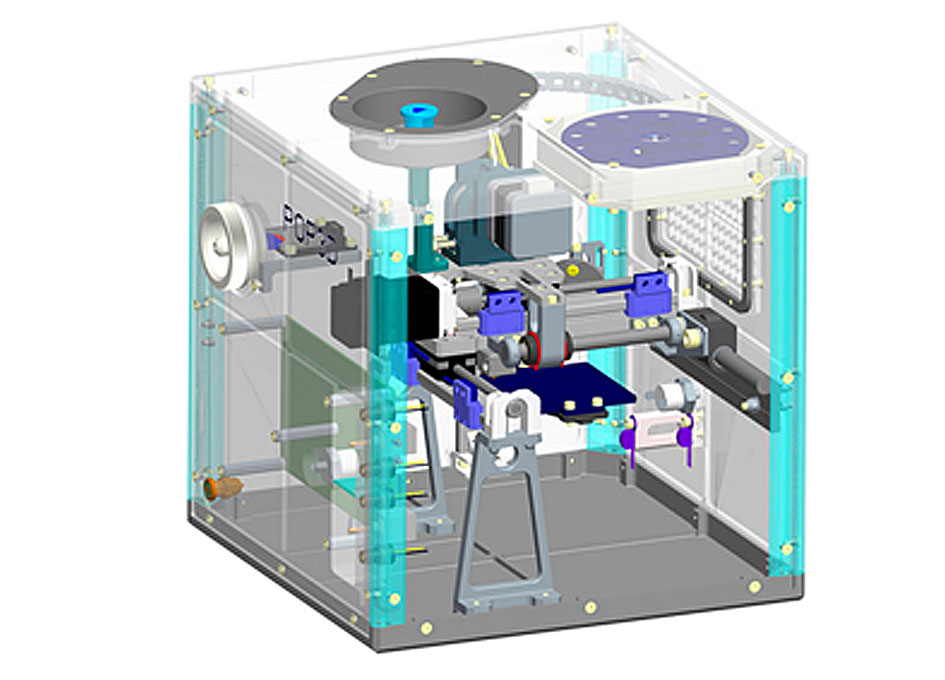
My plastic rockets were born as mathematical models, or, to put it more figuratively, 3D digital photographs. In order to fully concentrate on the printing process, I decided to use a ready-made project. When I looked at MakerBot's Thingiverse, I saw over 100,000 designs submitted by hobbyists from all over the country. Of these, I chose models of three rockets - one is better than the other. I borrowed a 3D printer from a friend, promising to give him a couple of rockets of my own production and a package of consumables. So I got the MakerBot Replicator 2.
3D printers create objects by "additive molding" - the application of a liquid polymer layer by layer. As a rule, such a gadget is something like a hybrid of an inkjet printer with a glue gun. The plastic filament is fed into the heated print head, from which the already hot liquid is squeezed out. In the open air, it quickly cools and hardens.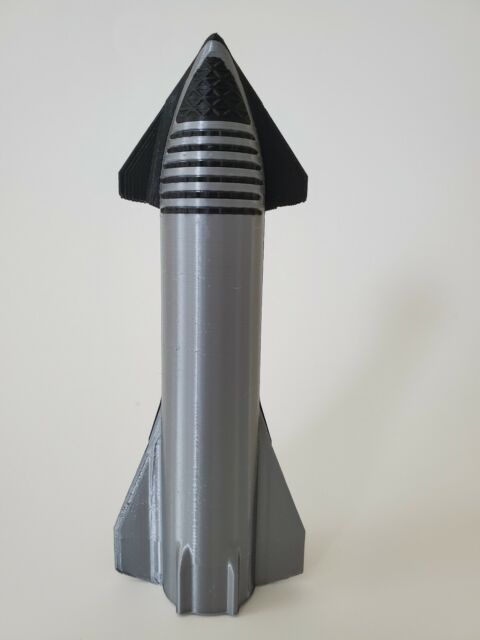
Early home-made printers used skeins of spare line for garden trimmers as material, and current devices work, of course, on specially supplied materials. If you are serious about this activity, get an apparatus that can work with a wide variety of types of polymers. The most commonly used plastics are ABS (Acrylonitrile Butadiene Styrene) and PLA (Polylactide). Nylon, fiber-reinforced plastics, and PET (polyethylene terephthalate) from recycled plastic bottles are also suitable.
Plastic filament for printer sells for $50 per 1 kg. Therefore, each of my PeeWee rockets cost me 35 cents. Large missiles are more expensive, almost a dollar.
ABS is still the most popular - it is a durable and cheap material. In addition, products taken out of the printer and molded from it are easily processed with familiar tools. However, ABS also has its drawbacks. It flows out of the print head in the form of a thick syrup, sets slowly, and shrinks when it hardens.
I used PLA for my rockets - simply because this material was already loaded into the printer. Usually this polymer is more difficult to work with than ABS, but it promises greater strength and accuracy. It sets faster, so its layers can be applied to the substrate without preheating, without fear that the part will warp. However, PLA will bring you some other problems that I ran into almost immediately.
Test run
I started with the simplest project, a small two-piece rocket - a conical nose cone and a tail fin assembly. These parts had to be tightly mounted on a standard magazine engine for toy rockets (which is a seven-centimeter long cardboard sleeve stuffed with gunpowder). Well, what is a rocket without a name? And I called her 3D PeeWee (in Russian - "Shorty").
I opened the file using the free MakerWare software package, which is kindly provided by MakerBot. The package includes all preparatory operations and layer-by-layer layout of the future product.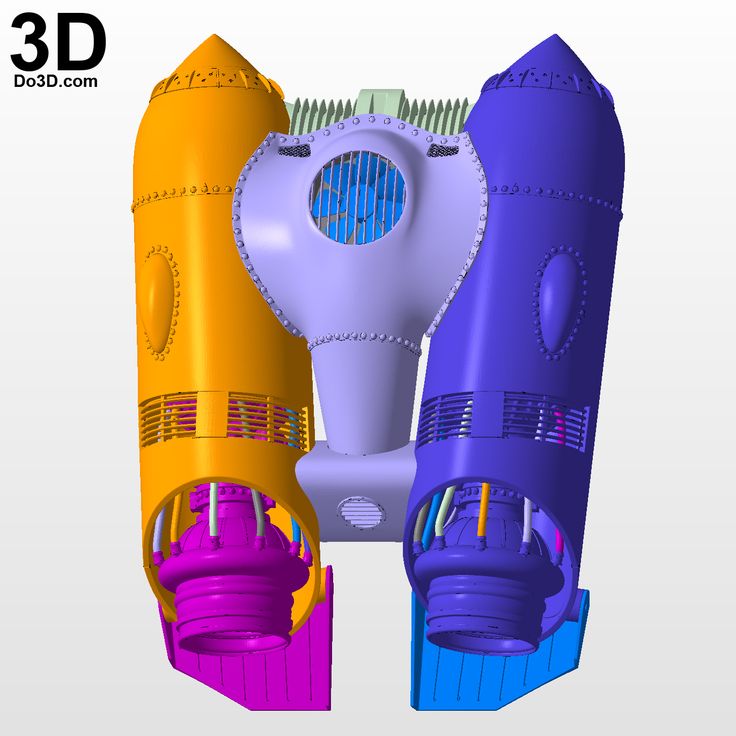 At the preparatory stage, you are given the opportunity to see in advance what you can do, adjust the size of the future part, choose the optimal orientation for it and a place on the desktop.
However, I made all this adjustment already in the layer-by-layer layout program. It represents the future object in the form of thousands of thin layers, after which it converts all the information into the CNC programming language that controls the movements of the print head. In most cases, if you want decent results, you'll have to mess with the software settings without being satisfied with the default settings. I adjusted the printer resolution level, the wall thickness of the future rocket, and the infill density. The fact is that those parts of the model that are solid (not hollow) according to the drawings, the printer prints in the form of a honeycomb structure in order to save material. The filling density determines the size of the honeycomb and, accordingly, the density and strength of the model.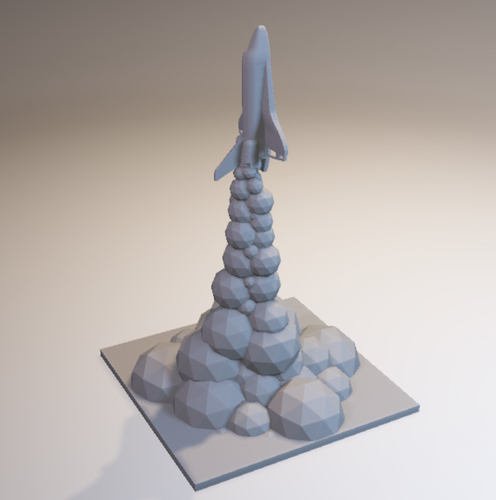
Both parts were made in just half an hour and took less than 50 cm of polymer thread. With such economy, I allowed myself a wide variety of experiments. However, it was impossible to do without them, because the first pancakes invariably came out lumpy. Particularly annoying was the reluctance of the tail stabilizer to stand still: with each pass of the printer, the part shifted slightly on the table. This did not suit me - I wanted to achieve an accuracy of at least 100 microns from the printer head. And if on the computer screen the rocket looked just beautiful, on the desktop I got something like a tangled lump of plastic vermicelli.
When molding your models in PLA, they often tend to come off the table - especially if they are fixed in just a few tiny areas. When working with ABS, this does not spoil life so much, because there you still need to preheat the desktop, and then this thicker polymer will be welded tightly to it.
I solved the problem in my own way: I went back to the layering program and added a few more rough passes to it, which should form a disk-shaped support pad.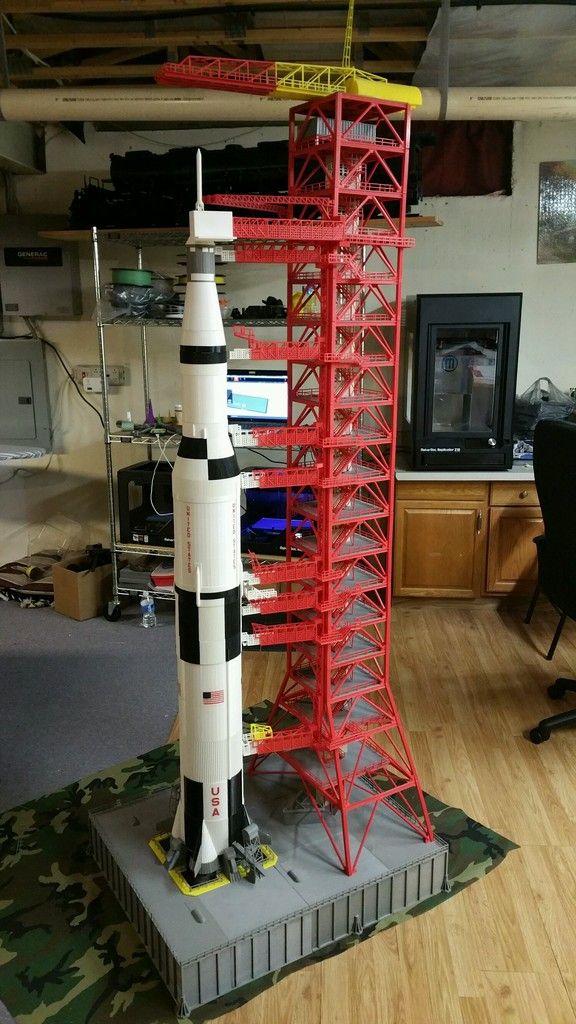 In our business, such an element is usually called a "support foundation". In this way, I increased the contact area of the part with the desktop, and it stuck to it so that it did not tear off. Then, when the job was done, I easily cut off the excess plastic with a knife.
Abstract Sculpture
So I have a few copies of my first rocket (a 3D PeeWee model) on my desk, and I'm starting to build a more complex rocket with reverse-swept stabilizer wings. The engine compartment consists of four parts. Their pointed ends must be joined to the rocket head, while enclosing the rocket engine. At the nose fairing, spring fingers must be molded, which will then be inserted into the head compartment of the rocket. There they must sit tightly during the entire flight, and at the end jump out of the nests and release the parachute to land the warhead.
Trouble started while printing the head. The part was skewed, and in the section I got an oval instead of a circle.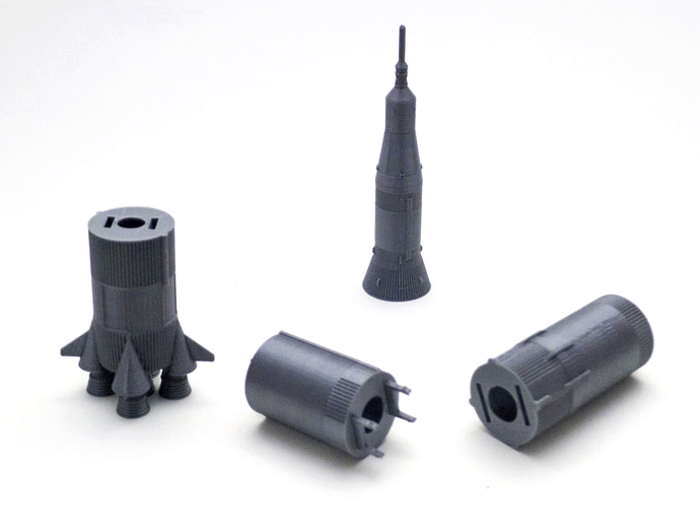 Yes, and the castle fingers turned out to be fuzzy. Due to these defects, it was not possible to dock the head part with the engine compartment, no matter how hard I tried. I returned to the layering program again and provided in it stiffening ribs that will hold the correct shape during the manufacturing process (then these ribs can be cut with a knife). As for the locking fingers, here I chose the “trial and error method”: I sculpted them again and again, changing the resolution of the printer, until something decent came out.
My third rocket was conceived as a one-piece casting. I planned to print its three-piece fuselage, nose fairing and stabilizer unit as a single piece. In theory, it was assumed that during assembly it was necessary to disconnect the parts one by one from the monolithic block. In practice, however, there was nothing to brag about. In front of me were several freaks that looked like abstract sculptures.
I'm still experimenting with the programming so that parts of the rocket are already light enough to take off with a medium power toy engine. Moreover, I'm thinking about how I can switch to some open source program - then it will be easier to interfere with the original settings. The MakeWare software package carefully prepares your work area and cuts the object into thin slices, but it does not leave room for experimentation, limiting your ability to independently adjust parameters such as, say, the temperature of the print head or the material feed rate. With this approach, you are unlikely to succeed if you take on an object with thin walls or small details.
A fairy tale is coming soon
On a sunny December day, I launched my 3D PeeWee rocket. The curved stabilizer feathers made the rocket spin around its own axis, which ensured good stability in flight. On the other hand, they created additional drag, so that my brainchild rose only 150 meters. Then I lost sight of it, and only some time later, somewhere at a distance of half a kilometer, I found scattered stabilizer feathers on the ground.