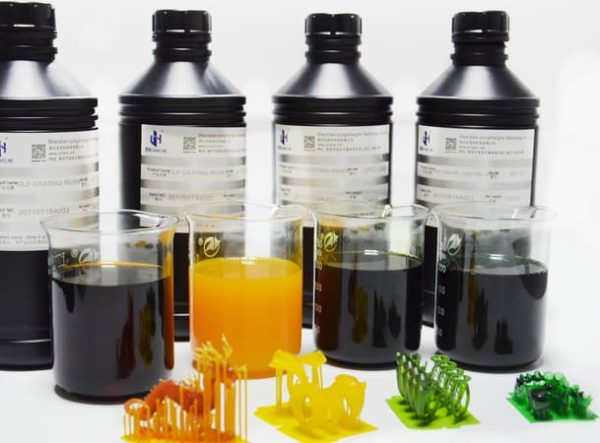
3D printer wax resin
Wax Castable 3D-printing resin for Jewelry parts
Liqcreate Wax Castable is a blue wax-based photopolymer with reliable processability and accuracy on LCD/MSLA, DLP and laser based 3D-printers. 3D-printed parts from this material captures intricate features and show crisp details. This wax-based material offers smooth surfaces with clean burnout for a reliable casting process. Create custom made elegant organic geometries with positive and negative engravings according to your preferences. Liqcreate Wax Castable creates perfect casting patterns for jewelry, dental and industrial parts.
Key benefits
- – High precision
- – Wax-based
- – Clean & ash free burnout
- – Excellent casting of engravings
3D-printer compatibility
- – Phrozen Sonic Mini 4K
- – Anycubic Photon
- – Elegoo Mars
- – And many more 385 – 405nm DLP, LCD and SLA 3D-printers
Wax-Based Clean and ash-free burn-out High accuracy
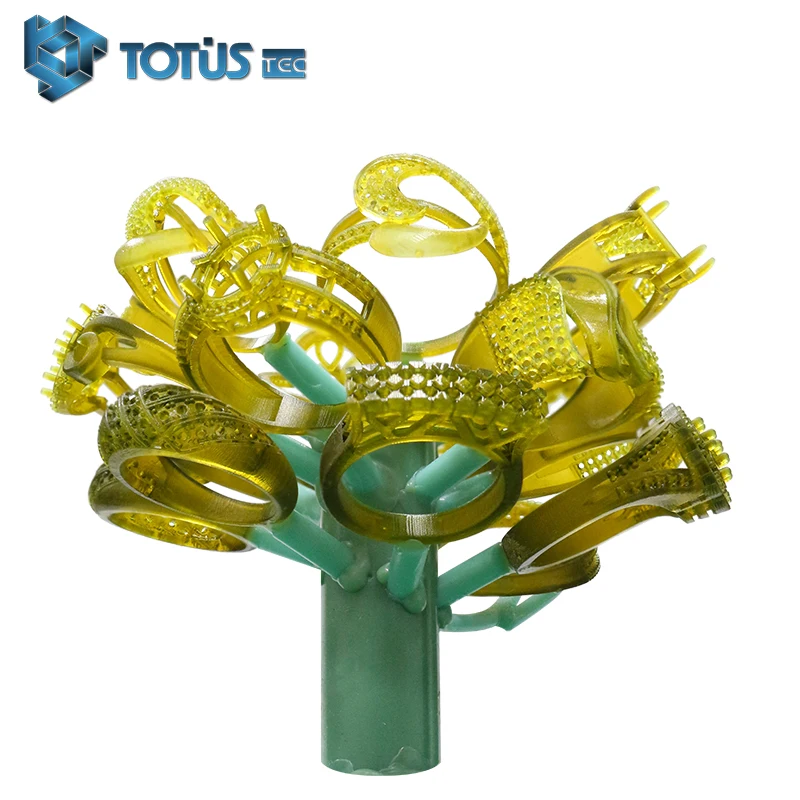
Ash free, clean burn-out wax castable resin perfect for jewelry engravings
One of the key benefits of using Liqcreate Wax Castable resin is the precise and flawless engravings in rings, as displayed in the rings below.
Processing Wax Castable resin
Due to the significant amount of wax, Liqcreate Wax Castable will solidify around 17 – 18˚C. It is not advised to use this product in environments with temperatures below 18˚C. storage or transport of Liqcreate Wax Castable below 18˚C is possible. Before processing, it is necessary to heat-up the product to its liquid phase. This can be done by leaving the product for 5 hours at room temperature or by placing the packaging in a warm environment (without direct light, in the original packaging) up to 50˚C for 20 minutes.
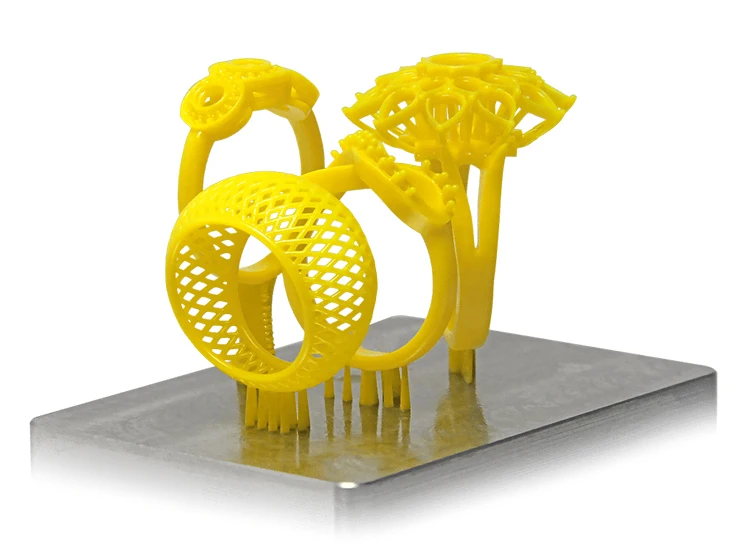
3D-printing with Liqcreate Wax Castable resin
It is important that the 3D-printed parts are flawless to get the best casting results. Layer thickness of below 0,05mm is strongly advised along with a well calibrated 3D-printer. Find the parameters of your printer here, or send an e-mail to [email protected] for more information about printer settings and compatible 3D-printers.
Investment material for Wax Castable resin
During the development of Wax Castable all casting tests were performed using the Prestige Unicast investment material.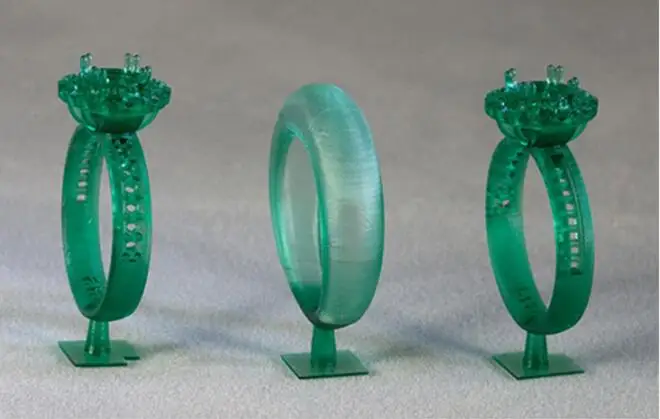 Other materials might also be suitable to work with Liqcreate Wax Castable. It is important to follow the instructions of the investment material to get the best results
Burn-out schedule for Liqcreate Wax Castable resin
We followed the instruction of the investment material (Prestige Unicast). The following burn-out schedule is used:
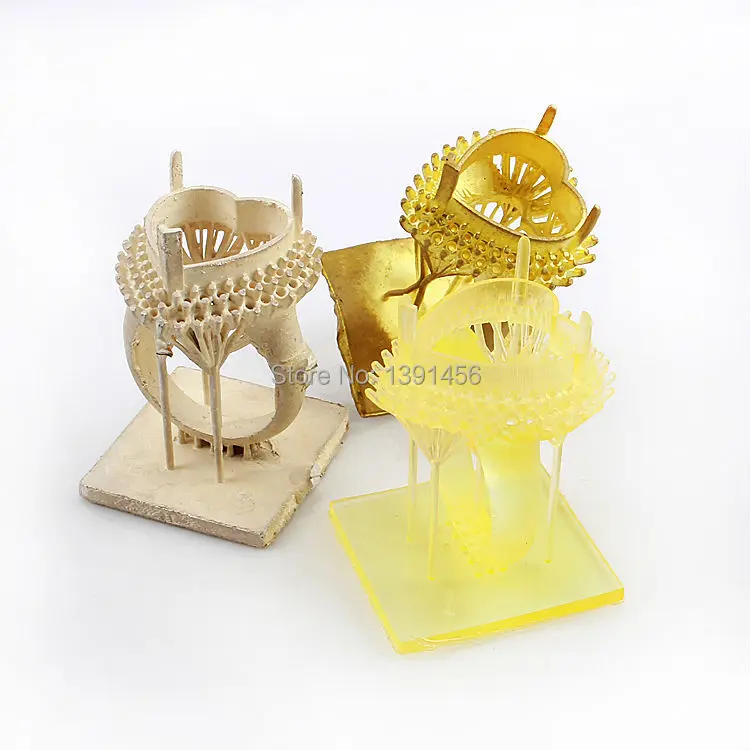
Parts have a matt finish after casting and polishing is necessary to get high-gloss metals. As a reference we shared a picture below of a printed part, freshly casted part and on the right side a (partly) polished part.
Frequently asked questions
In this section we cover the most frequently asked questions. Most of the defects after casting, can be traced back to the printed part, post-processing or type of investment material.
Printing with Liqcreate Wax Castable resin.
The investment material will take over every detail of the printed part. Meaning that the quality of the 3D-printed wax-like model needs to be as perfect as possibly. Printing with Wax Castable resin can be more difficult compared to other resins, due to the significant amount of Wax present in the resin. At temperatures below 18 degrees Celsius, the resin will solidify. It is important that the resin is completely liquid during printing. Also the room temperature were you are using the Wax Castable resin should be at least at 20°C. Usually the resin wont solidify during printing, however, when printing in a cold room, the droplets left on the platform can solidify. This will make the washing process more difficult. It is important that the washing solvents are also at least 20°C to prevent solidification during washing.
A lot of 3D-printers have already been optimized with Liqcreate Wax Castable resin. Find out if your printer is listed here. Send an e-mail to [email protected] if your printer is not listed. Most of the settings have been optimized on filigree designs, these are thin designs which often require a longer exposure time. If you have more bulky designs, the exposure time can be lower for your parts.
We have noticed that the wax inside the resin gives a low adhesion to anodized alumina platforms, like the Elegoo Mars series. To get the parts to stick to the platform better, it is advised to make some support changes. The raft of the supports has a big area and often pulls the part from the platform. To change the raft settings, printing will be much easier. Changing the raft height and raft thickness to 0,1mm will fix most of these issues.
Orientation of your parts.
Especially for rings with engravings, the orientation of your part is very important. For rings with engraging it is advised to place the rings under a 20 degree angle instead of printing vertical. The reason is that the chance of overcuring your engravings is far lower in this position. For best orientation see the image below. If you still have questions if your orientation or settings are good, don’t hesitate to contact us at [email protected]
Post-processing Liqcreate Wax Castable resin.
Next to adhesion, it is important that all layers of the parts are completely visible. The parts should be non-sticky and have a matte surface finish after washing and drying. Excess resin or sticky surfaces can react with the investment material and create pores in the casted parts.
If no Anti-aliasing or blurring settings are used, in perfectly printed and washed parts should the layers should be clearly visible. An example of a part that is printed and washed correctly can be found in the image below. It should be noted that the investment material, and thus also the casted metal parts will have these visible likes as well. If that is not wanted, grinding before casting, or using Anti-aliasing or Blur settings can help reduce the layer effect.
Investment material for Liqcreate Wax Castable resin.
Choosing the right investment material when using 3D-printed wax resin patterns is very important. Resin and also Wax-based resins have a higher thermal expansion compared to regular wax.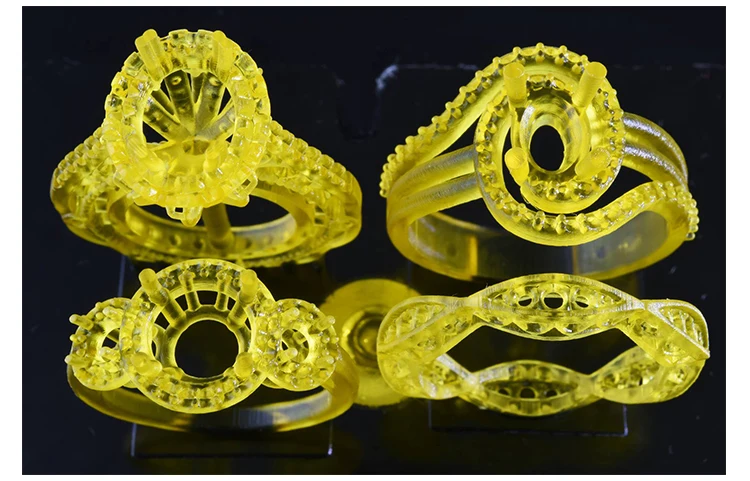 The investment material should be strong enough to survive this expansion and not crack. For jewelry applications, our beta-partners have had great success with Prestige Unicast investment material. Our dental partners at 3D-Dental Store are using both N&V and Ambervest investment materials with success for casting dental applications.
We wish you a great journey with our Wax based Castable resin. If you have printed or casted a great part and want to be featured in our social media, or have any questions about the product or processing, send us an e-mail to [email protected]
Castable resin for 3D printers
Sort byRelevanceBestsellersCustomer ReviewsPrice, Low to HighPrice, High to LowNew arrivalsHighest Discount
-
Liqcreate Castable Wax 250 g, 1. 000 g
000 g- High precision
- Wax-based
- Clean and ash-free burnout
-
Formfutura Castable LCD Series Castable Wax Resin - Blue 500 g- For dental, jewellery and industrial applications
- Ashless burnout
- Low shrinkage factor
-
Phrozen Wax-like Castable Resin - Violet 500 g- Castable synthetic resin
- Very little shrinkage
- High precision
-
BlueCast X5 Resin- No post-curing necessary
- No ash residue
- Simple post-processing
-
BlueCast Original LCD / DLP Resin- Castable resin
- Hardly any ash residue
- Reworkable by hand
-
Moiin Wax Cast 1. 000 g
000 g- Real wax content of over 30%
- Exact details and structures
- Burning out without residue
-
BlueCast X10 Resin- Smooth surfaces
- No ash residue
- Low shrinkage
All prices incl. VAT.
Formlabs Jewelry Resins material properties characteristics
Jewelry resins are specially developed by Formlabs for jewelry 3D printing. They create highly detailed prints for designing and making jewelry.
These resins are easy to work with. After all, they really accurately reproduce precise settings, sharp protrusions, smooth rods and fine surface details. By using Formlabs Jewelry Resins on the world-renowned Formlabs Form 3 Automated Desktop Stereolithography 3D Printer, you can be sure of the result of printing and casting. Resins are designed to mimic working with wax. They burn cleanly and residue-free with a controlled burn-out schedule and are suitable for traditional jewelry manufacturing methods. Thus, 3D printing with Formlabs jewelry resins fits into your traditional jewelry manufacturing workflow, accelerating and scaling it.
Printing accuracy and resin resin applications Formlabs
1| Compatible with printer | Bath compatible | Layer height, micron | Features and Applications | |
| Castable Wax | Form 2 Form 3 Form 3B | Form 2 Standard Form 2 LT Form 3 Tank V1 Form 3 Tank V2/V2.1 | Form 2, Form 3/3B - 25, 50 µm | Accurate settings, sharp teeth, smooth shafts, fine surface details Photopolymer with 20% wax No post-curing required |
| Castable Wax 40 | Form 2 Form 3 | Form 2 LT Form 3 Tank V2.  1 1 | Form 2, Form 3 - 25.50 µm | Photopolymer with 40% wax Heavy Statement Jewelry Pendants & Medallions Custom Wedding Jewelry |
1 Data as of March 2021 Accurate reproduction of even the smallest details and a clean casting every time. The photopolymer, which contains 20% wax, is specially formulated for reliable casting with 0% ash residue and clean burnout. Castable Wax Resin faithfully reproduces intricate details and offers the smooth surfaces that stereolithographic 3D printing is known for. 1 Material properties may vary depending on part geometry, print orientation, print settings and temperatures. 2 Data was obtained from parts printed on a Formlabs Form 2 3D printer, Castable 50 µm Fine Detail setting and washed without post curing. The Burnout Standard Chart is designed to give the highest possible investment strength and complete burnout of the finest details when using R&R Plasticast or similar investment materials. - Castable Wax 40 Resin contains a 40% mixture of solid and liquid waxes, which gives this polymer a low coefficient of expansion. The resin is available in a wide range of investment casting conditions and is compatible with leading plaster moulders. Parts printed with Castable Wax 40 have excellent detail and clean burnout across a wide range of workflows and casting conditions. Does not require additional polymerization. Castable Wax 40 offers the easiest workflow on the market for 3D printing and casting tasks with a highly detailed design. With more flexible casting parameters and burnout, this resin ensures that casters of all skill levels can produce high quality resin jewelry. Formlabs jewelry resins 1 Material properties may vary depending on part geometry, print orientation, print settings and temperatures. 2 Data was obtained from “green” parts printed on a Form 3 3D printer, 50 micron, Castable Wax 40 Resin setting, no post-cure. The following burn-in chart is designed to reduce the thermal expansion of the resin in the mold while still allowing full burn-out of thick jewelry pieces.
• Castable Wax V1 • Material properties
Castable Wax from Formlabs
Green 1 Method Tensile properties 2 Tensile Strength 11. 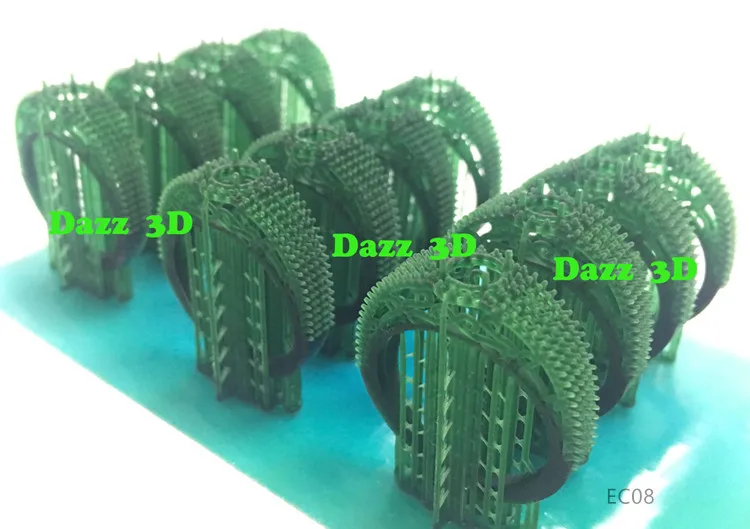 6 MPa
6 MPa ASTM D 638-10 Tensile modulus 220 MPa ASTM D 638-10 Elongation at Break 13.0% ASTM D 638-10 Burnout properties 2 Temperature at 5% weight loss 249 °C ASTM E 1131 Ash content (TGA) 0.0-0.1% ASTM E 1131 Formlabs Standard Burnout Chart
Castable Wax  Use this schedule as a starting point and make adjustments as needed.
• Castable Wax 40 V1 • Formlabs jewelry resins.
 Material Properties Castable Wax 40
Green 1 Method Burnout properties 2 Temperature at 5% weight loss 249 °C ASTM E 1131 Ash content (TGA) 0.0-0.1% ASTM E 1131 Formlabs Standard Burn-In Chart
Castable Wax 40  Formlabs Recommends Certus Prestige Optima 9 Investment Powder0079 TM
| Phase | Time | °C graph | ||
| A | After the setting period of the investment material (30-60 min), place the flasks in the stoving oven | Hold | 180 min | 55 °C |
| B | Thermal junction Wax sprue extends to the outside, increasing air flow to the resin pattern. The wax in the resin ends up in the investment. Burn-in starts gently, destroying the structure without much expansion | Heating | 48 min | 2 °C/min |
| Hold | 180 min | 150 °C | ||
| Heating | 75 min | 2 °C/min | ||
| Hold | 180 min | 300 °C | ||
| C | Burnout Removes resin and ash residues in the package | Heating | 108 min | 4 °C/min |
| Hold | 180 min | 732 °C | ||
| D | Casting temperature Cool the flask to the casting temperature of the selected metal | Heating | 44 min | -5 °C/min |
| Casting window | Up to 2 hours | Desired casting temperature |
Wash Information:
Rinse Castable Wax 40 prints in isopropyl alcohol (IPA) for several minutes.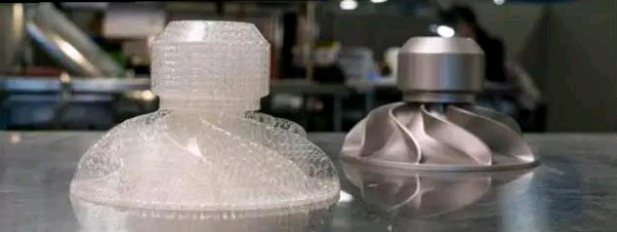 Rinse for 5 minutes in a second bath of purer IPA to remove uncured material. Dry parts completely with compressed air. Do not use TPM for washing.
Post cure information:
Curing is not required for Castable Wax 40 bulk prints, but may increase processing strength if desired. Cure parts for up to 30 minutes without heating.
FormLabs jewelry: physical properties
All characteristics of resins Formlabs
All about 3D technologies in jewelry
Buy formlans
Main
001
BlueCast X10 photopolymer resin is an evolution of the famous X5 photopolymer resin for direct casting of jewelry and dental models. It is a resin designed to provide perfect casting with wax equipment as well as conventional molding into plaster.
Main advantages:
- better adhesion to the platform
- less shrinkage
- no ash, even at lower temperatures
- improved detail
BlueCast X10 Photopolymer is monomer free, meaning the user does not have to deal with harmful low molecular weight chemicals.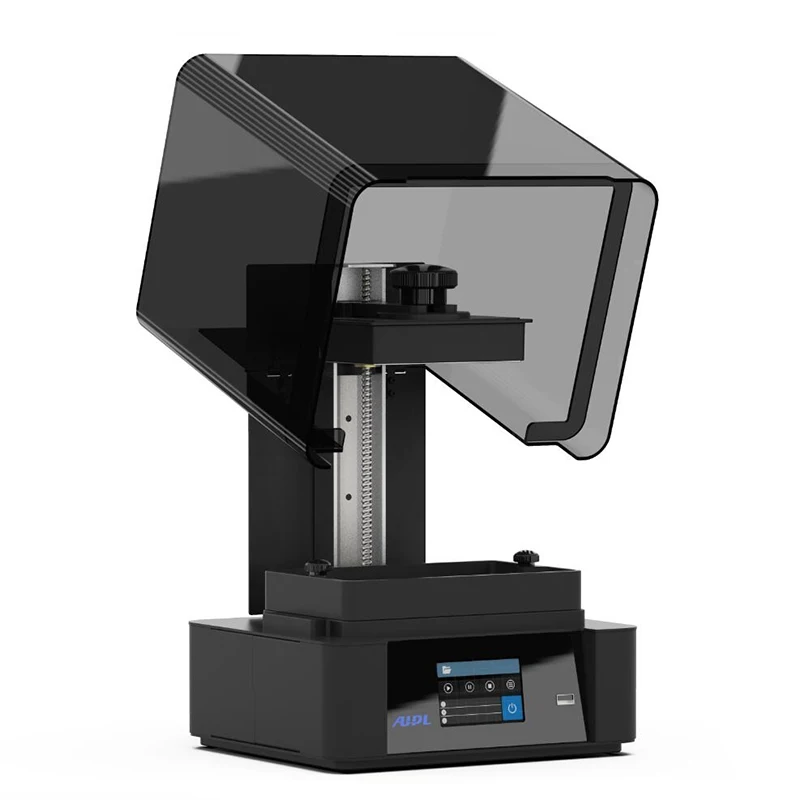 But even though X10 is NOT carcinogenic, non-toxic and safe, we strongly recommend that you use protective equipment when handling it, as specified in the MSDS, due to the presence of a small amount of phosphine oxide, which can cause skin irritation. Base component X10 is a specially designed methacrylic acid modified urethane compound oligomer that modifies the sublime bond (transition from solid to non-liquid gas phase) without volume expansion and emission of CO CO2 and water during this phase.
Molding:
The manufacturer has successfully tested almost all commercially available molds with good results and found that Certus' Optima Prestige provides the best detail and surface quality, and forgives small errors that can occur during flask preparation, but execution following instructions will ensure good results with all molds.
Mold storage:
Photo molds must be kept in a closed box/bag, moisture in the air will react with it every time it is opened, so try to minimize the time the mold is open.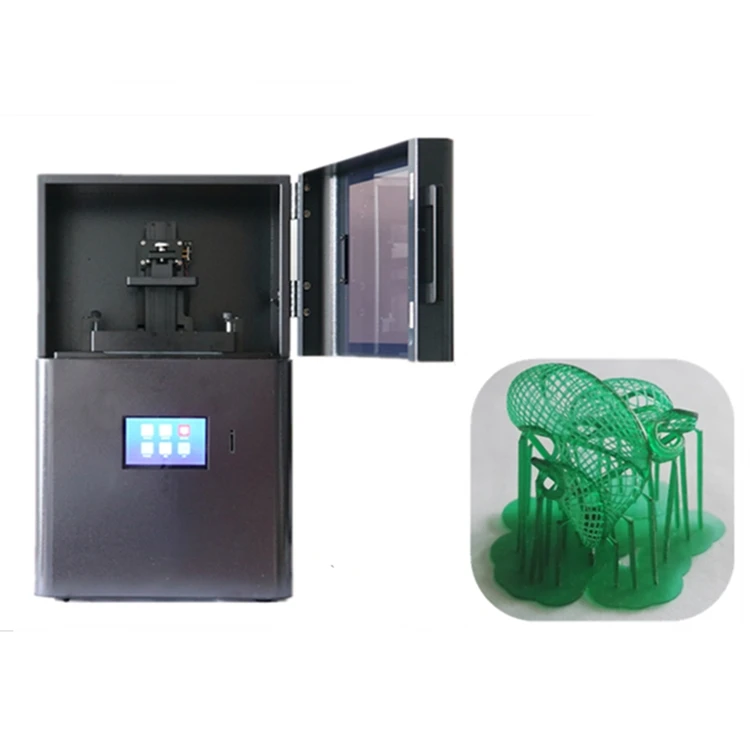
Water:
Never use tap water for molding. It contains chlorides and minerals. Use only distilled water.
Ratio:
If you decide to slightly change the water/powder ratio, be aware that lowering the water level will result in a stiffer/brittle molding mass, as well as making it harder for sublimation gases to escape, which create cracks, on the other hand, if you increase the water, you will get a softer mass, resulting in rougher surfaces and loss of detail
Temperature:
The temperature of both water and powder affects the quality of the casting. Store both water and powder in cool places. Gypsum hardening is an exothermic reaction, so improper storage can result in poor mold resistance and faster hardening.
Boric acid:
Boric acid hardens the mold mass, thereby closing many micropores, which can lead to cracks. We do not recommend using boric acid when molding X10.
Fast Burn Cycle:
Blue Cast X10 Resin is suitable for fast burnout. If you want to use it, remember that you need to apply additional wax sprues around the model; the wax will melt quickly, leaving routes for the gas to escape. Keep in mind that a fast burn cycle will produce a huge amount of gas and insufficient outlets will destroy the mold!
Pretreatment:
No special preparation, including esoteric rituals, is required. Printed, washed in alcohol, dried and cast. You can use additional illumination under a UV lamp for no more than 10 minutes if you are not sure that you have washed the unexposed resin well in alcohol.
Preparing the wax tree:
The Christmas tree is assembled in the same way as with casting wax. In order for sprues to stick better when soldering, it is recommended to sand the surface of the model where the connection with the sprue is planned.
Finish model:
No protective spray or dip treatment required. X10 has the correct surface tension and no reaction or interaction of the solid polymer with the mold mass occurs.
Mold holding time:
The manufacturer recommends that the flask be left to stand for at least 4-6 hours after molding, especially if your models have fine patterns.
Collar type:
ALWAYS use a perforated flask, even if you use a closed system, the holes help the gas escape during the sublimation phase.
Hole down or up?
Down, full cycle
Blu Cast X10 Resin Burn-in Temperature:
The first thing you need to understand is that the temperature set on the muffle furnace programmer will not exactly correspond to the actual temperature in the flask and the difference in these temperatures will depend on the location of the flask in the furnace. The best solution is to prepare a dummy flask with a temperature probe hole and go through a cycle with real temperature measurements to accurately determine this difference.
Remember that with X10 polymer 3 things are important:
- rate of temperature increase in the critical zone (from 250C to 550C), maximum 2 degrees Celsius per minute.
- maximum flask temperature (minimum 74°C, preferably 78°C)
- maximum temperature hold time (minimum 3 hours, preferably 4)
If you follow these parameters, you can be sure that you have properly managed X10 sublimation and residual burnout.
Now regarding the molding mass: There is a mythical belief that the molding mass cannot be heated above 720 degrees. The reality is that above 750 degrees Celsius a chemical reaction will begin to occur: 2CaSO4 = 2CaO + 2SO2 + O2 and, as you can see, this reaction will release oxygen (which will easily bind to carbon residues and leave the flask with carbon dioxide) and sulfur dioxide, which will slowly exit the mold during the final phase of the burnout cycle and exit completely during the pre-cast vacuum. Keep in mind that pouring metal into a flask will always produce sulfur dioxide, and this is the main reason you get oxidized surfaces on castings, so don't worry about warming up to 800°C.0004
Some Blucast X10 technical data and preferred burn cycle:
Purple line is TGA (thermogravimetric analysis) X10
The green line is the expansion/contraction of the mold
The blue line is the programmed burnout cycle
The blue line is the actual temperature inside the flask
The red area is the critical zone
The first step is to remove the water not used by the gypsum to make it hard (remember that 100g of gypsum only effectively uses 18g of water) and this is the first phase of burnout at 100°C.