Max feed rate 3d printer
3D Tomorrow - How to Calculate your 3D Printers Max Flow Rate & Speed
If you have ever been watching your 3D Printer chug away and then heard a clicking noise from your drive gear, it could be because your printer hit its max flow rate, the point where it is pushing plastic out too fast. I have created a video on YouTube which explains the process (below), however for completeness I have also written the steps below.
Step 1. Decide on the values for your control variables (Nozzle Temperature, Nozzle Size and Printer Filament). In the video I opt for 210ºC, 0.5mm Nozzle and 3DTomorrow Pro PLA ~ Artic White.
Step 2. Download the Flow Rate Tower Below.
Flow-Rate-Tower.stlDownload
Step 3. Setup the Flow Rate Tower in your slicing software.
Firstly make sure you are printing in vase mode.
Secondly select a print speed which is not too fast, 30-40mm/s should work well.
Next choose your layer height, for 0.4/0.5mm nozzles, 200 microns is a good shout.
Finally, you then need to vary the extrusion width so that every 20mm increment is printed at a 10% higher extrusion width than the base nozzle diameter, i.e. the first layer extrusion width is the same as your nozzle diameter (for me this was 0.5mm) and then the next layer is 10% higher (0.55mm for me) and so on (0.6mm, 0.65mm, 0.7mm…). Simplify3D Makes this easy to do with multiple processes, but if you get stuck, just add a comment and I will help out.
Step 4. Print the tower!
Step 5. Examine the results and identify the layer where printing went well for the entire layer, this is the layer that will tell you a safe maximum flow rate for your printer setup (with the exact nozzle temperature, nozzle diameter and filament you previously selected). Make a note of the extrusion width this would have been, e.g. if 140% is the selected layer and you had a 0.5mm nozzle, the extrusion width should be 0.5*1.4 = 0.7mm.
Step 6. Use the calculator below to find out your safe maximum flow rate:
a = (extrusion width identified in Step 5)/2,
b = (layer height)/2,
c = print speed.
Step 7. Now that you have a safe maximum flow rate calculated you can convert this back into a safe max speed for your 3D Printer. To do this you need to calculate the surface area that represents the size of lines you normally print. One variable ‘a’ is the layer height in mm (so 200 microns is 0.2mm) and the other variable is the extrusion width in mm (e.g. 0.55mm). The formula is: π * a/2 * b/2
Step 8. Divide the maximum flow rate obtained in step 6, by the surface area of your normal print line obtained in step 7. This value is a safe max printing speed for your 3D printer with the nozzle diameter, temperature and filament you previously set.
FAQS:
- My temperature tower printed fine all the way, what do I do? This is a good thing, it means your setup has a nice high max flow rate, you will need to print the next tower which starts at 180% extrusion width. You can download this at the bottom of the page.
Flow-Rate-Tower-From-180.stlDownload
How to Calculate your 3D Printers Max Flow Rate
Tagged on: 3d printing drive gear click flow rate print speed
speed - Marlin Adjusting feedrate
Ask Question
Asked
Modified 4 years, 6 months ago
Viewed 46k times
$\begingroup$
I'm using the Marlin firmware (1. 1.0-RC7 - 31 July 2016) for a 3d printer. Currently the printing is not perfect due to slight inaccuracies in movements along the x and y axis. I'm trying to change the feedrate for speed along the xy axis whilst the printer is in operation to make sure the printer stops on time and prints accurately.
I have some code for controlling the feedrate but the problem is that I'm not sure where I am supposed make these adjustments. In the configuration.h file I see this code: (lines 742 and 753 )
/*line 742*/ #define HOMING_FEEDRATE_XY (50*60) /*line 753*/ #define DEFAULT_MAX_FEEDRATE {300, 300, 5, 25} // (mm/sec) I'm probably misunderstanding something but it seems like this sets the feedrate to a default value which is the same as the maximum.
If the feedrate changes during printing I'm guessing it would be done in Marlin_main.cpp but I'm not sure which part it actually changes. Can someone point me in the right direction here?
- marlin
- speed
$\endgroup$
1
$\begingroup$
You can change the maximum allowable feedrate in Configuration. h, but the actual feedrate that is used isn't determined by your firmware. The feedrate is specified in the G-Code file. A command like
G0 X10.0 Y15.0 Z3.0 F9000
indicates a move to (10,15,3) at a feedrate of 9000 mm/min. If F is not specified, the last used feedrate is used.
You just have to provide the appropriate G-code commands with the feedrate you want in them. There's no reason to modify the firmware to get a different feedrate.
$\endgroup$
3
$\begingroup$
It seems like you might be wanting to look at the steps per mm line.
#define DEFAULT_AXIS_STEPS_PER_UNIT
This line is where you calibrate the number of steps per mm. To calibrate, mark a point along an axis, then move that axis something like 100 mm. If it didn't move 100 mm exactly, make a change
(how far it moved) (how far it should have moved) ------------------ = ------------------------------ (current steps/mm) (new steps/mm) --> find this
$\endgroup$
$\begingroup$
You have the lines to adjust the feed rate. The first one (line 742) is relevant to the maximum feed rate XY while homing (not during printing). I think this is not an issue in your particular case and you may leave it as it is.
The second one (line 753) is the feed rate while printing for XY. Particularly the numbers in the brackets refers to ( X, Y, Z, E). If your printer is moving it may affect XY more than Z and E. So you may try to adjust the first two numbers.
Due to the very specific situation is impossible to give you a feed rate based on calculation because you are dealing with external accelerations caused by the mobile situation. You will need to try and adjust it until you get right.
Another setting that may also help you to compensate the external acceleration, if any, is the acceleration of those two axes.You should find two lines like these:
#define DEFAULT_MAX_ACCELERATION {1500,1500,50,250} #define DEFAULT_ACCELERATION 1500 // X, Y, Z and E max acceleration in mm/s^2 for printing moves However the acceleration of the axes may impact on the quality of the printing.
$\endgroup$
90,000 at what speed are the FDM 3D printers
with what resolution 3D printers are printed
threaded parts of the printed parts
6 safe ways to remove 3D scribes
9000 3D-spent at home gives us the opportunity to give us the opportunity to produce given objects at a very low cost. However, the time it takes to turn a 3D model into a physical object is not as short as one might think. The size and quality of the print has a decisive influence on the speed of printing, and it can take many hours to get the final result. In fact, various tests show that printer speed has a much smaller effect on print time than size and quality settings. nine0003Desktop printers
3D print speed settings
In general, there are currently three blocks of speed settings supported by 3D printers. The first block includes speeds from about 40 to 50 mm / s, the second - 80-100 mm / s, the fastest printing is carried out at about 150 mm / s. Some printers can even print at speeds over 150mm/s.
Usually, though, faster 3D printing means lower quality. At speeds above 150 mm/s, the quality drops significantly, and problems can arise, since the filament is prone to slip at such speeds. nine0003
How to set the print speed
Typically, the 3D print speed is set in the slicer software used to prepare the 3D model for printing. In Cura, for example, you just need to enter the desired print speed in the Print speed field in the Basic tab (in previous versions, you first had to switch to the Advanced mode and open the Speed tab).
Cura calculates the duration of the print process based on print speed and quality settings. nine0040
As soon as the print speed ( Print speed ) or other setting is changed, Cura recalculates the print time and displays it (see arrow). Cura's calculations turn out to be very close to real-time printing.
How long does 3D printing take in practice?
To find out how fast 3D printers actually print, two popular desktop printers, the Ultimaker 2 and the Wanhao Duplicator 6, were tested on two more or less complex objects.
These two models were printed:
3DBenchy. This 3D model is designed to test and measure the speed of 3D printers; it is quite complex and requires attention. The boat is 6 cm long, 4.8 cm high and 3.1 cm wide. Here you can get the 3DBenchy STL file for testing for free.
3DBenchy's 3D printing speed is relatively slow, the model is quite difficult to print (Photo: 3DBenchy.com).
Universal tablet stand (up to 1.2 cm thick). The stand is 14 cm long, 4.2 cm high and 9.8 cm wide. The STL file is available for free on Thingiverse.
The stand is quite large and difficult to print (Photo: Thingiverse).
These objects were printed at two speeds, 100 mm/s and 50 mm/s, at similar settings. Here are the results:
Printer
Model
50 mm/sec
100 mm/sec
Ultimaker 2
3DBENCHY
h 09 min 9 min.0003
1 h 55 min
Wanhao Duplicator 6
3dbenchy
2 h 13 min
1 h 51 min
Ultimaker 2
Stand
9000 H 23 min4 h 36 min 9000 min
Wanhao duplicator 6
Stand
6hrs 27mins
4hrs 45mins
- For the smaller models, the difference between slow and fast print is not particularly striking: almost 2.25 hours versus less than 2 hours. Unless you're insanely short on time, choose a slower speed for better print quality. nine0122
- For large models, the print speed varies more significantly: 6.5 hours versus 4.75 hours.
Cunning. If you don't have your own 3D printer, download the free Cura software from the Ultimaker website. Cura has profiles for most desktop printers (FDM), so you can check how long it takes to print a specific 3D model on a particular device - just import the STL file and play with Cura settings. To try another 3D printer, select Machine > Add new machine.
Does high-speed sintering promise the fastest 3D printing?
On an industrial scale, even more impressive prospects dawn on the horizon. The University of Sheffield has announced that its scientists have built a £1m-funded 3D printer that can produce plastic parts as quickly as traditional mass-production methods such as injection molding.
The process is called high-speed sintering (HSS), which melts the polymer layer by layer (similar to the additive printing process), but instead of using lasers, HSS prints on a powder substrate with infrared-absorbing inks. After the layer is printed, it is exposed to infrared radiation, the ink-coated powder is heated, resulting in melting, while the non-irradiated powder remains cold. nine0003
A team led by Prof. Neil Hopkinson claims that their machine is capable of producing parts up to 1 m³, i. e. with a washing machine, which is three times more than existing printers can. The print speed is dependent on the size of the object, however, Hopkinson estimates that small components will be created at speeds of less than one second per part.
What use is this to us? The good news is that HSS technology has been licensed to industrial 3D printer manufacturers on a non-exclusive basis, and new machines are expected to hit the market in 2017. This means that in the near future we can expect the transition of this industrial technology to the "home" level. nine0003
In search of the holy grail or how to find the maximum speed of 3D printing.
How to do a quick extruder performance test? How to find the maximum print speed on an FDM printer? What is the best print speed? How to find the optimal print speed? Why is the extruder throat clogged, did I put everything together correctly? How to quickly print on a 3D printer? Why is the filament wrinkled in Bowden? Why does the extruder chew on the filament?
About the main thing
Only three parameters are responsible for the maximum print speed on an FDM printer:
- Printer specifications are how fast it can move the printer.
 You can learn them from the user manual, so the study of mechanics is not considered here - your printer will not be able to move the print head faster than it is physically capable of.
 - Extruder performance - whether the extruder is able to melt enough plastic to produce a line of a given height and width at a given print speed. This is an important parameter that depends on the design of the heating block, the standard E3D V6 melts less plastic than VOLCANO, but, as practice shows, there are no problems in the vast majority of cases, since on standard nozzles with a diameter of 0.2 to 0.6 mm you you will encounter another main reason for not being able to increase the print speed, namely:
- Maximum nozzle performance!
Yes, the most critical point on the way to print speeds is precisely the performance of the nozzle - the amount of plastic that it is able to pass through itself without damaging the thread, without clogging the extruder, etc.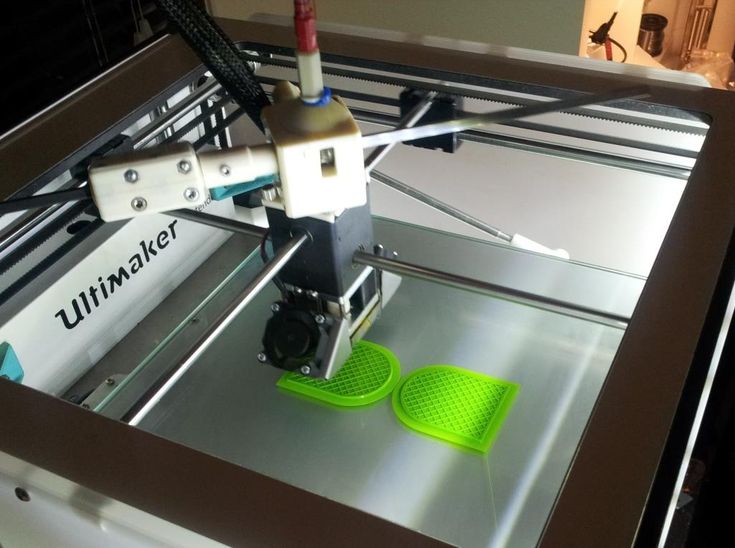
It is the nozzle output that is the overall output of the entire extruder, which affects the maximum line speed.
So, the output of the extruder is equal to the output of the installed nozzle. nine0003
How does it work? (short retelling, no details)
For those who are more interested in watching and listening - here is the video.
For those who are not interested in the details and who want more action immediately, without reading the abbreviations - a link to an Excel spreadsheet.
- Pre-set the flow (number of motor steps per mm), there are a lot of instructions on the Internet, I won’t write here - let’s assume that you have the flow set up.
- Uploading an excel spreadsheet. nine0122
- Enter the diameter of your nozzle, the diameter of the filament used, the height of the print layer in the fields marked in yellow (do not touch anything else!).
- In the table below you get the speed of feeding the filament into the extruder and the length of the extruded filament, sufficient to print a line with a given width and height for 3 minutes, at the specified print speed.
- Heat the extruder to the required temperature, and extrude the resulting length of the filament through the slicer at the selected feed rate (namely, the feed rate, not the print speed, do not confuse!). nine0122
Extruder sticking? Filament does not gnaw? Is the diameter of the extruded thread equal to the diameter of the nozzle? Throat not clogged? Does the filament wrinkle in the Bowden tube? Does the heating unit successfully melt plastic? Does the diameter of the extruded filament match the diameter of the nozzle?
Excellent! Go to the next line of the table and extrude the plastic at the next feed rate. As soon as the problems start - you have reached the performance limit, print at the speed that was successfully tested last, for example, if the plastic bites at a print speed of 70 mm / sec, but everything was fine at a speed of 60 mm / sec - print at a speed of 60 mm \sec. You have found the maximum possible print speed with your nozzle, on your plastic, with your print temperature and your layer height. nine0003
That's all, if you did everything right, it means that I helped you. You can leave thanks in the comments and / or donate using the details on the profile page, I won’t be offended :).
But what do not need to do is send me curses without reading the article to the end if something did not work out.
If you have read, but do not understand - I'm waiting for your questions in the comments, I'll try to answer.
If you have read and understood, but have your own opinion - also write constructive criticism in the comments, it will be useful to everyone. nine0003
How does it work?
And here are the details of the study, for people who are interested in the details.
To print at a given speed, we need that the volume of filament of a given diameter (1.75 mm or 3 mm) supplied be equal to the required volume of the printed line . We know that a certain amount of plastic is required to build a line, equal to Volume of extruded plastic (OP) = line height(HL) * line width(SHL) * line length(DL) , where Line Width (WL) is the diameter of the nozzle used, and Line Height (LH) is the height of the printed layer. The volume of extruded plastic (OP) is a tabular value and is constant regardless of the material used, it is determined only by the height, length and width of the printed line, for ease of use, these data are dynamically calculated in the Excel table attached at the link at the end of the article.
Knowing volume of plastic (PV) per second of time 93 filaments per second of time, which is equal to a filament feed rate of 3.3 mm/sec.
If the nozzle copes with the extrusion of a given volume of filament, no excess pressure is created in it, no excess plastic is ejected from the melt zone into the throat (there is no plug in the barrier), there is no jamming or jamming of the filament, and the thread squeezed out by the nozzle does not deviates from the specified diameter, which means that the selected maximum print speed (as well as the filament feed into the extruder) can be used in printing. nine0003
Actually, this is the answer to the question of what maximum print speed your extruder can support, on a given type of plastic, height and line width, at a given temperature.
The nozzle is the bottleneck of the whole system, even if the heating block is able to melt a lot of plastic - you will not be able to successfully extrude it if the nozzle does not allow it.
Many problems and questions may arise, but there is only one answer - the extrusion speed is greater than the throughput of the nozzle - it is necessary to experimentally (using the table) determine the allowable maximum printing speed and not exceed it. nine0003
The test can be carried out for each type of plastic you print with - their physical properties are approximately the same from type to type. I indicated at the very beginning how to use the table at the link at the end of the article - use it. I hope this helped you.
Important: if you experiment with different layer heights without changing the nozzle diameter, you will find the following: The change in layer height is inversely proportional to the printing speed.
And it's true, how many times you reduced the height of the layer - so many times you can increase the speed of printing! This is a consequence of the fact that the maximum allowable volume of extruded plastic does not change. Unfortunately, another conclusion follows from this - as the layer height increases, you will be forced to reduce the speed. nine0003
Important: If the filament is extruded with a larger diameter than the nozzle - reduce the print speed, do not try to reduce the flow rate in the slicer!
The slicer initially sets the amount of extruded filament required to print the line, and changing the setting will create underextrusion. Forget about slicer flow control (the topic of a separate article) - slicer flow control is necessary in exceptional cases, and believe me, your case is not exceptional, since the flow is perfectly controlled by the feed rate and setting the number of microsteps of the extruder motor (if the flow is configured incorrectly).