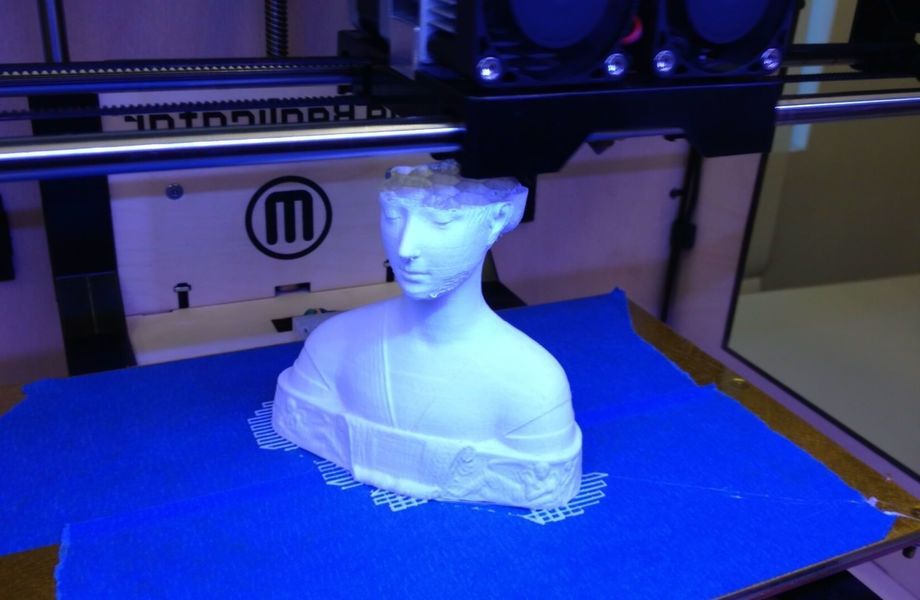
Klipper 3d printer
What is Klipper Firmware and Why Would You Want it?
Klipper Firmware/Courtesy: Klipper
Every electronic device is made up of three parts: hardware, software, and firmware. While the first two are more well-known, it is the firmware that connects the hardware to the software. Klipper is one such 3D printer firmware setup that uses Raspberry Pi to work alongside your 3D printer's mainboard. Klipper firmware is relatively new, and we intend to explain what it is and why you need it.
We're sure you've heard of the Marlin firmware. This is the most popular and widely used 3D printer firmware. In fact, your 3D printer or printers must be running on a Marlin firmware. We are certain of it. And why not? It was one of the first and most widely used firmware that delivered consistent results.
But did you know there are several alternatives to Marlin? Yes, there are, and the Klipper 3D printer firmware is one such option that is becoming increasingly popular due to the benefits it provides.
Klipper is an open-source 3D printer firmware developed by Kevin O'Connor, the original author and current maintainer of Klipper. It allows interaction between your 3D printer hardware, such as motors and sensors, and software, such as slicers, in order to understand the gcode commands used to 3D print an object.
It differs from traditional 3D printer firmware, which runs on a single mainboard. Klipper is designed to work with a 3D printer mainboard and a single-board computer, such as a Raspberry Pi to eliminate the issues of low computing power. Klipper works in tandem with the Raspberry Pi and uses the extra computing power to assist the mainboard in processing commands, allowing you to print more quickly and precisely.
The firmware is the unsung hero of any device and is critical to the system. The firmware dictates how efficient the system will run. So, even if you have a strong hardware and superior software, a sub-standard firmware can hamper the performance of the system.
Similarly, the firmware in your 3D printer will determine how well your entire system performs, influencing its operational efficiency. However, we are not pushing you to consider switching to the new firmware. We are just highlighting the trend and how more and more users are now turning to Klipper.
Klipper's popularity has grown rapidly, and the vast majority of Klipper users have reported numerous benefits. We share them for you below:
Old Hardware, New Power
Klipper has demonstrated the ability to take old hardware and make it run much faster. For example, an old 8-bit RAM support that can only perform 10,000 steps using a Marlin firmware is reported to run over a hundred thousand steps per second when using Klipper as its firmware. And for modern 32-bit systems like SKRS and Duet 2s, you can get up to 600,000 steps per second. Isn't this awesome?
Better print quality
The majority of users have reported improved print quality. It can be attributed to a variety of factors that Klipper influences. For starters, because Klipper makes use of extra computing power and built-in algorithms, it can precisely control stepper motors to the tune of 25 microseconds or less. This means that the printhead movements are smooth, reducing vibrations (vibrations are a common occurrence in Marlin-based printers) thereby improving the print quality.
Klipper also supports "Smooth Pressure Advance," a mechanism to account for the effects of pressure within an extruder. This reduces extruder "ooze" and improves print corner quality.
Higher print speeds
Klipper firmware makes use of additional computing power from the Raspberry Pi, allowing the 3D printer to divide work between the two boards. This means that the computing power of the Pi is used to process the gcode commands, while your 3D printer only needs to carry them out. This enables the hardware to perform more actions in a given amount of time, resulting in faster printing.
We agree that the benefits may not be obvious for smaller prints, but users certainly notice them for larger and longer prints.
Better dimensional accuracy
You've probably figured out that having more computing power allows for better control of stepper motor movements and faster execution of print commands. This also has an impact on the print precision. The smaller, vibration-free movements improve the dimensional accuracy of your parts.
Raspberry Pi 4 single-board computer/Courtesy: Raspberry Pi
Klipper is not your typical firmware program. It is unusual in that it is not installed on the mainboard of a 3D printer, but on a computer or a micro-computer such as a Raspberry Pi - usually a Pi 3, 4 or higher. On the mainboard of the 3D printer, a small piece of software is installed that acts as an intermediary between the 3D printer's elements and the Raspberry Pi.
With this dual board system, the 3D printer can fully utilize the capabilities of both boards. This dual processing capacity is greater than that of most 32-bit 3D printer controller boards.
Klipper has web interface capabilities for setting up and configuring it via OctoPrint or its standalone web interfaces such as Fluidd or Mainsail (more on this later).
Below we talk about some of the great features of the Klipper Firmware:
Precise stepper movements: Klipper uses a Raspberry Pi to process all of the stepper motor calculations and determine when to step each stepper motor. The mainboard then only executes the commands. In contrast to kinematic estimations used in other firmware, the software calculates precise step times based on acceleration and machine kinematics. This allows each stepper motor event to be controlled with a precision of 25 microseconds or better.
Class-leading performance: Klipper can move quickly on both new and old microcontrollers. Microcontrollers with 8 bits can perform 175K steps per second while modern Microcontrollers can perform millions of steps per second. So, it can deliver class-leading performance on both systems. This fine control over stepper rates means the print speed is high, improving the overall stability of the printer.
Smooth Pressure Advance: Klipper supports "Smooth Pressure Advance," a pressure-adjustment mechanism.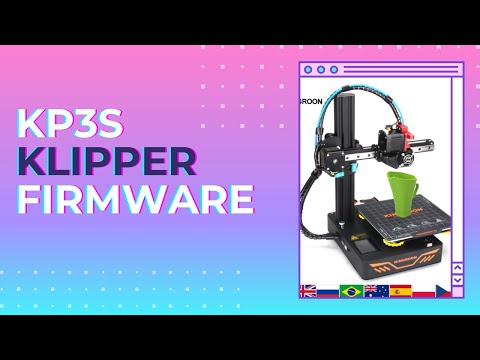 This mechanism reduces extruder "ooze," to improve print corners. Klipper's implementation avoids sudden changes in extruder speed, thereby improving stability and robustness.
Input Shaping: Klipper supports "Input Shaping," which reduces the impact of vibrations on print quality. This reduces or eliminates "ringing" in prints, allowing for faster printing while maintaining high quality.
Custom programmable macros: New gode commands can be added to printer configuration files (no code changes are necessary).
Other additional features include:
- OctoPrint is supported.
- Standard gcodes are supported.
- Dual extruders, including the IDEX system, are supported.
- Cartesian, delta, corexy, corexz, hybrid-corexy, hybrid-corexz, rotary delta, polar, and cable winch printers are all supported.
- Supports nearly all commonly used hardware, such as temperature sensors, fans, and common LCD displays that are directly connected to the printer.
- Automatic bed leveling is supported.
Klipper is a versatile firmware that works with the majority of 3D printers. Cartesian, delta, CoreXY, CoreXZ, hybrid-CoreXY, hybrid-CoreXZ, rotary delta, polar, and cable winch printers are all supported.
Because Klipper cannot be installed on top of existing firmware, you must completely replace the existing firmware with the Klipper firmware. Klipper can be installed on most devices that run Linux (or a similar operating system). So, depending on your preferences, you can use a Raspberry Pi (the most popular choice among users), an Orange Pi, a Beaglebone, or even a desktop computer. If you choose a compatible device, it should work with almost any 3D printer on the market.
Mainsail & Fluidd web interfaces for Klipper
If you are new to the Klipper firmware ecosystem, you may be unfamiliar with Mainsail and Fluidd. Both of these applications are open-source web interfaces created specifically for Klipper. While you can continue to use OctoPrint, Mainsail and Fluidd provide some incredible features that OctoPrint does not.
Mainsail web interface
Mainsail Web Interface/Courtesy: Mainsail
Mainsail is an open-source, lightweight and responsive web user interface for Klipper built on an intuitive and consistent design philosophy.
Top Features
- Responsive Web Interface: Designed to be compatible with desktops, tablets, and mobile devices.
- 3D Printer Farm: Allows for the use of multiple 3D printers.
- Statistics: See how long your printer has been in use and how many jobs have succeeded or failed.
- T emperature Presets: Configure various temperature presets for quick preheating.
- View your bed with a 3D mesh graph that includes bed mesh visualization.
- Using moonraker-timelapse, you can automatically record a timelapse of your print.

- Customizable user interface with logos, backgrounds, and CSS.
- Add more temperature sensors to the graph.
- Exclude parts of your print
Fluidd web interface
Fluidd Web Interface/Courtesy: Fluidd
Fluidd is a free, open-source, and responsive user interface designed for Klipper firmware management.
Top Features
- Responsive user interface: works on desktop, tablets, and mobile devices.
- Customizable layouts: Layouts are fully customizable, so you can place any panel wherever you want.
- Notifications: Pi throttling notifications and more.
- View your bed with a 3D mesh graph that includes bed mesh visualization.
- Presets for the temperature.
- Version management and upgrades
- Utilization graphs
Mainsail vs Fluidd web interface
We've included a quick table to help you understand the differences between these two web interfaces and how they perform against seven parameters.
| Parameters | Mainsail | Fluidd |
|---|---|---|
| Installation | Easy to install | Easy to install |
| Customizability | Vast customizing abilities | Limited customizing opportunities |
| Text Editor | Similar desktop version and mobile version better than Fluidd | Similar desktop version but mobile version is not too user friendly |
| Extra Features | Both have great features and depends on user preferences | Both have great features and depends on user preferences |
| Community | Mainsail has a bigger and more active community than Fluidd. | Less active community than Mainsail. |
| Update Frequency | Updates are more frequent | Updates are less frequent |
| User Experience | Good UX | Superior user experience |
Obico mobile app/Courtesy: Obico
As previously stated, the Klipper firmware can be controlled via OctoPrint, which is useful for local networks but has limited Klipper functionality. To get more features and functionality, you can use the Mainsail or Fluidd web interfaces. However, these, too, are only suitable for local networks. If you are looking for a solution wherein you are able to control your 3D printer from anywhere then you will need an additional solution.
This is what Obico brings to the table. With Obico you can gain unprecedented access to and control over your 3D printer. Obico is a smart, open-source, all-in-one 3D printing platform that allows you to monitor and control your 3D printer from any device in the world. Additionally, its AI Failure detection is able to catch hazards early thus safeguarding you, your 3D printer from equipment damage, and even your house from possible fire. With its Klipper-compatible mobile app, you are now able to operate and control your 3D printer from the comfort of your smartphone.
Setting up Obico for Klipper
Setting up Obico for Klipper is simple if you follow the steps we've outlined. But before we begin, you must ensure the following:
- You have the Klipper and Moonraker properly installed and connected to your 3D printer.
 Preferably use a web interface, such as Mainsail/Fluidd.
 - A webcam is connected to Mainsail/Fluidd/Moonraker and set up for your printer.
- There is sufficient lighting to illuminate your printer's printing area. If your printer is in a well-lit area, you should be fine. If you plan to print with the lights turned off, make sure the printing area is illuminated while your printer is printing. A small LED lamp or LED strip will suffice.
After you've completed these steps, you can download the mobile app of Obico for Klipper (Android orApple) and follow our Set up Obico for Klipper guide we've created for simple installation.
Klipper firmware is a rapidly growing alternative to the incumbent and widely used Marlin firmware. Klipper is not a simple replacement, but a feature-rich program capable of delivering unprecedented benefits to get the most out of your 3D printer. It will help you improve print quality, precision, and speed regardless of whether you have an entry-level or an older 3D printer.
However, to improve your 3D printing experience and make your 3D printer smarter, we recommend using Klipper in conjunction with Obico. The combination of Obico and Klipper will produce unrivaled results while allowing remote access, monitoring, and control of your 3D printer from anywhere in the world and using any device such as a computer, tablet, or smartphone.
How to Use Cura Slicer with Klipper 3D Printer Firmware
Klipper is quickly ranking its position as one of the best 3D printing firmware in the community. Using a combination of Raspberry Pi and web interface, Klipper significantly improves your 3D printer’s speed, print quality, and user experience.
Pair it up with Cura, and you open up a world of new possibilities for your 3D printing workflow. Cura is one of the most widely used and popular 3D printer slicers with top-notch features that help you achieve high-quality 3D prints.
Yet, as good as they are, there are some pointers you need to be mindful of when using Cura and Klipper together. In this article, we’ll understand how you can use these two software side-by-side to get the best quality results from your 3D printer.
Let’s Klip and Slice.
Advantages of Cura SlicerThe benefits of Cura slicer lie in its user-friendly nature and open-source development. It supports numerous 3D printers, is easy to use, and Ultimaker constantly keeps Cura up-to-date with the latest features.
Cura also has a considerable amount of slicer settings. With its Expert mode, you can fine-tune almost every aspect of your 3D model and set it up for the best quality 3D print.
Cura’s Marketplace has several useful plugins that help you extend its functionality beyond the basics. You can integrate Cura with your modeling programs, add custom supports, repair your 3D mesh, and many more functions via these plugins.
The plugins also let you take advantage of remote 3D printing with Octoprint or Klipper. Once set up, you can send your sliced gcode files wirelessly to your 3D printer without needing an SD card.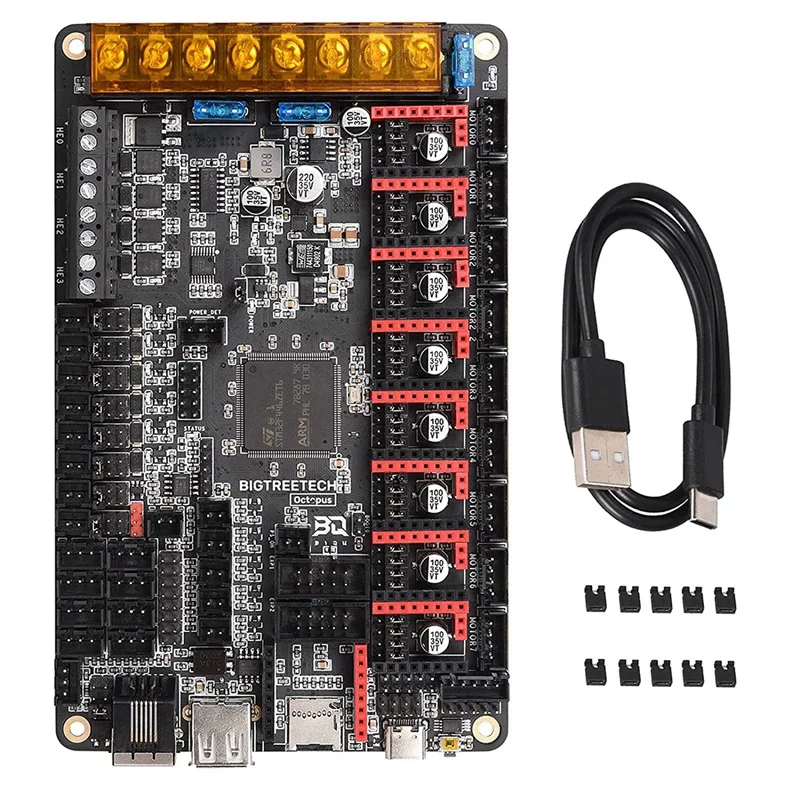 We’ll discuss the setup process for remote printing with Klipper later in the article.
Furthermore, Cura’s popularity and wide use have led to an extensive user base and support community that’s always ready to help you with any issues. You can find many guides and tutorials related to Cura’s various features.
Benefits of Klipper firmwareKlipper firmware is widely known for enhancing the printing speeds without losing on the print quality aspect. Integrating a powerful board like the Raspberry Pi gives Klipper the needed processing power for high-level features that significantly improve print quality.
For example, Klipper’s Input Shaping can reduce the ringing effect that occurs when printing at high speeds. Its Pressure Advance feature can help you achieve better corners and reduce filament stringing during printing. The Exclude Objects feature in Klipper can prevent a complete print failure by excluding specific failed prints on the build plate.
Using the Fluidd or Mainsail web interfaces, you can access your Klipper 3D printer on a laptop, smartphone, or tablet. You can change printer configurations quickly without needing to reload the firmware in the printer. This makes upgrading the hardware or adding accessories to your printer a straightforward process.
Lastly, Klipper’s community is growing by the day. It’s a relatively new firmware, but it has a great user community to guide you. The Klipper Discourse is a great place for troubleshooting your issues. On the Klipper Discord group, you’ll find loads of helpful resources and guidance for using Klipper with your 3D printer.
Specific slicer settings in Cura overlap with Klipper’s features and might negatively affect your print quality. In this section, we’ll look at some of the Cura settings you need to be careful about when using Klipper.
Turn off CoastingCoasting in Cura helps you avoid oozing filament during the travel moves and helps to improve the corner quality in your prints. But, it’s challenging to fine-tune and overlaps with Klipper’s Pressure advance feature.
If you enable both of these simultaneously, your prints will have more blobbing and filament oozing. So, it’s best to disable the Coasting setting in Cura and use Pressure advance for better print quality.
Additionally, Set the Retraction Prime Amount to Zero. This setting, too, interferes with the ooze control in Klipper.
Start and End Print MacrosMacros in Klipper are an excellent way of executing a set of predefined commands at the click of a button. Moreover, Klipper also uses extended Gcode commands, which make it easy for you to perform a specific action.
Using these two features, you can configure your Start Print and End Print sequences directly in Klipper’s firmware and create a macro for them.
For instance, you can create [gcode_macro START_PRINT] and [gcode_macro END_PRINT] in your printer’s configuration file in Klipper. Later on, by going over your Machine Settings in Cura, you can edit the Start G code and End Gcode to solely START_PRINT and END_PRINT, respectively.
It will help you edit Klipper's start and end sequences without having to reslice your 3D model. Let’s understand it better with a practical example.
Suppose you have a printer with manual bed leveling and slice your model in Cura with a specific sequence. Later on, you decide to install a bed leveling sensor and want to print the same sliced model.
Typically, you’d have to reslice your model in Cura with different Start and End Gcode sequences. But, with Klipper, you can edit the Start Print and End Print macros in your configuration file and print the same model again without reslicing it.
Retraction, Acceleration, and Jerk SettingsKlipper has its acceleration and jerk settings which you can configure within the firmware. So, it’s better to leave these settings disabled in Cura and let Klipper handle them. This way, you won’t face any compatibility issues and will have uniform settings for your 3D printer.
Similarly, if you’re using large retraction settings, it’d be helpful to tune the Pressure Advance instead of adjusting in Cura. It’ll give you better results and improve Retractions in your prints.
When using Cura with Klipper firmware, you can directly send your files from the slicer to your 3D printer using the Moonraker plugin.
Follow the steps below to configure the plugin for your Klipper 3D printer, and experience remote 3D printing.
- Ensure your desktop/laptop and Klipper are connected to the same network.
- Open Cura slicer.
- Open the Cura Marketplace, and Install the Moonraker connection plugin.
- Restart Cura for the changes to take effect.
- Click on your Printer on the main screen, and Open the Manage Printers section.
- You’ll notice a new Connect Moonraker option.
 Click on it to open a pop-up window.
 - Enter the IP address of your Raspberry Pi in the first section. It should look something like this - http://192.168.0.xxx.
- In the Upload section, you can select the file format of your sliced file. Gcode format will be your typical gcode file. In contrast, UFP with Thumbnail will display a small thumbnail of your 3D model beside the file name. It’s handy to quickly recognize your 3D file without looking at the name or loading it in a gcode previewer.
- Rest of the things, you can keep the default.
- In the Monitor section, you can input the URL of your Klipper camera. The URL should be like this - /webcam?action=stream. It’ll let you monitor your printer via the Cura slicer. You can leave this field blank, as Klipper lets you watch a camera feed.
- Closing the window saves the settings.
That’s It! You’ve successfully configured Cura to work with your Klipper 3D printer.
The next time you slice your 3D models, you’ll notice a small arrow beside the usual Save to the Disk option. Click on it, and Upload the file to your printer. You can start the print immediately after uploading or simply upload the file to Klipper’s directory.
While you can technically remote 3D print with Cura and Klipper, you’re limited to the range of your local home network. There’s also a requirement for your laptop and 3D printer to be connected to the same network.
However, with Obico, you’re not restricted by these limitations and can 3D print remotely from outside the range of your wireless network. You can access your 3D printer via mobile data on any device or location.
Obico lets you experience true remote 3D printing, and makes it easy to start, control, and monitor your 3D printer from anywhere. Additionally, you get the benefits of Obico’s AI failure detection feature, which automatically detects any failed prints and instantly notifies you.
The AI print failure detection has watched over 60 million hours of 3D printing footage and saved a lot of wasted filament material. It’s a nifty feature that can help put your mind at ease and free you from the constant stress of monitoring your 3D prints.
You can install Obico for Klipper as well as for Octoprint. The installation process is pretty straightforward, and should you run into any issues; there’s an excellent Discord community you can join to get help.
Feel free to share your experiences using Cura with Klipper. If you find Obico useful, please give us a star on GitHub, or leave us a review on our mobile app in the iOS App Store or Google Play Store!
What is Clipper and should I use it?
Klipper is a very powerful firmware add-on for most 3D printers.
Before jumping into Klipper, it's first important to understand the computing technology commonly used in desktop 3D printers. The most common configurations involve a microcontroller board such as an Arduino, Duet, or other model. These devices are directly connected to stepper motors that drive the movement system, heaters and other elements of the system.
These microcontrollers use firmware, which is simply software that runs on these embedded microcontrollers. Of several widely used standard firmware versions, perhaps the most popular today is Marlin.
The problem is that microcontroller boards usually do not have enough power for what is required of them. They don't have enough power because they are the least expensive boards you can find for a given configuration. This allows the manufacturer to keep the price of the machine low while still operating at an acceptable level of performance.
However, there are many who want to develop their equipment further. Two aspects in particular are desirable:
Faster printing speed
Best print quality
Often they are related: if you type too fast, the quality suffers. If you type slower, the print will be better, but at the expense of time.
Klipper can solve these problems by introducing new possibilities. Their project explains:
"Klipper is a firmware for a 3D printer. It combines the power of a mainframe computer with one or more microcontrollers.”
They add a much more powerful general purpose computer that will sit on top of microcontrollers and provide more processing power. This capacity can be used both to increase speed and to maintain or even improve print quality.
Klipper's main feature is that it takes the burden of stepper motor calculation that would otherwise fall on a low-capacity microcontroller board. Klipper uses all its power to calculate the printer's steps and simply passes the received instructions to the microcontroller for execution.
This calculation model allows for much faster stepper motor movements because the microcontroller does not get bogged down in the calculations. And that means you can 3D print faster. Clipper says that even old 8-bit microcontroller boards can be rated at up to 175k steps per second! For modern boards, they claim they reach 500k steps per second.
But there is another problem: when you turn the tool so fast, you have to overcome a lot of momentum. Clipper does the same. They explain:
“Each step event is scheduled to within 25 microseconds or faster. The software does not use kinematic estimates (such as Bresenham's algorithm) - instead, it calculates the exact step time based on the physics of acceleration and the physics of the machine's kinematics. A more precise stepping motion ensures a quieter and more stable operation of the printer.”
The Klipper uses processing capabilities for other functions, one of which is called "Smooth Pressure Advance". This is an extended calculation to account for the fluid pressure flow at the hot end of the extruder.
As you might have guessed, simply starting and stopping the extruder does not mean stopping and starting extrusion exactly.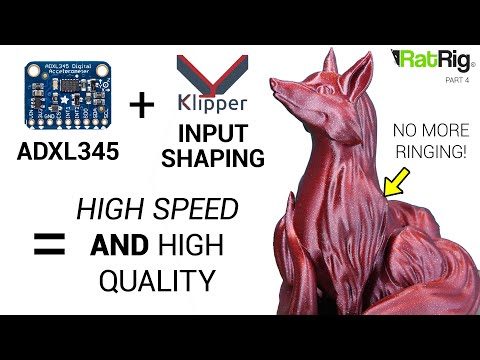 As the extruder pushes the filament into the hot end, the pressure gradually builds up until it reaches a critical point, and then the flow begins to flow out of the nozzle. Similarly, when the extruder motor stops the pressure at the hot end, and therefore the nozzle, does not stop immediately.
Smooth Pressure Advance performs advanced calculations to control these effects. In other words, extrusions should start and stop exactly when they should. This should result in fewer gaps and smudges on the prints, as well as greatly reduce the stretching of the mucus from the nozzle.
Another interesting feature is "Input Shaping" which eliminates ringing. Ringing occurs in the form of repetitive waves at the corners of objects. The pattern reflects the vibrations that occur when the direction of the print head changes abruptly.
Sound degrades surface quality, but can be reduced or eliminated with Input Shaping, which again uses processing power to calculate toolpath instructions, avoiding ringing effects.
Klipper offers many other features that you can see on their Features page.
Klipper is available for free via GitHub and can be installed using OctoPrint. Please note that if you are using OctoPrint, you probably have all the additional processing hardware ready to go.
The Klipper concept seems so powerful that I wonder why more 3D printer manufacturers aren't using it. Machine designs could be tweaked to more easily accommodate the extra processing power of this type, or even include a "Klipper option" for those who wish to push the envelope.
If you need speed, you should try Klipper. Klipper Wiki | Klipper.Wiki
Klipper is a software package for 3D printers that requires a separate computer for its operation, most often single-board computers from the Raspberry Pi and Orange Pi families are used (The abbreviation ROpi 9 will be used further0070 ), and manages connected printer boards. Basically, all that is required for Klipper to work is a computer (host) with the Linux operating system installed, as well as Python 2.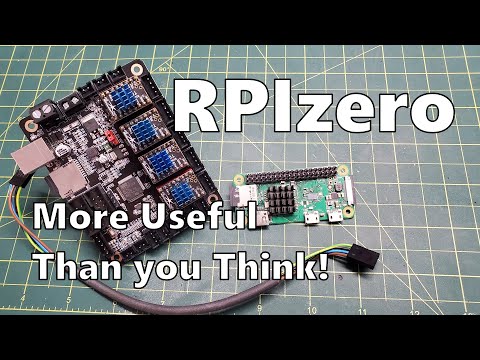 7 and a printer board connected and properly flashed.
Why does Klipper need a separate computer? Klipper does all the calculations for displacements, compensation for resonances, and so on. on the computer, and a ready-made code is transferred to the printer, so even weak 8-bit boards are able to please their owners with fast and high-quality printing. For example, a 16Mhz AVR allows you to get 154 thousand steps per second on one stepper motor and 102 thousand steps per second on three stepper motors. You can read more about performance on the Klipper Benchmarks page.
Another hallmark of Klipper is its modularity and flexibility. All settings are placed in the printer.cfg text file. And to change the settings, you do not need to reflash the devices every time, just restart Klipper itself. And in terms of modularity, Klipper has no limits on the number of boards it can manage simultaneously. For example, the Voron 2.4 printer uses 7 stepper motors for its work, and until recently it could not be placed on one board, so two BTT SKR 1.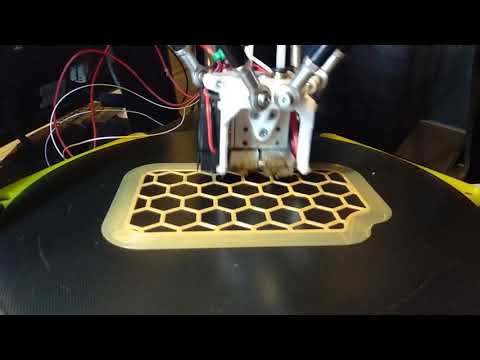 3 or BTT SKR 1.4 boards were used for its work. Thus Klipper is multi-controller. This relationship can be defined as follows:
flowchart LR K[Klipper] <--> MCU1(MCU_1) K <--> MCU2(MCU_2) K <--> MCUN(MCU_N) MCU1 --> Steppers MCU1 --> Extruder MCU2 --> Heat1[Extruder Heater] MCU2 <--> Thermistor(Extruder Thermistor) MCU2 --> Fan[Extruder Fan] MCUN --> ChambH[Chamber Heater] MCUN --> Led MCUN <--> ADXL345(ADXL345)
MCU is a micro-controller unit. That is, this is a device through which you can later access its ports, buses, GPIO. MCUs themselves are connected to Klipper with the following options: USB, UART, CAN bus. Each type of connection has its pros and cons, but this will be discussed in detail in the articles devoted to certain types of connection.
Each MCU provides Klipper with its own I/O ports, as well as data buses such as SPI, i2c. That is, various devices can be connected to each MCU and managed centrally. For example, considering connecting a common Creality Ender 3 printer to Klipper, you can connect:
- Printer board;
- ROpi single board computer - for connecting ADXL345 sensor, light, screen, humidity or temperature sensors;
- Arduino Nano (Pico Pi, Bluepill, etc.) - for connecting a filament size sensor;
But loss of communication with any of the connected MCUs will result in an error that will require a reboot of all MCUs and will abort printing. That is why it is not recommended to turn off the printer boards after printing is completed without turning off the Klipper host, as this will lead to an error that can only be resolved by turning all the boards back on and executing the FIRMWARE_RESTART commands on the host. But even this does not always guarantee the return of working capacity without restarting Klipper entirely.
Software The same interaction between the computer, Klipper and other software can be represented as follows:
flowchart TB subgraph Linux System Linux{{Linux host}} --- WebCam Linux <--->|Gcode file| KlipperFirm subgraph KlipperFirm [Klipper Service] Klipper(Klipper host software) KlipperMCU(Klipper host MCU) Clipper <--> ClipperMCU end WebCam --> Streamer(mjpg-streamer / µStreamer ) subgraph Local Network service Moonraker <--> nginx(Web Server) nginx <--> Fluidd(Web Interface) nginx <--> Telebot(Telegram bot) streamer --> nginx end KlipperFirm <===> Moonraker(Moonraker API) WebCam --> Telebot end subgraph MCUs MCU(MCU Software) MCU2(MCU_2 Software) MCUN(MCU_N Software) end KlipperFirm <==> |Wire USB/USART/CAN| MCUs Fluidd <==> User(User) Telebot <==> User style User fill:#f96; style KlipperMCU fill:#bbf,stroke:#f66,stroke-width:2px,color:#fff,stroke-dasharray: 5 5 style MCU2 fill:#bbf,stroke:#f66,stroke-width:2px,color:#fff,stroke-dasharray: 5 5 style MCUN fill:#bbf,stroke:#f66,stroke-width:2px,color:#fff,stroke-dasharray: 5 5 style Telebot stroke:#f66,stroke-width:2px,stroke-dasharray: 5 5 style Streamer stroke:#f66,stroke-width:2px,stroke-dasharray: 5 5 style WebCam stroke:#f66,stroke-width:2px,stroke-dasharray: 5 5
- Host - Device on which Klipper_host is installed and running, not necessarily MCU_Host;
- Webcam - The camera that is connected to the Host, usually (but not necessarily) a USB Webcam;
- Klipper_host software - service of installed Klipper on the computer;
- Klipper_MCU software - firmware that is installed on the MCU to work with Klipper;
- Moonraker API - Additional software that allows you to interact with Klipper over the network.
 As an example of such interaction, these are Web Interface and Telegram bot;
 - Web server - Represents server
nginxand provides the rest of the software with a network infrastructure; - Web interface - Represents an nginx server and one of the common Fluidd or Mainstall interfaces.
Please note that optional blocks are highlighted in red dotted line, but they can expand the functionality of your printer.
In this case, the loading of the Klipper and its interaction with the MCU will look like this:
graph TD A[Klipper service] -->|gCode: FIRMWARE_RESTART| B(Read printer.cfg file) B --> |Checking printer.cfg for errors| C(MCU port opening) C --> |Establishing connection with MCU| E(MCU configuration) E --> |Successful upload| F[Klipper status Ready]
In Klipper all parameters are set in file printer.cfg . The file printer. itself looks like this:  cfg
cfg
[mcu] serial: /dev/ttyACM0 [printer] kinematics: cartesian max_velocity: 500 max_accel: 3000 max_z_velocity: 25 max_z_accel: 30
What does it mean that in the file printer.cfg there are two sections [mcu] and [printer] , as well as parameters that apply to each of the sections.
A complete list of sections and their parameters can be found in the Config Reference.
How printer.cfg works : most of the parameters are preconfigured, and each section of the configuration file overrides the specified values, for example:
[printer] max_accel: 3000
Sets the value of max_accel to 3000, but if the construct in the configuration file is:
[printer] kinematics: cartesian max_velocity: 500 max_accel: 3000 max_z_velocity: 25 max_z_accel: 30 [mcu] serial: /dev/ttyACM0 [printer] max_accel: 5000
Then the value max_accel will not be 3000, but 5000, since the later value declared in the configuration file will be applied.
In addition, when using command save_config at the end of printer.cfg a block is added with parameters that have been changed or redefined as a result of other commands, for example: PID_CALIBRATE , SHAPER_CALIBRATE etc:
#*# <------- --------------- SAVE_CONFIG ----------------------> #*# DO NOT EDIT THIS BLOCK OR BELOW. The contents are auto-generated. #*# #*# [extruder] #*# control = pid #*# pid_kp = 22.266 #*# pid_ki = 1.227 #*# pid_kd = 101.033
In this block, you can see that the setting of block [extruder] in terms of PID coefficients is overridden, and given that this block is at the bottom of the configuration file, the current values will override the settings that were above.
The configuration file can also consist of several other files, for this the following construct goes: [include (path to the file)]
[include ./macros.cfg] [printer] max_accel: 5000
In this example, to the main file printer. the file  cfg
cfg macros.cfg located in the same folder is included, and then the main configuration file will contain the values in exactly the order in which they were included in the main file, for example:
printer.cfg :
[a] param1:value1 param2:value2 [b] [inculde additional.cfg] [c] [d] [e] param5:value5 param6:value6
additional.cfg :
[a] param2:value21 param3:value3 [e] param4:value4 param5:value51 [f]
After reading the files, you will get the following put together: printer.cfg :
[a] param1:value1 param2:value2 [b] [a] param2:value21 param3:value3 [e] param4:value4 param5:value51 [f] [c] [d] [e] param5:value5 param6:value6
And taking into account the redefinition of values (the ones below in the config override the above), the configuration file will have the following logical form:
[b] [a] param1:value1 param2:value21 param3:value3 [f] [c] [d] [e] param4:value4 param5:value5 param6:value6
This feature of Klipper must be taken into account when splitting its configuration into attached files.
The Klipper 3D printer software package can be installed on a fairly large list of devices, where the key is the presence of a free USB port, or the ability to use a USART connection.
There are so many options for MCU end devices, printer boards or additional devices that it is not possible to describe them all, we note that Klipper is easily installed on:
- Single board computers;
- Old laptops and computers;
- Some craftsmen install it on tablets and phones, as well as on tvbox.
There are two different scenarios for using Klipper:
- OctoPrint, on the plus side, former Marlin users will easily switch to Klipper, on the minus side, they will not get an increase in print speed, because OctoPrint does not pass the entire gCode file to Klipper, but sequentially sends commands from him. Which, by the way, allows you to disable unnecessary parts of gCode when printing several details on the fly.
- Moonraker API, transfers the whole gCode file at once, which increases the speed of command processing, allows you to use significantly higher speeds when printing.
 Recent versions of Klipper offer the functionality
 Object exclude, which allows you to cancel the printing of one of the details during printing.
In this case, the general logic of passing the gCode file can be visualized as follows:
flowchart gCode{{ gCode file}} Printed File{{Printed File}} Subgraph OctoPrint fileRead(Read file line by line) --o Anal(Analysis)--o commands(Single command transmission) --o Klipper(Klipper) Clipper --o MCU end Subgraph Moonraker moonRead(Transfer whole file)--o moonKlipp(Klipper) --o moonMCU(MCU) end gCode ===> OctoPrint ===> PrintedFile gCode ===> Moonraker ===> PrintedFile
We bring to your attention a generalized article on installation on different types of devices and performed in different ways. All this is covered in the article Installing Klipper.
In order to control the printer, as well as peripheral devices, backlights need to be able to interact with Klipper, they must be correctly configured and defined in the configuration.