Moonray 3d printer buy
Moonray S 3D Dental Printer
MoonRay S is a resin 3D printer from SprintRay using the DLP technology. High-quality prints are launched in a matter of clicks. This desktop 3D printer is known for its ease of use, reliability, and durability on top of bringing 3D printing to new levels of precision, functionality, quality, and flexibility.
The simplicity of using the MoonRay S is helped by the efficient automatic support generation brought by its accompanying software. MoonRay ushers in a new era of digital dentistry. Its seamless product ecosystem and customer support are the results of our commitment to the dental industry. It is both precise and fast, simple and powerful, technologically advanced, and durable.
An All-in-One System for Digital Dentistry
Choose between two high-performance options to meet your needs. MoonRay D75 is the preferred solution for producing highly detailed crowns, copings, bridges, and RPDs. MoonRay S100 excels at printing quickly, allowing you to create multiple precise dental models, surgical guides, all types of splints and retainers, provisional denture base, custom impression trays, and more.
MoonRay S Wireless 3D Printer Features:
- Ultra-high resolution products
- An all-in-one system on your desk: hardware, software, materials
- Rayware software – saves materials, reduces cleaning time. When developing a project, you do not need to think about the complex structure of supports. The Rayware software will create it automatically. Our advanced props generation algorithm is optimized to create strong, well-positioned props without wasting material.
- The RayOne UV projector offers high output resolution and 405 nm wavelength enhancement. Retains every smallest detail and ensures the highest accuracy and detail of printed models down to +/- 50 microns.
- A wide range of high-strength materials. SprintRay resins are designed to deliver high-performance results with every use. You can choose a resin to suit your printing needs: standard resin colors, modeling gray, or casting resin.
- Digital Light Processing (DLP) Technology
- 100 microns minimum feature size
- Print Volume 9.6 x 6 x 20 cm
- Layer Thickness Options 20 Microns, 50 Microns, 100 Microns
- Wireless printing with built-in computer
- RayOne custom-built projector with TI DLP chip
- 1 in/hour consistent print speed (at 100 microns)
- Ultra-durable resin tank
- Finishing kit and one container of Gray resin
- Rayware Software
- Dimensions 38 x38 x 50 cm 14 kg
- One-year limited warranty
- Multi-channel customer support
- Resin tank lasts 25 times longer when compared to its competitors.
- Moonray S can work with manufacturers both functional as well as standard resin.
- Compact and easy to use.
PROS:
- Compatible with multiple materials for your 3D printing project.
- Has an ultra-durable resin tank.
- High production rate.
- Top-quality lenses ensure dimensionally accurate parts.
- Dependable, high-resolution producing projector.
CONS:
- The build volume offered by MoonRay S falls shorter than most basic desktop-level FDM or SLA 3D printers.
- Although offering small build volumes, the printer is on the higher end of the budget.
SprintRay Software
Sensible, User-Friendly, Fast
When designing your application, you won’t need to worry about creating an elaborate support structure. Our software’s advanced support-generation algorithm does all the hard design work so that you can focus on what you love.
Precise and Efficient
High-Resolution Output
MoonRay’s DLP projector technology is perfect for printing dental applications. We’ve maximized consistency to preserve every detail and ensure the accuracy of your parts while offering industry-leading speed.
Hi-Def Materials
Biocompatible and Beautiful
SprintRay resins have been formulated specifically for dental applications. Our surgical guide resin is fully biocompatible, and our colored resins show the smallest details in your models. SprintRay printers are also compatible with NextDent resins for added versatility.
Million Pixels. Brilliant Reality.
Advanced DLP Projector
At the core of each MoonRay is our patented UV DLP projector, RayOne. We created RayOne so every MoonRay could be equipped with a well-calibrated, long-lasting projector. RayOne hits the correct light wavelength consistently across the build platform for improved resin-curing control and dimensional stability.
Say Goodbye to Consumable Tanks
Incredibly Durable Resin Tank
We’ve put an end to costly resin tank maintenance — no more replacing your resin tank regularly or changing the PDMS layer. You can focus on printing amazing models instead of spending time on machine maintenance. MoonRay’s durable resin tank lasts up to 25 times longer than the resin tanks of similar 3D printers, saving you time and money.
Start Printing in a Few Clicks
Powerful yet easy to use software
SprintRay Software makes printing simple. Add your models and let the software do the work for you. Our software also includes many optional adjustable settings, allowing your printing process to be as simple or as advanced as you’d like it to be.
Take Control
Generate and Edit Supports
SprintRay Software’s advanced support-generation algorithm adds strong, correctly placed supports in one click. Our supports feature easy-tear technology, which means that they easily snap off under pressure, reducing the time needed to finish your models. Plus, add and delete supports as needed.
Try-out Software For Free
The Workflow Revelation
Start 3D printing today
MoonRay comes with everything you need to bring your dental practice into the world of modern digital dentistry. Our product and customer support ecosystem are ready for you. All that’s left is to place the order.
Specifications:
- Printer dimensions – 380 x 380 x 500 mm
- Working area – 95 x 60 x 200 mm
- Layer height – 20, 50 or 100 microns
- Technology – DLP
- Working area – 95 x 560 x 200 mm
- XY resolution – 75 microns
- Minimum layer thickness (Z resolution) – 20, 50, or 100 microns
- Minimum workpiece size (XY resolution) – 75 microns
- Print speed – up to 25 mm / h
- Connectivity – WiFi or Ethernet
- Software – RayWare
- Materials (UV resins) – Biocompatible resins,
What’s in the package:
- 1 MOONRAY S 3D printer
- 1 installation booklet
- 2 resin tanks + glass tray
- Build Platform
- 1-year Warranty andMachines-3D Hotline
- Access to RayWare Software
- Spare resin drum
- 1 liter of standard resin
- Finishing kit
- Power cable
- Network cable
- Splint – Mouth Guard Resin
- Castable Resin – For printing and casting metal frameworks.
- Clear Resin – For prototyping and printing models. Allows for visual through the model (bone models, pre-operative study models, wax-ups)
- Resin Tank Assembly – Drum with the metal base plate attached.
- Resin Tank Drum – Purchase for quickly changing resins.
- Die & Model Resin, Tan – For prototyping and printing models.
- Ideal for visual external detail (aligner and study models, wax-ups)
- Moonray Resin 1 Litre: White
- Moonray Resin 1 Litre: Clear
- Moonray Resin 1 Litre: Castable
Reference Link
- Manufacturer Information
- Brochure
0/5 (0 Reviews)
Pro S Dental 3D Printer
Dental 3D Printing. Simplified.
Schedule a Demo
Buy Pro S
Download Brochure
Compare Configurations
PrintOS Release Notes
The Pro S 3D printer is designed to improve the productivity of your practice. It's been meticulously designed to make it easy to learn, train, and delegate your in-office production workflow.
User Friendly
Designed exclusively for dental professionals, Pro S is simple to learn and easy to teach thanks to its user-friendly design.
Bolt Optimized
Our fastest printer just got faster. Now Bolt Optimized to deliver more smiles per hour.
Fast and Versatile
Fabricate dental parts for all kinds of treatments with wide materials compatibility and industry-leading speed.
Onboard Intelligence
Pro S combines smart sensors with workflow context to make sure your 3D printing workflow operates efficiently.
Leading Accuracy
Digital dentistry demands tight tolerances and smooth margins. Pro S is our most accurate 3D printer yet.
Designed for the needs of your practice
World Class Engineering
DLP Refined
Upgraded optics feature an all-glass construction that improves uniformity across the build platform. 100% balanced light output from this upgraded projector means your prints will fit even better. The beating heart of SprintRay Pro S, we’ve pushed DLP optical technology to new heights to bring you the absolute best in dental 3D printing.
All Glass Optics
Advanced Resin Tank
Advanced tracking using near-field technology allows Pro S to track the lifetime of each resin tank automatically. It's just one of the ways SprintRay is taking the guesswork out of the 3D printing process, helping you maximize each dollar invested in your digital workflow.
RFID Lifetime Tracking
Upgraded Chassis
An upgraded structure underpins Pro S, enabling improvements to Z-axis accuracy. Software-controlled adhesion protocol allows customization of curing layers for individual resins with even tighter tolerances. The new chassis connects directly to the tank cradle, eliminating issues caused by sprung tension and offering perfect layers for every print.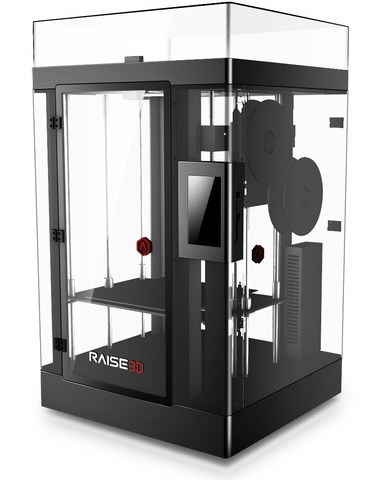
Improved Print Quality
Complementary Pairs
Ready for all types of in-office dental manufacturingPro95 S
Incredible speed and throughput meets industry-leading accuracy
Clear Aligner
Denture
Occlusal Guard
Study Model
Surgical Guide
Try-in Denture
Wax-up Model
Pro55 S
Ultra high resolution to meet the demands of restorative applications
Crown & Bridge
Implant Denture
Occlusal Guard
Shell Temps
Surgical Guide
Indirect Bonding Tray
Implant Analogue
Industry-leading Materials
The world's best 3D printer needs the world's best resinDiscover All SprintRay Materials
At SprintRay, our mission is to shorten and improve your digital workflow. Our 3D printing materials work in tandem with our hardware and software to deliver accurate, repeatable results and industry-leading mechanical properties.
Smart SprintRay Ecosystem
Frictionless 3D Printing Workflow
End-to-end Workflow
SprintRay Pro S is part of the full 3D printing ecosystem, which also includes cloud-based design and printing software, the Pro Wash/Dry automated cleaning system, and the world's most advanced post-curing with ProCure 2.
Designed Just for Dentistry
When you step up to SprintRay, you're joining a community of thousands of dentists who use our products every day to enrich their patients' lives. Our products are designed from the ground-up to empower your digital workflow.
What's in the box
- Pro S 3D Printer
- Smart Resin Tank
- Heated Build Platform
- Finishing Tools
- Quick Start Guide
- Warranty Card
- Power Cable
Get help buying
Have a question? Call a Specialist Call 1-800-914-8004.
Schedule a Demo
Find a SprintRay distributor
SprintRay works with with major dental sales channels to bring you the most seamless buying experience.
Find Your Distributor
How to create your own Moon / Sudo Null IT News
This article shows you how to make a 3D model of the Moon from scratch. It would seem, Why create a model of the Moon yourself, if you can buy it? If only because when you make a model of the Moon yourself, you can set the desired parameters, for example, the dimensions and thickness of the shell, image resolution, rotation limits, the position of the cutting plane, you can make a hole for the lamp, and so on. Let us proceed to the creation of our own moon.
A variety of 3D models of the Moon can be found on the Internet. Some can be purchased from online stores, others can be downloaded as files and printed on a 3D printer. Finished models can be divided into 2 categories:
-
The surface of the moon is drawn in detail and with high quality, but if a light source is placed in the model, its details are not highlighted from the inside.
-
Surface details are well drawn when illuminated from the inside, but without illumination they are not visible.
Step 1: Draw details
Details do not light up from the inside when a light source is placed insideDetails are drawn well when illuminated from the inside
If you do not have a 3D printer, you can buy a lamp like Moon Lamp on the Internet.
Step 2: Prepare the software
Below is a list of the software involved. After familiarizing yourself with the technique, you will be able to do the same thing as I did with ordinary tools.
Modeling Tools
Download my custom version of Banate CAD from GitHub .
Banate CAD is written in Lua, so install Lua for Windows to run scripts on Windows.
STL Editing Tools
Meshmixer
Step 3 Preparing Materials
Plastic for Printing
The images above show PLA products. Products resulting from 3D printing using different types of white PLA plastic may have different shades. The plastic supplier claims that option B is the best, but that, alas, is stuck in my printer.
Light source
The moon model can be illuminated in different ways, the light source can be powered by batteries, mains, and so on. The size of the model also affects the choice of light source. There are a lot of options, and if we start discussing them here, we will deviate from the topic of printing. It is enough to understand that there are a lot of options. I want to note that the warm white light of the source is more pleasing to the eye.
Matte Spray Paint
Most PLA models are highly reflective, so I recommend a matte finish. Matte spray paint will easily solve the problem.
Step 4. Images of the Moon
Two images of the Moon are required for the simulation. They are located in the BanteCAD/Examples folder. I reduced the resolution to 720x360, it should be enough for the model. If necessary, search for higher resolution images online.
Bump map
There is a special map for surface modeling, usually called a bump map. The shade of gray indicates the height of the corresponding point on the sphere. Having a bump map, you can accurately display all the details of the surface on the model. However, if you compare the bump map with the moon in the sky, you will notice that they are different from each other.
Visual map
Details of the real moon are not only different heights at different points. Color is also important. Naturally, we can instruct the printer to print different colors, but, fortunately, we see the real moon in grayscale. To allow light to pass through the model at different intensities, you can print the model with different wall thicknesses and superimpose a grayscale image on the model. To adjust the wall thickness of the model, we need a visual map of the moon.
Post-processing
-
Lunar surface map is a regular bump map.
I need to take into account the internal thickness, so using the Level function (Level) I shift the value to the right (a brighter image will be displayed on the bump map).
-
Inner map of the Moon is the shape of the inner surface of the model. From this map, we determine the thickness at each point of the surface, that is, the desired shade of gray. This map is built from a visual map, which in turn has thickness settings based on a bump map applied to it. Or, to use another calculation method, by subtracting the bump map from the inverted visual map.
Adjustable Parameters
-
If you lower the bump map level, the elevations on the surface will be smaller, and the sag will decrease, but the surface details will have to be distributed differently.
-
If you move the level of the visual map to the left, the shell will become thicker, and vice versa. In this case, it must be remembered that the level should not be shifted too far to the right.
The cladding must be at least 0.4 mm thick (if a 0.4 mm extruder nozzle is used), otherwise the cladding must be manually punched.
-
The range of the light gray scale depends on the level range of the visual map.
Attached files: moon.xcf
Step 5: Control the layer thickness higher. If the shell is thinner than it is possible to print, the printer simply will not print anything, holes may even form on the surface in unexpected places. You can fix it like this.
-
Open the STL file generated by BanateCAD with Meshmixer.
-
Delete the inner surface model.
-
Run the Edit command.
-
Select the Hollow command.
-
Set thickness to 0.5mm (for extruder size 0.4mm).
-
Run the Hollow command again.
-
Accept the changes, now the thickness of the shell of the lunar surface is 0.5 mm.
-
Rotation and cutting of the plane are carried out in the same way as in the settings of the lunar shell.
-
Export the STL file.
-
Open the moon shell STL file in Microsoft 3d Builder.
-
Repair any defects.
-
Open the STL file of the lunar surface with a shell thickness of 0.5 mm.
-
Repair object defects.
-
Select the entire object.
-
Accept the changes, now the thickness of the lunar shell is 0.5 mm.
-
Export the STL file.
Step 6 Modeling - BanateCAD
BanateCAD can model a 3D shape from a bump map. In the examples folder, I posted the corresponding script. It reads a map of the surface and an internal map of the moon, and then models both shapes. The following are the steps for modeling with BanateCAD:
-
Open the BanateCAD.wlua file.
-
On the File menu, choose Open.
-
Open the file moonlamp.lua in the Examples folder.
-
Optional: change parameters.
-
From the Compile menu, choose Compile and Render.
-
After a while, the 3D model will appear.
-
From the File menu, choose Export -> Export STL.
-
Enter a name for the STL file and click the save button.
Configurable Parameters
Output sphere diameter in inches, bump map and internal map are generated from this parameter:
local outputSize = 3 -- inches
Surface height factor:
local outputSize = 3 -- inches
The resolution must not be greater than the resolution of the PNG image:
USteps = 720, WSteps = 360,
Step 7: Create a Shell – Meshmixer
Based on the shapes made in BanateCAD, we can create a shell by subtracting the surface of the inner shape from the shape.
The following describes the steps to create a wrapper with Meshmixer:
-
Open the exported STL file with Meshmixer.
-
Wait for the download to complete.
-
Select both models in the Object Browser.
-
On the left toolbar, select Edit, then select Boolean Difference.
-
Wait for the calculation to complete.
-
Select Accept.
-
Wait for the calculation to complete.
-
Leave one model in the Object Browser, this will be the lunar shell.
-
Save the file.
Step 8. Modify and output the model - Meshmixer
Before 3D printing, you can configure any parameters. The options are:
-
If you want to put a model of the moon on your desktop, I suggest that the z-axis rotates from -45 to -60 degrees, so the moon will be directed towards you in its usual direction.
-
If you want to hang the moon model from the ceiling, I suggest that the z-axis rotate 120 to 135 degrees for the same reason as above.
-
If you want to install a backlight inside, do not forget to make a hole for the wire (if you have difficulty printing a hole on a 3D printer, you can, like me, just drill a hole after printing with a drill.
-
90% percent The cutaway moons are flat, so you can hide the seams and print it easily without sagging.0003
When finished, export the STL file for printing.
Step 9: 3D Print
Open the object in the 3D Slicer, make sure there are no holes in the shell, and start printing.
If the moon needs to be perfect, you can skip the previous step with cutting the plane and turn on the support option. But, in my opinion, removing the remnants of the caliper is quite difficult.
If the previous step was difficult for you and you could not print the STL file, use my file.
Assemble the top, light source and bottom together.
Step 10: Coating the Surface with Matte Paint
Most PLA 3D prints are highly reflective, so I recommend coating the resulting surface with Matte Paint. Now I'm trying to print a larger diameter moon lamp - 110mm, which is the largest size that can be printed with the Robo C2 printer. One printout will take tens of hours. I want a moon with these parameters:
local r = 52 local h = 3
Final!
You did it! Now you can brag to the familiar results of your work or just give the finished model to your friends!
Learn how to pump in other specialties or master them from scratch:
-
Profession Data Scientist
-
Profession Data Analyst
-
Course on Data Engineering
Data Analytics course
DevOps course
Stamped in space: Russian 3D printer will be tested on the ISS for the first time | Articles
The research program on the Russian Segment of the ISS includes tests of a 3D printer designed to operate in microgravity conditions. It will go into orbit in June this year. The main objective of the experiment is to learn how to print products with predictable characteristics, Roscosmos told Izvestia. Experts believe that at the current stage of technology development, such a device will help in the repair of household items and appliances on the ISS, but the polymer will not withstand the conditions of open space. In the future, the use of 3D printing can significantly accelerate the exploration of extraterrestrial space, simplify the organization of expeditions to the Moon and Mars, and even their colonization.
High art
The program of scientific and applied research and experiments on the Russian segment of the ISS included the development of additive manufacturing technologies for products in space. Simply put, this is printing from polymer materials using a 3D printer in zero gravity. The experiment will show how close we are to solving the problem of the operational supply of orbital stations and bases with spare parts, Roscosmos told Izvestia.
Now all the equipment used in space is delivered from Earth. This imposes serious restrictions on the weight and dimensions of the cargo, and besides, you have to take into account the delivery time - some flights have to wait weeks or even months. Therefore, one of the most important tasks arising in space exploration is the optimization of cargo traffic.
The ability to quickly, on the spot, produce the necessary tools, parts would be extremely useful when working on the Earth's orbit, and even more so during expeditions to the Moon and Mars.
But before you send a 3D printer on expeditions to distant planets, you need to learn how to print products with predictable characteristics in zero gravity. After the experiment, the samples made on board the ISS will be compared with similar samples created on Earth. So the researchers will find out the influence of microgravity on the 3D printing process and the characteristics of the created objects.
“In microgravity, the substance used for 3D printing begins to behave completely differently than on Earth,” Alexander Bloshenko, executive director of Roscosmos for advanced programs and science, explained to Izvestia. - In particular, a powder that could be melted and baked in a certain way cannot be used. Therefore, the task of the experiment is to work out the conditions in which you will have to work, and "adapt" to weightlessness in the conditions of the ISS.
Space cabinet
Printer developed at the National Research Tomsk Polytechnic University (TPU). It is similar in size to a bedside table. Weight - no more than 30 kg. The principle of its operation is the same as that of devices for terrestrial conditions - the technology of layer-by-layer imposition of a molten polymer thread is used. But the need to adapt it to work in zero gravity has made adjustments to the design and a number of printer elements, TPU noted.
- The entire design of the 3D printer is block-modular, all its components are located in a single housing. This is important for safety reasons and operating conditions of the station,” said Vasily Fedorov, head of the research and production laboratory “Modern production technologies” of TPU.
There are other features. Hot air on Earth is lighter than cold air, it goes up, and cold air comes in its place. But in zero gravity there are other convection conditions. Therefore, heat transfer in the printer will work in a completely different way. The influence of radiation is also taken into account.
- We are creating a printer so that it can work in the conditions of the ISS, that is, with continuous exposure to flows of heavy charged particles, - said Vasily Fedorov. — Doing so may cause the printer's electronic components to malfunction. Therefore, its design includes microcircuits that are resistant to radiation, and algorithms are used to correct errors in actuators.
The set of scientific equipment includes the 3D printer itself, a hermetically sealed complex with a system for filtering gases generated during the printing process, an embedded computer to control the process, and consumables.
TPU has already made a working layout and prototype equipment. He successfully passed all tests. Now in the stage of adjustment are flight samples of scientific equipment, which will go into space.
Will you be lucky or not?
Roskosmos believes that in the future 3D printing technology in zero gravity will simplify the implementation of long-distance and long-term expeditions. Apparatus and the necessary parts can be made right in space, without worrying about where to get them and how to repair broken ones. The results of the experiment on the ISS are planned to be used to develop technical requirements for the equipment of advanced industrial complexes, both orbital and planet-based.
Izvestia asked the experts to assess the potential of the experiment and the 3D printing technology itself in space.
- Classical additive technologies (layer-by-layer building up and synthesis of objects. - Izvestia) are good on Earth. Each layer of material shrinks slightly following it with the help of gravity. In zero gravity conditions, there is no such help, so the requirements for materials and printer operation parameters change. For example, the material must solidify rather quickly so as not to rise and scatter in the apparatus. The print speed should be much faster. Therefore, colleagues have to overcome certain difficulties,” explained Yousef Khesuani, co-founder and managing partner of 3D Bioprinting Solutions.
The expert also noted the need for post-processing of samples. Otherwise, tiny particles of material that need to be disposed of for safety reasons will simply scatter around the station.
— The very idea of the experiment is very interesting, and it will be useful to conduct it, — says Nikolai Kozlov, Professor of the Department of Technology of Composite Materials, Structures and Microsystems at MAI. “In my opinion, with the help of such a printer it will be convenient to create a variety of components and parts from polymers that can fail on board the station during operation or will be required during a long flight. This is convenient because the printer is easy to set up to create an object of any shape.
As for the materials used overboard, the current polymer materials widely used for 3D printing do not have sufficient resistance to space factors for this, experts say.
To assess the prospects for using 3D printers in space, we need to understand where we can get consumables. The economic feasibility of using the technology directly depends on this.
- The polymers themselves, which can be used as a material for a 3D printer, we are unlikely to find on other planets, - said Nikolai Kozlov. - These are synthetic materials, so you will have to carry all of them with you.
Theoretically, when creating planetary bases, the use of local resources, for the Moon - regolith, can reduce the cost of printing, Nikolai Kozlov noted.
- There are ideas about using solar energy to melt regolith - lunar soil, but such technologies are highly energy intensive and require large investments. However, it should be borne in mind that progress does not stand still, materials and technologies for their processing are intensively developing. Perhaps tomorrow, 3D printing technologies will be able to solve the problems of building residential complexes on the Moon and other planets.


