Juell 3d printer review
Top-Down 3D Resin Printers; Beginning the Quest!
As you already know, we have been exploring ceramic 3D printing using a Form2 printer. While we will still move forward on that front, and we HAVE found the keys to better reliability, I can't escape the sinking feeling that there has to be a better way.
There are three issues.
First, when I spoke to FormLabs about the Form3, they weren't exactly encouraging about using their experimental ceramic resin with the new Form3. They were distinctly non-commital at the time I asked.
Secondly, the whole idea of a part coming loose from the print plate and falling into the vat of resin is just plan wrong and full of potential issues. We first faced it with the ProJet 1200 where falling parts, for whatever reason, were a constant threat to the integrity of the vat window. With all of these hanging-part orientation printers if you don't absolutely get every last piece, no matter how tiny, out of the vat of resin after a support failure, you are going to cause BIG problems and possibly damage the printer.
Third, while I realize that even top-down resin printers will require some supports, the nature of those supports compared to the supports required for keeping a prints from dropping off a print plate in printers like the Form2 should be as different as night and day. All the Top-Down supports need to do is support... not adherence. They should, therefore, be somewhat fewer and lighter in structure.
Yet, the Form2 has done a great job at convincing us that we cannot dismiss ceramic resin printing because the detail is amazing and the whole ceramic firing work-flow is shorter than that of powder/binder prints. It is performing well as a TEST platform.
With all this in mind I began a search for what is known as a Top-Down resin printer. There aren't very many and the recent past is rife with companies trying to create them via Indiegogo or Kickstarter having disappeared in the dark.
My research, just days old, turned up five potential possibilities.
TOPDOWN CANDIDATE #1: THE PLUTO
Pluto Kickstarter Page
| Pluto Kickstarter Image |
Billed as "The World's Smallest High quality 3D Printer" and introduced on Kickstarter, it seems to have disappeared into the night. The web site linked to the project no longer comes up/
So that was a bust.
TOPDOWN CANDIDATE #2: THE JUELL 3D
The Juell 3D actually looks like an excellent printer!
| Juell 3D Printer by Park Dental Research |
But, alas, it is designed specifically for the dental industry and seems to require very specific resins from the manufacturer. I could not find a single instance of the Juell 3D-3 printer being used outside of the dental industry. Even so, it was well worth learning about. And, they are, apparently doing VERY well.
TOPDOWN CANDIDATE #3: THE OCTAVE R1
This is an interesting one,
.
https://octave-3d.com/
| Octave R1 Top-Down 3D Resin Printer. |
This printer was not a barn-nurner on Indiegogo, raising only $ 16,485 toward its goal of $250,000.
Indiegogo Page
Yet, it lives!!! This fact, alone, is pretty amazing.
But, for us, there is one glaring show-stopper... the noise. Watching the "Walkthrough" video, I realized the noises it makes would drive me crazy. and, that means it would have the potential of driving our autsim-spectrum students right over the edge.
So, until that situation changes, we'll not be pursuing that one just yet. But if you can take the noise, it is well worth exploring.
TOPDOWN CANDIDATE #4: THE MILKSHAKE 3D *
Milkshake 3D Web Site
| MilkShake 3D Top-Down Printer |
This one definitely has potential. We will be exploring this one further.
Although it is produced in Hong Kong, they have at least one distributor in the USA.
* #4: Selected for further review
TOPDOWN CANDIDATE #5: THE GIZMO 3D PRINTERS **
Gizmo 3D Printers Web Site
| GIZMO 3D TOP-DOWN Printers |
OK! Now we are talking not just one top-down printer; but, a series of industrial level printers that run EXTREMELY fast!
So far, the last two printers we've listed, #4 and #5, are the only viable options to pursue at this time. So, while I pursue them through extensive due-diligence research, I'll make sure I report every finding with our readers.
While they are located in Brisbane, Australia, prospective buyers can find a button for scheduling a phone call to talk in person right on the web page. I will give that a try and report back to you.
But, from the short time I have had since beginning my quest to find a potential Top-Down printer, the Gizmo seems not only to be the biggest; but, by far, the fastest. This video, from 2017, shows a 19 minute print and from what I understand they print even faster with their latest projectors.
And, they are the only printer that mentions Tethon3D's Porcelite in their documents. That's a good start
So, we continue toward cramic 3d printing on two different tracks... powder/binder and ceramic resin. It's one or the pther... it's BOTH.
** #5: Selected for further review!
.
Blog - The Ortho Cosmos
by Sean Holliday Leave a Comment
As 3D printing increases in utilization, the usage of CAD software becomes an important step in this digital process. It allows orthodontic labs to take a raw digital image and turn it into a useful design that can be 3D printed. The disadvantage of CAD software in orthodontics is that most of it comes at a significant monetary investment with upfront purchases and monthly service costs. For the basic user, and brand new owner of a 3D printer, this is can be quite a realization.
Fortunately, there are inexpensive workflows and free software solutions that help those starting the journey into 3D printing. The peril lies in the fact that I often see the temptation at “working” the CAD software much more than is necessary. Keep your uses of CAD software to a very specific goal, and consider all options as more efficient workflows become available.
The facet of time efficiency is a key component, especially bringing digital workflow in-house. It is up to each doctor and in-house lab to determine their time efficiency, labor costs, and material costs to make the best decision in a digital workflow.![]() Some steps are a no brainer bringing in-house due to improvement in patient experience, savings in lab fees, and faster turn-around. In some circumstances, I see a lot of doctor time consumed, or inefficient digital workflows used, that would be best delegated. Sometimes that delegation should be to outside labs that have greater expertise and efficiency than a less experienced in-house lab setup. Other solutions include investing in training for a highly effective lab team.
Some steps are a no brainer bringing in-house due to improvement in patient experience, savings in lab fees, and faster turn-around. In some circumstances, I see a lot of doctor time consumed, or inefficient digital workflows used, that would be best delegated. Sometimes that delegation should be to outside labs that have greater expertise and efficiency than a less experienced in-house lab setup. Other solutions include investing in training for a highly effective lab team.
To avoid risks in time consuming CAD workflow, consider proper lab delegation and lab training. Leverage your team and delegate accordingly. Whenever you incorporate new processes into your practice, take a look at the big picture. Start lean and mean, and don’t hesitate to invest in efficient software that saves in labor costs. Improving your lab team’s experience and ability are key to minimize risking increased doctor time in lab procedures.
Filed Under: 3D Printing
by Sage Humphries Leave a Comment
Today, orthodontics is rapidly changing. This is hardly debatable. Patients are changing. Technology is changing. Treatment is changing. And, the business of orthodontics is changing. Most orthodontists with successful practices succeed in spite of themselves. We have the luxury of excellent margins that parallel that of software companies. Most of us would not be able to survive with grocery store-like 1-3% margins.
The point? With all of these changes comes a lot of disagreement. There are those rooted in our profession’s traditional dogma, and those that are blazing the trail so quickly that few can get behind the movement. Most of us fall somewhere in between.
The orthodontic forums are a fantastic place to share ideas and to learn. They are a spawning ground for all things new in orthodontics. But, it is amazing how much controversy stems from the proliferation of new ideas. The outrage is palpable in the comments of many Facebook Groups. Even for us “scientists”, more evidence can make us less likely to believe an idea. Why?
The Backfire Effect.
So what is that?
The backfire effect is a name for the finding that, given evidence against their beliefs, people can reject the evidence and believe even more strongly. The phrase was first coined by Brendan Nyhan and Jason Reifler.
We are actually biologically wired to react to information that challenges one of our core beliefs in the same way that we would react to something that threatens our life. The response to anything that challenges a core belief is emotional. This comic does an excellent job at explaining the entire premise (first cell below).
So, to orthodontics. We all need to make changes to remain relevant in today’s changing landscape. The information is out there. You cannot eliminate the backfire effect. But, being aware of it may afford you the ability to distill information that you might otherwise miss. And that very well may be what was needed to remain relevant as our profession evolves. At bare minimum, it can help you to avoid getting angry when someone or something challenges your own beliefs.
Filed Under: Business, Lifehacks
by Scott Law 2 Comments
PerfectionismMust get the perfect case. Must get perfect Class I with perfect occlusion and perfect symmetry and in fewest appointments in least amount of time in chair with lowest overhead and fewest staff who are maximized to fullest absolute potential with ZERO errors, zero complaints, zero problems of any sort.
It’s a mental game sometimes played by orthodontists trying to squeeze everything possible out of every case and every person around.
As orthodontists, we are trained to present cases to colleagues and only talk about what is wrong. We are trained to only look for what is wrong with a case and what is abnormal. In consult we talk about what’s wrong with the patient and how far off they are from ideal. Our team meetings we talk about everything that is wrong and needs to change. The majority of the time when we speak individually to team members we tell them what they are doing wrong. All because we have been trained to make things perfect.
We believe that our perfectionism is an enviable professional quality that anyone who is anyone should have.
We call ourselves perfectionists. But really we aren’t perfectionists we are IMPERFECTIONISTS. We aren’t looking for what is perfect! We only look for what is imperfect. And it is miserable. (shout out to Dino Watt for helping me realize this)
As a recovering (and often relapsing) perfectionist I can speak that such a focus affects every area of our life. Every relationship at work and at home. We may even be hypercritical of others as we project our own thoughts and insecurities on those we love because they aren’t doing it as perfect as we think in our mind.
Our eye is constantly looking for the imperfect and wrong with everything around us and it can create an insatiable appetite to always achieving what is next- the next “perfect” milestone we have set for ourselves; the next trip, house, boat, office, car. We get so focused on the future perfect result and we fail to enjoy the present. And it is never enough. We still aren’t happy. We don’t enjoy the journey because perfection is always just out of reach in our minds. And since the state of perfection is unattainable in this life, we are never quite happy so we continue to compare and despair away our lives to others.
I’d ask you to recognize if you have an imperfectionist focus and to wake up and be present with your thoughts. Think about what you think about. Approach things from what is great with the situation and what can we help improve. Ask yourself how can you be of service to another? How can you begin to treat people as people around you? They to have hopes and dreams and desires too! Look for what your team members do well and what are areas they could improve? Inspire them and help them see what they could become for their own sake and in service to others. Show them the impact they could have on the lives of those they serve. Look for the good. Measure the progress and enjoy the journey.
With a hyper-focus on efficiency and being perfect let us not forget that our patients want to be treated as a person too. Not just a set of crooked teeth being treated with braces or aligners. Losing the customer service side by not loving on people and caring about them and their life is the fastest way to commoditize our services. Yes we treat teeth but first we must care for and serve people.
I have a few more posts on the subject and I look forward to sharing some positive steps I’ve taken and also mistakes I’ve made along the way as I’ve tried to lose my imperfectionistic view and enjoy the journey. I’d love to continue the discussion in the comments below.
Filed Under: Business, Lifehacks
by Sean Holliday Leave a Comment
To base or not to base, that is the question: Whether tis nobler in the mind to suffer additional 3D printer workflow. That is a question that is common these days as 3D printing grows in orthodontic practices. On the one hand models with bases look so nice, and seem to fit our traditional expectations of a study model. On the other hand, how much resin and time do you need to put into these add-ons, and are they even necessary?
Whether you do this workflow step or not, depends on the purpose of your 3d print. I will be reviewing some of the reasoning behind adding bases to dental arches, and how that decision impacts your 3D prints, especially if you are using the Form2 printer.
If the model’s intended use is for presentation, then a nice base is recommended to prepare the model for display. A base makes the model more presentable and gives a flat surface where supports could be avoided in the print process. The flat base and the print could be further improved by hollowing the model. As long as the wall thickness maintains a good dimension, the print will have reduced amount of resin. The software that hollows a base, though, is not readily available. To add bases to models, software such as meshmixer, 3D builder or OrthoAnalyzer can be integrated into your workflow.
Save the time in preparing the print by taking the clean stl into your preform software and add supports. The supports will give a stable, mesh base to the print that allows the lab access to the model to make appliances, while decreasing the amount of resin. In the example print (Fig 1) the upper arch impression will be used to fabricate a hawley retainer for a patient completing Phase I treatment. Without a base, the model’s volume is 23.4 mL and would take 2 hours and 3 min to print.
Figure 1Contrast that to the same model with a flat base where the volume increased to 30.1 mL and would take 2 hours and 43 min to print (Fig 2). Not to mention the laboratory staff time it took for the base to be added to the model.
Figure 2Dental arch scans are often a raw image captured with limited extensions into the vestibule and lack the traditional rolling that we see in other impressions. When there is limited data of the tissues around the teeth, the 3D print may need greater thickness so it is not damaged in the printing process or when making the desired appliance. In these circumstances, it is important to reinforce the print. When vacuum-forming an appliance, an uneven base with a thin profile will likely crack the print due to the lack of structural support. Adding a base to these prints will gain the strength necessary.
Adding bases to prints can seem like a tedious process, but setting preferences in your digital lab will help drive the proper workflow.
Filed Under: 3D Printing
by Sean Holliday 2 Comments
An interesting fact about orthodontists, is that we are driven people. Top of the class, best grades, and a competitive nature are all common denominators in our specialty. I have noted that in school, competitiveness becomes an important part of advancement since scholastic achievement is often measured by your ranking. Fast forward to professional, and business life, and you realize the rules of the world are just a bit different. We are misguided at times because teachers favored the best student. In real life, patients don’t regard your grades and class rank as valuable. There is no study, that I am aware of, where your academic ability was in any way related to your success in the business of orthodontic practice. And yet our competitive spirit continues.
It can be a never ending battle of frustration if our goal is to beat the rest. Ultimately, there is going to be someone better, faster, cheaper, more popular than you. This sense of competition is not unique to the orthodontic profession. Not at all. There are competitive business strategies all across industries. This leads to the concept of finite players vs. infinite players:
The joy comes, not from comparison, but from advancement” – Simon Sinek
I, like many of you, have a competitive spirit. And yet I find the most fulfillment in outdoing myself, than beating someone else. Constant and never ending improvement is one of our mottos. For the team, for myself, for our practice.
Filed Under: Business, Trends
by Scott Frey Leave a Comment
Going Vertical
Many people only print dental models horizontally on the build platform in order to reduce or eliminate the need for “supports.” However, printing models flat takes up more space and limits your utilization of the build platform. As you scale up your 3D print manufacturing, you will want to print in bulk rather than tying up your printer for only a few models at a time.
By orienting models, occlusal splints, etc. in a more vertical fashion (as seen below) many more items to be printed at once, increasing the scale of your manufacturing.
Many 3D printer manufacturers view the simple fact that a print did not fail as proof of it’s accuracy, but that is not necessarily the case. The question remains whether printing vertically with and without supports is as accurate as your traditional horizontal prints. The Z axis resolution (layer thickness) and XY resolution (which is based on the pointing precision of the lasers in a Laser-SLA printer) are different, so it is certainly possible that changing the orientation of the models might impact their print accuracy. Additionally, if there are no supports, or if the supports are inadequate, there can be distortion in the overhanging layers when they are printed.
Recently, we evaluated the dimensional accuracy of various 3D printers with models that were printed horizontally. We have now repeated this analysis to compare the accuracy of vertically printed models and the impact of supports. For this test, we compared a vertically printed model with supports on the Formlabs Form2 printer, at 100 micron Z resolution, to the same print completed horizontally. We also compared a vertically printed model without supports on a Structo DentaForm and an Enivisiontec Vida printer, at 100 micron Z resolution, to the same prints completed horizontally on their respective printers.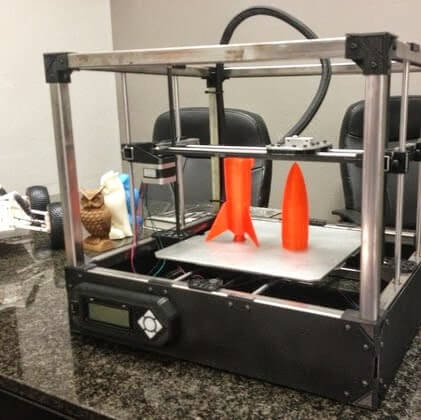
We found that, with the proper supports, there is no difference in the dimensional accuracy between horizontally and vertically oriented prints. Without supports being added to “overhangs” we observed a substantial decline in overall dimensional accuracy. The decline was less noticeable on the Structo DentaForm (these models were provided by the manufacturer and not printed in private practice).
We recommend that printed overhangs, most often present on vertically printed models, have supports added for the most accurate prints.
Heatmaps & Data for 3D Prints
Dimensional accuracy heatmaps and data for the horizontal and vertical prints that were analyzed are shown below:
Form2 Horizontal Print @ 100 microns
The printed model demonstrated an average dimensional accuracy of 67 microns. The printed models were dimensionally accurate to within 80 microns over 65.64% of their surface area. The maximum deviation from the original model was 125 microns.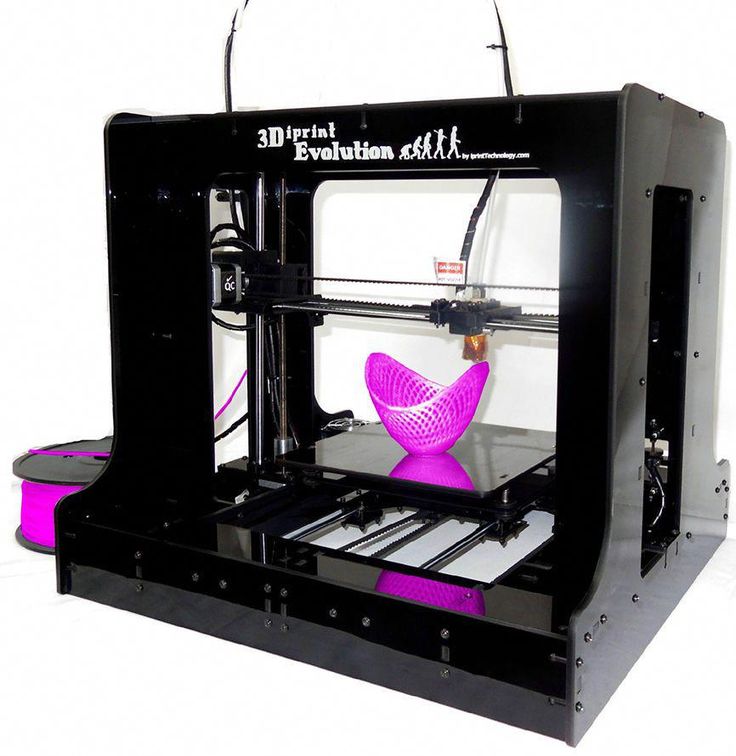
Form2 Vertical Print @ 100 microns
(with supports)
The printed model demonstrated an average dimensional accuracy of 70.6 microns. The printed models were dimensionally accurate to within 80 microns over 65.57% of their surface area. The maximum deviation from the original model was 125 microns.
Envisiontec Vida Horizontal Print
The printed model demonstrated an average dimensional accuracy of 49.4 microns. The printed models were dimensionally accurate to within 80 microns over 83.58% of their surface area. The maximum deviation from the original model was 146 microns.
Envisiontec Vida Vertical Print (without supports)
The printed model demonstrated an average dimensional accuracy of 82.4 microns. The printed models were dimensionally accurate to within 80 microns over 52.38% of their surface area. The maximum deviation from the original model was 147.3 microns.
Structo DentaForm Horizontal Print
The printed model demonstrated an average dimensional accuracy of 57.5 microns. The printed models were dimensionally accurate to within 80 microns over 66% of their surface area. The maximum deviation from the original model was 108.7 microns.
Structo DentaForm Vertical Print (without supports)
The printed model demonstrated an average dimensional accuracy of 67.7 microns. The printed models were dimensionally accurate to within 80 microns over 61% of their surface area. The maximum deviation from the original model was 136.7 microns.
Filed Under: 3D Printing
by Scott Frey 16 Comments
The Resolution Myth
Too often I see people confusing printer resolution with print accuracy. This is understandable mistake given the incremental way that 3D printers create objects; however, there is not a true relationship between accuracy and resolution. The accuracy of a print refers to how well that object conforms to its original form, while resolution is simply the smallest feature that can be printed in a particular plane. The smooth surface finish that results from printing at a higher resolution does not mean that you have an accurate product. Printers with lower, but acceptable, resolution specifications may actually deliver superior accuracy.
Dimensional Accuracy of 3D Printers
For orthodontic applications, we need 3D printers that can repeatedly deliver a high degree of accuracy. Since printer resolutions do not provide us with this information, a dimensional analysis of printed products must be performed.
To gather this data, we distributed a digital model of a patient’s lower dental arch to various orthodontic practices. They were given instructions to print the models and then scan the prints using the latest generation 3Shape Trios intra-oral scanner. This was performed for the following 3D printers: a Stratasys Objet Eden 260vs at both the High Definition (16Z, 42XY res)and High Speed print settings (30Z, 42XY res), a FormLabs Form2 at both 50 and 100 micron layer thickness (Z res), an Envisiontec Vida that was calibrated to 73 microns XY resolution (100Z res), and a Park Dental Research Juell Flash OC calibrated to 100 microns XY resolution (100Z res). Using the original .stl file of the mandibular arch and the .stl files of the scanned prints, the dimensional accuracy of the dentition and marginal gingiva on the printed models was assessed by an independent third party. To validate the consistency of the dimensional analysis, the Form2 50 micron file was submitted twice without the knowledge of the evaluator; the outcome of the analysis was the same.
Accuracy Results
All prints showed high dimensional accuracy with less than 100 micron average deviation. The differences in dimensional accuracy between printers were not clinically significant. Studies have shown that for a scan performed under extra-oral conditions the accuracy for a full dental arch is within 25microns and the minor differences between the printers were within the margin of scanning error.
Of the printers tested, the Envisiontec Vida showed the highest print accuracy; the Stratasys Objet Eden 260vs at the high speed print settings (30 micron layers) demonstrated the lowest print accuracy of the printers tested.
The overall accuracy results underscore that fact that high resolution does not mean high accuracy. This was particularly evident in the performance of the Stratasys machine. The accuracy data recorded for the Eden 260vs was in line with the stated accuracy of the printer from 3D systems, but it’s print accuracy was significantly less than the printer’s resolution and was not significantly different than more cost-effective machines.
Another interesting finding was that the most accurate prints were attained with 100 micron layer thickness (Z res) and when a finer Z resolution was used on the same machine (50 microns on the Form2 instead of 100 microns) the accuracy of the print did not improve. This would suggest that the size of features present in orthodontic models and appliances are not small enough to warrant selecting a layer thickness smaller than 100 microns. This means that the faster print speeds attained at 100 micron Z resolution can be used on these printers without degrading accuracy.
Choosing a 3D Printer
Manufacturers’ stated printer resolutions are no guarantee of accuracy. When evaluating any new printer for purchase, the dimensional accuracy of the prints must be validated and contrasted with exiting purchasing options. However, the results of this analysis demonstrate that price certainly isn’t the determining factor in print quality and accuracy. All printers tested demonstrated similar and sufficient print accuracy for orthodontic use, and the extremely cost-effective Formlabs printers were just as accurate as much more expensive printers. If you are paying more for 3D printers in the current marketplace, you aren’t doing your homework and it is time to start make better financial decisions.
Given the price point of printers like the Form2 and it’s high level of accuracy, there is no reason not to integrate 3D printing technology in your orthodontic practice. Unfortunately, some doctors who have their own small orthodontic labs are attempting to discourage orthodontists from investing in 3D printers. They jumped the gun on the 3D printer market and still need doctors to outsource their 3D printing services to them in the hopes that they can recover their investment on overpriced 3D printers. Don’t fall victim to their agenda.
3D Printer Accuracy Heatmaps & Data
Dimensional accuracy heatmaps and data for the 3D printers that were analyzed are shown below:
Stratasys Eden 260vs
High Definition Settings (16 Micron Layer Thickness)
The printed model demonstrated an average dimensional accuracy of 57.3 microns. The printed models were dimensionally accurate to within 80 microns over 78.55% of their surface area. The maximum deviation from the original model was 120 microns.
Stratasys Eden 260vs
High Speed Settings (30 Micron Layer Thickness)
The printed model demonstrated an average dimensional accuracy of 84.15 microns. The printed models were dimensionally accurate to within 80 microns over 50% of their surface area. The maximum deviation from the original model was 170 microns.
FormLabs Form2
@50 Micron Layer Thickness
The printed model demonstrated an average dimensional accuracy of 73 microns. The printed models were dimensionally accurate to within 80 microns over 64.7% of their surface area. The maximum deviation from the original model was 150 microns.
FormLabs Form2
@100 Micron Layer Thickness
The printed model demonstrated an average dimensional accuracy of 67 microns. The printed models were dimensionally accurate to within 80 microns over 65.64% of their surface area. The maximum deviation from the original model was 125 microns.
Envisiontec Vida
@73 Microns XY Resolution
The printed model demonstrated an average dimensional accuracy of 49.4 microns. The printed models were dimensionally accurate to within 80 microns over 83.58% of their surface area. The maximum deviation from the original model was 146 microns.
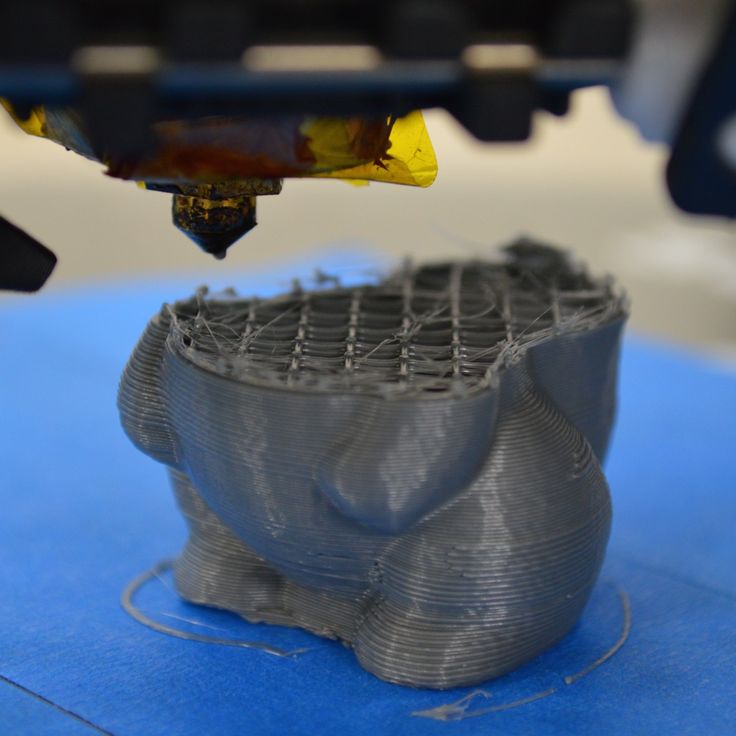
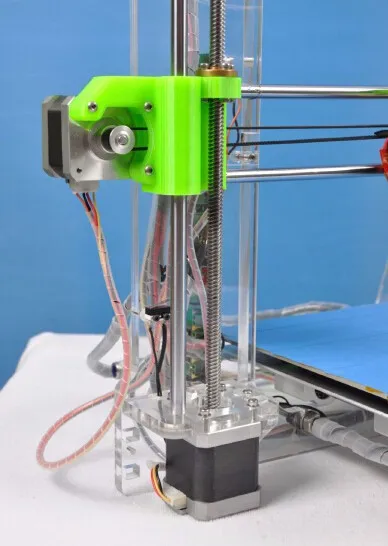
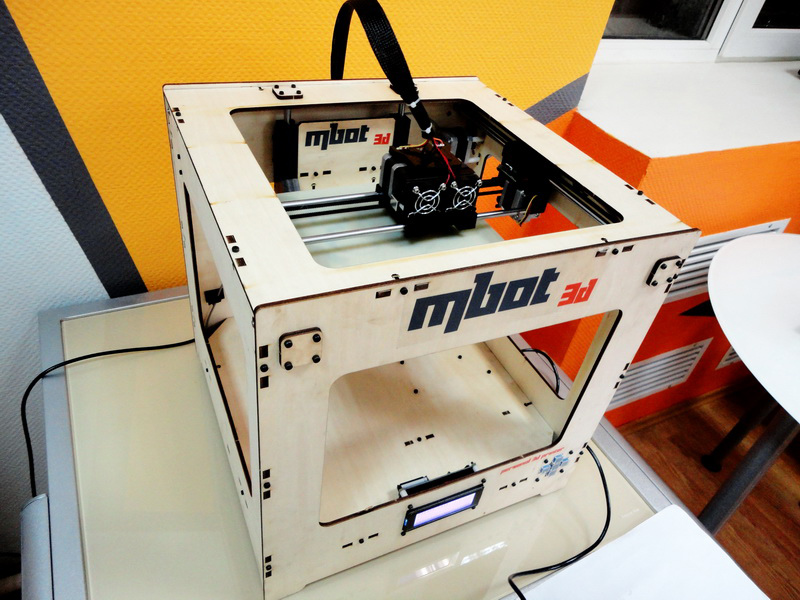
Park Dental Research Juell 3D-2
@100 Microns XY Resolution
The printed model demonstrated an average dimensional accuracy of 57.7 microns. The printed models were dimensionally accurate to within 80 microns over 68% of their surface area. The maximum deviation from the original model was 130 microns.
Structo DentaForm
@96 Microns XY Resolution
The printed model demonstrated an average dimensional accuracy of 57.5 microns. The printed models were dimensionally accurate to within 80 microns over 66% of their surface area. The maximum deviation from the original model was 108.7 microns.
Uniz Slash+
@75 Microns XY Resolution
The printed model demonstrated an average dimensional accuracy of 90 microns. The printed models were dimensionally accurate to within 80 microns over 40% of their surface area. The maximum deviation from the original model was 177 microns.
Filed Under: 3D Printing
by Sean Holliday Leave a Comment
Buying a 3D printer is one level of investment into a more digital workflow. If you plan on acquiring digital scans, there are many software solutions that cleanup and modify your scans for better, and more useful prints. Here’s a summary on several of the players:
Meshmixer – This software aids in cleaning up models and manipulating stl files. Although cumbersome for anyone who is not familiar with CAD software, it has nice features that can help prepare models for 3d printing. A great feature of meshmixer, is that it is free.
3D Builder – Speaking of free, this hidden gem is already available for anyone who has Windows 10. This software is easier to use than meshmixer, and can clean up cases to flatten models, add bases and label models with its text writing tool.
Easy Rx – This cloud based software organizes lab workflow to prepare outgoing lab cases or to better leverage your in-house lab. 3D printing workflow is nicely integrated to clean up casts and prepare them for any 3d printer. You can track cases, create reports, and lab slips for all types of appliances. It is a very intuitive system that aims to improve the efficiency of your lab.
Clincheck – Did you know you can 3D print models coming from Clincheck? STL files can be exported from the initial stage and the final stage of Clincheck. Remember, Align Technology is one of the first and largest 3D print manufacturers in the world.
Orchestrate 3D – This program allows for modifications to scans which include cleaning up scans, sectioning, virtual removal of brackets, adding pontics, adding attachments and tooth movement to fabricate appliances. There are options to have full control, or for an additional fee, setups can be prepared for the office.
Ortho Analyzer – This software from 3Shape is a suite of different solutions for 3D modeling and digital treatment planning. With this software you can create digital study models including virtual bases, and perform treatment planning and case analysis using 3D and 2D tools, virtual setups, and digital articulators.
Elemetrix – This cloud based software from Suresmile allows for diagnostics, IDB setups and designing aligner therapy. It can integrate with scans and CBCT images. Once the treatment planning is completed you can export stl files that can be loaded into your 3D printer to manufacture the appliances.
Exceed – The developers of the former Orthocad IQ IDB system have started the Exceed lab. They offer a digital workflow where intraoral scans can be processed into their IDB system or clear aligner therapy that can be performed using in-house 3D printing.
Filed Under: 3D Printing
by Sean Holliday 2 Comments
Extracting Efficiency
The use of Invisalign has continued to increase over the years. Greater utilization has led to an increase in applicability and more interest for the improvement of this product. In order to offset the lab fee, it becomes imperative to gain clinical efficiencies in the use of clear aligner therapy.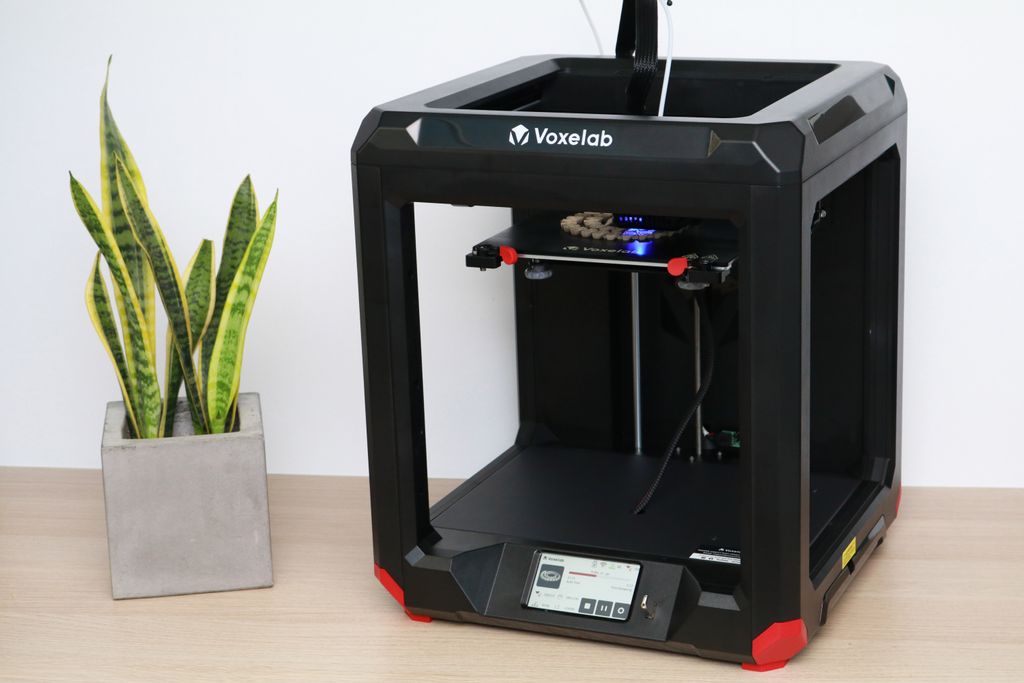 Especially if you want to avoid the top reasons why orthodontists disapprove of Invisalign.
Two years ago, we tracked a series of consecutively treated cases from my practice. As we analyzed the treatment times, number of appointments and other trends, we determined two main areas that would improve the value of Invisalign treatment to both the office and the patient. The two opportunity areas we focused on were decreasing the total treatment time and the total number of appointments.
Invisalign is a system that determines the number of stages in the treatment when a clincheck is developed and has best practices “rules” that affect the length of treatment. In order to make an impact in the efficiency of Invisalign, it became apparent that several changes would have to be considered in the planning of the treatment and in the execution of the delivery. Let’s take a look at some of the tools that can be used to improve the efficiency of the appliance:
7 day Aligner WearAccelerating the change of aligners will decrease the treatment time. In our sample, we reduced the average treatment time by 20%. The question is, does an increased rate of change affect results and increase the number of refinements? In the cases from my practice, 7 day aligner wear was only implemented in the final 6 months of treatment for most of these treated cases. Although I do not have a large enough sample yet to compare that was fully treated with 7 day aligner changes, this treated sample had an evident reduction of treatment time and no increase in the amount of refinement efforts. Since all of our Invisalign cases have now fallen into 7 day wear protocol, we are looking forward to seeing a greater gain in efficiency.
Optimum Staging
Going to 7 day wear, but doubling the number of aligners does not gain efficiency. It is important to maintain proper force systems in the appliance, and maintain a number of aligners that matches the amount of movement necessary to achieve the desired clinical result. Significantly increasing the number of aligners will degrade the amount of force delivered in each aligner, and this can affect the moment to force ratio and aligner optimization.
Scanning patients while they are in active aligners keeps momentum of treatment going. The advantage of an intraoral scanner is that scanners allow us to scan during active aligners instead of removing attachments and stopping elastics with PVS. This will also degrade the force systems. We don’t put patients on hold with braces, which could make aligners less efficient if not addressed. We are proactive scanning patients several aligners before completing the aligner series so the patient can continue movement while refinement sets are being prepared. In order to be more efficient, consider not putting the patient on hold while the refinement is being developed.
Decreasing the Number of AppointmentsIncreasing the time between appointments is a sure fire way to decrease the number of appointments. In our patient sample, we decreased the appointment visits by 46%. Since patients are changing aligners at home, periodic checks and adjustment visits are not needed on the same intervals of fixed appliances. Because there are no wire changes, patient appointments can be extended by 12 weeks, or sometimes more. The key factor here is setting an interval that keeps the patient engaged with the practice, and does not allow loss of tracking or compliance issues go undetected too long. Patient education, problem solving tools, and a team effort in promoting compliance are key before implementing extended appointment intervals.
Until clinical studies are published that reveal the effect of changes to the Invisalign protocol, it is a challenge for clinicians to determine the best course for both patients and practices. Using practice data that is relevant to your patient base and systems is a useful way to check trends and monitor clinical efficiency. I hope sharing some basic analytics will guide you on your journey to improve your Invisalign efficiency.
Filed Under: Aligner Therapy, Invisalign
by Scott Frey Leave a Comment
3D Printer Resolution
One of the more confusing concepts within 3D printing is understanding the resolution of the printer itself. I had several conversations during the AAO on this subject with people so I think the topic is worth revisiting.
People often misquote Z axis resolutions as the printer’s “resolution” because all additive manufacturing must occur in layers, and layer thickness is something that can be roughly compared between printers. In reality the Z resolution is only a very small part of the equation. The XY resolution actually has a far more significant impact on print quality and accuracy.
Perhaps the reason why XY resolution is rarely mentioned is that you can only make a direct comparisons between XY resolutions among pixel/projector based printing technologies like DLP-SLA, MSLA, and Polyjet. You cannot really make a direct comparison between these technologies and Laser-SLA.
With DLP, MSLA, Polyjet, and other “projector” based 3D printers, their XY resolution is defined mainly by the size of the pixels. If you want to understand the XY resolution of any of these types of printers, here is how:
- DLP-SLA -> Divide the length or width of the build platform by the number of pixels in the projector for that dimension (1920 x 1080p for an HD projector), then multiple by 25,400 to convert to microns. This will give you the pixel size in microns for either the X or Y dimension (pixels are rectangular). For example , to achieve a 50micron XY resolution the build platform can only be the size of a 3×5 card with DLP printers.
- MSLA -> This technology uses an LCD photomask to shape the UV light, so the pixel size is based on how the LCD photomask is manufactured and is constant.
 You can simply ask the manufacturer what the pixel size is of their photomask to get the XY resolution. One advantage of this technology is that you can have high XY resolution with a larger build area.
 - Polyjet -> The printers using this technology list the DPI for their projectors, which makes conversion easy. The Stratasys printer uses a 600dpi resolution in the XY, which is a 42micron XY resolution.
Laser-SLA printers are a completely different animal than pixel based printers (I think the featured image for this post helps highlight that difference). The XY resolution for these printers is actually determined by the pointing precision of the laser, which allows it to achieve a level of precision in the XY dimension that is finer than the laser spot size itself. For example, the pointing precision of the custom galvos on the Form2 is less than 10microns.
Now that we have clarified 3D printer resolution a little further, this should help you filter out the noise a bit better. In the end though, the resolution specifications on these machines are only a glimpse into the potential accuracy of a printer, and they don’t provide an adequate means of comparison for projector and laser-based 3D printers. The information we really want is the dimensional accuracy of the objects being produced, which we will look at from prints in a few days.
Filed Under: 3D Printing
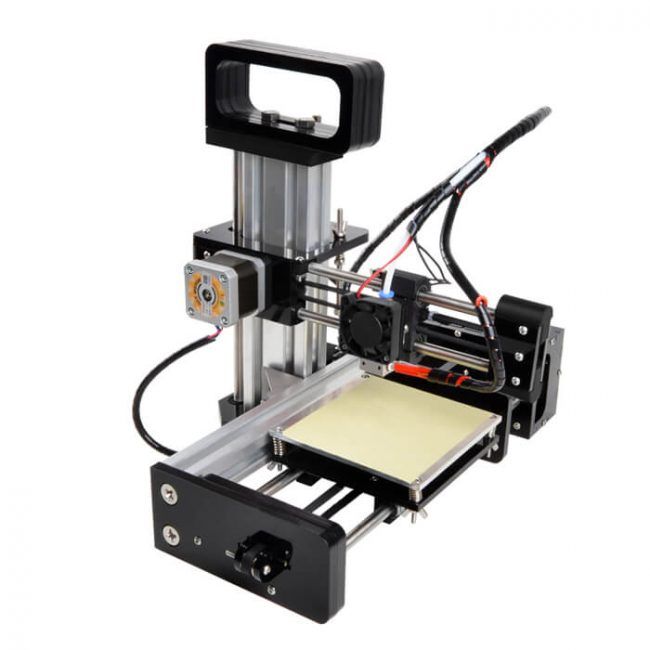
Best 3D Printer Candidate 2022 / 3D Printers, Machine Tools & Accessories / iXBT Live
If you want quality printing out of the box as well as a solid build, then Kywoo3D Tycoon Max is the one for you. This printer attracted me with interesting features at a low price. And most importantly, what attracted me is a very reliable design. After all, it is she who affects the quality of the print.
I found the first mentions of this manufacturer and printer on Kickstarter, and then on local sites. Then the model was simply discussed, but there were no real owners. But then the first reviews appeared, and to be honest, the printer was not praised in them. Despite the thoughtful design, the printer had problems with airflow and buggy firmware. Therefore, when I needed a 3D printer, I took myself Anet ET4 Pro. But then there was a need for another printer, so I, again returning to the question of choice, decided to take myself a Tycoon Max. And now, having used the printer for several weeks, I realized that I made the right choice. The printer for its price really gives excellent print quality, and if necessary, also a very fast print speed comparable to deltas.
Characteristics of Kywoo3D Tycoon Max:
Well, in words, I’ll add something that is not in the table:
- Print area: 300 * 300 * 230mm
- Print type: FDM
- Number of extruders: 1
- l. -0.4mm
- Nozzle: 0.4mm
- Control: USB, MicroSD card, Wi-Fi
- Power: 350W
- Maximum table temperature: 100C
- Maximum extruder temperature: 260C
- Additional design information:
- High rigidity aluminum profile frame.

- X-axis rails, Y-axis shafts.
- Z-axis motor belt synchronization
- 16-point auto-leveling
- 3.5" touch screen for printer and printing process control
- Convenient filament threading with ring on extruder 90 015
-
Now let's talk about the printer itself. It was ordered from a warehouse in the Russian Federation, and the delivery time took 5 days. A huge box weighing 16kg was received in the mail:
Inside the box is a printer disassembled into two parts. Everything lies in layers, which are laid with foam material. So it is unlikely that anything could be damaged along the way. Opening the box, the first layer I saw was the lower frame of the Y-axis with a heating table and ultra-base:
Below the next layer is the main frame of the Z-axis, a coil of PLA test plastic, a box with accessories:
I’ll tell you right away about the complete plastic. It has a weight of 500g, wound on a plastic reel, sealed in a vacuum bag.
 I printed part of the coil during the tests, and I liked the plastic.
 As for complete accessories, everything is relatively standard. Inside the box are a spatula, a set of hexagons in a convenient case, several spare ties, wire cutters, clamps for the ultrabase, four screws for assembling the printer, a Phillips screwdriver, a piece of heat pipe, a spare 0.4mm nozzle, a needle for cleaning the nozzle, a wrench for unscrewing the nozzle, spare limit switch, USB cable, reel mounting stand. Also included is a card reader and a MicroSD 8Gb flash drive manufactured by Netac ( a good manufacturer, I have several flash drives of this company, and they work well )
The printer is powered through a detachable cord with a European-type plug. If necessary, it can be replaced without any problems:
Also included with the printer is an assembly and configuration manual. It is made on high-quality printing, but, in fact, there is no great benefit from it:
Now let's consider ultrabase glass.
 It has dimensions of 305*320mm and a thickness of 4mm. On the edge there is an inscription with the logo of the manufacturer:
 Having already printed enough parts, I can say that the quality of the Ultrabase is excellent. It is strong, there are no problems with plastic sticking, it heats up evenly. And at the end of printing and cooling, the parts come off without problems.
The ultrabase is attached to the heating table with 4 stationery clips (they are included). The heating table itself is made of metal, and is attached to the frame on shafts through plain bearings. By the way, in order to reduce weight and inertia during movement, the manufacturer made the table itself with holes that do not affect rigidity.
By the way, the table is connected to the control board via the XT60 connector. This is the first time I see such a solution, but logically, this is a fairly reliable connection.
Another thing I would like to note on the table frame and X-axis is the presence of good legs that can be adjusted in height.
 This is useful if the printer is not standing on a completely flat surface, and correct adjustment will avoid unnecessary movement of the frame when printing.
 Now let's move on to inspecting the frame along the YZ axes. It also contains the control board and power supply. It also has an extruder. This is what it looks like:
The first thing I want to pay attention to is the overall rigidity of the frame. It uses a double frame made of aluminum profile, on which there is a metal box on top. This box serves two purposes: hiding the interior of the printer and adding rigidity to the frame. And it has a very good effect on the quality of the print.
The Z-axis of the printer is fixed on the frame through two shafts rigidly fixed to the frame itself and a closed plain bearing, and for moving there are two studs with stepper motors on both sides. Additionally, the manufacturer has added a belt that synchronizes the operation of these stepper motors:
Rails are installed on the printer to move the extruder.
 They are quite high quality, and during the work I personally did not have any problems with them. For better sliding, the rails are immediately lubricated from the factory, and the rails themselves also have holes through which this lubricant enters the rails. Also, through these holes, the rails were fastened along the entire length of the frame.
 As for the extruder, the manufacturer did not reinvent the wheel, and equipped the printer with a proven solution. This is MK10, but with some modifications. First, it adds an iron frame that looks good while protecting the user from contact with hot extruder elements. I would like to think that this frame also serves as an additional radiator, but if you look at how it is fixed, it immediately becomes clear that there is not much heat coming to it. And the second addition is a special lamb for scrolling plastic when refueling. And this is a really handy feature. When refueling, you do not need to press anything, as in other printers.
 We simply pull the plastic through the plastic sensor, point it into the hole of the extruder and turn the lamb. Plastic itself immediately clings and is pressed through. A simple and elegant solution that is sorely lacking in other printer models.
 Also immediately above the extruder is a low filament sensor. This is also a pretty good solution, since the distance between the sensor and the extruder is minimized here. And this means that you don’t have to throw out 20-30cm filament bars that simply cannot be pushed into the printer. The amount of waste here is minimal.
As for blowing, a fan with an impeller is used here, which is mounted near the nozzle. Fan model pb04010ms4. The airflow itself is realized through a wide slot. I personally did not notice any problems with blowing during printing, there is enough blowing, and it blows directly on the model. The blowing speed can naturally be adjusted both during the cutting of the model, and already directly during printing, the fan has speed control.
I also once had to disassemble the extruder to replace the nozzle during printing. What was in the kit, I managed to score on my own stupidity, alternating types of plastics without changing the temperature. Therefore, I will show the extruder in disassembled form:
I also want to draw attention to the fact that the printer has a table auto-calibration function. For this, a BL Touch sensor is installed here. More precisely, there is not the original 3D Touch with a plastic plug.
But by the way, I have no complaints about his work. The table calibrates perfectly, and even if there is a misalignment of fractions of millimeters, everything is taken into account and there are no problems with printing. The table itself is calibrated using 36 points (6*6) and looks like this:
Also, in addition, I can also note the presence of a silicone lining on the hotend, so that the temperature is more stable:
Well, after we have examined both halves of the frame, we can start assembling the printer.
 She's very simple. The existing 4 screws are screwed through the grooves, and we stretch harder.
 Additionally, you need to connect the connector to the table and connect the motor along the X axis. By the way, in the printer, all the wires are laid right away, and where they can be fixed with ties. Therefore, nothing dangles here, does not hang down and is as neat as possible:
That's it, the assembly is finished. This is what the assembled printer looks like, well, with the exception of the ultrabase and the bracket for installing the filament spool.
The bracket itself, by the way, is standard, like most printers in this price range. Metal profile and plastic tube. The bracket is installed at any point of the aluminum profile, through two spacer nuts:
Well, once the printer is assembled, you can consider the rest of the design elements. If you look at the back of the printer, you can see the power button and the port for connecting the power cord:
On the other hand, there is a sticker on the frame with information about the printer:
Separately, I would like to note one more convenient feature of this particular printer, which I have not seen anywhere else.
 These are convenient carrying handles:
 They are metal and rigidly fixed to the frame, you can safely lift the entire structure with them and not worry that something will break. For me, this is very important, since my printer can be transferred to different points around the room, and even between rooms. Depending on how long the print is placed.
If you look at the printer from the right end, then you can see a slot for a MicroSD card through which a model for printing is thrown onto the printer. There is also a MicroUSB port for connecting to a computer (does anyone use this method of printing?) and another slot for SD cards, the purpose of this slot remains a mystery to me:
Well, now the most interesting. It is, of course, a touch screen. When you turn on the printer, we first see a splash screen with the manufacturer's logo, and then the main desktop, from which you can get to different settings:0003
All items on the desktop are interactive. Management is implemented by clicking on the desired element.
 For example, by clicking on the ruler of XYZ axes, we get to the axis calibration menu:
 And if you click on the flash drive icon, the files for printing located on the flash drive are opened:
The printer sees folders and subfolders without problems, but there are Russian file names Problems. In the current firmware, the Cyrillic alphabet looks like unreadable krakozyabry.
If you click on the gear icon, then naturally we get into the settings menu. Here you can select the temperature of the preheating of the table and extruder, change the filament during printing or in idle time. Find out information about the firmware, set up Wi-fi and select the interface language ( there is no Russian language in the photo, but it has already been added in the latest firmware )
By the way, the printer has a built-in Wi-fi module, and it can be run in access point mode or connected to a home wi-fi network.
In the first case, you can connect to the printer and use an additional plug-in in Cura to send files for printing over the air, as well as monitor the status of the printer:
True, the wi-fi module has one minus.
 It stands inside a metal case, and it dampens the signal very noticeably. If the printer is in the next room, then I can no longer connect to it because the signal level is too weak. In fact, the range of the access point is about 5-6 meters maximum.
 But back to the screen. Despite the modern 32-bit processor, another disadvantage that I want to point out is the lack of model previews. This option is already firmly in use, and I would like to hope that it will also appear in future firmware. But so far the interface looks pretty simple. By the way, this is also visible at print time, when progress is displayed simply as a blue bar with a percentage of completion.
But in general, the management here is really convenient. You can change the Z-axis gap on the fly, change the speed of the blower fan and the temperatures of the table and extruder.
Well, I also want to show the inside of the printer without disassembling it. How could I get the camera. The printer is powered by the built-in Mean Well LRS-350-24 power supply.
 Already by the name it is clear that this power supply produces 24v / 350w.
 In the future, I plan to crawl up to this PSU and add a backlight tape to the printer frame so that you can see the printing process.
The brains of the printer are located in the upper part of the case, it is already much more difficult to crawl there with the camera:
But since the board is sold separately, I'll just add a photo from the manufacturer here:
True, in this photo it is not clear which processor is used in the board. But let's hope it's good enough.
In general, if we talk about the assembly, then it did not raise any questions for me. The frame here is well thought out and very rigid. All axles run smoothly and there is no backlash. The printer is large, solid and heavy. And gravity, as we know from the words of Boris Razor, is good and reliable.
Now it's time to talk about the printing process and the models I have printed
The first thing I decided to do was check the speed characteristics of the printer.
 The specifications indicate that its maximum speed reaches 150mm / s. Therefore, I printed a test cube at this speed:
 I shot with a macro lens so that the flaws in the layers were immediately visible. And they are here, since my plastic is not the best, besides, it’s also old, taken from the remnants.
Then I printed the same cube, but at a speed of 180mm/s, and put it next to the first cube:
Try to guess from the photo which of these two cubes was printed at what speed.
I'll give you a hint. On faster printing, at 180 mm/s, the plastic from the nozzle no longer has time to come out and lay down evenly, so the layers appear thinner, and there are gaps between the layers.
And yes, on the left it's a cube printed at 180mm/s and on the right it was 150mm/s.
And by the way, this speed is quite suitable for printing rough parts, when you need to determine the degree of fit and size, without regard to quality. This saves a lot of printing time.
Well, at a speed of 150mm / s, you can already print full-fledged models. Here, for example, I printed a model at this speed:
And this is not a draft part, but a full-fledged one, for a commercial order. Here is what I printed, the size of this medal is 22 centimeters:
If you look at macro photography, you can evaluate both the detail and the level of stacking layers at this print speed:
By the way, as you can see, the medal was printed in two colors of PLA plastic. This type of printing is not difficult, just at a certain moment of printing, you can pause the printer and replace the filament. But I want to add that Cura has a handy plugin that allows you to precisely set the pause on the desired layer. To do this, go to the plugins, and select the “Filament Change” function in the post-processing plugins, in which we simply set the layer on which the pause will occur. The printer will stop printing at the right moment, move its head to the extreme left side in front and squeak loudly, calling for a replacement of the filament:
Through this plug-in, you can set the replacement of the filament at least on each of the layers, which is very convenient and allows you to achieve interesting effects when printing art objects.
 I hope my advice will be useful to those who are fond of 3D printing.
 I also printed an axolotl toy for children, which consists of closed links:
Printing was done at a speed of 120mm / s, and could have been more successful if I had not forgotten to remove the automatic supports in Cura. But since there were supports, I had to spend time post-processing and separating the supports, as well as cleaning up excess plastic in the links. This is what this axolotl looks like on a macro shot:
Layer height 0.25mm, travel speed 120mm/s, table temperature 60 degrees, extruder temperature 220 degrees.
The next model was among the models on the flash drive provided with the printer, this is a ghost keychain.
By the way, I want to add a macro photo of the substrate that remained after printing, so that you can evaluate the uniformity of laying layers and tracks:
a piece of ordinary sponge to clean the plastic from dust, which is very visible on white parts.
 Some print different boxes and cases, but I just took a piece of dish sponge and pierced it with a filament, which I then moved on. After that, the parts became noticeably cleaner.
 Another custom-printed detail. Steering shaft bushings for Nissan Qashkai. Designed to eliminate the runout between the shaft and the tube in the steering reach adjustment mechanism:
Another model. Decepticon logo overlay for standard Mazda car logo:
Spinner gear. A toy that I printed to test the possibility of printing gears:
Stand legs for Sony PlayStation 4 Slim:
Well, there were many other models that were printed to order, but I did not have time to take high-quality photos. I mainly use PLA and Petg plastics when printing. Well, a little ABS, which I really dislike because of its capriciousness to ambient temperature and drafts. And as you can see from the photo, there are no problems with printing. The only problem I've encountered is changing different types of plastic during printing and clogging the nozzle as a result.
 But it's my own fault, I shouldn't have experimented.
 Conclusion:
As you can see from the review, I really liked the Kywoo3D Tycoon Max 3D printer. It is definitely worth the money, here it is clear that the manufacturer did not save on everything and everyone, as is the case with other manufacturers. I will try to indicate the advantages that the buyer receives:
Reliable design and rigid frame . A double profile and a metal frame are assembled into a single design that is reliable and does not give any backlash. This has a positive effect on detail and print quality, as well as on the maximum print speeds. Also, all cables and wires are correctly laid in the printer immediately from the factory. And the heating table is attached through the XT60 connector, which has long proven its reliability.
Shafts along the axes Z and X. The presence of shafts and plain bearings also has a positive effect on the accuracy of printing and the reliability of the design as a whole.
 Since they are less subject to wear and play, unlike wheels that drive along a profile.
 Axis rail Y . The advantage of rails over conventional wheels, I think, is not even worth discussing. This is a more accurate movement of the extruder, and the absence of backlash, and durability. Of course, it would be better to have rails on all axes, but this will significantly increase the price of the printer, and it will no longer be so interesting.
Convenient filament threading with scroll knob . Here I will attribute this not only to pluses, but directly to huge pluses. Such a trifle like, but very much affects the work with the printer, especially if you print a lot and often change the filament.
Short feed extruder MK10 . Allows you to safely print any type of filament, including flex. In addition, unlike Bowden, plastic is saved here. The retract works more adequately. In general, I personally prefer Direct extruders, although I have a printer with a bowden system.

Availability Wi- fi module. Let it be weak, and not everyone needs it. But for some it will be very useful and necessary.
Axis motor synchronization Z . Another little thing that many manufacturers neglect. Meanwhile, this little thing affects the accuracy of printing. And many people customize their printers by adding a Z-axis belt.
Auto level. The printer builds a table map using 36 points and then takes into account any irregularities during printing. Which is very good for the adhesion of the base layer. Well, of course, there are no dances around the printer with a leaflet for an exact fit. To be honest, this process is what I dislike the most during printing.
Print area 300*300*230mm. With such dimensions of the printed area, you can print a much larger number of details than with the usual 220 * 220mm in most models.
 True, as a minus, the dimensions of the printer themselves are already acting here. Under it, you need to prepare a surface with dimensions of 62 * 62 centimeters, and not every table is suitable here.
 But to be honest, I did not find any minuses for the printer. Well, except perhaps the dimensions and the weak signal of the Wi-fi module. But I already wrote about this above. Well, perhaps the relatively simple firmware can be attributed to the minuses, although it does not affect the print quality, it's just an interface.
Kywoo3D Tycoon Max is currently my main 3D printer, on which I print most models. For yourself and to order. Print field 300 * 300 * 230mm allows you to print large enough parts or batches of parts, which suits me completely. I also liked the robust, well-thought-out and monolithic design of the printer, as well as the speed of its operation. As for working on wi-fi, this did not take root for me. At first I dabbled in sending and monitoring, and then, out of habit, I returned to the flash drive and card reader again.
 In terms of noise, the printer does not raise any complaints, it is the same as most FDM printers. Mostly you can only hear the fans. I also cannot fail to note the most convenient type of filling the filament with the help of a lamb, in my opinion, this bribed me very much.
 Well, as it became clear from the review, I can safely recommend this printer for purchase, especially since its price is quite affordable, and frankly, for its price of $280, I cannot find a single competitor for this model. If you like the printer and want to buy it, you can use the promotional code KY3D06 when ordering, which will give an additional discount. And these printers are in stock in the Russian Federation, so delivery will be fast.
Current price for 3D printer Kywoo3D Tycoon Max
Overview of Zenit 3D 3D printer
Hello everyone! 3DTool is with you, and today we will talk about a fairly well-known FDM 3D printer completely developed and made in Russia called ZENIT.

In addition to the text review, please watch the video review with more information about the printer (recommended).
Driven by the desire to give a competitive answer to similar Russian and Western developments, spending many months on implementation and testing. At the end of 2015, Zenit3D presented its own 3D printer with the same name Zenit.
In total, there are 2 versions of this printer: This is Zenit, which we will talk about in this review, and Zenit DUO, which is distinguished by the presence of two extruders. But first things first.
Appearance
The first thing we see is a rigid, as a cast, metal case, which provides vibration resistance. The weight of the printer is about 20 kg.
On the front side of the printer, there is a transparent acrylic door for easy viewing of 3D printing and access to the working chamber.

The top of the 3D printer case is not closed. Since the plastic for the printer is refueled precisely in the upper part of the extruder, this is convenient.
The stand for the plastic coil is a separate design. It comes with the printer as a set.
Control screen
The printer also has an LCD display on the front panel, which makes its use convenient and ergonomic. Completely Russian-language interface. Joystick control. Thanks to this, during printing, we can manage the printer and monitor parameters without connecting to a computer.
Work table
Now let's look inside.
We open the door and immediately see a heated desktop made of aluminum, and for greater convenience there is also a removable glass.
There is also an indication of the heating of the table, when it is cold, the inscription ZENIT glows in blue,
and when the temperature has risen to the operating temperature - red.

The table itself heats up in less than 2 minutes, and its maximum temperature is 110°C.
The maximum size of a part that can be printed in this printer is 240x215x230 mm, and the minimum layer height along the Z axis is 50 microns, which shows us the great ambitions of this printer.
Calibration of the Zenit 3D printer is carried out manually using screws under the desktop, which just adjust the distance between the nozzle and the table. All you need to do is run the extruder over 5 points on the desktop.
Kinematics
On the Z axis, a ball screw screw is used (installed on all printers from the end of 2016) and double 10 mm shafts.
Shafts with a diameter of 8 mm are installed along the X and Y axes. The mechanics of the printer are driven by stepper motors via a toothed belt.
Extruder
The printer is equipped with a direct extruder, which means that there are no problems with rubber-like plastics.
 The extruder has an efficient cooling system that works great with PLA-like plastics. There are no restrictions on the list of materials used. It should also be noted that the extruder is heated up to 280°C, which allows us to print materials such as PLA, ABS, Flex and Nylon.
 I would especially like to say about the reliability of the extruder (there are no plastic jams - from the word at all). This is achieved by a thread pulling mechanism developed by the manufacturer Zenit3D. Works stably like clockwork. This is an extremely critical parameter for long-term 3D printing.
The diameter of the nozzle installed in the extruder is 0.3 mm.
The maximum print speed with the standard nozzle is 35 cm3 per hour. With all this, the maximum speed of movement of the print head is 300 mm / s.
The thickness of the layer along the Z axis is adjustable and ranges from 50 to 250 microns.Software
The software (Repetier-Host) for the 3D printer is supplied free of charge.
 With this software, you can import STL files to send your 3D model for printing. The program allows you to change the scale, and perform all kinds of manipulations with a 3D model on a plane.
 The assembly of the printer is at a very high level. During the entire period of sales of Zenit 3D printers in our company, which is about 90 machines per year, there has not been a single case of printer failure at the stage of acceptance testing from the factory. Believe me, this is a very cool indicator of quality.
Zenit 3D printer can work both from a computer via a USB cable, and offline via an SD card.
Seal
Well, now let's see how the printer behaves in operation.
The print quality is at a decent level, and the printer is almost inaudible during printing. This is especially true when working at home or in the office.
Learn more
- Maximum print speed: 0mm/10mm s (personally tested up to 140mm/s and it prints fine)