Best 3d printer quality
Prusa MK3S+ 3D Printer Review: The Heavyweight Champ Continues to Dominate
Tom's Hardware Verdict
The Prusa MK3S+ continues to hold its own in a market saturated with low-cost competitors.
Pros
- +
+ PrusaSlicer provides best-in-class model slicing
- +
+ Flexible build platform sets the standard
- +
+ Automatic bed leveling
- +
+ Stealth Mode enables a nearly silent printing experience
There are few 3D printers with as many industry accolades as the Prusa i3 MK3S+, and after spending some time with this printer, it’s easy to see why it’s one of the best 3D printers currently on the market. With a price tag of $999 for an assembled machine or $750 for a DIY kit, the price point of the MK3S+ is towards the high end for an open format consumer 3D printer, but the features of this machine and the ecosystem created by Prusa (they make their own hardware, software, filament, and more) have made the MK3S+ a formidable machine for anyone interested in taking their 3D printing game to the next level.
The features of the MK3S+ (silent stepper drivers, power-panic, etc.), noteworthy when originally launched, have largely become standard on lower-cost machines and may not seem particularly impressive on a spec sheet. However, clever software implementation and well-written documentation have created a machine that provides a best-in-class printing experience. For instance, the auto-leveling SuperPINDA probe of the MK3S+ maps the build platform for surface distortions, but the printer firmware is capable of storing multiple Z-offsets so you can switch build platforms without having to recalibrate every time.
The MK3S+ is a visually distinct machine; and the Prusa team has kept their black and orange color scheme for their smaller printer, the Prusa Mini+. The bright orange printed parts on the MK3S+ have created instant brand-recognition for the Prusa line of printers, and Prusa has doubled down on this by reinforcing their branding across their machine. In fact, you can find the word ‘Prusa’ printed, engraved, or etched into the MK3S+ in 25 places, 29 if you’re using a spool of their Prusa Polymers Prusament PLA material.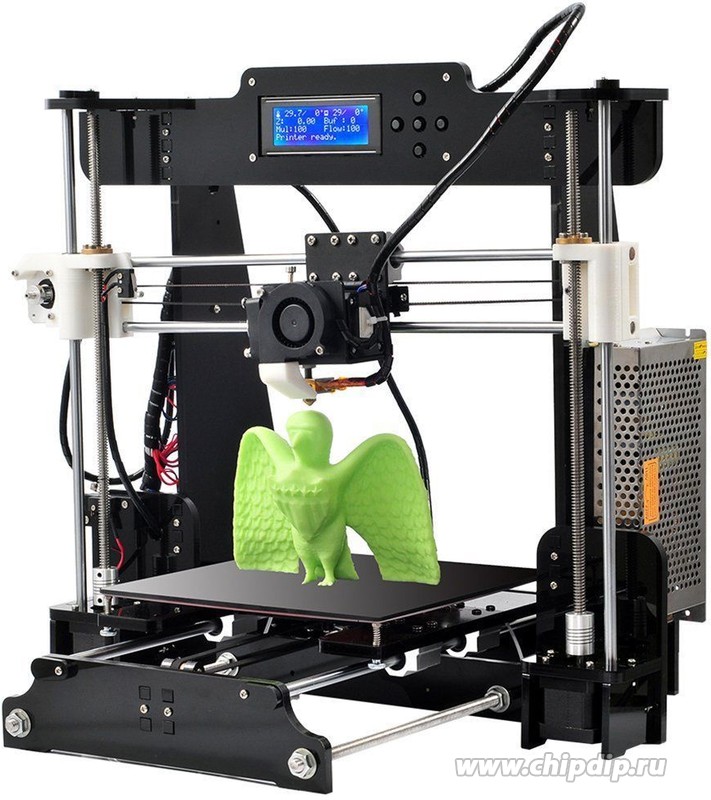
Specifications
| Machine Footprint | 16.5 x 16.5 x 15 inches (42.0cm x 42.0cm x 38.0cm) |
| Build Volume | 9.84 x 8.3 x 8.3 inches (250mm x 210mm x 210mm) |
| Material | 1.75mm PLA, ABS, ASA, PETG |
| Extruder Type | Direct Drive |
| Nozzle | .4mm |
| Build Platform | Magnetic Heatbed with removable PEI spring steel sheets |
| Power Supply | 240 Watts |
| Connectivity | USB, SD Card |
| Interface | 3.4-inch Mono LCD and click wheel |
| Filament Run-Out Sensor | Yes |
Included with Prusa MK3S+
The fully assembled Prusa MK3S+ ships with all of the accessories required to make your first print, and also includes enough spare parts to replace almost every fastener on the machine. The fully assembled MK3S+ also includes a bag of Haribo Goldbears, a signature addition from the Prusa team.
Image 1 of 2
(Image credit: Tom's Hardware)(Image credit: Tom's Hardware)The Prusa MK3S+ includes a full spool of silver PLA material, screwdriver, a metal part scraper, a glue stick (for adhesion), an isopropyl alcohol wipe, lubricant for the linear rails, power and USB cables, a sheet of stickers, a printed handbook, and a diagnostic printout that confirms the functionality of the mechanical and electrical systems.
Image 1 of 2
(Image credit: Tom's Hardware)(Image credit: Tom's Hardware)The usefulness of the handbook is hard to overstate. When you’re starting out with your first 3D printer, it can be difficult to pinpoint the cause of problems such as loss-of-extrusion, poor layer adhesion, or a clogged extruder. The included handbook is full of detailed photographs, troubleshooting workflows, and solutions to common problems. This is an invaluable resource for beginners, amateurs, and experts alike, and it’s clear to me that Prusa has set the standard for technical documentation.
Setting up the Prusa MK3S+
(Image credit: Tom's Hardware)The Prusa MK3S+ ships with a completed print attached to the build platform. This print features a serpentine line with 90 degree angles, curves, and a solid block in the center with the Prusa logo facing upwards. This print serves to confirm that the printer is functional and has been properly assembled and calibrated. I was able to easily remove the print from the build platform by bending the steel sheet and carefully removing it.
(Image credit: Tom's Hardware)After powering on, the printer automatically runs through an initial setup process. This process involves calibrating the Z axis by running it all the way to the top of the printer, running the mesh bed leveling process to set the Z offsets, and loading the filament. This entire process only took me a few minutes, and the high level of automation involved means that the only thing I needed to do was insert the filament into the extruder after it had heated up.
You might be surprised to find that the Prusa MK3S+ is based on the RepRap i3 (third iteration) frame, originally released in September of 2012. Despite this nearly decade-old release date, the MK3S+ is full of modern advancements and enough innovative features to still be a top contender in the prosumer 3D printer market.
Image 1 of 2
(Image credit: Tom's Hardware)(Image credit: Tom's Hardware)The bright orange color makes the 3D printed parts on the MK3S+ easy to spot. The brackets mounted to the printer are printed in-house by Prusa using their own Prusament PETG filament. These brackets are robust and sturdy, and the uniform appearance between the printed parts give the printer a professional appearance. This version of the MK3S+ shipped with orange printed brackets, but the printer is also available in an all-black variant. A large selling point of the MK3S+ is the open-source nature of the machine, which means the printed parts are all available to download if you want to download, modify, or print them out yourself.![]()
The monochrome LCD interface and click-wheel on the MK3S+ is one of the few less-than-impressive features on this machine; it feels dated and the UI navigation can be a little clunky. This stands in contrast with printers like the Anycubic Vyper, a sub-$400 machine that features a bright and responsive color touchscreen that shows detailed print statistics during printing. This monochrome display was industry standard when the original 8-bit i3-style of printers was introduced, but it feels outdated when compared to recent printers with color touchscreens.
(Image credit: Tom's Hardware)The MK3S+ uses a filament spool holder that mounts directly to the frame of the printer. The T-shaped holder is able to hold two spools simultaneously, which is ideal if you plan on swapping between multiple colors to produce a multicolor 3D print. The direct-drive extruder on the MK3S+ feeds filament straight down into the hot end, so mounting the filament directly above the extruder gives the filament a straight path between the spool and the extruder.
At the heart of the MK3S+ is the 8-bit Einsy RAMBo board, housed in a 3D printed enclosure mounted to the frame of the machine. This board is equipped with Trinamic 2130 silent stepper drivers, user-replaceable fuses, and the cable management is clean and professional.
The features made possible by this board (power-panic, live-Z adjust, silent steppers) were all major leaps when originally introduced, but many of these features have made their way down to less expensive FDM 3D printers like the Elegoo Neptune 2. The interface feels sorely in need of an update, and the addition of a color touchscreen and a 32-bit board (such as the one equipped on the Prusa Mini+) would refresh this platform.
(Image credit: Tom's Hardware)The attention to detail on the Prusa MK3S+ is clear, and a perfect example of this is the wire management across the machine. Current-carrying wires are attached to the extruder module with zip ties that act as a strain-relief to prevent the wires from fatiguing and separating. The wires from the power supply are tucked neatly under the frame of the machine, out of sight and reach from users to prevent accidentally unplugging them during printing.
What Makes the Prusa MK3S+ Different?
It can be hard to understand why the Prusa MK3S+ costs so much more than a printer like the Creality Ender 3 Pro, which seems to have similar specs on paper. To understand why this machine is so much more expensive, we need to take a closer look at the individual components of the MK3S+.
(Image credit: Tom's Hardware)Critical to the success of the MK3S+ is its custom-made Delta 240 Watt power supply, mounted to the frame of the machine. This unit supplies 24V power to the bed with a max current of 10 Amps, which provides fast and reliable heating for printing high temperature materials like PETG and ASA. Less expensive machines typically use lower wattage power supplies, such as the 150W power supply used by the Flashforge Adventurer 3 Lite, which take longer to heat and can have difficulty maintaining a higher temperature.
The 24V heated bed is able to reliably hit 100C, which is more than enough to allow high temperature materials like PETG and ASA to adhere to the build platform without delaminating. The magnetic build platform is firmly held in place without any clips or latches and can easily be removed once it cools to room temperature. PETG in particular is easy to remove from the textured surface of the textured spring steel sheet, and the MK3S+ build platform is best-in-class for high-temperature adhesion.
Image 1 of 2
(Image credit: Tom's Hardware)(Image credit: Tom's Hardware)The MK3S+ is equipped with a genuine E3D hot end, and it has the holographic sticker to prove it (seriously). E3D manufactures every component in the hot end from the nozzle to the heatbreak which means you are very unlikely to run into the type of manufacturing defects that occasionally pop up on less expensive printers (incorrectly drilled nozzles, degraded PTFE tube liner, etc. ) In addition, this nozzle is rated for a max temperature of 300C (572F), which is easily hot enough to extrude most common thermoplastics and even some higher-temperature engineering-grade materials like Nylon and Polycarbonate.
Image 1 of 2
(Image credit: Tom's Hardware)(Image credit: Tom's Hardware)The printed parts on the MK3S+ are a perfect example of a company applying its in-depth knowledge of a subject to its product. The printed brackets found on the MK3S+ have been printed in PETG, and the outward-facing textured surface shows the level of quality you can expect from using a textured sheet.
In addition, I appreciate that Prusa has applied DFAM (Design for Additive Manufacturing) principles to these parts. These DFAM principles include concepts like printing hexagons instead of circles for relief holes, which print without requiring support material, and printing brackets perpendicular to their intended load to create mechanically tough parts.
(Image credit: Tom's Hardware)The Prusa MK3S+ comes equipped with a SuperPINDA probe which is used for hands-free leveling of the build platform. The SuperPINDA (which stands for Super Prusa INDuction Autoleveling sensor) operates by detecting the proximity of the probe to the build platform and storing that information in firmware. The MK3S+ isn’t the first printer to use a probe for bed leveling, but the software implementation in PrusaSlicer means that after the printer has been set up, you can print without spending much time thinking about calibration.
Compared to the manual bed leveling process of a printer like the Creality Ender 3 Pro, the MK3S+ is faster, easier to use, and requires less trial and error. PrusaSlicer includes a “G80” command in the start G-code (the instructions the printer reads when making a part), and this command performs a ‘Mesh Bed Leveling’ which probes the bed in a 3x3 grid to create a mesh surface that is used for calibration. This mesh surface causes the Z-axis motors to undulate over uneven areas while the print head remains perpendicular in the X/Y axis. During my testing, I didn’t need to run a single non-print calibration on the printer after the initial mesh bed leveling.
Build Platforms on Prusa MK3S+
(Image credit: Tom's Hardware)Removing a printed part from the build platform of a 3D printer can be a challenging experience if the printer isn’t calibrated correctly. The Prusa MK3S+ attempts to solve this problem by using a removable build platform that is held in place magnetically and can be flexed to remove parts after the platform has cooled. I’ve tried many different types of build surfaces, and the smooth PEI sheet used by Prusa is by far one of the easiest to print on, remove parts from, and clean.
(Image credit: Tom's Hardware)Prusa also offers a textured steel build platform for the MK3S+ that has a gritty surface which can give printed parts a more uniform appearance. In fact, the signature textured look of the printed parts on the MK3S+ come from this build platform.
Parts printed on a smooth build platform will have a smooth bottom surface, which looks visually distinct from the striations on the sides of the part. By using a textured sheet, I was able to make prints that have a textured appearance on the bottom as well as the sides. This sheet is ideal for printing with PETG; the high print temperature of the material requires a textured surface to stick to, but also needs a surface that it can easily detach from.
Printing on the Prusa MK3S+
(Image credit: Tom's Hardware)The sample prints on the included SD card with the Prusa MK3S+ are a refreshing change from the sample parts that are typically included with low-cost 3D printers. The MK3S+ includes 16 pre-sliced parts that have been prepared for PLA with the total print time included in the file name. The sample prints vary in time from 23 minutes (a simple block with the word PRUSA on it) to almost 14 hours (a castle printed at .1mm layer height), and have all been prepared using sensible settings for the machine and highlight various features (variable layer height, multicolor printing, and fine .1mm layer resolution).
Image 1 of 2
(Image credit: Tom's Hardware)(Image credit: Tom's Hardware)One of my favorite sample parts is the planetary gear bearing that prints in a single print. I printed this model using the Prusament Jet Black PLA material, and after removing it from the build platform I was able to easily spin the gear freely. This part really highlights the ability of the MK3S+ to produce parts with functional strength and purpose in addition to parts designed with aesthetics in mind.
(Image credit: Tom's Hardware)Another stand-out sample print included with the MK3S+ is the dragon model titled Adalinda the Singing Serpent by Loubie3D. This model takes a little longer to print (about 8 hours), but the final print is another favorite of mine. Because this model was sliced by Prusa for the MK3S+ printer, the sample print comes out with a high level of detail and no unexpected settings that can cause problems (too many exterior shells, no retraction, etc. ) like the sample prints included with other FDM 3D printers.
Printing with PrusaSlicer on the Prusa MK3S+
(Image credit: Prusa)Prusa has developed its own in-house slicer for the Prusa MK3S+, called PrusaSlicer. PrusaSlicer is a fork of the confusing-to-pronounce Slic3r app, which is also a free and open-source app. Prusa has invested a considerable amount of time and effort in PrusaSlicer, and this has translated into one of the most powerful 3D printing slicer apps available for desktop 3D printers on the market.
(Image credit: Prusa)The current version of PrusaSlicer (2.3.3) includes profiles for printers by Prusa, Creality, Lulzbot, and more, and also includes a library of material profiles. In addition to these profiles, PrusaSlicer also includes multiple print setting profiles, which range from ultra-high detail at 0.05mm layer height to a draft mode which offers .3mm layers fast print speed at the expense of reduced quality.
Slicing Models in PrusaSlicer for the Prusa MK3S+
(Image credit: Prusa)PrusaSlicer is a feature-rich program with a simplified interface that is accessible to beginners, experts, and everyone in between. I’ve spent a lot of time in the PrusaSlicer settings, and I appreciate how much work Prusa has put into making almost every parameter of the printing process addressable without creating an overwhelming interface.
The settings are broken down into three primary categories: Print Settings, Filament Settings, and Printer Settings. Print Settings generally focuses on the speed / quality of the print, Filament Settings is used to determine temperature and extrusion parameters, and Printer Settings is used for global parameters and determining start / stop instructions.
(Image credit: Prusa)The primary interface offers three settings: Simple, Advanced, and Expert. Simple offers a stripped-down experience with only a few parameters able to be adjusted, while Advanced and Expert allow you to adjust the print on a more granular level.
PrusaSlicer Quality Settings for the Prusa MK3S+ / PLA
(Image credit: Prusa)| Material | Prusa Basic PLA, Silver |
| Layer Height | 0.20 mm |
| Infill Percentage | 15%, Gyroid |
| Print Speed | 45mm/second |
| Extruder Temperature | 215 degrees Celsius (419 degrees Fahrenheit) |
| Heated Bed Temp | 60 degrees Celsius (140 degrees Fahrenheit) |
| Print Time | 1 Hour, 34 Minutes |
There are few prints that are better at testing out a printer than the 3DBenchy, so I used the included spool of silver Prusa PLA to print this model out using the default .2mm Quality PrusaSlicer settings. I was impressed with the overall quality of the Benchy, and even with a highly-reflective material like a silver PLA which can highlight defects from uneven layers, the layers looked even and consistent throughout.
Image 1 of 2
(Image credit: Tom's Hardware)(Image credit: Tom's Hardware)The Benchy boat model is designed to highlight various features of a printer (such as the ability to print steep overhangs, small features, etc.), and a quick examination of the model shows that the MK3S+ performed very well and didn’t have any of the common defects typically seen on this model.
PrusaSlicer Spiral Vase Settings for the Prusa MK3S+ / PLA
(Image credit: Prusa)| Material | Prusament PLA, Galaxy Purple |
| Layer Height | 0.20mm |
| Infill Percentage | 0% |
| Print Speed | 60mm/second |
| Extruder Temperature | 215 degrees Celsius (419 degrees Fahrenheit) |
| Heated Bed Temp | 60 degrees Celsius (140 degrees Fahrenheit) |
| Print Time | 3 Hours, 9 Minutes |
Slicing a model using the ‘Spiral Vase’ mode in PrusaSlicer will automatically create a model that is composed of a single continuously rising helical contour, which allows models to be printed a fraction of the time it would normally take to print using multiple layers. This mode is ideal for printing objects like vases or enclosures that only require a single contour as opposed to multiple contours and an infill structure. I printed the Curved Honeycomb Vase by eggnot to highlight this printing mode.
The Prusament Galaxy Purple is a favorite color of mine due to the glitter additive in the filament. This additive creates layer lines that are evenly blended and have a textured appearance. Combining this material with the Spiral Vase mode produces parts that look almost conventionally manufactured, with layer lines that are difficult to see. This model printed in just over 3 hours in Spiral Vase mode, as opposed to over 13 hours if it had been printed using conventional settings.
PrusaSlicer Speed Settings for the Prusa MK3S+ / PETG
(Image credit: Prusa)| Material | Prusament PETG, Chalky Blue |
| Layer Height | 0.2mm |
| Infill Percentage | 15%, Grid |
| Print Speed | 60mm/second |
| Extruder Temperature | 250 degrees Celsius (482 degrees Fahrenheit) |
| Heated Bed Temp | 90 degrees Celsius (194 degrees Fahrenheit) |
| Print Time | 4 Hours, 5 Minutes |
Image 1 of 2
(Image credit: Tom's Hardware)(Image credit: Tom's Hardware)PETG is a material that offers increased mechanical toughness, heat resistance, and flexibility when compared with parts printed with PLA. Prusa has taken advantage of these material properties by printing many of the components on the MK3S+ with PETG, which creates a rigid part that is able to withstand mechanical stress. PETG is also notoriously difficult to print with due to the high level of stringing that can occur when printing multiple parts simultaneously, but I didn’t have any issues when printing with the Prusament PETG material on the MK3S+.
Image 1 of 2
(Image credit: Tom's Hardware)(Image credit: Tom's Hardware)I used the default settings in PrusaSlicer to print the clamp model provided by Prusa that was designed specifically for PETG. This model features a functional thread, a flexible ball-and-socket joint, and can be tensioned without snapping the body of the clamp. The part printed in multiple pieces without stringing, and I was able to easily assemble it and verify functionality without damaging the clamp. If printed in a more brittle material (like PLA), I would expect the clamp to crack at a transition point on the body, but the PETG was able to hold tension without deforming or breaking.
PrusaSlicer 3MF Import for the Prusa MK3S+ / PLA
(Image credit: Prusa)| Material | Prusa Basic PLA, Silver |
| Layer Height | 0.20mm |
| Infill Percentage | 15%, Grid |
| Print Speed | 60mm/second |
| Extruder Temperature | 215 degrees Celsius (419 degrees Fahrenheit) |
| Heated Bed Temp | 60 degrees Celsius (140 degrees Fahrenheit) |
| Print Time | 2 Hours, 17 Minutes |
PrusaPrinters (the online file repository created and maintained by Prusa) offers the unique ability to share 3D printable files that have been pre-sliced and prepared for the MK3S+ with detailed print statistics available from the site. A perfect example of this is the Bag Clip by Andrei; a cam-driven bag clip that highlights the type of design freedom offered by a 3D printer.
This model has been uploaded as a . 3MF file that contains all of the information required to print, such as slicer settings, nozzle and bed temperature, and custom support structures (visibile in the screenshot above.) 3MF is an increasingly popular alternative to the STL file, which doesn’t contain much information aside from the raw geometry of a model.
This part printed flawlessly on the first try, and the provided .3MF (or .gcode) allows a user to send this file to anyone else with the same printer and material and feel confident that the part will be indistinguishable in appearance and performance. I’ve always thought of a 3D printer as the replicator from the Michael Crichton novel Timeline, which is able to produce identical objects at various locations by converting them into digital information. However, the success of a part is frequently beholden to the settings selected by a user for fabrication, so the ability to share the fabrication plans is one step closer to being able to send a physical product as a form of digital data.
At a price-point of $999 for an assembled printer (or $749 for a kit), the Prusa MK3S+ is a machine that doesn’t compromise on user experience and is absolutely one of the best 3D printers currently on the market. The MK3S+ has a professional and neat appearance, but the 8-bit monochrome LCD user interface might be a challenge for some users to get past, given the steep price. Interface aside, the prosumer features of the MK3S+ make it a stand-out machine for anyone who is looking for a reliable machine to produce functional parts without worrying about spending a lot of time tinkering.
If you are looking for a less expensive machine outside of the Prusa ecosystem, the Elegoo Neptune 2 (currently on Amazon for $180) offers similar printing size and features (with the notable exception of automatic bed leveling) at a fraction of the price but without the same level of robust support and documentation provided by the MK3S+ or any of the name-brand components like the E3D hotend. If you want the Prusa experience but are looking to spend a little less money, the Prusa Mini+ (available from Prusa for $399 assembled, $349 for a kit) is an excellent place to start.
Andrew Sink first used a 3D printer in 2012, and has been enthusiastically involved in the 3D printing industry ever since. Having printed everything from a scan of his own brain to a peanut butter and jelly sandwich, he continues to dive ever more deeply into the endless applications of additive technology. He is always working on new experiments, designs, and reviews and sharing his results on Tom's Hardware, YouTube, and more.
Creality Ender 3 S1 Pro Review: All the Bells and Whistles
Tom's Hardware Verdict
Creality took its most popular budget 3D printer and decked it out with all the upgrades, saving you time, and even a little money.
Pros
- +
Quality prints
- +
Easy assembly
- +
Auto bed leveling
- +
Direct drive
- +
Touch Screen
Today's best Creality Ender 3 S1 Pro deals
$499
View
The Creality Ender 3 S1 Pro is quite a mouthful, but it’s also quite a printer. Shortly after announcing the deluxe Ender 3 S1, Creality inexplicably added even more features to their trusty workhorse and dubbed it the “pro” version.
None of these new features will make you throw your S1 in the garbage, but they are enticing if you’re stepping up from an Ender 3 Pro or V2 model. Ready to compete with the best 3D printers on the market, the Ender 3 S1 Pro comes with Creality’s first all metal hotend, a PEI flex plate, a touch screen, an improved spool holder and a built-in light kit.
That’s on top of core improvements already introduced in the S1 version, such as a direct drive, dual Z axis, auto bed leveling, and a slot for a full sized SD card.
Retailing at $479 on Creality’s website , this printer is a far cry from its budget minded roots. It’s still $360 cheaper Prusa MK3S+ kit, but nearly twice the price of basic Ender 3s still on the market. Those bargain basement Enders are still popular because they are so easily upgraded. Nearly everything that comes on an Ender 3 S1 Pro can be added to a classic Ender 3, if you’re willing to spend at least $350 in parts and add them to the old printer yourself (which is a hassle and costs more if you don’t already own an Ender 3).
- Creality Ender 3 S1 Pro (Grey) at Amazon for $499
Specifications: Ender 3 S1 Pro
| Machine Footprint | 6490 x 455 x 625 mm (19.2 x 18 x 24.5 inches) |
| Build Volume | 220 x 220 x 270 mm (8.5 x 8.5 x 10.5 inches) |
| Material | PLA/PETG/TPU/ABS |
| Extruder Type | Direct Drive |
| Nozzle | .4mm (Interchangeable) |
| Filament Runout Sensor | Yes |
| Bed Leveling | CR Touch |
| Connectivity | SD card, Type-C USB |
| Interface | Color Touch Screen |
Creality Ender 3 S1 Pro: Included in the box
(Image credit: Tom's Hardware)The Ender 3 S1 Pro comes with everything you need to get your printer set up. You get tools to build and maintain the printer, side cutters, a metal scraper, a nozzle cleaner, a spare nozzle, an extra Z limit switch, and a full sized SD card with a USB adapter. There’s also a small sample of white PLA to print your first model.
The SD card has two short videos, one on assembling the printer, and another on how to level it. You also get a PDF copy of the manual, a copy of Creality Slicer 4.8.0 and models in both pre-sliced .gcode and .stl format.
(Image credit: Tom's Hardware)The Ender 3 S1 Pro is quite a bit flashier than the old Ender 3s, but only slightly different from the previous S1.
The Ender 3 S1 Pro has a modern look, with an all-in-one design, smooth metal frame and flat cables. It has Creality’s newest direct drive, the all metal Sprite, which not only improves performance, but does away with the need for a Bowden tube.
The direct drive is an all metal, dual gear unit that works beautifully. It’s a little industrial looking compared to the rest of the machine, but the lack of plastic housing serves to cut down on weight. It’s a titanium heat break allows it to heat up to a toasty 300 degrees. This allows us to print more materials, but more important, cuts down on nasty clogs from burnt PTFE tubes.
The Creality Sprite extruder is shipped unmounted and attaches with a few easy to reach screws. It’s meant to be simple to remove, so you can swap it with a laser kit , purchased separately. We’ll be reviewing the laser at a later date.
(Image credit: Tom's Hardware)I’m still not loving the awkward front-mounted parts cooling fan, which makes it hard to watch your first layer go down. The machine also comes with a run out sensor mounted near the spool holder and power loss recovery.
Like the S1, the Ender 3 S1 Pro has a CR Touch for auto bed leveling, but kept the bed’s flexible springs and knobs. Should the CR Touch fail completely, or you just hate easy bed leveling, Creality included a Z limit switch you could add to convert it back to manual.
A final intriguing addition is a dual Z axis upgrade, something normally reserved for larger printers. The two lead screws are kept in sync with a belt for added security. The extra Z axis ensures smoother prints by giving the X gantry more support.
I was most excited to see my favorite upgrade – a PEI coated steel flex plate. The PC coated plate on the S1 was both too sticky and too floppy, and damaged a few vase mode prints.
(Image credit: Tom's Hardware)If you’ve used any Creality machine in the past, the new touch screen will throw you for a loop. The layout is completely different from all the old versions with a complex text menu that, honestly, doesn’t make a lot of sense in places. For example, the automatic preheat buttons are hidden under “manual” and bed leveling is stashed under settings.
(Image credit: Tom's Hardware)Assembling the Creality Ender 3 S1 Pro
(Image credit: Tom's Hardware)The Creality Ender 3 S1 Pro is mostly pre-assembled and comes together with a handful of neatly labeled bolts and screws. Creality learned from the S1 and made the paper manual much larger. If you find video easier to follow, you can watch a good assembly video on the included SD card.
I installed the gantry first. It fits into slots on the base unit and is held in place with 2 screws and 2 bolts on each side. Then I fitted the hotend assembly onto the X gantry with four screws. The control screen bolts to the side with 3 screws and the spool holder snaps into place on the top.
Wiring is very simple as everything is already attached to the frame and only needs to be plugged in.
Last, flip the power supply switch to match your main household electric, which is 115V in the U.S. Creality placed a giant sticker to make sure you don’t overlook the hidden switch.
(Image credit: Tom's Hardware)Leveling the Creality Ender 3 S1 Pro
(Image credit: Tom's Hardware)The Ender 3 S1 Pro comes with a CR Touch installed, Creality’s version of the popular BL Touch. It physically taps the build surface with a metal probe and works with both metal or glass surfaces.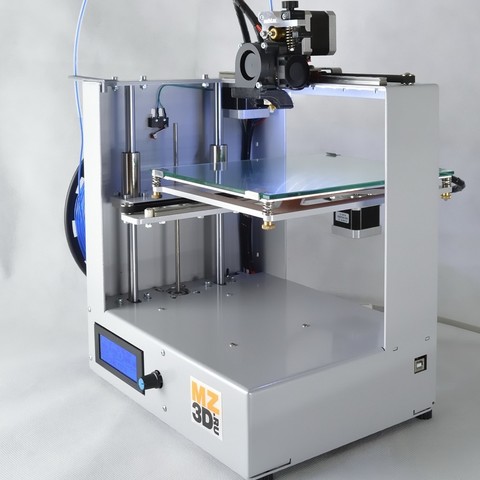
To level the printer for the first time, select Level from the settings menu. Click Start and the printer will immediately go into its leveling routine without preheating and tap 16 points around the bed.
(Image credit: Tom's Hardware)Now go back to the previous menu and click “Auto Level” to set the Z offset by sliding a piece of paper under the nozzle. Move the Z offset up or down until the nozzle just scrapes the paper. The printer I tested did not need to adjust the Z, it was perfect the first time.
If the CR Touch is unable to level the bed, you will need to do a manual level. Directions for this are in the manual.
Loading Filament on the Creality Ender 3 S1 Pro
(Image credit: Tom's Hardware)The Creality Ender 3 S1 Pro is the first Ender to include a filament loading routine in the control panel. This is located under Ready → In/Out. Click the nozzle icon, enter a number of millimeters you’d like to advance. 20 is a good place to start. If the nozzle is not hot, the Ender 3 S1 Pro will automatically warm up to 200 degrees, then advance the filament.
To unload material, just reverse the process.
Preparing Files / Software for Creality Ender 3 S1 Pro
(Image credit: Tom's Hardware)The Ender 3 S1 Pro comes with a copy of Creality Slicer 4.8.0, which is simply an older version of Cura with Creality branding and every printer its ever made pre-loaded. PrusaSlicer is another popular alternative that’s also free and some consider easier to use.
The latest version of Cura (5.0) doesn’t have a profile for the Ender 3 S1 Pro, but you can use the profile for the Ender 3 Pro and adjust the build height to 270. PrusaSlicer has a profile for the Ender 3 S1, which has the same build size.
Printing on the Creality Ender 3 S1 Pro
The Creality Ender 3 S1 Pro printed wonderfully right out of the box. My first print was a pre-sliced Cat from the SD card – which was also the test print supplied with the S1. I turned out exactly the same, including the same little stray bit of filament on the mouth. This is printed using the sample filament.
I like to test bed adhesion with a print in place model, like a flexi toy. This dolphin from Flexi Factory fit the bill and printed very cleanly. I did a manual color swap just to use up some final scraps of PLA. This is printed in Inland Turquoise PLA and Matterhackers Pro Series Blue PLA. This took 3 hours and 55 minutes at a .2mm layer height and 60mms speed.
Model by Flexi Factory (Image credit: Tom's Hardware)I wanted to test TPU in an interesting way, so I ran this really cool coaster set from Trilobyte3D. It won a contest on Printables.com for, you guessed it, coasters! This is a three part print, with the leaves printed in TPU laying flat, then the stem and pot printing separately without supports. The leaves are made from Matterhackers Translucent Green TPU and come off the stem to place under your drink. The stem is Emerald City Green Silk from Polyalchemy Elixir and the pot is Protopasta Recycled PLA in Still Colorful 11. Everything was printed individually at a standard .2mm layer height, and the whole project took 19 hours and 45 minutes of printing time.
I’ve been looking for practical prints, and found it with this credit card cutlery model from jq910. I used Keene Village Edge Glow Glass PETG. It’s only a nine layers thick, but still quite sturdy. This printed in 36 minutes with a .2mm layer height and 60 mms speed.
Model by jq910 (Image credit: Tom's Hardware)To see just how big I can print with an Ender 3 S1 Pro, I took this Twisted Cloud Vase by PressPrint and expanded it 200% until it filled the bed. Then I ran it in Blue/Purple Evyone Matte Dual-Color PLA . It’s a vase mode print, so it only took 7 hours and 36 minutes at a .2mm layer height and 60 mms speed.
Model by PressPrint (Image credit: Tom's Hardware)The Ender 3 S1 Pro is a fantastic printer and a refreshing change of pace from its bare-bones beginnings. It’s easy to assemble and the CR Touch leveling system worked perfectly without a need to make any adjustments. The new PEI coated flex plate is great and all the little upgrades from light kit to all metal hotend make this printer feel like a complete consumer grade product. This isn’t a science project to stick out in the shed, it’s a real piece of hardware to sit proudly on your desk.
Retailing at $479, the S1 Pro has everything you need in a 3D printer, and more features than a lot of the competition. However, if you want the deluxe Ender experience and don’t need an all metal hotend, you can save a few bucks by getting the Ender 3 S1. Another feature packed printer we like is the Anycubic Kobra, priced at $319, it’s an Editor’s Choice and our pick for Best Printer for Beginners.
Denise Bertacchi is a Contributing Writer for Tom’s Hardware US, covering 3D printing.
top 10 rating according to KP
A 3D printer opens up incredible opportunities for a person. The first prototype of such a device was born back in 1984. The idea of the invention belongs to the American Charles Hull, he received a patent for it only two years after development. The printer was a rather massive industrial installation and, despite many inaccuracies and shortcomings in operation, the technology was used.
Hal co-founded 3dsystems, a leader in industrial 3D printers. However, this material is not dedicated to these large machines. 3D printing is becoming more and more part of everyday life. Thus, the technology is used to create unique toys, various models, figurines, packaging, clothes, shoes and jewelry. For these purposes, it is not at all necessary to purchase a large-sized printer. You can get by with a small device. It has a compact size, and its technology is completely identical to the industrial one. Heated plastic is fed through the nozzle (spout) of the device, which is laid out on the surface in accordance with the drawing specified in the program. And if earlier such a device was a luxury that only a few can afford, today a 3D printer is available to everyone.
Top 10 rating according to KP
1. Creality3D Ender 3
Creality3D Ender 3. Photo: market-yandex.ruOur rating opens with a model from the world's largest manufacturer of 3D printers. The Ender 3 features an elegant and thoughtful design, excellent print quality and a wide build area. Manufacturers have provided a good arrangement of wires that do not get confused during operation. The small control unit of the device is located to the right of the work surface. The gadget prints perfectly with various types of plastic. In particular, we are talking about varieties of ABS, PLA, TPU and PETG. The scope of this printer is quite wide. It can be used to produce minifigures, do artistic modeling, and make small prototypes of parts and functional elements.
Main characteristics
| Print technology | fdm/fff/pjp |
| Field | PLA, Wood |
| Workspace width | 220 mm |
| Workspace height | 250 mm |
| The depth of the workspace | 220 mm |
| Features | Heated table, displays, active cooling, nozzle change, USB, Micro SD |
| Press speed | 180 mm/sec | Number of extruders | 1 |
Pros and cons
Possibility of using various types of plastic, high quality of parts, reliable design
A small display that displays only basic information
2.
 FlashForge Adventurer 3 FlashForge Adventurer 3. Photo: market-yandex.ru
 The model from the Chinese developer FlashForge took the second position in our rating. The device is equipped with a Wi-Fi receiver, a removable heated pad for printing. In addition, manufacturers have provided a built-in webcam, a closed case and a color touch-screen display. The latter, although it does not support the Russian language, is intuitively understandable. The ergonomics of the device is provided by the filament sensor: if the printer runs out of plastic, it automatically goes into standby mode and does not idle.
Pros and cons
Webcam and Wi-Fi receiver allows you to monitor the work, unusual design, simplicity from anywhere in the world in the setup, the presence of a filament sensor
Despite the rather wide functionality, this model is hardly suitable for an experienced printer or a small production due to the small area of the working space, high price
3.
 FlyingBear Ghost 5 FlyingBear Ghost 5. Photo: market-yandex.ru from FlyingBear is ideal for semi-professional use. Uniform supply of filament (plastic) provides good opportunities for creating three-dimensional figures with a fairly high resolution. High productivity is achieved thanks to the transparent Dual Drive extruder with BMG double drive. The gadget has a body closed on three sides. Its walls are made of heat-resistant non-toxic ABS plastic. This protection prevents the accumulation of dust on the working parts of the device, which greatly facilitates the maintenance of the printer. The device is controlled using a 3.5-inch color TFT display.
 Main characteristics
| Print technology | fdm/fff/pjp | |||
| Field | for house/diy, initial level | |||
| Open Camera | Open Camera | Open Cam | ABS, PLA, Wood, HIPS | |
| Workspace width | 255 mm | |||
| Workspace height | 210 mm | |||
| Working space | 210 mm | |||
| Features | Heated table, display, active cooling, nozzle adjustment, temperature control | |||
| Connection | Wi-Fi, SD | , SD , SD 9001|||
| Print speed (extruder speed) | 150mm/s | |||
| Number of extruders | 1 | |||
| Printing accuracy | X, Y 0. 01 mm 01 mm | |||
| Positioning accuracy | Z 0.002 mm |
Pros and cons
Short power cord, inaccuracies in the Russian-language menu, weak airflow system.
4. Anet N4
Anet N4. Photo: market-yandex.ruThe budget model from the Chinese manufacturer Anet N4 is equipped with all the necessary functions for a small domestic production. The base of the device is made of cast aluminum alloy. The weight of the gadget does not exceed 9kg. A transparent tinted hood protects the work surface from external sources of ultraviolet radiation. It can be removed to remove the finished product and clean the printer. Also, manufacturers have provided a removable resin bath and a working platform, which greatly facilitates the use of the device.
Key Features
| Print Technology | LCD | |
| Application | Home/DIY Professional | 30 mm/h |
Pros and cons
Ability to use photopolymer resins from any manufacturer, high polymer curing speed
Small work surface, slightly inferior to competitors in some parameters
Photon Scu0bic0 Anycu0bic08 5. S. Photo: market-yandex.ru
 In the middle of our rating is the Anycubic Photon S model. It is equipped with an advanced optical system and a large working camera. The device has a matrix light source that provides a uniform luminous flux over the entire plane of the desktop. This allows a very high curing speed of the layers to be achieved. In addition, the printer has an original function that allows you to simultaneously print eight identical models. According to the developers, the target audience for this device are orthodontists and jewelers. Most parts of the device are made of plastic. This factor significantly reduces the weight of the device and makes it convenient to transport.
Plus and minuses
High printing quality
Small worktop
6. ELEGOO Mars Pro
ELEGOO Mars Pro. Photo: market-yandex.ru
 This model is significantly different from its predecessor Elegoo Mars. Thanks to the advanced Z-axis mechanics and directional UV light from the diode array, it is suitable not only for hobbies, but also for fields of activity such as dentistry and jewelry. In addition, the developers moved the USB connector to the front of the device. Now there is no need to constantly rotate the gadget in the process. The weight of the device is only 7.5 kg, which makes it very convenient for transportation. A translucent plastic cover will reliably protect against extraneous radiation and will allow you to monitor the production process.
The main characteristics
| Print technology | LCD |
| Scope | for home/diy, for medicine |
| Print speed: (layer build-up) | 22. 5 mm/h 5 mm/h |
| Print precision | X, Y 0.047 mm |
| Positioning accuracy | Z 0.125 mm |
| The wavelength of light source | 405 Nm |
PLASS AND MINCOUSS
Convenient price, LIGHT PRICE
9000 7. Two Trees Bluer Two Trees Bluer. Photo: market-yandex.ru
This is one of the most popular home models of 3D printers. It is ideal for getting acquainted with technology, various experiments, training and prototyping. Distinctive features of Two Trees Bluer are: "quiet" drivers, which are the engine of the device, a heated table, two-way airflow and a thread break sensor. The mechanics of the printer is quite simple, and at the same time very effective. The open type case will be very convenient when cleaning the work surface. The firmware of the device provides the functions of auto-calibration and automatic resumption of printing in case the power was accidentally turned off.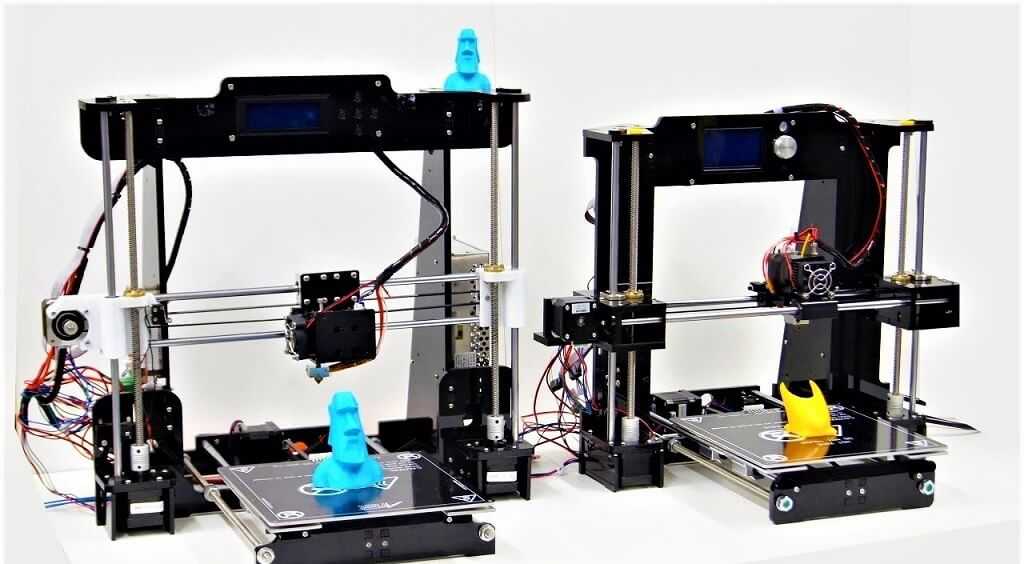
Pros and cons
Low price, easy and convenient to use
Lack of protection for the work surface, poor quality of spare parts
8. Wanhao Duplicator i3 Mini
Duplicator Mini i3. Photo: market-yandex.ruMiniature 3D printer does not look like other devices. However, this feature does not affect its technical characteristics. The plastic spool is located on the right side of the bracket. Wanhao branded coating is pasted over the table. There is no platform heating, so it is recommended to use PLA plastic for printing. The manufacturer clearly states in the manual that the printer is designed to work only with PLA material and nothing else. The body of the gadget is made of sheet steel. The memory card slot and all printer control elements - a monochrome liquid crystal display, a universal knob-button and a Reset micro-button - are placed on the front panel of the printer.
The main characteristics
| Print technology | FDM/FFF/PJP | ||||||||||||||||||||||||||||||||||||||||||||||||||||||||||||||||||||||||||||||||||||||||||||||||||||||||||
| Field | Educational, for House/DIY, for medicine | ||||||||||||||||||||||||||||||||||||||||||||||||||||||||||||||||||||||||||||||||||||||||||||||||||||||||||
| Openly Camera | Open | PLA | |||||||||||||||||||||||||||||||||||||||||||||||||||||||||||||||||||||||||||||||||||||||||||||||||||||||||
| Working space width | 120 mm | ||||||||||||||||||||||||||||||||||||||||||||||||||||||||||||||||||||||||||||||||||||||||||||||||||||||||||
| Working space height | 100 mm | ||||||||||||||||||||||||||||||||||||||||||||||||||||||||||||||||||||||||||||||||||||||||||||||||||||||||||
| The depth of the workspace | 135 mm | ||||||||||||||||||||||||||||||||||||||||||||||||||||||||||||||||||||||||||||||||||||||||||||||||||||||||||
| Features | displays, active cooling, speed control, temperature control | ||||||||||||||||||||||||||||||||||||||||||||||||||||||||||||||||||||||||||||||||||||||||||||||||||||||||||
| USB, SD card | ) | 70 mm/s | |||||||||||||||||||||||||||||||||||||||||||||||||||||||||||||||||||||||||||||||||||||||||||||||||||||||||
| Number of extruders | 1 | ||||||||||||||||||||||||||||||||||||||||||||||||||||||||||||||||||||||||||||||||||||||||||||||||||||||||||
| Printing precision | X, Y 0. 012 mm 012 mm | ||||||||||||||||||||||||||||||||||||||||||||||||||||||||||||||||||||||||||||||||||||||||||||||||||||||||||
| Print technology | FDM/FFF/PJP |
| Scope | Educational, for the house/DIY, Industrial, Professional Material |
| ABS, Flex, Nylon, PLA, PETG, SBS, CopperFILL, DuraForm TPU | |
| Working width | 220 mm |
| The height of the workspace | 250 mm |
| Dent of the workspace | 220 mm |
| Features | Heated table, Active streaming, Control adjustment, Tempension |
| USB, micro-SD | |
| Print speed (extruder speed) | 150 mm/s, |
| Number of extruders | 1 |
Pros and cons
Spacious work surface, robust housing
Little functionality for a rather high price, lack of work surface protection, few functions on the control screen.
10. Tianfour Sparkmaker
Tianfour Sparkmaker. Photo: market-yandex.ruThis model is ideal for beginners, as it does not require additional settings at all before starting work. Externally, the printer has the shape of a cylinder with a height of 27.5 cm and a diameter of 17 cm. The realistic contours and smooth curves of the figures are ensured by LCD technology. The printer works with any photopolymer resins for 3D printing with a flash length of 405nm.
How to choose a 3D printer
Choosing a 3D printer is not such a difficult task as it might seem at first glance. Despite the relentless interest in 3D printing and the incredible number of devices on the market, the basic requirements for models remain unchanged. Komsomolskaya Pravda turned to Svyatoslav Vulf, a blogger and host of a YouTube channel about modern technologies and experiments, for help in this matter. He regularly monitors new products on the 3D technology market and tests them at home.
Product size
Initially, you should decide what size of products you expect to receive in the end. The required area of the working surface depends on this. Note that the price of the device also depends on the size of the latter. For work at home, there will be enough indicators: 200 × 250 × 200 (WxHxD).
Technology
Today, there are several technologies for printing on a 3D printer. They differ significantly from each other. Let's consider some of them.
SLA-technology — works on the basis of a liquid photopolymer, which under the influence of laser light changes its physical properties and hardens. It allows you to create figurines with the highest precision of microforms.
DLP technology is an alternative SLA method. However, instead of laser systems, LED projectors are used here, which significantly reduce the cost of 3D printers. When using this technology, the future prototype is formed layer by layer.
The FDM method is ideal when prototypes are required that will be actively used and not just sitting on a shelf. Here, high-strength industrial plastics will be used for production. Please note that there are other technologies, but they are very similar to the above.
Material
Before buying a printer, you should also pay attention to what materials it works with, as they have significant differences from each other. For example, ABS can take many different polymeric forms. This is a very durable plastic. It is easily sanded and processed. PLA plastic is considered more environmentally friendly. It is made from agricultural products - corn, potatoes, beets and others. In its original form, it is transparent and can be colored. PLA is just as strong but tougher than ABS. The ductility and heat resistance of SBS make it the material of choice in engineering and mechanical applications.
Noise level and drivers
An important factor when choosing a 3D printer are drivers - device engines (not to be confused with software). They affect the overall noise level of the device. For example, if you buy a printer with cheap A4988, then even neighbors will hear its work. In this case, you should pay a little more and purchase a gadget with more expensive drivers.
Self-assembly
Some manufacturers prepare the model completely before sale. The buyer can only get the printer out of the box and connect the power. However, there are some models that require self-assembly. Be sure to consider this factor before purchasing. If you are purchasing such a device for the first time, then it will not be easy for you to assemble it.
TOP 15 best models in terms of quality and reliability
A 3D printer is a device used for 3D printing. In this article, we will tell you how to simplify the search for the necessary 3D printer model among the variety on the market. We analyzed the options available in online stores, studied their functionality, got acquainted with the technical characteristics and user reviews. Here we present the ranking of the best 3D printers for 2022. They are grouped by the most popular request categories.
Ranking of the best 3D printers for 2022
| Rank | Designation | Price | Description |
|---|---|---|---|
| Best 3D printers by price/quality for 2022 | |||
| 1 | Wanhao D12/500 | Ask for a price | User Choice Best Price/Quality for 2022 |
| 2 | Creality 3DPrintMill CR-30 | Ask for a price | High quality 3D printer using conveyor printing method |
| 3 | Phrosen Schuffle XL Lite | Ask for a price | Stable and easy to use large format 3D printer |
| Best Kids Educational 3D Printer | |||
| 1 | Creality Ender 7 | Ask for a price | The best children's educational 3D printer |
| 2 | Anycubic Vyper | Ask for a price | Excellent value for money 3D printer with new board and high performance control chip |
| 3 | Flying Bear Aone | Ask for a price | Budget model of children's educational 3D printer |
| Top Industrial 3D Printers | |||
| 1 | Anycubic Photon Mono X | Ask for a price | Experts voted the best industrial printer today |
| 2 | Phrozen Sonic Mighty 4K | Ask for a price | Robust 3D printer for industrial projects |
| 3 | CF Chef | Ask for a price | New chocolate 3D printer which is suitable for making various kinds of chocolate figurines |
| Top Resin 3D Printers | |||
| 1 | Creality HALOT ONE PLUS | Ask for a price | Best Large Area Resin 3D Printer Chosen by Users Today |
| 2 | Phrozen Sonic 4K 2022 | Ask for a price | Good photoresin 3D printer often used in dentistry and dental laboratories |
| Best Home 3D Printers | |||
| 1 | Creality Ender 3 Pro | Ask for a price | Best 3D printer for home projects |
| 2 | Flash Forge Adventurer 3 | Ask for a price | Reliable and high quality 3D printer for various home projects |
| Best Inexpensive 3D Printers | |||
| 1 | Creality Ender 3 | Ask for a price | Best budget 3D printer available as a do-it-yourself device |
| 2 | Anycubic Mega-S | Ask for a price | Inexpensive 3D printer model with excellent functionality |
Contents
- Top 3D printers for 2022
- How to choose a 3D printer?
- Best value for money 3D printers for 2022
- printing technology and volume;
If you are going to produce high precision and small parts, SLA or DLP is the way to go.
 If the range of tasks is wider and low manufacturing cost is important, then your choice is an FDM printer.
 - workspace size;
Many 3D printers have a working space of 200x200x200mm. This is enough for most tasks. However, you may need a smaller size, or vice versa, you will need a larger one, it depends on your needs.
- print precision;
Nozzle size affects print accuracy. Not only smooth layers depend on it, but also the detailing of the model. A smaller nozzle diameter gives more detail, but slower production speed. Many printers have the ability to change the nozzle for a specific task.
- platform heating;
The presence of this function ensures better adhesion of the first layer. Engineering plastics, for example, cannot be used without heating the table, since the figures can warp.
- camera type;
Can be open or closed.
 The latter options are usually presented on more expensive and advanced models.
 - number of extruders;
When printing complex elements, you will need a model with two materials and corresponding extruders in order to be able to print supports from soluble material. Models with a large number of angles greater than 30 degrees or a large number of hanging elements are called complex. If the models are not too complex, one extruder will suffice, which will greatly help save the budget.
- print speed;
The parameter implies the maximum head movement speed. A 14x4x10 tablet stand will print approximately 6-6.5 hours at 100mm/sec.
- functionality;
Printers can support wireless communication with various devices: phones, tablets, etc., as well as memory devices. Plus, as a rule, printers are already equipped with software when they are sold. Pay attention to the compatibility of the OS with the OS of the computer.

Best Price/Quality 3D Printer for 2022
1. Wanhao D12/500
Wanhao D12/500 is the best price/quality 3D printer for 2022 as voted by users. A 3D printer that is great for mass production. The optimal size of its zone makes it possible to print a large model in one cycle. The control system here is intuitive and clear, the user can easily calibrate the printer to fit his needs.
Wi-Fi wireless connection helps you connect to your PC or laptop. Extruders will allow you to print using supports. The color display with touch keys will be an excellent assistant in setting up the device.
Designed with a heavy duty frame and adjustable straps. The working surface is automatically heated to achieve adhesion to the first layers of plastic. The switch is equipped with 2 fuses for emergency protection.
Specifications:
- Print technology: FDM/FFF/PJP
- working space dimensions: 500x500x500 mm;
- print speed (extruder speed): 150 mm/s;
- number of extruders: 2;
Features:
- 2 extruders;
- high print speed;
- workspace size;
Drawbacks:
- cost;
2.
 Creality 3DPrintMill CR-30
 The Creality 3DPrintMill CR-30 is a quality 3D printer using a conveyor printing method, which is perfect for small and medium businesses with the ability to organize mass production. Instead of a platform, there is a nylon-based transport tape with excellent adhesive properties.
The design allows printing of long products of non-standard dimensions. Three powerful fans provide excellent airflow. Management is carried out using a convenient display, which is located on the right side of the case. There is an SD slot for downloading files offline.
End of filament sensor will stop the device if the filament breaks. In the event of a power failure, auto-update will help restore functionality. The maximum extruder temperature is 240 degrees.
Specifications:
- Print technology: FDM/FFF/PJP;
- working space dimensions: 200x170 mm;
Advantages:
- wireless connection;
- the ability to adjust the temperature and speed;
- is suitable for small and medium businesses;
Disadvantages:
- noisy;
3.
 Phrosen Schuffle XL Lite
 The Phrosen Schuffle XL Lite is a stable and easy to use large format 3D printer. It makes it possible to print both large models as a whole, and many small ones at once. The new matrix shows excellent print accuracy. The software is included in the kit, so it is quite easy to manage the device.
The printer is suitable for dentistry, jewelry and prototyping as it prints reliably with high precision. The double linear guide guarantees long-term operation without interruption.
Operation is simplified by the large and bright display with an easy-to-use touch panel. The device can be used not only by professionals, but also by amateurs. Z-axis of the printer is stable, has zero fluctuations during printing.
Specifications:
- print technology: DLP, LCD;
- print material: photopolymer;
Advantages:
- acceptable cost;
- high precision printing;
- stable Z-axis;
Disadvantages:
- sometimes there are some difficulties when changing already programmed material;
Best Kids Educational 3D Printer
1.
 Creality Ender 7
 The Creality Ender 7 is the ultimate children's educational 3D printer and one of the fastest in the mainstream segment. Its speed is its main trump card, but you need to remember that it is impossible to work with some types of thermoplastic at high speed. In general, not very high-precision details are printed quickly.
Operation is carried out using a convenient display, which is located in the central part of the housing. For downloading files offline, there is an SD slot and a USB connector. The maximum extruder temperature is 260 degrees.
The print platform is heated to 100 degrees. The nozzle has one of the most popular diameters of 0.4 mm. The printer is also equipped with a filament control sensor, and calibration is automatic.
Specifications:
- Print technology: FDM/FFF/PJP;
- working space dimensions: 250x250x300 mm;
- print speed (extruder speed): 250 mm/s;
Advantages:
- reasonable cost;
- high print speed;
- large working space;
Faults:
- small printable area;
2.
 Anycubic Vyper
 The Anycubic Vyper is a great value 3D printer with a brand new board and high performance Cortex M3 control chip. It features good speed and smooth operation. It prints not only accurately, but also silently. The platform has a high-strength coating that provides easy removal of the finished model.
The blower system consists of a pair of fans that will allow you to quickly cool the models. Management is carried out using a large touch screen. It features a new interface, simple and smooth operation, and the ability to switch languages to English and Chinese.
The electronic system automatically calibrates the platform with sixteen points. The dimensions of the device are compact, and the working space is large. Printing is recommended at a speed of 80-100 mm/sec.
Specifications:
- Print technology: FDM, FFF, PJP;
- working space dimensions: 245x260x245 mm;
- print speed (extruder speed): 100 mm/s;
Advantages:
- quick and easy to assemble;
- silent operation of the device;
- convenient and clear control;
Disadvantages:
- not very convenient location of the coil;
3.
 FlyingBear Aone
 The FlyingBear Aone is a low cost educational 3D printer for kids in a compact package suitable for home projects. It comes as a self-assembly kit. Its case is open, like many inexpensive models. The printing table is heated from 60 to 100 degrees Celsius.
Print speed up to 100 mm/sec. Management is carried out using a special color touch screen, which is located at the bottom of the printer.
The USB port can be used to connect to a PC or laptop, while the SD slot is suitable for stand-alone operation. The power supply is installed in the bottom of the case and is built-in. The extruder is equipped with a nozzle with a diameter of 0.4 mm.
Specifications:
- Print technology: FDM, FFF, PJP;
- working space dimensions: 190x190x190 mm;
- print speed (extruder speed): 100 mm/s;
Advantages:
- quick and clear assembly;
- inexpensive 3D printer;
- is easy to use for beginners;
Disadvantages:
- very noisy fans;
Best industrial 3D printers
1.
 Anycubic Photon Mono X
 Anycubic Photon Mono X is the best industrial printer according to experts today. It has the largest printable area among resin printers. It features good speed and smooth operation. It prints not only accurately, but also silently. The platform has a high-strength coating that provides easy removal of the finished model.
Controlled by large touch screen. It features a new interface, simple and smooth operation. The dimensions of the device are compact, and the working space is large.
Printing recommended at 80-100 mm/sec. The printer is equipped with a wireless Wi-Fi connection to connect to the Internet, to a computer or laptop. The matrix light source consists of UV LEDs. This improves accuracy and reduces exposure time.
Specifications:
- Print technology: LCD, SLA;
- working space size: 120x245x192 mm;
Advantages:
- high detail;
- large print height and area;
- comfortable and bright screen;
Disadvantages:
- high cost of spare parts;
2.
 Phrozen Sonic Mighty 4K
 The Phrozen Sonic Mighty 4K is a robust 3D printer for industrial projects with a large build area and high print speed. It is an excellent choice for both creative and professional use. The new matrix shows excellent print accuracy.
The software is included, so the device is easy to operate. The printer is suitable for dentistry, jewelry work and prototyping, as it has a reliable print with high accuracy.
Double linear guide ensures long, trouble-free operation. Operation is simplified by the presence of a large and bright display with a convenient touch panel. The device can be used not only by professionals, but also by amateurs. Z-axis of the printer is stable, has zero fluctuations during printing.
Specifications:
- Print technology: DLP/LCD/SLA;
- working space dimensions: 200x220x125 mm;
- print speed (layer building): 80 mm/h;
Advantages:
- quiet operation;
- fast printing;
- compact dimensions of the device;
Disadvantages:
- high cost;
3.
 CF Chef
 CF Chef is a new chocolate 3D printer that is suitable for making various kinds of chocolate figurines. It can be used to create openwork chocolate toppers for confectionery, print corporate chocolate gifts, make text messages and logos, and print chocolate figures.
The dimensions of the printer are 300x300x380 mm, so it can be placed in any room, but the working area is quite large. The printing time of chocolate models depends on their complexity. The printer allows you to create 2D, 2.5D and 3D products. You can use a USB cable or a wireless WI-FI connection to connect to a computer. The printing speed can reach 100mm/s.
Specifications:
- print material: tempered chocolate and chocolate glaze;
- print speed: 100 mm/s;
Advantages:
- the ability to connect to a computer or laptop;
- good print speed;
- suitable for the food industry;
Drawbacks:
- cost;
Top 9 Resin 3D Printers0007
1.
 Creality HALOT ONE PLUS
 The Creality HALOT ONE PLUS is the best large area resin 3D printer according to users today. It can be used for both business and home projects. The device is controlled using a convenient display, which is located in the central part of the case.
Wi-Fi port and USB port for uploading files and updating firmware. The nozzle has one of the most popular diameters of 0.4 mm. The printer is also equipped with a filament control sensor, and calibration is automatic.
UV source for improved detail and print quality. Windows and Mac OS are compatible with the printer. Quad-core ARM Cortex M4 processor provides high power and performance, as well as stable operation.
Specifications:
- Print technology: LCD;
- working space dimensions: 102x160x172 mm;
Advantages:
- low cost;
- the presence of a USB connector;
- UV source;
Drawbacks:
- 1 extruder;
2.
 Phrozen Sonic 4K 2022
 The Phrozen Sonic 4K 2022 is a good photopolymer 3D printer that is often used in dentistry and dental laboratories. The new matrix shows excellent print accuracy. The software is included in the kit, so it is quite easy to manage the device.
The printer is suitable for dentistry, jewelry and prototyping as it prints reliably with high precision. The double linear guide guarantees long-term operation without interruption.
Operation is simplified by the large and bright display with an easy-to-use touch panel. The device can be used not only by professionals, but also by amateurs. Z-axis of the printer is stable, has zero fluctuations during printing. In the event of an unexpected power outage, operation can be resumed from the point at which it was stopped.
Specifications:
- Print technology: DLP, LCD;
- working space size: 134x200x75 mm;
Advantages:
- improved accuracy;
- excellent performance;
- availability of various interfaces;
Disadvantages:
- very high cost;
Best Home 3D Printers
1.
 Creality Ender 3 Pro
 The Creality Ender 3 Pro is the ultimate 3D printer for home projects. It is quick to assemble, easy to understand and set up and ensures stable operation. Both an experienced user and a beginner can handle it.
Operation is carried out using a convenient display, which is located in the central part of the housing. For downloading files offline, there is an SD slot and a USB connector. The nozzle has one of the most popular diameters of 0.4 mm.
The printer is also equipped with a filament control sensor and calibration is automatic. The device can be used both as a main and as an additional to professional equipment. Branded power supply makes the device more stable. The camera of the printer is open, like many inexpensive models.
Specifications:
- Print technology: FDM, FFF, PJP;
- working space dimensions: 220x250x220 mm;
- print speed (extruder speed): 180 mm/s;
Pros:
- is great for beginners thanks to easy assembly;
- simple and inexpensive repair;
- inexpensive model;
Disadvantages:
- noisy model;
2.
 FlashForge Adventurer 3
 FlashForge Adventurer 3 is a reliable and high quality 3D printer for various home projects. With its use, you can print pre-prepared files. The device has a closed chamber. The supply end sensor will tell you when to add it. The printer will automatically stop when the media runs out.
The nozzle has a typical diameter of 0.4 mm. It is made of stainless steel, which perfectly resists mechanical stress and quickly warms up during operation. LAN, USB and WI-FI interfaces allow you to connect to a computer or laptop. The printer is compatible with all major operating systems: Windows, Linux, MAC, which will be a big plus. The main working program FlashPrint will provide professionals and hobbyists with all the basic functions to work with.
Specifications:
- print technology: FDM, FFF, PJP;
- working space size: 150x150x150 mm;
- print speed (extruder speed): 100 mm/s;
Advantages:
- convenient and clear slicer;
- works silently;
- flexible detachable platform;
Disadvantages:
- expensive to repair;
Best Inexpensive 3D Printers
1.
 Creality Ender 3
 The Creality Ender 3 is the ultimate budget 3D printer that comes as a DIY kit. The device is controlled using a convenient display, which is located in the central part of the case. For downloading files offline, there is an SD slot and a USB connector.
One of the most popular nozzle diameters is 0.4 mm. Mechanical and electronic parts of the device are separated from each other. The device can be used both as a main and as an additional to professional equipment.
Proprietary power supply makes the device more stable. The camera of the printer is open, like many inexpensive models. The workspace allows you to manage most projects. Even a beginner can handle this device.
Specifications:
- Print technology: FDM, FFF, PJP;
- working space dimensions: 220x250x220 mm;
- print speed (extruder speed): 180 mm/s;
Pros:
- platform area is great for most applications;
- simple and clear assembly;
- budget model;
Disadvantages:
- slightly skewed in the Z-axis due to design features;
2.

Learn more