Ciclop 3d scanner upgrade
CowTech Ciclop 3D Scanner
CowTech Ciclop 3D Laser Scanner
Over $180,000 raised on Kickstarter! 1700+ scanners sold and counting.
The 3D printing revolution has come, and it’s time for 3D scanning to follow. The CowTech Ciclop is a RepRap 3D scanner with a large scan volume, simple, yet elegant design, and a disruptive price point that blows any other laser scanner out of the water. The user prints the plastic parts on their own printer in any color and resolution they choose, and can assemble the scanner in less than 30 minutes. Then, simply take any object you want to replicate, set it on the 200mm laser cut acrylic turntable, and start scanning. We wanted to make sure our product was usable for anyone who owns a 3D printer, so we meticulously designed our parts for a print bed volume of only 115mm x 110mm x 65mm (4.5 x 4.3 x 2.6in) so they can be produced on even the smallest of printers.
Print your own parts and save money!
How It Works
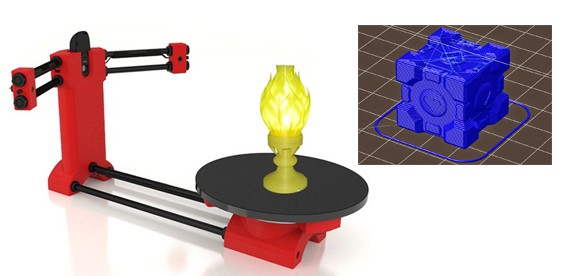
Laser scanners are a very common type of 3D scanner that use a pair of line lasers that flash in succession in combination with a camera and a rotating turntable. As the lines flash on the object, they trace the outline of the object in red light. The camera then picks up the location of the laser lines in 3D space, converting those lines into hundreds of thousands of points, and as the turntable rotates, every side of the object is scanned into a cloud of points, which can then be stitched together to form a mesh that replicates the surface of the object with up to 0.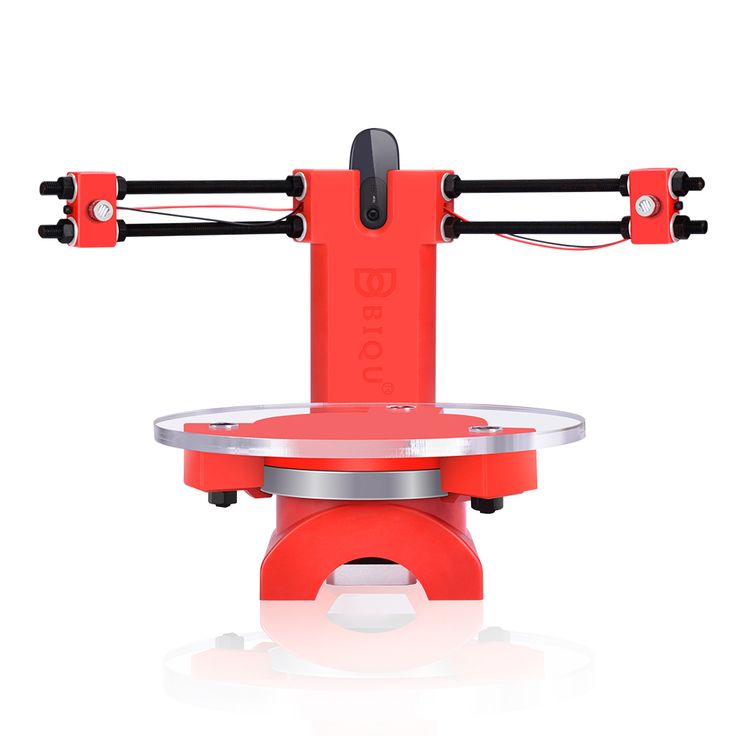 5mm precision.
3D printed model lion, 0.2mm resolution, PLA, Prusa i3
The term 3D scanner is a bit of a misnomer. Technically, most 3D scanners are actually point cloud generators. The scanner itself is a tool to make a .PLY file, or a point cloud, made up of hundreds of thousands of points that represent the geometry of the object. The typical user will want to convert this point cloud to an .STL file, which can easily be printed on a 3D printer.
Scanned and post processed model loaded into Cura for slicing alongside the model mesh in CloudCompare
User submitted 3D prints
Once you have a digital 3D file of the part, the possibilities are endless. The CowTech Ciclop uses Horus, software developed by BQ for their version of the scanner. Unfortunately, Horus doesn't support direct .STL exports at this time, but this feature may be developed in later versions of the program. Fortunately, there are many options for post processing programs that can stitch the point clouds together into a printable file.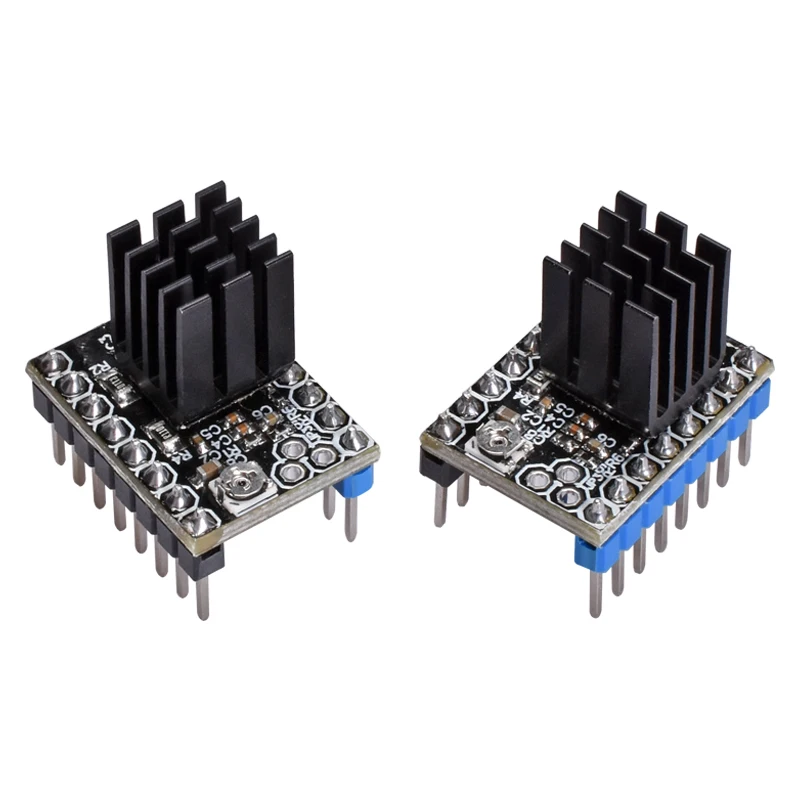 These include Meshlab, Cloudcompare, Netfabb, Blender, and more. We recommend Meshlab and Cloudcompare, and provide detailed documentation with the scanner on how to use these programs.
The CT Ciclop scanner is a fully open source Rep Rap project, and part files and details on how to build your own can be found in the downloads section of our website.
All laser scanners can struggle with objects that are very black, very shiny, or furry, as the laser doesn't register properly with the camera. The CowTech Ciclop, is designed for experienced users who can familiarize themselves with different software programs in order to use the scanner and get high quality outputs from it.
We like to think of a 3D scanner like a video camera. A nice camera gives you the tools to take great pictures and videos, but without post production work in a video editing or photo editing program, you will likely be disappointed in the end result.
Shop Now
CT Ciclop
Ready to Scan Kit
Now Just $179
Ships Free!
Shop Now
CT Ciclop
Standard Kit
Now Just $139
Ships Free!
Shop All CowTech Ciclop Scanners and Accessories
Ciclop based Laser Scanner — FabScanPi documentation
1.
 About Ciclop
2. Bill of Materials
The following list shows what you need to modify the Ciclop scanner for using the FabScanPi Software.
General components
- 12V to 5V switching regulator
- Raspberry Pi 3 B+ or higher
- Raspberry Pi camera V2
- Raspberry Pi Camera Connection Cable - 50cm
- Micro SD Card ( >= 8GB)
- Silent Step Stick Motor driver
- 3D printed Camera Mount
- 3D printed Raspberry Pi Mount
3. Ciclop Modification
Mounting Raspberry Camera
You can use a printed camera mount to mount the Raspberry Pi Camera to the ciclop. The Raspberry Pi Camera will replace the USB webcam.
Note
The Raspberry Pi camera has a better image quality than the ciclop USB webcam.
Replacing the Motor driver
It is recommended to replace the default motor driver of the ciclop with a silent step stick driver. You can use a TMC2100, TMC2208 or TMC2009. But you need to configure the TMC2xxx driver to run in 1/16 micro stepping mode. If you decided to use the TMC2100 driver all you need to do is removing the jumpers under the ciclop motor driver. For other TMC drivers read the manual at watterotts TMC guide.
The motor driver which was included in the kit has a red or green surface.
The picture shows a TMC2100 motor driver on the ciclop Arduino Shield.
Note
You can also use the default driver, but the usage of a TMC motor driver lets the turntable move much more silent and smooth. That leads you to much better calibration and scan results.
Connecting Raspberry Pi
Connect the Ciclop Arduino USB cable to the USB port of the Raspberry Pi. Then connect the Raspberry Pi camera ribbon cable to the Raspberry Pi.
Note
You can use a Raspberry Pi camera ribbon cable extension (50 cm).
You can use a Ethernet cable for Network connection or configure the Raspberry Pi’s wifi setting-up-wifi.
Warning
The Raspberry Pi 4 needs active cooling by a fan. Otherwise the scan process will stuck or fail.
Proceed with the Power Management.
The Power Management
The fastest way is using two power supplies. One 5V supply for the Raspbbery Pi and a second one with 12V connected to the Arduino for the motors.
Warning
Do not use the 5V supplied by the Arduino, because it does not supply enough current. The Arduino and even the Raspberry Pi may be demaged otherwise.
But if you want a setup with less wires, you should add a Step-Down converter like on the picture below.
The 5V output of the Step-Down converter is connected to the 5V and GND pin of the Raspberry Pi.
Connecting LEDs (WS2812)
It is recommended to connect a WS2812 LED-Ring or some WS2812 LED stripes for a better illumination of the object. You can use the 6 pin header on the original ciclop ZUM board.
5. Software Installation
Now you need to install the FabScan sotware. Please follow the Guide for Installing the Software.
6. Software Configuration
The image installation from the previous step already contains a default configuration for the FabScan.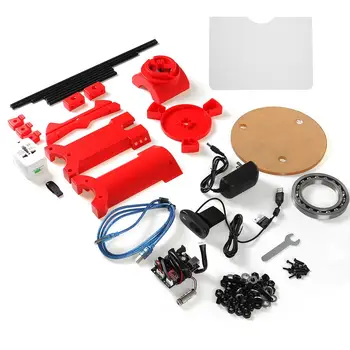 But some values need to be adjusted, depending on your hardware setup. You should recap your motor type, and the number of lasers at this point.
Note
If you don’t know how to edit a file by using a text editor on a Raspberry Pi console, you should read detailed chapter on How to Edit the Config File first..
Motor Config
You should be sure that the number of steps matches your motor. If you are using a NEMA17 motor, the common number of steps for a full revolution is 200 (1.8 degree per step). The motor driver is set to 1/16 step what results in 16*200=3200 steps. Most of the ciclop kits come with a 200 steps stepper motor.
Warning
It is important to set a correct value for your motor. A incorrect value can cause double/mirrored looking scans results. Even the calibration process might fail.
The example below shows a configuration for a 200 step stepper motor. The cilop turntable radius is 100mm. If you are using another turntable than the default one, change the radius.
"turntable": { "steps": 3200 "radius": 100, "height": 155 } Laser Config
Change the number of lasers to a number which matches your setup. If you are using just one laser then change numbers to 1, otherwise numbers should be 2. And be sure that interleaved is set to true.
"laser": { "interleaved": "True", "numbers": 2, "color": "R (RGB)" } Serial Connection
Be sure that the connector type is serial and the firmware is set to ciclop. The port should match the serial port where the ciclop board is connected. Mostly the port is /dev/ttyUSB0. The baudrate should be set to 14400 for the ciclop.
"connector": { "type": "serial", "firmware": "ciclop", "baudrate": 14400, "autoflash": "True", "port": "/dev/ttyUSB0", "flash_baudrate": 115200 } Calibration config
You need to change the calibration board config to the ciclop calibration board values.
"pattern": { "square_size": 13, "rows": 6, "columns": 10, "origin_distance": 35 }, Note
Read more about the calibration configuration in the advanced Advanced Configurations section.
Leave the rest of the file as it is.
7. Using the Software
You can proceed with the software First Steps with the Software . A more complete software manual can be found in the section Software User Manual. Don’t miss to read the section about Calibrating the Software.
Note
A precise calibration is the key for good scan results!
3D scanners Ciclop and Piclop
3D modeling
Subscribe to the author
Subscribe
Don't want
19
Two scanners with a similar ideology, but different hardware and software solutions. Probably the easiest way to scan a model is to place it on a turntable, illuminate it at an angle with a laser pointer with a cylindrical lens that turns a point into a vertical line, film it with a camera, and calculate the offset of the line points from the vertical caused by the model.
About 3 years ago the idea was implemented in Spain by BQ labs and published under free licenses. Details of the design for printing on a 3D printer and a very beautiful horus program written in Python were posted. To clearly highlight the laser illumination, it was necessary to control the exposure of the camera. At the time of creation, Ubuntu 14.04 was up-to-date. V4L2 supports camera control, but it does not interface with the official version of OpenCV.
Following the principle of writing minimal custom code to get a workable result, the developers slightly tweaked the current version of OpenCV. The decision is correct, a working installation has been received, and whoever is late, let him clear up the situation in which installation on new versions of Ubuntu requires the demolition of all programs using newer versions of OpenCV. Ideologically, the system is outdated, and the authors. it was probably not interesting to edit subsequent versions, especially since this did not affect the mass consumer using Windows in their work, since this OS uses drivers from the camera manufacturer.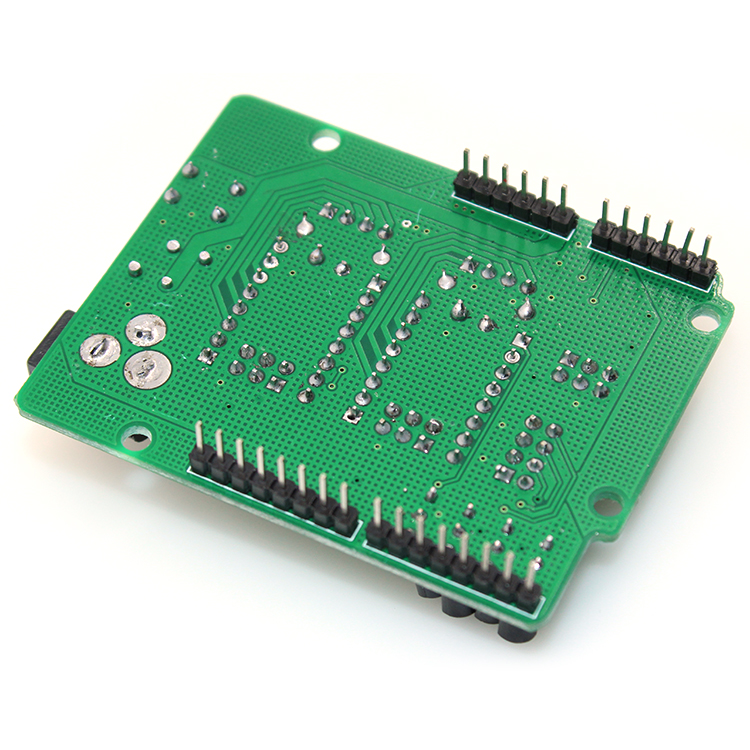
The community, of course, tried to solve the problem, but it seems that they did not achieve an ideal result that suits everyone. I followed the solutions suggested by Fabien Devaux. Its horus version does not require a special version of OpenCV, but is very slow. He proposed his own solution to this problem by writing a program thot with a CLI (Command line interface) command line interface. The program has its own automatic calibration system, but you can also use the calibration results obtained using horus.
I really liked the program, but automatic calibration is not my style :-). In the case of manual calibration, achieving a result is a matter of time and patience, and in the case of automatic calibration, it is always a lottery. The Ciclop design is not well suited for calibration by moving the lasers and camera, although it is of course possible to tweak the automatically generated numbers to obtain an acceptable result with the existing arrangement of the design elements.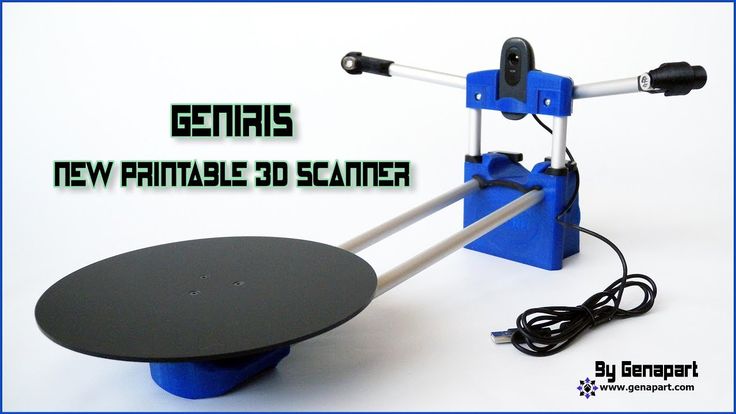
Therefore, having met on the net a description of the scanner on the Raspberry Pi camera (with which I am well acquainted) and requiring precise mechanical alignment of structural elements, I decided to repeat it. In this case, the freelss program, written in C ++, is used for control. Raspberry Pi cameras have very rich exposure controls, but this program does not use them, and uses adjustable lighting for fine adjustment.
At this stage, I did not change the program and decided to compare the capabilities of the scanners as if in their original form. Since I assembled my design exclusively from the available parts, some changes were made to the design, and compatibility with the source code of the program was achieved by introducing, generally speaking, an extra element on the Arduino computer.
- My Piclop scanner design
- Scanning with freelss
- Scanning with horus
- Scanning with thot
- Processing
- MeshLab
- CloudCompare
- Summing up
Scanners achieve approximately the same result.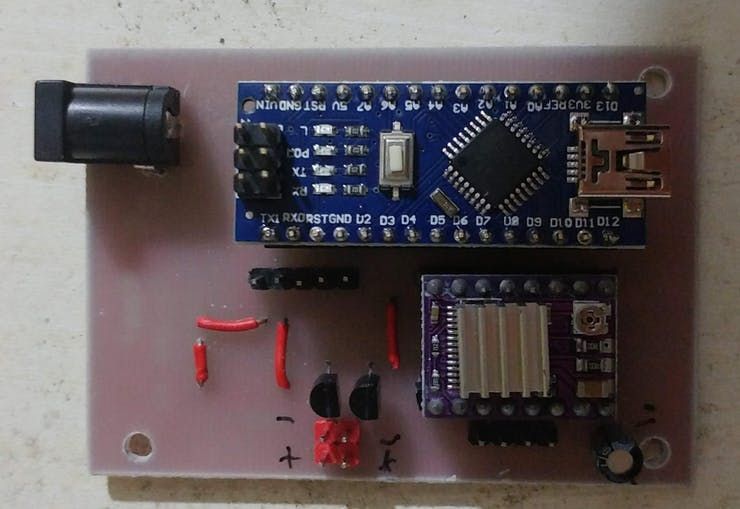 The high resolution of the Piclop camera is not in demand, as is the ability to take more than 800 shots in one revolution. The perceived thickness of the laser beam limits the resolution. The perceived thickness of the line depends on the brightness of the point, which in turn depends on the reflectivity of the material of the model and the angle of incidence of the beam on the surface.
With the current laser beam extraction algorithm, reducing the line thickness due to better focusing or increasing the single threshold value will result in improved resolution for bright points and complete loss of information for darker ones.
Now we have a compromise that by limiting the resolution we get information about all points of the surface on which the laser beam fell. Potentially, for the Piclop scanner, you can write a program that, at high resolutions, will take several pictures with different exposures. However, this will increase the already not small scanning time with a resolution of 5 megapixels.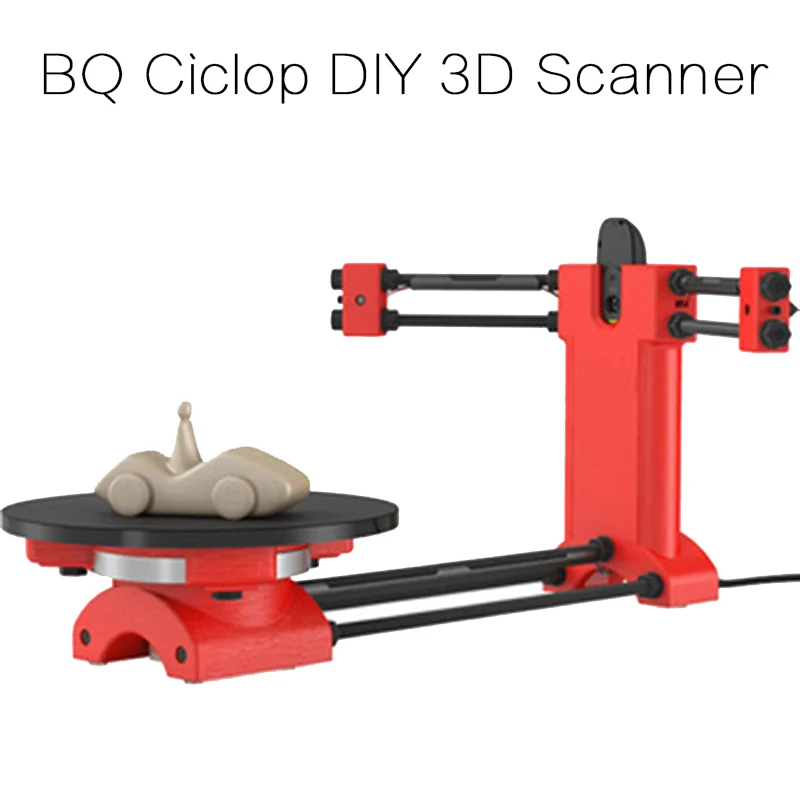
Aside from individual models with fine, subtle relief, a reasonable resolution for this scanner is 1.9 MP (1600 x 1200). At this resolution, the scanning speed for both scanners is about five minutes, but given the fewer final processing operations, the result from the Piclop scanner will be obtained a little faster.
I found it easier to achieve an acceptable result when scanning with two lasers on on a manually calibrated Piclop scanner. This is quite laborious, but patience and time allow you to achieve a result, while automatic calibration is a lottery, you may get lucky right away, you may never be lucky.
Follow author
Follow
Don't want
19
More interesting articles
four
Subscribe to the author
Subscribe
Don't want
The CAD Competence competition is a unique opportunity to demonstrate to the professional community. ..
..
Read more
one
Follow author
Subscribe
Don't want
Often, when modeling, a situation arises when a step is formed due to the difference in heights, and for ...
Read more
115
Subscribe to the author
Subscribe
Don't want to
The catalogs of models are full of various bizarre airflows, but very often after printing and installation ...
Read more
About the store Order conditions Wholesalers Dropshipping Order status Contacts
12360
Description
bq Ciclop 3D Scanner.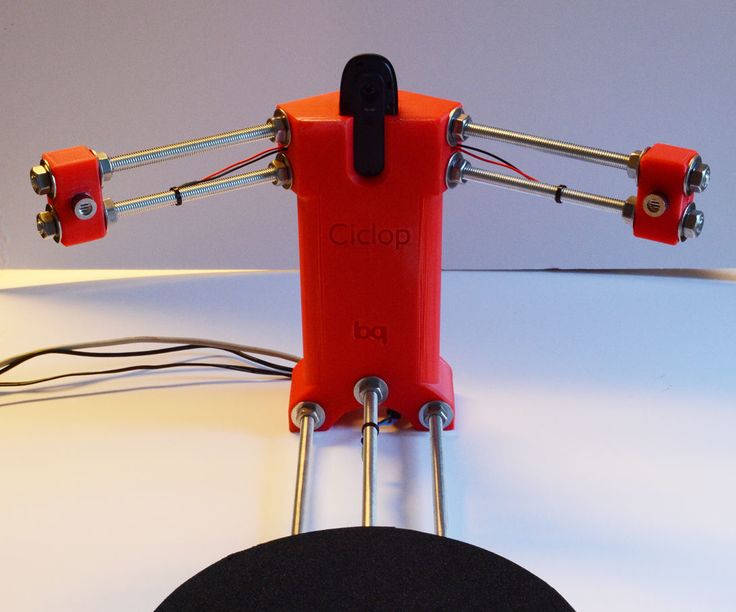
bq Ciclop 3D scanner is a 100% free project. Like all products in bq's DIY ecosystem, Ciclop and Horus are licensed under CC-BY-SA and GPL. All information about mechanics, electronics and software is available to the community and becomes part of the Technological Heritage of Humanity. The goal is not only to be able to learn and understand how the scanner works, we also want the community to get involved, make changes and improvements, contributing to the further development of the Horus software. The bq company relies on free knowledge and thus wants to contribute and give impetus to the development of such devices.
Simplicity of design and openness to improvement
Ciclop is a 3D rotary triangulation laser scanner. It uses 2 laser beams in its work to obtain data on the geometry and texture of a scanned object rotating on a turntable.
Interaction with the Horus software is carried out through three desktops: control of components (camera, lasers, electric motor and photoresistors), calibration and scanning.
Auto-calibration, our hallmark
Ciclop is a DIY (do it yourself) category scanner and in the case of manual assembly, the distances between the elements and their positions in the final product may differ, which makes it difficult to calibrate the device. Horus eliminates this inconvenience by accurately automatically calculating the internal parameters of the scanner, based on the design assembled by the user, and thus independently performs the correct calibration. Therefore, we guarantee a good result of each scan.
Key element of the Ciclop scanner: its electronics
The bq ZUM Core board based on the Arduino platform incorporates improvements and features from similar boards, making it the best choice for developing electronic projects. bq ZUM Core is responsible for the operation of the motor and laser control software and hardware.
Attached to the top is a power board, ZUM SCAN, developed from the Arduino CNC Shield.
Creative Scanner
Ciclop Scanner is designed for the free software community, creatives, artists, designers and developers who want to learn, explore, improve and make the best use of 3D scanning.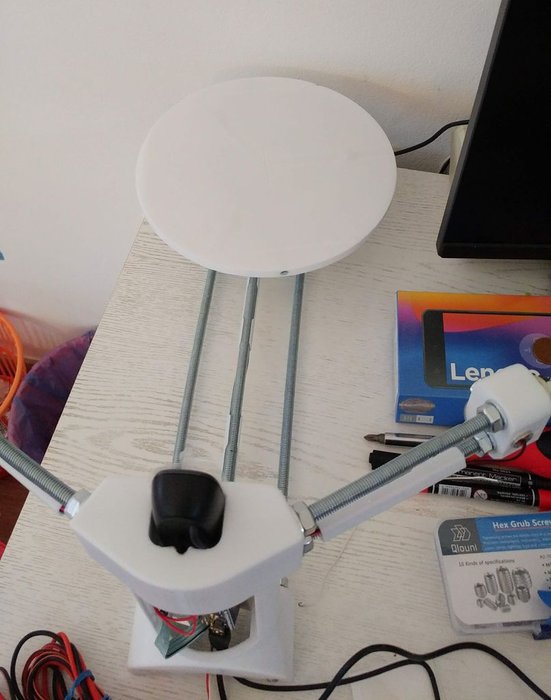
Scan, modify and make it a reality
The Ciclop scanner completes bq's DIY product family. Paired with a Prusa i3 Hephestos or other 3D printer, it opens up new possibilities for you, incl. in terms of turning your projects scanned with Ciclop and Horus into tangible objects.
Optional
| Country of brand registration | China |
| Country of origin | China |
Comments
0No comments yet.
Comment
| Dear customers!
|


