Jgaurora 3d printer assembly instructions
JGAURORA A5 USER MANUAL Pdf Download
Table Of Contents
2-
page of 20
- Contents
- Table of Contents
- Bookmarks
Advertisement
Table of Contents
Table of Contents
1 Preface
Introduction
Safety Advice
Filament Requirements
Environmental Requirements
2 About A5
Basic Reference
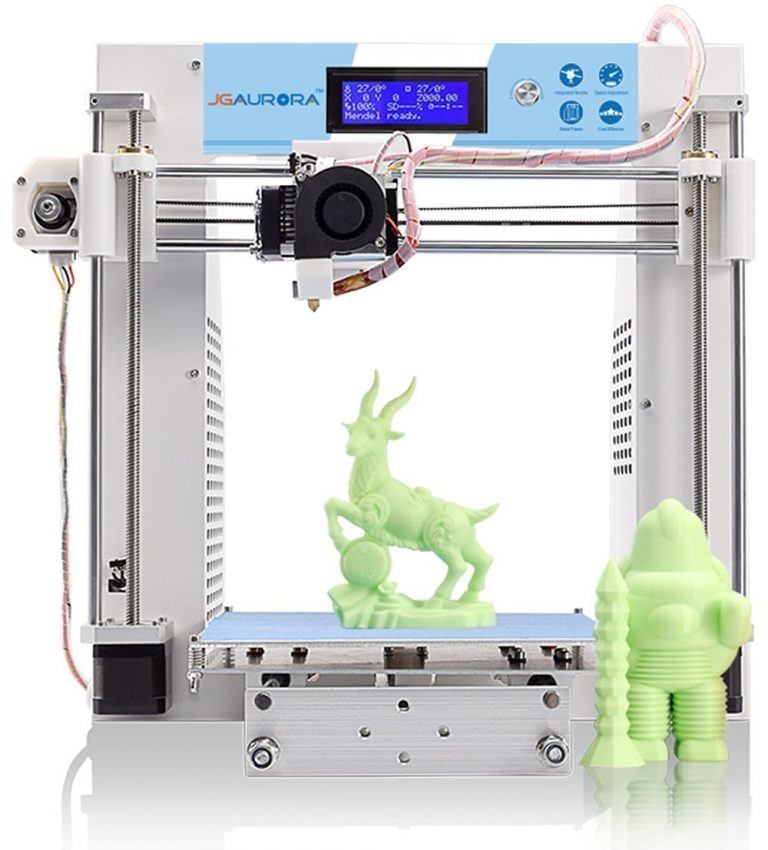
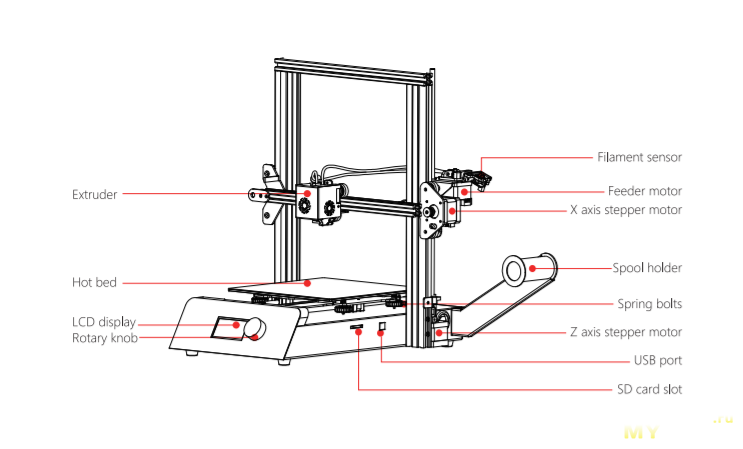
Overview of A5
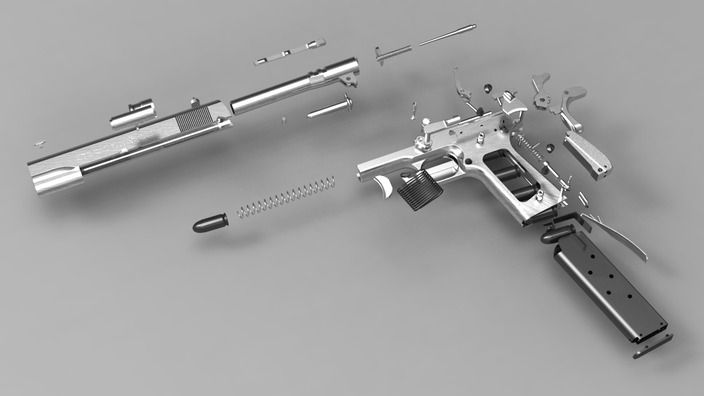
- Extruder Nozzle Assembly (Exploded View Diagram)
Tool Box Lists
Input Power Adjustment
3 About Jgcreat Software
Software Installation
Jgcreat Introduction
4 Basic Printing
Control Menu Introduction
Main Menu Introduction
Platform Leveling
Filament Loading
Trial Printing
Filament Replacement Notes
5 Common Problems and Solutions
500 D Printer Maintenance
Daily Maintenance
Basic Maintenance
Maintenance of Moving Components
7 Support and Service Details
USER GUIDE
Table of Contents
Previous Page
Next Page
Table of Contents
Related Manuals for JGaurora A5
- 3D Printers JGaurora A-8 Operation Instructions Manual
(49 pages)
- 3D Printers JGAURORA A-4 User Manual
(20 pages)
- 3D Printers JGAurora A3S User Manual
(20 pages)
- 3D Printers JGAurora A3S User Manual
(34 pages)
- 3D Printers JGAurora A8S User Manual
(20 pages)
- 3D Printers JGAurora A7 User Manual
Intellectual 3d printer (21 pages)
- 3D Printers JGaurora A7 User Manual
Intellectual 3d printer (21 pages)
- 3D Printers JGAurora JGMAKER Magic User Manual
(35 pages)
- 3D Printers JGaurora Z-603S Operation Instruction Manual
(49 pages)
Summary of Contents for JGaurora A5
Getting Started [The Unofficial JGMaker (& JGAurora) Wiki]
Table of Contents
New Owners Guide: Getting Started
-
1.
Check the Power Supply
2. Software Setup & Manual
3. First Print Checklist
4. Itching for upgrades?
5. Troubleshooting
-
«Back to JGAurora A5 wiki
So you bought an A5 or A3S — congratulations! Here's hoping it serves you well. Before you get started, you would be wise to read this page through. It will prevent headaches better than a packet of paracetamol…
Having some problems? See the troubleshooting section below.
1. Check the Power Supply
BEFORE YOU PLUG IN YOUR PRINTER
CHECK THE VOLTAGE SWITCH ON THE INTERNAL POWER SUPPLY
If it is set incorrectly for your local voltage, and you plug in the printer to power, you will DESTROY the power supply. The switch is located inside the printer, but you can access it from underneath. Looking from the back side of the printer, tilt the printer upwards to show an access hole.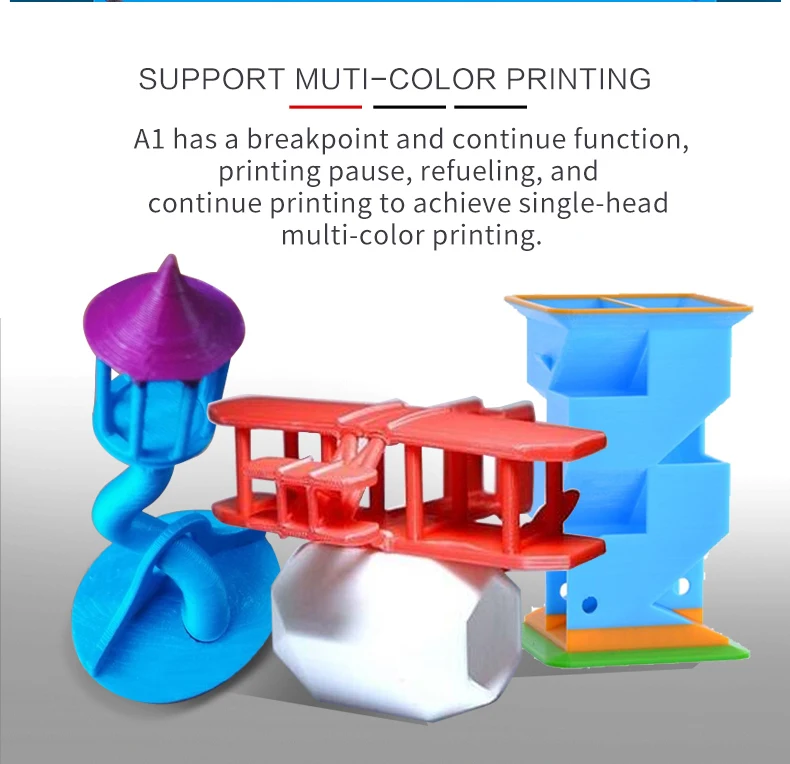 If you look into the hole at an angle, you will see a red switch. Check that the switch says the correct voltage setting (230 for use in 220-240V countries, or 115 for use in 110-120V countries). If you unfortunately already fried your power supply, you can purchase another one here.
(Photo credit: Marcus Harrysson from facebook)
2. Software Setup & Manual
Manual
A copy of the JGAurora user manual, with some additional corrections to the english translation, can be downloaded here.
Printing Settings & Profiles
NEW: download the Cura 4.0.0 beta and you will find that it now includes a starting profile for the JGAurora A5!
Slicer Software Setup: See this page for advice on setting up your printing software (slicer)
Material Printing Settings: See the same page for suggested printing settings, and some contributed pre-configured profiles for various slicers and materials.
3. First Print Checklist
Before you do your first print, here are some things you may want to double check.
Ensure you push the cable connectors in ALL the way. Many problems occur from poor connections at the side connectors. Your printer may not heat up. Your printer may crash the nozzle into the bed, or slam the head into the end of an axis… PLEASE DOUBLE CHECK all cable sockets FIRST if you are having some problems!
Inspect the printer thoroughly before use. Check all the screws you can access are tight, and that the axis all move smoothly. Check the bed is parallel with the main chassis of the printer, and check the x-axis is also parallel with both the bed and the main chassis.
Level the printing bed
Be careful not to grind the nozzle on the bed - the bed coating is very abrasive and will damage the brass nozzle requiring replacement.
JGAurora does not tune the stepper drivers, so if you are unlucky you might find an axis is skipping steps. For this reason, you might want to open the main chassis, and tune the stepper drivers.
Useful links for beginners
Essential Tips: How to get prints to stick to the bed!
Troubleshooting FAQ Page
After your first print, you may want to try to improve the printing quality. Check out the links below to find out how!
Improving print quality guide (by Simplify3D)
Print Troubleshooting Guide & Tutorials (by AprintaPro)
Software tips from CR-10 forum
4. Itching for upgrades?
Looking to buy some upgrades? Check out our Essentials page for super essential tools, 3D printer parts and great upgrades.
For starters, I'd recommend taking the time to tune your stepper drivers, upgrade your mainboard firmware , and have a browse through some of the 3D printable upgrades you can do! Maybe start with a new 3D printed fan duct? ABS recommended for this one.
5. Troubleshooting
Having some problems with your printer? First, check out the FAQ page, which lists many common A5 problems and solutions!
Prints not sticking? Check this page and do ALL the steps and prints will stick without resorting to glue stick!
Join one of the A5 & A3S support groups, or join us on the forum!
pre-assembled and tuned model, ready to go in 15 minutes / 3D printers, machines and accessories / iXBT Live
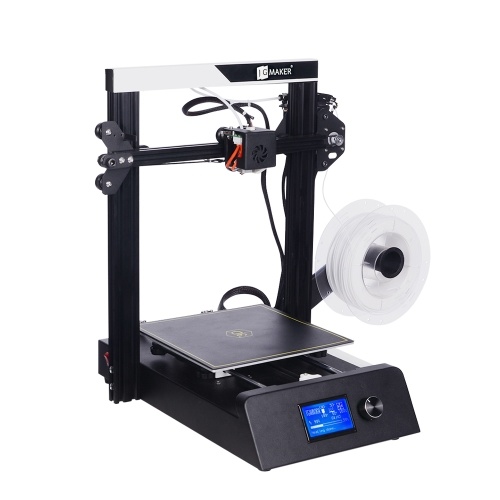
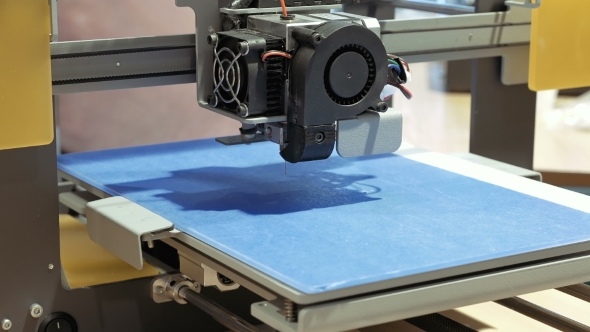
Hello everyone who looked at the light. The review will focus, as you probably already guessed, on the chic 3D printer JGMAKER JGAURORA A5S . This model is interesting in that it comes pre-assembled and is almost ready for printing within 15 minutes after unpacking. The printer boasts good quality and large print area, high-quality heated platform and simple operation. If you are interested, you are welcome ...
Buy a 3D printer JGMAKER JGAURORA A5S You can in an official store on Aliexpress here
Content
- Characteristics:
- Base:
- Rama:
- Rama Rama:
- Ram print ready:
- Pins:
- References:
Characteristics:
- - Manufacturer - JGMAKER
- - Model name - JGAURORA A5S
- — Printing technology — FDM
- — Number of extruders — 1pc (Bowden extruder)
- — Printing material — plastics ABS, PLA, HIPS, FLEX, Watson, PETG (diameter 1.
 75mm)
75mm) - — Display — touch LCD 2.8″
- - Platform - heated
- - Print area - 305x305x320mm
- - Nozzle diameter - 0.4mm
- - Layer thickness - 0.05-0.3mm
- - Print speed - 140mm /s
- - Supported format - STL, OBJ, G-Code
- -options for loading models-from PC for cable and from SD card
- -dimensions-536x480x543mm
- -weight-13.8 kg
Kemit:
- -base
- -directing Rama complete
- — Spool holder
- — PLA reel
- — Accessories
- — User manual
- — Setup manual
0005
As a rule, delivery is carried out by a courier company to your home, so there are no problems. In the case of export from the distribution center, take care of the availability of a vehicle, since this box cannot be carried away by hand.
Two-tier packaging, guide frame located at the bottom, and the base with a movable table at the top:
Both "tiers" have separate protective boxes made of foam, which takes all the mechanical impact on itself, so you can be calm about the safety of the product. nine0005
Additional accessories are included in a separate box:
This includes a power cable with Euro plug, mounting hardware, an additional nozzle with a diameter of 0.4 mm, a spare filament feeder foot, a USB cable for connecting to a computer, an SDHC SanDisk 8GB memory card with a card reader, a silicone bumper and Spare temperature sensor:
The complete set is rich. Not only is the printer itself pre-assembled and configured, there are also some spare parts and a PLA plastic reel included in the kit. Actually, after the basic assembly, you can safely start printing, you don’t need to buy anything else! nine0005
Base:
The base (base) is a prefabricated module that houses the control board, power supply and movable table (platform). In addition to the fact that the base is packed in a separate foam box, the desktop is additionally protected with shipping tape:
The desktop consists of an aluminum plate with a heating element and Ultrabase glass with a special coating for better adhesion (sticking) of the printed part. Such materials were not chosen by chance, since aluminum is an excellent conductor of heat, and glass gives a more even surface without any oxidation or bending during operation. The table dimensions are 305mm*305mm, and the model building area is 305mm*305mm*320mm:
If you look closely, you can see special heating tracks and a temperature sensor for temperature control.
All control is concentrated in front and carried out using the touch screen:
The screen diagonal is 2.8″, and the presence of touch input significantly speeds up control. The display is very contrasty with good viewing angles.
On the right side there is a USB Type B connector for connecting to a computer and three connectors for connecting actuators and sensors:
The JGAURORA A5 model had an additional USB Type A connector for connecting flash drives, but it was removed in the updated version. There are no other elements on the body.
For good stability and minimizing vibration during operation, the sole is equipped with rubberized feet:
Inside the base case there is a control board, a power supply, a display module and movable table drives:
Mounting deserves special attention: soldering is even and neat, all cables are tightened harnesses, and detachable connections are fixed with hot-melt adhesive. In general, everything is gorgeous:
The 32-bit STM32F103ZET6 controller controls all this economy:
Display module:
Power supply for 360W (24V / 15A), judging by the weight, is of sufficient quality:
If desired, you can replace it with some branded (MeanWell) , there is plenty of space inside.
A special advantage of this model is that the printer is already assembled and set up from the very beginning, the belts are tensioned, the screw and cylindrical guides are lubricated, so there is no need to study assembly manuals:
Also pleased with the good strength and rigidity of the structure due to the use of sheet metal with a thickness of about 1.35mm and stiffeners:
Frame:
box:
The wall thickness of the body is about 1.3mm, the structure also boasts good rigidity:
The X-axis extruder carriage moves along cylindrical guides. It is quite miniature and combined with a cooling radiator, which allows you to print at high speeds:
This model uses a two-piece Bowden extruder. The feed mechanism (“cold-end”) is rigidly fixed on the frame:
From it, the filament is fed through a special tube into the extruder itself (“hot-end”), which combines a plastic heating unit and a special print head (nozzle), located already directly on the movable carriage:
It is worth noting that the kit includes a nozzle with a diameter of 0.4 mm, with which a layer thickness of 100 microns can be achieved. Without additional manipulations, ABS, HIPS and PLA plastics with a diameter of 1.75mm are supported, you need to experiment with other types. nine0005
Connecting wires are braided to prevent accidental contact with rotating elements. The shafts are lubricated, the limit switches are adjusted. To minimize vibrations and other effects (wobble), flexible split couplings with misalignment compensation are used. Two motors and two ball screws on the sides are used for precise positioning along the Z axis (height):
In general, the entire assembly routine, which often intimidates beginners so much, is accurately and accurately done by the manufacturer, you just need to screw the frame to the platform and you can print. nine0005
Assembly:
The JGMAKER JGAURORA A5S 3D printer is remarkable not only for its excellent print parameters, but also for the fact that it comes pre-assembled. Users who have not previously dealt with 3D printers will appreciate this moment.
The assembly itself is outrageously simple:
1) the first step is to fasten the frame to the platform with 8 screws:
M4 screws for fastening from below, M3 screws from the side. The latter just appeared in the updated model to increase structural rigidity
2) remove the shipping tape from the table. This is the longest operation, since the tape sticks very strongly and is not always easy to remove. After that, we take 4 clamps and fix the table with the heating plate to each other:
Be guided by the white fields on the reverse side of the plate so as not to damage the tracks. I recommend removing the tape after attaching the frame to the platform, because. the table is movable and may get scratched if not assembled properly
3) do not forget to connect the three connectors from the frame. It is impossible to confuse them, because the number of pins they have is different:
4) then we take a silicone bumper and fasten it to the edges of the horizontal portal of the frame:
It is very important, because in its absence the corrugation will catch on the edges of the portal with its protrusions:
The corrugation slides perfectly with the bumper and does not cling
and finally, we fix the coil holder on the frame with three screws:
That's it, the assembly is over. The following design should be obtained:
If there are sticky spots on the stage, it can be lightly wiped with weak solvents, such as alcohol. Remember that the table has a special coating for better plastic adhesion, so treat it with care! nine0005
Operation and preparation for printing:
The operation of the JGMAKER JGAURORA A5S 3D printer is quite simple and is carried out from a touch screen with good contrast:
Firmware version:
The menu should not be intuitive and difficult to use. Before printing, it is necessary to prepare the printer according to the standard algorithm:
1) calibrate the desktop using four adjusting screws from the bottom side. It is necessary for each assembly / disassembly, various mechanical effects on the case, and just before the "responsible" printing. This option is in the preparation menu "Prepare" -> "Level":
The same minimum clearance must be achieved at all five points on the table. At first, you can use a regular sheet of paper, then purchase special probes
2) degrease the table so that the printed model adheres well to it. When printing large parts, this item should be given great attention, because. a model that has peeled off the table at the end of printing will waste all the time and plastic spent. For more reliable fixation, you can use adhesives (BF glue with alcohol)
3) heat up the extruder (hot-end) to the desired temperature and load the plastic (filament). Usually for PLA plastic it is 190-200°C, for ABS and PETG 220-230°C. This model has a built-in plastic loading function, but it is only suitable for PLA plastic, because. heating is limited to 187°C:
For loading other types of plastic, there is a separate loading function where the temperature can be set manually:
After pressing the "IN" button, loading will begin, I recommend helping the feed mechanism a little with your hands. After loading the filament, the preparation for printing is completed. nine0005
The desired temperature of the table and extruder is set in the "Prepare" -> "Heat" menu:
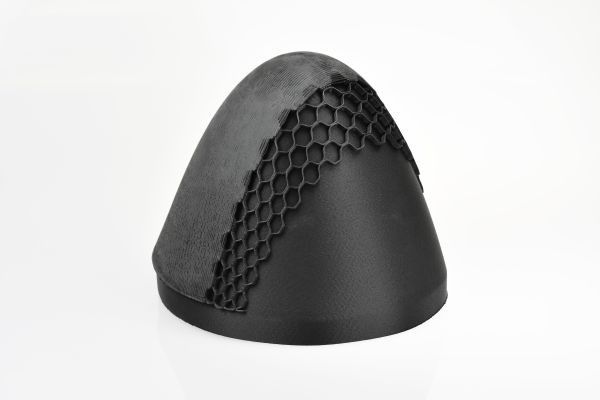
To try to print your first part, just download the model of interest in a supported format, for example, "STL" (for one-color models), "WRL" (for people of color), "OBJ" and others. But this alone is not enough, therefore, in order to convert these models into a form understandable to the printer, special slicer programs are used. They cut the object into layers, from which the 3D printer creates a physical model. The JGAURORA A5S 3D printer is initially configured, so by downloading the required model in G-CODE format (already converted) and putting it on a memory card, you can try to print it without additional gestures. For example, without connecting the printer to the computer, I managed to print a simple whistle with basic settings:
The print quality is good, but since 3D printing technology is based on the sequential application of plastic layers, there is a slight ribbing on the product. You can minimize it during the printing process by installing a smaller nozzle, but you won’t be able to get rid of it, or you can use post-processing of an already finished product. Most often, the product is processed mechanically (with fine-grained sandpaper), or with solvents (acetone, dichloromethane).
If you dig deeper into the settings, you can adjust the necessary parameters (quality, filling, etc.) and get a very high-quality part. This is a topic for a separate article, so I will try to write about some of the subtleties in the second part, simultaneously reviewing interesting and useful models. nine0005
Conclusions:
I really liked the JGMAKER JGAURORA A5S 3D printer. Firstly, it comes pre-assembled and there is no need to smoke assembly manuals. It is enough to connect the frame to the base and you can print. Secondly, JGAURORA A5S is a refinement of the popular A5 model, in which minor “sores” have been eliminated, so there are simply no significant shortcomings. Thirdly, this model boasts a large print area of 305x305x320mm, which is rare for inexpensive printers. Fourthly, the 3D printer has a chic platform (Ultrabase glass with a special coating and heating). Fifthly, there are all the useful "buns" here: continued printing after a power failure, lightweight carriage, rigid body and much more. Of the controversial points, perhaps the Bowden extruder, but if you fine-tune the retracts, then there will be no problems. nine0005
If you have not dealt with 3D printing before, but you want to try, then I recommend this particular model. It will allow you to get comfortable, understand the basics, while providing good print quality and is inexpensive.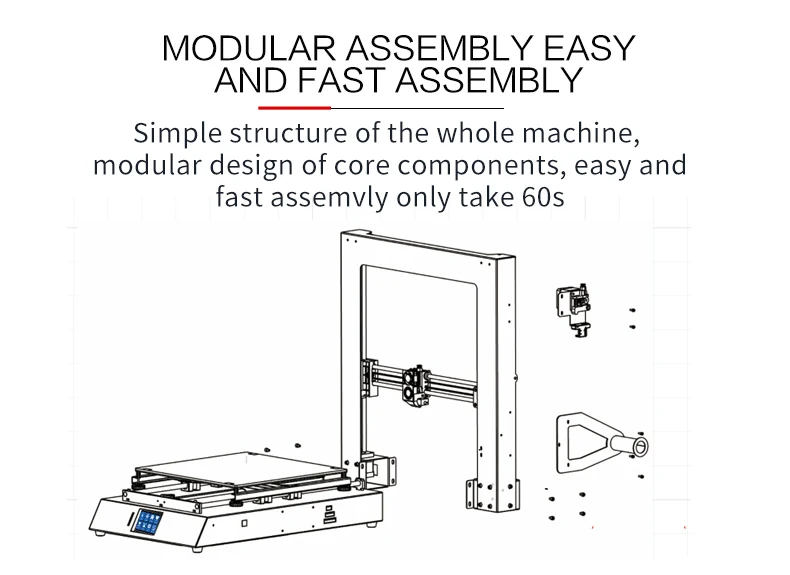 I recommend to buy!
Links:
Buy 3D printer JGMAKER JGAURARA A5S You can in the official store on Aliexpress here
Various types of plastic can be bought here or here
9000 90,000 JGAURORA 3D printer JGAURORA Z-605SThis content was written by a site visitor and has been rewarded.
I present an overview of the JGAurora 3D printer assembly kit. This is not my first printer, so during the assembly process I will compare it with my previous one from Sanhokey. Both printers are good enough for their price range, but still have a number of differences, let's see what's what.
The JGAurora set arrived in a box I already knew. Inside, everything is the same, time-tested, protective packaging made of polyethylene foam with cut-out compartments for parts. The box arrived in a more whole form, the thing is that it was sent from a warehouse in Moscow. This is a new feature of Chinese stores so that the buyer does not solve possible issues at customs. Most of the goods are already in Russia and delivery is fast and there are no problems. nine0254
These are all the details of which the future 3D printer is worth. Unless, here I already managed to assemble the X-axis with an extruder.
Ok, let's not rush this time and put everything together nicely, neatly laying the wires in the snakeskin.
This requires disconnecting the terminals.
We stretch the wires into a braid and close the ends with heat shrink. Looks great in my opinion.
This is the longest wire for the Z-axis motors. By the way, this is a slightly different circuit than on an existing printer. Both motors are powered by the same driver. In theory, this carries a slightly greater load on it, in fact the driver works fine and I did not notice its excessive overheating, besides, you do not need to use two drivers on the board, and this is already a saving, and a reasonable one.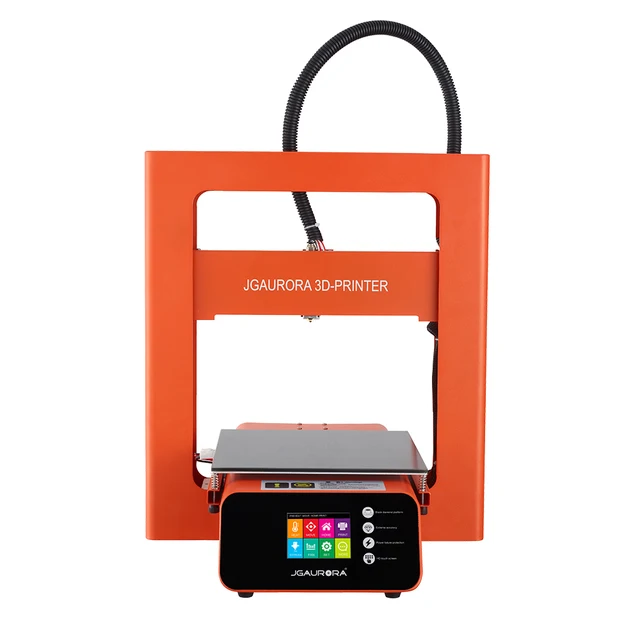 nine0254
All wires are ready, let's start assembling the frame.
With the remnants of the braid, I decided to close the long guides, especially since they are the only ones of all 8mm threaded studs made of galvanized metal, the rest are all stainless steel. So let's fix this aesthetic flaw.
There are detailed assembly instructions on the flash drive, but I decided to go my own way, after all, after all, I already have experience.
By the way, here's a life hack for you. To reduce the vibrations and noise produced by the printer, I glued rubber dampers on the bottom of the frame. These are curtain seals from IKEA, I kept them after I hung curtains at home. The set includes thick and thin seals, and only one set is used for installation. Here are the leftovers and served the cause. nine0254
Collecting further.
We mount the Z-axis motors. Here the motors are already connected to the trapezoidal axis studs. I would say, not the best solution, except that everything is clearly centered from the factory. But I like when there is a damper. Looking ahead, I will say that this did not affect the press in any way. The result is still as good as the Sanhokey.
Motors installed. By the way, a scarf for their installation was put on 2 pcs. more, since these are the parts that are very easy to pull during installation and they crack. nine0254
Mounting the table base. the base is aluminum, it is very good, no effects of temperature changes will affect it.
The studs of the base of the frame are connected to each other with plastic parts.
they were previously printed on a printer, but this was a long time ago and in the first batches. Now these are factory parts made by casting or stamping, in any case, their strength is very high. I also made legs on the bottom of them.
The table is almost assembled, the motor is installed, the belt is fixed. And here is the first minus, there is no belt tensioner, you have to pull it with your hands and tighten it into the fasteners - it’s not very convenient.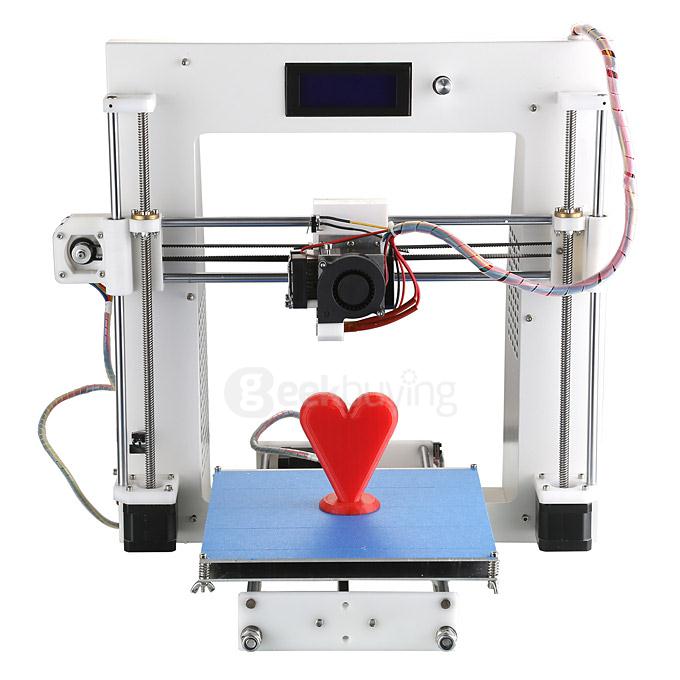 nine0254
And here is the heating element of the table - MK3. The table is excellent, and even from the factory it is pasted over with real blue 3M adhesive tape. This is the tape that many printers print on. Although I prefer to print on a mirror with a layer of PVA.
We fasten the heating element on the bolts through the springs with the winglets. By the way, the rams are awesome. True, at the top they can cling to the frame and you need to make sure that their ears do not stick out to the sides, but are in the direction of travel. But it is very convenient to twist them.
The printer is almost assembled, there is very little left.
Moving on to the X axis. And here are the printed parts. The two extreme ones are just printed, and the central one is already factory. Well, by the way, the flash drive in the kit has all the STL plastic parts, if you wish, you can reprint them, if you suddenly need to.
We put the axle on the guides, twist the brass nuts into trapezoidal screws and close the top with the remaining acrylic parts.
Now it remains to mount with the control board and connect the wires. nine0254
The screen is a standard two-line character screen with a card reader and an encoder, but its fastening is very solid. Only a cut hole in the frame itself is stronger. In Sanhokey, the screen is still a little flimsy and you have to support it from behind when you press the buttons, everything is monolithic here.
But the printer control board has undergone some changes. In the first releases, JGaurora used the Melzi board. The biggest drawback was that it was difficult to reflash. Now the MKS Base board is used here. an excellent and high-quality solution, although all with the same soldered drivers as Melzi. But flashing here is no more difficult than uploading a sketch to Arduino. nine0254
Screw the board onto the wall. By the way, there are holes on the wall for almost all types of boards and power supplies, this is the first time I've seen such an approach and it's very cool.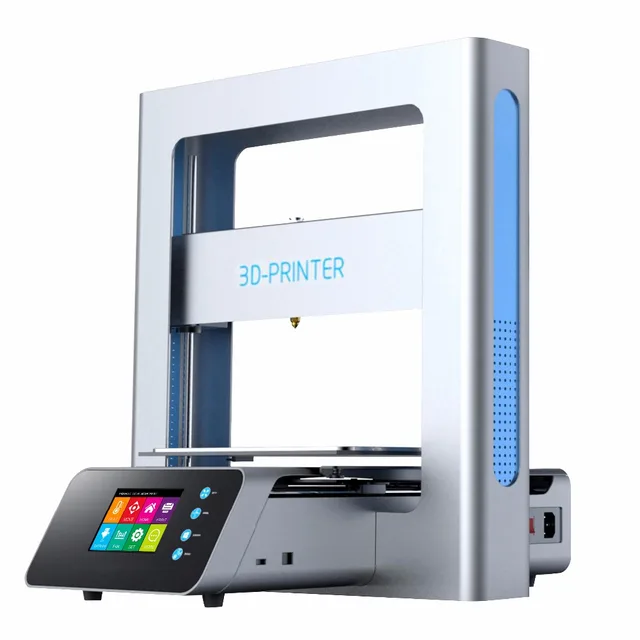 Many manufacturers of frames for printers do not bother with standardized holes and make them mainly for Arduino Mega, and here such care is taken by the consumer. Or just convenience for assemblers?
We connect the connectors.
At the same time, we beautifully spread the wires in the basement, fixing them with ties. Good cyberpunk coming out. nine0254
It remains to connect the power supply. It is here at 20A, 10 less than the Sanhokey, but this is enough for normal operation.
The printer is assembled, let's start printing.
I read reviews of this printer that I found on the net that there were problems with the extruder. Looking at the changes that this set has undergone, I hoped that there would not be such a jamb, but.
But alas, the firmware uploaded to the control board contained the same error here. The number of extruder steps was set incorrectly. I had to contact support and request a normal firmware. nine0254 Here is the source file, if anyone needs it: https://yadi. sk/d/v8iqlFDgqxe5E
It is uploaded via the Arduino IDE from a computer via a USB cable, you must first turn off the printer power, otherwise the firmware will not upload.
Well, after these manipulations, the printer worked with a bang. The frame has excessive rigidity and the geometry of the printed parts is obtained exactly as intended.
Print area here 22x22x20cm. If you put a mirror tile, then the print area is slightly reduced to 20 cm on each side, but it is already fashionable not to be afraid that the nozzle will touch the protruding table bolts. nine0254 Well, here are examples of what I have already printed on this printer.
Dough boot, ABS material, layer 0.15
Raspberry Pi Enclosure
Lamp body and lamp shade.
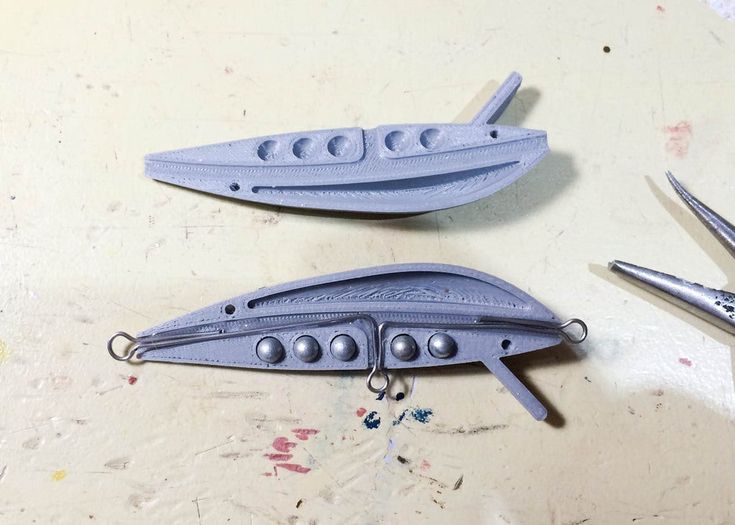
Boats.
Robot arm, still in progress. Combined ABS and PLA materials
Sandpaper holders. On the right, a sample of a 0.6 nozzle and a 0.3 layer is rough, but very fast.
Automatic watering planters, PLA material, layer 0.2. Depending on the plastic, different print quality is obtained. Choose only high-quality plastic :) nine0254 What are the advantages of this set compared to what I reviewed last time?
1. Acrylic parts are thicker, unlike Sanhokey's 6mm acrylic, here they are already 8mm thick. I lifted the assembled printer several times by the top of the frame, nothing wobbles or plays. Sanhokey, I do not risk raising it like that, something may crack.
2. Direct type extruder. Well, this is not really an advantage, it has its drawbacks - for example, weight, but I tried to print them with flexible materials up to Flex, and it allows you to do this without modifications, right out of the box. nine0254 3. Again, an extruder with an already installed system for blowing the print area, there is no need to invent and fence anything.
4. Heated table. And not as frail as the Sanhokey, but a full-fledged mk3 on an aluminum plate.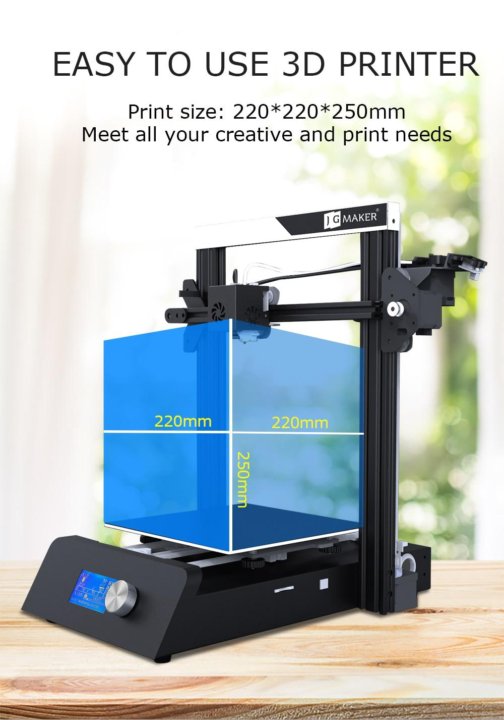
5. Again, the base of the table is not acrylic, but completely metal, it is somewhat reminiscent of the table at Wanhao Duplicator i3.
The disadvantages include a jamb with firmware and the need to update it, a power supply with constantly on airflow without intelligent control. On 30A power supplies, it turns on under load, but here it makes noise all the time. Well, in principle, from the disadvantage of everything. They are not so significant, apart from the firmware of course. nine0254 In general, the printer is very pleasant and with a fairly high-quality print out of the box, again, if there was a normal firmware right away. I am satisfied with the purchase, and if you wish, you can replace the frame with a steel one for only 3-4 tr. and get an already higher level printer.
Link to the store where I bought it: JGAURORA Z - 605S
This content has been written by a visitor and has been rewarded.
Subscribe to our channel in Yandex.