Jennifer maker 3d printer
Cricut Tool Holder & Organizer: Cricut Tool Bench
Learn how to make this sturdy craft tool bench to hold all of your Cricut tools, and then some! This Cricut tool holder can be made by those who have the Cricut Maker or the Cricut Explore cutting machine.When I first began sharing my craft projects with you just over two years ago, I made this very sweet and simple craft organizer. It is nothing more than a cute little basket with some paper towel tubes cut to various lengths. It literally took me five minutes, and it’s been SO useful! Well, these days I have more craft tools, especially tools for my cutting machine. I have scoring tools, scrapers, weeding tools, Cricut pens, so much more! And with the Cricut Maker, I now have many different blade and tool housings, as well. I was using so many of them that they weren’t even fitting in the built-in storage compartment on my Cricut. That’s when I knew it was time to make a NEW craft tool organizer: a Cricut tool holder!
My Cricut Tool Bench has lots of room for all my Cricut tools and blades and plenty of room to grow! There are spots in the front for all of the blade and tool housings, with two spots in the back a wee bit bigger to fit the QuickSwap tools. There are even two smaller spots on the sides for the scoring and engraving heads, as you don’t want to lose those.
Along the sides of the Cricut tool holder I’ve put in slots for my Cricut scrapers and paper edge distressers. And nice strong tubes in the middle hold all of my long tools, like my weeding tool, quilling tool, spatula, TrueControl knife, scissors, tweezers, Cricut makers, and fabric marking pens.
And these tubes? They are nothing more than the leftover tubes you get when you use up a roll of Cricut vinyl! That’s right — finally a great use for those sturdy tubes. And if you haven’t used any vinyl yet, a paper towel roll tube will fit in there, too.
In fact, it’s these tubes that are the secret to the stability of this Cricut Tool Bench! You see, I wanted to make a tool organizer that could be made by those who had either a Cricut Maker OR a Cricut Explore, as so many of the other ones I’ve seen are just for those with a Maker.
So by using these nice strong tubes to help support our Cricut tool holder, we can make this on either cutting machine. The base material you use will differ a bit. On the Maker, we’ll use heavy chipboard 2mm thick. And on the Explore, we’ll use Kraft board — three layers of it. You might be able to use a thinner chipboard on your Explore as well, but it can get a little tricky and may require the deep-cut blade. But for the Kraft board, the deep-cut blade is NOT needed — just the fine-point blade that comes with your machine.
In addition to your base material, you’ll need some hot glue to assemble it. And decorating is up to you! Leave it plain and simple, or add an outer layer for a little pizzazz. This pink one was made on my Explore and it has an outer layer of pink foil Kraft board.
I made the blue one on my Maker and added a layer of iron-on glitter vinyl to dress it up! I’ll show you how I did both!
Key concepts taught in the video tutorial include what materials are best, how to upload SVG files, how to ungroup and attach, how to mirror iron-on vinyl, how to cut Kraft board and chipboard, how to put iron-on vinyl onto chipboard, and how to cover edges.
See exactly how to make my Cricut Tool Bench in this step-by-step video below:
Time to Make: 1 hour
Skill Level: Intermediate
Finished Size: 7.5” x 5.25” x 3”
Ok, let’s make a Cricut tool holder! This post contains some affiliate links for your convenience (which means if you make a purchase after clicking a link I will earn a small commission but it won’t cost you a penny more)! Read my full disclosure policy.
Quick Links to Information in this Post
Materials for Cricut Tool Bench (Cricut Tool Holder)
TIP: You can save 10% off your purchase of $50 or more in the Cricut shop using my promo code Make2022
- One sheet of 11″ x 11″ 2mm heavy chipboard (if you have a Maker) or three sheets of 12″ x 12″ Kraft board (if you have an Explore)
- Cardboard tubes (I re-used the tubes that come inside my rolls of Cricut vinyl — if you don’t have these, paper towel tubes work, too)
- Knife blade and housing (if you’re cutting heavy chipboard on the Maker)
- Fine point blade and housing (if you’re cutting Kraft board on the Explore)
- StrongGrip Mat
- Painter’s tape or masking tape
- Hot glue gun and sticks
- Tacky glue
- Spray adhesive glue (permanent)
- (Optional) Iron-on glitter vinyl (I used this vinyl)
- (Optional) Foil Kraft Board
- (Optional) Paint or washi tape to dress up your tubes
- (Optional) EasyPress or Mini-Iron to adhere iron-on vinyl to your pieces
- (Optional) Parchment paper for pressing the iron-on vinyl
- A way to cut your vinyl (I used the amazing Cricut)
- Design #136 – My free SVG/DXF/PDF cut files/patterns (available in my free resource library—get the password at the bottom of this post)
How to Make a Cricut Tool Bench
Step 1: Get my free Cricut Tool Bench pattern
Get the free tool bench design (Design #136) from my free resource library (get the password to the library in the form at the bottom of this post). Note that this pattern is available in SVG, DXF, and PDF formats.
Watch our video to see this step in detail.
Step 2: Cut out your materials
You can cut this craft tool bench out by hand with the PDF file or with a cutting machine like a Cricut. If you’re going to cut this tool bench on your cutting machine, upload the file to your design software.
Tip: If you’re not sure how to download and upload an SVG cut file to Cricut Design Space, watch this helpful video training series I made. If you’re on an iPhone or iPad, here’s how to download and upload SVG files to the Cricut Design Space app.
Attention Cricut Design Space Users: If you upload the SVG file and it appears too small, use the “stacked” version of the SVG to retain the proper sizing. Here’s what that will look like when you first upload it to Design Space:
Here are the sizes of the major elements in this file:
Tip: To get the pattern to fit efficiently on your materials and mats, ungroup everything, then attach all of the yellow layers together and then all of the blue layers together. The yellow layer is your base material (so your Heavy Chipboard or your plain Kraft board) and the blue layer is your decorative covering (so your iron-on glitter vinyl or your foil Kraft board).
If you cut heavy chipboard on your Maker, be sure to tape your chipboard to your mat, put in your knife blade, and move your star wheels (those white wheels on your Maker) all the way over to the right side. It took about 45 minutes (20 passes) to cut my heavy chipboard for this Cricut Tool Bench pattern. I recommend you keep an eye on your Maker as it cuts, as it may be done in as little as 10 passes. To check, just pause your machine, lift up a corner, and see if it’s cut all the way through yet or not.
When you cut iron-on vinyl, remember to MIRROR your layer in Design Space and then put the glitter itself FACE DOWN (shiny side down) on your cutting mat.
Watch our video to see this step in detail.
Step 3: Cut your tubes to the right lengths
Use a craft knife to cut sturdy cardboard tubes to these lengths:
- 1 tube at 4″ long
- 2 tubes at 3″ long
- 2 tubes at 3.
 5″ long
Watch our video to see this step in detail.
Step 4a: Assemble your Cricut Tool Holder (Kraft Board Version)
The Kraft board version of my Cricut Tool Bench cut on your Explore (or Maker!) is three layers of Kraft board. One of those layers (the top layer) can be the pretty foil Kraft board like I used for my pink one. Or you can use iron-on glitter vinyl over your three layers of regular Kraft board as I did with my blue one. Your choice!
Watch our video to see this step in detail.
Step 4b: Assemble your Cricut Tool Holder (Heavy Chipboard Version)
The Heavy Chipboard board version of my Cricut Tool Bench cut on the Maker is just one layer of heavy chipboard. One of those layers (the top layer) can be the pretty foil Kraft board like I used for my pink one. Or you can use iron-on glitter vinyl over your three layers of regular Kraft board as I did with my blue one. Your choice!
Watch our video to see this step in detail.
One of the things I just love about these Cricut Tool Benches is how surprisingly sturdy they are. This blue one is rock solid thanks to the heavy chipboard and even the layer of iron-on glitter vinyl seems to help! The pink one gets its strength from the tubes, and you can put a surprising amount of stuff inside. Both can be picked up and moved about without worrying that everything will fall out.
I can think of so many fun ways to decorate these. I used glitter and foil, but you could paint them, cover them with washi paper, or adhesive vinyl. You can also make these from some different materials. A couple layers of basswood would work, for example. As would a couple layers of lighter chipboard. Just plain cardstock is not likely to be strong enough, however.
Get my free SVG cut files for the Cricut Tool Bench
Download my free Cricut Tool Bench pattern by subscribing (free) below to get the password to my resource library.
I’m hoping to see lots of people make these tool benches AND personalize the panel on the front! Put your name, some cute pictures, or even just “Cricut Tool Bench!” I’d love to see YOUR Cricut Tool Organizer! Please share a photo in our Facebook group or tag me on social media with #jennifermaker.
Love,
Tool Holder for Cricut Tool and Blades Designed by Jennifer
Etsy is no longer supporting older versions of your web browser in order to ensure that user data remains secure. Please update to the latest version.
Take full advantage of our site features by enabling JavaScript.
-
Item in the photo is in Side Holders: Center Piece Only
Option selected!
This option is sold out.
-
Item in the photo is in Side Holders: Pen + Blade Holder
Option selected!
This option is sold out.
-
Item in the photo is in Side Holders: Pen Holder
Option selected!
This option is sold out.

Click to zoom
Star Seller
Star Sellers have an outstanding track record for providing a great customer experience—they consistently earned 5-star reviews, shipped orders on time, and replied quickly to any messages they received.
| 10,597 sales |
5 out of 5 starsfrom €61.30
Loading
VAT included (where applicable), plus shipping
Primary color
Select a color Black Blue Brown Gray Green Orange Pink Purple Red White Yellow
Please select a color
Side Holders
Select an option Pen Holder (€76. 63) Pen + Blade Holder (€76.63) Center Piece Only (€61.30)
Please select an option
Explore related categories & searches
Listed on Aug 28, 2022
94 favorites
Report this item to Etsy
Choose a reason…There’s a problem with my orderIt uses my intellectual property without permissionI don’t think it meets Etsy’s policiesChoose a reason…
The first thing you should do is contact the seller directly.
If you’ve already done that, your item hasn’t arrived, or it’s not as described, you can report that to Etsy by opening a case.
Report a problem with an order
We take intellectual property concerns very seriously, but many of these problems can be resolved directly by the parties involved.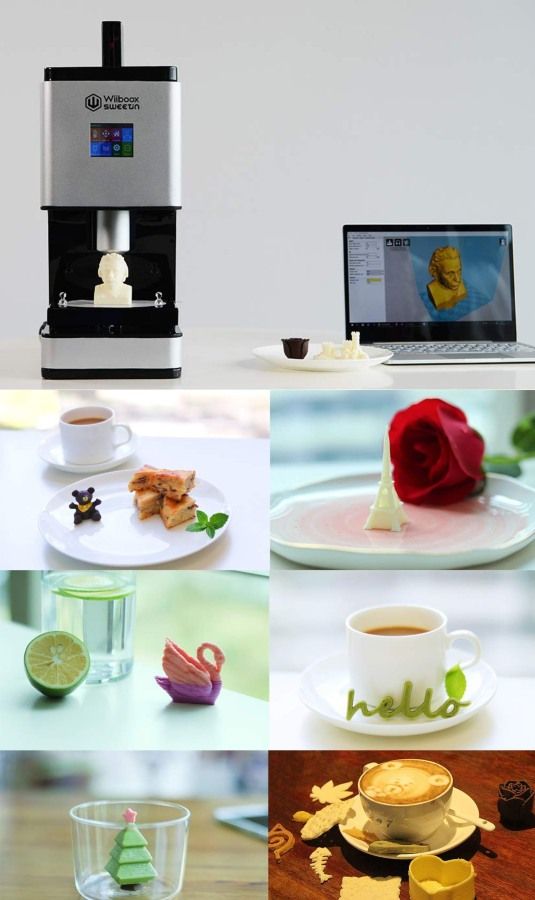 We suggest contacting the seller directly to respectfully share your concerns.
If you’d like to file an allegation of infringement, you’ll need to follow the process described in our Copyright and Intellectual Property Policy.
Review how we define handmade, vintage and supplies
See a list of prohibited items and materials
Read our mature content policy
The item for sale is…not handmade
not vintage (20+ years)
not craft supplies
prohibited or that use prohibited materials
not properly labeled as mature content
Please choose a reason
Tell us more about how this item violates our policies. Tell us more about how this item violates our policies.
All categories
Craft Supplies & Tools
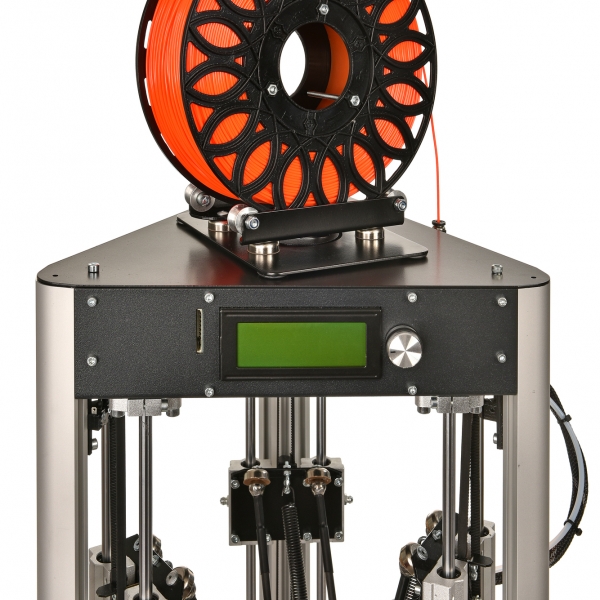
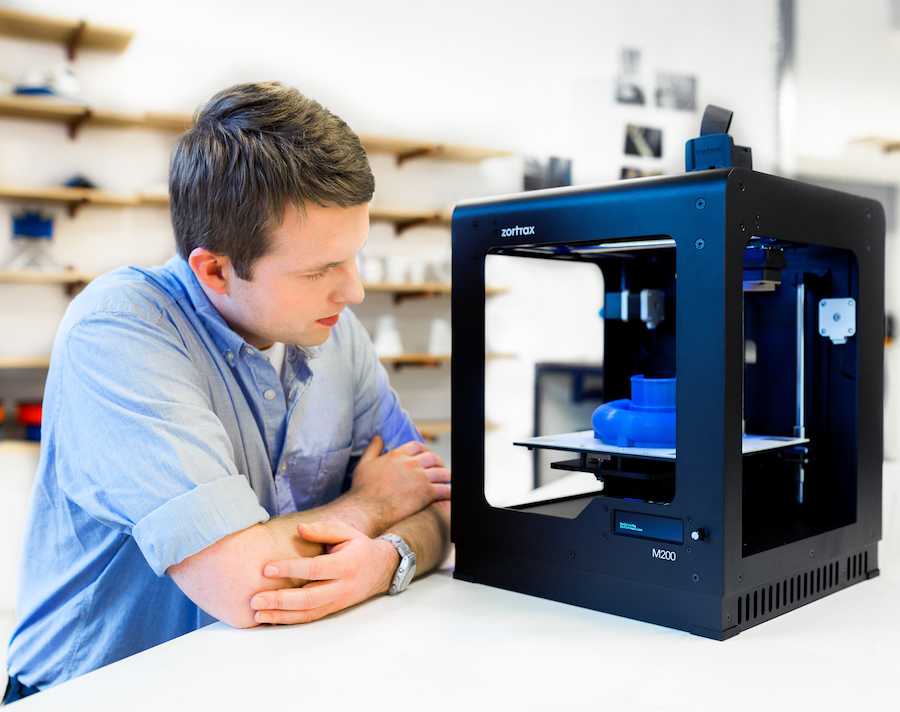
how to create an artifact with a 3D printer - T&P
In the future, a 3D printer may become as natural a part of home life as a washing machine or a toaster, but for now, 3D printing remains an unfamiliar art for the advanced. At Do Fest, specialists from the HSE Prototyping Center will teach everyone to create three-dimensional objects, paint them, and assemble them into constructors. "Theories and Practices" learned from the organizers the details of the future master class and remembered the most unusual things that can already be printed on a 3D printer.
Anna Vakulik and Alexander Moiseev,
specialists from the HSE Prototyping Center - Our center is somewhat similar to a technical creativity circle, it is created for those who are interested in 3D prototyping and printing. We try to organize a community of involved people around us. Any user can come to us with some kind of creative idea, and we try to help implement it. Moreover, it is not necessary to be a designer or a techie - humanists have a good imagination, and in our center they have the opportunity to meet specialists of a different profile and do something together.
For example, now we have guys who will shoot a fantastic mini-movie: they are making a dummy of a futuristic neuro-gadget with built-in LEDs. Our employees from the MIEM Robotics Laboratory, together with us, have been preparing a robot for the well-known Eurobot competition for six months, and other guys are preparing a gadget that will help people with poor eyesight see better. We have many plans: we are going to launch courses in 3D modeling, and at the end of May we will start holding hackathons where teams will create ready-made product prototypes.
It's not a fact that everyone will need home 3D printers, but it must be admitted that the industry is developing rapidly. It would be great if the printer could print food and clothes, as well as metal things - for example, some components for robots that would be more durable.
We will bring a 3D scanner and a 3D printer to the workshops and tell you how to work with them. We will sculpt from plasticine, scan and get a three-dimensional image. We will also show models made by a milling cutter or a laser cutter. For children, we will cut the designers - flat parts from which it will be necessary to assemble some kind of figure. In addition, it will be possible to paint different three-dimensional models.
Rocket Parts
NASA has been interested in 3D printing technology for a long time: a rocket engine injector created using a 3D printer has already been tested (in which it was necessary to withstand a temperature of 3,316 degrees Celsius and extreme pressure) and showed themselves as well as traditionally made parts. In addition, the agency has allocated half a million dollars to a project called Spider Fab, which in the future will allow the use of 3D printing to produce individual parts of a spacecraft right in orbit.
Athlete's Shoes
Sports shoe customization is another exciting area of 3D printing: New Balance has already launched a collaboration with famous athletes Jennifer Simpson, Kim Connelly, Barbara Parker and Jack Bolas. To create this unusual shoe, specialists use sensors to track the movements of the athlete's foot while running and, taking this information into account, print a special sole on a 3D printer, which is connected to the standard top.
House on the Moon
London-based architecture firm Foster + Partners is working on a project to create moon houses. The structure, designed for four residents, will be a frame made of pipes with an inflatable dome, which will be covered with a special foam material using a robot equipped with a D-Shape printer. Moreover, the material will be produced right on the spot, from lunar soil mixed with magnesium oxide. Such a house will be able to protect residents from sudden temperature changes, meteorites and gamma radiation.
Musical instrument
Sustainable musicians can switch to biodegradable polyamide guitars, an option offered by designer Scott Summit, who was the first to 3D print not just a decorative guitar, but an instrument with a full sound. Since guitars, unlike violins, do not have a single standard, different players may need different sounds, and three-dimensional printing allows you to customize the acoustic properties of the instrument to your taste. When the guitar has outlived its usefulness, it can be sent for recycling.
Artistic Encephalogram
The image of a thinker has been reinterpreted in an art project by artist Iain Popian, who has turned electroencephalograms into 3D art projects. Together with programmer Thomas Martinez, Popian turns EEG data into a three-dimensional wave-like landscape, which is then printed on a 3D printer - in theory, now anyone can hang a sculpted "portrait" of their own mind in the living room. From the point of view of science, such a sculpture does not represent anything special - the usual fluctuations in the activity and relaxation of the brain - but one cannot but admit that there is something bewitching in these objects.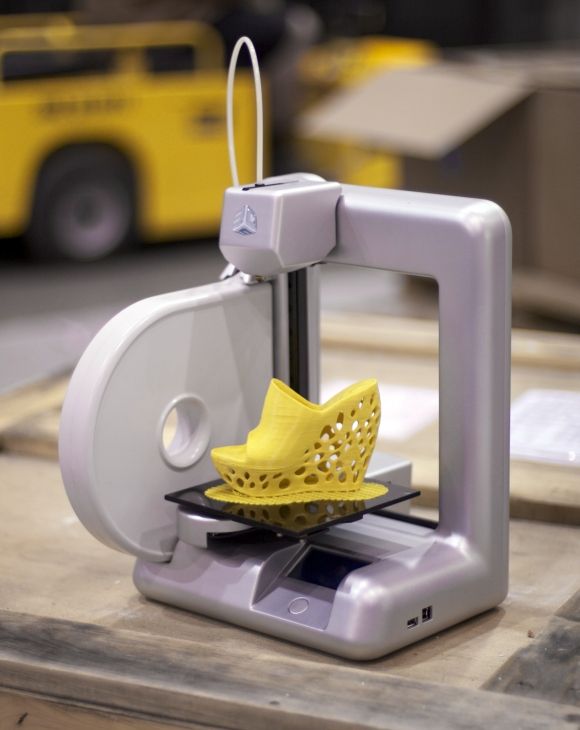
Pizza and desserts
NASA is going to use 3D printers for more than just rockets: the agency has invested $125,000 in Systems & Materials Research's pizza printer project. The prototype uses powdered ingredients and oils for cooking and can significantly reduce the amount of food waste, which is of great importance for a spacecraft. And Natural Machine has developed the Foodini multifunction printer for earthly realities - with its help you can cook pizza and burgers, as well as desserts.
Skeletons of prehistoric animals
3D scientists at the Smithsonian Institution collaborated with paleontologists to take 3D scans of the bones of ancient whales and marine vertebrates, some of which are over 11 million years old. One of the 3D printed copies is already on display at the Washington Museum of Natural History. Such models allow scientists to study fossils more closely and allow museums to expand their collections.
Learn more
- Master class "How to play Reactable"
- Master class "How to draw with light, or create your own rock art"
- Master class "How to communicate with vinyl producer and DJ"
Varlamova Daria
Tags
#Technologies
#3D-printing
#3D printers
#Delafest
-
676
Furniture we talk about the manufacture of furniture using additive technologies - 3D printing - about the advantages and examples of using this approach in practice and what technique is best to use.

This article was prepared using a publication from 3dsourced.com, which was translated and updated for you by Top 3D Group.
You may have once had the idea to use 3D printing in the manufacture of furniture for your home, but you dismissed it, considering this idea too laborious, time consuming or expensive. After all, large industrial 3D printers with a huge print area, like the Farsoon SS403P 3D printer, are usually needed to create large pieces of cabinet furniture, right?
That used to be true, but now there are ways to use 3D printing in the interior without the need for large-format industrial machines.
Read on - we'll take a look at some of these applications with real examples.
Option 1: Build furniture with the Hangprinter
Developed by Thorbjørn Ludwigsen, the Hangprinter is a cable-suspended and movable print unit designed to print large objects as cheaply as possible.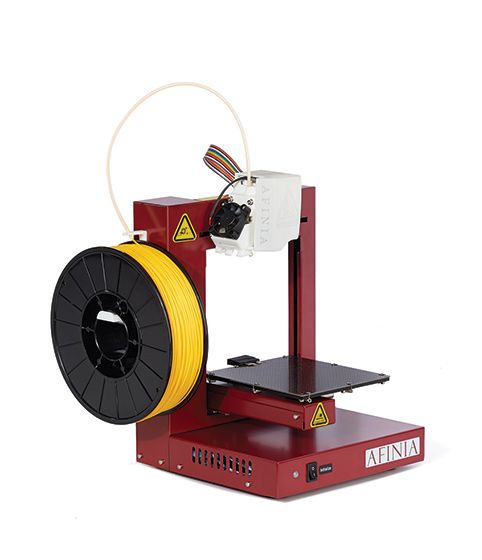 The Hangprinter doesn't fit in a case, its print chamber is the entire room.
Hoping to inspire others to try frameless 3D printing, Thorbjörn has made the software files for this printer open and free for everyone to copy, use and further refine. Most parts of the Hangprinter can be 3D printed, and the cost of building one yourself is estimated to be as low as $250.
Chris Riley Stool
Introduced in mid-2017, Hangprinter printing immediately began to be tested in the creation of large objects. In the video below - one of the very first examples - Chris Riley's bar stool.
Such videos showed the strengths and weaknesses of Hangprinter, for example, the ability to create really large objects for relatively very little money and the possible delamination due to the lack of a closed camera.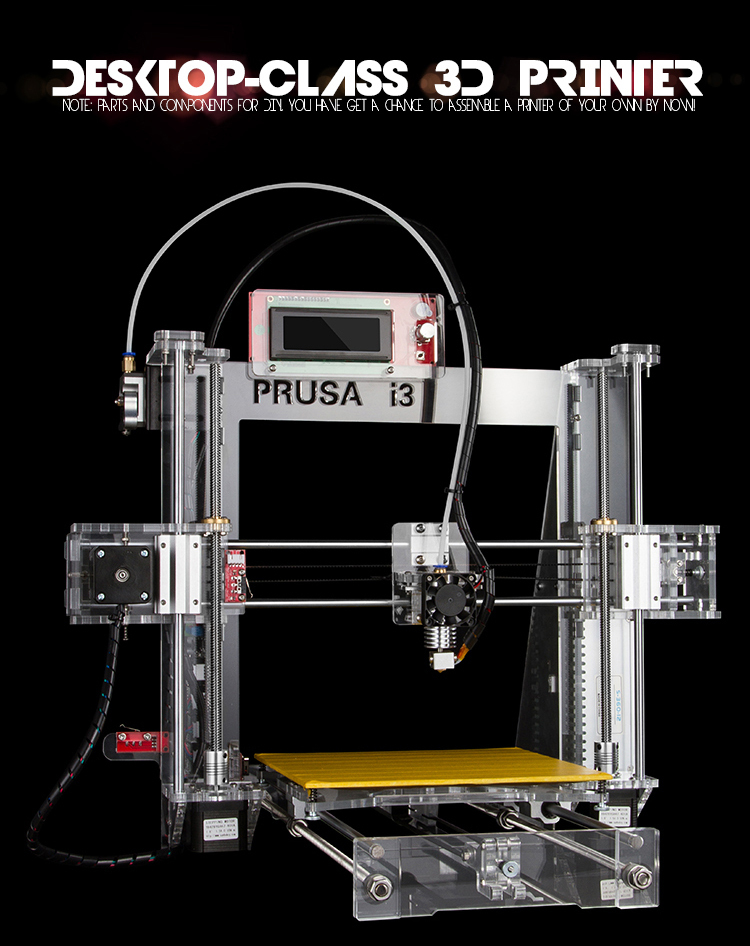
Chris Riley's Stool printed with offset layers and delamination, and it also took two weeks to print because the Hangprinter was so loud it couldn't be used at night and had to be printed only during the day.
Building and operating the Hangprinter requires familiarity with 3D printers, an understanding of the mechanics of how they work, skills in working with electronics and debugging devices, but there are also detailed instructions for beginners, as well as a small but growing community of other Hangprinter users who can be contacted for help.
For those who are willing to put up with the disadvantages described above, or are confident that they can avoid them, Hangprinter remains the most affordable and affordable way to create fully 3D printed furniture.
Option 2: 3D printed furniture on a large 3D printer
3D printed furniture from the “Print Your City” project. This model may not fit in your desktop printer.
The second method is to use a stationary 3D printer with a really large print chamber
Print Your City
The “Print Your City” project, for example, uses a 3D printer to print street furniture and other small architectural forms, consisting of a robot and a fenced indoor area equipped with a special printing platform.
Last but not least, plastic for printing is made from recycled waste.
Despite the simplicity of the idea itself, this method of manufacture is beyond the reach of most people. Large 3D printers not only take up a lot of space, sometimes entire rooms, but are also incredibly expensive. Large industrial 3D printers like the Farsoon HT1001P can still cost hundreds of thousands of dollars.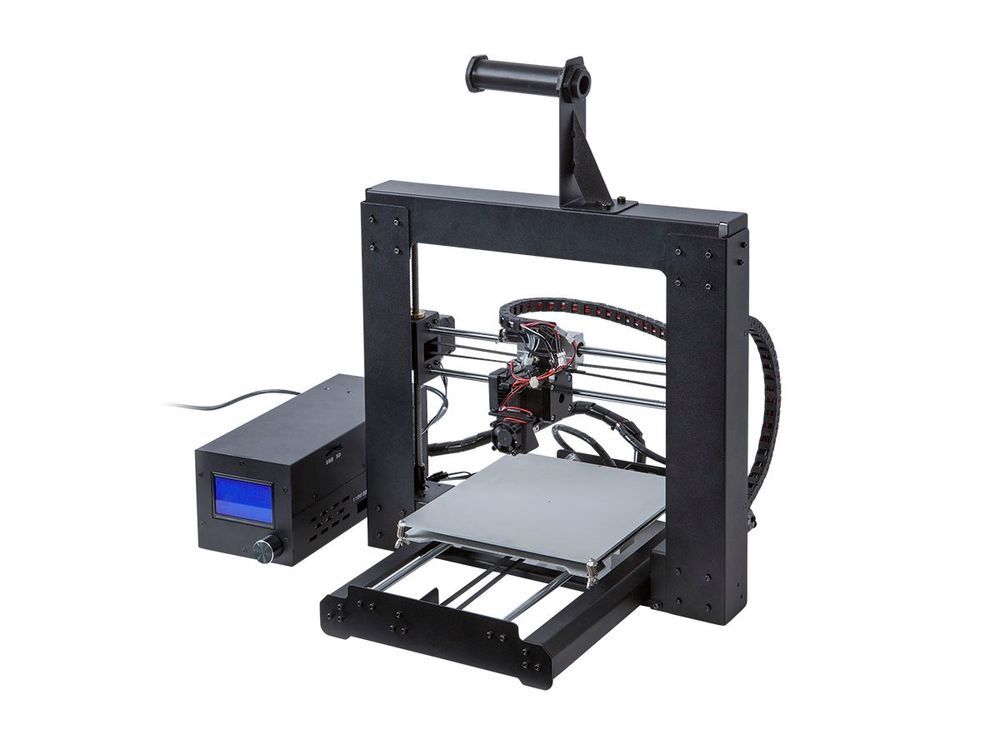
Because of this, very few furniture projects are carried out by individuals, usually by businesses or very passionate enthusiasts, and the Wilkhahn Printstool stool shown below is an example of both.
Wilkhahn Printstool One
Designed by Thorsten Frank and manufactured by Wilkhahn, this 3D stool was produced on an industrial 3D printer and is available as part of Wilkhahn's premium office furniture range.
Wilkhahn is a German furniture manufacturer that strives to differentiate itself from its competitors.
“Unlike almost any other office furniture manufacturer, Wilkhahn stands for designs made in Germany all over the world. It offers high-quality office and dynamic conference furniture that sets the benchmark for the entire industry,” the company says.
Printstool One is one of the few 3D printed pieces of furniture available on the market.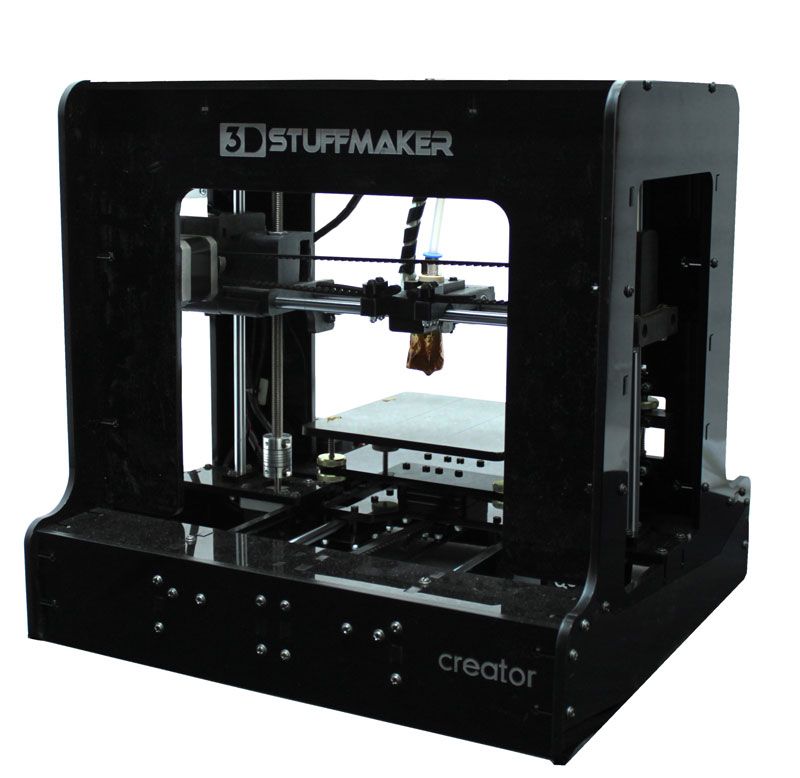 It takes several hours to create and assemble, including 3D printing the base and attaching the seat. The base is printed with lignin, an organic biopolymer that decomposes in nature.
Although the Printstool One is a commercial product, it is not easy to obtain. It is not part of the main Wilkhahn catalog and was released in a limited edition of 500 pieces.
The price for such a stool has not been disclosed and probably depends on options, seat material, for example. But given that regular stock stools in this manufacturer's catalog range from $266 to $660, it's safe to assume that the Printstool One costs at least $500, making it quite an expensive plastic stool. However, overpayment for exclusive furniture is a quite common phenomenon.
In recent years, 3D printing has become more and more accessible. Most likely, this will also affect its large-format sector.
RH Engineering & ManoFigura - furniture for the home
"Magna Patero Ortus" - 3D printed sink RH Engineering & Manofigura .
In mid-2020, this pair of German designers broke into the luxury furniture and interiors segment with their signature Manoveneer finishing technology and large-scale 3D printing.
Their favorite printer is BigRep One, large enough for furniture printing, with a working volume of 1005 mm³, costs about 39000 dollars, depending on the characteristics.
The production process begins with 3D printing of craft furniture based on the client's design, then the ManoVeneer branded coating is applied to the product. What Manoveneer is made of is a company secret, it is only known that the coating is waterproof, can imitate the texture of natural stone and weighs very little.
Option 3: modular printing on a small 3D printer
Large 3D printers will always be a barrier to 3D printing furniture due to their size and cost, prompting designers to look for ways to stop using them - they are turning to small 3D printers -printers and print smaller parts for subsequent assembly.
Supermod 3D printed wall
Supermod 3D printed wall.
Designed by the founders of Simplus Designs, the Supermod shelving wall consists of individually printed modules that snap together.
Supermod was created for decoration, visual division of the room into zones and storage of small things in cells. As a modular system, Supermod bypasses the need for large scale 3D printers. While the assembled wall may be taller than most people, each module can be printed on an affordable desktop 3D printer.
The following method involves using 3D printed parts in combination with conventional ones, such as a table top shield or wooden legs, giving the 3D printed components the role of fasteners and framing elements. This is the most accessible way for a wide range of makers to use 3D printing in the creation or repair of furniture.
Option 4: 3D printed parts as accessories
John Christie Saul dining table and chairs
John Christie, who has been designing custom-made furniture for over 20 years, returns to university at 40.
“During my studies, I became interested in 3D printing and how I could integrate it into the traditional furniture making process. In my projects, I studied how 3D printed parts can be used in the production of furniture.”
John is best known for his Saul Dining Table and Chairs. The table is a handcrafted piece of wood with 3D printed connections.
The author suggested that his connection system would provide "greater customization options, reduced production time and waste" when applied to existing pieces of furniture.
This furniture set was exhibited at the Royal Academy of Arts in Edinburgh in 2016.
This is a craft project to sell products, but similar technology has been used by amateur authors as well.
Alexandre Chappelle Furniture
Designer and YouTuber Alexander Chappelle has documented the process of making his own wooden table with 3D printed connections. As with John Christie's project, the only 3D printed parts on this table were the articulations, while the rest of the table's parts were made from wood using conventional hand tools.
The chair is another creation of Alexandre Chappelle.
The author has posted the STL files and instructions on his personal website, where they are available for as little as $5.
This is perhaps the most affordable way to 3D print your own furniture, although the fact that John and Alexander's designs are mostly made of wood begs the question: is using 3D printed fittings 3D printed furniture?
What technique should I use to 3D print furniture?
So which of these methods can you use for your own furniture project?
If you are a professional studio or independent designer with the necessary funds, and you have a project that needs to be printed reliably and with high quality, then a large 3D printer will be the best option.