How to make custom 3d prints
New 3D printer? Here's how to create your own printables
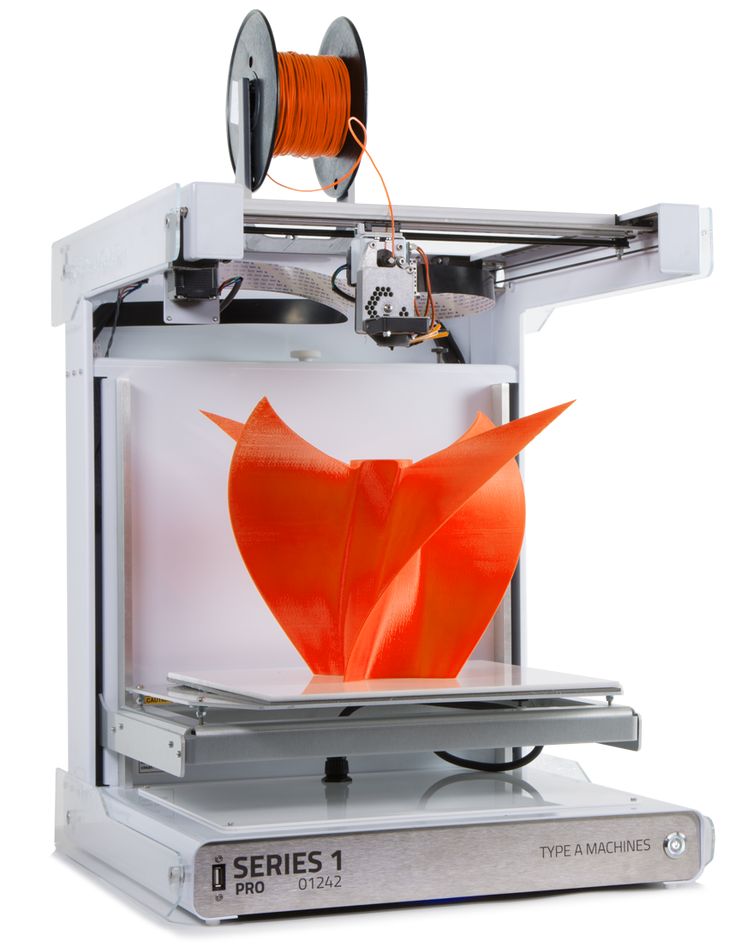
Recently I got the chance to spend some time with a Micro 3D Printer, my first foray into the world of turning a spool of plastic filament into, well, just about anything.
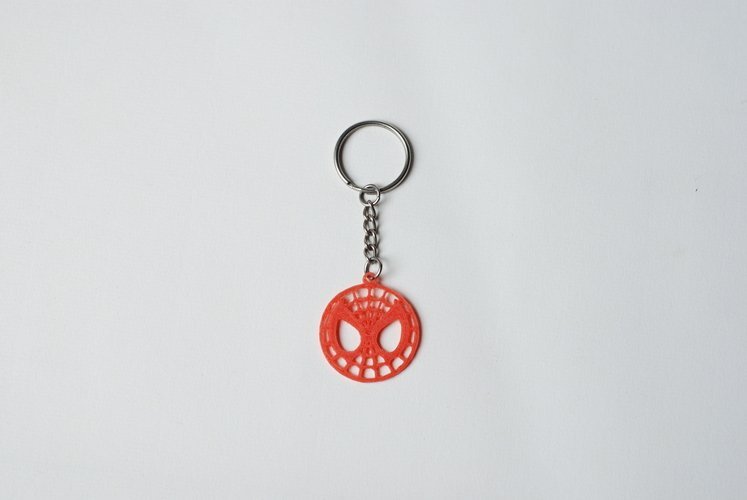
I had lots of fun downloading existing designs from sites like Pinshape and Thingiverse, but eventually I wanted to create objects of my own. Unfortunately, I don't have a degree in CAD or access to any kind of 3D-design software.
Good news: Turns out you don't need either one. Autodesk's Tinkercad is a free Web-based design tool that enables you to create 3D objects, then download those creations in a printer-friendly format. Here's how to get started.
Step 1: Head to Tinkercad and sign up for a free account using Facebook, Twitter or your e-mail address.
Step 2: The service will immediately walk you through a lesson to help you learn basic navigation, followed by another lesson that teaches camera controls, and so on. It's a good idea to go through all of these, just to familiarize yourself with the environment.
Step 3: When you're ready to create your own object, return to the Tinkercad dashboard, then click Create New Design. The tool will immediately send you to the design page, complete with a randomly assigned (and often amusing, like Tremendous Snaget-Fulffy) name for your project. You can change the name by clicking Design > Properties, though this can happen at any point along the way.
Step 4: Now it's time to start assembling your object. The toolbar on the right side is home to a wide assortment of prefab shapes you can drag to the workplane and modify as needed. (You can also import existing SVG (2D) or STL (3D) shapes if you have any.) For purposes of our tutorial, click Geometric, then drag the Hexagonal Prism to your workplane.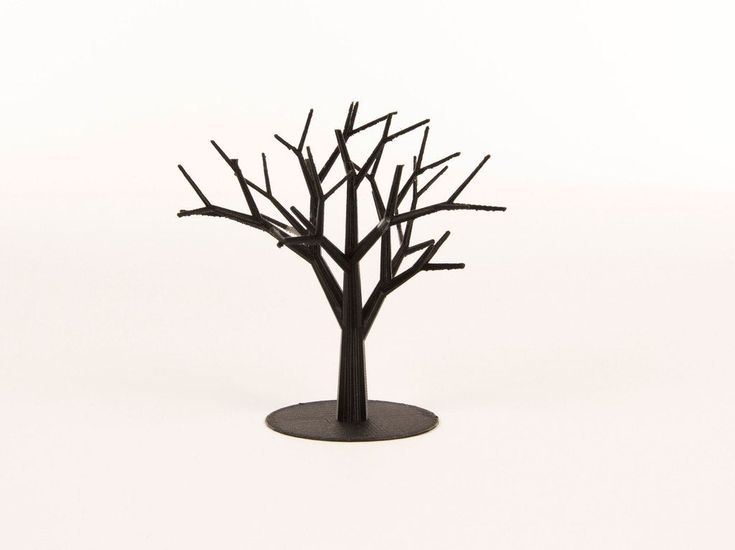
Step 5: Notice that the shape has five white "handles": one at each corner and one in the center at the top. When you mouse over any of them, you'll see corresponding measurements appear. Click and drag any of the corners to resize the prism in that direction; click and drag and center one to adjust the height. (The thing that looks like a black teardrop above the center handle is used to raise and lower the object relative to the workplane.)
Enlarge Image Screenshot by Rick Broida/CNETStep 6: As you add and modify more objects, remember the size of your 3D printer's print bed and build accordingly. When you're done, click Design > Download for 3D Printing and you'll immediately get an STL file you can load into your printer.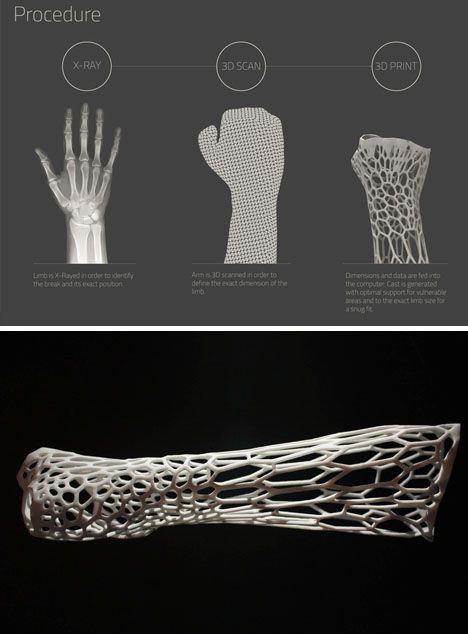 (As you'll see, Tinkercad also has options for Minecraft versions, ordering 3D prints and uploading to Thingiverse.)
And that's all there is to it. This is a great place to start creating 3D objects to print.
Before you get back to it, here are some quick tips for the Tinkercad beginner:
- Use your mouse wheel to quickly zoom in and out.
- Click and hold the right mouse button, then move your mouse to change the viewing angle.
- After selecting an option, you'll see an Inspector window. Click the Hole option to make that shape "pass through" any solid shape. That's how you would, for example, create a cylindrical hole down the center of your prism.
- To make finer adjustments to object placement, click the Snap grid pull-down and choose a number smaller than the 1.0 default.
Have you found another good tool for creating 3D printer-ready designs? Name it in the comments!
What software to use for 3D printing: The complete guide
David Roberson13 May 2021
Guide
Before starting to 3D print, you will need to make sure you have gathered all the necessary software “ingredients” that will guide you through the printing process, from preparing your 3D model to managing printers themselves.
These include:
CAD software to create a 3D model (you can also use an existing 3D model, if you do not wish or need to design one)
Slicing software
Software to operate your printer remotely (this is optional, but can be convenient)
This article will go through each of these ingredients, and will also touch on how the Ultimaker platform creates a seamless end-to-end flow between hardware, software, and materials, empowering you to unlock the magic of 3D printing and make innovation happen.
What is a “slicer”?
A 3D printing slicer – also known as slicing or print preparation software – is a program that converts a 3D model into a language your 3D printer understands.
Slicing software, such as Ultimaker Cura, digitally cuts a model into flat layers, which your printer can then print one by one. With the Ultimaker platform, however, slicing software is not always needed, thanks to integrations that allow you to print directly from CAD or the Ultimaker Digital Library.
Preparing a 3D print using Ultimaker Cura software
What is the best CAD software to design 3D prints?CAD, or computer-aided design, software enables you to design a 3D model from the ground, up. There are many types of CAD software, each with its own benefits. AutoCAD, created by Autodesk, is perhaps the best-known among them since it was one of the first CAD software programs available for personal computers when released in 1982. Other CAD platforms include:
Fusion360 – great for designing and creating efficient mechanical parts
3ds Max – used in all types of 3D model creation, including video game design, architecture, and 3D printing
TinkerCAD – A free, browser-based CAD tool that allows users to build 3D models out of various shapes. Popular with CAD novices and for STEAM education
Blender – free, open-source 3D model creation software
Siemens NX – for designing and creating advanced 3D models
Solidworks – for designing and creating professional parts for industrial use
Catia – Advanced design software used for creating surfaces and engineering systems
Before you begin 3D printing, be sure to do your research and pick the CAD software that’s right for your use case. This way, you’ll get the most out of the model you choose to design and print.
Also check which file types your slicing software is compatible with, so you can make your 3D designs into 3D prints.
A design in CAD software (left screen), slicing software (right), and the finished print
How to design parts for 3D printing?
When designing for 3D printing, there are best practices to help you get the best results from your 3D printer and the parts it creates. Design parts optimized for 3D printing will improve print success rates, reduce costs through lower wastage, and boost the speed of your product development cycle.
Consider build volume. Your 3D prints can only be as large as your printer’s build volume. Be sure to know its dimensions, then create a part that can either be printed within those dimensions in one go, or plan to use modularity (printing then combining separate parts).
Decide orientation early. Because FFF prints layer by layer, determining the print orientation early in the process helps drive design choices, text alignment, and snap features.
Evaluate overhang support requirements. FFF printed parts are self-supporting up to 45 degrees. Overhangs below 45 degrees must be supported from below with support material.
Follow bridging support guidelines. For most basic filaments, FFF printing does not need support when bridging materials within a 10 mm gap.
Pay attention to nozzle size. When designing small features, you should consider height, wall thickness, and nozzle size. Larger nozzles will print faster than smaller nozzles, but at a cost of increased minimum thickness and height for your models.
Design with hole diameters in mind. Generally, 3D printed hole features should not be smaller than 2 mm. If accurate holes are required, it is recommended to design the holes smaller than intended and post-process with a drilling operation.
Avoid sharp corners. Sharp corners can be modelled in CAD, but the print may warp. Increasing the area of the surface in contact with the bed will decrease the likelihood of the warpage.
For a deep dive into these factors and more, check out our blog on design for 3D printing.
What software do I need to start a 3D print?
This depends on how much of the 3D printing workflow you need to perform.
As long as you already have access to a 3D model, you will typically need software that can slice that model, so your printer can get to work. Once you have started to print, you can also use software to manager your 3D printer (or printers) remotely.
But as we saw earlier, the slicing step can be avoided if you have a 3D printer integration installed in your CAD tool. If you already have access to a 3D printable file (such as a G-code on a USB stick) you can also go ahead and print without the need for any slicing software, as your digital file is already ready to print.
Controlling 3D printers remotely with Ultimaker Digital Factory software
Managing 3D printers remotely
Ultimaker S-line printers, the Ultimaker 2+ Connect, and the Ultimaker 3 can make use of a network connection to access cloud-based services on Ultimaker Digital Factory. By linking a printer to your Ultimaker account, your printer can then be controlled remotely, from outside of its local area network.
Want to learn more about 3D printing software?
Download our free white paper, “Important 3D printing software features,” which will help you determine the best 3D printing software for your business needs, as well as examine settings, print profiles, and other features that can help you get the most out of your printing experience.
Get the white paper
3D printing in CUSTOM
Application
Subscribe to the author
Subscribe
Don't want
5
Hello everyone!
We would like to tell you about one interesting project.
Custom Sports Bucket
The task was to make an individual custom seat using 3D printing. Because Since this is custom and you always want to do something individual, it is the quick changes to the 3D model that allows you to achieve the desired result almost at the first iterations of printing.
So, to create a bucket, a model was designed, according to the approximate dimensions of the pilot, and after the first print it was clear that changes needed to be made. After changes in the model and confidence that this is exactly what is needed, the “final” printing was started.
The model was divided into several pieces due to the rather small print area of the 300x250 3D printer, as well as in order to minimize supports.
Printer we used - ZAV with 0.6mm brass nozzle
According to the settings in cura it was decided to use 20% infill, 2.4 mm wall and 0.3 mm layer
Oddly enough, plastic was chosen for printing REC PLA
with settings: nozzles at 245°C; table 50°С
For good adhesion to the table used Glue The3D
By the way, for the best result in printing, it is advisable to pre-dry the plastic.
Printing was quite fast, each element was printed in about 3 hours
Then the question arises, how to connect all this?
Many options available: glue, weld, epoxy, etc.
We chose welding, for this method you will need an ordinary (Soviet) soldering iron and some additional filament (yellow in the photo) to strengthen the welding seam.
A little patience, seam after seam, and our part is ready.
We try on a chair and sit down.
Oooooop
Some office testing ;D
And the test passed without any crunch, everything is fine.
Well, then the most interesting. Installation on custom, in this case it is a drift trike.
The bucket fit perfectly and fell into place, it is fastened with 4 bolts to the base of the drift trike.
And of course the sea trials were a great success, the lateral support was excellent and the test pilot was pleased with the result.
In the future, it is planned to make a new model and use it as a form for a small series. It is also possible to strengthen the structure with fiberglass.
p.s. Turn ideas into reality
Thank you all for watching.
More information about us:
Our website
VK
FB
PLA 3D printing custom
Follow author
Follow
Don't want
5
More interesting articles
17
Subscribe to the author
Subscribe
Don't want
My life takes place in a 5-storey Khrushchev building with water heating through a gas column. And service...
Read more
one
Follow the author
Subscribe
Don't want
Equipment from SHINING 3D and software from Verisurf allows you to digitize original. ..
..
Read more
204
Subscribe to the author
Subscribe
Don't want
Sadness has come. The screwdriver began to discharge quickly. Time to change batteries.
Look...
Read more
3d printer for silicone molds and products
With the help of a 3D printer, you can create many complex and unusual products from various materials. In recent years, silicone 3D printing has become increasingly popular, which allows you to create implants, organ prototypes, and other useful products. Let's take a closer look at silicone printing, products that can be created with its help, the necessary equipment and the prospects for the development of new technology.
What is 3D printing silicone?
Silicone is a polymer that consists of chains of alternating silicon and oxygen atoms.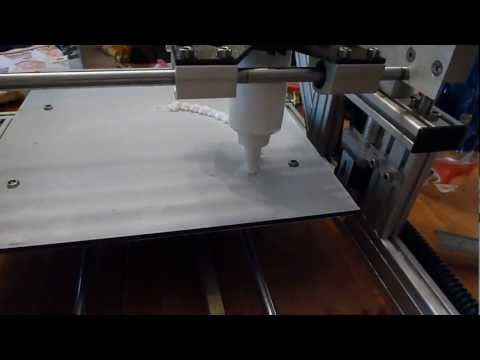 This material is resistant to various temperature ranges and various chemicals.
In 2016, Wacker Chemie found the most efficient way to 3D print silicone products. Based on this technology, Fripp Design, Envisiontec, Carbon 3D developed and produced equipment and materials that made it possible to work with silicone on a 3D printer.
Silicone is most often used in the medical industry to create objects that are resistant to changing environmental conditions. Until 2016, it was possible to create medical objects from silicone only with the help of injection molding of thermoplastics (injection molding). However, the new technology of additive 3D printing allows you to create smaller parts at an acceptable cost compared to injection molded products.
Silicone 3D Printing Technology
The 3D printer that can print silicone products has the same principle as an inkjet printer. Liquid molten silicone is fed through the extruder in small droplets that are superimposed on each other, forming layers. The printer software is responsible for the correct formation of lines and shapes as a whole.
The curing process is required for the silicone to cure. It is performed using ultraviolet radiation, which forms cross-links between sections of the polymer chain. Due to this, the silicone is strengthened and becomes heat resistant.
3D printed silicone inside a microgel
Silicone 3D printed inside a microgel was developed at the University of Florida. This technology makes it possible to create more durable, but at the same time flexible and comfortable implants. At the same time, the cost of their production will be significantly lower, as well as the final cost for buyers. In the future, silicone printing inside the microgel will allow the creation of various therapeutic devices and very complex structures, such as human organs and tissues.
This 3D printing method allows you to create individual products of various shapes. The printing nozzle moves along a predetermined path and extrudes liquid silicone drop by drop onto the microorganic gel substrate. Depending on the complexity of the finished product, the printing process can take from several hours to several days.
Silicone Mold Printer Application
Silicone Mold 3D Printer is applicable to the following industries:
- Medicine. Silicone is biologically compatible with the human body, does not have a toxic effect on it and is resistant to the influence of an aggressive environment. Thanks to this, the material is used for the production of:
- individual implants;
- respiratory masks;
- hearing aids;
- ear prostheses;
- training preoperative organ models;
- spectacle nose pads;
- contact lenses.
- Automotive industry. Due to the resistance of silicone to extreme temperatures and solar radiation, it is used for the production of automotive plugs, hose. The presence of waterproofing properties also allow the use of silicone for the manufacture of seals in hydraulic systems and materials for sealing automotive joints.
- Manufacture of casual or sports articles. The elasticity of silicone and the safety of its use makes it possible to produce insoles for running shoes, ear plugs for headphones, and wristbands.
- Manufacture of souvenirs and jewelry.
Which 3D printer is suitable for silicone products?
What to look for when choosing?
When choosing a 3D printer for printing silicone products, you should pay attention to three main parameters of the device:
- Extruder. It must be inkjet, as liquid silicone is used for printing.
- Integrated heater and pump. To prevent liquid silicone from cooling down during printing and not clumping, the printer must have a heater that will constantly maintain the same temperature. It is also important to have a pump. It will help to evenly supply liquid filament to the work surface from the extruder.
- Covered print area. It is necessary for the vulcanization of the printed blank.
 An ultraviolet emitter is located in the printed area, and the area itself is closed with a darkened glass dome.
German RepRap LAM PRE-SERIES 3D printer
Ideal for printing silicone products. It adopts FDM technology, in which two-component liquid silicone rubber (LSR) is mixed by a pneumatic piston and extruded by an extruder. Then each layer of material is thermally cured under the action of an infrared rod.
The FDM technology used by the printer has increased print speed, reduced waste during production, completely eliminated post-processing of the product and accelerated its time to market.
The operation of the device is controlled using the touch screen. The printer uses Simplify3D software to process 3D models.
3D printer German RepRap LAM PRE-SERIES
- Base platform heated
- The weight 80
- Material LC-3335
- Seal FDM
- Working chamber area 390 x 400 x 330 mm
- Speed 6000 mm/m or 100 mm/s
- Number of print heads 1
- Layer thickness from 100 µm
- Nozzle diameter, mm 0.
 4
4
Go to product
Top 9 Silicone 3D Printers0005
The following professional silicone 3D printers have proven themselves in the market:
- EnvisionTEC - printing medical and dental parts (Perfactory Micro, Vida HD CROWN & BRIDGE and Xede 3SP Ortho lines).
- Structo - creation of dental products (OrthoForm, DentaForm series).
- Total Z - printing of advertising, souvenir, layout and educational products (Anyform line).
- Stratasys - creation of parts for the automotive, aerospace, defense industries (Connex Objet series), printing of dental products (J720 Dental line).
- 3D Systems - printing of souvenirs, models, promotional items and educational products (sPro series).
- Sinterit Lisa Set is a system for creating advertising, souvenir, mock-up and educational products.
- Intamsys FUNMAT PRO 610 HT is an industrial printer for printing large items and testing functional parts under critical conditions.
3D printer Intamsys FUNMAT PRO 610 HT
- Software IntamSuit, Simplify 3D, Cura
- Control connection interfaces WiFi, Internet, USB
- Material PEEK, PEKK, PEI, PPSU, PC, Nylon, ABS, PLA, PVA, TPU, Carbonfiber Reinforcement
- Seal FDM
- Supported file formats STL, OBJ
- Z-axis resolution 0.0016 mm
- Resolution X and Y 0.016 mm
- Platen temperature 300°C
- Extruder temperature 500°C
- Working chamber area 610 x 508 x 508 mm
- Number of print heads 2
- Layer thickness from 50 µm
- Thread diameter 1.
 75
75 - Nozzle diameter, mm 0.4 (0.25, 0.5, 0.6, 0.8, 1.2 mm)
- Display 7" color touch screen
Go to product
Sinterit Lisa Set
- Control connection interfaces WiFi
- Laser IR 5W
- Maximum Layer Height 0.15 mm
- Maximum consumer power 24 W
- Maximum build chamber temperature 105 °C
- Maximum platform temperature for printing 190 °C
- Max extruder temperature 275 °C
- Material PA12 smooth, flexa Black
- Minimum Layer Height 0.
 06 mm
06 mm - Seal SLS
- Food 110/120 V or 220/230 V
- Supported Software Sinterit Studio 2016
- Dimensions (mm) Sinterit Lisa - 650x550x450; Sinterit Sieve - 600x340x330; Sinterit Sandblaster - 480x370x360
- Accuracy along X, Y axes, mm 0.1
- Speed 15 mm / hour
- Layer thickness from 75 µm
- Weight, kg Sinterit Lisa - 35;Sinterit Sieve - 22.
 5;Sinterit Sandblaster-15
- Data output format STL, OBJ, 3DS, FBX, DAE, 3MF
- Max workpiece size PA12: 90x110x130 mm, flexa Black: 110x130x150 mm
- Print area Sinterit Lisa - 150x200x150 mm; Sinterit Sandblaster - 410x310x200 mm
- Operating system Microsoft Windows
Go to product
The future of silicone 3D printing
Silicone printing was originally developed for medical applications. Therefore, the most promising goal is the development and creation of silicone tissues and human organs that imitate real ones with great accuracy.
Help.
Learn more