How to make 3d printers
How Do You Make & Create STL Files for 3D Printing – Simple Guide – 3D Printerly
When you are in the field of 3D printing, there are steps you have to follow to be able to actually 3D print your objects. Many steps are done for you but making 3D printer files is one of the most important ones.
This article will show you exactly how 3D printer files are made so read on if you’d like to know.
3D printer files are made by using Computer Aided Model (CAD) software which allows you to create what your model will look like. After your model is complete, you need to ‘slice’ your CAD file in a slicer program, the most popular being Cura. After your model is sliced, it will be ready for 3D printing.
Once you understand the steps of this process and do it for yourself, it all becomes very easy and clear. I will do my best to detail the step-by-step process on how beginners create 3D printer files.
Creating models for 3D printing and learning how to make your own 3D model is a great skill to learn, so let’s get right into it.
- Choose & open a CAD program
- Create a design or model using the tools in your chosen program
- Save & export your completed design to your computer (STL file)
- Choose a slicer program – Cura for beginners
- Open & ‘Slice’ your file with your desired settings into a G-Code File
If you want ready-made files that you can get 3D printed, check out my article 7 Best Places for Free STL Files (3D Printable Models).
Choose & Open a CAD Program
There are many CAD programs out there that can be used to create your model, but some are definitely more tiered towards beginners which is what I’ll focus on in this article.
Also, many higher level programs actually need to be purchased, so you’ll be happy to know everything I recommend will be completely free.
The best CAD programs for beginners are:
- TinkerCAD – click and create your own account
- Blender
- Fusion 360
- Sketch Up
- FreeCAD
- Onshape
Check out my article Best Free 3D Printing Software – CAD, Slicers & More.
The one that I will focus on and do recommend is TinkerCAD for beginners because it was definitely designed for you guys in mind. Beginners don’t want a complicated CAD program that takes a while getting used to, they want to be able to put something together in the first 5 minutes and see its capabilities.
One of the great features of TinkerCAD is the fact that it’s browser-based so you don’t have to install some huge program file to get started. Just go to TinkerCAD, create an account, go through the short tutorial on the platform and get to modeling.
Once you get the hang of one CAD program and the way designing a model works, you can move onto other programs, but at first just stick to one simple program.
TinkerCAD has enough capabilities to keep you modeling there for at least a few months, before you think about moving to a software with more features. For now, it will work wonders!
Create A Design Using the Tools in Your Chosen Program
TinkerCAD specializes in ease of use, as you put together blocks and shapes to gradually build a more complex structure that you can be proud of. The video below will show you a quick tutorial on exactly how it looks and how it’s done.
It’s always best to follow a video tutorial when learning how to create designs, while doing the same thing in the program yourself.
Reading a guide of some sort is great when you understand the program and are looking for ways to do cool, new things but when just starting out, get the experience behind you.
Once you’ve created some of your own models by following a tutorial, a good point to go to next is to play around in the program and get creative. One thing I chose to do is find a few household objects and try to model it as best as I could.
This ranged from cups, bottles, small boxes, vitamin containers, anything really. If you want to get really accurate, you can get a sweet pair of Calipers from Amazon.
If you want a quick, cheap but reliable set I’d recommend the Sangabery Digital Caliper.
It has four measuring modes, two unit conversion & zero setting function. You can get very accurate readings with this device, so I do recommend you getting one if you don’t already. Also comes with two spare batteries!
If you want a higher quality Caliper, go for the Rexbeti Stainless Steel Digital Caliper. It is more premium with a polished finish and a case to hold the device. It comes with IP54 water & dust protection, has 0.02mm accuracy and is great for the long-run.
Once you get some good practice creating different items, you’ll be a lot more prepared to start making useful and complex 3D printer files.
At first, it seems like all these simple shapes and holes won’t be able to make much. This is what I thought at first before seeing what people could really create in this software.
The following was made on TinkerCAD by Delta666 found on MyMiniFactory. It would be hard to describe this as a simple design, which just goes to show you the potential you could have with designing your own 3D printer files.
Save & Export Your Completed Design to Your Computer (STL File)
The great thing about TinkerCAD is how it’s made for things to be easy to use. This also includes saving and exporting your STL files straight to your computer.
Unlike some downloaded CAD software, this one auto-saves your work each change you make so you don’t have to worry about losing your work.
As long as you have named your work in the top left, it should continue to save. You’ll see a small message saying ‘All Changes Saved’ so you know if it’s working.
As you can see in the picture, exporting your CAD files into a downloadable STL file is a piece of cake. Simply click the ‘Export’ button in the top right of your TinkerCAD page and a box will pop up with a few options.
When it comes to 3D printing files, the most common ones we see are the .STL files. There are a few things that people say it’s abbreviated from such as Stereolithography, Standard Triangle Language and Standard Tessellation Language. Either way, we just know it works pretty good!
The complex part behind STL files is that they are made up of several tiny triangles, with more detailed parts having more triangles. The reason behind this is 3D printers can better understand this information with this simple geometric shape.
Below is a clear illustration of these triangles making up a model.
Choose a Slicer Program – Cura for Beginners
If you’re in the 3D printing field, you either would have come across Cura by Ultimaker or are already well-versed in the program. Cura is the most popular, cross-platform slicing software that 3D printer hobbyists use to prepare their files for 3D printing.
There isn’t much point trying to go with another slicer because this one works so well and does exactly what you need it to do. It’s very beginner-friendly and doesn’t take long at all to get the hang of it.
There are other slicer programs out there like PrusaSlicer or SuperSlicer. They all essentially do the same thing but Cura is the choice I recommend.
Check out my article Best Slicer for the Ender 3 (Pro/V2/S1), which also goes for other 3D printers as well.
Open & ‘Slice’ Your File With Your Desired Settings Into a G-Code File
The term ‘slice’ your file is one that is widely used in the 3D printing field which means to prepare your CAD model and turn it into a G-code file which 3D printers can make use of.
G-code is basically a series of commands that tell your 3D printer what to do, from movement, to temperatures, to fan speed.
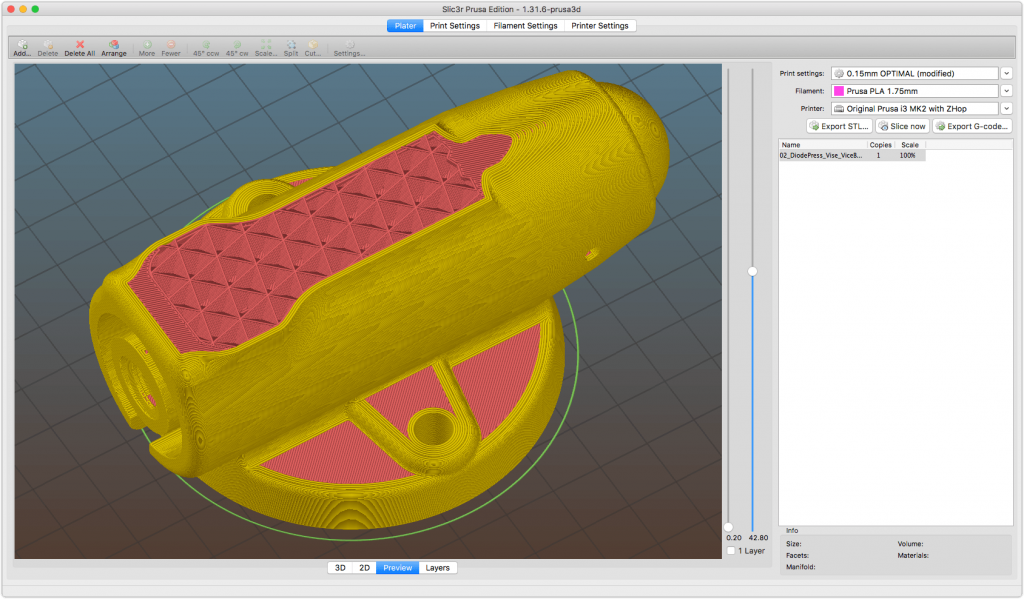
When you slice your file, there is a certain function where you can preview your model in its 3D printing form. This is where you view each layer of your 3D print from the ground, up and you can even see the direction your print head will go while in the printing process.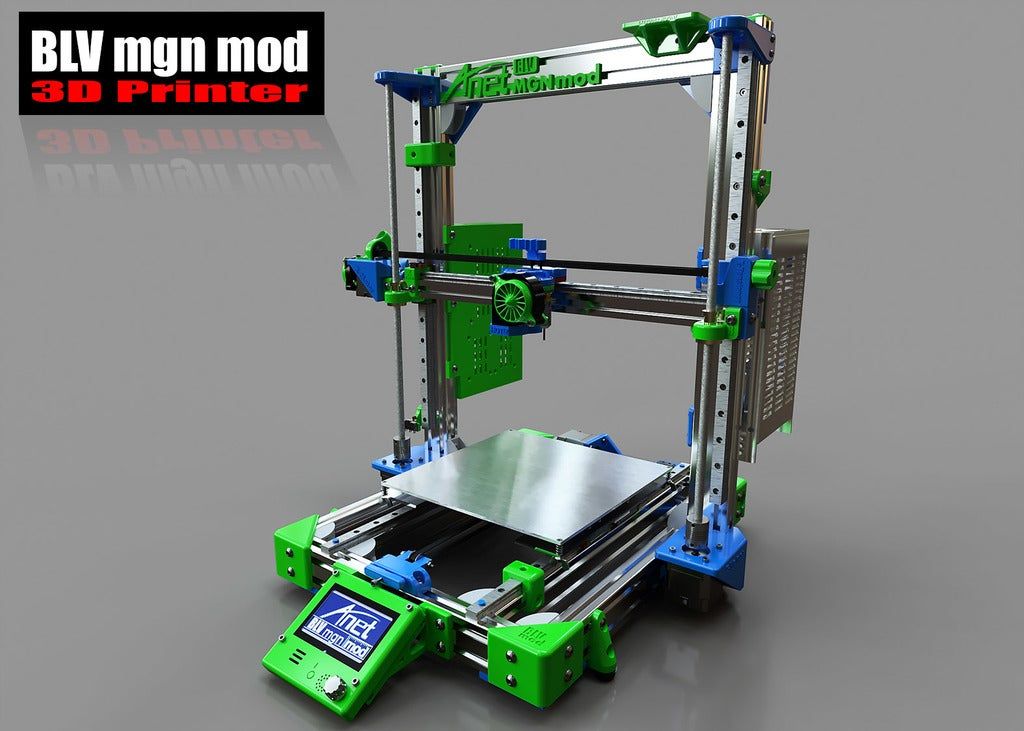
It really isn’t as complicated as it looks. All it really takes is looking over the settings and hitting the blue ‘Slice’ button on the bottom right of the program. The box to the top right shows a simplified way to change settings without getting into all the specific settings.
It’s a spice rack in case you’re wondering!There are many settings in your slicer you can take control of such as:
- Print speed
- Nozzle temperature
- Bed temperature
- Retraction settings
- Print order prioritization
- Cooling fan settings
- Infill percentage
- Infill pattern
Now just because it isn’t complicated to get started doesn’t it mean it can’t get as complicated as you’d like it. I’m sure there are settings that Cura experts have never thought about touching.
This really is a short list when you have seen just how many settings there are, but luckily, you don’t have to worry about most of the settings. Cura has default ‘profiles’ which give you a list of already done for you settings that you can input.
This profile usually works great by itself, but it can take a little tweaking on the nozzle & bed temperature before you get some great prints.
There is a cool menu which allows users to choose custom setting views for beginners to masters, down to custom so the functionality and ease of use is great.
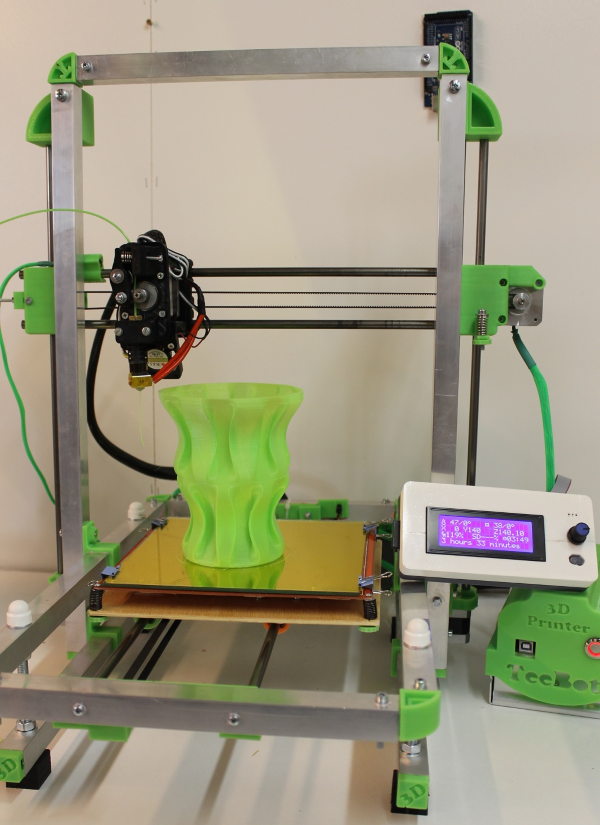
After you follow all these steps, you’ll have created your 3D printer file which your printer can understand. Once I’ve sliced a model, I simply get my USB drive and micro SD card which came with my Ender 3, plug it into my laptop and select the ‘Save to Removable Device’ button and Voilà!
I hope these steps were easy to follow and help you get started making your own 3D printer files.
It’s an amazing skill being able to design your own objects from start to finish, so try your best to stick with it and become an expert in the future.
If you found this helpful, I have other similar posts like the 25 Best 3D Printer Upgrades/Improvements You Can Get Done & 8 Ways How to Speed Up Your 3D Printer Without Losing Quality so feel free to check them out and happy printing!
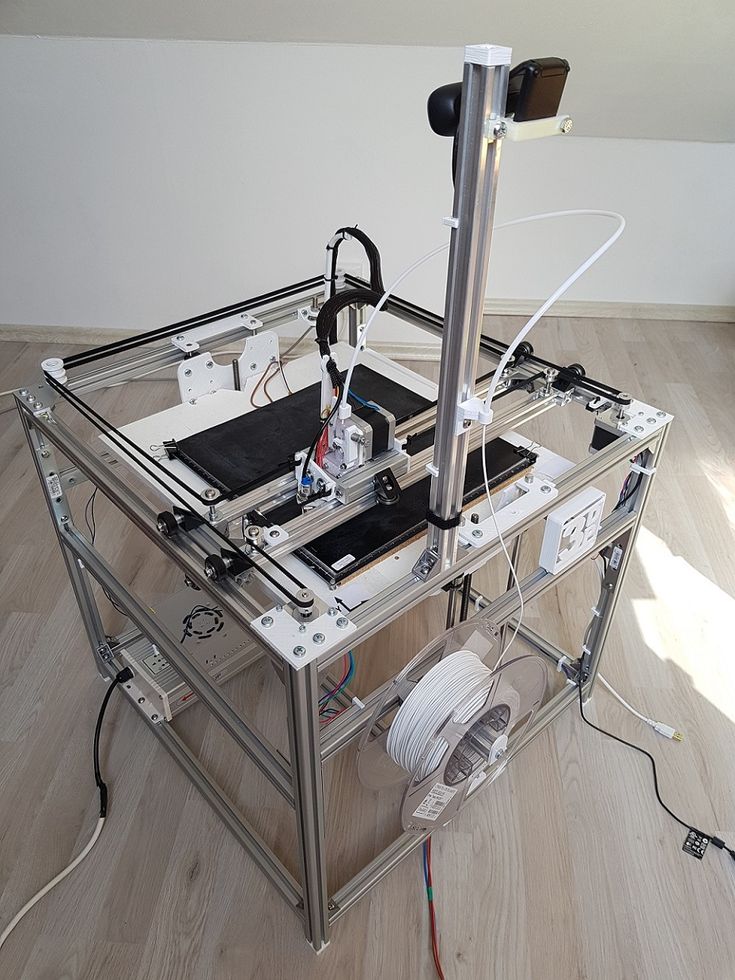
How to Build a 3D Printer From Scratch
If you are reading this article that means that you’ve probably decided to join the community of 3d printing enthusiasts and find out more about 3d printers, or maybe you have already got some experience in it and are ready to try to create your own 3d printer from scratch.
In this article you will find general understanding how 3D printers can be built as well as links to really useful resources where you can find more detailed information with step-by-step description.
Currently there is a big variety of 3d printers in the Internet that already assembled and are ready to print right after you unpack them from a box, of course you also need to buy a 3d printer filament for it. Do not forget that not all 3d printers can use the same filament types, so please read the instruction before you purchase it.
But for some people who love to make something new with their own hands can be more interesting to build their own 3d printer from scratch. Based on our research the 3D printing community is filled with many enthusiastic people so called DIY’ers (Do It Yourself’ers), who are fascinated with building 3d printers literally almost from scratch.
Good example of it is RepRap movement. RepRap is short for a Replicating Rapid-prototyper. In other words it is the self-replicating 3d printer. In fact most of today’s top consumer level 3D printers (picture above) are originated in one way or another from RepRap.
You can find a lot of examples on how to build a 3d printer from scratch on RepRap website, but we also want to describe some of more essential steps in order to give an overall understanding of what to expect if you really decide to make your own 3d printer.
The first step is to find and buy 3d printer DIY kit. Kits usually contain most of parts needed to assemble the printer and can be divided into two main types:
Scratch Built 3D Printer – This 3d printer DIY kit is for those who prefer to build thing from scratch, or in other words go to DIY RepRap route. Apart from some essential advantages this approach has also its disadvantages. In theory it can save you some money and since you build it from scratch you will know every nut and bolt in it by the time you can use it and successfully print your first object. Main disadvantage of this method is time. Literally it will take a lot of time to deal with all these hundreds of bolts, wires, belts and much other stuff. In the end you still need to select and purchase or build a controller board, but it depends on your skills level.
Kit Built 3D Printer – This type of kit is good if you want to save some money and at the same time not to deal with all challenges described in the 1st kit type. Many manufactures sell such kits with “easy-to-assemble” instructions included. I doubt that it will be as easy as assemble a chair from IKEA, so you still have to be mechanically inclined and able to understand basic geometry. Some of such kits contain not all parts and you may need to buy something in addition.
The next step will be to determine the design for your 3D printer. In my humble opinion most of DIY 3D printers have not very breathtaking and futuristic design in comparison with MakerBot and other brands. But it is also a matter of taste, for some people the design is not very important.
Once you have got your 3d print DIY kit and chosen the design you could go ahead and start the most fascinating and time consuming part – build your own 3d printer. Be prepared for sleepless nights and a lot of fun. Maybe you will make up something new and present your findings to RepRap community.
When the hardware part of the 3d printer is ready you also need to add a software component to it. It basically does the following things: allows you to view and alter 3d graphical objects, as well as converts the 3d images into instructions that 3d printer can understand.
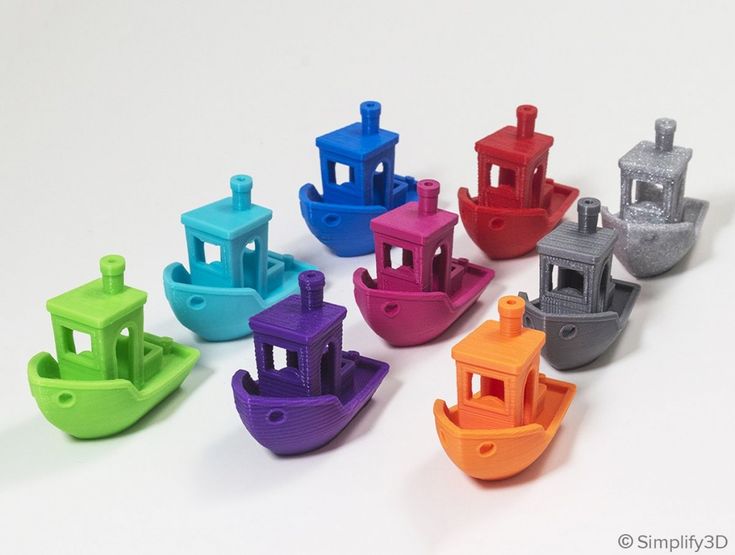
Finally you can 3d print your first object! If you do not have anything to print, you can find a big variety of objects on specialized marketplaces such as Shapeways, Thingiverse and others. Before printing make sure that the object you want to 3d print has the right size and fit on the printer frame.
At the end there is a list of some links where you can find more information about how to build your own 3d printer from scratch:
- RepRap options
- 3D Printer DIY: How to Build Your Own 3D Printer from Scratch
- 3D Printing: Build Your Own 3D Printer and Print Your Own 3D Objects
- Arduino Controlled CNC / 3D Printer Hybrid
- El34 World – 3D Printer Build using 1 inch T-Slot extrusions
- CNET 3D Printer Build Week
Also watch a video from Ben Heck in which he answers on some 3d printing related questions.
Related Articles:
- What is 3d printing – 3D printing technologies overview
- What is 3D Printing?
- History of 3D Printing
- Direct and Binder 3D Printing techniques
- Photopolymerization and Sintering
- 3D Printing Process
- 3D printing revolution
- 3D Printing Materials
- How to choose a right 3D printer filament type
- 3D Printer Filament Types Overview
- Types of 3D printers or 3D printing technologies overview
- How to find and buy a right 3D printer
- History of 3D printing in one picture
- Places to download 3D printer files and files formats overview
- 3D Printing Services Overview
- You Should Know These Important 3D Printing Concepts
How a 3D printer works, what can be printed on a 3D printer
The 3D printer is a technology that allows you to create real objects from a digital model. It all started in the 80s under the name "rapid prototyping", which was the goal of the technology: to create a prototype faster and cheaper. A lot has changed since then, and today 3D printers allow you to create anything you can imagine.
Contents:
- What is 3D printing?
- How does a 3D printer work?
- What can be printed?
The 3D printer allows you to create objects that are almost identical to their virtual models. That is why the scope of these technologies is so wide.
What is 3D printing?
3D printing is an additive manufacturing process because, unlike traditional subtractive manufacturing, 3D printing does not remove material, but adds it, layer by layer—that is, it builds or grows.
- In the first step of printing, the data from the drawing or 3D model is read by the printer.
- Next is the sequential overlay of layers.
- These layers, consisting of sheet material, liquid or powder, are combined with each other, turning into the final form.
With limited production of parts, 3D printing will be faster and cheaper. The world of 3D printing does not stand still and therefore there are more and more different technologies competing with each other on the market. The difference lies in the printing process itself. Some technologies create layers by softening or melting the material, then they provide layer-by-layer application of this same material. Other technologies involve the use of liquid materials, which acquire a solid form in the process under the influence of various factors.
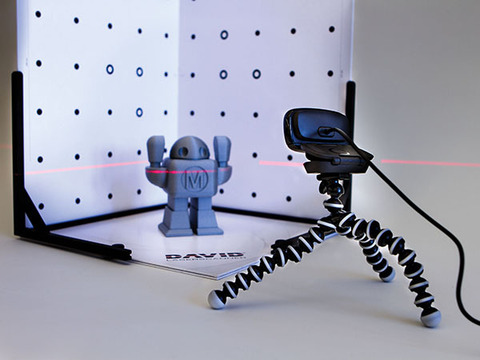
In order to print something , you first need a 3D model of the object, which you can create in a 3D modeling program (CAD - Computer Aided Design), or use a 3D scanner to scan the object you want print. There are also easier options, such as looking for models on the internet that have been created and made available to other people.
Once your design is ready, all you need to do is import it into the Slicer, a program that converts the model into codes and instructions for a 3D printer, most of the programs are open source and free.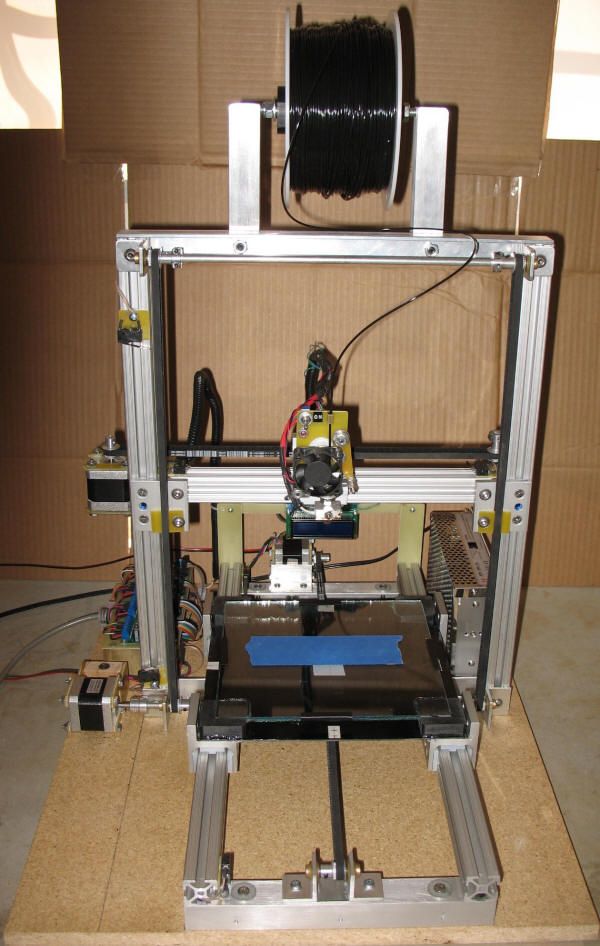 The slicer will convert your project into a gcode file ready to be printed as a physical object. Simply save the file to the included SD card and insert it into your 3D printer and hit print.
The whole process can take several hours and sometimes several days. It all depends on the size, material and complexity of the model. Some 3D printers use two different materials. One of them is part of the model itself, the other acts as a prop that supports parts of the model hanging in the air. The second material is subsequently removed.
How does a 3D printer work?
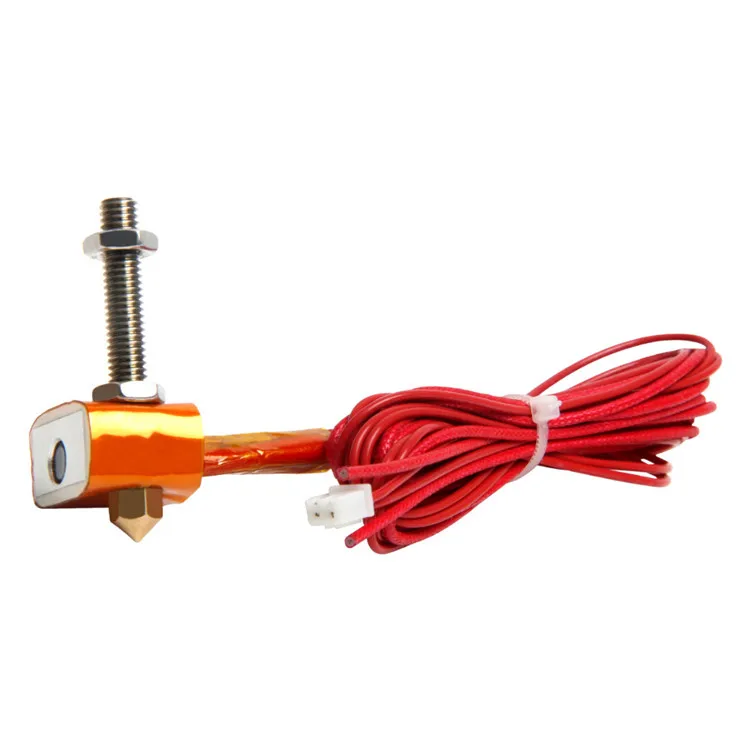
Although there are several 3D printing technologies, most create an object by building up many successive thin layers of material. Typically desktop 3D printers use plastic filaments (1) which are fed into the printer by the feeder (2) . The filament melts in the print head (3) which extrudes the material onto the platform (4) creating the object layer by layer.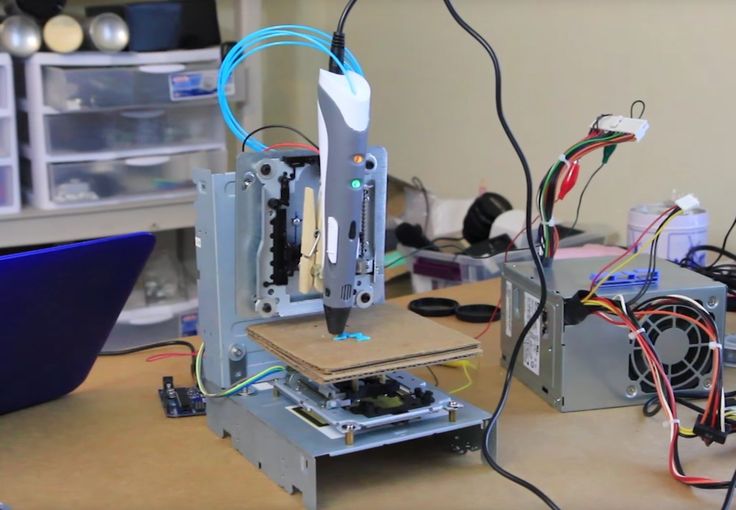 Once the printer starts printing, all you have to do is wait - it's easy.
Of course, as you become an advanced user, playing with the settings and tweaking your printer can lead to even better results.
What can be 3D printed?
The possibilities of 3D printers are endless and they are now becoming a common tool in fields such as engineering, industrial design, manufacturing and architecture. Here are some typical usage examples:
Custom Models
Create custom products that perfectly match your needs in terms of size and shape. Do something that would be impossible with any other technology.
Rapid Prototyping
3D printing allows you to quickly create a model or prototype, helping engineers, designers and companies get feedback on their projects in a short time.
Complex geometry
Models that are hard to imagine can be easily created with a 3D printer. These models are good for teaching others about complex geometry in a fun and useful way.
Cost reduction
The cost of 3D printing end-use parts and prototypes is low due to the materials and technology used. Reduced production time and material consumption as you can print models multiple times using only the material you need.
How to choose and buy a 3D printer? →
3D modeling rules for 3D printing
It is known that a prerequisite for 3D printing is the presence of a 3D model, according to which the printer will grow a three-dimensional object. But, even after simulating an object, you should not assume with absolute certainty that the job is done, and soon the printer will give you the finished product. The fact is that not all models are suitable for 3D printing. There are certain requirements for the dimensions, thicknesses and design of models - and these requirements vary depending on the material used and the printer. In addition to these individual characteristics, there are general requirements that distinguish print models from other 3D models.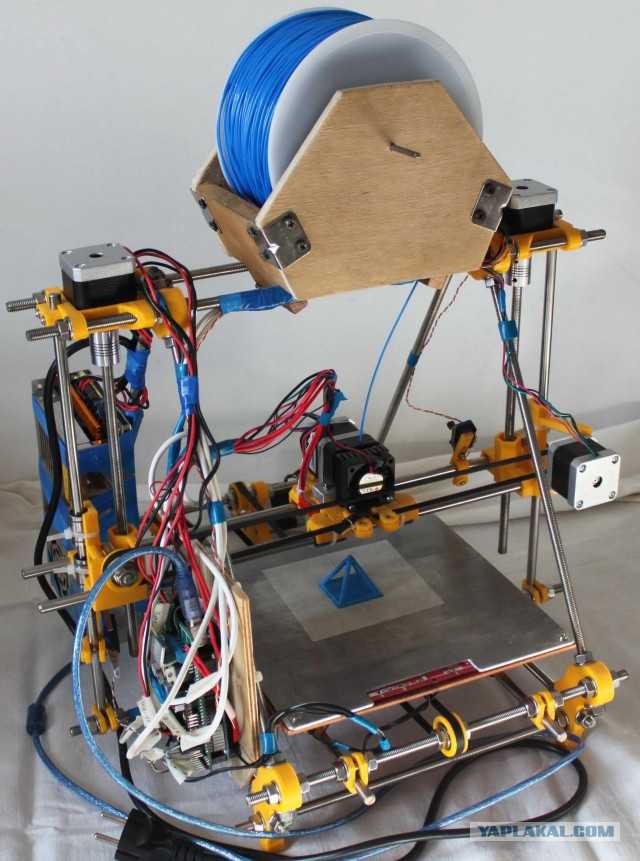 And now we will talk in more detail about how to prepare a model for 3D printing.
First of all, you need to remember that STL files (for one-color models) and WRL (for color plaster 3D printing) are suitable for 3D printing. Almost all 3D modeling programs allow you to export models to STL, so this should not be a problem. You should also take into account that for online download on our website, files no larger than 50 MB each are accepted, as well as an extended list of formats that are automatically exported to STL: STP, STEP, OFF, OBJ, PLY and directly STL. If the file size is more than 50 MB, then you need to send the model to our email address: [email protected]. By the way, one of the easiest ways to reduce the volume of the model and the file size is to create hollow 3D models, we already wrote about how this works in our blog.
Before you start creating a model for 3D printing, it is important to understand what material you want to print the product from.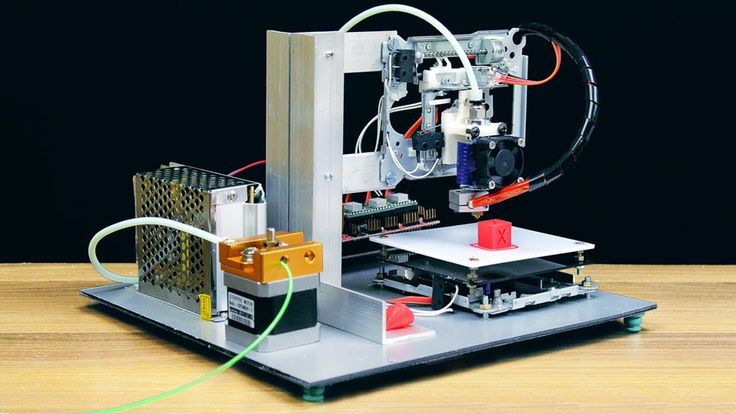 Each material has its own individual characteristics for 3D modeling - maximum and minimum model dimensions, wall thicknesses, distance between moving parts, etc. You can learn more about the requirements for a particular material in the appropriate section on our website.
If you use the online model upload on our website, it will automatically check for standard 3D modeling errors. Models are checked instantly, and if errors that prevent 3D printing were not found, then immediately after uploading the model will appear in your personal account in the "My Models" section. If the model did not pass the test, then you will see a notification that the file cannot be loaded, then you will need to check and refine the model again.
What are the most common errors encountered when modeling for 3D printing?
- Inverted normals - incorrectly oriented normals. Normals should always point outward, they define the boundaries of the object and allow the 3D printer software to understand which is the inside and which is the outside of the model.
 If at least one of the normals is directed in the opposite direction and contradicts the other normal, then this causes a failure in 3D printing, since the printer cannot distinguish between the front and back sides of the object.
 - Non-manifold geometry - Non-manifold 3D model is a prerequisite for 3D printing. The essence of this concept is that each edge of a 3D model must have exactly two faces.
The following errors are usually included in this concept:
o Mesh with holes - "unclosed" mesh problem. Remember the basic rule of 3D modeling: your model must be "watertight" or "airtight". If a hole is formed, it means that some edge is missing one face, therefore the model is not manifold, and therefore not suitable for 3D printing.
o Presence of internal polygons. There must be no faces inside the model, for example inside walls.
o Common ribs. An error occurs when more than two polygons are attached to the same edge.