3D printer styles
Types of 3D Printers, Materials, and Applications
Skip to Main Content
3D printing or additive manufacturing (AM) technologies create three-dimensional parts from computer-aided design (CAD) models by successively adding material layer by layer until physical part is created.
While 3D printing technologies have been around since the 1980s, recent advances in machinery, materials, and software have made 3D printing accessible to a wider range of businesses, enabling more and more companies to use tools previously limited to a few high-tech industries.
Today, professional, low-cost desktop and benchtop 3D printers accelerate innovation and support businesses in various industries including engineering, manufacturing, dentistry, healthcare, education, entertainment, jewelry, and audiology.
All 3D printing processes start with a CAD model that is sent to software to prepare the design. Depending on the technology, the 3D printer might produce the part layer by layer by solidifying resin or sintering powder. The parts are then removed from the printer and post-processed for the specific application.
See how to go from design to 3D print with the Form 3 SLA 3D printer. This 5-minute video covers the basics of how to use the Form 3, from the software and materials to printing and post-processing.
3D printers create parts from three-dimensional models, the mathematical representations of any three-dimensional surface created using computer-aided design (CAD) software or developed from 3D scan data. The design is then exported as an STL or OBJ file readable by print preparation software.
3D printers include software to specify print settings and slice the digital model into layers that represent horizontal cross-sections of the part. Adjustable printing settings include orientation, support structures (if needed), layer height, and material. Once setup is complete, the software sends the instructions to the printer via a wireless or cable connection.
Some 3D printers use a laser to cure liquid resin into hardened plastic, others fuse small particles of polymer powder at high temperatures to build parts. Most 3D printers can run unattended until the print is complete, and modern systems automatically refill the material required for the parts from cartridges.
With Formlabs 3D printers, an online Dashboard allows you to remotely manage printers, materials, and teams.
Depending on the technology and the material, the printed parts may require rinsing in isopropyl alcohol (IPA) to remove any uncured resin from their surface, post-curing to stabilize mechanical properties, manual work to remove support structures, or cleaning with compressed air or a media blaster to remove excess powder. Some of these processes can be automated with accessories.
3D printed parts can be used directly or post-processed for specific applications and the required finish by machining, priming, painting, fastening or joining. Often, 3D printing also serves as an intermediate step alongside conventional manufacturing methods, such as positives for investment casting jewelry and dental appliances, or molds for custom parts.
The three most established types of 3D printers for plastics parts are stereolithography (SLA), selective laser sintering (SLS), and fused deposition modeling (FDM). Formlabs offers two professional 3D printing technologies, SLA and SLS, bringing these powerful and accessible industrial fabrication tools into the creative hands of professionals around the world.
Stereolithography was the world’s first 3D printing technology, invented in the 1980s, and is still one of the most popular technologies for professionals. SLA 3D printers use a laser to cure liquid resin into hardened plastic in a process called photopolymerization.
SLA resin 3D printers have become vastly popular for their ability to produce high-accuracy, isotropic, and watertight prototypes and parts in a range of advanced materials with fine features and smooth surface finish. SLA resin formulations offer a wide range of optical, mechanical, and thermal properties to match those of standard, engineering, and industrial thermoplastics.
Resin 3D printing a great option for highly detailed prototypes requiring tight tolerances and smooth surfaces, such as molds, patterns, and functional parts. SLA 3D printers are widely used in a range of industries from engineering and product design to manufacturing, dentistry, jewelry, model making, and education.
- Rapid prototyping
- Functional prototyping
- Concept modeling
- Short-run production
- Dental applications
- Jewelry prototyping and casting
Learn More About SLA 3D Printers
Stereolithography (SLA) 3D printing uses a laser to cure liquid photopolymer resin into solid isotropic parts.
SLA parts have sharp edges, a smooth surface finish, and minimal visible layer lines.
Selective laser sintering (SLS) 3D printers use a high-power laser to sinter small particles of polymer powder into a solid structure. The unfused powder supports the part during printing and eliminates the need for dedicated support structures. This makes SLS ideal for complex geometries, including interior features, undercuts, thin walls, and negative features. Parts produced with SLS printing have excellent mechanical characteristics, with strength resembling that of injection-molded parts.
The most common material for selective laser sintering is nylon, a popular engineering thermoplastic with excellent mechanical properties. Nylon is lightweight, strong, and flexible, as well as stable against impact, chemicals, heat, UV light, water, and dirt.
The combination of low cost per part, high productivity, and established materials make SLS a popular choice among engineers for functional prototyping, and a cost-effective alternative to injection molding for limited-run or bridge manufacturing.
- Functional prototyping
- End-use parts
- Short-run, bridge, or custom manufacturing
Learn More About SLS 3D Printers
SLS 3D printers use a high-powered laser to fuse small particles of polymer powder.
SLS parts have a slightly rough surface finish, but almost no visible layer lines.
Fused deposition modeling (FDM), also known as fused filament fabrication (FFF), is the most widely used type of 3D printing at the consumer level. FDM 3D printers work by extruding thermoplastic filaments, such as ABS (Acrylonitrile Butadiene Styrene), PLA (Polylactic Acid), through a heated nozzle, melting the material and applying the plastic layer by layer to a build platform. Each layer is laid down one at a time until the part is complete.
FDM 3D printers are well-suited for basic proof-of-concept models, as well as quick and low-cost prototyping of simple parts, such as parts that might typically be machined. However, FDM has the lowest resolution and accuracy when compared to SLA or SLS and is not the best option for printing complex designs or parts with intricate features. Higher-quality finishes may be obtained through chemical and mechanical polishing processes. Industrial FDM 3D printers use soluble supports to mitigate some of these issues and offer a wider range of engineering thermoplastics, but they also come at a steep price.
- Basic proof-of-concept models
- Simple prototyping
Learn More About FDM 3D Printers
FDM 3D printers build parts by melting and extruding thermoplastic filament, which a printer nozzle deposits layer by layer in the build area.
FDM parts tend to have visible layer lines and might show inaccuracies around complex features.
Having trouble finding the best 3D printing process for your needs? In this video guide, we compare FDM, SLA, and SLS technologies, the most popular types of 3D printers, across the most important buying considerations.
Each 3D printing process has its own benefits and limitations that make them more suitable for certain applications. This video compares the functional and visual characteristics of FDM, SLA, and SLS printers 3D printers to help you identify the solution that best matches your requirements.
Do you need custom parts or prototypes fast? Compared to outsourcing to service providers or using traditional tools like machining, having a 3D printer in-house can save weeks of lead time. In this video, we compare the speed of FDM, SLA, and SLS 3D printing processes.
Comparing the cost of different 3D printers goes beyond sticker prices—these won’t tell you the full story of how much a 3D printed part will cost. Learn the three factors you need to consider for cost and how they compare across FDM, SLA, and SLS 3D printing technologies.
As additive manufacturing processes build objects by adding material layer by layer, they offer a unique set of advantages over traditional subtractive and formative manufacturing processes.
With traditional manufacturing processes, it can take weeks or months to receive a part. 3D printing turns CAD models into physical parts within a few hours, producing parts and assemblies from one-off concept models to functional prototypes and even small production runs for testing. This allows designers and engineers to develop ideas faster, and helps companies to bring products more quickly to the market.
Engineers at the AMRC turned to 3D printing to rapidly produce 500 high-precision drilling caps used in drilling trials for Airbus, cutting the lead time from weeks to only three days.
With 3D printing, there’s no need for the costly tooling and setup associated with injection molding or machining; the same equipment can be used from prototyping to production to create parts with different geometries. As 3D printing becomes increasingly capable of producing functional end-use parts, it can complement or replace traditional manufacturing methods for a growing range of applications in low- to mid-volumes.
Pankl Racing Systems substituted machined jigs and fixtures with 3D printed parts, decreasing costs by 80-90 percent that resulted in $150,000 in savings.
From shoes to clothes and bicycles, we’re surrounded by products made in limited, uniform sizes as businesses strive to standardize products to make them economical to manufacture. With 3D printing, only the digital design needs to be changed to tailor each product to the customer without additional tooling costs. This transformation first started to gain a foothold in industries where custom fit is essential, such medicine and dentistry, but as 3D printing becomes more affordable, it’s increasingly being used to mass customize consumer products.
Gillette's Razor Maker™ gives consumers the power to create and order customized 3D printed razor handles, with the choice of 48 different designs (and counting), a variety of colors, and the option to add custom text.
3D printing can create complex shapes and parts, such as overhangs, microchannels, and organic shapes, that would be costly or even impossible to produce with traditional manufacturing methods. This provides the opportunity to consolidate assemblies into less individual parts to reduce weight, alleviate weak joints, and cut down on assembly time, unleashing new possibilities for design and engineering.
Nervous System launched the first-ever 3D printed ceramic jewelry line, consisting of intricate designs that would be impossible to manufacture using any other ceramic technique.
Product development is an iterative process that requires multiple rounds of testing, evaluation, and refinement. Finding and fixing design flaws early can help companies avoid costly revisions and tooling changes down the road. With 3D printing, engineers can thoroughly test prototypes that look and perform like final products, reducing the risks of usability and manufacturability issues before moving into production.
The developers of Plaato, an optically clear airlock for homebrewing, 3D printed 1,000 prototypes to fine tune their design before investing in expensive tooling.
3D printing accelerates innovation and supports businesses across a wide range of industries, including engineering, manufacturing, dentistry, healthcare, education, entertainment, jewelry, audiology, and more.
Rapid prototyping with 3D printing empowers engineers and product designers to turn ideas into realistic proofs of concept, advance these concepts to high-fidelity prototypes that look and work like final products, and guide products through a series of validation stages toward mass production.
Applications:
- Rapid prototyping
- Communication models
- Manufacturing validation
Learn More
Manufacturers automate production processes and streamline workflows by prototyping tooling and directly 3D printing custom tools, molds, and manufacturing aids at far lower costs and lead times than with traditional manufacturing. This reduces manufacturing costs and defects, increases quality, speeds up assembly, and maximizes labor effectiveness.
Applications:
- Jig and fixtures
- Tooling
- Molding (injection molding, thermoforming, silicone molding, overmolding)
- Metal casting
- Short run production
- Mass customization
Learn More
3D printers are multifunctional tools for immersive learning and advanced research. They can encourage creativity and expose students to professional-level technology while supporting STEAM curricula across science, engineering, art, and design.
Applications:
- Models for STEAM curricula
- Fab labs and makerspaces
- Custom research setups
Learn More
Affordable, professional-grade desktop 3D printing helps doctors deliver treatments and devices customized to better serve each unique individual, opening the door to high-impact medical applications while saving organizations significant time and costs from the lab to the operating room.
Applications:
- Anatomical models for surgical planning
- Medical devices and surgical instruments
- Insoles and orthotics
Learn More
High definition physical models are widely used in sculpting, character modeling, and prop making. 3D printed parts have starred in stop-motion films, video games, bespoke costumes, and even special effects for blockbuster movies.
Applications:
- Hyper-realistic sculptures
- Character models
- Props
Learn More
Jewelry professionals use CAD and 3D printing to rapidly prototype designs, fit clients, and produce large batches of ready-to-cast pieces. Digital tools allow for the creation of consistent, sharply detailed pieces without the tediousness and variability of wax carving.
Applications:
- Lost-wax casting (investment casting)
- Fitting pieces
- Master patterns for rubber molding
Learn More
Hearing specialists and ear mold labs use digital workflows and 3D printing to manufacture higher quality custom ear products more consistently, and at higher volumes for applications like behind-the-ear hearing aids, hearing protection, and custom earplugs and earbuds.
Applications:
- Soft silicone ear molds
- Custom earbuds
Learn More
The market for 3D printing materials is wide and ever-growing, with printers for everything from plastics to metals, and even food and live tissue in development. Formlabs offers the following range of photopolymer materials for the desktop.
Standard 3D printing materials provide high resolution, fine features, and a smooth surface finish ideal for rapid prototyping, product development, and general modeling applications.
These materials are available in Black, White, and Grey with a matte finish and opaque appearance, Clear for any parts requiring translucency, and as a Color Kit to match almost any custom color.
Explore Standard Materials
3D printing materials for engineering, manufacturing, and product design are formulated to provide advanced functionality, withstand extensive testing, perform under stress, and remain stable over time.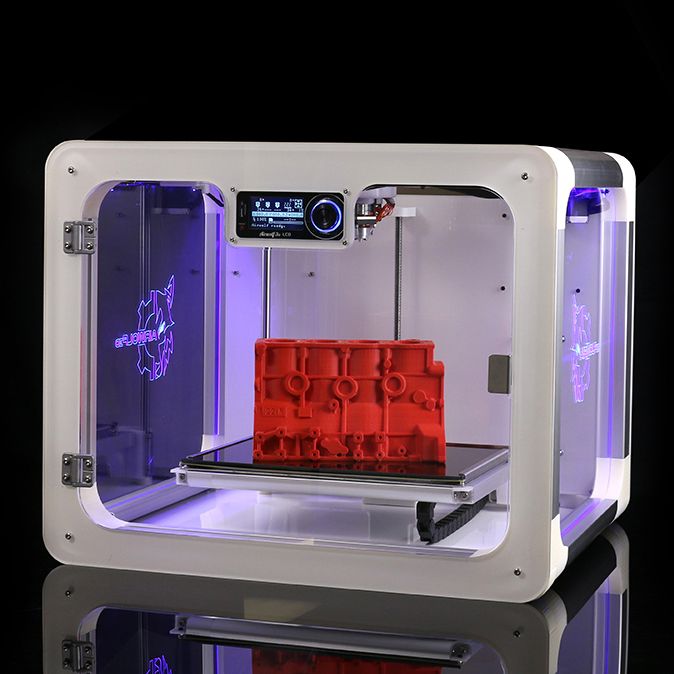
Engineering materials are ideal for 3D printing strong, precise concept models and prototypes to rapidly iterating through designs, assess form and fit, and optimize manufacturing processes.
Explore Engineering Materials
Medical resins empower hospitals to create patient-specific parts in a day at the point of care and support R&D for medical devices. These resins are formulated for 3D printing anatomical models, medical device and device components, and surgical planning and implant sizing tools.
Explore Jewelry Materials
Jewelry resins are formulated to capture breathtaking detail and create custom jewelry cost-effectively. These resins are ideal for jewelry prototyping and casting jewelry, as well as vulcanized rubber and RTV molding.
Explore Jewelry Materials
Specialty Resins push the limits of 3D printing, featuring advanced materials with unique mechanical properties that expand what’s possible with in-house fabrication on our stereolithography 3D printers.
Explore Specialty Materials
In recent years, high-resolution industrial 3D printers have become more affordable, intuitive, and reliable. As a result, the technology is now accessible to more businesses. Read our in-depth guide about 3D printer costs, or try our interactive tool to see if this technology makes economic sense your business.
Calculate Your Savings
New to 3D printing? Explore our guides to learn about the key terms and specific characteristics of 3D printing to find the best solution for your business.
For further questions,
Explore 3D Printing Resources
The First Affordable Large SLA 3D Printer
Skip to Main Content
With a large build volume of 33.5 × 20 × 30 cm (13.2 × 7.9 × 11.8 in),
you can print full-scale bulky prototypes or detailed models.
Stop outsourcing large-scale prints.
Work faster with a large format 3D printer that’s versatile enough to bring large scale fabrication in-house.
Life-sized prints for larger-than-life ideas.
The Form 3L is large enough to print human-scale models, like a prototype of a helmet that’s ready to try on.
Perfectionism that scales.
Two precision Light Processing Units inside the printer achieve consistent accuracy and detail across the entire build platform.
Material
Print Time
Print Cost
Part By
Black Diamond Equipment is prototyping climbing helmets at 1:1 scale to test for form and fit, producing several iterations per week in-house and reducing costs. Read more about how Black Diamond uses the Form 3L.
Note: print time and cost will vary based on part geometry, material, layout, and orientation.
Get more done and work more efficiently with an end-to-end 3D printing workflow. From printing, to post-processing, each step of the process was designed with efficiency in mind.
Watch the Webinar
Choose from a wide range of advanced materials, developed specifically for Formlabs printers by in-house materials scientists. With simplified material switching and automatic resin dispensing, the Form 3L allows you to walk away and focus on other work once your print job starts.
Many applications, one printer.
Print in over 15 functional resins to support a wide range of workflows on a single platform.
Switch materials in minutes.
Avoid the hassle and mess of purging materials with our swappable cartridge system, cross-compatible with other Formlabs SLA printers.
Automatic resin dispensing.
Our automated resin system dispenses resin as parts print. The Form 3L holds two cartridges of resin to avoid mid-print interruptions.
Explore All Materials
Available layer thickness settings vary by material. Visit our material settings roadmap for more details.
Formlabs is known for designing end-to-end additive workflows you’ll be excited to use. The Form 3L brings the Formlabs experience to large format 3D printing.
Streamline your 3D printing workflow and consistently produce high-quality parts with our automated large-format post-processing solutions, Form Wash L and Form Cure L.
Learn More
Printer
Form 3
Form 3L
Build Volume (W × D × H)
14.5 × 14.5 × 18.5 cm
5.7 × 5.7 × 7.3 in
33.5 × 20 × 30 cm
13.2 × 7.9 × 11.8 in
33.5 × 20 × 30 cm
13.2 × 7.9 × 11.8 in
XY Resolution
25 microns
25 microns
25 microns
Biocompatible Materials
No
No
Yes
Laser Power
One 250 mW laser
Two 250 mW lasers
Two 250 mW lasers
Weight
17.5 kg
38.5 lb
54.4 kg
120 lb
54.4 kg
120 lb
Printer Dimensions (W × D × H)
40.5 × 37.5 × 53 cm
15.9 × 14.8 × 20.9 in
77 × 52 × 74 cm
30.3 × 20.5 × 29.1 in
77 × 52 × 74 cm
30.3 × 20.5 × 29.1 in
Explore Form 3
Buy Now
Buy the Form 3L
3D food printer from Moscow scientists prints chocolate, cakes and even nuggets
A 3D food printer with a system of "smart" recipes that prints food products with specified properties was created by scientists from the Moscow State University of Food Production (MGUPP). The new device consists of 99% domestic components and can be used to design vending machines that print products according to the client's order. The 3D printer already prints with dough and chocolate, and in the future it will be able to produce even meat products - nuggets, for example, have already been successfully obtained.
chocolate chess
One of the goals of developing a 3D food printer was to create food rich in vitamins, micronutrients and antioxidants that would be a healthy alternative to traditional meals.
“Today, many are deficient in nutrients and micronutrients that can be replenished with elements in chemical form, but eating foods fortified with them contributes to better absorption. The main goal of creating a food printer was the ability to produce personalized functional products using a system of “smart” recipes, which will be like instructions for the printer,” says Aleksey Kuchumov, Vice-Rector for Research and Development of MGUPP.
The main difference between the development of MGUPP scientists and existing 3D printers is the units modified for the tasks of the food industry. The unique technology allows you to take a device for printing with plastic and upgrade it for printing with food raw materials.
“We made one unique extruder (a nozzle through which the raw material exits) of a revolving type. Inside it is a drum into which various raw materials are fed, which allows you to speed up the production process and use fewer parts. This is also our innovation - the use of one powerful drum extruder, into which various raw materials are fed under different pressures and temperatures, ”notes Alexey Kuchumov.
The development of MGUPP scientists allows you to make a 3D printer of any size and for any task, as well as increase the print area to one and a half meters, which is 1.2 meters more than existing analogues.
3D printer
In addition, the new device provides the ability to produce artificial meat using bioprinting technology. At the same time, the printer performs the function of a freezer - a refrigerator, and with different setting temperatures. It is designed in such a way that the necessary climatic environment will be formed for each type of raw material: its own temperature, its own humidity, etc. Among other things, a laboratory for the production of “cultured” meat is being opened together with 3D Bioprinting Solutions.
“The bioprinter prints a special plant-based substrate, on which live cells taken painlessly from animals are applied. This device prints according to a given digital model, using special nozzles - devices that allow you to print both cellular material and plant fibers. Such meat can be called “ethical”, and it will be in demand on the market,” comments Alexey Kuchumov.
As 3D Bioprinting Solutions Managing Partner Yousef Hesuani, 3D Bioprinting Solutions Managing Partner, added: “At this stage, it is possible to obtain the structure and organoleptic properties of the product similar to a natural product. The technology of printing with plant fibers followed by the application of a cell culture to the printed fibers has been developed, and special food bioprinters have been developed that allow automating the printing process. For example, the nuggets obtained using this technology were prepared according to a special recipe.”
Today, the MGUPP 3D-farm operates continuously, students and graduate students independently assemble printers and debug printing with food raw materials and living cells. The development is carried out within the framework of the MGUPP strategic project "Additive Technologies and Ingredients of the FoodNet Market" under the program of the Russian Ministry of Education and Science "Priority 2030" within the framework of the national project "Science and Universities".
3D styles
3D styles3D Styles
3D styles are sets of parameters (3D mechanism, Shading, Background, etc.) that determine how the model is displayed in the 3D window.
3D styles are saved in the View Options. Editing a 3D Style automatically updates all views using that Style.
Note: To set the Size of the 3D window, use a separate command available in the context menus (Tab Bar and in the 3D window).
See 3D window dimensions.
Apply Style 3D
To switch the 3D Style, use the 3D Style drop-down menu present:
•in the context menu of the 3D window
•in the Scoreboard or in the Operational Parameters Panel
•in the context menu of the 3D window tab.
In the list of 3D Styles, a separator separates Styles that use the Vector 3D engine from those that use OpenGL.
Creating or Changing a 3D Style
To open this dialog, use the menu command View > 3D View Options > 3D Styles.
The list of 3D Styles present in the project is displayed on the left.
•Select any Style to edit its settings on the right.
• You can select multiple Styles for simultaneous editing.
•Click the New button to create a new 3D Style.
•To transfer 3D Styles (in XML format) between projects, use the Import and Export buttons.
Basic Parameters
3D movement
Select the 3D engine you want to use in the 3D window:
•OpenGL: Allows rendering of textures (Surfaces) by taking advantage of the performance of OpenGL graphics cards. This mechanism is applied by default. It is recommended to select it if your video card supports OpenGL. It is optimized for fast and smooth model navigation and is well suited for showcasing designs. Copying/pasting or exporting from the 3D window results in the creation of bitmaps.
Some effects, such as 3D vector hatching, are not available in OpenGL mode. Using OpenGL does not allow saving the contents of the 3D window as 2D vector drawings.
Click the Options button on the right to further customize OpenGL.
See OpenGL Options.
•Vector 3D Render Engine: Creates 3D views without textures or photo-realistic effects. Allows you to display vector hatching (Surfaces), and the image can be printed at any scale. The contents of the 3D window can be saved as 2D vector drawings. Copy/paste or print to PDF results in 2D primitives such as lines and arcs. In most cases, it reduces the speed of navigating through models.
3D View Mode
Select Wireframe, Hidden Line Removal, or Colorize and Drop Shadows for this 3D Style.
Note: When using the OpenGL rendering engine, only wireframe mode or a mode with colorization and shadows can be activated.
Wireframe mode displays all edges of model elements. Please note that many elements arranged one after another make it difficult to perceive the image.
In the Hidden Line Removal mode (only available for the Vector Engine), hidden edges of elements are automatically hidden. This mode is best for showing a model without coloring or shading. It is also well suited for 3D printing. Images with Hidden Line Removal can be saved in various 2D and 3D file formats.
In the Paint and Shadow mode, all visible surfaces of 3D elements are displayed, taking into account the position of the Sun, set in the 3D Projection Options dialog.
Visualization with coloring is convenient from the point of view:
• the speed of obtaining visual feedback;
• ease of evaluation of color solutions;
• Creation of any demonstration materials and presentations when photographic image quality is not a requirement.
Note: If you have defined a layer as a wireframe, then its elements will be rendered in wireframe mode, even if you have selected a different rendering method.
Transparency
Check this box to activate the transparency of elements in Coloring mode. The image below shows a glass wall with the Transparency effect turned off and on.
Transparency settings are saved with views.
Note: When using the Vector Engine, Transparency has no effect on Postscript printers.
Monochrome Model
By activating the Monochrome Model marker, you can set uniform colors for displaying all Surfaces and Paths of model elements.
Otherwise, the colors of the surfaces are determined by the Building Materials of the elements.
Watch video
Background
The Preview window allows you to see the effects obtained by changing the settings:
Use the Sky Color and Earth Color fields to set the background colors of the 3D window.
Click the chain button to apply a single background color.
•Renderings: Activate this checkbox to use the image selected in the Rendering Options dialog as the background.
See CineRender Basic Settings: Background Panel.
Circuit
The Preview window allows you to see the effects obtained by changing the settings:
Outline Display
Activate this checkbox to display the outlines of the model elements in the Painted and Shadowed mode. The quality of the outline display can be adjusted using the drop-down menu located on the right.
•Quality option gives excellent results, but may slow performance when displaying large and complex 3D models.
• Selecting Draft Outlines improves navigation speed, but the quality of the outlines is greatly reduced.
Below are the line thickness controls.
•Contours. The Outline Thickness options apply when displaying all connecting surface polygons.
•Silhouettes (only counts when using the Vector Gear). Line thickness parameters of Silhouettes are effective when displaying only one surface polygon (all other surfaces are not in the camera's field of view).
Vector Hatching (only taken into account when using the Vector Gear)
Vector Hatching can be displayed in Hidden Line Removal and Shadow Paint modes, provided that 3D Hatching is configured in the Coatings options dialog.
For more information, see Coatings.
Note: 3D vector hatching is also available in the Sections/Elevations/Developments and 3D documents windows, but its use is configured separately in the Parameters dialogs of these views and projections.
Shadow Outlines (only counted when using the Vector Gear)
This parameter becomes available only when Solar Shadows is activated (see below).
Shadows
Sun Shadows
Activate this marker to create sun shadows with ARCHICAD.
The following additional Sun Shadow settings become available when using the Vector Gear:
• Shadow Brightness: Use the slider to adjust the brightness of the Sun Shadows.
•Shadow Outlines: Activating this checkbox will create drop shadow outline lines.
•Use the dropdown menu to select where to create Sun Shadows:
- all surfaces or
- only at a given level (that is, on a horizontal plane). The latter option is convenient for analyzing cast shadows in top views. If you select this option, specify the absolute elevation of the horizontal plane on which the vector shadows will be drawn.
•Custom Sun Shadows: If this checkbox is unchecked, then all identical surfaces are painted the same color regardless of their orientation.