Slice 3d model for printing
Open source 3D printing toolbox
What is Slic3r?
Features
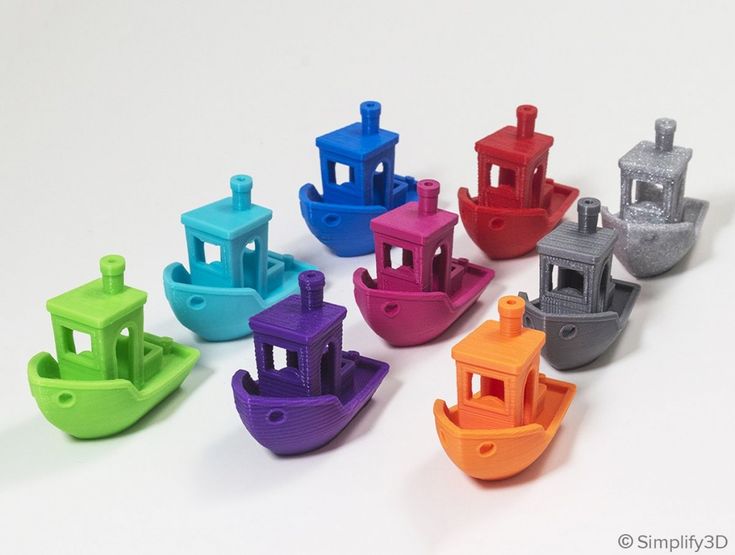
Compatible with your printer too. RepRap (Prusa Mendel, MendelMax, Huxley, Tantillus...), Ultimaker, Makerbot, Lulzbot AO-100, TAZ, MakerGear M2, Rostock, Mach4, Bukobot and lots more. And even DLP printers.
Fast G-code generation is fast. Don't wait hours for slicing that detailed model. Slic3r is about 100x faster than Skeinforge. It also uses multithreading for parallel computation.
Lots of input/output formats. Slic3r reads STL, AMF and OBJ files while it can output G-code and SVG files.
Do you like the graphical interface or command line? All the features of the user-friendly interface are also available from command line. This allows to integrate Slic3r in your custom toolchain and batch operations as you like.
Open source, open development. Slic3r is open source software, licenced under the AGPLv3 license. The development is centered on GitHub and the #slic3r IRC channel on FreeNode, where the community is highly involved in testing and providing ideas and feedback.
Dependencies? Nah. Slic3r is super-easy to run: download, double click and enjoy. No dependencies needed. Hassle-free. For MacOS X, Windows, Linux.
Print with dual multiple extruders. Print beautiful colored objects, or use your secondary extruder to build support material. Or put a larger nozzle on it and print a faster infill.
Use brim for the best adhesion. This unique feature improves built plate adhesion by generating a base flange around your objects that you can easily remove after printing.
Microlayering: save time, increase accuracy. You can choose to print a thicker infill to benefit from low layer heights on perimeters and still keep your print time within a reasonable amount.
Compose a plate but print one object at time. Use the built-in plating interface that allows to place objects with drag-and-drop, rotate and scale them, arrange everything as you like. The sequential printing feature allows to print one complete object at time in a single print job.
Cool cooling strategies. A very smart cooling logic will regulate your fan speed and print speed to ensure each layer has enough time to cool down before next one is laid on it.
Manage multiple printers, filaments and build styles. The configuration handling system was designed for people working with multiple machines and filaments: you can save configurations as presets for each category avoiding to multiply your saved configurations.
Enjoy support material. Automatic generation of support material for overhangs.
Gallery
Links
The RepRap Project
How to Split & Cut STL Models For 3D Printing – 3D Printerly
Splitting and cutting your models or STL files for 3D printing is important if you want to create prints that are larger than your build plate. Instead of scaling down your project, you can separate your model into different parts which can later be joined together.
In order to split and cut your STL models for 3D printing, you can do this in many CAD software such as Fusion 360, Blender, Meshmixer, or even directly in slicers like Cura or Lychee Slicer. You simply select the split or cut function within the software and split the model where you choose.
This is the basic answer for splitting and cutting your model, so keep on reading to get the details on how to do this successfully, along with more useful information that you can use.
How Do You Break Up Models & STL Files for 3D Printing?
When it comes to 3D printing, breaking up large models is an important skill to learn since we are limited by the size of our build plates for each print.
Rather than stopping at this limitation, people figured out they could break models into smaller sections, which can then be glued back together afterwards. This can be done by using design software or even directly within our slicers, though it takes some knowledge to get it right.
It’s similar to having a model which is split with the main model and the base or stand of the model, but doing this for multiple parts of the model.
After you split and print the model, people tend to sand the prints down, then super glue them together to provide a strong bond that shouldn’t come apart.
Popular software that can split your STL files or models up are Fusion 360, Meshmixer, Blender, and many more. Some of these are easier than others, mainly due to the user interface or how many features the application has.
It’s best to pick a software and follow a good video tutorial that takes you through the steps to split up your models with ease. You can actually use the popular Cura slicer to split your models down and separate them into different STL files which can be printed separately.
Similarly, you have resin slicers such as ChiTuBox or Lychee Slicer that have inbuilt split functions where you can cut a model and organize it on the build plate as you wish.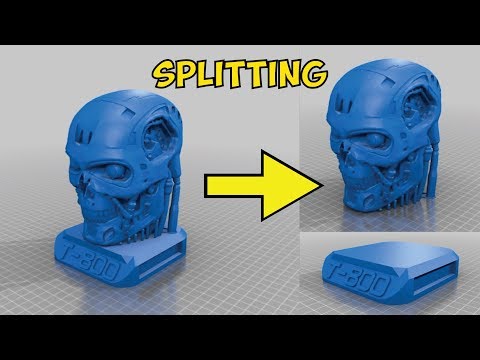
The process of splitting a model and changing the orientation can allow you to easily fit a large model on your build plate, by utilizing the whole area.
In some instances with more advanced model, designers actually provide STL files where the model is already split up, especially when it comes to figurines, complex characters, and miniatures.
Not only are these models split up nicely, but sometimes they have joints which fit together nicely like a socket, allowing you to easily glue them together. With experience and practice, you can even take STL files, edit them and make your own joints.
Let’s look into how to actually split models using different software.
How to Split a Model in Fusion 360
A simple way to split a model in Fusion 360 is to sketch where you want to split the model, Extrude the sketch towards the inside of your model, then change the Operation to “New Body”. Now you can hit the “Split Body” button with the Splitting Tool highlighted and select the model to split up the two separate parts.
Another way to split a model in Fusion 360 is to create an Offset Plane on your model under the “Construct” section in your toolbar, then move the Plane to where you want to split the model. You then click the “Split Body” button in the toolbar and select the Plane to cut. Each face of your model can have a Plane.
Check out the video below for a great illustration and tutorial on how to get this done for your models.
The video above shows how to split really simple models, though for more complex ones, you may want to use a more advanced technique to get the splits perfect.
The video below by Product Design Online takes you through two main methods on how to split large STL files so you can successfully 3D print them. It works for STL files or even STEP files that are large meshes.
Many people describe it as one of the best videos on how to split 3D printer files for printing.
The first method consists of:
- Measuring the Model
- Turning on the Mesh Preview
- Using the Plane Cut Feature
- Selecting the Cut Type
- Selecting the Fill Type
The second method consists of:
- Using the Split Body Tool
- Moving the Newly Cut Parts
- Creating a Dovetail
- Copying the Joint Type: Making Duplicates
How to Split a Model in Cura
To split a model in Cura, you first have to download a plug-in called “Mesh Tools” from the Cura Marketplace. After getting it, you simply choose your model, click on the Extensions tab and find Mesh Tools there. Finally, click on “Split model into parts” and enjoy your model cut into two.
Cura’s method for splitting up a model is quite uncomplicated. The older versions of this slicer software didn’t even require downloading the Mesh Tools plug-in.
You simply had to right-click on the model and the option to split your model would appear. Painless360 has explained how to break your model into parts in the following video.
Unfortunately, Cura does not involve advanced techniques to cut your model. You’ll have to use Meshmixer or Fusion 360 for more complex part splitting.
How to Cut a Model in Half in Blender
To cut a model in half in Blender, go to “Edit Mode” by pressing the “Tab” key, then find the “Bisect Tool” in the “Knife” section on the left column. Ensure the mesh is selected by pressing “A” then click the first and second point to create a line where your model will be cut. Now press “P” to separate the model.
- Go into Edit Mode by pressing the Tab key
- On the left column, find the “Knife” tool, hold the left click and select the “Bisect Tool”
- Make sure the mesh is selected by pressing the “A” key
- Create the line by clicking the first and last point across your model to start the split
- Press the “V” key then right-click to make the actual split in the model
- While the split is still highlighted, press “CTRL+L” to select the active mesh it’s connected to.
- You can also hold “SHIFT” and click any meshes if there are loose parts then hit “CTRL+L” to select it
- Hit the “P” key and separate parts by “Selection” to separate the parts in the model
- Now you can hit “TAB” to go back to Object Mode and move around the two separate pieces.
There are some options that you can play with while splitting up your models, though it’s very simple to do for the most part.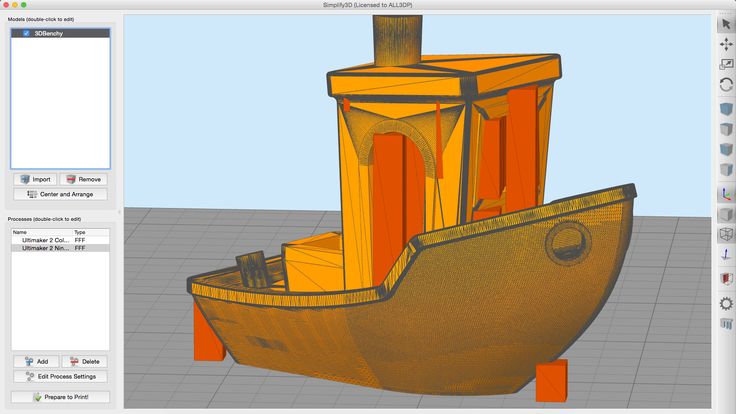
You can choose whether you want to keep the part of the model you are splitting by checking the “Clear Inner” or “Clear Outer” part of the model, as well as choose whether to “Fill” the mesh, so the split doesn’t just have a gap in there.
If you forgot to fill in your models during the splitting process, you can hold “SHIFT + ALT” then Left-Click the outer mesh or edge of the model to select the whole exterior or “loop select” the model. Now press the “F” key to fill in the mesh.
There are more tips that you can do to smooth your model and even make the edges match up better. Check out the video below by PIXXO 3D for a great tutorial on how to split models on Blender.
How to Separate Objects in Meshmixer
When it comes to creating complex cuts, doing it in a slicer or very basic CAD software can be difficult or just not possible.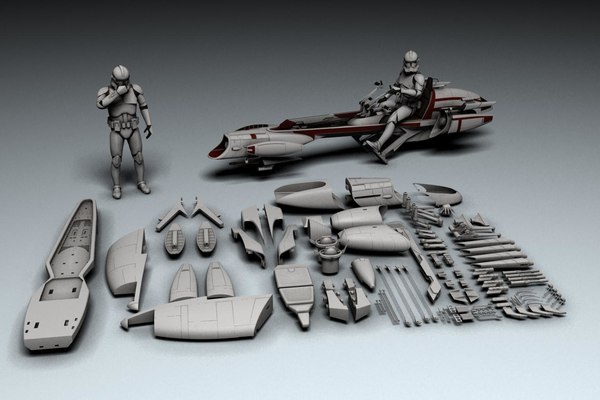 Meshmixer is a popular CAD software that allows you to have a lot more control over how you separate and split your 3D printing files.
To separate objects in Meshmixer, you have to click on the “Edit” section and choose “Plane Cut” from the options there. Then, select “Slice” as the “Cut Type” and separate the object using a plane cut. Go back to “Edit” and click on “Separate Shells.” You will now be able to easily “Export” the individually split models from the menu on the left.
You also have a second option to split models by using the “Select Tool” and specifying a smaller area of the model to be cut.
Josef Prusa has a great video showing you exactly how you can cut STL models successfully in Meshmixer.
Here is a summary step-by-step guide to separating objects in Meshmixer.
- First, import your model into the Meshmixer platform
- Select “Edit” & hit “Plane Cut”
- Rotate the view to identify the Plane you want to cut
- Click and drag to cut the model in the desired area
- Change the “Cut Type” to slice so you don’t discard any of the model and hit “Accept”
- Your model is now separated
- You can go back to “Edit” and select “Separate Shells” to split the model up
Another cool thing you can do in Meshmixer is to actually create aligning pins to your split models which fit like a plug between two pieces. This is also shown in the video above, so definitely check that out to learn how to do it like the pros.
Bonus Method: Use 3D Builder to Split 3D Models Easily
3D Builder is one of the easiest ways of splitting up an STL file and cutting it into different parts. It comes pre-loaded on most Windows computers, and can also be downloaded for free through the Microsoft Store.
The application enjoys a fluid, responsive interface with easy-to-understand controls that even beginners won’t have a difficult time getting used to.
To split a model in 3D Builder, simply select your model, click on “Edit” in the Taskbar above, and then click on “Split.” You would then use the rotation gyroscopes to position the cutting plane however you want. When done, click on “Keep Both” and select “Split” to cut the model in half and save it as an STL file.
3D Builder makes the splitting process quite effortless for 3D printing enthusiasts and experts alike. The cutting plane is easy to handle, and you can easily use it as your go-to model slicer, as thousands of other people do.
The following video can help illustrate the process even further.
Another way to cut a 3d model for printing.
Miscellaneous
Follow author
Follow
Don't want
18
Hi all!
Let's go!!!
Many people use Simplify3D. Also, many people know that it is impossible to cut the model into 2, or even into 3 or even 4 parts in it IMPOSSIBLE!
Of course, you can take and set the height in half and print the top.
Then go to Advanced
and set Start to 0 and stop at the height where you split the model the first time.
Is it that easy? Yes! But there are times when you need to print two parts at once, or you never know who has any troubles)))
For another method, we need Slic3r-1.36.2-prusa3d.
I like this method better, and it takes a little longer)
Start Slic3r. Select the model and press 'Cut...'
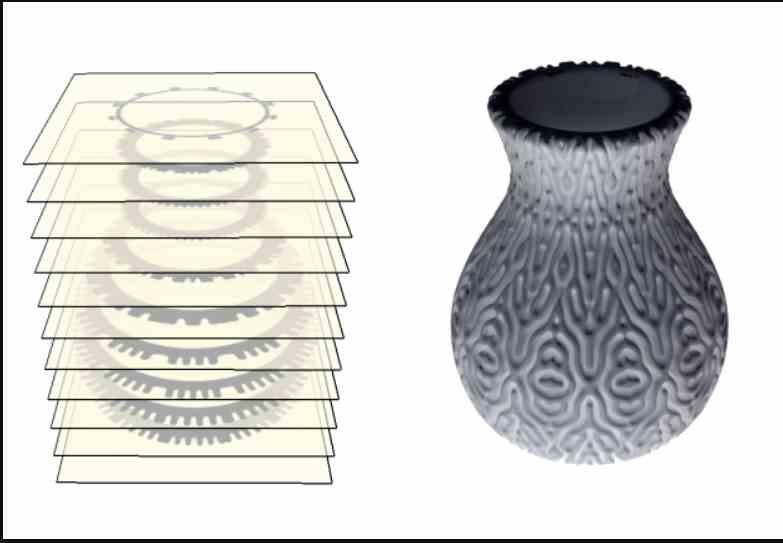
Get into the menu for cutting the model. You can select the height of the cut (division) with the slider or enter the desired height of the layer.
The model is divided into two parts. But as you can see, it fits on the table with difficulty. Of course, who has a larger table and everything will be fine))) Slic3r can save in STL. Before that, delete one part and save, then everything from the beginning. Save the second part.
Here I saved without deleting one of the parts. You can see the file is one, and the detail is two. There is another cool thing in Slic3r!
If the object is not in contact with each other. Then it can be divided into two files or three. Looking at how many objects.
We need to click on the model and then on Split.
And we have two files again.
It also happens. You have downloaded the model (no matter where). We inserted it into the slicer and there . .. AAA !!! What the ***? How can I print this? etc.
The same as with the vase. We press the model, then on Split. And Slic3r divided everything into parts. We just have to delete the unnecessary)))
We just have to save the file in STL. So that we can open it in our favorite slicer)))
Thank you for your attention!
Happy printing everyone!
Follow author
Follow
Don't want
18
More interesting articles
fourteen
Subscribe to the author
Subscribe
Don't want to
The fog of war is gathering, the howling wind brings disturbing signs - it is time to prepare for battle...
Read more
2
Subscribe to the author
Subscribe
Don't want
The International Championship of Hi-tech Professions 2022 will be held in Yekaterinburg from 8 to 10.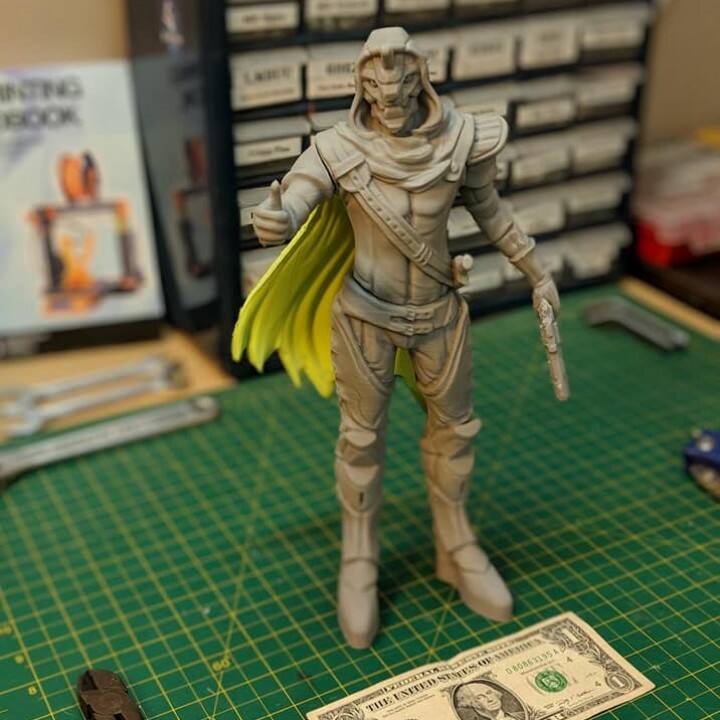 ..
..
Read more
CEPKO777
Loading
02/08/2018
140201
274
Subscribe to the author
Subscribe
Don't want
Hello everyone. After buying a printer and understanding the principle of operation of CNC machines, I began to look at others ...
Read more
How to cut a model in 3Ds Max in 20 steps.
Greetings to all readers of the portal! I want to share with you a simple way to cut a model using 3Ds Max (2016). Actually, the version of the program is not very important, since the order will still be approximately the same. And the instruction itself is mainly for those who are just starting to master the program.
Let's go!
All procedures will be performed on an experimental character from the DooM universe - Cyberdemon. First, we need to correctly import the STL model into the program. To do this, follow the first two steps:
1) Click on the program icon in the upper left corner (in older versions it's the 'File' button;)
2) Select 'Import' . Also select 'Import' from the dropdown menu.
Select a file with the appropriate extension (*.stl) and import it. In the window that appears, select 'Quick Weld' - this will significantly speed up the stitching of the geometry vertices of the object.
So, our model has been successfully loaded into the program. To rotate the camera around the object, select one of the rotation modes by clicking on the icon in the lower right corner of the screen.
A total of three rotation modes are available, see which one is more convenient for you to work.
If only one viewport is displayed, for convenience, switch to advanced mode using the keyboard shortcut 'Alt+W'
3) Select the tab 'Modify' . Below we see a list of modifiers - Modifier List .
4) Select modifier ' Slice' . After that, in the projection of the window, we see the cut plane that appears.
5) In the modifier settings, select the drop-down item ' Slice Plane' , after which our cut plane is available for manipulation. By clicking RMB anywhere in the viewport, select Move (Move) or Rotate (rotation). We arrange our plane as if it is a 'virtual knife' which, by the way, has no boundaries, so the cut will be through.
6) In the modifier settings, select Split Mesh . This means that our plane cuts the model in such a way that we end up with two conditionally independent objects. In the future, they will need to be disconnected. By the way, the last two modes simply cut off (delete) one of the parts of the object below (Bottom) or above (Top) the cut plane.
For more precise control of the plane, I advise you to use digital values for coordinates:
For example, let's try to cut off a hand (out of context it sounds creepy). We arrange our plane in such a way that it will be more convenient to print it in the future, i.e. approximately perpendicular to the limb.
By the way, you can create an infinite number of such cut planes. To do this, you must either select the modifier Slice again in the list of modifiers, or by right-clicking on the modifier, copy it, then paste it.
7) PKM click on our model and finding paragraph 'Convert to:'
8) In the drop -down menu, select 'Convert to EDITABLE POLY'
0 9000 9000 9000 9000 9000 9000 9000 9000 9) Choose to work with elements.
To do this, LMB click on the icon with a cube ( Element)10) Then select the parts that need to be cut off (in this case, the arm). To select multiple objects, hold down Ctrl.
11) Separate the selected objects (or several) with the button Detach . Uncheck the boxes, if any, and click 'Ok'.
12) Return to menu Create . As you can see, our limb was successfully amputated. We can freely move or rotate it (keys 'W' and 'E' respectively). But our reference point ( Pivot ), around which the manipulations take place, is located to the side, which is very inconvenient.
Let's fix it.
13) Select the tab Hierarchy
14) Click ' Affect Pivot Only.' Pivot can now be moved to any location.
15) By pressing the button 'Center to Object' move move the reference point to the geometric center of the hand.
Returning to the Create menu (step 12) place our detached hand (in the Front, Left, Back or Right window) cut down, trying to descend to the horizontal plane (zero) as much as possible.
The fact is that 3Ds Max itself does not 'close' the cut plane (unless it is a Boolean section, of course), so we need to close the resulting hole. Therefore, we return to the tab ' Modify' (step 3).
16) Select the selection of open borders - Border
17) LMB select the edge of our hole that needs to be closed. The outline will be highlighted in red.
18 ) Use button 'Cap' to close the cut.
I want to say right away that Cap works correctly only if all cut points are in the same plane:
19) Export the model. We simply select Export (for some reason, there is no STL format in Export Selected)
20) Select the format *. STL , enter any object name (optional), select Binary . Check the 'Selected only' checkbox if you want to export not the entire scene, but only the selected object.
P.s. There is another interesting point. The procedure is not necessary for most slicers, but it can be useful if the object 'falls' into the table: after placing the slice plane on the horizontal axis, move the Pivot to zero as well.