How to finish 3d printed items
Ultimate Guide to Finishing 3D Printed Parts
Time to read: 13 min
The purpose of this article is to detail the different finishing methods for FDM and PolyJet 3D printed parts and the techniques/tips that can elevate the look and feel of your prototypes.
A simple Apple Watch stand design will be utilized as a case study. This stand is a model with pockets and internal and external features that needs to be surface finished to a standard that complements the shiny exterior of an Apple Watch put on it.
Here’s a quick overview of the main points this article covers:
- PLA: If you’re working with a tight budget then PLA is going to be your best material choice; the results aren’t as polished but the price is cheapest.
- ABS: If your budget is moderate then go with ABS. It’s not as cheap as PLA but still at a low price point and the material is more reliable than PLA.
- VeroBlack or VeroWhite: For the highest quality parts go with VeroBlack/VeroWhite.
This will give you the best dimensional accuracy and best overall polished look.
The 3d printing post-processing needed for the watch stand parts involves a combination of repairing and preparing the print for post-processing, sanding, and painting.
The finished sample 3D printed parts with all three materials should be smooth, matte black surfaces. Inherent to the 3D printing process, with every print are unique challenges and considerations to arrive at the best finish possible. Although there are ways to mitigate the challenges, experience in 3D printing goes a long way.
The print settings process for each material is detailed separately and a summation of the results may be found in the conclusion of this article.
ABS (Printed on a Dimension Elite)
The Dimension Elite prints are smooth, clean, and ready to sand out of the NaOH bath.
There are, however, clear stepping lines between the printed layers.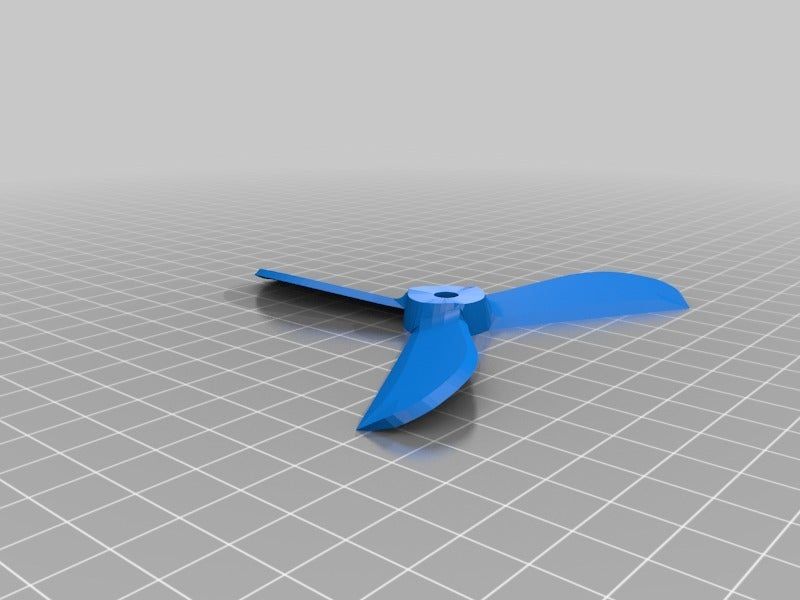 If we don’t remove these stepping lines, they’ll show up in the final paint coat which will ruin our smooth finish. Thankfully, removing these will be easy thanks to ABS’s high melting point and easy sandability.
Materials Needed
The materials we’ll be using:
- Sandpaper (grits 100 to 600)
- Medium, fine, and extra-fine sanding sponges
- XTC-3D brush-on coating (As an alternative, Bondo putty is a common solution to fill holes in parts. We chose XTC-3D for its viscosity, sandability, and ability to penetrate small perforations, which makes it desirable over Bondo putty)
- Razor blade
- Foam brush, mixing cups and popsicle sticks
- Sandable Krylon Primer
- Montana Acrylic Primer in Shock Black
- Matte Acrylic Varnish
Sanding
Sanding the ABS print is simple and straightforward. First start with 100 – 200 grit sandpaper to remove stepping lines and then gradually increase up to 600 grit to achieve a smooth finish without sanding lines.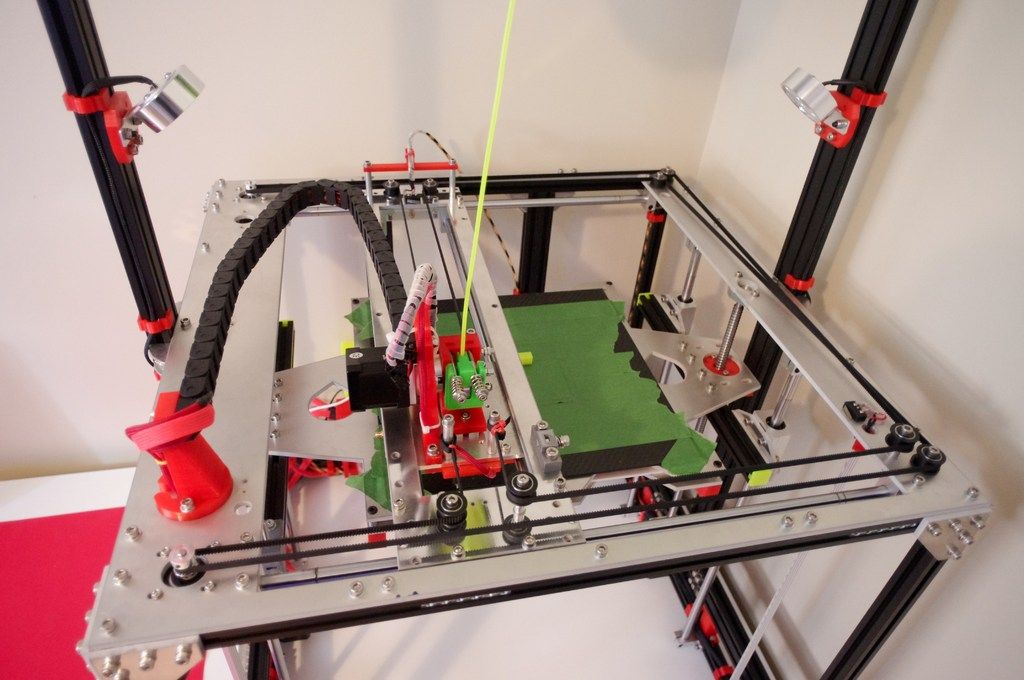
Pro Tip: Sand in small circular movements evenly across the surface of the part. Avoid sanding in one direction only, especially in the direction of the stepping lines to prevent striations or “trenches” in the print.
Beware that ABS is very easy to sand, so be careful not to overdo it. Removing as little as .010” can be enough to completely remove any stepping layers and oversanding can compromise critical dimensions.
After sanding the parts, some holes are revealed on our part left by an incomplete layer around the letters DIM. These holes can perforate through the finished paint coat to create ugly sinkholes, so we need to find a solution.
As you can see in the Catalyst tray to the right, there are large holes between the DIM and the edge of the part. Moving the DIM up in our Solidworks model would solve this, but for now we’ll have to find a way to fill these holes with a sandable filler.
Repairing the Incomplete LayerWe’re going to use a thin, sandable epoxy called XTC-3D to fill the tiny holes and crevices in our print.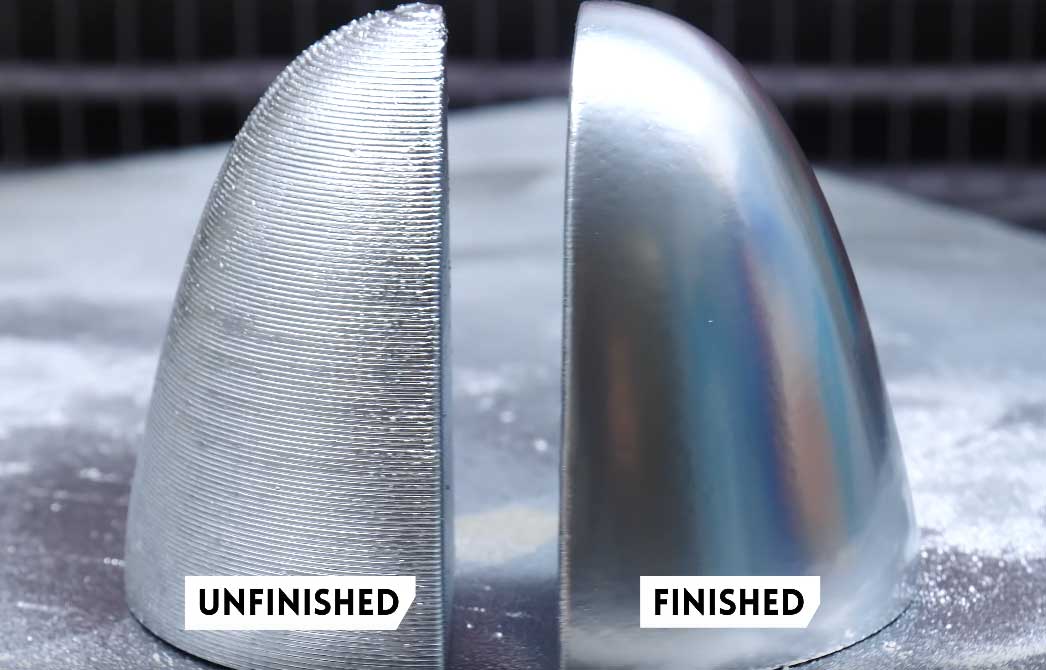 XTC-3D is cheap (a 24 oz bottle costs about $25), quick, thin, and effective. Note that a small amount goes a long way (within the 10 minute pot life).
Pro Tip: Be sure to maintain a weight ratio of 100 Part A to 42 Part B. Mix thoroughly for one minute and coat your part within the 10 minute pot life. For more details, check Smooth-On’s technical bulletin here, and a great instructional example here.
Before applying the XTC-3D, wash the part with soap and dry with compressed air to ensure your part is thoroughly clean and free of any oils or sanding dust. Also make sure to wear gloves so as not to get any hand oils or sweat on your part.
Fill in holes or gaps in your print with a very thin (1/64”) coat; a thin layer of XTC-3D will level itself out. We used a razor blade to scrape excess XTC-3D into the unwanted holes and gaps, making sure to avoid any areas we didn’t want filled (like the letters DIM).
Allow the XTC-3D sufficient time to become tack-free dry (approximately 2 hours). Now we’re ready to continue sanding away at the excess XTC-3D layer with 300 to 600 grit to reveal the repaired surface.
Then, after another thorough wash, we’re ready to begin preparing our repaired surfaces for painting.
Priming and Painting
Painting 3D printed parts is a vast world of acrylics, enamels, sprays, and airbrushes.
In this example, we’ll be using Montana spray can paints to follow a relatively straight forward process: prime, dry, paint, dry, varnish, dry.
Standard spray painting principles apply:
- First make sure your surface is oil-free, dust-free and hole-free
- Shake your cans for at least two minutes prior to painting
- Ensure your cap is clean to prevent drips
- Be aware of how the paint is accumulating on the part and look for any pooling or dripping
- Paint in many light coats rather than fewer heavy coats; this is especially important for 3D printed parts with internal and obscured geometries
- Paint in controlled, well-ventilated and well-lit areas
The Dimension prints started with very obvious stepping between layers. If you’ve sanded properly up until now to create as smooth a surface as possible, these layers shouldn’t show up in your final paint finish.
The finished ABS part is matte black and smooth to the touch with very little evidence of layering in most surfaces. A few important results to note here:
- Sharp internal pockets are tough to sand. After about 30 minutes of sanding, we still had a hard time removing all the layering and the stepping shows up even after priming, painting, and varnishing the print.
- Because we had to remove more surfaces from the sanding, there is some sacrifice in regards to the final geometry of the part.
- Filling the incomplete layer with a thin coat of XTC-3D worked very well; those holes are invisible in the final paint layer.
VeroBlack (Printed on an Objet30)
Thanks to .0011” resolution, the Objet30 prints have some stepping between layers, but nowhere near as obvious as in our FDM prints.
The Objet30 prints come out of the printer with a thick layer of support structure material so before we can begin finishing our VeroBlack part, we’ll need to remove this support structure and the residue it leaves behind.
VeroBlack 3D Printed Part Materials NeededThe materials needed for post-3D printing finishing:
- Sandpaper (grits 100 to 600)
- Medium, fine, and Extra fine Sanding Sponges
- Sandable Krylon Primer
- Montana Acrylic Primer in Shock Black
- Matte Acrylic Varnish
Start with 100 grit sandpaper to wet sand the residue and gradually move to wet sand with 300 grit sandpaper; the residue will fall off in small soft white chunks. This is the hardest part of the VeroBlack finishing process and it took us about 30 to 40 minutes to remove all the residual layer.
After removing the residual layer by wet sanding utilizing 300 grit sandpaper, the surface of the part will begin to feel smooth.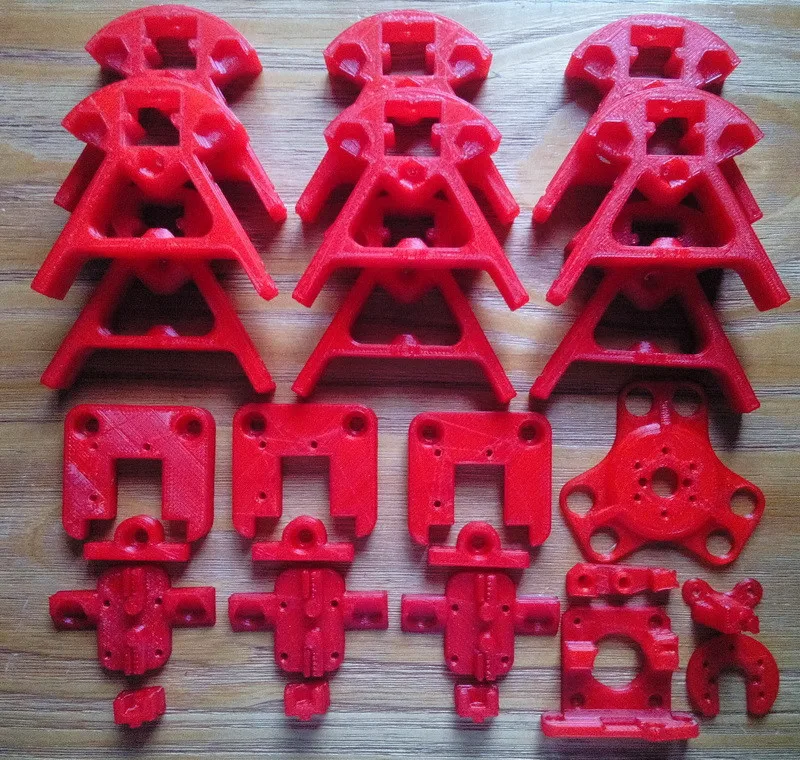 If you rub the part with your fingernail, you’ll feel it’s harder and more plastic-like beneath the gummy residual coat. Continue wet sanding through to 600 fine grit sandpaper until the part is fully smooth.
Pro Tip: Water breaks up the residue, so wet sanding is a highly effective method to get a smooth, residue-free, paintable, and homogenous surface.
Thoroughly clean your part with soap and water before you move on to the next step to remove any additional residue. Again, we recommend using compressed air to dry the part and clear any accumulated dust.
Beware that VeroBlack is like ABS: very easy to sand, so be careful not to overdo it. Once you break through the residual layer, the actual VeroBlack will sand very easily. Removing as little as .005” can be enough to completely remove any stepping layers. Be careful as oversanding can compromise critical dimensions.
VeroBlack 3D Printed Part Priming and PaintingNext, we’re going to paint the VeroBlack part just as we did the ABS part: using Montana spray can paint with the following process: prime, dry, paint, dry, varnish, dry.
Standard spray-painting principles apply:
- First make sure you have a good surface quality which is oil-free, dust-free and hole-free
- Shake each paint can for at least two minutes prior to painting
- Ensure your cap is clean to prevent drips
- Be aware of how the paint is accumulating on the part and look for any pooling or dripping
- Paint in many light coats rather than fewer heavy coats; this is especially important for 3D printed parts with internal and obscured geometries
- Only paint in controlled, well-ventilated, and well-lit areas
The finished VeroBlack part is matte black and smooth to the touch. A couple points to note here:
- Some of the internal corners were not sanded enough to remove the residue, so you can see how the paint powdered up in these areas.
 This will likely result in peeling paint over time.
 - Although very little stepping is visible on the part, you can see slight evidence of it here. This part could have probably used 30 more minutes of thorough sanding.
Now for the dreaded PLA, a notoriously difficult material to finish. But with some tricks and patience, it too can join ABS and VeroBlack in the ranks of matte black glory!
This Replicator print came off the plate with severe striations: see the parallel grooves in the layers of the part above. This could be a result of machine quality, but for now we’ll just have to find a way to maneuver these striations to a smooth part.
Sanding PLA is difficult, in part because of how soft and gummy it becomes if you try to sand too aggressively or quickly, so we’ll explore options on how to smooth 3d prints with minimal effort and abrasion.
PLA 3D Printed Part SandingIf you choose to sand the PLA directly, the process is straightforward.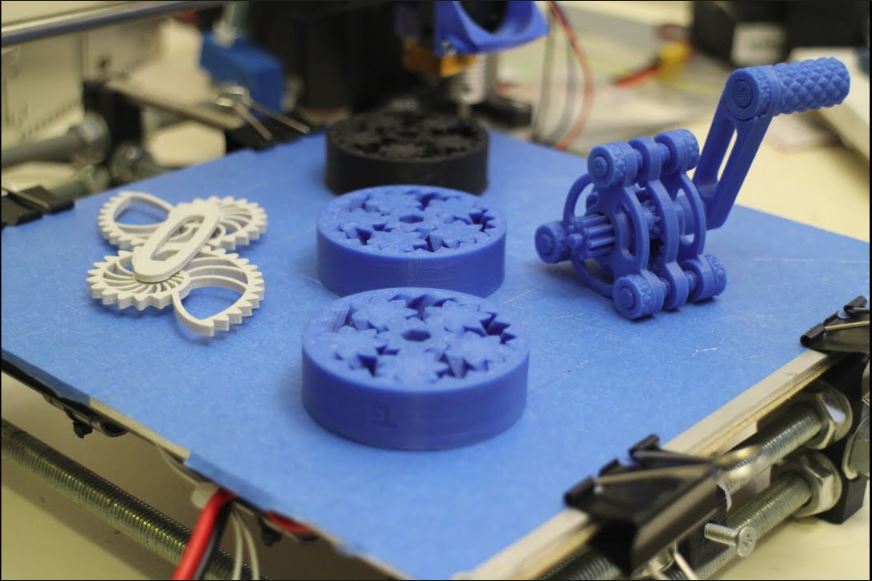 Note: PLA acetone smoothing is not advisable. PLA smoothing is not as forgiving as ABS when it comes to sanding and abrasion, so you will likely spend more time removing the stepping between layers, especially with the severe striations in a print like ours.
Begin with a low (100 – 200) grit sandpaper, sanding away at the bumpy striations and any raft or support material (aluminum foil) left behind. Particularly in the case of MakerBot support, it’s easiest to remove them with a flush cutter or pair of pliers and brush them with a rotary multi-tool first before sanding away at them.
Depending on the size and geometry of your part, you’ll likely be stuck in the 100 – 300 grit sandpaper range for a while to smooth out striations and pesky support structure remnants.
Once layering and striations are less prevalent, move through finer grits (400 – 600) sandpaper to achieve a shiny surface ready for priming and painting.
Pro Tip: Patience is key when sanding PLA. Turn on a movie or your favorite show, but don’t zone out! Sand in small circles evenly across the surface of the part. If you’re using a sanding multi tool on PLA, be careful not to overheat/melt your 3D printed part.
An alternative method to sanding PLA prints directly is smoothing the PLA print with the XTC-3D first and then sand on top of the coating.
PLA 3D Printed Part FinishingWe’re going to use XTC-3D to create a smooth, sandable, paintable layer of epoxy clear coat glossy finish around our PLA print.
Before applying XTC-3D, ensure that your part is thoroughly clean, free of any oils and sanding dust (sensing a pattern yet?). Wash the part with soap and dry with compressed air to clear any dust. Again make sure to wear gloves to protect both your part and your hands.
Brush on the XTC-3D in a thin (1/64”) coat; as long as the coat is thin enough, it will level itself out. Between coats, leave 1.5 hours for the XTC-3D to dry.
It may be difficult to coat an entire part at once, so don’t be afraid to do it in sections, making sure to keep overlapping to a minimum between sections. Wait 90 minutes between first and second coats and after you’ve finished wait 2 hours to allow the shiny surface to become tack-free.
With striations as severe as ours, it will take multiple coats to get a smooth uniform surface, so patience is key. Remember that multiple thin glossy finish coats will level better than thick coats.
Pro Tip: Internal pockets are susceptible to pooling so be careful to suck up or remove any pooling that occurs before the XTC-3D begins to dry (that’s what we’re doing in the left picture above).
Beware that XTC-3D may compromise critical dimensions, but applying thin glossy finish coats will allow you to minimize the additional material.
After the XTC-3D layer has hardened (two hours after application of the last coat) it should be ready for sanding. Follow basic sanding guidelines, starting with 300 grit sandpaper (thanks to the smoothness of the XTC-3D) and sanding in small circular movements to even the surface. Any wavy patterns may require a coarser grit sandpaper to remove.
The sandpaper will scratch up the XTC-3D coat; focus on getting a level surface, moving through to 600 grit sandpaper.
After you’ve finished sanding 3D prints, make sure to thoroughly clean your part with soap and water and then dry using compressed air before moving on to the next step.
PLA 3D Printed Part Priming and PaintingPainting PLA parts follows the same process as the ABS and VeroBlack parts: prime, dry, paint, dry, varnish, dry.
Standard spray painting principles apply:
- Make sure your surface is oil-free, dust-free and hole-free
- Shake your cans for at least two minutes prior to painting
- Ensure your cap is clean to prevent drips
- Be aware of how the paint is accumulating on the part and look for any pooling or dripping
- Paint in many light coats rather than fewer heavy coats; this is especially important for 3D printed parts with internal and obscured geometries
- Paint in controlled, well-ventilated and well-lit areas
The XTC-3D coated PLA part is matte, black, and has a smooth surface to the touch with a few problems:
- Although the XTC-3D has worked well to smooth the part and make sanding quicker and easier, it has left pooling in the internal pocket that has shown through the paint finish.

- Striations are still visible on the part. 30 more minutes of sanding 3D prints could have prevented these from showing through the final paint finish.
After finishing all three parts to a smooth, matte black finish, let’s take a look at the differences in process, time, materials and finish.
Differences in ProcessABS (Dimension Elite)- Sand from 100 to 600 grit
- Repair holes with XTC-3D (may not apply to your part)
- Sand away XTC-3D with 300 to 600 grit
- Prime, Paint, Varnish
- Sand from 100 to 600 grit
- Prime, Paint, Varnish
- Coat in 1 to 3 layers of XTC-3D (depending on how bad the striations on your print are)
- Sand away XTC-3D with 100 to 600 grit
- Prime, Paint, Varnish
The part that took the longest to finish was PLA due to the XTC-3D coating time. Even without XTC-3D, however, PLA typically takes longer to sand than ABS or VeroBlack.
In our example, the VeroBlack was ultimately faster to finish since we repaired our ABS print with XTC-3D and stepping between layers was not as significant in the VeroBlack print.
All things considered, VeroBlack was the quickest to get to a smooth, matte black finish.
Pro Tip: If you’re in a rush to get from printer to photoshoot, pick the Dimension Elite or Objet30. Especially in models with overhangs and significant amounts of support material, the Dimension Elite and Objet30 both have support material that is quickly removable via dissolution, whereas the PLA support on a Replicator can significantly increase the time required to get to a smooth surface part.
Differences in Cost and MaterialsIt’s important to consider the amount of time it will take to finish your model as well as the overall look and dimension when considering the price.
PLA is the cheapest out of the three, at $20 per part, followed by ABS at $55, and VeroBlack at $110. In our opinion, VeroBlack is the best bang for your buck since it’s the shortest to surface finish and will give you the most accurate model.
At first glance, all three models may look very similar, but there are a few key differences in the final finish.
Both the ABS and the PLA finished prints have evidence of stepping between layers that is visible in the final paint coat. The VeroBlack print requires much less effort to remove these steps, which ultimately are not as obvious in the final paint coat.
Although the ABS and the VeroBlack finished prints have very similar surface finishes, more material (approximately .020”) was lost in the sanding process for the ABS to remove stepping between layers. In contrast, the VeroBlack print required less sanding, so the final object dimensions are closer to the original design intent.
Individual Summary of Each PartVeroBlack: High layer resolution (. 0011”) means little sanding is required to get a smooth, paintable part. Critical dimensions don’t need to be compromised to get a smooth surface quality part and no repairs are needed for fine detailed features.
ABS: Parts are easy to sand, but small fine detailed features may require repairing and careful sanding to remove stepping between layers. Once this stepping is removed, painting is straightforward.
PLA: The cheapest option, but also has the potential to be the most difficult to finish, depending on support structures and quality of the print. May require significant sanding and repairing via XTC-3D or Bondo filler.
Browse our website to learn more about our capabilities, such as 3D Printing and CNC Machining.
Quick Facts:
- Finishing a 3D printed part often involves a combination of the following processes: smoother application, sanding, polishing, cleaning and painting. The process is unique to the material type.
- A smooth finish with 3D printing is achievable but, post-processing will greatly improve the smoothness of parts.
- Epoxy resins are an excellent choice for sealing PLA printed parts.
- Acetone smoothing is not recommended for PLA prints.
- In general, IPA or rubbing alcohol will not dissolve PLA but there are some varieties that may be IPA soluble. Consult your filament material datasheet or technical datasheet for more information.
- PLA may be smoothed without sanding by dipping it or spraying it with a coating.
- ABS is tougher and lighter than PLA which is stronger and stiffer. Both have their ideal applications, but PLA is typically considered a hobby material whereas ABS is ideal for prototyping.
How to Finish Your 3D Prints - Ultimate Guide to Filling, Priming, Sanding & Painting 3D Printed Parts
Your 3D prints are now coming out great & looking as they should, but then again, they’re still looking like they’re 3D printed.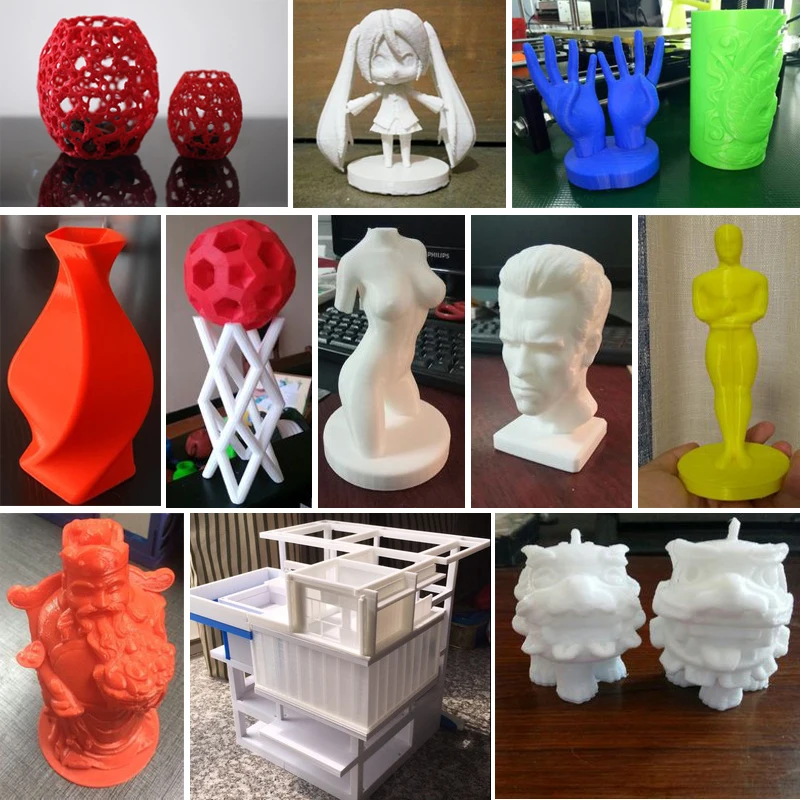
Whether you’re printing for business, want to rescue a not-quite-perfect print, or just need some tips for finishing 3D printed parts, this guide on how to finish 3D prints will explain the various methods the experts use: allowing you to learn the full lowdown on how to smooth out 3D prints.
In general, finishing is the post-printing process of smoothing the surface of a printed object so that it looks as perfect and professional as possible. Large industrial 3D printers accomplish this task by using acetone cloud chambers, multi-axis enamel jets, and agitating chemical baths.
However, I’m guessing you don’t have to have that kind of expensive equipment to finish 3D printed parts that are smooth and sharp.
In this article, we’re going to look at the various finishing techniques that you can use to get perfect-looking printed objects every time. Because every print material requires slightly different finishing techniques, we’re going to look at each of the common finishing techniques in turn and see how they apply to a material you may be using.
This will give you an opportunity to decide what may work for you given your individual setup, circumstances and printing practices.
Basic Best Beginning Practices for 3D Print Finishing
On the subject of printing practices, one of the best ways to minimize the amount of finishing work cleaning up 3D prints is by starting at the very beginning of the printing process. Your slicer settings have a lot to do with how your finished object looks.
For example, layer height contributes greatly to how a finished object looks. Layer height is the setting that establishes the height of each layer of filament in your print. In some sense, layer height in 3D printing is akin to resolution in photography or videography.
When you choose a thicker layer height, your object will have less fine detail and the layers will be more viable. When you choose a thinner layer height, a higher level of detail is possible and your layers will tend to blend into one another.
Print speed is another important setting that can contribute to overall object quality. Print speed is how fast the print head travels while extruding filament. Therefore, optimal speed depends on the object you are printing and the filament material that you are using to fabricate the object.
In general, simple objects with less detail can be printed faster without much loss of quality. On the other hand, more complex objects with more detail will benefit from a slower print speed. Because of this, it pays to experiment with your print speed to see what works best for the job you’re printing.
If you’re intending on painting 3D printed parts after you’ve finished printing, it may be best to use a lower layer height. You’ll spend more time printing, but less time sanding 3D printed parts before painting them. Read on to learn more about painting PLA and other 3D materials.
You’re going to be sanding 3D prints after printing in order to obtain the smoothest surface possible. This means that your object is going to need to be a bit more robust in terms of thickness and infill than you previously planned for.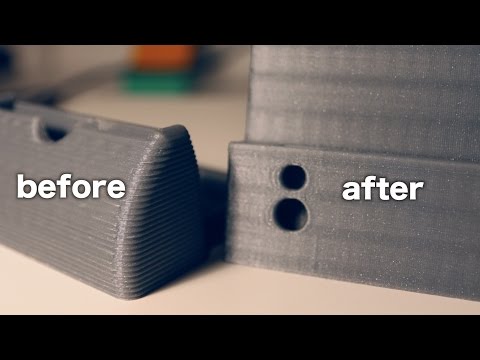
A shell is the outer wall of a designed object. Shell thickness refers to the number of layers that the outer wall will have before infill printing will begin. The higher the setting is for shell thickness, the thicker the outer walls of your object will be.
Obviously, thicker walls make for a sturdier object. So, when you’re planning to finish your object post-printing through sanding, you want to increase the shell thickness to account for the material that you will be removing later.
Fill density or infill is a measure of how much material will be printed inside the outer shell of the object in question. Fill density is usually measured as a percentage of whole, as opposed to a unit of measure. This means that if 100% fill density is selected, the printed object will be solid, with no empty space inside the outer shell. Likewise, if 0% is selected, the printed object will be empty inside.
Fill density is used to conserve filament while printing and speed up printing times. However, an object with more infill will be stronger and heavier than an object with less infill. Again, because sanding removes material from the surface of an object and requires the application of a certain amount of pressure to do so, you’re going to want to increase your fill density when printing the object. Doing so will insure that your object won’t be damaged or deform during the finishing process.
For more information on slicer settings, take a look at our article on the subject here.
Slicer settings are not the only thing that affects the amount of potential finishing work that may need to be done once an object is printed. The quality of the printing filament that you are using can impact end quality as well. Poor quality filament contains impurities that will negatively affect how the material melts, extrudes and cools.
In addition, cheaper filament is not produced to the rigid tolerances necessary for high-quality end results. Specifically, variations in the diameter of the filament can lead to under extrusion and over extrusion problems during printing, both of which will produce a final object with serious surface flaws that will have to be dealt with through finishing.
Finally, consider using a color of filament that will closely match the desired color of the finished object. Doing so will reduce the amount of painting that needs to be done once printing is over and you’re finishing the object.
Admittedly colour is less important for those truly professional-grade finishes though, because of the amount of primer paint coats needed.
Support Structures
As you know, a 3D printer starts printing an object from the bottom up. This means that if you have a design that incorporates overhangs, upper areas in your model that don’t have any underlying material, you’re going to run into problems. After all, your printer filament is subject to the law of gravity. It can’t be extruded onto thin air.
In these cases, you will have used a support structure which supplies a surface onto which your overhangs could be printed. These structures, which may or may not be soluble, will need to be removed before the finishing process can begin.![]()
If your support structure isn’t soluble, you will need to break or cut away the supporting material. A pair of flush cutters or an Exacto knife can help you get cuts that are flush with the printed surface of the object that you wish to retain. Once the supporting material has been removed, use a bit of 200 grit or 400 grit sandpaper to gently smooth the support marks.
You’ll notice in the image above, the model was printed upside down so that minimal support structures would be left – and so less work to remove them. It’s also easier going smoothing PLA on large, simple areas like the top of the helmet than potentially more intricate parts of the underneath.
If your support structure is soluble, you’re likely dealing with either PVA or HIPS. In this case, simply submerge the object in the solvent in question – water for PVA and Limonene for HIPS. The water should completely dissolve the PVA support structure within several hours.
Limonene will take longer to dissolve the HIPS support structure, usually about 24 hours. In both cases, remember to give the containers containing the solvent and your object a gentle shake from time to time to help the process along.
How to Clean Up 3D Prints With Filler
Before you sand and paint 3D printed models, it may be worth filling any small gaps, cracks, or underfilled sections with a 3D print filler solution. This is usually a variant of epoxy resin that is easy to work with, and can be sanded down afterward.
We recommend using XTC-3D which you can get here. You’ll notice you can even use it for smoothing out 3D prints just by brushing it over as a 3D print coating.
Although you won’t get the same level of high-quality finish we’re aiming for in this article – it could be a quick way to improve a print. Think of it as the lazy man’s 3D printing finishing tip.
The neater you are filling the gaps, the less sanding you’ll need to do afterward – so try to be as neat as possible.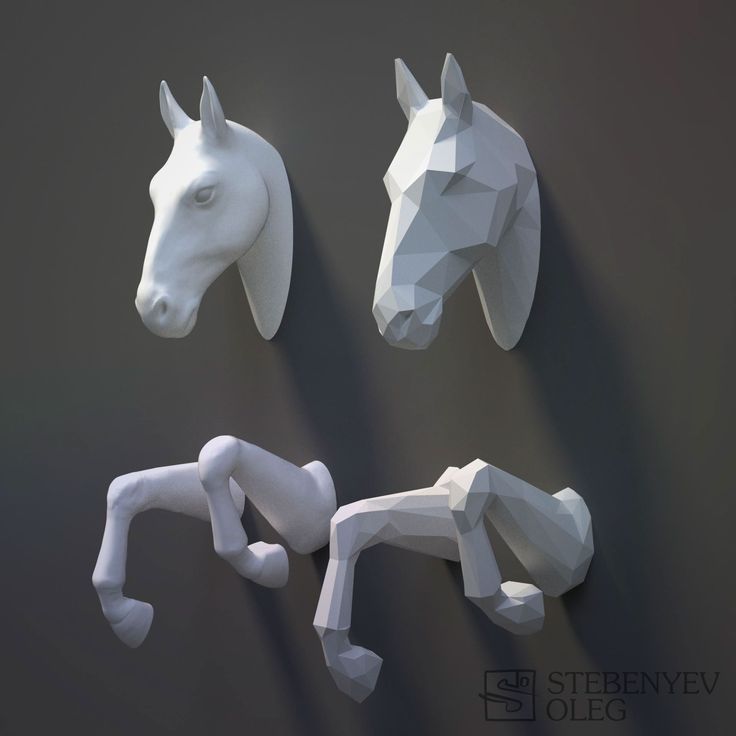 You’ll also need to leave it to cure for at least a few hours after filling.
Sanding is a simple and somewhat easy way to finish processing a 3D print, depending on the material in question. Some printing materials respond well to sanding, with other materials it may not be an option.
For example, PLA and ABS can respond very well to sanding. With harder materials, like Polycarbonate and PMMA, sanding is not an option. (We will discuss finishing options for harder materials in more detail below.)
If you’re looking for how to make 3D prints smooth and the material you’re using can’t be vapor smoothed, then sanding it is!
Among the few PLA finishing techniques, sanding gives the best result. Be sure to choose a good quality PLA filament, as poorer filaments can be more challenging to get a good smooth surface on.
Sanding the surface of an object made from PLA or ABS is a fairly straightforward process – as long as you approach the job with some patience. For example, PLA’s lower melting temperature can make it get gummy and soft if it is sanded to aggressively and quickly. Therefore, patience and a bit of time are the keys to getting a smooth mirror finish on any object made with PLA.
Also, you need to be prepared to use multiple grit sizes of sandpaper. For example, with PLA be prepared to use every size from a 200 rough grit to a 3000 fine grit and every gradient in between.
Pro tip: With a material that’s a bit harder, like ABS, you may want to start with the same grit size but try wet sanding the object with a waterproof abrasive sheets such as “Wet & Dry.” A harder material can stand increased pressure while being sanded, but friction still is an issue.
Wet sanding helps reduce the heat that results from friction, allowing for more efficient removal of unwanted material with less deforming of the object due to frictional heat.
No matter the material, you want to start with the coarsest grit of sandpaper.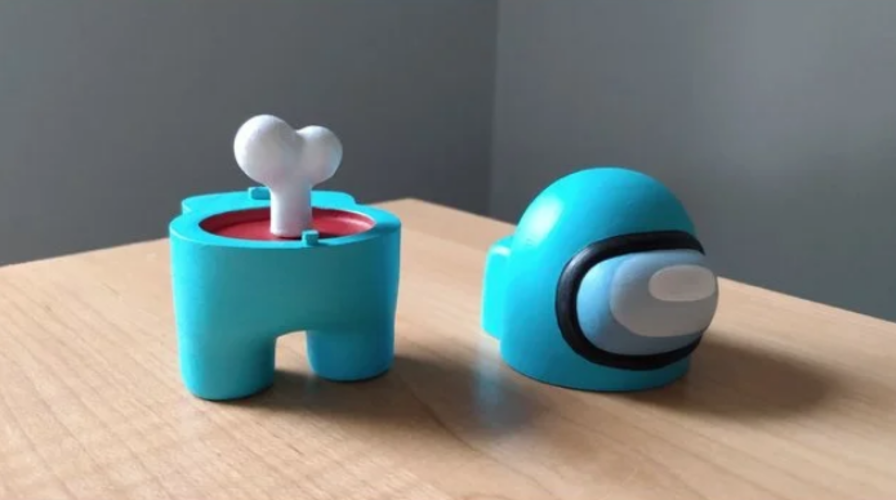 Use a circular motion with a slow moderate pressure to remove unwanted material. The idea is to get rid of what you don’t want while leaving absolutely no trace that you’ve done any finishing work.
Once you’ve gone over the object once with coarse grit sandpaper, you want to repeat the process with a finer grit. For example, if you started with a 200 grit sandpaper, you want to switch to a 400 grit sandpaper on your next pass. Once you’ve patiently done a pass over the object with the 400 grit, you switch to 600 grit and repeat the process.
The idea is to slowly and carefully remove the features on the objects that you don’t want, while slowly and carefully retaining and highlighting the finish on the features that you do want to keep.
When you are scaling up the grit number on the sandpaper, remember that time is your friend when it comes to getting a mirror-smooth finish. In general, the more time that you spend sanding, the better the finish that you will obtain. This is especially true with the lower-numbered grit sandpapers.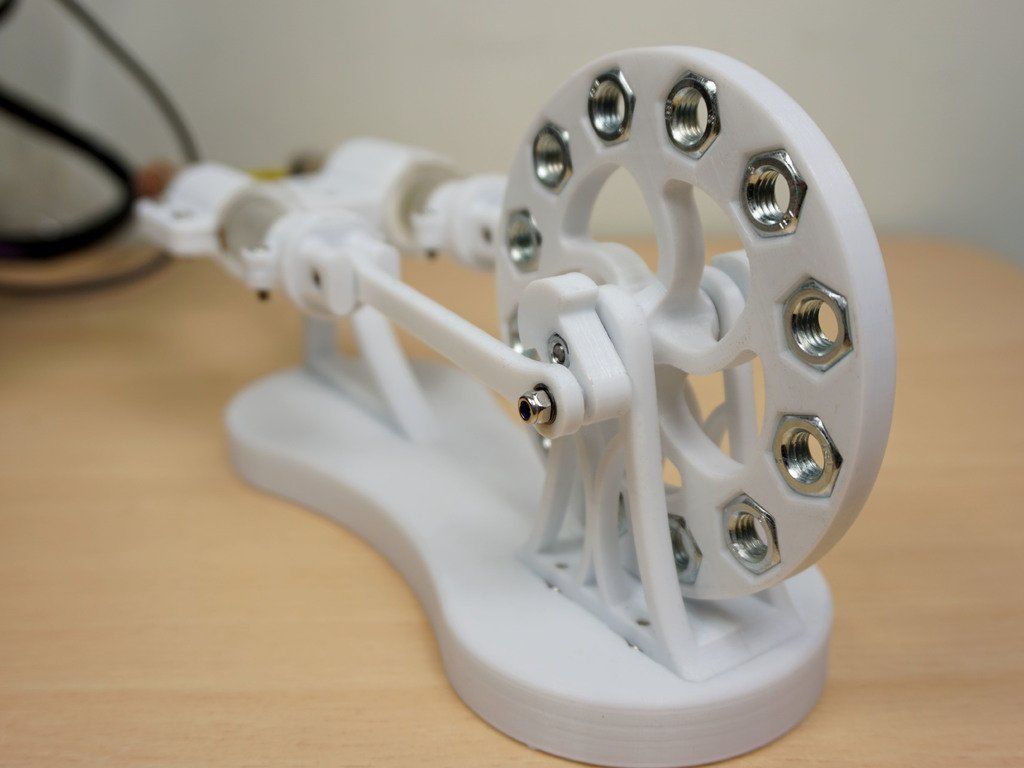
Keep working your way up to finer and finer sandpaper grits – 600 to 800, 800 to 1000, and so on. As you get up over 1000 grit, the finish on your object will start to feel really smooth, but don’t stop here. To get a truly professional finish, take the time to carefully go over your object with 2000 girt and then 3000 grit. That extra attention will really pay off in the quality of the finish that you end up with.
Once you’ve sanded your object, it’s ready for either painting or simply polishing, depending on your preference. For more detail on this 3D sanding technique, view our guide on getting a mirror finish from sanding here.
Vapor Polishing
The before and after effects of a cold acetone smoothing bath.An alternative to sanding is vapor polishing. With vapor polishing, a small amount of an applicable solvent is placed in a container. The printed object is also placed in the container on a platform that suspends it above the solvent. A non-airtight cover is placed on the container and the solvent is then heated until it begins to produce vapor.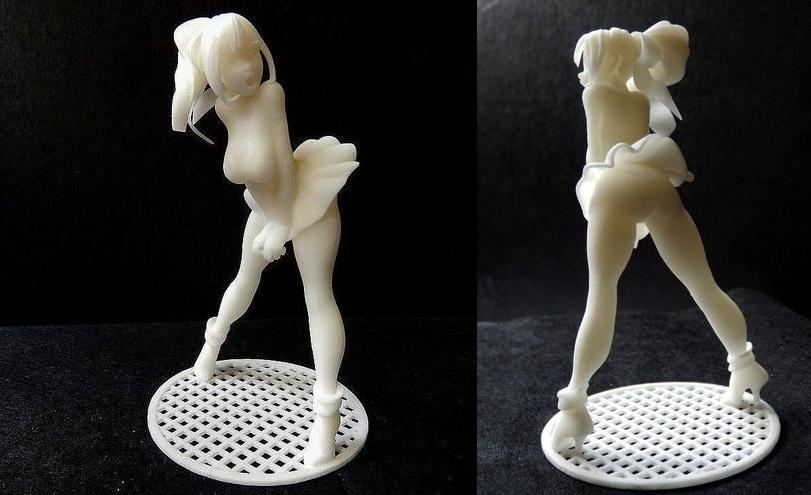
This is an analogous process to what happens when water is heated to a point where it begins to form steam. Essentially, the solvent in question is brought to a temperature where it steams, or begins to transition from a liquid to a gas.
Once this happens, the solvent “steam” is allowed to surround, coat, and interact with the surface of the printed object. Ideally, the gaseous solvent begins to slowly and evenly dissolve the surface of the object, removing unwanted material and features.
Once the desired look of the surface of the object is achieved, the object is removed from the container and allowed to air dry. Drying stops the interaction of the solvent with the material the object is made of. The end result is an object with a smooth and professional finish.
As was the case with sanding, increasing shell thickness and fill density prior to printing will produce a more robust object that will be capable of withstanding vapor polishing without problems.
Vapor polishing softens the rough surface layers of the object so that they flow together to produce the desired finish. So if there are insufficient top layers present when using this process, just like with sanding, the undersurface of the object can be exposed and ruin the effect.
While industrial printers and finishers use cloud chambers to vapor polish projects, many makers replicate the process using common objects. For example, a wide-mouthed glass container with a lid or a simple saucepan can be used to hold the solvent. A raft or platform of aluminum foil can be used to suspend the object above the solvent. Finally, the heated bed of your printer or your home range can be used to carefully heat the solvent.
Now a word of caution. Every printing material is soluble is a different substance. Some of these substances are relatively benign, others are extremely toxic.
For example, in ascending order of toxicity, PVA is water-soluble. HIPS is soluble in Limonene. ABS and PMMA are soluble in acetone. PLA is most efficiently soluble in tetrahydrofuran or THF. Polycarbonate is soluble in dichloromethane.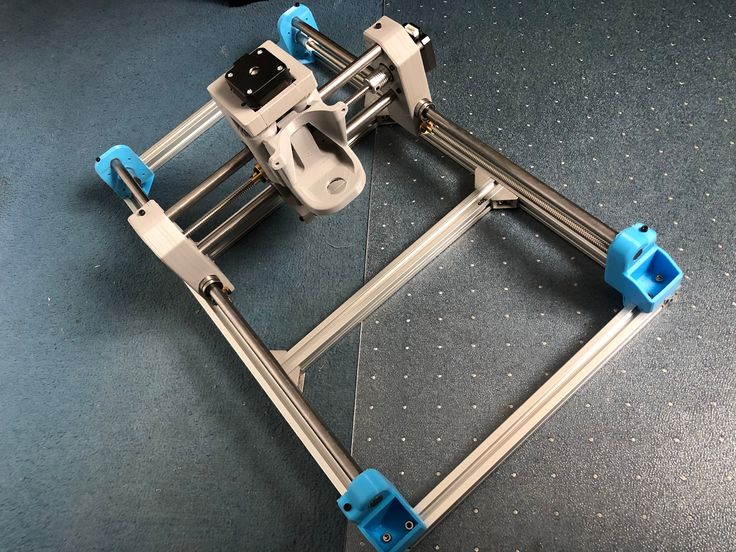 The list goes on.
Vaporizing any chemical solvent poses a number of hazards. First, solvent steam is much more readily absorbed by the body through respiration and contact. The more toxic the solvent, the worse the prolonged exposure to the substance will be. Therefore, any vapor polishing must be done in a well-ventilated environment. The use of a respirator, protective clothing and gloves is well neigh mandatory.
Second, many solvents are flammable. Therefore, heating a solvent must be done under controlled conditions. You need to know the solvent’s boiling point and flame point beforehand and use a calibrated thermometer to ensure the temperature of the solvent stays within safe parameters. Always work with a fire extinguisher handy. To read more about vapor polishing, check out our in-depth guide here.
How to Paint 3D Printed ObjectsNo matter if you’re prototyping an object for use in a Kickstarter campaign or simply want to create something that’s absolutely stunning in its presentation and perfection, painting may be the way to go.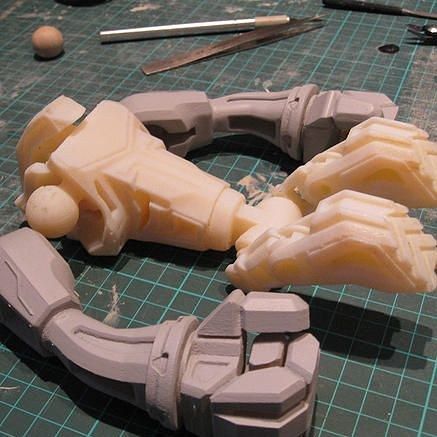
Successful finishing using paint actually involves two separate processes – priming and then painting. However, before looking at either, let’s take a look at a preliminary step that you need to take that will guarantee stellar results once you start painting.
If you’re wondering: can you paint 3D printed objects – the answers yes of course, but you need to do the right…
Preliminary Steps
When priming and painting an object, it’s best to first mount it on what’s known as a painting block using a dowel. A painting block is nothing more than a block of wood that supports the object while it is being primed and painted.How to paint PLA: Here you can see the helmet raised up, ready for finishing touches.
Simply take a wood dowel and, using a drill with a bit that is equivalent to the dowel’s diameter, drill a small hole into an inconspicuous area of your object. Insert the dowel into the hole you’ve drilled until it sets securely. (Alternatively, you can use a naturally occurring hole or declivity in your object to seat the dowel. )
)
Next, using the same size drill bit, drill a hole into a block of wood large enough to securely balance and support your object. Insert the other end of the wood dowel that you used on your object into the wood block. You now have a way to provide even and smooth coats of primer and paint to your object without having to touch it and risk leaving smears and fingerprints behind.
Also, remember that priming and painting an object can be a messy business. You want to stop the paint from getting on objects that it shouldn’t and you want to keep foreign objects, like dust, from settling on your printed object while it dries. Therefore, work in a well-ventilated area that is clean and well-lit.
Most spray-on paints contain solvents that can aerosolize and be inhaled. Consider wearing an approved respirator and nitrile gloves while priming and painting.
Also consider constructing a simple spray booth by hanging plastic sheeting around three sides of the surface you will be placing the object on while priming and painting.
This will contain the paint to the area around the object and will reduce the amount of dust and debris that will adhere to the object while the paint or primer is drying.
Priming before painting 3D printsPrimer for 3D prints is a special type of paint that comes in neutral colors. It is designed to provide a uniform surface that paint can easily bond to. Primer comes in both brush-on and spray-on varieties. When choosing a primer for your object, you are better off going with a spray-on variety.
It will cover the surface of your object with an even coat and will eliminate the use of brushes which can leave noticeable brush marks.
Best paint for 3D prints? For best results, use a primer (and paint) that are compatible with plastic and are of the same brand. Using a high-build filler primer like Krylon and Montana both are good choices.
Before priming your object, spend at least two to three minutes swirling the contents of the can of primer, using a circular motion. Doing so fully dissolves the pigment into the solvent within the can. You should never, under any circumstances, shake the can before you prime or paint. If you do, you will mix the pigment into the solvent, instead of dissolving it.
This will result in the formation of bubbles that will appear on the surface of your object while spraying. After about two or three minutes of swirling, you should hear the metal ball within the can moving smoothly. This indicates that the pigment is dissolved into the solvent and you are ready to begin priming your object.
Start with the nozzle of the can about 15 to 20 cm (6 to 8 in.) from the surface of the object. Using short and rapid strokes, begin spraying the object Start each stroke before the beginning of the object and end each stroke after the end of the object. Move quickly, rotating the object as needs. Avoid over-spraying. The goal is to start with a very thin initial coat that can be built up over time.
Once the initial coat of primer is dry, it’s time to add a second coat.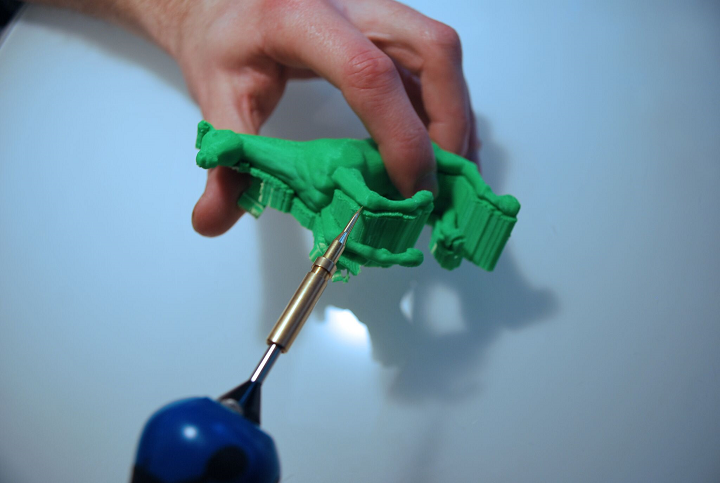 Again, use short rapid strokes that start before the beginning of the object and end after the end. In the vast majority of cases, your object will only need two coats of primer to ensure an even cover that will improve the adherence of the paint you have chosen.
Once your second coat of primer is dry, you want to buff and polish the primer coat. A great and easy way to do this is to use nail buffing sticks, the kind that are available in any chemist or drug store and are used in manicures and pedicures. They come with a three grit surface.
You can skip the roughest surface and use the buffing and polishing surfaces to bring the primer coat up to glossy shine. As you did with the sandpaper, take your time and use a circular motion where possible. The goal is uniformity. When you’ve finished, gently wipe the object with a tack cloth to remove any dust created during the buffing and polishing.
Once you’ve buffed and polished the primer coat, you’re ready to begin painting.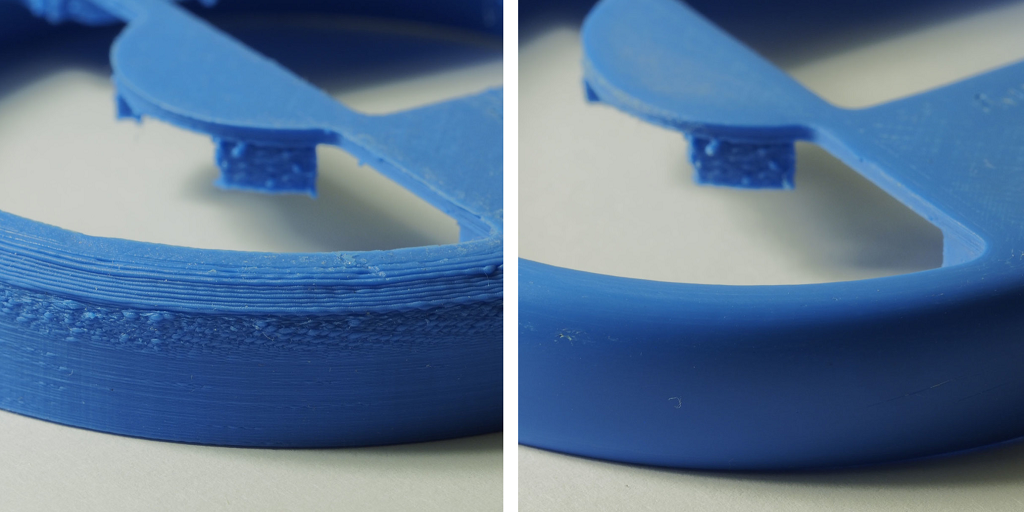 The painting process itself involves three distinct steps – undercoating, top coating and clear coating. As was the case with the primer coat, your best bet when painting is to use a spray-on variety. It will give you greater control over uniformity and layer thickness. It will also allow you to avoid brush marks.
You want to choose a painting that goes on as thinly as possible. One of the best choices is Tamiya. Tamiya paints are specifically designed for use by modelers and radio control enthusiasts. This makes them a perfect choice for finishing painting 3D printed objects.
Undercoating
Applying an undercoat layer will allow you to get the richest and deepest color when painting your object. An undercoat should not be confused with the primer coating. The two serve entirely different purposes. The primer coat is there to give the paint something even to adhere to. It prevents blotching and uneven coverage.
The undercoat layer is there to block the neutral and flat color of the primer. Undercoat layers are usually either solid black or white. Black is used for objects that will be a painted with darker toned colors. Obversely, white is used for objects that will be painted with lighter-toned colors. No matter the color, the undercoat will shine through the topcoat layers, giving the finish a luster and depth that is unmatched.
As was the case with the application of the primer, you want to use a respirator and gloves while painting. Spend two or three minutes swirling the paint can in a circular motion until the pigment dissolves in the solvent. You’ll know that this happened when you feel the metal ball in the can revolve around the inside without resistance.
Once the paint is well mixed, hold the nozzle of the can 15 to 20 cm from the surface of the object and apply the undercoat in short and rapid strokes. Once again, start these strokes before the beginning of the object and end after the end of the object. As always, rotate the object on the painting block while applying the undercoat in the thinnest layer possible.:quality(90)/images.vogel.de/vogelonline/bdb/1157300/1157362/original.jpg)
Once the initial undercoat layer is dry, buff and polish the undercoat layer using a nail buffing stick in the same manner as you did when buffing and polishing the primer. Once this is completed, you are ready to apply a second undercoat in the same manner as the first. Once the second undercoat is dry, buff and polish as you did before.
Top Coating
Now it’s time to apply the top coat. Top coating isn’t about complete coverage. In some sense, it’s the icing on the cake. It’s there to enhance and improve all the work that you’ve already performed. Ideally, the top coat will be a color that contrasts with the color of your undercoat. The top coat will add gradients of color which will allow the contrast of the undercoat to show through. The end result will be a depth and resonance that will make your object look amazing.
All of the steps that you’ve already used when applying the primer coat and the undercoat are also used when applying the top coat. You want to use a respirator and gloves. You want to keep your object mounted on the paint block. You want to keep and the nozzle of the paint can 15 to 20 cm from the surface of the object and use short rapid strokes while painting. You want to rotate your object rapidly on the paint block while applying the top coat. You want to polish and buff in between the first and second coats.
You want to make sure that you don’t apply the paint too thickly when doing the top coating. Remember, the goal is to let some of the contrast of the undercoat to show through the top coat in order to get a sense of depth. To that end, check that there is sufficient contrast showing after the first top coat layer has dried and been polished and buffed. Depending on what you find, apply the second top coat accordingly.
Clear Coating
Clear coating, also known as finish coating, is the last step in the painting process. The purpose of clear coating is twofold. First, the clear coat adds final layers which enhance the finished look of the object.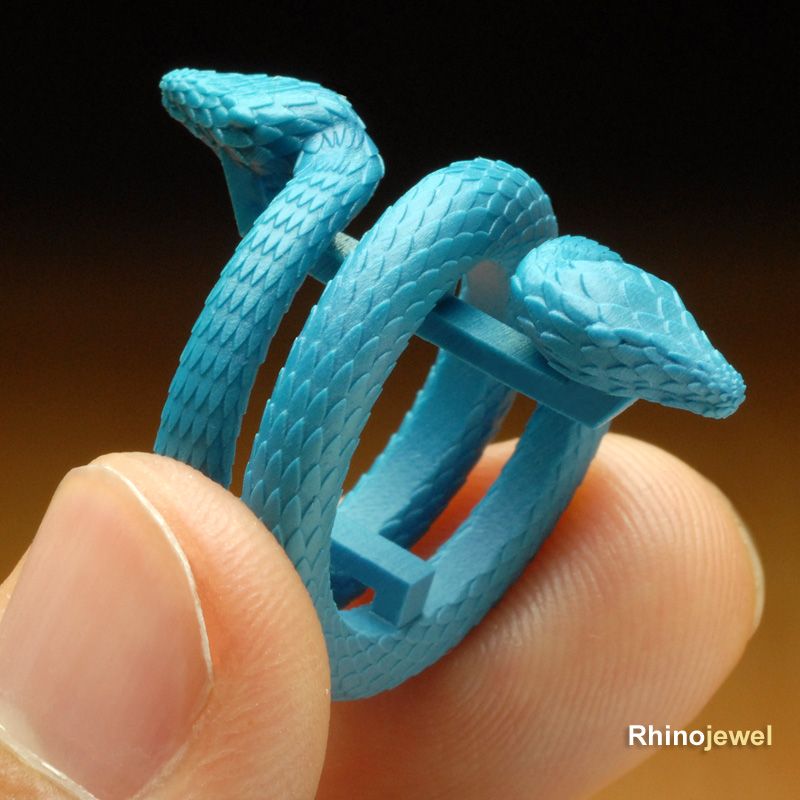 Second, the clear coat protects all of the hard finishing work you’ve already done under a protective coating.
There are two types of clear coating available – glossy and matte. Obviously, glossy is shinier and matte provides a flatter-looking end appearance. The choice between the two is merely aesthetic. Practically, they both do the same thing.
Clear coat is applied in the same way that you’ve applied every other coating. Respirator, gloves, well-swirled coating, short rapid strokes, etc. You can apply either one or two coats of clear coating depending on the circumstances and the finished look that you’re trying to achieve.
I hope this guide has been a comprehensive breakdown of the available options to you for 3D printing post-processing and gives you a clear layout on how to paint 3D printed models. If you’re willing to put in a little time, truly exceptional finishes can be achieved. But if you’re just looking for tips on smoothing out 3D prints, then this guide will at least have given you some food for thought.
Related:
- How to sand PLA to a smooth finish
- Best infill settings
- How to prevent filament stringing and pillowing
13 notes about 3D printing, after 3 years of owning a 3D printer / Habr
This article will be, first of all, of interest both to those who have directly dealt with 3D printing, that is, who owns a 3D printer, but also to those who are just about to join the ranks of 3D printers and are thinking about buying their own printer.
In the framework of this article, I want to present my observations, as a direct owner of a 3D printer, for more than 3 years.
Despite the fact that 3D printers have been known for a long time and, in my memory, have become widely used, judging by the information on various resources, starting around 2010 (I may be wrong, these are my subjective observations), for a long time I ignored this area, it’s hard to say why…
Probably thought it was some kind of "childish pampering", another hype topic for which there is simply not enough time. ..
..
The turning point happened when one of the wheels on my travel suitcase wore out. You know, a big plastic suitcase, with four spinning wheels on the bottom. Unfortunately, it is a “rather disposable thing”, due to the lack of bearings on the wheels, which is why the wear of the friction point of the axle and wheel allows the suitcase to last no more than one or two seasons.
And it’s like “lightning flashed in the middle of the day: 3D printer!” It is with his help that I can fix this problem! Looking ahead, I’ll say that I didn’t succeed in fixing the suitcase in this way, so I had to use a different approach ...
As a result, I “upped” it - installing wheels from unnecessary roller skates. Thanks to this “up”, the suitcase has become a real all-terrain vehicle and, even being very loaded, it rides easily - pushed forward even with “one finger”. And even in the snow, 5-6 cm thick. A tank, not a suitcase turned out! By the way - I took spinning wheeled "units" in Leroy. Then he took off and threw out his native plastic wheels from there, inserting from roller skates:
But this thought itself became a kind of trigger that allowed me to finally join the world of printers and buy my first 3D printer.
Like many, before buying it, I studied various forums and sites for a long time, delving into all the subtleties. And for some reason, I immediately liked the type of printer called the delta printer. Probably because during operation it looks like some kind of "alien device".
If at your leisure you like to sit “looking into the carpet”, then with the advent of such a printer you will have a much more interesting activity, even hypnotizing, one might say :-))
And this, in fact, is my delta (if anyone is interested), which went through, let's say, the "ultimate up": all the electronics are placed upstairs, on a self-made welded frame, covered with polyethylene and a magnetic door is made. The coil with a bar is installed at the top, on the frame. The axis on which the coil is put on is machined on a lathe from aluminum and a bearing from the VAZ timing is inserted into it. As a result, the coil - "rotates even from the passage of a fly nearby":
Well, yes, I won’t argue for a long time, let’s start reviewing the main facts that I have accumulated as a result of owning this car ... The facts are purely subjective and may differ from your vision. In any case, I will be glad to comments, clarifications, etc.
▍ NOTE 1. Delta is good, but...
Here I should give a number of my observations regarding the delta printer:
- It contains a completely finished frame of the future box, which makes it easy to form a heat chamber. I understand that many printers are made in the form factor of a “certain box” (but this point cannot be ignored), which greatly facilitates the process of wrapping this box with heat-insulating material.
 In my case, as such a material, I used a plastic film.
 - Already thanks to its design, delta allows you to work at much higher speeds than XY printers. By the way, it is on the delta principle that many modern high-speed industrial robots are built to sort various parts directly on the conveyor belt:
However, this plus does not allow to fully realize the occurrence of parasitic vibrations, even despite their suppressors:
Thus, accurate printing is possible, only at speeds (at least that was the case for me), no more than 60 mm per second. A complex procedure for aligning the movement of the head parallel to the table, which is why, for many, the so-called "lens" appears. People struggle with it with varying degrees of success, but I have not encountered this on my printer and for me, therefore, the “lens” has never been a problem. At the same point, it is worth noting the calibration of the table, which was initially absent on the first deltas, and I had to use an external third-party solution from one American do-it-yourselfer called EZBED. This solution was a hardware-software complex that allows you to quickly and easily calibrate the printing table, that is, to let the printer understand its geometry. Modern printers do not have this issue as they come with a built-in calibration solution. It is worth noting that I solved this problem by attaching a limit switch to the print head, and using the Marlin-1.1.9 firmware.
▍ NOTE 2. "Size doesn't matter..." :-)
When I got the printer, I was impressed by the possibility of huge printouts, a la the handguards of some futuristic rifles, huge body parts, etc.
However, if you try to analyze the results of your many years of practice, it turns out that in most cases, rather small objects were printed that easily fit in the palm of your hand, a maximum of two palms. Despite such a seemingly small size, the printing of these details took a significant amount of time. Of course, this very much depends on which nozzle you print with. But, despite this, it is difficult to disagree with the fact that most of the printed parts will be quite utilitarian and small in size.
Therefore, to be honest, the need for a printer that allows you to print "Venus de Milo in life size" is not obvious.
Of course, you can object to me that “I’m going to buy a printer, I’ll get used to it a little and I’ll get started!!!”
One simple point must be taken into account here: there are no universal things. And in order to understand how much 3D printing in general and your printer, in particular, you will need to solve your problems, and how much it will be able to solve such problems, you just need to first try the 3D printing method personally and then a lot will become clear to you .
Therefore, for a beginner, I recommend taking a small printer that allows you to print extremely small items that fit in the palm of two. With such a device, you will definitely never lose, as it will always be needed. In addition, with its help you will be able to get used to the printing process and, if necessary, purchase a larger device, already clearly understanding its capabilities and ability to solve your set of tasks.
▍ NOTE 3. "What type of printer to get."
Based on the foregoing, I do not recommend taking a delta printer and this can be said right away.
Not because it is bad, in fact, it prints quite accurately, its main problem (in my opinion) is the inability to print rectangular flat, fairly large case components, as well as the inability to fully realize high-speed work, since the quality drops critically. Here it turns out to be a rather offensive situation - the printer can work quickly, but this cannot be done, since the quality will be “nothing”.
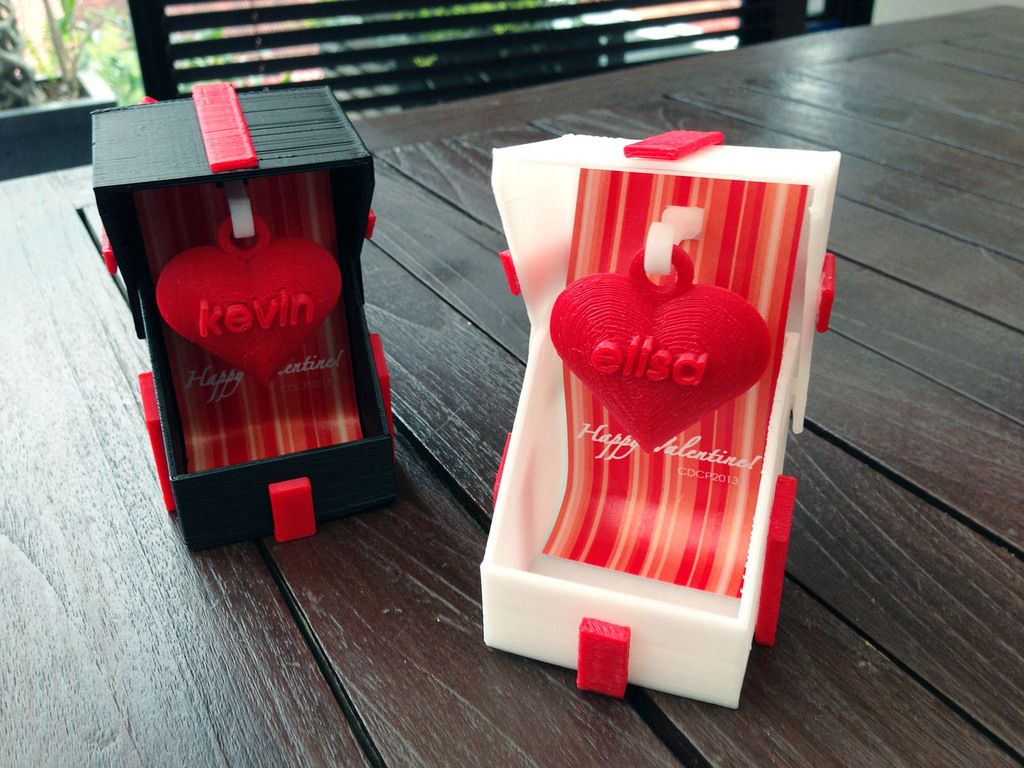
And then what kind to take? Depending on the budget and capabilities, I recommend taking any cube printer, for example, the same Core XY (the head moves, and the table goes down as the model “grows”, from top to bottom):
Image source: thingiverse.com
Such a printer allows you to easily print fairly large flat parts of cases, has good speed and accuracy. In addition, the presence of a rigid box-shaped frame allows it to be easily covered with polyethylene to create a sealed heat chamber. In addition, the very fact that the table does not move while working reduces the number of problems with model peeling.
However, the advantages of this printer will not be fully revealed if it has a direct extruder. On the one hand, it will allow printing with rubber-like materials, on the other -
large inertia and head weight. And these are parasitic vibrations, wear of the fur. parts, etc. (like everything in life, “we treat one thing and cripple another” :-))
At the initial stages, this may not be necessary, but in the future it may be necessary to print, for example, tires for your homemade car. And with this, the Bowden extruder has obvious problems. Although, in fairness, printing with such a rubber-like material is far from a daily need. However, whoever seeks will always find: over time, I found a way to “upgrade” my printer with a Bowden extruder to print with flexible materials.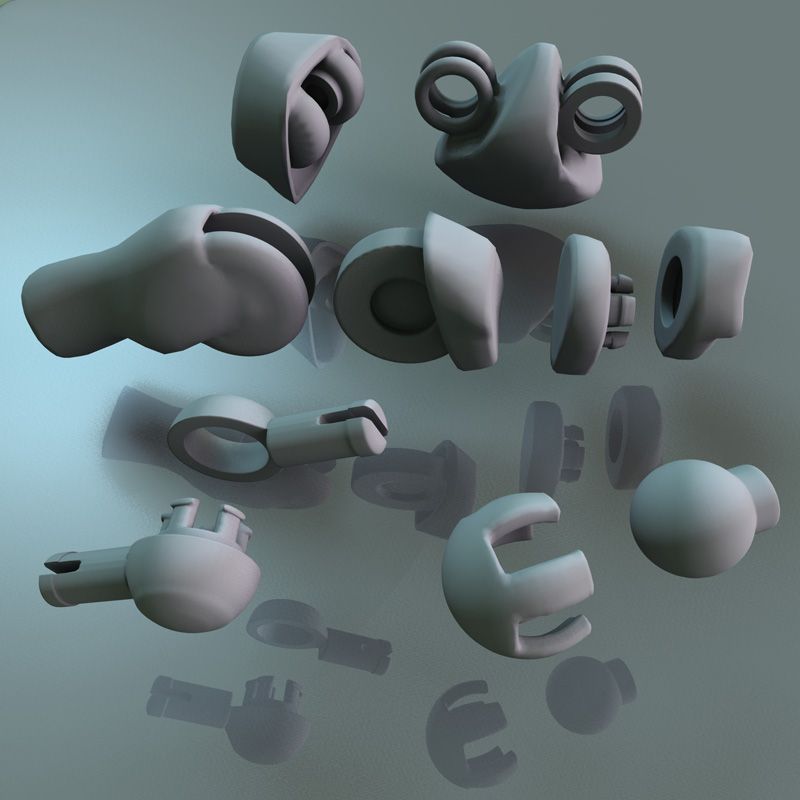 "Crutches" of course. But even so.
By the way, there are printers of a cheaper type, the so-called "drygostol", printing by moving the table and head:
They are inexpensive, moderately accurate, but they require a sufficiently high-quality gluing of the printed model to the table, because the table moves, and the model can come off when the table is jerked sharply. When printing large models, this can be a problem.
▍ NOTE 4. What to print with?
It's only a matter of taste and purpose. That is, if your printout will only stand on a shelf and should differ in some kind of aesthetic appearance, these are some requirements, if the printout is an engineering part that will be operated under conditions of increased mechanical load, these are different requirements. That is, in the first case, you can use any PLA, SBS plastics, and others with similar properties.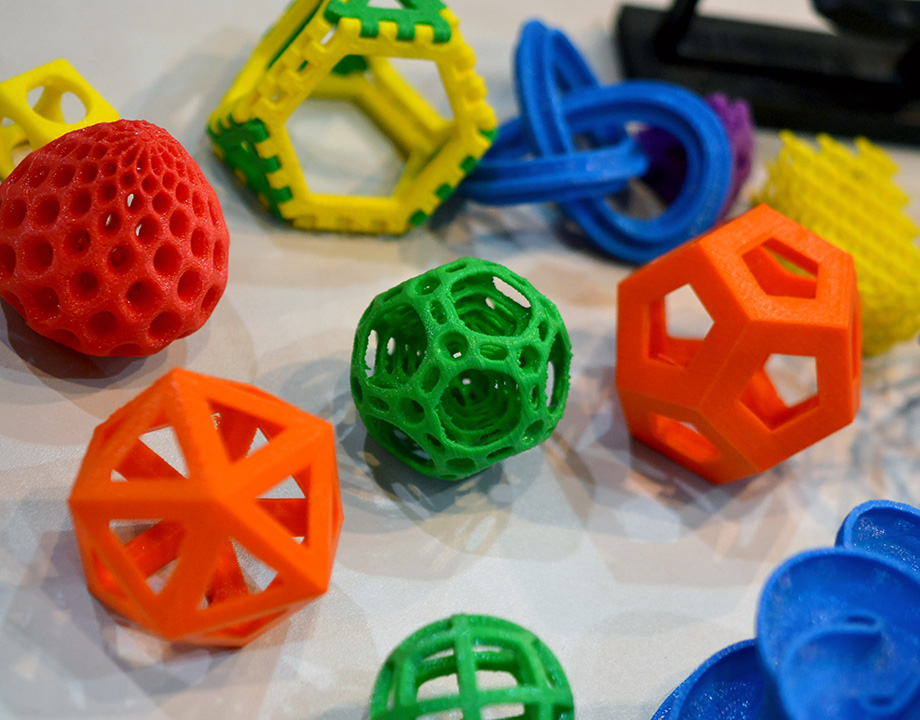
For engineering parts, for example, I only use ABS. It combines high hardness, strength and low price. Although I understand that now this last statement will cause a storm of comments in the style of “no! - there is even stronger, even better, the same PETG, etc. ":-)
Just here I wanted to say that thanks to the low price and the practical experiments that I conducted with ABS plastic, I realized that it is completely meets all my requirements.
However, the fact that ABS plastic releases carcinogenic substances when heated is quite annoying and forces you to take measures to prevent poisoning. For this, my printer prints completely closed and on an open balcony. After printing, the printer chamber opens, and it remains open in this form until it is completely ventilated and cools down.
▍ NOTE 5. "ABS is difficult to type on, it flakes, peels off the table, etc..."
With a properly configured printer (in my case, at a print temperature of 205 degrees, a thermal chamber and a desktop temperature of 100 degrees), the use of auxiliary techniques, for example, among which, one can name the so-called ABS juice (which is ABS- plastic dissolved in acetone), you can create wear-resistant and durable things, without any hypothetical problems.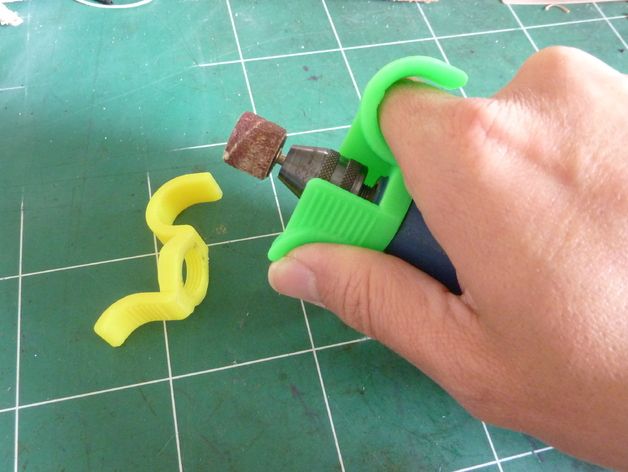
For example, my printer has been printing for many hours at temperatures well below freezing. And this happened more than once, not twice, not three! And the print quality was excellent:
12-hour ABS printing at -4 C
▍ NOTE 6. Acetone for post-processing and ABS juicing
At one time, I wrote a fairly detailed article on this topic and I will try to give the main excerpts from it. The essence of the issue here is as follows: due to the fact that different GOSTs are used for the production of acetone, acetone differs in quality. Despite the fact that it would seem that “acetone is also acetone in Africa,” nevertheless, one type of acetone can differ significantly from each other. For example, ordinary acetone, which can be bought at any hardware store, such as "1000 little things", "store near the house" and the like, is very low quality acetone, smells disgusting (although someone like it, maybe someone likes its pleasant building aroma and "aftertaste" :-))).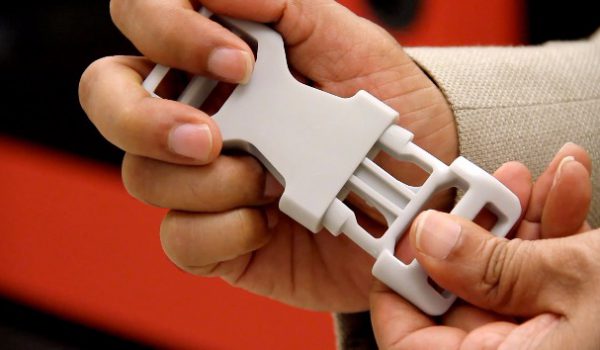
In contrast to it, there is a much higher quality acetone, which, however, is not found at all in any household stores, even large chain stores, such as Auchan or Leroy Merlin.
This type of acetone is found exclusively in shops that sell varnishes and paints for automotive work, i.e. these are highly specialized shops for car workshops:
Acetone, which can be purchased there, is of excellent quality, smells almost like alcohol, quickly disappears,
:-) - this is a joke, of course, don't even try it.
However, its main advantage, compared to household type acetone, is that it perfectly dissolves ABS plastic and does not allow it to precipitate. For me personally, it was a very surprising observation when the same ABS plastic was perfectly dissolved with acetone from an auto shop, and completely precipitated when I tried to use household acetone (I just ran out of good acetone, and I had to use "what is ").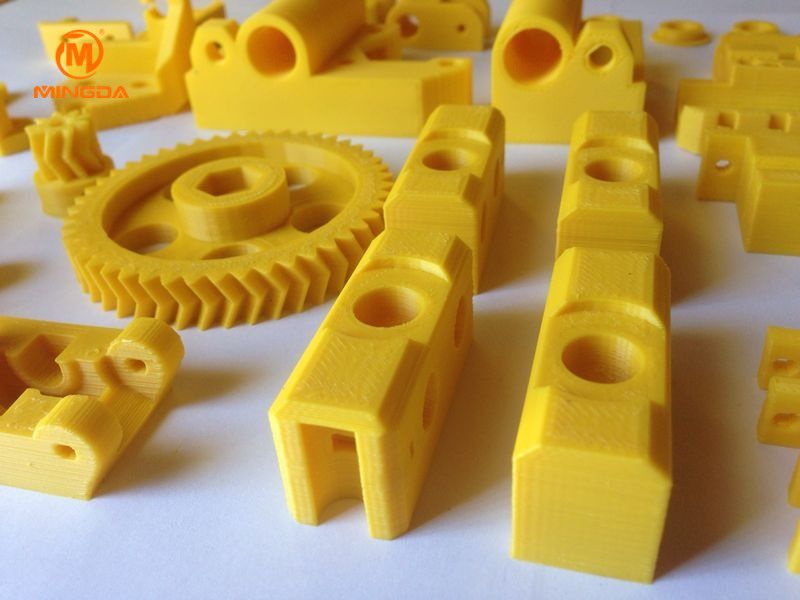
Therefore, if you want your results to always be excellent, then here is the right acetone. It should be labeled "for professional use":
▍ NOTE 7. What about ABS juice?
"ABS juice" is what printers call a mixture of acetone and pieces of ABS plastic dissolved in it. This mixture is smeared on the surface of the desktop before printing and allowed to dry. Thanks to this spread, the model easily sticks to the desktop and does not peel off during the printing process. After printing is completed and the platen has cooled down, the model can be easily separated.
All that needs to be said here is that, after trying different approaches over time, I settled on using flexible metal spatulas, also called "Japanese type spatulas":
According to the results of many tests, this method of spreading turned out to be one of the most convenient options, such spatulas can be cleaned very quickly and easily after work.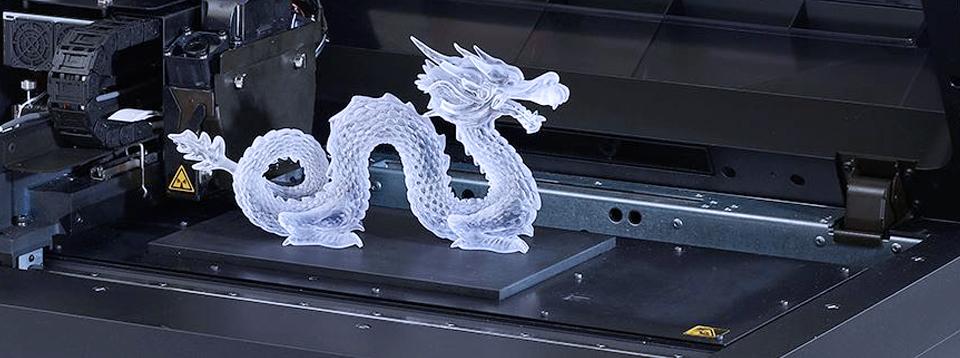 In other words, highly recommended!
▍ NOTE 8. "Yes, nothing sensible can be done on it, I indulged a little and decided to sell it - you can't use it for anything good anyway"
I absolutely disagree with the statement above, which is periodically heard from newcomers to 3D printing. You can even say more: at the moment I can’t even imagine how I used to live without a 3D printer! Since it is he who makes it possible for any do-it-yourselfer to significantly expand their capabilities and make piece products, almost of factory quality! Of course, for this, appropriate hands must be applied to the 3D printer, but that’s another question… and take on things that I would never have thought to take on before!
For example, among my homemade products, the following can be listed:
- Heated sole for boots, which is a hose integrated into the insole (and filled with household silicone from a household store), through which water flows, heated with a catalytic type hand warmer.
 Water is pumped using a small peristaltic pump. The engine with a metal gearbox, which is used in the creation of this pump, allows you to develop a force of 3 kg, which is even redundant for this homemade product. The engine is powered by Peltier elements mounted next to the catalytic heater. The project is currently in progress.
- Centrifugal water pump mounted on the shaft of an internal combustion engine that drives a high pressure wearable air compressor with a pressure of 500 bar. The pump pumps coolant through the casing of the high pressure pump, or rather its second stage. Despite the fact that the pump is 3D printed and runs at over 6000 rpm, nothing “fell apart, fell apart, didn’t break.” As you can see in the photo, the pump is installed instead of the “starter”, that is, the armstarter. The compressor scheme as a whole is as follows: 2 engines. Connected by clutch. One is heavy duty. The second is modified and turned into a high pressure compressor:
Yes, before assembling this, I also did not believe that this was possible. Moreover, even when I collected it, I did not believe my eyes :-))). However, it is a fact…
- I printed a number of Rank-Hilsch test tubes, the essence of which I have described in detail in this article.
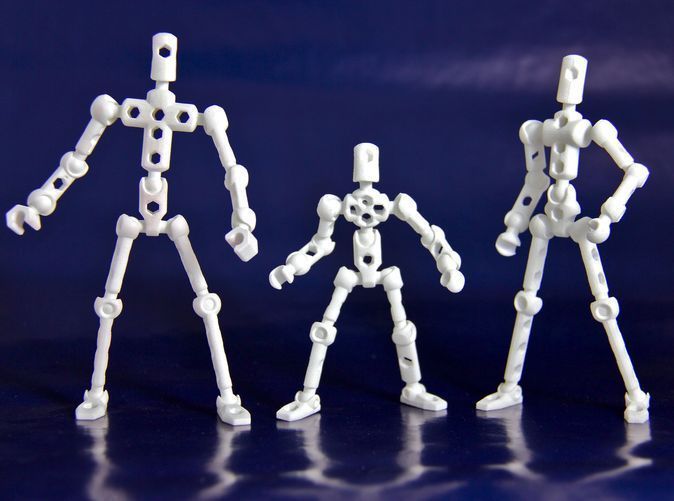
- Printed mass of parts, more than 100 pieces, to create 10 web-controlled robots. There was also a detailed article about this here.
Well, and a bunch of all sorts of useful and not very crafts. As you can see from my crafts above, I have a special passion for creating some useful things, a utilitarian direction. That is, so that the printout is useful, and does not belong to the type “yyy breathe, Mikola, what am I doing here” :-), and then put it on the shelf and that's it. Although, engineers are also not alien to beauties, and this will be my next fact below.
▍ NOTE 9 Proper placement of the model when printing is half the battle
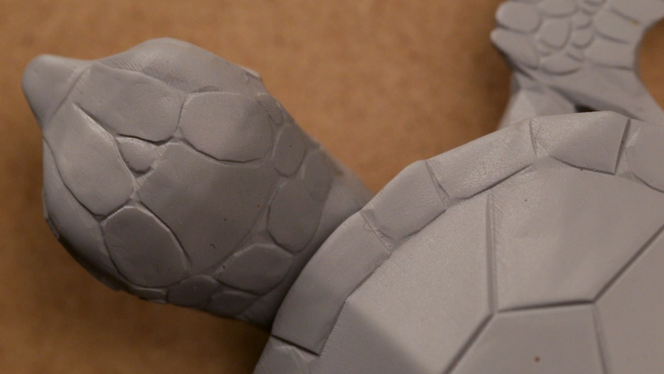
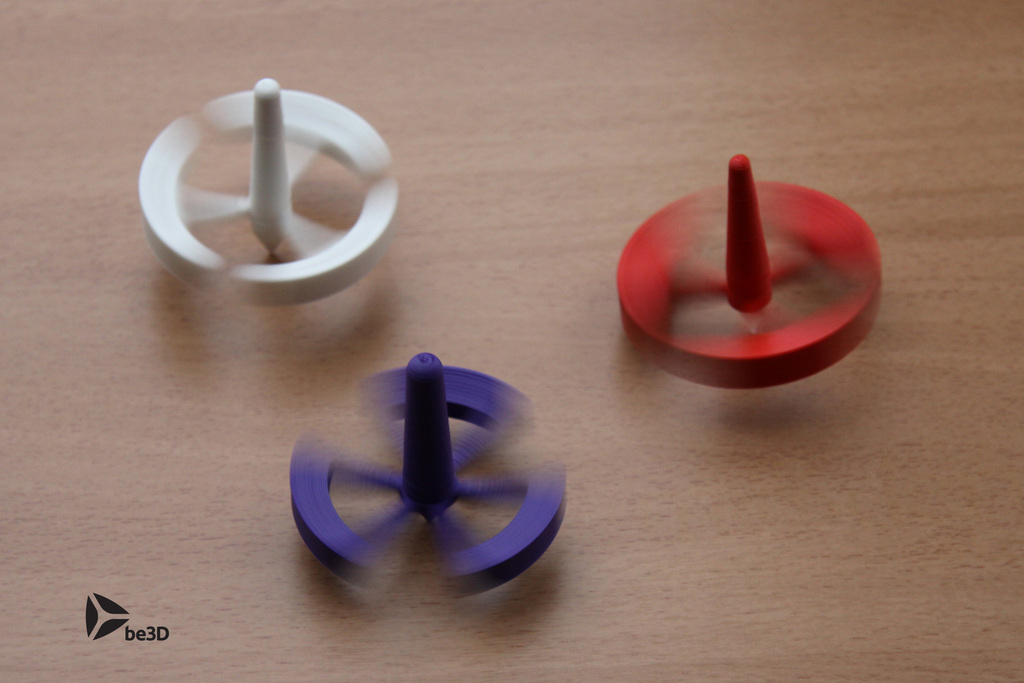
It would seem an obvious fact, but many underestimate it.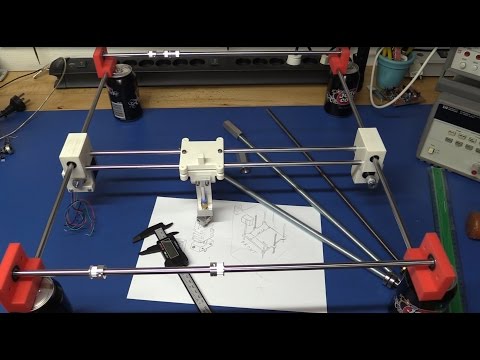 Here I mean the following: by experience, I accidentally discovered that when printing various statues (in which I, completely unexpectedly for myself, discovered another passion of mine), it is advisable to place the statues at an angle to the printing table.
This allows the layers in the printout to run at an angle of approximately 45-50 degrees to the model. The result of this is that the printed model is almost completely invisible layers and the model looks like it has been post-processed, but at the same time retains a deep matte color, which, to my personal taste, is more like a marble than a glossy result of processing in an acetone bath :
An additional advantage of this method is that the layers going at an angle of 45-50 ° to the model give it additional strength. This is especially true for printing statues, which contain many thin elements that are easily chipped when the statue is accidentally dropped from a table or shelf (learned from bitter experience, this happened to me many times, and ruined some fairly decent prints).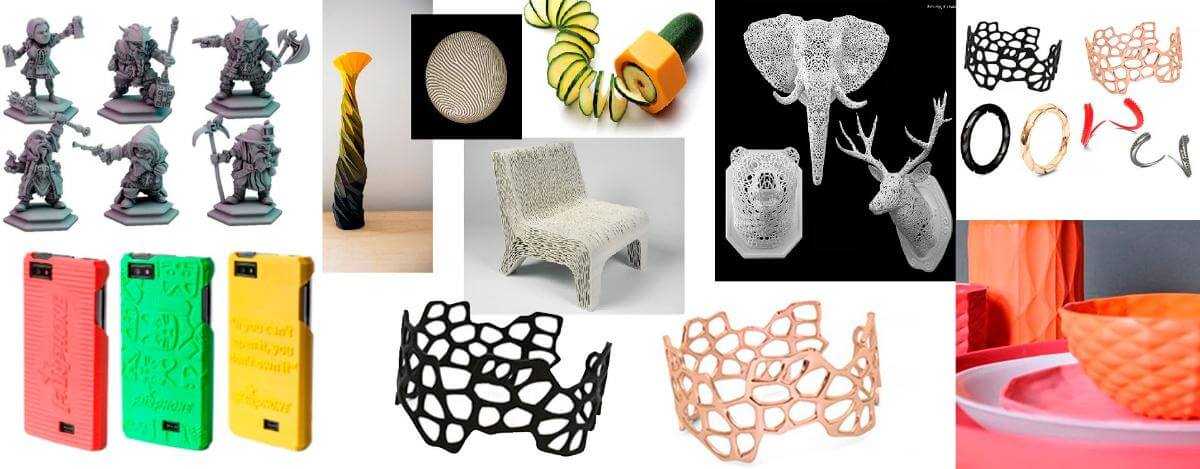
That is, the layers going across the model, if the model has a large length in height, does not allow it to maintain sufficient strength. For better understanding, I tried to illustrate this point in the figures below:
▍ NOTE 10. Bleeding must be taken into account when printing, especially if the model is composed of separate parts and must be assembled by joining these parts to each other, entering into each other, etc.
I tried to illustrate this point in the figures below. The implication here is that if you're printing a composite model, you need to correct for the amount of bleed on the plastic (I'm not sure what it's called, but at least I tried to convey what I mean). If this is not taken into account, then the model will not fit.
For example, in my case this correction is 0.2 mm per diameter - if I want the model to fit more tightly; if I need a free joint, without excessive density, then 0.3 mm per diameter:
That is, suppose that the blue part has a size of 10x10mm. So it must be modeled in a CAD program as 9.8x9.8 mm (if we want it to sit tight) or 9.7x9.7 mm (to sit freely). Well, or expand the hole in the green part, and leave the blue one as it is.
This is often a problem when you download a prefabricated model from the Internet - but it is not going to, even if you crack! And because no amendments have been made…
For your particular case, the amendments may be different.
▍ NOTE 11. What if...
In fact, this note complements note number 8. Using a 3D printer allows you to create metal parts using a printed 3D model. For this, the casting method is used according to the lost wax or burnt model. In our case, we will deal mainly with metal casting on a burnt model.
Briefly, it looks like this: printing a 3D model (using PLA plastic) → pouring it with plaster → burning PLA plastic, simultaneously with burning the mold, in a conventional stove oven → pouring the resulting mold with molten metal (melted in a conventional microwave) .
Image source: 3dtopo.com
I told about a simple method of melting metals in a home microwave oven here.
There was even a good article about casting on Habré.
▍ NOTE 12. Durability?
Despite the fact that ABS plastic is called exposed to ultraviolet radiation and, accordingly, burns out, losing its strength in the sun, in my practice, even printouts that are constantly exposed to the sun have not lost their strength and color at all, continuing to be successfully used and Currently.
It should also be added here that printouts are constantly exposed not only to the rays of the sun, but also work continuously in damp conditions!
As such printouts, I can give an example of winglets for technical cranes, which I printed out, but, unfortunately, did not photograph this process; as well as fasteners on shoes that I use “both in the snow, and in the heat and in the pouring rain, and in general are always with me”:
▍ NOTE 13.
 And what about the thread?
 Periodically, there is a need to print parts containing a particular thread. Modeling such products requires a good understanding of what a thread is in general, as well as what corrections need to be made in your particular case, which I have already described above.
But since I've owned a metal lathe for a long time, I'm not at all happy with the 3D printed carving that looks like "something very carving-like".
I am satisfied with an exceptionally perfect carving. Therefore, I keep in stock a large set of various taps and dies, with which I cut all my threads in plastic printouts:
I posted a photo of dies and taps not to brag, but to make the reader understand that serious carving requires a serious approach (unfortunately). And considerable costs for all this thread-cutting iron ...
To create your own threads (both threaded channels and threaded pins), I recommend the following reference materials: for holes, for pins.
Well, that's where I want to end my story and note that he does not claim to be exceptionally accurate and exhaustive. Nevertheless, I tried to state a number of my observations. It will be interesting to read yours, in the comments!
Once again about the use of 3D technologies
3D printer in the construction industry
A group of engineers from the British Loughborough University, working under the direction of Dr. Sungwu Lim, managed to create a unique cement composition that allows printing products of any shape: convex, cornerstone, curved, cubic.
Researchers abandoned the use of laser sintering technology and digital light processing. Instead, they returned to the origins of 3D printing with a slightly modified fusing technology.
Advanced cement formula is extruded to greatly simplify construction work by eliminating the need for formwork. Ready-made concrete figures are easy to adjust and finish.
The experiments of British engineers did not go unnoticed.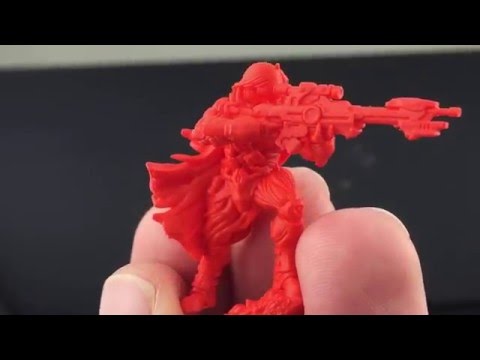 Their idea aroused the keen interest of scientists from the University of Southern California. They suggested using huge 3D printing machines directly on construction sites.
At the moment, a project called Contour Crafting has been sent to the US Patent Office, on the basis of which it is planned to assemble a huge printer that can print complete houses: not only load-bearing walls, but also wiring along with plumbing.
Jewelry Sphere
The main advantages of jewelry 3D printers are ultra-high printing precision and excellent surface quality. We emphasize once again that thanks to the technologies used, the printed three-dimensional models are exceptionally smooth and do not require additional processing or adjustment.
Now about a dozen specialized (CAD) programs have come to your aid, allowing you to virtually work out all the smallest details of the future gold or silver jewelry on a computer screen. And if we add the capabilities of modern 3D scanners, which are also available in our company, to the capabilities of CAD programs, then the work of a jeweler will be even more simplified.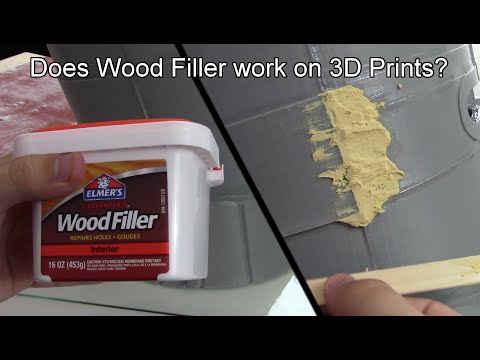
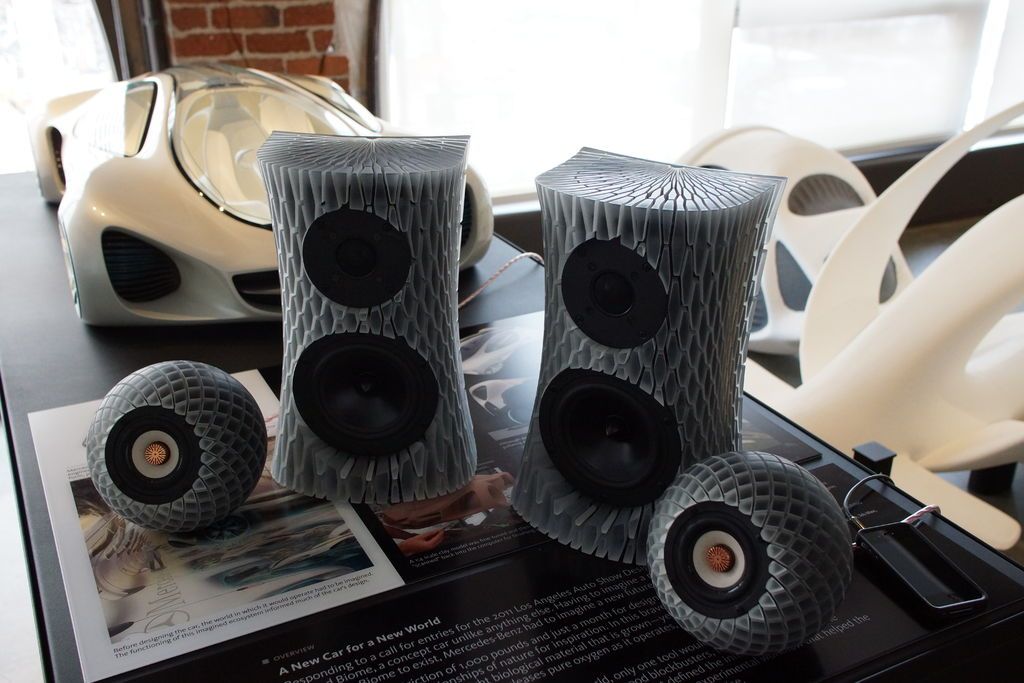
Photo - a few examples of 3D printing models of future jewelry, pay attention to the complexity and detail of the elaboration of the smallest elements.
Automotive
Local Motors uses 3D printing to produce their Strati cars.
Local Motors hopes to start selling its Strati next year. The car, which will be produced in small series, still has to pass crash tests and overcome a number of other obstacles before this happens. They report that the finished car, which receives the powertrain, suspension and other parts from Renault, will cost in the region of $18,000 - $30,000, including the production of printed parts, which cost more than $5,000.
But the use of 3D printers is not limited to designs or extravagant cars. Supercar Koenigsegg One:1 with 1,341 hp uses some 3-D printed parts, including a turbo assembly and a titanium exhaust tip, which take only three days to produce, but this reduces their weight by half a kilo.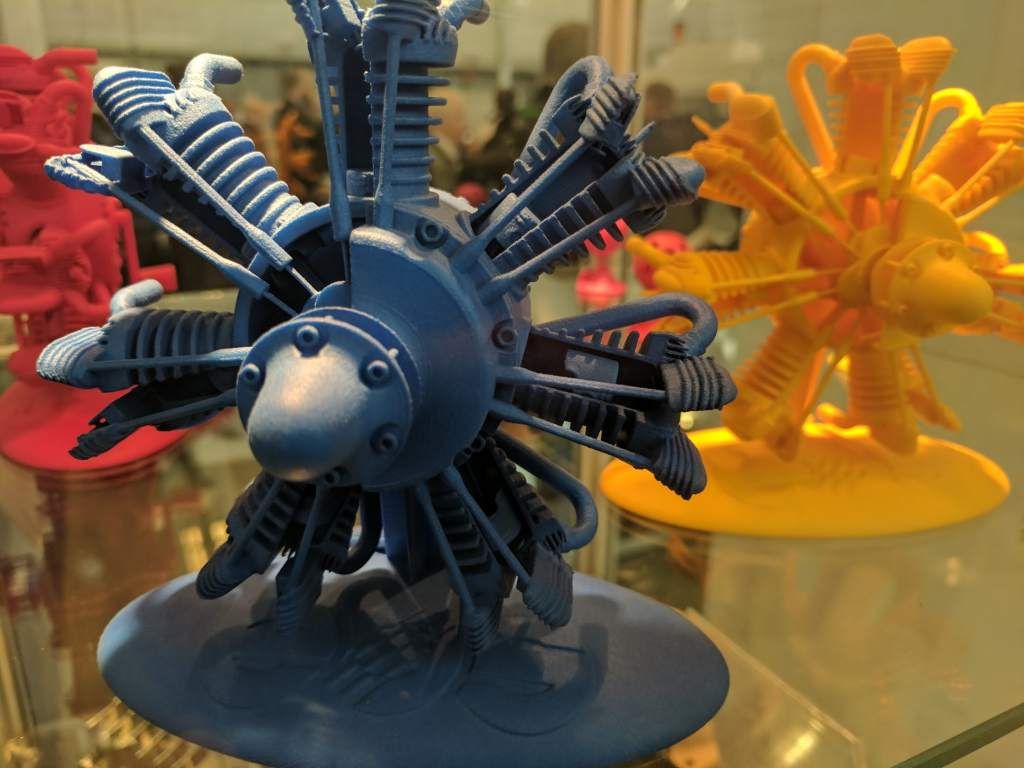 Race car designers Nissan Motor Corp. Delta-Wing uses 3-D printing to create brake radiators, air intakes and transmission side covers.
Among more mainstream production vehicles, the next generation of the Mercedes-Benz S-Class due in 2018 will feature 3-D printed interiors, including air vents and speaker grilles, British website AutoExpress told in August. chief designer of Mercedes.
Medicine
Prostheses - recently in medicine, prostheses made on 3d printers have become widespread, which take into account the individual characteristics of a person as much as possible and can be quite complex in design and withstand heavy loads;
Replica of the skull - using special scanners, it became possible to reproduce an exact copy of the human skull and use part of this copy as an implant;
Intervertebral discs - thanks to a 3D printer that works with materials containing stem cells, it is possible to restore damaged areas of the spine or even create new, artificial discs;
3D models and crowns - using 3D printing technologies, special 3D models are produced that help in surgery, and dental crowns are also made;
An operation has now been performed to implant a piece of the skull into the patient.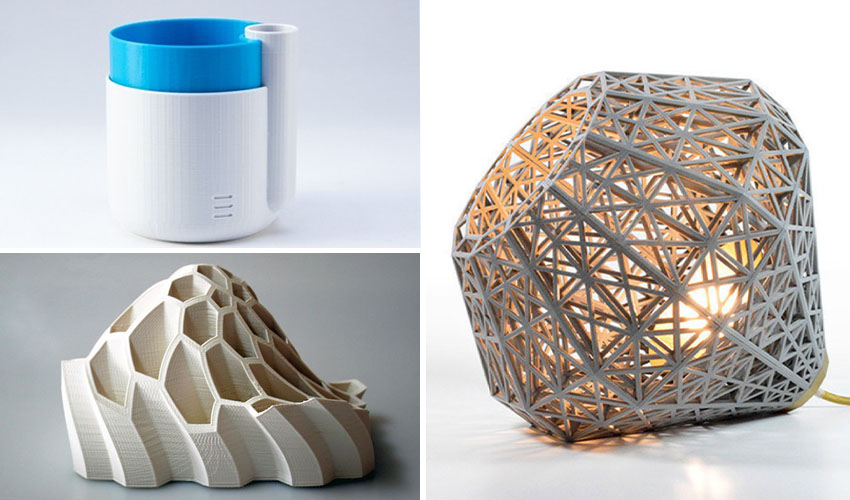 This implant was made using a 3d printer, but before that, a model of the patient's skull was created thanks to a 3d scanner, which is also widely used. The advantage of this model is that it takes into account all the uniqueness of the structure and shape of the patient's skull, which means it fits him better. Such a model was made for two weeks after scanning, it was made up of 23 bones, which are part of the human skull. All even the smallest details are taken into account. Such implants are currently helping a large number of people who have suffered from traumatic brain injuries.
In addition to implants, 3D printing is also used to make prostheses for various parts of the human body. These prostheses take into account the individuality of the structure and the uniqueness of human needs, and therefore are very comfortable. In these prosthetic systems, microcavities are specially left, thanks to which the patient's own healthy tissue cells are able to move in them. Thus, faster adaptation to the prosthesis is carried out.
Aircraft industry
In 1995, the Northwest Polytechnic Institute of China (NPU) launched the Laser Additive Manufacturing (LAM) research program to develop metal 3D printing devices using titanium alloys, superalloys and stainless steel.
At present, LAM developments are widely used in the design and manufacture of Chinese military aircraft, in particular, the J-15 carrier-based fighter, the J-16 fighter-bomber, the J-20 stealth fighter and the latest fifth-generation fighter J-31.
In addition to the military, 3D printers are also being used in China's civil aviation.
In 2013, in the laboratory of the already mentioned NPU institute, a 5-meter central wing spar was printed for the promising Comac C-919 passenger aircraft, which was supposed to enter commercial operation in 2016.
Thanks to the use of 3D technologies, it was possible to significantly reduce the weight of the spar - it weighs only 136 kg (a similar part obtained by forging - 1607 kg).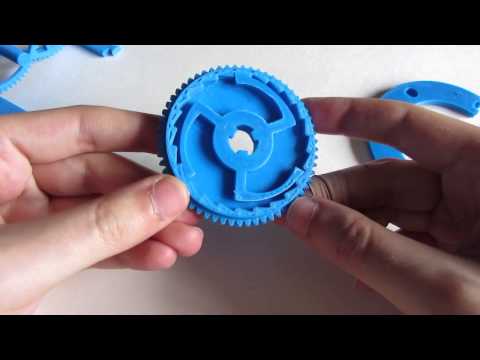 At the same time, material savings amounted to 91.5%, and tests have shown that 3D printed parts behave at least as well as those obtained by traditional methods.
FOOD
According to most films, our future is scary and wonderful at the same time. What will we see? What do we do? What will we eat? Since microwaves are radiation to many of us, we are constantly inventing new ways of cooking. Now that the world has learned about 3D printing, it is only natural that this technology will be used for cooking and make this process easier, or at least more fancy. If you believe the Star Trek movie, then 3D printing will be the only way to cook food in 2,000 years. So let's go over the list of eleven different food printing machines to get an idea of the near future of food:
1. 3D Systems ChefJet Printer
The ChefJet 3D premiered at CES in January of this year. The 3D printer produces some of the most amazing 3D prints I've ever seen, and they taste just as good as they look.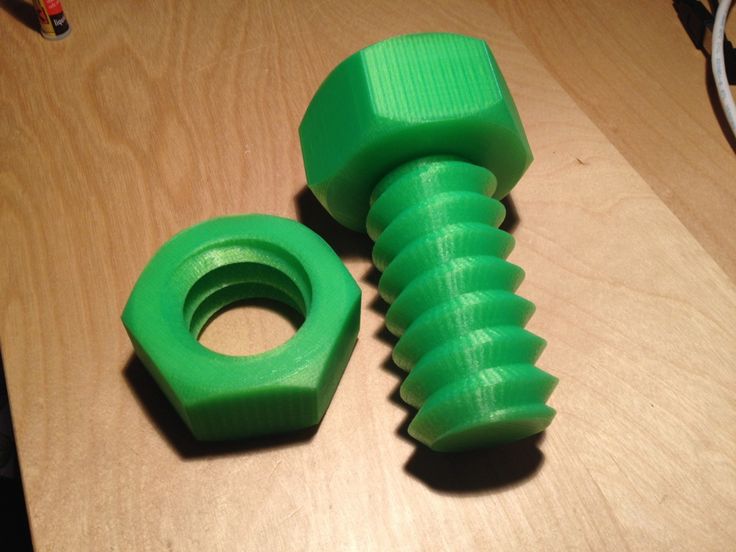 The ChefJet was originally developed by a small firm, Lab Sugar, founded by a married couple of architects, Kyle and Liz von Hasseln.
To satisfy their sweet tooth, 3D Systems acquired a start-up and rebranded the company, emphasizing that this 3D printer is the ideal tool for restaurateurs, professional chefs. It is also a must for consumers who want to 3D print goodies in beautiful and decorative shapes that are even a pity to eat. ChefJet comes in two versions - standard and professional, which allows you to print in color. What's more, ChefJet prints just about any flavor that a modern food lab can create.
According to 3D Systems, the ChefJet is scheduled to be released in the "second half of 2014" for less than $5,000, the only problem is that the second half of 2014 is almost over and the printer still hasn't hit store shelves. Unfortunately, 3D Systems revealed during its Q3 financial report that many of the printers scheduled for release this year never saw the light of day, so we won't see the ChefJet outside of shows and blogs until next year.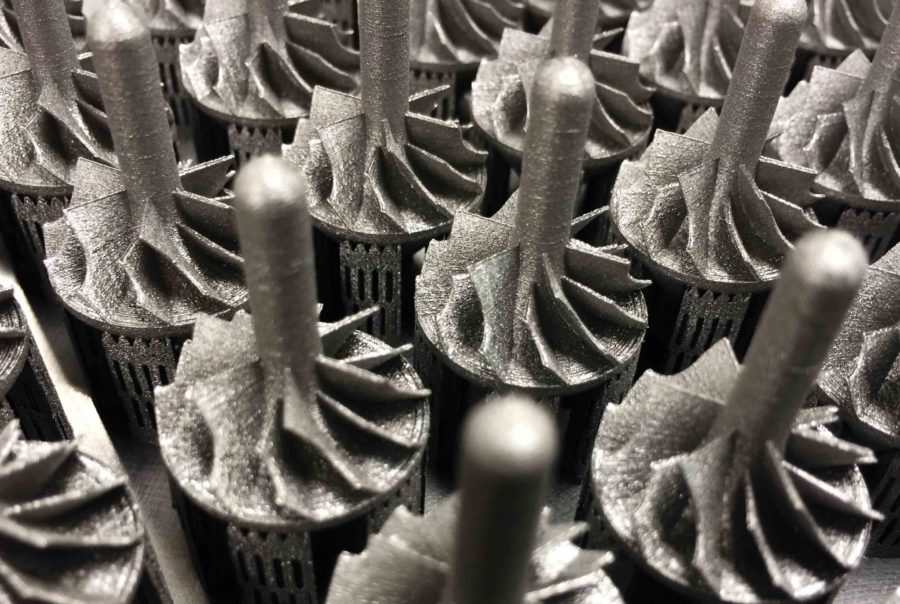
2. Natural Machines Foodini Printer
Although this list is not intended to be judged, Foodini can be ranked first, along with ChefJet, in terms of how they attract public attention. With a marvelous marketing campaign and the ability to prepare savory meals, Natural Machines Foodini 3D Printer is the answer to the age-old question of healthy eating. Foodini users can cook with fresh ingredients, create a variety of pastas, and place them in reusable capsules, which are then printed in any 3D shape. By using freshly made pastas, there is an opportunity to opt for healthy, natural foods, as opposed to processed foods that are crammed with additives.
Natural Machines launched a Kickstarter campaign back in March of this year, but the goal was not achieved. And it's pretty amazing, as Potato Saladearned got 554928% of its Kickstarter goal. Being confident in their idea, Natural Machines does not give up. Instead, they are completing their funding phase and planning to mass-produce their printers in the second half of 2015 for a retail price of around $1,000. I would like to point out that Foodini does not cook the food it prints, so you need to either print the food that is already edible or cook it. after printing.
3. f3d 3D printer designed by smart students from England
What interested me about the f3d 3D printer, which was developed by students from Imperial College London as a graduation project, is that the f3d printer is able to use up to five different extruders, and prepares his food prints using a 1400W halogen oven. The students were able to print out three different ingredients—dough, tomato sauce, and cheese—and make one dish: a tiny pizza. The total cost of the components is about $1900.
4. SMRC Food Printer for NASA
What associations do most people have when they hear the word NASA? Food. NASA has been making strides in food science ever since they sent the Tang drink into orbit in 1962 with the Friendship 7 spacecraft. Texas, where Senior Mechanical Engineer Anyan Contractor is working on a food printer for astronauts bound for Mars. Using raw ingredients packaged in capsules, SMRC's food printer can combine different individual ingredients to 3D print a wider variety of food. The firm has already printed proof of its concept, a pizza that was ready in just 70 seconds after printing. The next step for the SMRC is to add nutrients to their meals so that one day, the Mars colonists will be provided with the vitamins and minerals they need to fight the space monsters.
5. Choc Creator Printer by Choc Edge
There are a number of companies on the market that 3D print chocolate. They can either print sweets for you or sell you their own 3D chocolate printers. Choc Creator by Choc Edge is one of the first chocolate 3D printers on the market.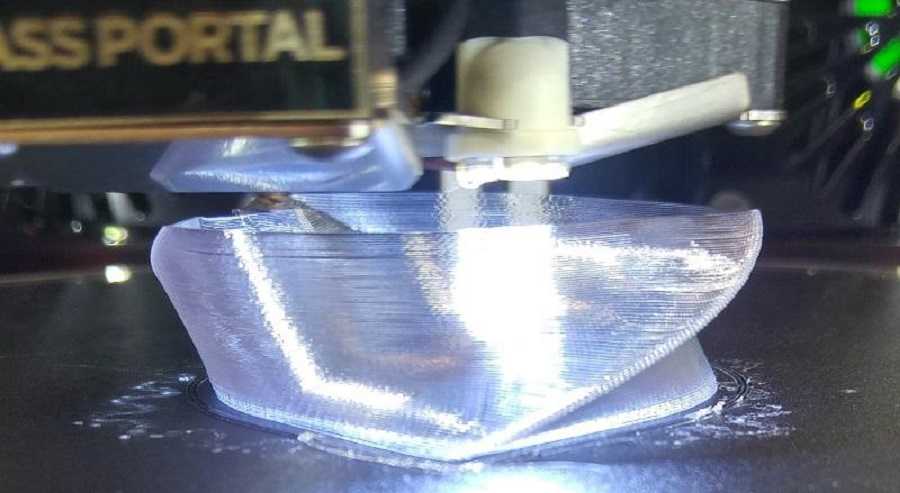 Designed by Dr. Liang Hao in 2012, Choc Creator can draw most of the 2D shapes you can think of individually or on cakes and cookies. And with some skill, you can create entire 3D layers. Choc Creator II is currently available for a discounted price of £3200.
6. Extruder for cakes and chocolate from ZMorph
As you already understood, buying a food 3D printer is not so easy. With the exception of the Choc Creator, commercial food 3D printers really aren't on the shelves yet. Thus, you have to either wait or make them yourself. You can also buy a "regular" desktop 3D printer and make it print with something edible. Some printer makers have already picked up on the idea, like ZMorph, who make a versatile 3D printer with interchangeable tools, including a pasta extruder that can 3D print chocolate and dough.
7. Structur3D's Discov3ry Extruder
If you already have a 3D printer but want to use it for food purposes, you should consider Structur3d's Discov3ry Extruder, which isn't really available online yet.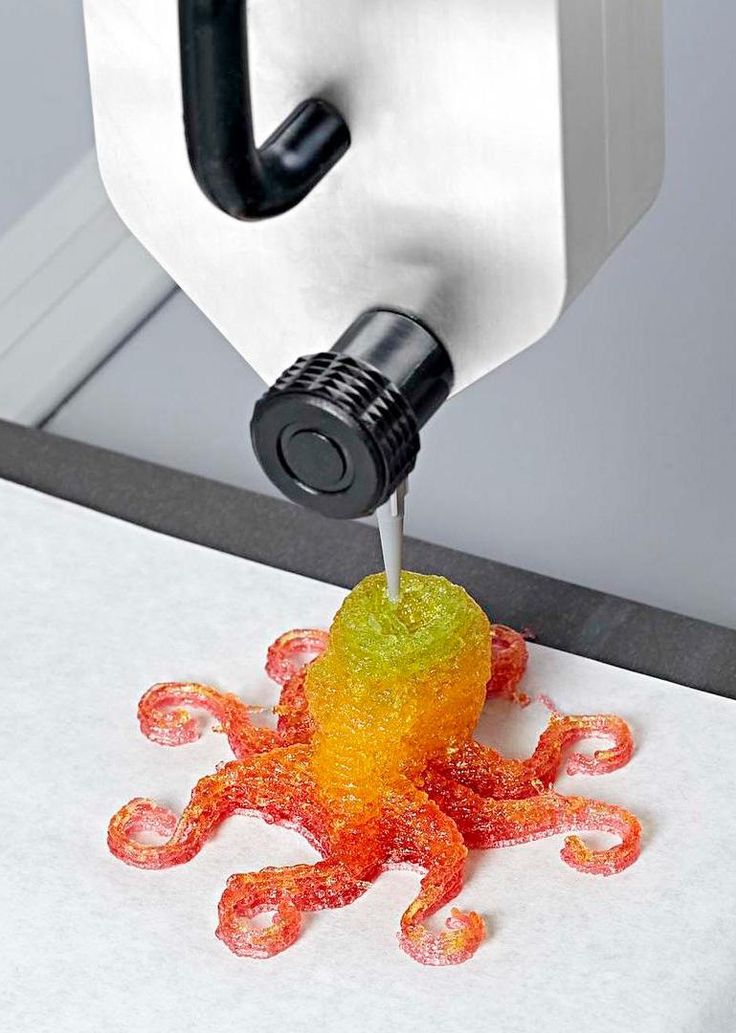 store. Discov3ry is a versatile paste extruder. The campaign to fund it has already been successfully launched on Kickstarter. In no time, you will be able to meet all your printing needs with paste, namely chocolate, icing, or other viscous but less edible materials such as silicone and clay. If you don't feel like waiting, you can build your own versatile grazing extruder, following the example of designer Richard "RichRap" Horne.
8. Dovetailed Fruit 3D Printer
If you're picky enough that you don't want to eat pasta, then wait until the Fruit 3D Printer comes out. Its creators have come up with a way to fill a sodium gel with flavors that mimic strawberries, after which the entire mixture is placed in a solution of calcium chloride to obtain a product that looks like raspberries. After an initial flurry of media coverage and prints that look more like jelly than real fruit, the firm is never heard from again. However, this is an innovative approach to the art of food printing.
9. TNO's 3D Everything Printer
TNO (or "Nederlandse Organisatie voor Toegepast Natuurwetenschappelijk Onderzoek", I hope you haven't broken your tongue) has come a long way in the field of food printers. This Dutch research group has been working on 3D food printing since 2012 and treats the topic as a major technological breakthrough, not a kitchen fantasy.
TNO believes that these printers can help humanity print food according to the individual needs of each individual. Using historical and physiological data, the printer can prepare food that contains the right amount of nutrients, and at the same time uses flavors according to the user's mood, using alternative sources of nutrients: algae, beet leaves and even insects.
TNO is already partnering with Barilla 3D printing 15-20 pasta every two minutes. They have also teamed up with Chloé Rutzerveld and 3D printed biscuits made from dried fruits, vegetables, nuts and seaweed filled with yeast, bacteria and germinated seeds. Delicious!
10. Biozoon's Goop Printer
If you're under 60, chances are you won't see this printer any time soon. The German company Biozoon is developing mold printing from a nutrient mash specifically for elderly residents of a nursing home. With financial support from the EU, Biozoon plans to complete the 3D food printer by 2015. Using 48 nozzles, liquefied food and a thickening agent, this printer will recreate the shape and taste of something hard to swallow, like a chicken wing, but such a product will simply melt in the mouths of old people. Moreover, such food will be full of nutrients, so necessary to maintain their health.
11. The original food printer from Fab@Home
It is possible that the entire food printer industry began with Fab@Home. The fact is that the creators of this device, Hod Lipson and Evan Malone from Cornell University, just decided to experiment with the introduction of rapid prototyping to the masses at a low price, and the instructions were posted in the public domain. With this, their task was completed. Since 2010, their lab, along with local partners such as the French Culinary Institute, have been among the first to experiment with food extrusion: 3D baked livers with letters baked inside, spaceship-shaped scallops, chocolate, icing, cheese and more. . If it weren't for their creation, we might never have even seen 3D like this - non-printed cakes, chicken wing-shaped porridges, or small pizzas.
What associations do most people have when they hear the word NASA? Food. NASA has been making strides in food science ever since they sent the Tang drink into orbit in 1962 with the Friendship 7 spacecraft. Texas, where Senior Mechanical Engineer Anyan Contractor is working on a food printer for astronauts bound for Mars. Using raw ingredients packaged in capsules, SMRC's food printer can combine different individual ingredients to 3D print a wider variety of food. The firm has already printed proof of its concept, a pizza that was ready in just 70 seconds after printing. The next step for the SMRC is to add nutrients to their meals so that one day, the Mars colonists will be provided with the vitamins and minerals they need to fight the space monsters.
Weapons
For the first time the idea to print military weapons on a 3D printer appeared in the United States of America.
In May 2013, a video appeared on the Internet in which a man shoots from a printed mock-up of a Liberator pistol. It was 25-year-old Cody Wilson, head of Defense Distributed, which promotes the idea of universal availability of 3D weapons.
Using a 3D printer, they printed firearms and uploaded the files of their work to the World Wide Web. Defense Distributed employees have already made magazines that hold more cartridges for the AR-15s rifle and the legendary Kalashnikov assault rifle (AK-47 modification). Also on their account is the manufacture of the lower part of the receiver, in which the bolt of a self-loading rifle AR - 15 is placed.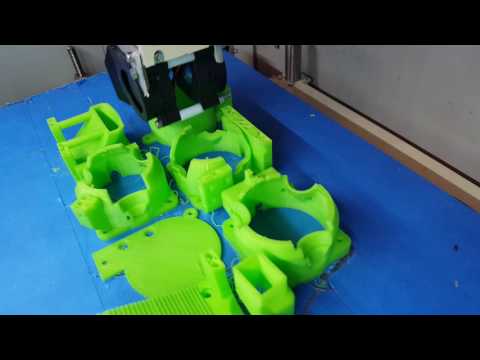 You can attach the barrel and magazine to it, having received a finished weapon without any problems. No authorization is required to purchase parts in the USA. Now work is underway on a 3D printout of the entire rifle. In doing so, Cody and his team dealt a major blow to the American gun control debate. The discussion began in December, after twenty children and six adults were killed by assassins at a junior high school in Connecticut. The vast majority of Americans rallied to support government reform. This is a thorough check that will make it difficult for criminals to obtain weapons. However, this did not prevent Mr. Wilson from obtaining a federal license to manufacture and sell firearms.
More serious developments in the field of printing firearms on a 3D printer are being carried out in Austin, Texas. The project is led by Eric Macler, coordinator at Solid Concepts, a 3D printing company.
Erik Machler
Ten industrial 3D printers are installed at the Austin plant.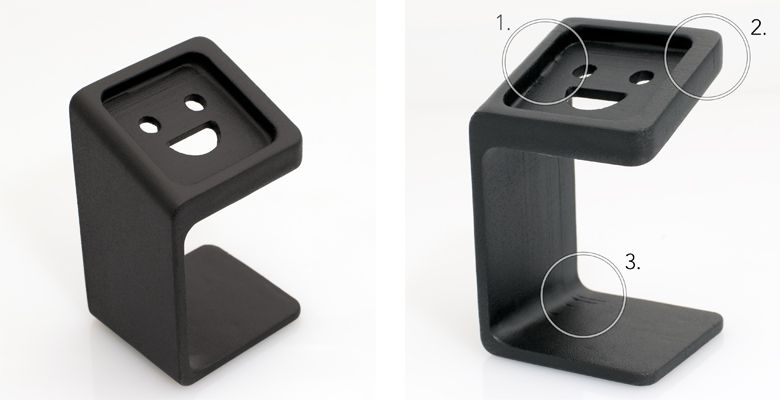 Solid Concepts received a federal license to manufacture weapons, and now, using direct metal laser sintering technology, produces the Browning 19 pistol.eleven". Making a pistol takes up to 35 hours. Depending on which printer and materials are used. More than 1,000 shots have already been fired from the first printed pistol, Solid Concepts, while the company has created a second version of the Browning 1911 model.
FASHION
Another famous designer has started experimenting with 3D printing technology. And the results are simply amazing. Katherine Wales started her career in the fashion industry over 15 years ago. She has trained and collaborated with some of the most eminent professionals in the profession, including Jasper Conran, Jean Charles de Castelbajac, Oswald Boateng, Emmanuel Ungaro and Saint Laurent. However, she worked independently on her latest collection. The collection was born thanks to the innovative achievements in the field of additive technologies of the London College of Fashion. She combined all the models into a collection called "DNA Project", thanks to which, among other things, the designer touched the world of 3D printing and transferred her ideas to the creation of accessories.
The DNA Project is not entirely unique. The collection is the result of a synergy of haute couture, technology and science. As a result of this interaction, incredible models were born that embody the features and structure of human chromosomes. The DNA Project is almost entirely made up of separate and identical balls and structural components (through the use of 3D printing technology) that can create a wide variety of shapes.
FURNITURE
A graduate of the Royal Academy of Art in The Hague, Lillian van Daal was one of the first to develop a unique structure ideal for creating 3D printed furniture.
The designer took the cell structure of living organisms as a basis. A mixture of modern technology, creative genius, and the ability to visualize the finished result helped her create a Biomimicry soft chair printed with plastic filament. The finished product consists of a binding of soft and hard elements, thanks to which it provides a comfortable fit and stands out for its high strength and wear resistance compared to other furniture designs.
It is noteworthy that Lillian van Daal continues to work in this direction. The designer plans to replace polyamide with an environmentally friendly material to create truly safe furniture. It is possible that in the near future stands of the new Biomimicry brand will appear in furniture stores.
EDUCATION
The introduction of 3D printers into the school system is a progressive phenomenon. It contributes to the creation of new opportunities in the study and consolidation of many school subjects.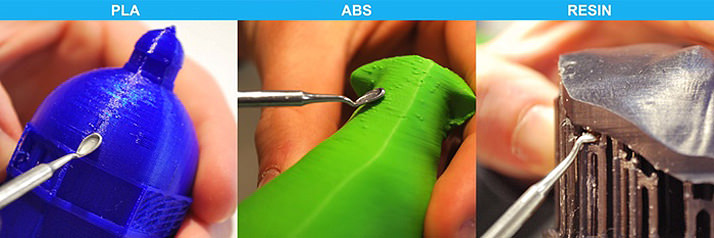 For example, a teacher in a biology class can create a visual aid: some part of an animal skeleton, a human eye, and so on. Or prepare a model of a system of blocks for students for a physics lesson, details of various mechanisms.
ARCHITECTURE
Throughout his twenty years of work in the field of computer-aided design, R. "Parta" Parthasarati meets a new client with the same question: "What problem can we solve for you?"
The usual answer is: "Accelerate time to market for our product."
With regard to architecture, Parthasarathy found that the two main causes of delays came down to lack of theoretical study of the project and poor communication. Two years ago, he discovered 3D printing, a completely new technology that significantly reduces design time. It allows you to make an accurate three-dimensional physical model of the building and make it an important element in the work of every designer. Partha saw this as a great opportunity to improve understanding among all those involved in the project, increase efficiency and eliminate costly mistakes.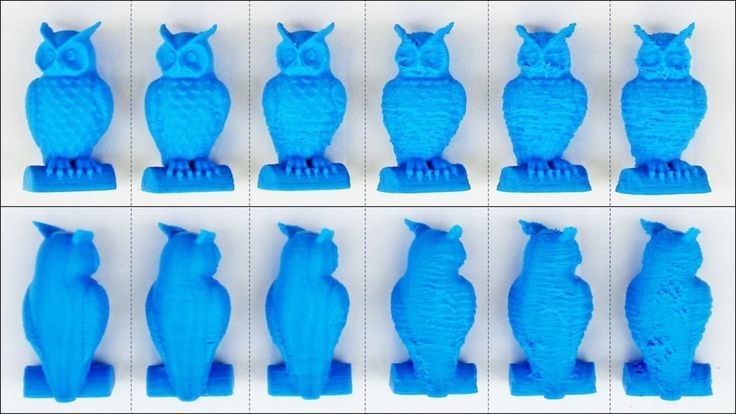 Thus was born iKix, India's first architectural 3D printing service bureau.
Previously, all construction models were made by hand. Since this process is time consuming and expensive, architects only make the layout at the final stage of the project, just before the public presentation.
“iKix prints a 3D layout in an average of six to ten days, which is much faster than the month it takes to produce a similar layout by hand,” says Parta. “Let's say a 1,000-acre plot layout—including houses, schools, churches, golf courses, and more—we can build in six weeks versus five months of manual work. The time and cost savings become even more noticeable when plans change and the layout has to be adjusted on the fly.”
iKix uses the color Spectrum Z510 from Z Corp. The capabilities of this printer allow the architect and project manager to quickly obtain multiple copies of the layout - one each for the architect, client, general contractor, subcontractor and civil authorities. “A 3D printer is more than just a prototyping machine,” Parta says.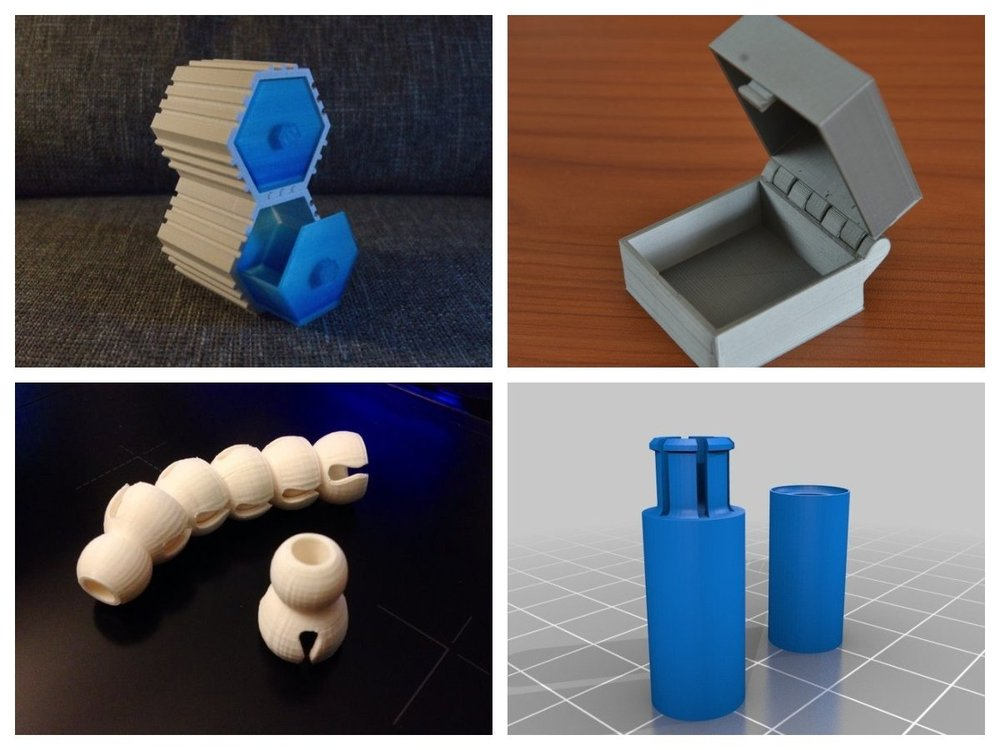 – It really became one of the developer's tools. 3D printing is a breakthrough that I believe will determine the future of technical information exchange for the next two hundred years. Each project must be presented in 3D, and soon it will be so. I sincerely believe that all architects will work in 3D. iKix clients come here to implement more and more new projects in three-dimensional layouts. The benefits are undeniable."
Parta believes that infrastructure objects also need physical layouts. For example, when the authorities decided to build a highway interchange, it is necessary to plan traffic in all modes of its operation. The presence of a physical 3D model simplifies the solution of this problem.
MEDICINES
The US Food and Drug Administration has approved the use of 3D printed medicines for the first time. Aprecia Pharmaceuticals has received permission to manufacture tablets using 3D printing. The drug is used to prevent seizures in adults and children with epilepsy.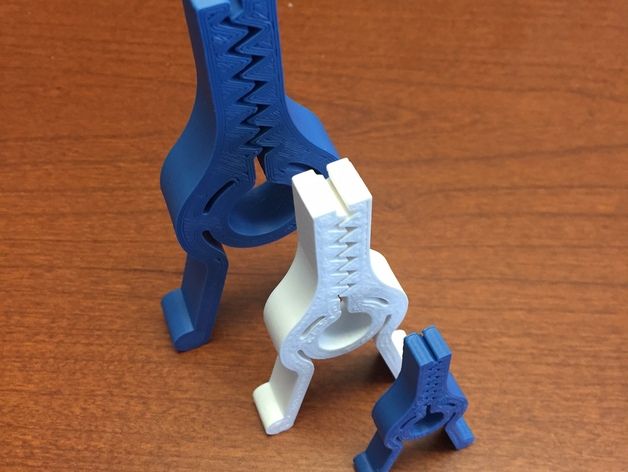
The tablet, called Spritam, contains a large dose of an anti-epileptic drug that dissolves in a small amount of water, which the manufacturer says should help patients with swallowing problems.
However, the big news is that this is the first time that a 3D printed drug has been approved by the FDA (Food and Drug Administration), writes Business Insider.
Researchers are impressed with the potential of 3D drug printing. The technology makes it possible to create individual medicines with an accurate dosage for each patient.
3D printing can also be seen as an inexpensive way to produce drugs for developing countries. The main thing here is to prevent the production of illicit drugs, the recipe and chemical components of which can be obtained using the Internet.
It is worth noting that the FDA has long appreciated the benefits of 3D printing in medicine.