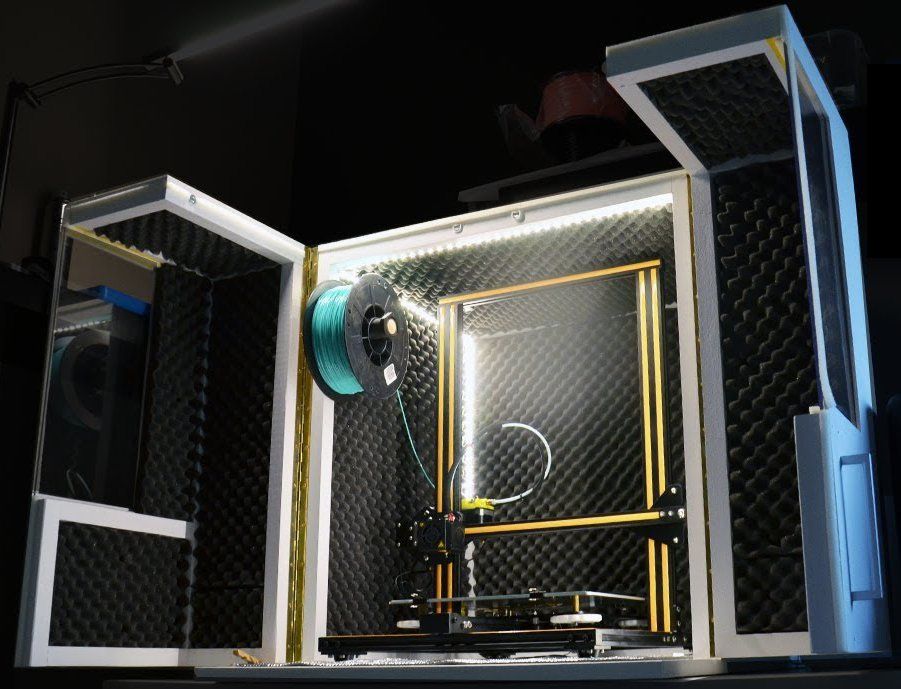
3D printer grinding noise
11 Ways How to Fix Grinding Noise in 3D Printers – Ender 3 & More – 3D Printerly
Grinding noises in 3D printers can happen which gets pretty frustrating, but there are different reasons why it may happen. This article will take you through some methods to fix this grinding noise in your 3D printer.
To fix the grinding noise in your 3D printer you can upgrade your stepper drivers to improve the movements of your axes. Putting your 3D printer on a stable surface helps reduce noises significantly, as well as tightening up loose belts and screws. Adjusting your eccentric nuts can help as well.
This is the basic answer but keep on reading for more information.
Why Do 3D Printers Make Grinding Noises?
3D printers can make grinding noises for many reasons:
- Older or outdated stepper drivers
- Printing on an unstable surface
- Wires are loose or bent
- Hotend fan and cover issues
- Badly adjusted bed
- Extruder issues
- Low printing temperature
- Bad BLTouch pin
- Limit switches not being hit
It’s a good idea to first figure out what is causing your 3D printer to make grinding noises before applying the fixes, so you can narrow it down rather than doing too many things.
How to Fix 3D Printer Grinding Noises
There are quite a few ways to fix the 3D printer grinding noise. As the noise generates from different cause, you can fix the grinding noise in your 3D printer by following these provided solutions.
- Upgrade the Stepper Drivers
- Place Your 3D Printer on a Stable Surface
- Secure Loose or Bent Wires
- Fixing the Hot End Fan & Cover
- Tighten Up Loose Belts
- Adjust Rollers or POM Wheels
- Turn On or Increase Z-Hop When Retracted
- Fix Extruder Issues
- Increase Your Printing Temperature
- Replace the BLTouch Pin
- Make Sure the Limit Switches Are Hit
Look at these in more detail.
1. Upgrade the Stepper Drivers
One thing that you can do to fix grinding noises in 3D printers is to upgrade your stepper drivers. The stepper drivers are what controls the movement of the axis and extruder on your 3D printer. They go through a lot of demand during the printing process, which can cause a grinding issue.
What you can do is upgrade your stepper drivers to something like the TMC2208 Stepper Motor Driver from Amazon. These are known to be high quality and produces little to no noise while operating smoothly when your voltage is properly adjusted.
One user who previously used the older a4988s driver purchased this TMC2208 Stepper Motor Driver used a Teaching Tech installation guide to get it working. He says he’s so much happier because his 3D printer is a lot quieter and even prints faster with better quality.
The previous steppers would miss steps resulting in print imperfections. Here’s the Teaching Tech video that was used.
2. Place Your 3D Printer on a Stable Surface
Another way to fix a grinding noise on a 3D printer is to put something stable underneath it or place it on a stable surface. Surfaces that don’t have a lot of stability such as a cart or flimsy table can amplify sounds on a 3D printer.
A few people have fixed grinding noises in their 3D printer by placing it on surfaces such as:
- Rubber mat
- Concrete base
- Sorbothane feet
Some people even recommend placing your 3D printer on the floor depending on what surface you have to dampen sounds.
I’d recommend going with something like the Anti-Vibration Rubber Feet from Amazon. Many users who purchased this said that it worked really well for their 3D printers.
One user who heard loud, unpleasant noises from their 3D printer installed these and confirmed that it works to reduce vibrations and noise and is durable.
Modern 3D printers have started to install rubber pads or feet at the bottom of them to improve the vibration reduction also.
3. Secure Loose or Bent Wires
One user who was experiencing a grinding and scratching noise on their 3D printer figured out that it was actually happening due to the cables near the hotend not being secured and being affected by the fans.
They fixed this noise by applying a zip tie closer to the hotend which stopped the wires bending and making the fans create that grinding noise.
You can get yourself some Amazon Basics Multi-Purpose Cable Ties for a good price.
Reseating some of your other cables could also fix the issue like it did for one user.
4. Fixing the Hot End Fan & Cover
Another thing that can cause grinding noises is actually from the hotend fan itself. One example is from one user who found out that the grinding noise came from a broken hotend cover screw affecting the fan.
A separate issue could be that the hotend fan is actually colliding with the housing or the bearings of the fan have failed.
The simple solution here would be to either try to check out the hotend fan housing and screws then try to do a basic fix, or to replace the old fan and hotend cover.
It’s a good idea to tighten up any loose screws that might be on the hotend fan as well.
You can find a decent fan like the Creality Ender 3 Original 4010 Fans from Amazon. It’s a 24V fan that works well for effectively cooling your model during the printing process.
You might also just be experiencing too much dust on the blades which can spin on the bearings, so you can disassemble the fan and clean the dust.
5. Tighten Up Loose Belts
Some users did mention that a loose belt could be causing the grinding noises, so it’s a good idea to check that your belts aren’t loose. The belts are what help movements in the X & Y axis so if they aren’t tensioned properly, it could cause movement issues.
If you don’t have belt tensioners that can easily be adjusted by twisting a tensioning knob, you want to learn how to properly adjust it through the manual technique.
Check out the video below to see how it’s done.
6.
 Adjust Rollers or POM Wheels with the Eccentric Nuts
The POM wheels or rollers also contribute to movements in your 3D printer. If these aren’t adjusted properly, it could cause a grinding noise in your 3D printer.
Try moving your bed freely by hand across the X & Y axis to see how smoothly it moves. You might need to adjust the eccentric nuts on your 3D printer to improve how well each axis moves.
The video below shows you how to adjust the eccentric nut to fix wobbles that could cause a grinding noise.
One user ended up raised the level of their bed and fixed their grinding noise issue
The grinding noise is also caused by a wobbled bed that allows one side of the bed to be higher than the other. This occurs when the Y axis wheels are tight on one side and loose on the other, causing the bed to catch the Y motor and produce the grinding sound.
7. Turn On or Increase Z-Hop When Retracted
Another potential reason for a grinding noise in 3D printers is down to your nozzle rubbing against the infill during a travel move. You can fix this issue by turning on your Z-hop in your slicer or increasing the level of Z-hop.
This basically raises up your nozzle during travel moves to avoid hitting your 3D print.
8. Fix Extruder Issues
The extruder might be the cause of this grinding noise, stemming from a build up of pressure in the extruder, especially when printing at higher speeds. It could also be caused from your motor being too hot and making your extruder skip.
A filament pathway that isn’t smooth can cause the extruder to work harder and make the motor too hot. Another thing to keep in mind is what your stepper driver current is.
This determines how powerfully your stepper motors operate, so having the current too high can cause movement issues which can contribute to a grinding noise.
Here’s a great video showing you how to adjust stepper motor currents on a 3D printer.
One user found that the noises coming from the extruder happened due to their extruder being cracked, which happens to a lot of plastic extruders. He recommended to get yourself a Creality Aluminum Extruder from Amazon.
After purchasing the metal extruder, a user confirmed that the Bowden extruder was a perfect upgrade for the original plastic extruder after experiencing a crack. The installation was swift and it eliminated their filament guide problems.
If the grinding noise is generated from the extruder having too much pressure, you can try reducing your retraction speed to around 30-35mm/s
9.
 Increase Your Printing Temperature
A grinding noise could simply be from your filament not being sufficiently heated, meaning there is more resistance while trying to extrude this filament. One user fixed their grinding noises by increasing their printing temperature by 5°C.
If issues still occur, you can increase it by more, or you might have a partial clog that needs to be cleared out. To clear this out, you can increase the hotend temperature to a higher than usual temperature, and use a nozzle cleaning needle to push the clog out.
10. Replace the BLTouch Pin
Your printer may make a grinding noise if a BLTouch pin is broken or bent.
One YouTuber by the name of Janis Henderson explained how her printer makes a grinding noise and no longer works. She directed her complaint at the BLTouch pin, which refused to extend.
If you encounter such a problem, the BLTouch pin can be easily repaired by following the steps below:
- Remove the grub screw on the top of the BLTouch sensor
- Extract the broken pin out
- Replace the broken pin with a new pin into the sensor
- Screw the grub screw back to the top of the BLTouch sensor
You can get this 5 Pcs BLTouch Probe Pin Replacement from Amazon.
Check out the video below to see the issue in action.
11. Make Sure the Limit Switches Are Hit
You might experience a grinding noise when trying to auto home your 3D printer. The cause of this could be that your limit switch is not being hit, which means your 3D printer will continue moving in the direction even though it’s at the end of the axis.
To fix this issue, you want to disable your steppers through your 3D printer’s control screen, then manually move the 3D printer to the limit switch. If it doesn’t hit the limit switch, you want to figure out what’s in the way and fix it.
One user found that extending the limit switch with some plastic tape worked well to fix their issue, so the 3D printer could touch the limit switch. Another user said they attached a bobby pin on the limit switch, then attached tape over it to secure it in place.
You can see it being done in the video below.
In a different experience, another problem that could hinder the 3D printer auto home is when the plastic housing covering the Y motor is slightly raised, where one of the corners is higher than the other or the Z limit switch stopper is incorrectly fixed.
One user found that their Y motor’s plastic housing was manufactured incorrectly, being raised slightly on one of the corners. They ended up removing it, sanding it down with a belt sander and it fixed their issue on an Ender 3 V2 machine.
Try out the fixes above, and your problems should be solved.
Good luck and happy printing!
How to Fix Resin Printer Noises – Popping, Knocking, Grinding, & More – 3D Printerly
When you use a resin 3D printer, you may get popping sounds and grinding noises in machines such as the Anycubic Photon Mono & the Elegoo Saturn. These can get annoying after a while, so I decided to look into why these sounds happen, and whether you can fix them.
To fix resin printer noises such as knocking, grinding or screeching, you should make sure all the thumbscrews and screws around the printer are nice and tight, so there isn’t a lot of loose movement. Ensure you don’t leave cured resin in the vat and lubricate the Z axis nicely. An uneven build plate can cause noises.
There are more details behind fixing a popping, knocking or grinding sound in your resin 3D printer, so stick around and read through the article to learn how to finally fix these issues.
Why is my Elegoo Mars or Anycubic Photon Making Popping/Sticking Noise?
It’s normal for your resin 3D printer to make popping or sticking noises because it’s the sound of the FEP peeling from the suction force of the build plate raising up. It’s what makes the cured layer of resin on the FEP film get removed and stick to the build plate. No sticking noise may mean the print is failing.
You shouldn’t be alarmed if you do hear this noise on your resin printer, more so it should be happening for a print to be successful. If you do hear this suction or peeling noise being very loud, it’s usually because your print has a large surface area being cured at one time.
It’s possible to reduce the noise levels by making sure there aren’t flat areas in the print that are too large by orienting the resin model at an angle.
I wrote an article about How to Orient Models for Resin 3D Printing, so check that out for more details.
Why is My Elegoo Mars or Anycubic Photon Making Knocking or Grinding Noises?
The Elegoo Mars or Anycubic Photon resin printer can make a popping or sticking noise when there is some obstruction in the resin vat which prevents the build plate from reaching the base of the FEP film. It can also make noise due to the build plate trying to go further than the set home position.
Resin 3D printers are expected to produce very minimal noise while 3D printing, and there is also a popping sound when the first layer peels off the FEP film while printing which is normal. However, it is possible to get really weird sounds while 3D printing with your resin printer which needs to be addressed.
Here are reasons your Elegoo Mars or Anycubic Photon could be making popping or sticking sounds when;
- Loose screws or parts around the printer
- Cured resin left in the bottom of the vat
- The Z axis needs to be lubricated
- There is a vacuum under the FEP film
- Loose and uneven build platform
- Build plate is going beyond the set Home position
- The Z axis rod is loose
- Misalignment of the leadscrew and linear rails
- Limit switch is blocked or faulty
Having stated the most common reasons why your Elegoo Mars, Anycubic Photon or similar resin 3D printer can make a popping, grinding, or knocking sound, we can then go ahead and take a look at the ways you can fix each of these issues.
How to Fix Grinding, Clicking & Knocking Noises in Resin Printers
1. Check and Fix the Loosened Screws – Vat, Build Plate, Stepper Motor
One of the most common fixes of the grinding, clicking, and knocking noises in resin printers is by fixing any unsecured or loosen screws. It is possible that one of the screws or supporting areas that hold the resin vat has loosened.
When you observe that your resin 3D printer is making really weird noises, you can do a thorough check of your resin vat to ensure that all four screws are tightly and properly fixed.
If you notice that any of the screws are a bit loose and not as tight as they should be, you should note and fix this immediately.
There was a user who experienced a grinding noise while they were printing on their resin machine. When they noticed that one of the resin vat screws was loose, they tightened it and this solved the grinding issue for them.
Another user who was having issues of loud sounds from the motor noticed some wobbling movements. He used an Allen key to tighten all the bolts and noticed that there were two loose bolts that were supposed to secure the stepper motor.
He tightened the bolts up to be snug and all his issues were solved.
If this does not fix the noise issue with your resin printer, you can try the rest of the solutions below.
2. Inspect and Remove Cured Resin in the Bottom of the Resin Vat
Cured resin left in the bottom of the resin vat is a very common issue in resin 3D printing. This can occur when there has been a failed print or when print layers stick to the FEP film instead of the build plate.
A good way to fix noises in resin printers is by ensuring that there is no cured resin left in the resin vat.
When this happens, the build plate may not be able to reach the base of the tank so it can continue to make a loud grinding sound to show that it can’t go low enough to the set home position.
A user who printed with a clear blue resin experienced this kind of issue before. Even though they were printing with a clear resin, they still could not see any cured resin in the bottom of the vat.
They ended up using a spatula to sweep the bottom of the FEP film inside the resin vat, and as suspected, it was met with resistance.
A fully cured rectangular plastic sheet was lifted up which they removed from the vat. After this, they tried 3D printing again, and it worked perfectly well without any weird sounds.
This could occur if you did an exposure test while the resin vat was still inside the printer, or if you have damage to the LCD screen.
You will need to use a spatula or check the base of your resin vat even if you’re using a clear resin to print. Sometimes, you may not be able to see the cured resin just by looking into the resin vat.
3. Lubricate the Z AxisAnother thing you want to check when you are experiencing this type of issue is if the Z axis of your resin printer is well lubricated.
To lubricate the Z axis of an Elegoo Mars resin printer for example, you can simply spray the lead screw and linear rail with PTFE spray, then raise the Z axis up and down a few times so it can spread out nicely.
After doing this, your Z axis should be sufficiently lubricated to prevent any grinding or knocking noise that may occur as a result of the Z axis not being well lubricated.
If you want to really get a full lubrication going, you can follow the video below by Elegoo, showing users an alternative method to lubricating the Z axis, using a thicker grease.
To do this on a 3D printer like the Elegoo Mars Pro, you will need the following tools:
- Lubricating Grease
- Small Rubber Shovel
- 2 L-Type Long Wrenches (M2.5 and M3)
4. Level the Build Platform
Another possible reason why your resin 3D printers make these types of noises is often as a result of printing with an uneven build plate. Your resin 3D build platform should be well level before printing.
I’d follow through your 3D printer’s leveling process and make sure it’s done properly.
If you experience a strange sound while printing with an uneven build platform, this shows that maybe only one side of the build plate is hitting the bottom, and the other side is not getting to the bottom of the resin vat.
This can stop the build plate from triggering the end stop when going down as a side of the platform is not getting low enough to trigger the stop.
Even if your build plate looks level, don’t assume that it is well level. The main reason people may not have a level build plate is because they forgot to loosen the build plate screws while leveling.
5. Set the Home Position
There can be screeching sounds in the resin 3D printer when the build plate is trying to go beyond the LCD screen. When you hit the home button, the build plate may touch the screen but continue to go down.
This can be solved by making sure you loosen the build plate screws before you lower the build plate for leveling. Gently push the build plate down on the leveling paper when it’s in the home position, then tighten the build plate screws.
This should reset the home position and prevent the build plate from trying to move beyond the screen when homes.
Screeching sounds occur when the home position of the resin printer is
6. Tighten the Z Axis Rod (Grinding Noise)
One thing you want to check when your resin printer is making a grinding noise is the Z axis rod. When the Z axis rod is loose, it can make a grinding noise when moved. You should ensure that the two screws on the Z axis rod are well fixed.
You should also check all the connections of the Z axis by first loosening them and then tightening them up to ensure they are well screwed.
A user who had issues with the Z axis making a grinding noise when moved tried doing all other things to fix this except checking all the connections of the Z axis. When they eventually checked, they saw that one of the motor cables was barely long enough.
They saw that the connection was also loose and tightened it. This fixed the issue immediately. They tried loosening the connections to see and it made the grinding sound again. When they tightened it again, it stopped the grinding noise immediately.
You definitely want to check your Z axis when your resin printer runs into this type of issue.
7. Misaligned Lead Screw & Linear Rail (Screeching Sound)
Addressing harsh squeaking sound on resin printer from 3Dprinting
One user found that he was experiencing a harsh screeching or squeaking noise on his Creality LD-002R resin printer only when moving the build plate downwards.
It was recommended that he use a flexible coupler since they are more forgiving in instances of misalignment in the assembly, as opposed to rigid couplers.
The reason for this happening is mostly likely due to the lead screw not being parallel with the linear rail. In a case where the alignment was diagonal and out of line, it would cause a squeaking noise in both directions.
What you can do here is to measure the distance between the linear rail and lead screw at the bottom and top, then figure out if there is much of a difference. Even a 1mm difference can cause this issue.
To fix this, you can try to reassemble your 3D printer or use a good flexible coupler.
8. Check Your Limit Switch Isn’t Blocked or Faulty (Grinding Noise)
If you are experiencing your 3D printer not identifying the “Home” position properly, and the build plate continues to go down and create a noise, it’s likely a limit switch issue.
You can check whether there is a problem with your limit switch by first checking for the lights to on, as it should show an indicator light, depending on the printer.
When the build plate touches the LCD, it should create a buzzing sound. If you aren’t getting this, it’s likely that your limit switch is faulty.
Elegoo recommend trying to remove your resin vat and build plate, then seeing if the Z axis reaches the bottom so you can see whether it’s just the limit switch stopper that is too short to trigger the build plate.
If this is the case, you can put a 1-2mm spacer between your screws and the limit switch stopper (located at the bottom of the Z axis connecting shaft).
Printer creaks when printing: why and what to do
When the printer creaks when printing, it always seems to be some kind of mechanical problem. But is it really so? Is it worth prematurely sounding the alarm and taking the device to the repair service?
Causes of the problem
Many people may have encountered this problem, especially those who deal with older models. The creaking usually comes from the wear and tear of some parts of the printer that have lasted longer than they were intended by the manufacturer. However, in some cases, a simple replacement of the device cartridge will help eradicate the "ailment". If this does not help solve the problem of printer creaking when printing, then you should take the issue more seriously and disassemble the devices into their component parts, and then look at each detail for wear.
Noise from the printer
Since most causes often converge to the same for many people, there is a short list of the most common causes of creaking: creak.
 If the printer has been serving you for more than 5-7 years, then most likely the grease has simply worn off.
 Espon printer
Note: There is a separate answer to the question why the HP printer creaks when printing. Printers have gearboxes that are very sensitive to cleanliness. If any dust, particles of paper or toner get on them, then an unpleasant sound will be heard during printing, which can be described as a creak or whistle.
Solving the problem
It is worth solving all creaking problems after the factor of their occurrence is revealed.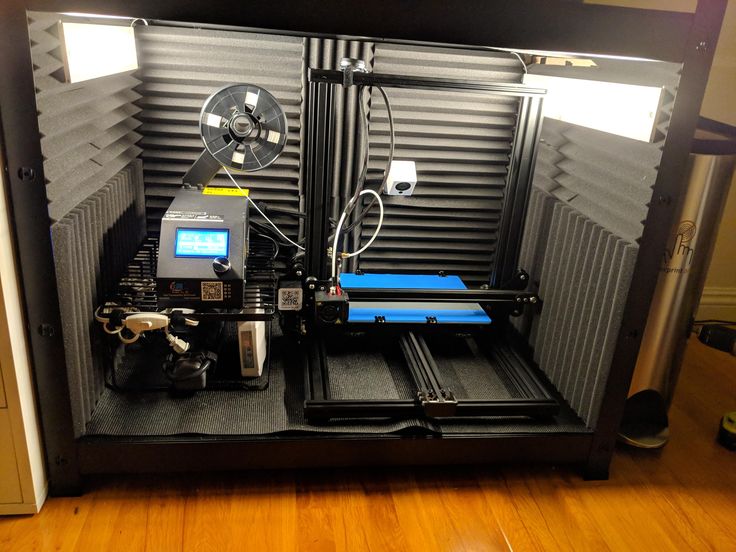 However, in any case, you will have to disassemble the device.
Note: If the HP printer creaks when printing, it is possible to solve the problem simply by blowing a fan around the device and its “innards”.
After the device is disassembled, it is worth lubricating all the parts on which you can notice any traces of the same grease. It should be white or grayish. If there is no lubricant anywhere, then check the parts by touch - those that leave greasy traces should be lubricated with a special compound that can be purchased at electronics stores. The remaining parts should be wiped with wet wipes for office equipment.
Disassembled printer
However, not always people have the appropriate experience to easily disassemble and assemble the printer, and do it in such a way as to avoid negative consequences. If you are one of the owners of "direct hands", then it is recommended to properly scour the Internet in search of a diagram of your printer device.
Otherwise, it is best to take the defective machine to a printer repair company. Judge for yourself, if it turns out that the problem lies in the wear of parts, then you cannot do anything about it without proper skills. But if it turns out that the problem is solvable, then you will have to spend a lot of time and effort to return the printer to its former state.
Printer Repair
Try to assess the situation soberly and solve problems to the best of your ability. I hope this article was useful for you and answered your possible questions.
5 Clogged Nozzle Causes and Solutions・Cults
You are in the middle of a long 3D print, you hear a click and the filament stops extrusion. Your printer may have failed. Seizures and blockages happen to all manufacturers, and luckily they are pretty easy to fix!
Before we start, it's important to define each of the parts we're talking about, as the wording can be a bit confusing. We will focus on assembling the extruder, which consists of two parts: a hot end and a cold end.
The cold end pushes the thread forward. The filament is clamped between the gear and the bearing and is pushed forward by the stepper motor. The filament is fed into the hot end where it first passes through a melting zone to thin the filament before it is deposited outside the nozzle.
There are two types of extruders - bowden and straight. A direct drive extruder sits directly above the hot end and feeds the filament directly through it. The Bowden extruder is usually attached to the frame of the printer and brings the filament through a thin tube to the hot end.
Direct Drive Extruder
Bowden Extruder
When a filament gets stuck, it is either in the melt zone or the nozzle portion of the hot end, not the cold end. Now that we know what parts of the printer we are dealing with, let's look at some of the symptoms and causes of jams.
If the hot end is stuck, you may notice that less filament comes out of the nozzle or no filament comes out at all! Here are some of the most common causes:
1) Thermal creep: This may seem counterintuitive, but if the hot end is not cooled properly, the filament starts sticking too high at the hot end and we run into a problem called thermal creep. This happens when the filament thins too much and the extruder has to work much harder to push it through the nozzle until it becomes unable to do so and jams.
Solution: You will usually hear a grinding or clicking sound from the extruder motor when the filament is stuck, and if so, stop printing and remove the filament. Check that the hot end cooling fan is working properly and that the heatsink and heater block are securely fastened. In the case of hot ends like the V6 E3D, it is helpful to apply thermal paste to the thermal break wires.
2) Hot end temperature too low: If the hot end temperature is too low, the filament cannot be fed through it, causing the extruder to grind the filament, making extrusion more difficult.
Solution: Check the temperature rating for the specific filament. PLA likes to be extruded around 200C while ABS likes to be extruded around 245C. If you're having trouble with these specs, try increasing the iteration by 5 degrees, but make sure you don't exceed your hot end's maximum temperature. When switching filaments, make sure that all previous material has been removed before the temperature change.
3) Nozzle too close to the bed: If the nozzle is too close to the bed, there is no room for the filament to be squeezed out of the nozzle, resulting in clogging.
Remedy: Make sure your bed is level. See our bed leveling guide for more information.
4) Incorrect filament diameter: Most filament manufacturers claim that their filaments are within 0.05 mm of the declared extrusion width (usually 1.75 mm or 3 mm). If your filament deviates too much from specification, you may have trouble feeding it through the hot end.
Solution: If you suspect this is happening, take a caliper and measure the thread at a few random places to see if it is within specification. If the thread diameter is constantly decreasing, it may be time to consider a new brand.
5) Dust or particles: Dust or other small particles can stick to the filament until it reaches the hot end and burns off, causing annoying clogging.
Remedy: Unlock the nozzle using the cold pull method - see below for a more detailed description of its operation.
Some articles recommend using a cutter or drill to clean the nozzle. For those of us who can't rely on power tools, fire and chemicals, here's a safer way to remove filament from a nozzle called "cold drawing".
The idea behind cold drawing is that you set the hot end to the glass transition temperature of the filament. This is the temperature at which the filament is between the solid and the liquid. This allows you to remove the thread and take all the leftovers with you. It works best with nylon, ABS or PLA.
Before you start: If you are using a Bowden extruder, remove the tube and any materials in it before starting work, as cold shooting with a Bowden tube can be difficult. After completing the cold firing, replace the Bowden tube.
Step 1: Heat the nozzle to print temperature and manually feed about 10 cm of filament through the hot end (where the Bowden tube was).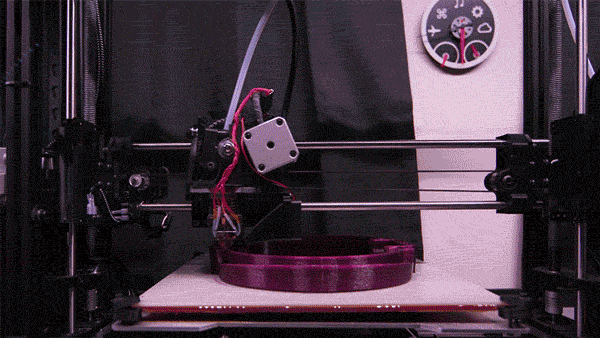 Try to keep the thread as straight as possible. A natural or light-colored thread is best, so that when it is removed, the remains are visible. If your hot end is too clogged to pull out, take some thin wire and pliers and stick it into the tip of the nozzle to clear the clog.
Step 2: Once the filament comes out of the nozzle, lower the nozzle temperature (120C for ABS, 90C for PLA and 100-140 for nylon). Try to use the lowest temperature for this step. It should be hot enough that the thread is pliable, but not so hot that it is too soft. Be sure to cut off the filament dripping from the nozzle before starting the broach.
Step 3: Pull on the top of the thread until you feel it slowly pull away. If it comes off too easily and no sediment is left at the end, lower the temperature. If you find it difficult to get it, increase the temperature until it comes out.
You'll know you've done it right when there's a small point at the end and possibly some leftover thread (this is more obvious when shooting cold with white or clear thread).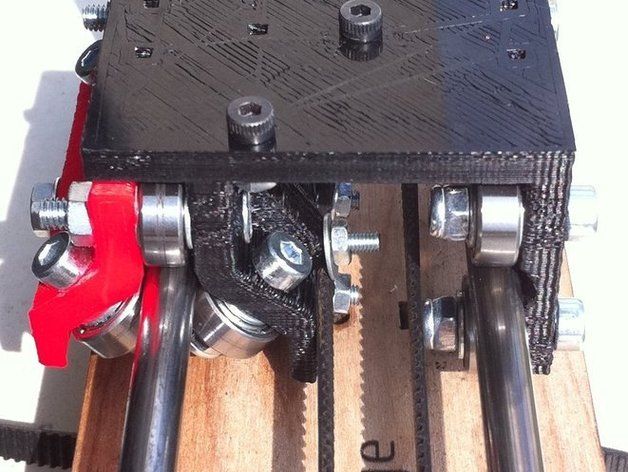
The Mkme lab also has a great video tutorial on how to do this:
You may need to do this a few times to remove any leftovers. As a result of the last cold pull, you should have a smooth, clean piece of thread (no dark residue). When you are sure all blockages have been cleared, replace the Bowden tube and try printing.
By following these tips, you will be able to clear nozzle clogs and hopefully prevent them from happening again. Happy printing!
via Pinshape
This page has been translated using machine translation. Suggest the best translation
Previous
ShareNext
Similar publications
We love shiny things, so we're making a tutorial on polishing and finishing metal-filled filaments.