Where to buy 3d printer filament locally
11 Best Stores To Buy 3D Filament Locally – Printing It 3D
A 3D printing process can’t proceed without a filament, as it’s the input that produces the final product. Now, to make a high-quality print, you also need a top-notch material. So, what are the best stores to buy 3D filament locally?
Here are the 11 best stores to purchase 3D filament locally in the US:
- MatterHackers Hardware Store
- Walmart
- Staples
- iMakr Store New York
- Imagine That 3D
- Micro Center
- Lowe’s
- Ultimate 3D Printing Store
- 3DXTech
- Grainger
- Plug n Play 3D
Let’s have a closer look at these 3D filament sellers in detail. Read on to learn about their pricing, ordering, and delivery policies.
1. MatterHackers Hardware Store
Apart from being one of the most sought-after manufacturers of 3D products, MatterHackers also owns a popular hardware store.
The shop is in Lake Forest, California, and it is open from Monday to Friday (10 am to 5 pm). The Californian-based brand sells top-notch 3D appliances, including filaments, 3D printers, printer components, adhesives, resins, and laser cutters.
MatterHackers offers one of the largest 3D filament collections. So, you’ll find a variety of industry-proven filaments that include the MH Build and the professional-grade (Pro) series.
These filaments are made from different high-quality materials, including:
- PLA
- Nylon
- ABS
- PETG
- TPE
- TPU
- Polycarbonates
- Flexibles
Apart from their own 3D printing filaments, MatterHackers sells 3D filaments from other reputable manufacturers. These brands include Ultimaker, Proto-pasta, ColorFabb, and eSun. However, the filaments are cheaper than those from MatterHackers.
MatterHackers offers curbside pickup and delivery for customers who can’t make it to the store.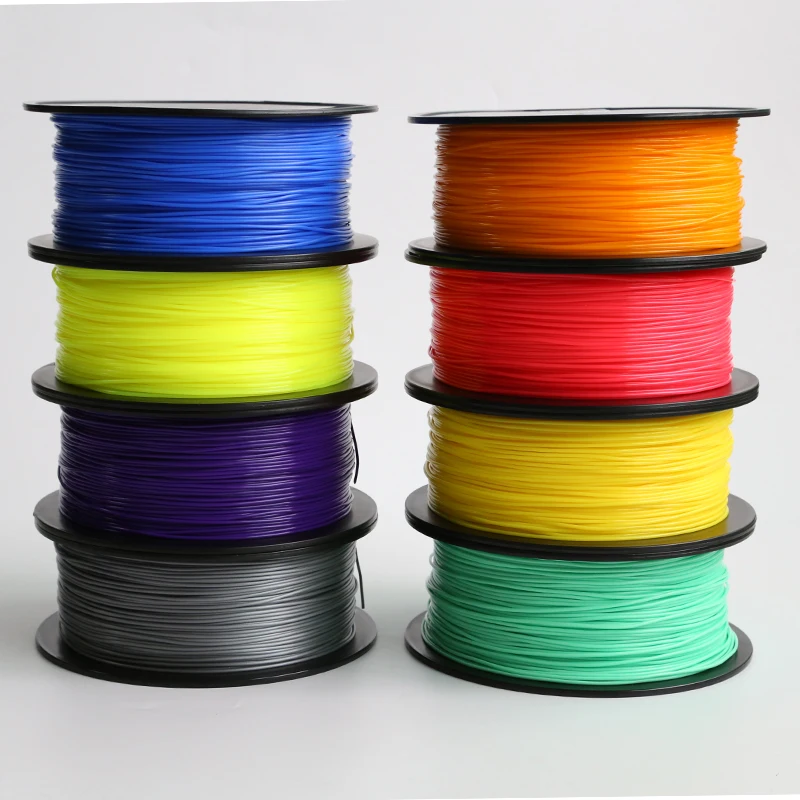 Moreover, the manufacturer houses a team of experts who test all their items before sale. Hence, their showroom in Valencia, California, is open for visits following appointments during weekdays, from 10 am to 5 pm.
2. Walmart
Walmart is the perfect destination if you’re looking for a local retailer that will serve all your 3D printing needs.
The multinational corporation has thousands of hypermarkets, departmental warehouses, and grocery stores that offer a wide range of items, including 3D printing essentials such as printers, filaments, scanners, and resins.
So, you can visit the nearest Walmart branch for in-store shopping or order your preferred 3D filament online and then pick it up later.
Since Walmart isn’t a manufacturer, it sources its products from reputable local and international brands. Despite importing some items, the retailer sells the items at reasonable prices. Moreover, the staff in every store is always ready to assist and meet the customers’ needs.
Walmart has strived to improve customer experience in every branch. Hence, their stores stock a vast array of 3D filaments and accessories. Moreover, buyers can navigate their e-store beforehand to view the available products and prices. Hence, it becomes convenient, as they’ll already know what they’re looking for when they visit the stores physically.
3. Staples
Staples, a US-based chain retailer, is renowned for offering brand-name electronics and printing services and distributing office tools and furniture.
Staples branches stock high-end 3D filaments, printers, printing resins, and other accessories from premium brands, such as MakerBot. Their great 3D filaments come in several materials, including PETG, PLA, PVA, ASA, and TPU.
Staples guarantees that they only sell high-precision 3D filaments that have passed through quality checks. Moreover, these filaments are available in multiple diameters and a wide variety of colors. Also, you can get assorted colors in 9-packs to suit your needs.
Staples has customer-friendly pricing, so you’re sure to find a bargain here. However, the in-store prices may differ from those displayed on their e-store. So, find out how much your preferred 3D filament costs at your nearest Staples branch.
Staples stores offer free delivery for enrolled members. Moreover, members can enjoy up to 5% back in rewards, among other benefits. Staples also allows the return and exchange of goods bought in-store, as long as they’re in their original condition.
4. iMakr Store New York
Located in Manhattan, New York, iMakr Store is one of the largest retailers for 3D printers, scanners, and filaments.
The retailer also comprises a dedicated team of experts who offer 3D printing (on-demand) services and classes. iMakr Store also provides consulting and advising services and hosts 3D printing demos and events.
iMakr Store offers various 3D printing filaments from renowned brands, including MakerBot, NinjaTek, PolyMaker, and 3DXTech. What’s more, the filaments are available in a wide array of materials such as ABS, PLA, PETG, ASA, Carbon fiber, and nylon.
Potential customers can also visit iMakr Store’s website to check out discounted products and deals. Moreover, the store sells ex-demo and used products that its engineers have reconditioned. So, if you’re planning to buy a 3D filament from this retailer, you can also try out one of these reconstructed appliances.
5. Imagine That 3D
Located in Murray, Utah, Imagine That 3D is a local store that sells 3D printers and consumables from well-known and less popular brands.
The retailer offers customers and visitors an opportunity to try out their printers and 3D printing materials, including filaments and resins. Additionally, the passionate in-house experts offer live demonstrations during interactive sessions.
Imagine That 3D stocks various 3D Printing filaments, allowing customers to choose their preferred types and sizes. Moreover, they display models made from these filaments, enabling potential buyers to test and see how the filaments turn out. The prices are also customer-friendly.
Apart from selling 3D printing products, Imagine That 3D allows customers and visitors to access their computer labs. Here, they teach customers about various 3D printing software. Additionally, customers can view the latest design tools and 3D scanners.
Imagine That 3D’s customer service is top-notch, and they offer 24hr customer support. Moreover, the store provides maintenance and repair for their products. Customers can visit the store between Monday and Saturday from 10 am to 6 pm.
6. Micro Center
If you’re a seasoned expert in 3D printing, you might be familiar with Micro Center. The US-based Computer and Electronic Device retailer has its headquarters in Hilliard, Ohio. Micro Center has 25 stores in 16 states, enabling customers from all over the USA to access products and services conveniently.
Micro Center’s stores have expanded their departments to include a vast selection of goods. Also, they offer quick one-stop shopping and customer assistance.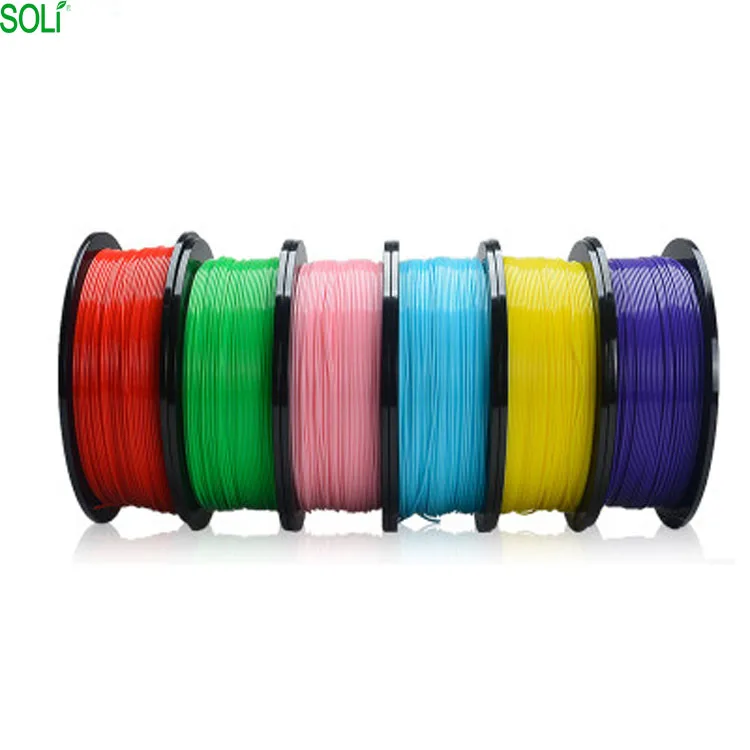 All their shops are easily accessible and have ample parking.
Micro Center stores are renowned for selling premium and high-performance 3D printing products, including printers, filaments, and resins. So, you’ll find a generous selection of 3D printing filaments, from the most popular ones to the most pocket-friendly. Additionally, Micro Center accepts several payment methods, including credit cards.
Micro Center offers customers the Micro Center Insider Credit Card for only in-store purchases. So, customers can obtain the card after approval by Wells Fargo bank. Moreover, they can enjoy promotional offers using the card if they bring their original cards to the stores.
Micro Center also allows customers to make pre-orders on the retailer’s website and then pick the items in-store. Hence, buyers have the advantage of checking the latest arrivals, highly rated 3D filaments, and the most affordable brands. Once they make their orders, the filaments are packed, and a buyer can pick them up in a couple of minutes.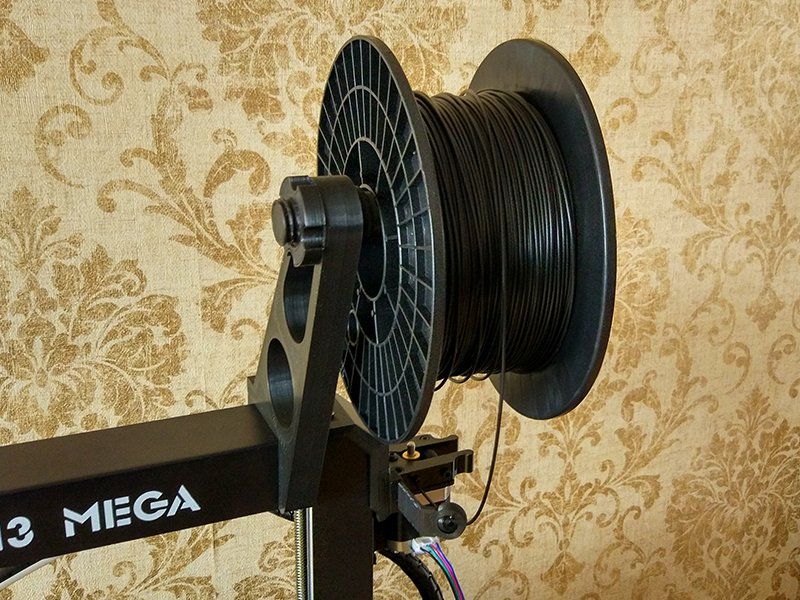
7. Lowe’s
Initially a little hardware store in North Carolina, Lowe’s is one of the leading home improvement retailers. The mega-store has partnered with over 300,000 associates and serves more than 20 million customers per week. Moreover, Lowe’s has over nine store support centers in the US and Canada.
Lowe’s offers a wide selection of 3D printing products, including filaments. The retailer sells 3D printing filaments from two highly sought-after brands Dremel and Made in Space. These high-quality 3D filaments can help you turn your wildest dreams and designs into reality by creating appealing products.
Apart from selling 3D printing consumables, Lowe’s offers many home improvement services and ideas. Hence, you can find interesting DIY projects to try out on their website. Moreover, the retailer has numerous deals for its customers and unlimited rewards for enrolled members.
8. Ultimate 3D Printing Store
Ultimate 3D Printing Store (U3DPS) is a family-owned company based in the US.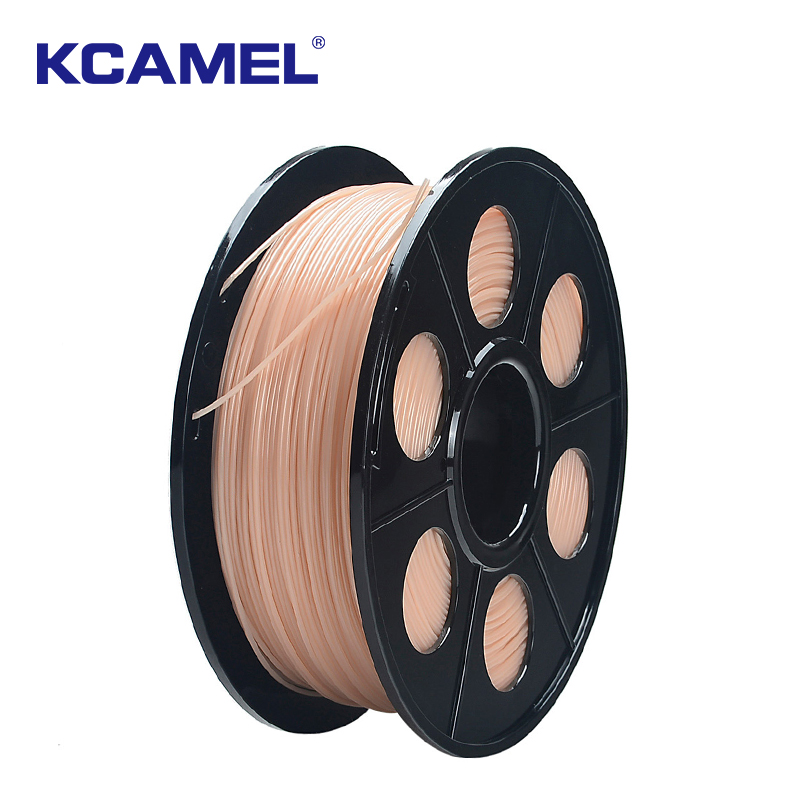 You can find it in Odessa, Florida, and its warehouse is open during weekdays from 9 am to 5 pm.
U3DPS allows showroom visits and live demonstrations on 3D printing on designated days.
The brand takes pride in creating opportunities for hobbyists, public corporations, and customers who want to advance their enthusiasm for 3D printing and technology. Hence, it provides all 3D printing tools and supplies, including filaments, resins, printers, laser cutters, printer components (nozzles, hot ends, and extruders), and accessories.
U3DPS is a one-stop shop for all your 3D filament needs. The distributor has partnered with other reputable manufacturers and has a wide selection of high-quality filaments. These 3D filaments are made from different materials, including ABS, PLA, carbon fiber, copolyester, and fiberglass, to serve home-based and industrial 3D printers.
If you’re wondering about their pricing, U3DPS has options for all types of customers. Hence, it provides products in a wide price bracket ranging from the most inexpensive to high-end filaments. Moreover, the leading seller has frequent deals and discounted offers for all customers.
U3DPS has a Rewards Program where all sellers benefit from redeemable reward points to boost their sales and improve customer loyalty.
It’s super easy to join this program, as you only have to register by entering your details. Hence, you’ll be earning some points when you buy goods from this platform, share information about the brand on social media, or refer people to make purchases from the site.
9. 3DXTech
3DXTech is an American-based Company located in Grand Rapids, Minnesota.
The brand takes pride in manufacturing and distributing high-quality filaments. So, 3DXTech utilizes state-of-the-art equipment and well-thought-of processes to produce professional-grade filaments.
3DXTech serves the needs of 3D printing hobbyists and experts by offering a wide array of filaments for creating industrial-grade objects and complex engineered products. They’re available in different materials, including carbon fiber, PLA, HIPS, and Nylons, to mention a few.
The brand’s factory store is open from Monday to Friday, from 9 am to 4 pm. Apart from serving the local community at Grand Rapids and Michigan, 3DXTech delivers 3D printing filaments to customers in other parts of the country. Moreover, free shipping is available for orders exceeding $50.
10. Grainger
Are you looking for unique 3D filaments to actualize your creative designs? Grainger has your back.
The renowned distributor has served customers for over 90 years by delivering MRO and industrial products. Therefore, it also retails 3D filaments to meet your 3D printing needs.
The 3D printing filaments available come in various colors and materials, including PLA, PETG, HTPLA, and carbon fiber. They also exhibit attractive qualities such as abrasive, ultra-rigid, metal-filled, glossy, or matte materials. Moreover, they’re from sought-after manufacturers, including LulzBot, Dremel, and Creality.
Grainger has numerous branches that offer over-the-counter services in over 200 locations. So, you might easily find a Grainger store in your locality. Moreover, these stores accept all forms of payment, including credit cards and cash.
Customers can choose their preferred filaments from their website in different categories. So, you can use filter options, including collection, color, material, or finish, to get your ideal filament. Then, you can make your order and have the filament ready for pick up at your nearest store.
Most Grainger stores are open during weekdays, but the opening hours may vary. However, a customer can make an order even past working hours and pick it up later for a small fee. Moreover, the retailer’s staff members offer round-the-clock customer support and answer all queries.
11. Plug N Play 3D
Plug n Play 3D is another US-based distributor of high-tech 3D products.
The distributor stocks a wide selection of 3D filaments from famous brands like Protoplast. Therefore, it meets the needs of 3D printing customers in commercial, industrial, and professional sectors.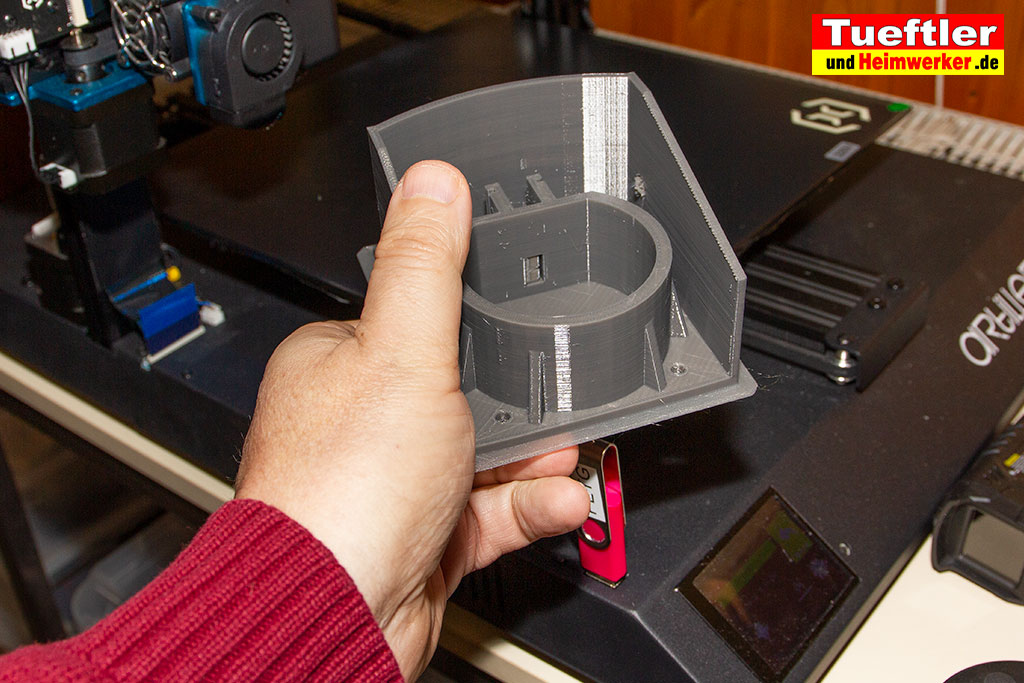
Plug n Play 3D’s store is in Sacramento, California. It is open from Tuesday to Sunday from 10 am to 5 pm (4 pm during the weekend). Apart from sales, the distributor offers service assistance even during the off-hours.
Now, you’ll find a vast array of 3D printing filaments at the Plug n Play 3D store. The high-quality filaments are made from different materials, including PLA, PET CF, PPS CF, Nylon, PETG, and TPU. Moreover, the retailer offers customer resources on 3D printing on its website.
Plug n Play 3D is committed to strengthening customer relations and improving their shopping experience. So, it has a reasonable pricing mechanism and offers prompt customer support. Moreover, educator coupons for teachers and gift cards are available from the store.
Staples® Official Online Store
End of the year deals are here
End the year with a bang and prep for the new year with awesome deals from Staples.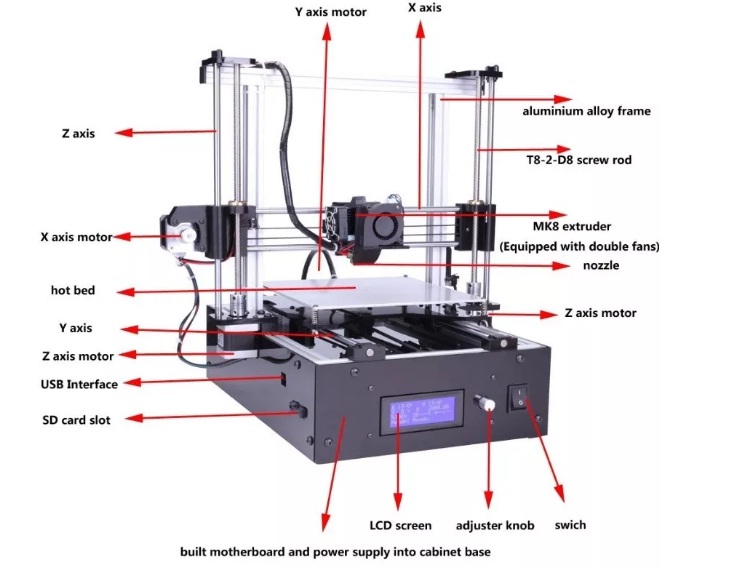 Start with Staples Black Friday deals on everything from computers and tech to gaming chairs, printers, and more! The savings continue with a week of Cyber Monday deals you don't want to miss! Use this time to stock up on essentials, update your office, and find gifts they'll love receiving.
With the new year right around the corner, it's the perfect time to refresh your office and replenish your supplies. Get back to work and take advantage of savings on ink and toner, office furniture, packing and shipping supplies, and more. Stock up and save on all kinds of supplies for the office. Get deeper discounts on supplies like copy paper, file folders, and writing supplies when you set up a business account with Staples Business Advantage or order using the Staples AutoRestock feature.
Make sure you're prepared for the upcoming tax season
As the year comes to an end, it's time to get your financial documents in order and prepare for the upcoming tax season. Keep your financial records up to date throughout the year with the right financial software for your personal or company needs. As well as making sure that your office is well stocked with the necessary tax forms and envelopes to get your employees or contract workers their paperwork as soon as possible. See how Staples can help you prepare for your taxes:
- Starting with the right financial software can help keep you ahead of the game before the next tax season. With recognized financial brands such as Quicken Finance Software. Take the hassle out of staying financially organized.
- Getting your employees and contract workers' tax forms out to them on time is as simple as just pressing print when you have the appropriate tax forms on hand. From W2, 1099, 1095, and even the envelopes to mail it out, we have your tax form need in mind.
- When it comes time to file your taxes, we can even help you find the right tax software that fits your filing requirements. From software for personal taxes, business taxes, or both, we offer top brands such as Turbo Tax and H&R Block.
 With the ability to e-file or print and mail both your federal and state taxes.
From employees' tax forms to software to keep your finance in order, or software to get your taxes done, Staples has you covered this upcoming tax season!
Rest assured it arrives safely & securelyWhether you are sending business documents or customer products, shipping and mailroom supplies from Staples make the process seamless.
Keep packing supplies ready for easy shipping. Padded envelopes and bubble mailers are perfect for shipping small, non-fragile items. Pack larger items in shipping boxes that are slightly larger than the item and use packing peanuts, bubble roll, or other packing materials to keep objects from moving in the box during transport. Choose the right packing tape to seal shipping boxes and keep them sealed. Staples carries clear acrylic packing tape for everyday shipping and reinforced packing tape, or water activated tape for packages that require a heavier duty seal.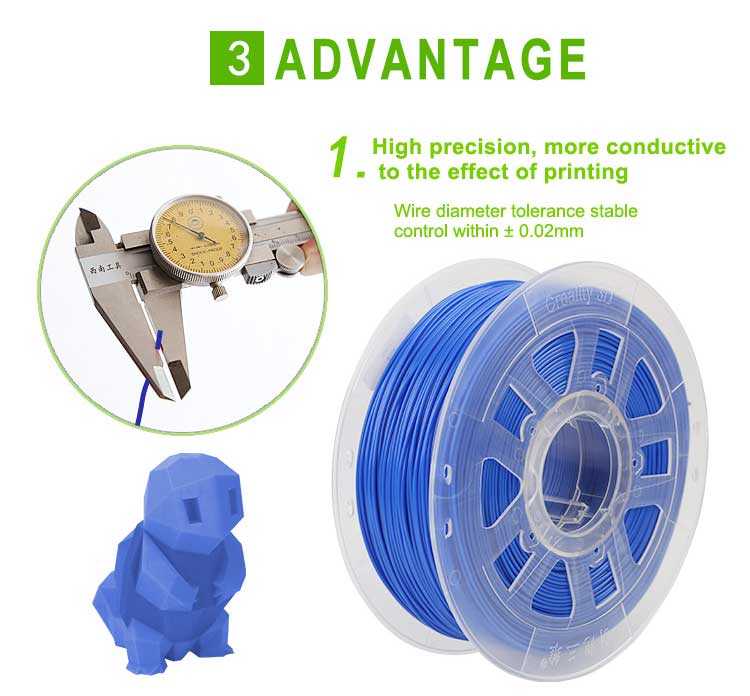
Manage the day-to-day office correspondence smoothly with a wide selection of business envelopes, inter-office envelopes, and catalog envelopes in the mailroom. Have finger pads and envelope moisteners on hand for speedy document collation and a quick seal. Choose security envelopes for confidential office correspondence and inter-office communications. If your office or organization sends out large mailings, consider a paper folding machine and self-sealing envelopes to increase efficiency.
Hybrid work just got easier Whether you work in a traditional office, from home, or anywhere in between, the right supplies and technology will keep you working efficiently no matter where you are. Update your tech with a new laptop computer or 2-in-1 tablet for work on the go. Keep important files accessible wherever you are with portable hardrives and USB flash drives that fit easily into a laptop bag. Choose a headset for virtual meetings or noise-cancelling headphones to block out unwanted sounds when working in public.
In your home office, make sure to have a comfortable set up that's built with you in mind. Select an ergonomic office chair or gaming chair, and browse our selection of sit and stand desks for a convertible work area. Add an extra computer monitor to your set up, and choose from our wide selection of mice and keyboards. And don't forget to stock up on office supplies. From notebooks and copy paper, to pens and highlighters, Staples offers flexible AutoRestock options on all the basics, so you can get supplies shipped to your door without having to remember to order.
Take the guess work out of shopping for ink & toner When it comes to selecting the right ink or toner cartridges for your printer, the choices can be confusing. Let Staples Ink and Toner Finder take the guess work out of choosing the right refills for your printer. You can search by model or browse by brand, including top brands like HP, Brother, Canon, and Xerox ink and toner.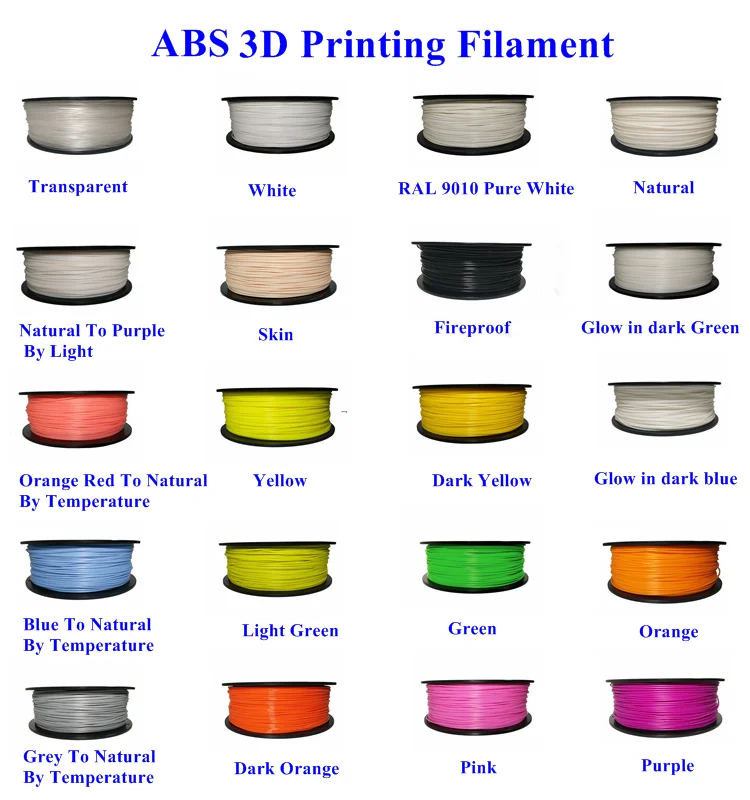 With cartridges available for over 30 brands, you'll be sure to find what you need to keep printing. When your cartridge is empty, take it to any Staples store for free tech & ink and toner recycling every day!
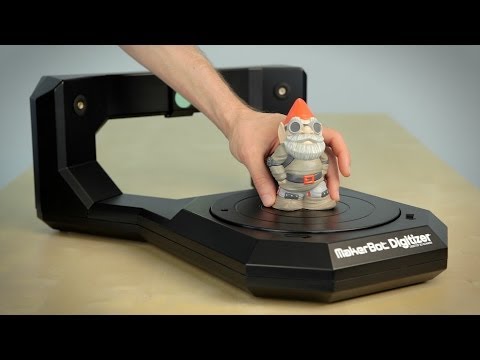
How PLA is made for 3d printers. Report from the shop / Sudo Null IT News
A pistol shot was the signal to create a business.
In order to dispel the myths that plastic spools for 3d printers grow on trees can only be bought and resold, as well as that it is enough to buy an all-in-one extruder and start your own business, I went on reconnaissance to the Moscow manufacturers of ABS and PLA (and HIPS). Indeed, I ended up in a professional workshop with industrial equipment, with high-precision measuring and control devices, high standards of cleanliness (because the production process is very responsible) and sociable founders (ready to share knowledge with an inquisitive and thinking audience), who have a lot of techno-creative ideas and takeover plans world market. (+5 National Pride Level)
As the co-founder of the company told me: "First we saw a fruit knife open and an orange peeled with it, then the video of Cody Wilson's gun came as a shock and away we go..."
At the time when I wrote the first 2 articles about 3d printers on Habré (spring 2013), these guys had already started creating a plastic production business. It is interesting that both I and they came up with a similar idea, how to supplement the saying, they say, a person can endlessly look at fire, water, how another person works and how a 3d printer prints.
Polylactide (PLA, PLA) is a biodegradable, biocompatible, thermoplastic, aliphatic polyester whose monomer is lactic acid. The raw materials for production are annually renewable resources such as corn and sugar cane. It is used for the production of products with a short service life (food packaging, disposable tableware, bags, various containers), as well as in medicine, for the production of surgical sutures and pins.
Under the cut - the main stages of turning raw materials into coils with PLA for 3d printers
Shop panorama
Right to left
There was a corn, then it is processed into such balls and put in such boxes
About 900 kg of plastic is obtained from a ton of raw materials
Since this is a natural product, it is afraid of light and moisture, so it is protected with such a bag and a piece of silica gel
And this is a "vacuum cleaner" with which 100 kg of "corn balls" are scooped up and sent to container
Here the raw materials are dried, while the smell is like in a confectionery
Add a “pinch” of dye (also completely natural, Austrian quality)
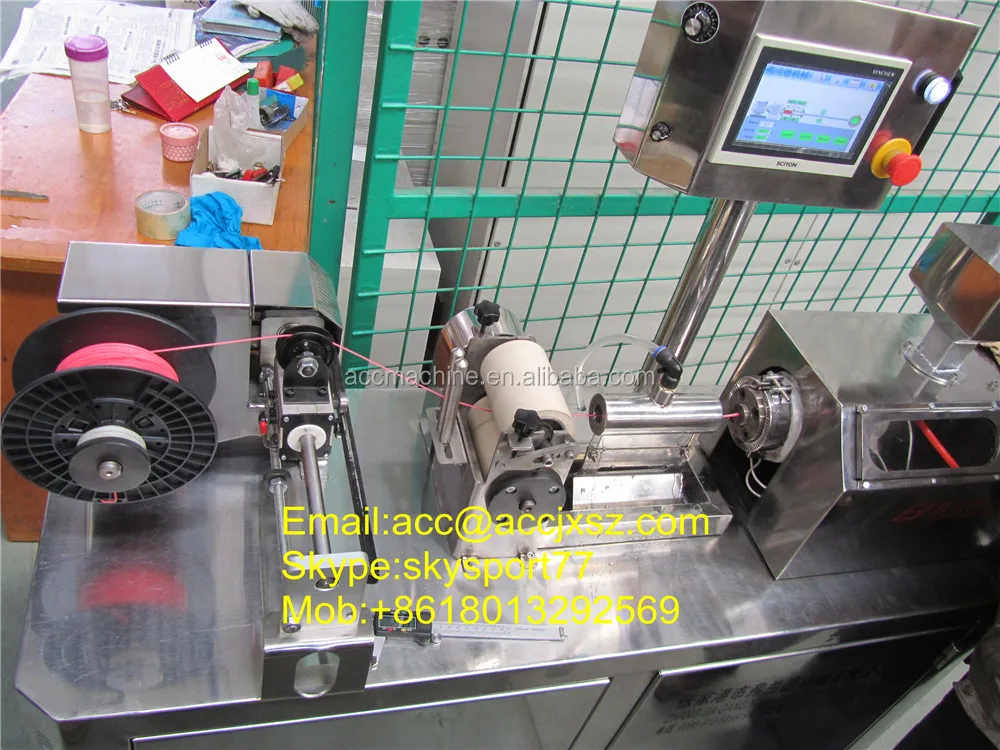
Here the raw material is heated and turns into a viscous mass.
Under the pressure of the shaft, we pass through the heating elements.
The diameter of the outlet of the "furnace" is about 3 mm, the plastic acquires the desired diameter (1.75 mm) due to the fact that it is immediately pulled, and the draft is very precisely adjusted
Bosh. For ABS and PLA different temperatures
The diameter of the cooled plastic is measured by a laser device. Thread diameter tolerance set to ±0.03 mm
Remote monitoring of plastic diameter
Laser threading speed 55 meters per minute
Traction management. It is the thrust that creates the desired diameter. Using this unit, you can very accurately select the thrust of the motors and thereby adjust the diameter of the plastic.
"Spindle" - controls the speed of winding on the coil. No on COIL.
Here is the COIL.
Without plastic
It is important to note the uniformity of filling the spool
After the large spool is full, it is removed and the thread is rewound onto small (usual for everyone) spools.
Ordinary coils fall into the caring hands of the girl who completes the box
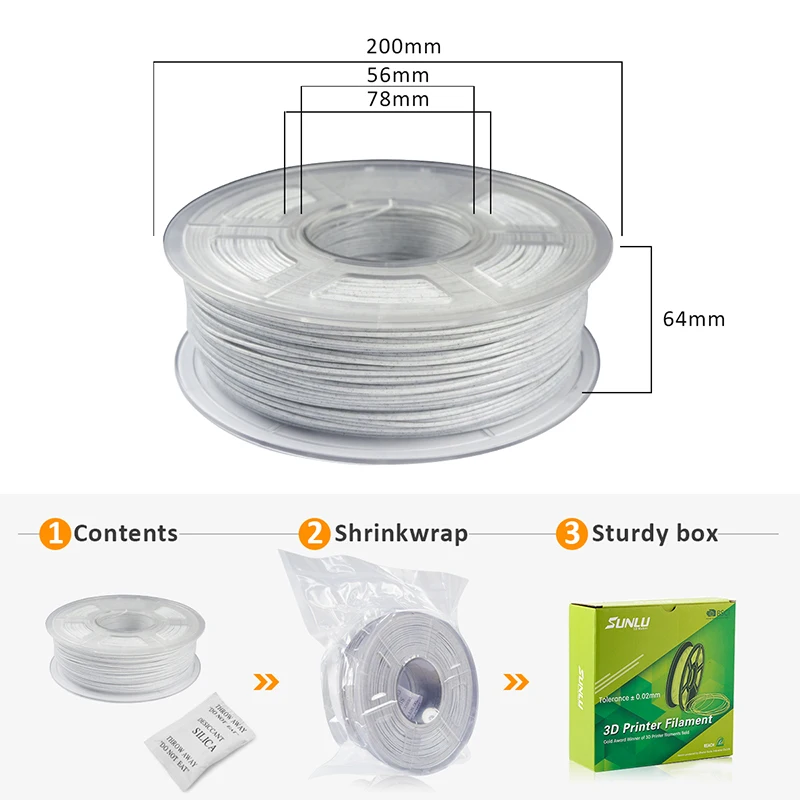
Dust-proof bag, moisture-proof silica gel, strong box to protect from direct sunlight and stickers. The stickers indicate the recommended melting temperature (they are different for ABS and PLA), filament diameter, weight and material.
From here they will go all over Moscow and the CIS countries
Purity
What I noticed is that the workshop is very clean, all measures have been taken to keep dust as low as possible: windows are sealed with adhesive tape, cleaning is often done, antistatic liquid is used, especially important places are covered with polyethylene.
soluble plastic
high-strength polystyrene (HIPS), which in its characteristics is very similar to conventional ABS (for which Rep 2X is “optimized”). HIPS dissolves in limonene, a citrus-based substance.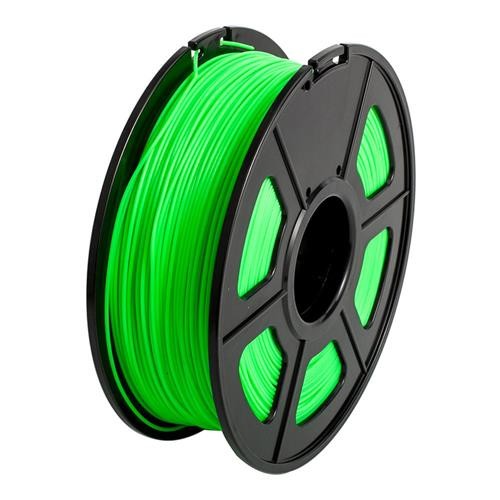 Complex objects can be printed with standard ABS or PLA, and HIPS can be used as support material. The final product is immersed in a limonene bath where the HIPS dissolves in a few hours. In addition, HIPS has a close operating temperature, adheres well to ABS and the platform. The consumption of limonene is small, since most of the support is usually removed by hand. A lemon bath is a slightly more complicated procedure than if it were ordinary water, but it has its own plus: after bathing, the item smells like lemon.
A couple of tips on how to choose good plastic.
PLA is very sensitive to storage conditions (dark, dry and dust-free). The twig should be clean, without inclusions, smooth, without delamination, on the surface - a slight sheen.
The presence of foreign bodies is checked at the rupture site. If you pull yourself up and tear a piece of plastic (and it breaks where it is “thin”), then the place of the gap should be uniform - this is a sign of good quality.
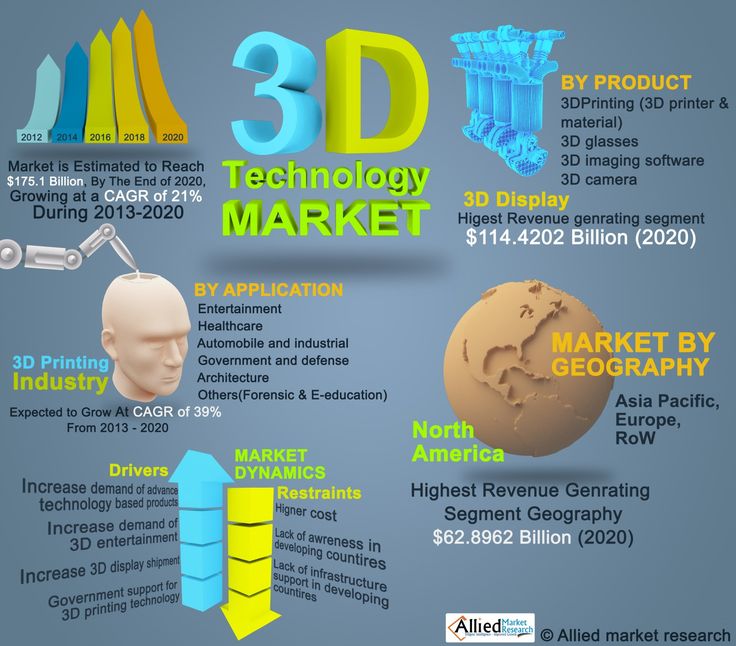
Durability/Biodegradability
(picture for environmental investors)
and here is the data that is similar to the truth
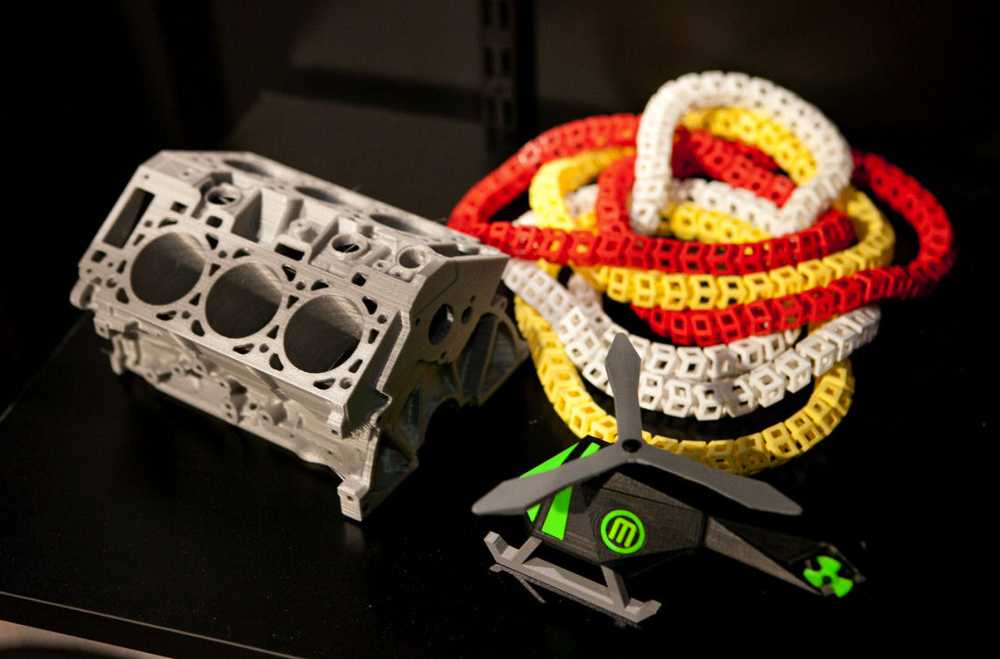
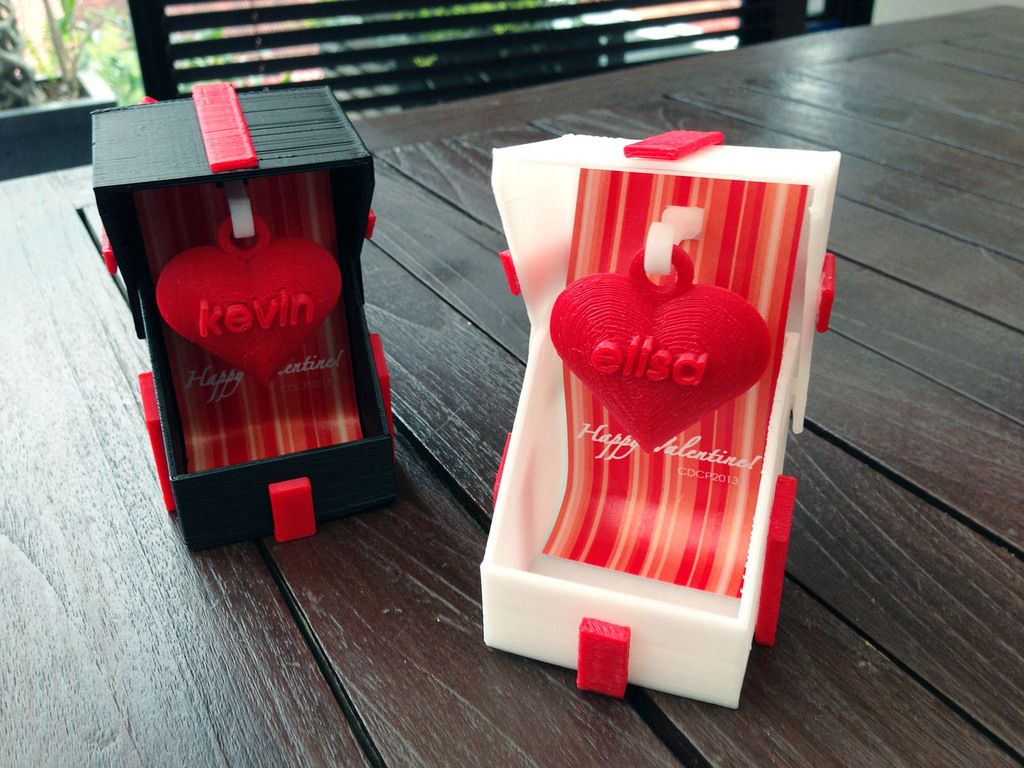
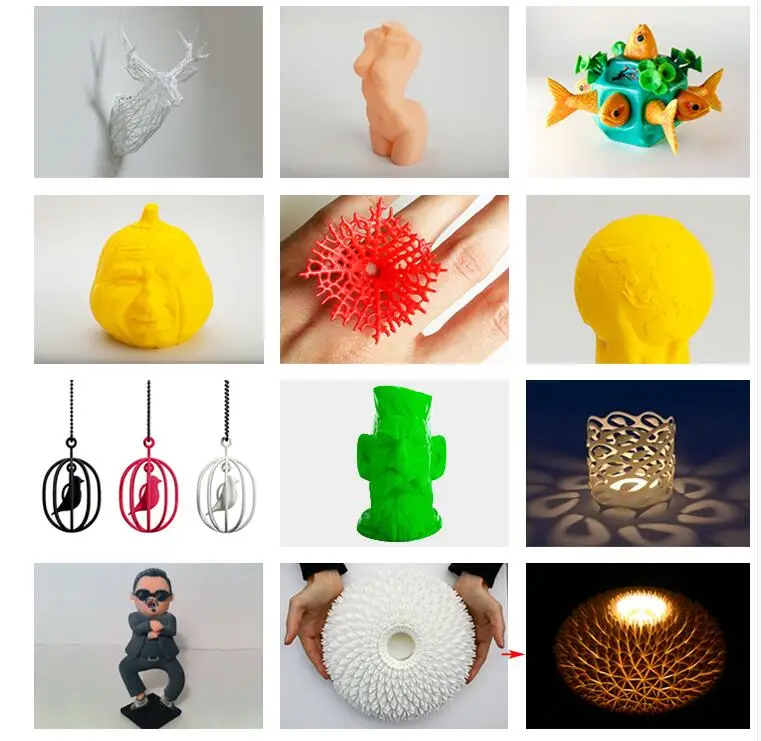
examples from PLA
20 most common 3D printing problems (Part 2)
A continuation of the translation of the article Troubleshooting Guide to 20 Common 3D Printing Problems, Part 1 is available here.
3D Printing Issue #11: Layers Offset
- Issue Description
The top and bottom layers are misaligned, creating a step effect in the printout.
Why did the problem occur?
There can be many reasons for misalignment of layers - even pushing the printer during printing can provoke it. Also, it can be affected by: bent or misaligned studs, a nozzle that hits the printout and moves it on the platform, etc.
Solution
- The printer must be placed on a stable stand.
 Place the printer on a stable stand where no one can accidentally push or move it. Even slight movement of the printer during printing can cause the layers to shift.
 - Make sure the printer platform is secure. Some 3D printers use a detachable platform. This is convenient enough for taking printouts, and it saves the printer from possible damage. But we must remember that the screws and clamps loosen over time, which leads to the movement of the platform. Make sure you secure the printer platform properly so that it does not move when printing.
- Watch for distortion of the top layers of the printout. The top layers of the print can warp easily if cooled too quickly. When the layers deform, they rise and can create an obstacle for the moving nozzle. If the top layers of the printout are warping, try lowering the fan speed.
- Printing too fast. Printing time can be increased by increasing the temperature and flow rate. But this can affect the amount of filament released.
 If you hear a tapping noise while printing, the printer is running too fast. If you hear a knock, check if the filament is slipping (in the extruder) before setting the print speed in the slicer settings. Set Other > Default Printing Speed (mm/min)' to Simply 3D. In Cura, adjust the print speed in ‘Basic > Print Speed (mm/s).
 - Check belts. If the layers continue to shift, check the belts. To do this, simply tension the two belts at the same time. The tension should be the same, if not, tighten the loose belt until the tension is even. Rubber belts stretch over time (you can tell by the way they begin to slip on the pulley) and it's best to replace them with new ones. Too tight belts can also be a problem, but this problem only occurs if you assemble the printer yourself. Printers such as the Prusa i3 have screws that allow you to adjust the tension of the belts.
- Check the pulley. Pulleys are usually connected directly to the stepper motor or to the main pin that moves the print head.
 If you carefully turn the pulley, you will see a buzzard. Twist it to secure the pulley.
 - Check that the studs are clean and grease them. Over time, filament residue sticks to the studs, causing them to have more resistance, which in turn affects the free movement of the head and the displacement of the layers. Clean and oil the studs to fix this problem.
- Bent or misaligned studs. If you notice that the print head is oscillating, a bent pin may be the cause. This can be determined by turning off the printer and moving the print head through the X and Y axes. If you feel resistance, something is wrong. Check if the studs are straight and if so remove them and lay them on a flat surface. If they are bent, you will immediately see it.
Checklist:
- Make sure the printer is on a stable surface.
- Check that the platform is securely fastened.
- Be careful with warped top layers.

- How much to print may be too high for your printer.
- Check belts.
- Check pulley.
- Clean and grease the studs.
- Bent or misaligned studs.
3D printing problem #12: Clogged nozzle
Problem Description0004 You start printing, but nothing comes out of the nozzle. Reloading the thread doesn't help.
Why did the problem occur?
Small pieces of filament stuck in the nozzle after changing the spool, often when the filament breaks. When the new filament is threaded, the pieces of old filament that are left in the nozzle prevent the new filament from being squeezed out.
Also, the problem may be that the plastic has frozen in the nozzle and must be removed manually. Other reasons include: engineering plastics, old or cheap plastics, etc.
Solution
- Use a needle. If you're lucky, cleaning the nozzle will be easy.
 Start removing the filament. Then use the control panel to select “heat up nozzle” and heat up the nozzle by increasing the melting temperature of the cured filament. If you are using Ultimaker 2 go to Maintenance > Heat Up nozzle. For PLA, set the temperature to 220 degrees Celsius. When the nozzle heats up to the correct temperature, use a fine needle to clean the hole (be careful not to burn your fingers). If the nozzle diameter is 4 mm, use a thinner needle.
 - Push the plastic. If the nozzle is still clogged, try pushing through the excess filament with new plastic. Start in the same way as in the previous step, and then remove the Teflon tube from the print head. Heat the hot end to 220 C for PLA and use another filament to push the stuck filament out of the nozzle. As a rule, if the new filament fails to push through the excess, you can manually apply the necessary pressure. But be careful - do not press too hard, because. you can bend the horizontal studs.
- When the end of the nozzle is clean, push the needle into the nozzle and clean it of excess plastic.

- Remove or rebuild the hot end. If after all the manipulations the nozzle remains blocked, you will have to make a small intervention in the structure of the printer and disassemble the hotend. If you've never done this before, describe or take a photo of the hot end to make it easier to assemble it later. Start removing the filament, and then following the printer's manual, disassemble the hot end.
If you're printing with the Ultimaker 2, it's easy enough. When disassembling the hot end, wear heat-resistant gloves, as hotend will be hot. Move the print head to the center of the printer. Disassemble the four screws on the top of the printhead and release the hot end and fans. Increase the temperature of the hot end to 220 C (for PLA) and wait for it to heat up. Then turn off the printer. While holding the fan, use tweezers to remove debris from the nozzle. Use a needle to push debris through and clear excess filament from nozzle. Turn off the printer and let it cool down. When the printer has completely cooled down, start it up with a new spool or filament.
Checklist:
- Warm up the nozzle and clean it with a needle.
- Remove the Teflon tube and try to push the remaining filament through with new filament.
- Take the hot end apart and see if you can manually clear the blockage.
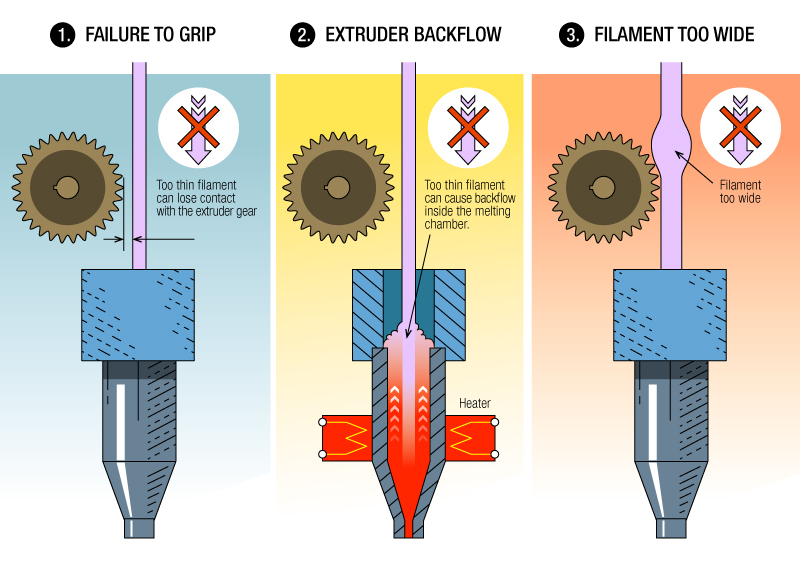
3D Printing Issue #13: Broken Plastic
Problem Description
Plastic spool is still full, filament feed into Teflon tube OK, but nothing coming out of Teflon tube. This problem is often found with printers where the direct filament feed is hidden and it is not always possible to replace what exactly the problem is.
Why did the problem occur?
This problem is quite common and has many causes. The most common are old or cheap filament. Most filaments, such as PLA and ABS, cannot be used for a long time because if they are stored in the wrong conditions (for example, in direct sunlight), it becomes brittle.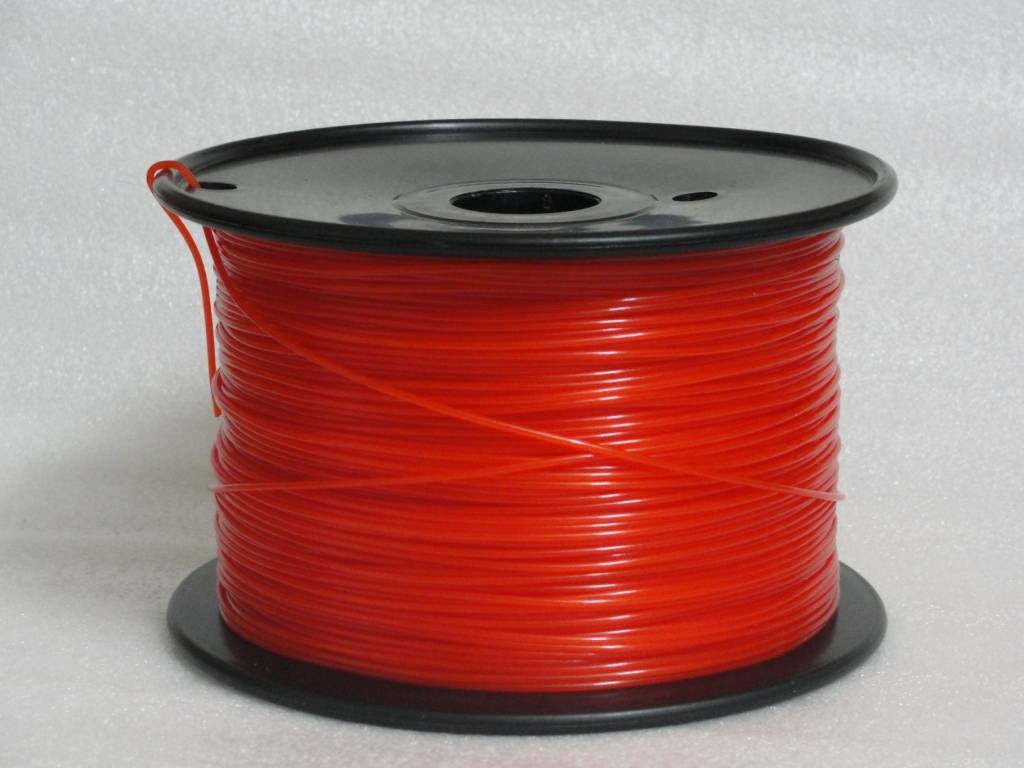 No printer settings can help this.
Another problem is the thread diameter. It may depend on the manufacturer and batch of the product. Sometimes the filament is too tight on the spool, which can cause the filament to break during printing.
Solution
- Remove the filament. First, remove the filament from the printer in the usual way. If you are using an Ultimaker printer, select Maintenance and then Change Material. Because The filament usually breaks in the tube, you have to remove the tube from the extruder and hot end. Then warm up the nozzle to remove excess filament.
- Try another filament. If restarting the filament does not help, try a different filament. Perhaps the old thread is too fragile.
- Release tension (feed pulley). If the new filament breaks, check the tension - the feed pulley on the extruder may be too loose or tight.
- Check nozzle. The nozzle may be clogged and you need to clean it.
- Check flow and temperature. If the problem persists, check the temperature of the hotend. Also check that the filament feed rate does not exceed 100%.
Checklist:
- Check that the filament is not damaged.
- Check filament diameter.
- Adjust the extruder feed pulley.
- Check that the hot end is clean and properly heated.
- Set the feed rate to 100%.
3D printing problem #14: Filament stitching
Problem description
Filament stitching at any stage of printing and with any plastic. As a result, the hotend does not extrude the filament and interrupts the print.
Why did the problem occur?
There are many reasons for this problem, but they are easy to fix (wrong temperature, low voltage, dirty nozzle). As a result of the problems that have arisen, the extruder cannot properly extrude the filament.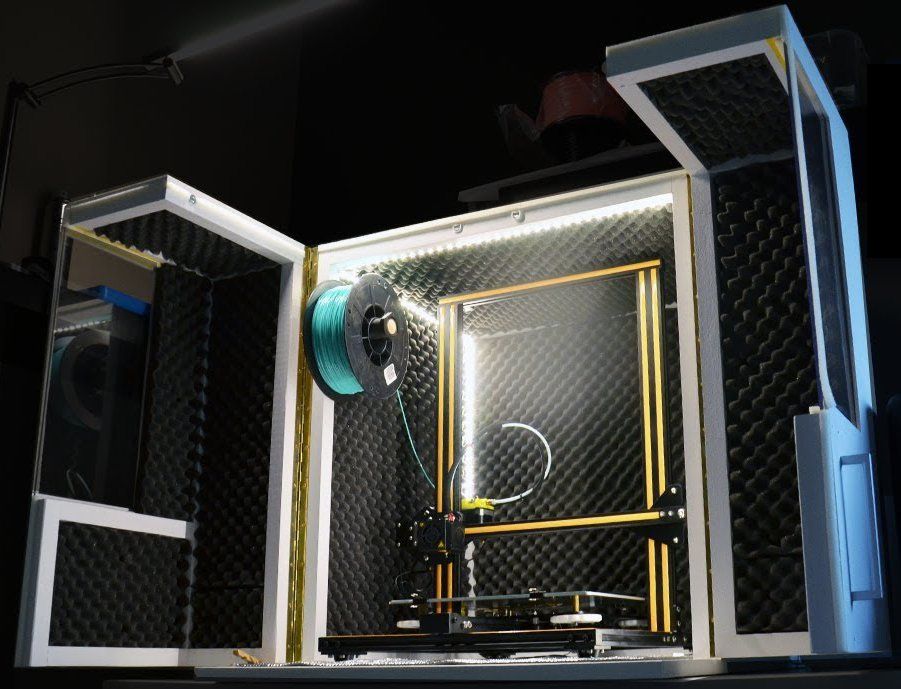
Problem Solving
- Help the extruder push the filament. If the thread has just begun to grind, you can tell by the noise and the appearance of chips from the plastic. Press down to help the thread feed. This often helps to get the feed system working again
- Adjust the tension of the feed pulley. Start by loosening, thread and tighten until it stops slipping. The filament can vary in diameter and although adjustment will remove some of the difference in diameter some filaments require fine adjustment
- Rethread the filament. In most cases, you will need to remove or replace the old filament and re-pass it through the feed system. Once the filament has been removed, cut off the filament that has the seam and re-thread the system. If the filament is cracked, it means that it is no longer usable. Try it again and if it cracks again, it's too brittle and you need a different filament.
- Check hot end temperature.
 If you are using a new filament and the problem persists, check that the temperature setting is correct.
Checklist:
- Help the extruder push the filament.
- Adjust the feed pulley tension.
- Reload the filament.
- Check hot end temperature.
3D printing problem #15: Poor infill
Problem description
The internal structure of the model is missing or poorly printed.
Why did the problem occur?
There are many reasons why the internal structure of the model is not printed. One of the most common is incorrect slicer settings. It could also be a clogged nozzle
Solution
- Check the fill percentage. Check the filling density settings in your slicer. Indicators in the region of 20% are considered normal, if less, there may be problems with printing.
 For larger printers, you can increase this figure.
 - Filling speed. The speed at which the printer fills can affect quality. If the infill looks loose, reduce the print speed.
- Change the fill structure. Most slicers allow you to change the internal structure. You can have mesh, triangular, honeycomb or other content. Try different options.
- Check nozzle. Sometimes, these problems are caused by a clogged nozzle. This may not be noticeable when printing smoother outer elements, as the feed rate is much slower, and when printing internal elements at a high speed, this may affect the reproduction quality.
Checklist:
- Check and adjust fill density.
- Reduce fill rate.
- Try other fill options.
- Check nozzle for cleanliness.
3D Printing Issue #16: See-through internal structure
Description of the issue
Final print looks good but outlines of internal structure are visible through the walls of the print
Why did the problem occur?
The problem occurs because the plastic sticks around the perimeter of the model. This is visible when the printout has thin outlines. Also, the problem may arise due to the fact that the structure of the infill coincides with the perimeter line. However, contour printing is an important part of the printing process that helps the internal structure connect to the external walls. Fortunately, this problem is easy to fix.
Also, the problem may be that you have chosen the wrong wall thickness in relation to the nozzle size you are using. Under normal conditions, the ratio of nozzle size to wall should be directly proportional. If you are using a 0.4mm nozzle, the wall thickness should be a multiple of this value - 0.4, 0.8, 0.12, etc.
Solving the problem
- Check the thickness of the model outlines. Make sure you select the correct model wall thickness, which is a multiple of the nozzle diameter.
- Increase the wall thickness of the model. The simplest solution to this problem is to increase the wall thickness.
 By doubling it, you will correct the defect.
 - Change the print order. Most slicers give you the option to activate infill printing after perimeter printing. In Cura open Expert Settings and in the Infill section check the box next to Infill prints after perimeters. In Simply3D click on ‘Edit Process Settings’, select ‚Layer’ and under ‘Layer Settings’ select ‚Outside-in’ next to ‘Outline Direction’
- Check the printer platform. Check the model and if you notice that the effect is more pronounced on one side than the other, the problem may be platform miscalibration. Recalibrate the platform.
- Use this to your advantage. Depending on the type of model being printed, you can use this problem to your advantage. When you start printing a model whose durability doesn't matter, select Print from Outside-in. if strength is paramount, select Print in Inside-Out and double the wall thickness. The difference is that when printing with Outside-in, you eliminate the possibility of overlapping, which leads to the infill showing through, but this also means that the tightness of the connection between the external and internal structure will be lost
Checklist:
- Check the wall thickness of the model.

- Increase the wall thickness of the model.
- Print infill after perimeter printing.
- Check platform calibration and recalibrate if necessary.
- Use this to your advantage.
3D printing issue #17: Gaps between infill and walls
Issue Description
If you look at the print from above or below, you will see gaps between the infill and the outlines of the print.
Why did the problem occur?
Gaps between the outline and infill used to be a common problem with many printers. Now the printing accuracy has improved, more materials are supported, and the problem does not occur as often. But sometimes when using new materials or not as common as PLA and ABS, the problem still occurs.
Gaps appear because the plastic used to print the infill and outline does not bond, but this is an easy problem to fix. Typically, the fill connection parameter is not set, or is set to 0. This means that the slicer tells the printer that the two elements should not touch.
It could also be that you have set the wrong outline and fill order. If you print the outline first and then the infill, this shouldn't be a problem.
Solution
- Check filler connection. This is one of the most common causes and is easy to fix. In the slicer, select Infill Overlap and increase the value. In Cura this is 15% by default, increase it to 30%. In Simplify3D select Edit Process Settings > Infill > Outline Overlap and increase the value. This setting is directly proportional to the width of the extruder, so the % value will depend on the % width of the extruder. Make sure that after adjusting the parameter, the value does not exceed 50% - this can lead to defects.
- Seal infill before show jumping. If you are printing a model with relatively thin walls, infill jumping may appear. If this happens, try changing the print order of the fill and outline layers.
 In Cura you can tweak this by checking the box 'Infill prints after perimeters
 - Increase hotend temperature. Using some of the latest printing materials such as XT-CF20, increase the temperature of the hot end by 5-10 degrees.
- Slow down the print speed. Printing at high speeds often causes problems if the printer is not perfectly calibrated. If you need to print your model quickly, you can avoid the gap problem by slowing down the print speed of the top layer.
Checklist:
- Check fill connection.
- Print the fill first, then the jumping.
- Increase hotend temperature.
- Reduce the print speed.
3D Printing Issue #18: Non-Manifold Edges
Description of the Issue
Printout features are missing or the final printout looks weak and quality is falling apart. Sections of the printout don't look like the preview, or the final printout has confusing geometric errors.
Why did the problem occur?
This problem often appears in warped or strange (model) seals. Non-manifold edges are sides of the model that only exist in 3D space, not in the physical world. For example, if you have two cubes in the real world, and you try to cross them, then you will fail, because. two solid walls prevent two objects from crossing.
In 3D modeling, you can easily intersect two objects and they will still be two separate objects. The software will also help them cross paths in the virtual world. In order to get two correctly printed objects, you need to connect them so that any internal walls are removed and the object has an undivided internal cavity. Among the common causes is the removal of object surfaces. This way you just get an object with a hole - it may look like an object with 5 sides, but it will only exist in 3D space, because there is no such object in geometry.
You can also see the outer contours in the software, these contours intersect in the same space along two axes. The third axis is the wall thickness and it is symbolic and has no real physical dimensions. When the model is sliced, the slicer algorithm will work correctly and in many cases it will remove holes, however, in complex models, the effect may be different.
Solving the problem
- Use the latest version of the slicer. Most recent software supports auto-correction of non-manifold edges, but it's still best to double-check that the model is properly created and ready to print
- Correct Cura's Horrible setting. Open the Expert Settings tab in Cura and make sure you select Combine everything (Type-A) in the Fix Horrible option
- Fix the ‘ Non-manifold ’ option in Silmplify 3 D . In Process settings, select the Advanced tab and select Heal next to Non-manifold segments.
- Use layer view. If your slicer uses layer view, check the model to determine where the problem is.
- Use the software to correct the problem.
 One of the easiest ways to fix this problem is to use custom software such as Blender or Meshmixer. Both programs will help you quickly identify model problems and fix them before slicing.
 - Connect objects. It's better to fix the 3D model before you send it to the slicer. To do this, make sure there are two objects in the model that intersect or overlap. Select the desired Boolean function to intersect, merge, or split elements.
Checklist:
- Update the slicer to the latest version
- In Cura, fix the Fix Horrible setting
- In Simplify3D, fix the Fix Non-manifold setting
- Use the preview of the layers to fix the problem.
- Use Blender or Meshmixer to fix problems
- Merge objects.
3D Printing Issue #19: Model Sagging
Issue Description
You load the model into the slicer and everything looks fine. You start typing and find that some elements of the model print fine, while other parts look absolutely ugly. Model sagging is a typical rookie mistake. But the strangest thing is that even experienced professionals often encounter the problem of sagging and do not know how to deal with it.
Why did the problem occur?
Fusion printing requires each layer to be superimposed on the other. Naturally, if your model has an element with nothing under it, the filament will be extruded into the air and end up sagging or forming an incomprehensible mess.
Actually, the slicer should prevent this. But in most cases, the slicer will just continue to print without warning that the particular model needs more support.
Troubleshooting
- Additional support. The easiest and fastest way to solve the problem is to add support for sagging elements. With the help of a slicer, this can be done very quickly. In Simplify3D, click Edit Process Settings > Support > Generate support material and select quantity, schema, and settings.
 In Cura, just click Support type in Basic settings.
 - Create support in the model. The support created by the slicer can be intrusive, so creating your own support in the model is a good idea. It takes some skill, but the result is worth it.
- Create a supporting platform. When you print a figure, the long distance movement of the print head causes problems. Using support from the platform can also create problems. For high supports that are fragile and easily removed, this distance is the root cause of all problems. Creating a solid block or wall (support) under overhanging objects (like under the arms on the model) and creating less support between the arm and the block (the main element of the printed model) can be a good solution.
- Tilt the walls. Tilt the wall at a 45º angle so that it serves as a support for itself. At the same time remove any additional support.
- Print the element piece by piece. Another way, instead of printing the whole element at once, is to divide it into several elements.
 In some models, you can turn over the element whose sags and make it the basis. The only thing you need to find is a way to glue all the elements together.
Checklist:
- Add support.
- Add support to the model.
- Create a supporting platform.
- Tilt the walls.
- Divide the model into several small pieces.
3D Printing Issue #20: Model Skewed
Issue Description Instead of being printed flat, the top borders are printed at an angle, but not all the way around the model. The angle of inclination can change on different layers.
Why did the problem occur?
The cause of this problem is very simple - one of the pulleys that attach to the stepper motor is loose (loose) or one of the belts frays something and prevents the head from moving completely. To correct this error, you need to make sure that the pulleys are securely fastened and the goosenecks are fixed in the right places.
Although this is a quick and easy way to fix the problem, finding and tightening the bellows is not so easy. Determining which of the pulleys is the problem and getting to it can take a lot of time.
Solution
- Check X and Y axes. If your printout is skewed left or right, the problem is in the x-axis. If forward or backward, the problem is in the y-axis. Once you have determined which way your printout is skewed, check the belts and pulleys. If you are using printers such as the PRUSA i3 this will be fairly easy as the steppers are attached to the main drive belt. For other printers, this may take longer.
- Check that the belts are not frayed . Inspect each belt to make sure they do not fray/slide on the printer and its parts. Also check that you have aligned the straps correctly. If one of the belts is at an angle, this may cause a problem.
- Tighten the stepper motor pulley. Once you have determined which axle has the problem, use a hex wrench and tighten the pulley buckle that attaches to the motor.
Learn more