Raspberry pi camera 3d scanner
OpenScan DIY 3D scanner works with Raspberry Pi, DSLR, or smartphone cameras
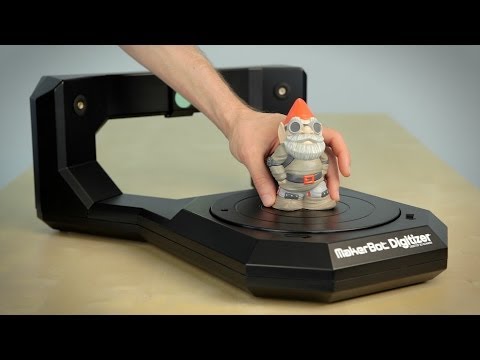
OpenScan is an open-source DIY 3D scanner that relies on Photogrammetry and works with Raspberry Pi camera modules, compatible ArduCam modules, as well as DSLR cameras, or the camera from your smartphone.
The open-source project was brought to my attention after I wrote about the Creality CR-Scan Lizard 3D scanner. The OpenScan kits include 3D printed parts such as gears, two stepper motors, a Raspberry Pi shield, and a Ringlight module to take photos of a particular object from different angles in an efficient manner.
OpenScan ClassicThe OpenScan Classic kit above allows for 18x18x18cm scans and comes with the following components:
- 1x Nema 17 Stepper Motor (13Ncm)
- 1x Nema 17 Stepper Motor (40Ncm)
- 2x A4988 Stepper driver
- 1x Power Supply 12V/2A (5.5-2.5mm plug)
- 1x Optional Bluetooth remote shutter control for smartphones
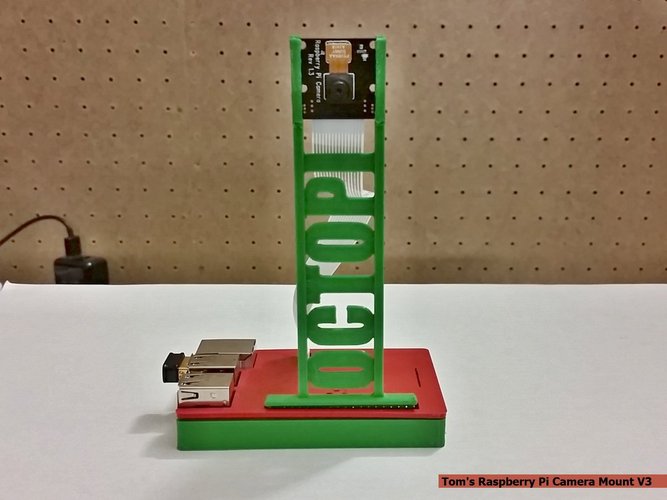
If you’re going to use the Raspberry Pi as shown on the right side of the image, you’ll also need
- Raspberry Pi 3B+ SBC or compatible,
- 8MP Raspberry Pi Camera 8MP with 15cm ribbon cable (or compatible like Arducam 16MP)
- 1x Pi Shield (either pre-soldered or solder-yourself)
- 1x Pi Camera Ringlight (optional but highly recommended), pre-soldered or solder-yourself
- 8x M3x8mm, 10x M3x12mm, 8x M3 nuts, 50x6mm steel rod, 2x 1m stepper motor cable
Alternatively, you could use a smartphone or a compatible DSLR camera with a ring light mounted on a tripod. There used to be an Arduino kit, but it has now been deprecated.
An alternative design is the OpenScan Mini pictured above with the Raspberry Pi camera and ring light attached to it, and suitable for scans up to 8x8x8 cm.
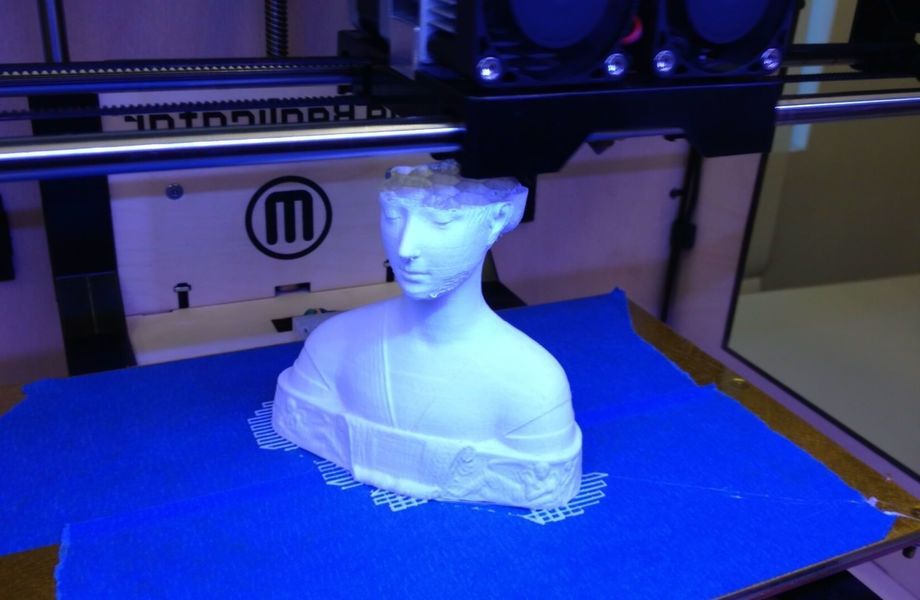
The system would then take photos from different angles under the same light conditions thanks to the ring light. Depending on the complexity of the object, you may have to take hundreds of photos. The photos can be imported to Photogrammetry software for processing. Open-source Photogrammetry programs include VisualSFM that’s fast but only outputs point clouds, as well as Meshroom and Colmap with mesh and texture support, but you’ll need a machine equipped with a CUDA-capable GPU for both. Meshroom is the most popular and actively developed.
There’s also the OpenScanCloud that will process the photo in the cloud with minimum user intervention. It’s free thanks to a donation, but usage is limited, and whether it can stay up and running may depend on the continuous support from donations. Here’s a short demo of how this all works.
You’ll find the latest Python software for Raspberry Pi and a custom Raspberry Pi OS image on Github, and 3D files for the scanner and Raspberry Pi shield on Thingiverse.
The easiest way to get started would be to purchase one of the kits directly from the project’s shop for 107 Euros and up. Note that a complete kit with pre-soldered boards, a Raspberry Pi 3B+, and an Arducam 16MP camera module goes for around 298 Euros including VAT.
It’s also possible to use photogrammetry without a kit, for example for larger objects, by simply taking photos of the object by yourself, but results can be mixed as found out by “Making for Motorsport” when comparing CR-Scan Lizard 3D scanner with photogrammetry using only a DSLR camera. It should be noted that both methods also required editing of the 3D model to remove “dirt” and adjust some shapes.
Jean-Luc Aufranc (CNXSoft)
Jean-Luc started CNX Software in 2010 as a part-time endeavor, before quitting his job as a software engineering manager, and starting to write daily news, and reviews full time later in 2011.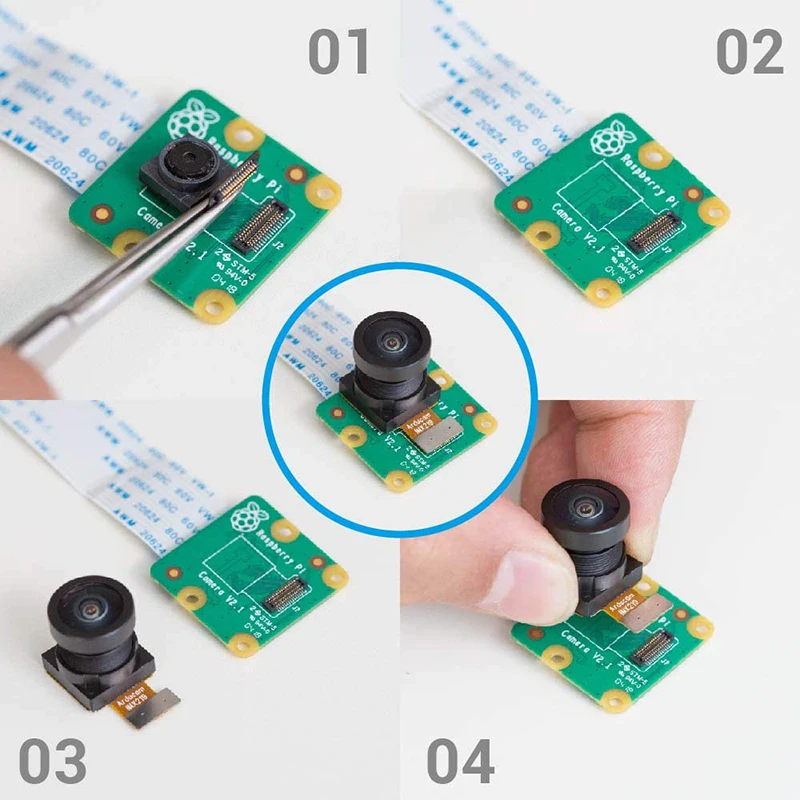
Autofocus Pi Cameras for DIY Doc/Book/3D Scanning & OCR Applications
Published by Lee Jackson on
Low Accuracy, Read Rate, and Other Application-Wise Disadvantages of Fixed-Focus Cameras
Here are some stats about the minimum object distances (MOD) of the Official Pi cameras:
| Camera | MoD |
|---|---|
| Camera Module V1 (5MP) | 50 cm ~ ∞ |
| Camera Module V2 (8MP) | 20 cm ~ ∞ |
| High Quality Camera (12.3MP) | N/A |
You don’t have to build a camera project with Pi to learn that the things you are trying to capture can sometimes be out of focus. It’s a simple fact about fixed-focus cameras, and perhaps one of the most inconvenient problems makers have with the official RPI camera boards.
The workarounds are awful, not everybody is skilled enough to make manual focus adjustments to the Raspberry Pi V1 and V2 modules, doing so means you are highly likely at risk of both damaging the module and having to make re-adjustments for other use cases. With the HQ camera module offering interchangeable lens options, and the addition of Arducam’s huge selection of varifocal lenses, fixing a blurry focus is as simple as rotating the focal length ring, you can easily get any desired MOD out of them and for your projects.
However, this is unfortunate yet true: there are situations where neither fixed nor adjustable focus cameras will work.
A typical example can be where if you use OpenCV with Raspberry Pi to build image classification/OCR/etc projects that take live image data from a Pi Camera, and what you are trying to capture comes really close and the object-to-camera distance shifts uncontrollably, you will either have to manually refocus the camera before taking each photo or have to deal with fuzzy images.
And the impacts of poor quality captures are fatal: if you are using pre-trained recognition models, the read rate and accuracy will notably decrease. On the other hand, if you are training your own models with data sets like these, you are going to have so much trouble through the inference/training process and eventually end up with an unusable model.
The one important thing everybody can agree on is that we want neither low data throughput nor unsatisfactory performance with these Pi cameras, that’s why Arducam has come to the rescue for these problems, once again.
How Autofocus Cameras Can Help
Arducam fathered autofocus cameras for the Raspberry Pi community.
Programmable/Automatic focus is the game-changer mostly because:
- You do not need to make manual focus adjustments anymore, good for when you have to put your Pi and camera into some hard-to-reach places.
- Refocusing takes only lines of code, you can still get sharp shots even if the distance between your target and your camera changes a lot.
- As long as it’s within the camera’s MOD, you can safely move your camera around any target and always keep it in focus.
As said, the Arducam autofocus cameras can make the Raspberry Pi more adaptable for the type of applications that are affected by focusing issues.
DIY Document and Book Scanners
DIY book scanners with Raspberry Pi are one of the best ways to leverage an autofocus camera. Instead of using CHDK to control DSLR cameras through Pi Scan, you can effortlessly add a pair of the latest Arducam autofocus cameras to your own DIY scanning rigs like the Archivist Quill to get higher quality images. Unlike DSLRs, they cost less and draw less power.
Aside from book scanning, there are plenty of scanning tools in Linux that can turn your Pis into nifty document scanning machines as well.
Optical Character Recognition (OCR) and Verification(OCV) Cameras
Using a Raspberry Pi with an autofocus camera and tesseract, the famous open-source OCR engine, you can create an OCR camera that extracts and reads alphanumerics off any captured images, and the higher the resolution, the better the result. Creative folks can take the OCR output and use TTS (text-to-speech) to turn it into audio to make it more applicable for other ways of integrations.
In some industrial applications, autofocus cameras are built into camera systems that make use of machine vision for Optical Character Verification (OCV) which examines boxes/bottles/etc in production or assembly lines for labeling defects and printing issues.
Raspberry Pi 3D Scanners and Photogrammetry
Because of the limitations on the native Pi cameras, 3D scanning on Raspberry Pi hasn’t gotten so far with full automation, and big scanners like Pi3DScan still use IMX219 cameras in their setups.
Open Scan has made the big move, the project utilizes a Raspberry Pi and the 8MP camera module V2 to take hundreds of photos of an object from various angles, turns them into point clouds, and reproduces a 3D model of that object. But the original V2 is a fixed-focus camera, which means all the focusing issues with close-range captures still exist and can be terrible enough to ruin your 3D models.
Though there have been experiments with the High Quality cameras, it’s still far away from perfect. Arducam is the only company that gets to the bottom of these questions and finds that the right answer should be autofocus cameras.
With our solutions, you can finally put an end to all the inconveniences and gain performance boosts to produce better results for Raspberry-Pi-based photogrammetry applications.
Pivariety 16MP and 21MP Camera Modules for Raspberry Pi
Our Pivariety project introduces more image sensors to Raspberry Pi and takes advantage of its own ISP tuning algorithms to bring you superior image quality and native-grade support.
The 16MP and 21MP autofocus cameras can offer:
- Native ISP tuning (AE, AWB, and AF) support for highest possible qualities.
- 2 ~ 3 times higher resolution than the popular V2 and HQ modules.
- Way more compact than an HQ camera and lens set.
- Faster autofocus/refocus speed with MODs from 50 mm to infinity.

OpenScan DIY 3D scanner works with Raspberry Pi, DSLR or smartphone cameras. — CNXSoft - Android Set-Top & Embedded Systems News
OpenScan is an open source homemade photogrammetry-based 3D scanner that works with Raspberry Pi camera modules, compatible ArduCam modules, as well as DSLR cameras or your smartphone camera.
After we wrote about the Creality CR-Scan Lizard 3D Scanner, an open source project caught our attention. OpenScan kits include 3D printed parts such as gears, two stepper motors, a Raspberry Pi screen, and a Ringlight module for efficiently photographing a specific object from different angles.
OpenScan ClassicThe above OpenScan Classic kit allows you to scan 18x18x18 cm images and includes the following components: A4988
If you are going to use Raspberry Pi as shown on the right side of the picture, you will also need
- Raspberry Pi 3B+ SBC or compatible,
- 8MP Raspberry Pi Camera 8MP with 15cm ribbon cable (or compatible with e.
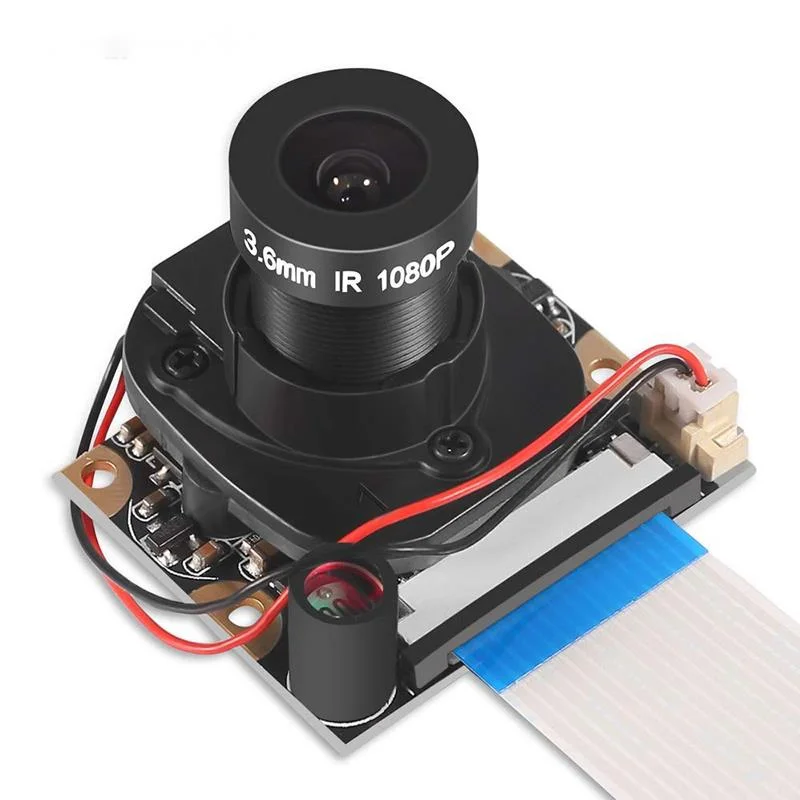 g. Arducam 16MP)
 - 1x Pi Shield (either pre-soldered or self-soldered) )
- 1x Pi Camera ring light (optional but highly recommended), pre-soldered or soldered by yourself
- 8xM3x8mm, 10xM3x12mm, 8x M3 nuts, 50x6mm steel rod, 2x 1m stepper motor cable
Alternatively, you can use a smartphone or a compatible ring-illuminated DSLR mounted on a tripod. There used to be an Arduino kit, but it's outdated now.
An alternative design is the OpenScan Mini pictured above with a Raspberry Pi camera and a ring light suitable for scanning up to 8x8x8 cm.
The system will then take photos from different angles under the same lighting conditions thanks to the ring light. Depending on the complexity of the property, you may need to take hundreds of photographs. Photos can be imported into photogrammetry software for processing. Open source photogrammetry programs include VisualSFM, which is fast but only outputs point clouds, and Meshroom and Colmap with mesh and texture support, but both require a machine equipped with a CUDA capable GPU. Meshroom is the most popular and actively developing.
There is also OpenScanCloud, which will process photos in the cloud with minimal user intervention. It's free thanks to donations, but use is limited and whether it can stay operational may depend on continued support from donations. Here's a short demo of how it all works.
Find the latest Raspberry Pi Python software and custom Raspberry Pi OS image on Github, and Raspberry Pi scanner and screen 3D files on Thingiverse.
The easiest way to get started is to buy one of the kits directly from the project store for 107 euros and up. Please note that the complete kit with pre-soldered boards, Raspberry Pi 3B+ and Arducam 16MP camera module costs about 298 euros including VAT.
It is also possible to use photogrammetry without a kit, e. g. for larger objects, by simply photographing the object yourself, but the results can be mixed, as Build for Motorsport found out when comparing the CR-Scan Lizard 3D scanner to photogrammetry using only a DSLR camera . It should be noted that both methods also required editing the 3D model to remove "dirt" and adjust some of the shapes.
We express our gratitude to the source from which the article was taken and translated, the site cnx-software.com.
You can read the original article here.
Free STL file OpenScan - 3D Scanner
Sitting Dog - 3D Scan
Free
Dreaming Angel - 3D Scan
Free
Cute Bunny - 3D Scan
Free
Macaw parrot - 3D Scan
Free
Mother Mary Statue 2 (3D Scan)
Free
Mother Mary Statue - 3D Scan
Free
German Sheperd - 3D Scan
Free
Sleeping Angel - 3D Scan
Free
The best files for 3D printers in the Tools category
Grinder Rick and Morty
2,50 €
Tool Holder for Socket Wrench Set 12pcs 1/4" with Extension Bar and Sockets for Wall Mount 001
Free
Saddle mount for "Smart LED / Planet Bike" lights
Free
Multicolor Thread Configuration Disc: MCFCD
Free
solder smoke extraction - Boo - LED Eyes
0,50 €
Parts Bike carrier for motorhomes
Free
Face Shield - Minimal Assembly - COVID-19
Free
HODOR DOOR STOP - GAME OF THRONES
Free
Bestsellers in the Tools category
Tool holder for 3D printer V3.
 0
0 1.03 €
INDICATOR FOR BETTER BED LEVELING FOR ENDER 3 V2
2,80 €
PET-Machine, make your own plastic bottle filament at home!
15 €
ENDER 3 S1/PRO SPRITE, V3 AIR DUCT 5015 OR 4020, LED strip
€2.68 -twenty% 2.15 €
Case for Chill Buddy lighter
0,93 €
209 Flash Bang / Ukrainian Hot Potato
0.94 €
Bambu AMS Stand for placing the raised 2nd block behind
1.15 €
Display holder FLSUN v400
€9.99 -fifty% 4.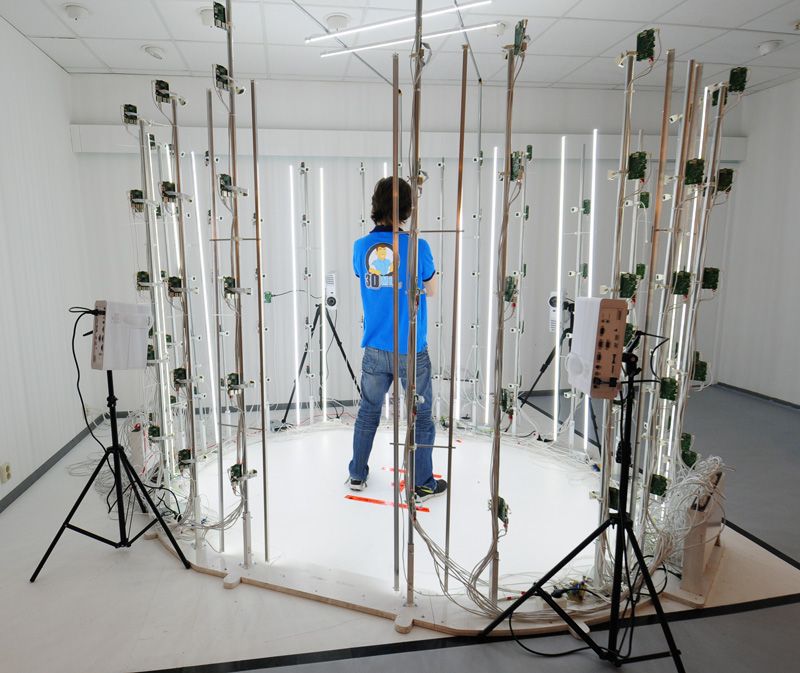 99 €
99 €
Paint stand with scissors
5.17 €
3D printed wave transmission (harmonic drive)
4.99 €
Quick print stackable parts containers / storage boxes
2.91 €
PRECISE DIAL INDICATOR 3D PRINT DIY
1.91 €
Spartan pen holder
1,80 €
telephone ring holder
0,90 €
ENDER 3 S1/PRO SPRITE, HOTEND 4020 OR 5015 FAN PROBE NO Y OFFSET
€2.28 -twenty% 1.82 €
ENDER 3 S1/S1 PRO COIL HOLDER AND DEPORTED COIL
€2.
Learn more