How to 3d print small objects
How to 3D Print Small Plastic Parts Properly – Best Tips – 3D Printerly
Printing small parts on a 3D printer can be tricky if you don’t have the right advice or tips to get it done. There are some useful things that you should know to 3D print small objects so I decided to write about them in this article.
To 3D print small plastic parts, use a good enough layer height like 0.12mm along with a 3D printer that can handle lower layer heights. Printing multiple objects at a time helps with cooling to reduce warping. You can 3D print calibration models like the 3D Benchy to dial settings in, as well as a temperature tower.
This is the basic answer, so keep reading through this article to learn the best ways to 3D print small parts.
Best Tips for 3D Printing Small Parts
Having established the fact that 3D printing small parts can be tricky without the right tips to follow, I have come up with a list of best tips you can apply in 3D printing small parts and they include;
- Use a good layer height
- Use 3D printers with low resolution
- Print multiple objects at a time
- Use the recommended temperature and settings for your material
- 3D print a Benchy to test the quality of small parts
- Use adequate supports
- Remove supports carefully
- Use a minimum layer time
- Implement a raft
Use a Good Layer Height
The first thing you want to do for 3D printing small parts is to use a good layer height that brings out the quality and detail you are looking for. It’s quite difficult to 3D print small parts so using a layer height of around 0.12mm or 0.16mm should work quite well in most cases.
The general rule for layer heights is to fall between 25-75% of your nozzle diameter, so with a standard 0.4mm nozzle, you can comfortably use a 0.12mm layer height, but you may have trouble with a 0.08mm layer height.
The reason you are seeing the layer heights in 0.04mm increments is because these are the optimal values based on the way 3D printers move around, especially with the stepper motor.
You’ll usually get better quality using a 0.12mm layer height rather than 0.1mm layer height due to this. Even Cura defaults the layer heights to these values. For a better explanation of this, check out my article 3D Printer Magic Numbers: Getting the Best Quality Prints.
So try different layer heights for your small 3D prints and see what quality you are okay with. The lower the layer height or higher the resolution, the longer these prints will take, but with smaller prints, the time differences should be too significant.
If you do need a layer height below 0.12mm, make sure to change your nozzle diameter for something that puts it in the 25-75% category like a 0.2mm or 0.3mm layer height.
You can get the LUTER 24 PCs Set of Nozzles for a pretty good price, so feel free to check that out.
It comes with:
- 2 x 0.2mm
- 2 x 0.3mm
- 12 x 0.4mm
- 2 x 0.5mm
- 2 x 0.6mm
- 2 x 0.8mm
- 2 x 1.0mm
- Plastic storage box
Check out the video below that shows you can still get really small 3D prints with a 0.4mm nozzle.
Use 3D Printers with Low Resolution
Some 3D printers are built better than others when it comes to quality and high resolutions.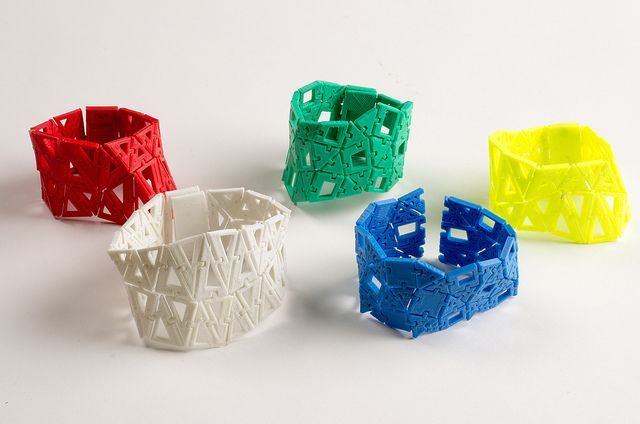 You may have seen a specification on your 3D printer which details how high the resolution goes. Many filament 3D printers can reach 50 microns or 0.05mm, but some cap out at 100 microns or o.1mm.
Using a 3D printer that can handle a higher resolution is going to be better for producing smaller parts, but it’s not required to get the parts you may want. It really depends on what level you are trying to achieve.
If you are looking for really small parts with high resolution, you may be better off with a resin 3D printer since they can reach resolutions of just 10 microns or a 0.01mm layer height.
You can produce great small 3D prints with a filament printer, but you won’t be able to get the same detail and quality from a great resin 3D printer.
A great example of just how small you can 3D print with a resin printer is this video by Jazza.
Print Multiple Objects at a Time
Another valuable tip you should consider when printing small parts is to print more than one part at once.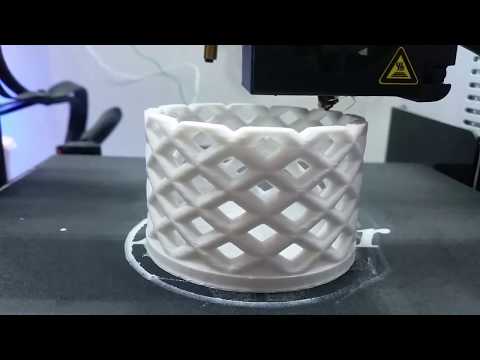 This tip has worked for other users out there.
Printing multiple parts together ensures that each part gets enough time for each layer to cool, and reduces the amount of heat that is radiating on the part. You don’t even have to duplicate the object, and can just print something basic like a square or round tower.
Rather than your print head going straight to the next layer and not allowing a small layer to cool, it will move over to the next object on the build plate and complete that layer before moving back to the other object.
The best examples are usually something like a pyramid, which gradually decreases the amount needed to extrude as it gets to the top.
The freshly extruded layers won’t have a lot of time to cool down and harden to form a solid foundation, so having multiple pyramids in one print would mean it has time to cool when it travels to the second pyramid.
It’s going to increase printing time but really not as much as you may think. If you look at the printing time for one object, then input multiple objects into Cura, you won’t see much of an increase in time overall since the print head moves fairly quickly.
On top of this, you should be getting better quality smaller 3D prints by doing this.
A standard 3D Benchy showed an estimated printing time of 1 hour and 54 minutes, while 2 Benchys took 3 hours and 51 minutes. If you take 1 hour and 54 minutes (114 minutes) then double it, that would be 228 minutes or 3 hours and 48 minutes.
The travel time between the 3D Benchys would only take an extra 3 minutes according to Cura but do check for timing accuracy.
If you do duplicate models, make sure to place them close to each other to minimize stringing.
Use the Recommended Temperature & Settings for Your Material
Each material used in 3D printing has its own guidelines or requirements which are meant to be followed when using that material. You want to ensure you get the right requirements for the material you are printing with.
Most guidelines or requirements of materials are mostly found on the package used in sealing the product.
Even if you have been using a PLA from one brand and you decide to buy PLA from another company, there will be differences in manufacturing which mean different optimal temperatures.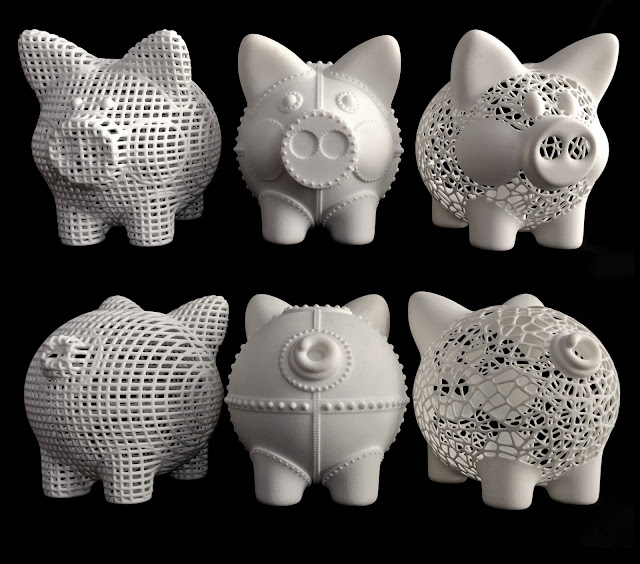
I highly recommend that you 3D print some temperature towers to dial in the best printing temperature for your small 3D printed parts.
Check out the video below to learn how to create your own temperature tower and actually get the optimal temperature settings for your filaments.
It’s basically a temperature calibration 3D print that has multiple towers where your 3D printer will automatically change the temperature so you can see the quality differences from temperature changes in one model.
You could even go a step further and make sure to 3D print small temperature towers so it better mimics the type of 3D prints that you plan to make.
3D Print a Benchy to Test the Quality of Small Parts
Now that we have our temperature dialed in, one key thing that I’d recommend you do if you want to 3D print small parts accurately is to do a calibration print like the 3D Benchy, known as the ‘torture test’.
The 3D Benchy is one of the most popular 3D prints out there for a reason since it can help you assess the performance of your 3D printer, easily downloadable from Thingiverse.
Once you’ve dialed in your optimal 3D printing temperature, try to create a few small 3D Benchys within that optimal temperature range and see what works best for surface quality and features like overhangs.
You can even 3D print multiple 3D Benchys to have a better replication of what you will be doing to get the best small plastic 3D printed parts.
It really is all about testing with 3D printing. One user found that they needed lower temperatures than usual for small parts. They tried 3D printing a Benchy and found that higher temperatures would lead to the hull sometimes deforming and warping.
Below is a 3D Benchy scaled down to 30%, only taking 10 minutes to 3D print at a 0.2mm layer height.
You want to use this as a benchmark for how small you want your 3D prints and to see just how well your 3D printer can perform with models that size.
You may end up having to change out your nozzle and use a lower layer height, or to change printing/bed temperatures, or even cooling fan settings. Trial and error is a key part of 3D printing small models successfully, so this is one way you can improve your results.
Use Adequate Supports
There are some models that may require that you print some parts thin and small. You may also have some models that are required to be printed small. Small or thin print parts often need to be adequately supported.
With filament printing, small parts are going to have difficulty being 3D printed without a good foundation or support holding it up. Same with resin printing since there are suction pressures that can cause thin, small parts to break off.
Getting the right placement, thickness, and number of supports for smaller models is important.
I’d highly recommend learning how to use custom supports to really dial in the perfect number of supports and size of supports for your small models.
Remove Supports Carefully
Supports are definitely essential structures that are needed while 3D printing small parts. Getting them off the prints is one thing you want to do with full attention and care. If support removal is not done the right way, it can potentially destroy the prints or even break them apart.
The first you want to do here is figure out the exact points where the support is attached to the model. When you analyze this, you have set the paths straight for yourself and you will have minimal issues detaching the supports from the prints.
After identifying this, pick up your tool and start from the weaker points of the supports as these are easy to get out of the way. You can then go for the larger sections, carefully cutting so as not to destroy the print itself.
Removing supports carefully is a great tip you want to look out for when it comes to 3D printing small parts.
I’d recommend getting you a good post-processing kit for 3D printing like the AMX3D 43-Piece 3D Printer Tool Kit from Amazon. It contains all sorts of useful accessories for proper print removal and clean up such as:
- A print removal spatula
- Tweezers
- Mini file
- De-burring tool with 6 blades
- Narrow tip pliers
- 17-piece triply safety hobby knife set with 13 blades, 3 handles, case & safety strap
- 10-piece nozzle cleaning set
- 3-piece brush set with nylon, copper & steel brushes
- Filament clippers
This would be a great addition for 3D printing small parts and minimizing damage, while increasing ease of use.
Use a Minimum Layer Time
Small 3D printed parts have a tendency of sagging or warping if there is not enough time for the freshly extruded layers to cool down and harden for the next layer. We can fix this by setting a good minimum layer time, which is a setting in Cura that will help you prevent this.
Cura has a default minimum layer time of 10 seconds which should be a fairly good number to help layers cool. I’ve heard that even on a hot day, 10 seconds should be enough.
In addition to this, using a good cooling fan duct to help blow cool air on the parts is going to help these layers cool down as soon as possible.
One of the most popular fan ducts out there is the Petsfang Duct from Thingiverse.
Implement a Raft
Using a raft for small 3D prints helps with adhesion so the models stick to the build plate a lot easier. Getting small prints to stick can be difficult because there is less material to make contact with the build plate.
A raft definitely helps create more contact area, leading to better adhesion and stability throughout the print. The usual “Raft Extra Margin” setting is 15mm, but for this small 30% scaled 3D Benchy, I reduced it to just 3mm.
The “Raft Air Gap” is how much of a gap the raft has with the actual model, so you can test this value to see if the print is easy to remove without damaging the model, or whether you have to increase this value so it’s easier to remove.
Since the raft is touching the build plate, it reduces warping in the actual model itself, so it’s a great foundation to take the heat, resulting in a better quality small 3D print.
How to 3D Print with a Small Nozzle
3D printing with a small nozzle can be challenging in some cases, but once you understand the basics, it isn’t too difficult to get some great quality prints.
The 3D General created the video below detailing how he 3D prints with extremely fine nozzles successfully.
As mentioned before, you can get yourself the LUTER 24 PCs Set of Nozzles to get a range of small and large nozzles for your 3D printing journey.
He talks about how using direct gear extruders are better for 3D printing with these smaller nozzles, so I’d recommend going for that upgrade for the best results.
You can’t go wrong with the Bondtech BMG Extruder from Amazon, a high performance, low weight extruder, that improves your 3D printing.
You probably want to test out different printing speeds to see the effects on surface quality. I’d recommend starting low at around 30mm/s, then increasing that to see what difference it makes.
Line width is also a crucial part of printing with small nozzles. Using a smaller line width can help with printing more detail, but in many cases, using a line width the same as the nozzle diameter is recommended by most users.
Default printing speeds may cause trouble with the flow of material through the extruder. In this case, you can try decreasing the speed to about 20-30mm/s.
Proper calibration of your 3D printer and nozzle is required when printing with small nozzles, so attention to detail is very important.
You definitely want to calibrate your e-steps for the best results.
Best Cura Settings for Small Parts
Getting the best Cura setting can be quite a task if you are too familiar with the slicing software. To find the best setting for your Cura slicing software, you may have to start with the default setting and test each until you find the one that gives you the best result.
However, here is the best Cura setting for small parts which you can use with your Ender 3
Layer Height
A layer height between 0.12-0.2mm should work great with a 0.4mm nozzle for smaller parts.
Printing Speed
Slower printing speeds usually brings better surface quality, but you need to balance this with the printing temperature so it doesn’t overheat. I’d recommend going with a printing speed of 30mm/s to start with and increasing it in 5-10mm/s increments to find a good balance of quality and speed.
Fast speeds aren’t too important with small parts since they are relatively quick to make.
Printing Temperature
Follow your brand’s recommendation for printing temperatures at first, then get the optimal temperature by using a temperature tower and seeing which temperature gets the best results.
PLA has a usual printing temperature between 190-220°C, ABS 220-250°C, and PETG 230-260°C depending on the brand and type.
Line Width
In Cura, the line width default setting is 100% of your nozzle diameter, but you can go up to 120% and see if you get better results. In some cases, people go up to 150% so I’d recommend doing your own tests and see what works best for you.
Infill
The best recommendations for infill are to use 0-20% for non-functional parts, 20%-40% infill for some extra durability, while you can use 40%-60% for heavy-use parts that may go through a significant level of force.
How to Fix Small 3D Printed Parts That Don’t Stick
One of the issues which you may face while 3D printing small parts is that they have the potential to fall off or not stick to the build plate. Here are some tips which you can try to potentially fix this issue if you encounter them.
- Use a raft
- Increase the bed temperature
- Make use of adhesives such as glue or hairspray
- Lay down tapes like Kapton tape or Blue Painter’s Tape
- Ensure that the filament is completely dried of moisture by using a Filament Dryer
- Get rid of dust by cleaning the bed surface
- Level the bed
- Try changing the build plate
The first thing I’d do is implement a raft so there is more material to stick to the build plate. Then you want to move onto increasing the bed temperature to the filament is in a more adhesive state.
You can then use solutions like glue, hairspray, or tapes to stick on the build plate to increase adhesion for smaller parts.
If these tips aren’t working, then you want to look at your filament and make sure it’s not old or filled up with moisture which can affect the printing quality and adhesion to the bed.
The bed surface can start to gather up dust or grime over time so definitely clean your bed regularly with a cloth or napkin, making sure not to touch the bed surface with your fingers.
Leveling the bed is very important also, but not so much for smaller parts.
If none of these work, it may be issues with the build plate itself, so changing over to something like a PEI or glass bed with an adhesive should do the trick
The best tips for 3D printing small objects
3D Learning Hub
See all categories
Contents:
- Introduction
- Is 3D printing beneficial for manufacturing small parts?
- Our top 5 Tips for 3D printing small objects
- Get your small object 3D printed right now
Introduction
Creating small objects can be tedious, arduous and time-consuming. Why bother when you can 3D print them? Additive Manufacturing has numerous appliances and is not limited only to large scale. With our best tips for 3D printing small objects, you will successfully improve your 3D model and get your parts 3D printed without any issues.
With our ultimate guide, you will learn about the most important factors influencing the 3D printing process. We won’t focus only on the manufacturing of your product, but also on the correct preparation of the STL files, which is essential for your 3D design to be printed correctly. We will go over the crucial elements of both 3D modeling and 3D printing. Follow the guide.
Is 3D printing beneficial for manufacturing small parts?
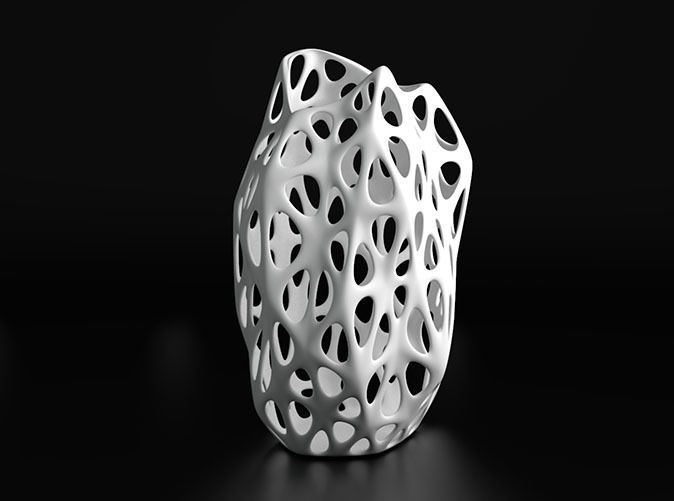
There are several reasons to choose 3D printing over traditional manufacturing methods. First of all, 3D printing gives you absolutely new design freedom. Thanks to Additive Manufacturing you can reach a level of complexity that was not possible before. Also, your 3D printed parts can be edited on the inside, giving you lightweight but durable structures.
3D printing also operates on layers and the thickness of those depends on the technology you use. This factor gives you more flexibility and helps you to find the most suitable 3D method for your needs. You might need your parts to be stronger, with better mechanical properties, or you might be looking for more subtle and decorative characteristics. Whatever your choice is, keep on reading to learn all the necessary requirements for the perfect 3D print.
Our top 5 Tips for 3D printing small objects
In this chapter, we will go over our best tips and tricks to achieve the perfect 3D print. Starting with the correct STL files preparation, we will move on to the accuracy of your 3D models, then we will go over design guidelines and finally, we will talk about the layer height. We will also advise you on the best 3D printing technology for each type of materials. Let’s get started!
Realistic and functional model is the key
Even before we talk about the properties of 3D printers which are one of the most important factors, we need to start with how to 3D model your objects. First of all, you need to make sure your 3D model is precise. You can’t have polygons, walls or faces missing as that will create a hole in your 3D model and we will not be able to print it.
It’s essential to understand that the 3D model has to be realistic after all the 3D design on your computer will become an actual object and it has to meet all the requirements that any object produced with other technologies. Your part has to actually be functional and in that case, 3D printing is no different from CNC or traditional foundry. 3D printing won’t break the laws of gravity, however, it will definitely be able to manufacture your models with high precision and level of detail.
Respecting the guidelines
To give you the best 3D printing experience, you can find the most important information on each page of our 3D printing materials. The characteristics of materials are different and that’s due to the technology as each 3D printer has its own properties. Remember to always check the design guidelines to assure your 3D models are well prepared for printing. It is crucial for the guidelines to be respected in order for the 3D prints to be accurate and precise. Yes, Additive Manufacturing gives you a new possibility regarding the level of details, but we also have to be able to print your 3D design.
Essential things to keep in mind are minimum wall thickness, which assures your model won’t break, minimum detail and clearance, to make sure your object will be as accurate as the 3D design on your computer. For other measurements, the maximum/ minimum size is also worth mentioning. It depends on the size of the bed of the 3D printer and, depending on the 3D printing method, either the sintering laser beam or the nozzle size. Keeping those factors in mind will help you to achieve the best results.
Think about the supports
As the aim is to print a small object as accurately as possible, some parts of it might be thin and will require supports on some technologies. Supports are additional parts to keep your model stable and printable, they are later removed from your object.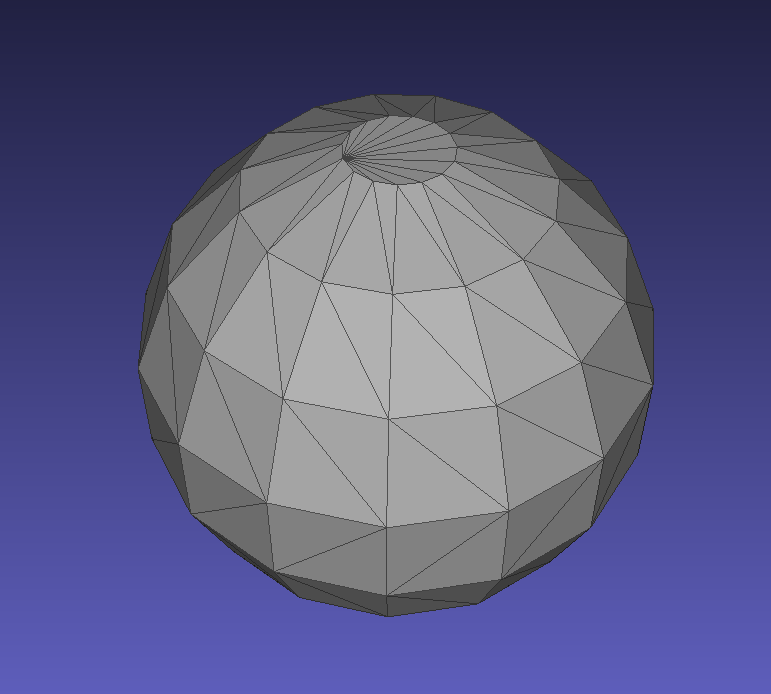 And that’s exactly what you need to think about: the removal of the support. We print objects with support, but the models have to be thick enough either for you or for our 3D printing experts to gently take out the supporting system. If your 3D design is too thin, it will simply break during the support removal.
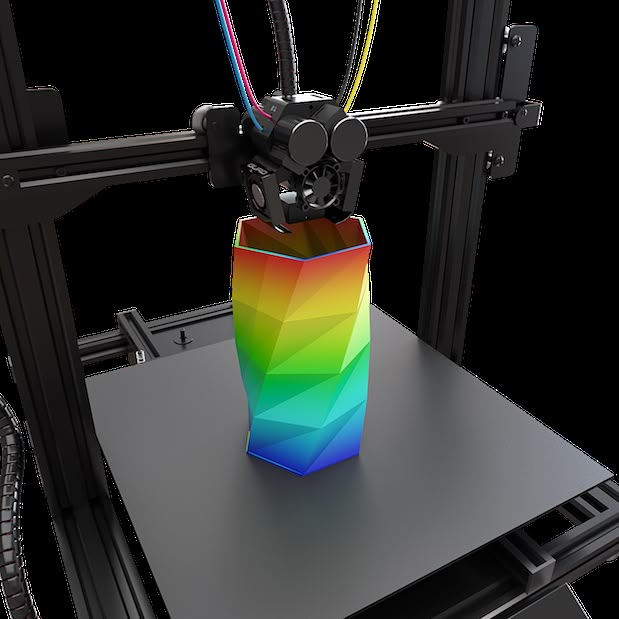
Accurate print: the layer thickness
Layer thickness: explained in micrometers (µm), it is one-millionth of a meter, so 100µm equals 0.1 mm. Thickness can also be called layer height. Each 3D printing technology works with layers and without knowledge about this particular element, the 3D models might not meet your expectations as the layers of material will be visible. Let’s see some real-life examples.
Plastic and Resin 3D printing
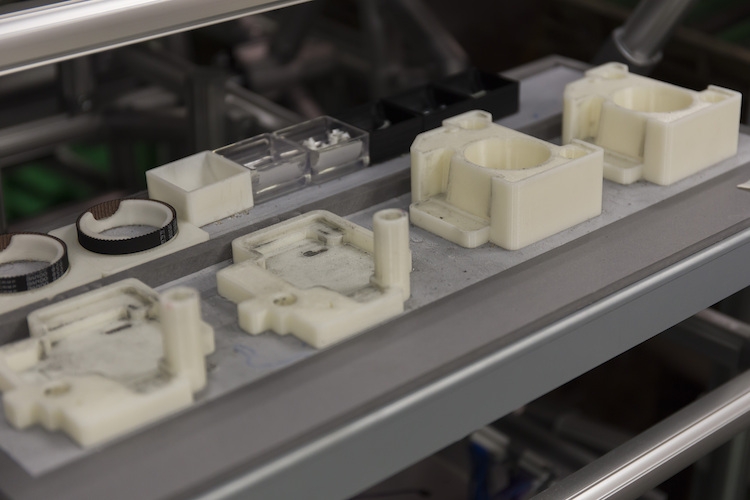
As mentioned above, each Additive Manufacturing method has certain characteristics. For instance, if you would like to print objects in resin, PolyJet technology will provide you with some pretty impressive results at 28µm layer height with VeroWhite or VeroClear. Despite the names Clear and White, those 3D printing materials come in different colors! However, if you need your parts stronger, we would recommend going for Nylon PA12 for SLS, which still gives amazing results with the high definition option and some very good finishes.
Another plastic worth mentioning is MultiJet Fusion PA12 with a layer thickness of 80µm. What differs from Nylon PA12 is smaller minimum wall thickness (0.8 mm vs 0.6 mm), which might be important for your project. Additionally to that, MultiJet Fusion PA12 has also excellent resistance to chemicals. Remember to make sure that your 3D models have the right thickness for the exact technology for us to be able to print them.
PolyJet Resin VeroWhite: 28 µm layer height Nylon PA12 layer thickness high definition 60 µm (left) and standard 100- 150 µm Nylon PA11/12 Polished and Raw Nylon PA12 with different finishes at the same layer height MultiJet Fusion PA12 at 80 µm layer heightMetal 3D printing
As for Metal 3D printing, you have plenty of options with Sculpteo. We offer 4 3D technologies: SLM, DMLS, Binder Jetting, and Casting. The technologies differ in print time, temperatures of binding the metal, and the time to cool your 3D design. However, your projects will be robust and stiff with other methods, we highly recommend Casting for the small object. With a layer thickness of 25 µm, the object comes out precise and accurate, especially for little parts. Make the right choice of metal to print objects perfectly. Silver 3D prints: layer thickness 25 µm Brass 3D prints: 25 µm layer height
Get your small object 3D printed right now
Most important points of our blog post are for you to remember about the proper preparation of your 3D models, such as checking if you’re not missing any structures of your model, keeping in mind the printability of your project and support removal, followed by checking which technology has the most suitable layer thickness.
Do you have a project in mind? Print objects with us! We are here to help you all the way through, from the 3D design with our Design Studio, through the prototyping stage to production, simply contact us. Don’t wait any longer and upload your 3D models right now!
Related Topics
- Return to Top
Get the latest 3D printing news delivered right to your inbox
Subscribe to our weekly newsletter to hear about the latest 3D printing technologies, applications, materials, and software.
How to create models that are larger than the print volume of a 3D printer
Don't have a large format 3D printer yet? When evaluating the capabilities of a compact desktop 3D printer, do not limit yourself to print volume. Many objects, like your smartphone or a bridge over a river, are made up of many individual components. Therefore, splitting the model into smaller parts that can be aligned after printing is a great solution for 3D printing large objects that do not fit on the platform.
Also, splitting the model can be a great way to get a high quality result, even if the whole model fits on the platform. This makes sense when multiple or opposing surfaces must be free from support structures, when the model has complex ledges, or contains cavities where liquid polymer can remain.
3D printing of various parts opens up new possibilities, for example, the creation of prefabricated structures from various materials or the combination of rigid and flexible parts to simulate the overmolding method.
When choosing a gluing method, it is necessary first of all to take into account the required degree of strength of the glued joints, which depends on the purpose of the models:
-
chemical: use adhesive on artwork, scale models, and complex shapes that are not intended for functional use and should not be impacted;
-
Mechanical: Provide threaded holes or sockets for attaching parts that require a secure mechanical connection, or repeatedly detaching and attaching components as needed.
This tutorial focuses on building large, prefabricated 3D stereolithographic (SLA) printed models with chemically bonded components. Read on to learn all the steps in this process, from model separation to post-processing for a professional finish.
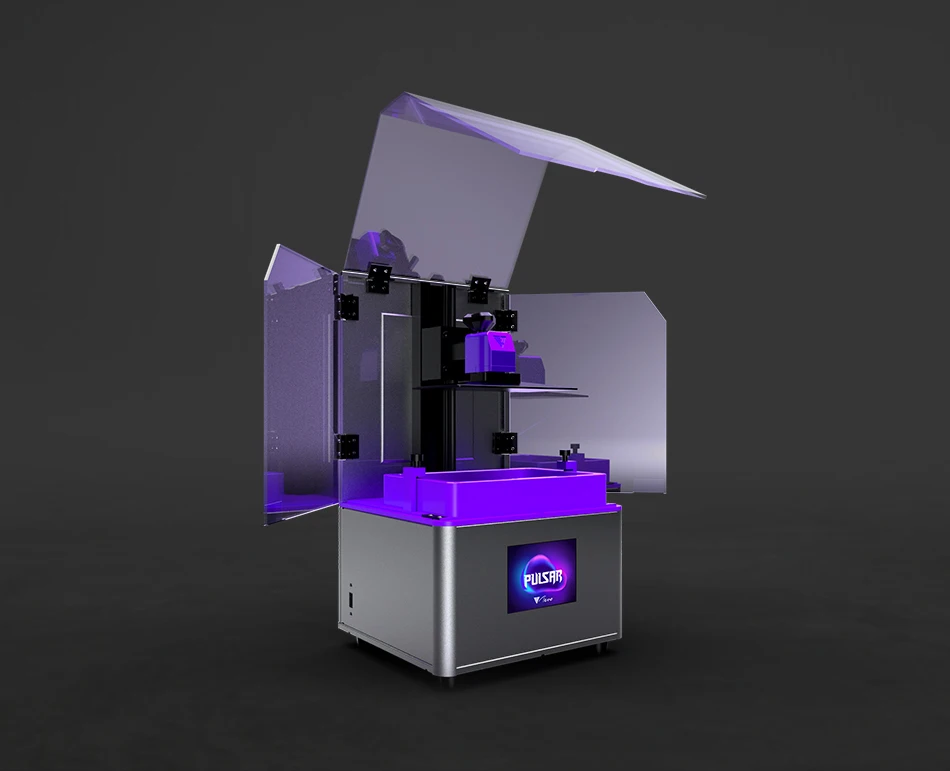
Formlabs Form 3L is the first affordable, easy-to-use large format 3D printer optimized for reliable production of industrial-quality models. The Form 3L stereolithographic 3D printer features a huge print volume of 30 x 33.5 x 20 cm and unrivaled cost-effectiveness.
Meet the Form 3L
We recommend two ways to separate models: adding features to the design that will allow the parts to fit together, or separating the model with straight lines, which will require them to fit together properly during the bonding process.
Regardless of which method you choose, if you have a lot of parts, it's helpful to add a unique identifier (letters/numbers) for each one to make assembly easier.
Use CAD software to split a 3D model and add basic centering components such as slots, pins, slots, notches, and tabs, or more complex features such as dovetails and slots to match model folds.
Adding centering components to the design makes it easier to assemble parts.
Ideally, these components should make it easier to align and assemble parts, but can cause problems if they differ even slightly from your 3D models, preventing perfect centering. Therefore, it is best to use centering components only when the printer can print parts with accurate dimensions that are not subject to deformation.
Splitting a 3D model along straight lines requires less effort than adding components to center. There are also fewer problems when using this separation method if the parts are slightly deformed or differ in size.
Adding IDs for each part makes the assembly process easier.
On the other hand, parts separated by straight lines can be time-consuming to assemble, as each part must be manually centered and ensured that they all remain in the correct position until the adhesive is completely dry.
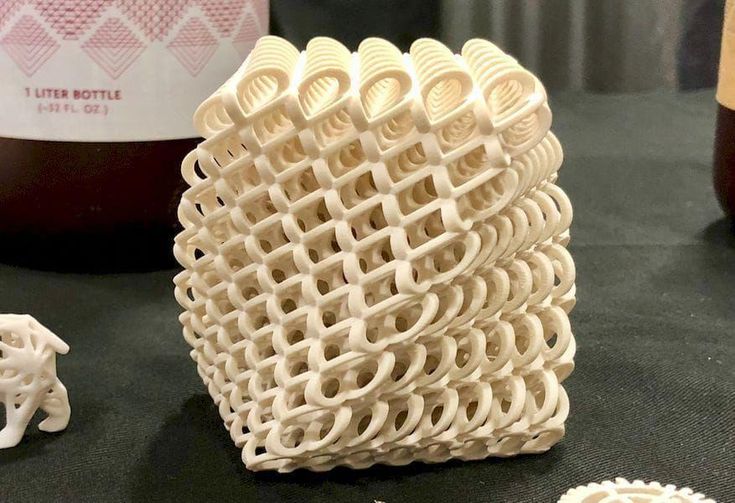
By default, when printing on a stereolithographic 3D printer, solid models without voids are obtained.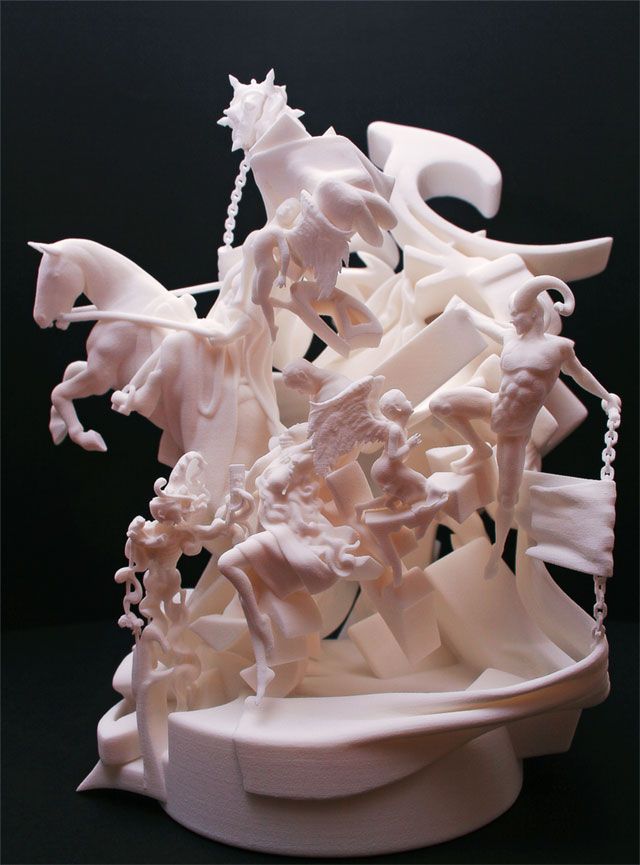 Depending on the design, different requirements may apply to the manufacture of large items. In such cases, 3D printing the outer shell or converting the structure into a hollow is a great way to save a lot of material and time. When printing hollow models on a stereolithographic 3D printer, be sure to add ventilation holes to avoid creating cavities filled with air and pressurized resin.
SAMPLE PART
Experience Formlabs print quality firsthand. We will send a free sample of the printed model directly to your office.
Request a free print sample
Converting a model design to a hollow saves a lot of time and material because the printer only needs to print the outer shell.
Learn more about how to save materials and time by hollowing out 3D models.
Depending on the size of the details and the purpose of the model, we recommend three mounting methods:
| Epoxy glue (5-30 min) | cyanoacrylate (CCA, Supercollah) | Resin | |||||
|---|---|---|---|---|---|---|---|
Square. | Large | Small/Medium | Small | ||||
| Paintable | Yes | Yes | Yes | 9006 7Yes | 9006 70072Medium | Low | Low |
For large parts and maximum adhesion, use 5-30 minute dry epoxy. It takes longer to dry than other adhesives, allowing you to fit large 3D printed parts but slows down the assembly process. Most 5-minute epoxy adhesives stop changing shape in as little as five minutes and cure by about 75% in less than an hour.
For large parts and maximum adhesion we recommend using epoxy adhesive.
The next option is cyanoacrylate (CA or superglue), which quickly forms a strong bond, ideal for small to medium sized parts. Thoroughly clean the part before applying CA to the surface, because contaminants adversely affect the quality of the connection. CA has a moderate impact strength, but is not recommended for models that require high strength.
For small models, you can simply use liquid resin from a stereolithographic 3D printer. Pour a small amount of resin into a tray from a bottle or cartridge, pick it up with a pipette or syringe, and place it on the surface to be bonded. Connect the parts and wipe off excess resin that may spill around the edges. Aim a 5mW (405µm wavelength) UV laser pointer at the contact area to cure the resin and bond the parts.
This method produces a chemical bond similar to 3D stereolithography printing, but is only suitable for bonding small surfaces as a low power light pointer cannot penetrate the model deep enough to create a strong bond.
Note. Protective equipment must be worn when working with polymers, including proper eye protection and gloves.
Download PDF
Don't have time to read the article now? Download it in PDF format.
Download as PDF
After assembling the model, it's time to move on to post-processing. This step includes geometric correction of the model to provide a smooth surface that matches the original 3D model, and aesthetic finishing to obtain a uniformly colored surface.
Depending on the precision of the printer and the size of the printed parts, there will almost always be slight voids or mismatches at the contact points. Automotive sealant (e.g. Bondo 907) adheres well to polymers, therefore, to eliminate such inconsistencies, it is recommended to apply it in a thin layer on the surface. Lightly sand the surface after each coat has dried to bring the model to its final shape.
Sealing models with automotive sealant (red area in image) will help eliminate small gaps and inconsistencies between parts.
Sanding helps remove traces of support structures and remaining inconsistencies in the model. Gently start sanding the surface with 150-grit sandpaper to remove traces of support structures and smooth edges where parts meet. Once the surface is smooth, sand it wet using 320 grit sandpaper to remove any remaining layer lines.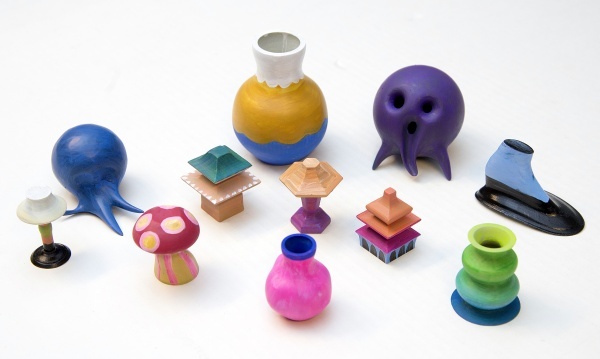 Sand the surface in random motions so as not to leave marks. In most cases, these two methods will produce a fairly smooth surface, but you can continue to increase the grit of the sandpaper up to 2 times and, after wetting it, sand the entire model until the surface is reasonably smooth.
Power sanding is great for large flat surfaces, but can ruin fine details. Grinding of small models is recommended to be done by hand, and for large ones, a combination of manual and mechanical grinding is recommended.
Machining large parts with mechanical and manual grinding saves a lot of time. Power sanding is great for large, flat surfaces, but can ruin the fine details, sharp corners, and subtle contours that are typical of stereolithography. As a result of mechanical grinding, a lot of dust is also generated, so before starting processing, it is necessary to prepare the working area.
Note. The use of power tools requires full attention and the use of protective equipment.
The surface can be damaged very quickly without even realizing it, just by leaving the sander without moving.
When finished sanding the model, rinse it in soapy water to remove dust and debris and dry thoroughly before proceeding to the last step.
The primer helps the paint adhere to the surface and can indicate areas where additional sanding is needed or removal of traces of supports that you may have missed. The Universal Matte Gray Plastic Primer shows these spots exceptionally well. For best results, apply it to the surface in several thin coats. Sand critical areas and reapply a thin coat of primer. Repeat this process until the entire surface of the model is level.
Note. Use protective equipment during priming and painting, including a respirator to protect against paint fumes.
All-purpose matt gray primer for plastics excels at showing fine details and helping to identify areas that need to be sanded down.
Find out more about sanding and priming in our detailed guide.
When painting with multiple colors, protect the model with a temporary coat. First, plan the order in which you will paint the model, depending on the color, transparency, and size of the area of a particular color. Start with small details so that fewer of them can be protected when painting with the main color. Apply painter's tape to the edges and corners. To quickly cover large areas, attach sheets of paper to them. Ribbon guides (laser cut) can also be useful for creating straight lines, circles and complex shapes.
When it comes to masking, figuring out the correct order is your first priority. In our case, the parts were first painted silver and the sections that would remain silver on the final part were then covered with painter's tape to hide them from the next l
painting. In our case, we first painted the parts silver and put masking tape on the areas that should remain silver in the finished model so that they do not get paint of a different color.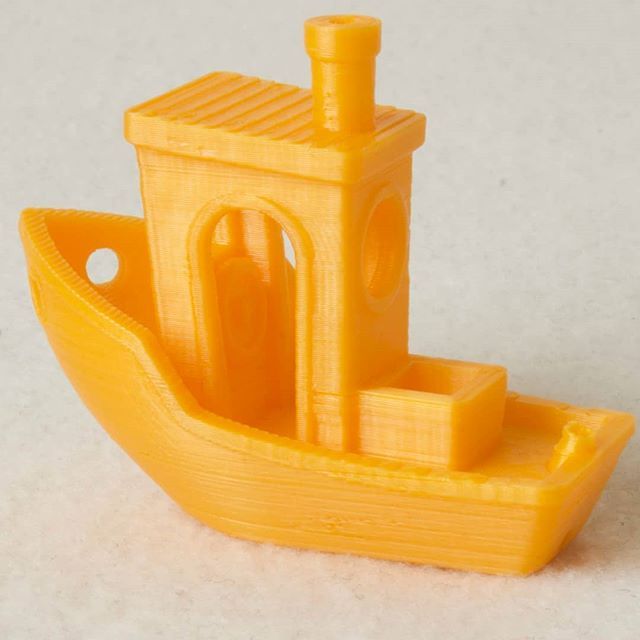
As with primer, several thin coats of paint should be applied for optimal results rather than one thick coat. Most spray paints will achieve the best color in warm and slightly damp conditions in the absence of wind. In this case, you must always follow the manufacturer's recommendations, which can be given on the paint container or in the technical documentation.
Consider the time the paint needs to dry: Allow layers to settle before applying the same color and allow the paint to dry completely before applying a new color.
The area where we applied masking tape is still silver.
Become an expert in painting 3D models with our detailed guide
Already wondering what your finished model will look like?
"Sorry sir, that R2-D2 over there is in excellent condition and inexpensive."
Formlabs optics designer Adrien Tanner created this R2-D2 model from 105 parts printed on a Formlabs stereolithographic 3D printer. It even has working electronics borrowed from the Form 2 printer - a galvanometer drive for sound reproduction, a cartridge dispenser for lamps, and a Z-axis drive for dome rotation. 9The 0003
Form 3L is the first large-format 30 x 33.5 x 20 cm 3D printer for producing massive, industrial-quality models.
Reduce order processing time when outsourcing or manual work when assembling large-scale 3D models. Now you can print large 3D models in their entirety on the Form 3L, the first affordable large format SLA printer.
Want to see how stereolithographic parts work? Explore our resources to learn more about stereolithographic resins, or request a free sample to evaluate print quality for yourself.
Request a free print sample
How to 3d print another 3d printer
Already have a 3D printer? Want another one?!
Why is this needed?
Well, let's say you have your own large printer and you can print fairly large objects. Do you believe in the idea of the reprap movement, the printer should be able to reproduce itself!
Or do you want to challenge yourself and finally figure it out, how a 3D printer works .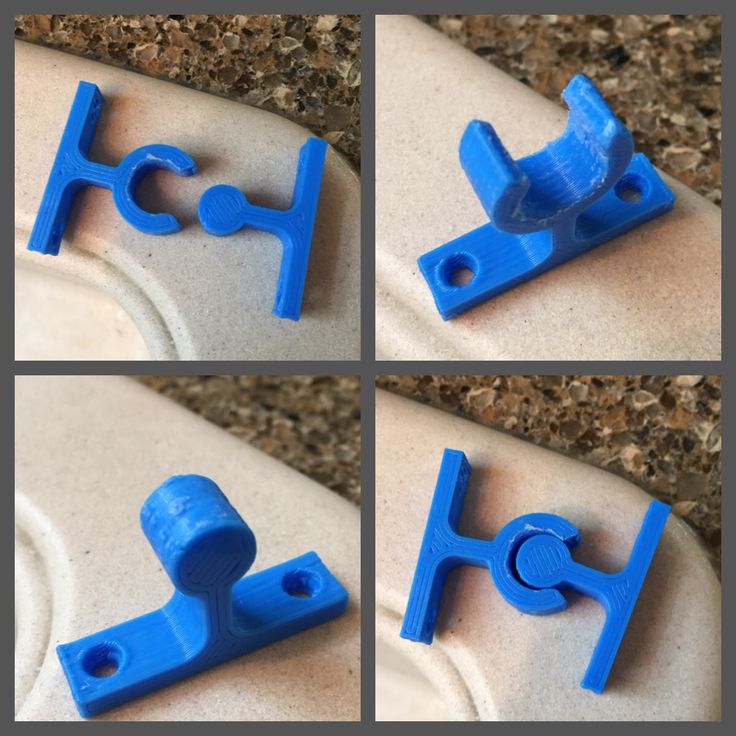
Or your current 3D printer is just sitting around gathering dust in the corner of the room, because you have already printed everything that came to mind, and the most difficult task that worries all 3d printing professionals is how to clone existing equipment on itself.
Step 1: Preface
Let's be honest... the is not the ultra cheap printer. This is not Chery 3D printer for $60. This not is a way to save money or time. This is not first printer.
Now let's talk about what is .
B 3Dtje mini 3D printer is:
- Damn easy to print
- Printed parts from PLA
- Everything fits within 200x200 print volume
- Most parts can be printed in 100x100 print volume
- Most parts are printed without supports , only in some cases they may be needed to improve the quality of
- Very few few needed tools
- Unlike most crafts that require a laser cutter, the CNC
- You can probably get away with a drill and a hacksaw to prepare 2 rods of the required size
- No source of MDF, or wood, or acrylic sheets or aluminum profiles, which can cost a lot
- A Prusa i3 Clone
- This design is not new, nothing revolutionary, but it is reliable, prints well and works with any slicer
- Open source
- All files of models can be downloaded free of charge
- You can download them and modify them as you like
- You can even sell them if you need to!
- Simple and interesting printing
- 19 models
- All parts are different and look very interesting together
- Easy to assemble
- All parts are connected with M3 screws and nuts.
- Cutting 2 to 4 metal rails
- Some 3d printed parts are assembled intuitively , you can even ignore photo
- All parts are connected with M3 screws and nuts.
- Really fucking cool!
- Small, portable, low moving parts! This printer can print fast! (when properly configured)
- This 3D printer you will DIY , completely!!
Let's get started!
Step 2: Prerequisites
You will need a 3D printer , well, or find someone with this device.
- Printable area must be at least 200x200mm XY and maybe 200mm Z if you want to print with refills
- PLA 1 kg, can be different, but this is the most convenient option
- I honestly don't know how much it will take. Likely 500g or so
- Tools
- Screwdrivers for screws
- Pliers, cleaning tools for printed objects (a clerical knife is enough)
- Metric drills for opening / cleaning the printing hole (you can also use a screwdriver)
- Knowledge on how to build a 3D printer from scratch
- These are not hard requirements, but knowing how to solve common printer problems will reduce the amount of swearing when things aren't perfect the first time.

- If you understand firmware Marlin it would be very cool to talk about this, as there is a desire to improve some things.
- These are not hard requirements, but knowing how to solve common printer problems will reduce the amount of swearing when things aren't perfect the first time.
Step 3: Parts
Right off the bat, I've made a list of exactly what you need and what you can buy to make the best possible quality. But it will be more expensive. Therefore, you choose which set to buy - in principle, they will not differ. In addition, you can order all this from China, it will be cheaper, but the wait will be longer. In any case, you need to look for all the components in English, so we take them from the table and, for example, insert in alliexexspress search .
The table is located at this link.
Step 4: Printing Parts of
Now let's move on to the most interesting part, in my opinion - prototyping models of . To be honest, I really like to print different things, you feel that you can handle any task when you have a 3d printer at hand.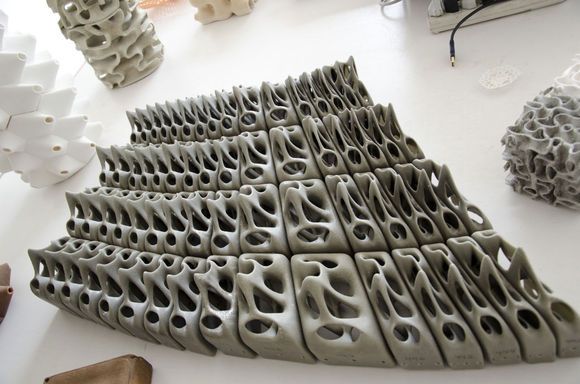 Okay, it's all lyrics.
Here is the project itself, where you can download 3d models for printer for free . Download and start preparing for printing.
The most important thing is to arrange the parts correctly on the table . The idea is to make the models have as few parts hanging in the air as possible. This will allow to drop support for . After all, they spoil the quality very much if you do slicing through Repetier Host with their auto-generation, and not draw them yourself.
You can watch a video showing the optimal arrangement of parts. Print settings I think you know how to do it, if not - there are articles about it with configuration files.
Step 5: Mounting
Let's assume that we have printed everything. Someone may have decided to use metal guides, buying them, for example, from IKEA, and cutting them into sections of the desired length.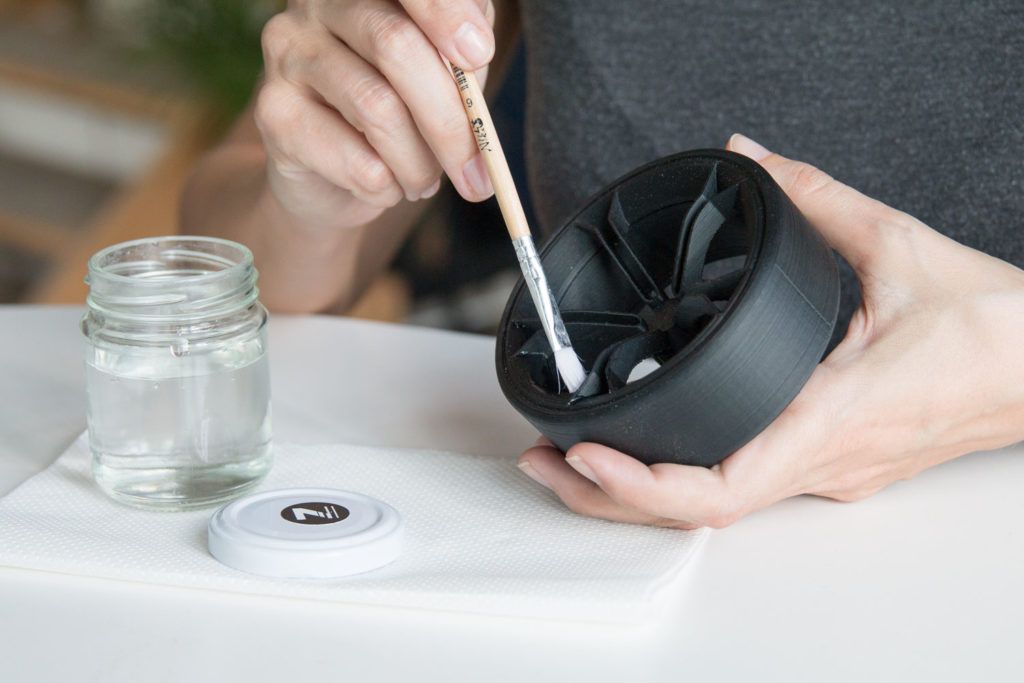 In any case, writing how to assemble this 3d printer does not make much sense, and it's too lazy, to be honest. In my opinion, there is nothing better than pictures!
Frame assembly
First, I'll lay out how our miracle should look like at the moment of medium readiness. Then we will see how the modules were assembled.
The Asses of the Y
axis. This drives The so -called bed . First we need to install the motor, put on the pulley on it. Then we install a freely rotating pulley on the other side and measure 9 for them0013 belt .
And now we will install the bed itself, which will fasten the two ends of the belt to us. Just don't forget to tighten the pulleys and anything that isn't tight yet. The substrate will be massive and it will be inconvenient to crawl there already. The connection will require 200mm x 6mm bolts, so have them ready right away.
It should be noted that the belt must be very tight . This will greatly affect the print quality of . If you cannot do this at the time of assembly, you can use special tensioner . It's basically a simple spring. As for the axes, in this case they are printed, although this is far from mandatory, just the name of the project obliges))
X-axis assembly
Depending on your printer, you may need to make a hole with a 3mm drill in the belt tensioner. This hole should be quite free.
- Attach the motor to the end of the x-axis with the connector down
- Attach 20T gear
- Insert 6mm rods 6mm x 180mm into the holes on the motor side. You need to cut these rods if you bought 200mm.
- Assemble the x-axis tensioner with either your own or printed tensioner bearing.
 Make sure the m3 nut is in the tensioner before proceeding.
 - Pass the belt from the left side (engine side), through the gearbox, through the idler bearing to the right side
- At this point, install belt tensioner to the right of the x-axis on the rods
- If you are happy with the length (make sure the x-axis of the tensioner is recessed quite a bit) you can cut the belt. Don't forget to leave extra belt length
- Attach LM6UU bearings in bottom bracket x
- All assembled, attach the straps to the carriage x
- Then it remains to adjust everything a little to make sure that nothing touches each other
Assembling the Z axis
Now we assemble the Z axis. If you have not installed the engines in the course of past work, it's time to do it. As you understand, they should stand on the left and on the right. We will install adapters for screw rods on them, where we will put them, holding them with a hexagon.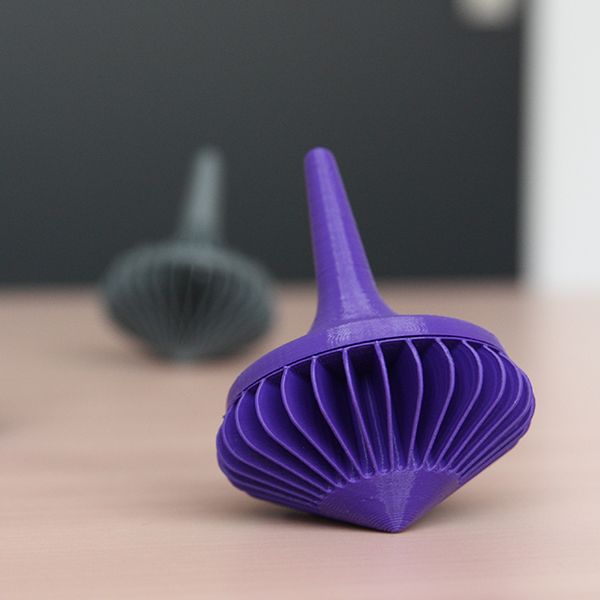
We stick the guides (parallel to the screw rods). We can say that we have finished assembling the case.
Step 6: Assembly of the electrical circuit.
How to lay the wiring is everyone's business. Here the options will be shown in the photo, but it's up to you to decide. The most important thing is to connect everything correctly. I’ll also post the diagram, but it’s better to see how it is done in ordinary 3d printers. For example, in order not to go far, you can go over the following articles directly on this site:
-
Exploring the features of a 3D printer
-
3D printer setup and calibration
-
Ramps 1.4 connection in 3d printer
It is not necessary to read everything - you can see the key places from the pictures and delve into their study.
The picture below shows the green power terminal. This is a very dangerous and unreliable thing that sometimes ignites - it is dangerous to leave a working 3d printer at home unattended. Therefore, in an article about Ramps, it is better to read how to be in this case.
Step 7: Firmware
Since you will (most likely) have an Arduino Mega as the brain of a 3d printer, uploading firmware to it will be quite simple. All you need is the Arduino IDE. The most standard firmware from Marlin. The main thing is to choose the correct configs for the board. I have not seen an article about the firmware on this resource, but it can be easily found on the Internet. Here are useful links:
- Firmware Marlin manual
- May be useful to someone info about electronics reprap , how is it functioning
Step 8: Testing
Finally time to print something! We note right away that the table must be covered with molar tape or Kapton, since we have it without heating.