Beginners guide to 3d printing
A Beginner's Guide to 3D Printing
3D printing is an additive manufacturing process that uses thin layers of filament (in most cases, plastic) to create a physical object from a three-dimensional model. A digital file creates the model which eventually transfers to the printer. The 3D printer creates thin layers, one on top of another, until a 3D printed object is formed. 3D printing also allows the production of models of more complex shapes with less material than traditional manufacturing techniques.
Research shows that 3D printing was first introduced in the ’70s. It was not until 1980 that early additive manufacturing equipment and materials were developed. Hideo Kodama initiated a patent for this technology but, unfortunately, never commercialized it. In the ’90s 3D printing began to attract attention from technologies around the world. These years also saw the invention of fully functional human organs for transplants in young patients using 3D printed methods covered with particles and cells from their very own body. It was a major success for the medical industry.
Despite these advancements, 3D printing had limited functional productions until the 2000s, when additive manufacturing gained popularity. Additive Manufacturing is the process of adding materials together to produce an item. The procedure of additive manufacturing is in stark contrast to the concept of subtractive manufacturing. Subtractive manufacturing is the process of removing material by carving out a surface to create an object. This process also produces a great deal of material waste. In this regard, the term 3D printing still refers more to technologies that use polymer materials and, additive manufacturing refers more to metalworking. But by the early 2010s, the terms of these two processes were used in popular language across the market, media, companies, and manufacturers.
Around 2008 the first self-replicating 3d printer model was created. That means a 3D printer was able to recreate itself by printing its parts and components. This enabled users to produce more printers for others. Studies show that later the same year, a person successfully walked with a 3D printed prosthetic leg fully printed in one piece. Then in the 2010’s the additive processes matured, and 3D printing work began to create objects layer by layer. In 2012, with the addition of plastic and other various materials for 3D printing, several authors began to think that 3D printing could be important for a developing world.
During the following years, more applications for 3D printing have emerged, including the world’s first aircraft. Makers using 3D printers agree that this method is faster and cheaper compared to traditional methods and are ideal for those who need rapid prototyping (RP). Terms such as desktop manufacturing, rapid manufacturing, and rapid prototyping have since become synonymous with 3D printing.
The market offers a wide variety of 3D printers. Sophisticated machines are expensive, but there are also more affordable models available with high-quality printing and features.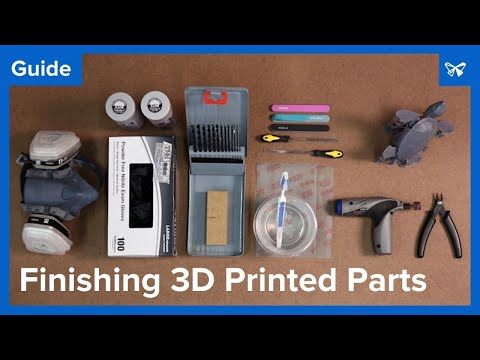 3D printing also offers easy-to-use desktop printers, which are increasingly popular among schools and engineers.
In a shell, 3D printing works by blending layers of material to build an object. In this process, the 3D printer works with the direction of a computer 3D modeling software that regulates the process with high precision and exactness.
The 3D printing manufacturing includes several types of manufacturing technologies, all these work in the same way by creating models’ layer by layer essentially. Each one of these types of 3D printing manufacturing processes may utilize a different type of material, finish, and cost.
Some of the most common and utilized types of technologies are FDM, SLS, SLM, SLA, and DLP. Below read on a summary of each one of these technologies.
Let us start with the most common of these, the FDM or Fused Deposition Modelling, this is a trading name given by Stratasys.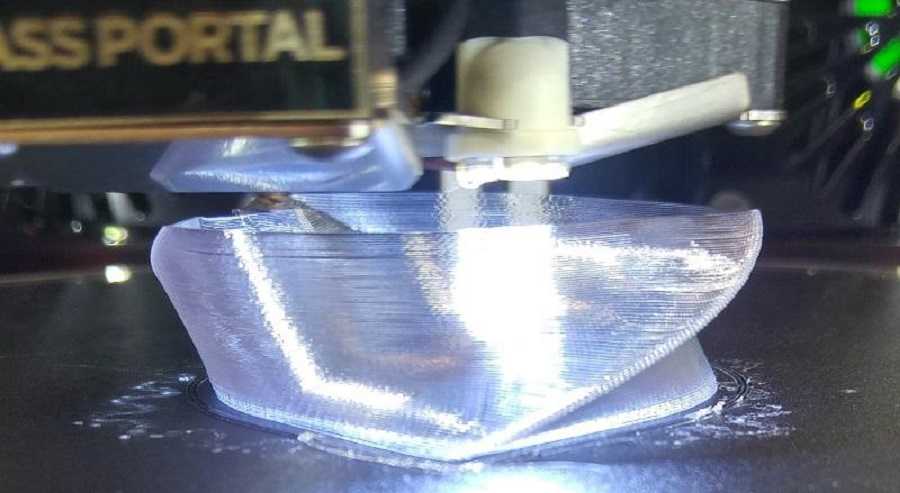 Even though this concept has been around since the ’90s, a lot of 3D printers since 2009 starting to utilize this process. This technology is also known as FFF (Fuse Filament Fabrication). In this type of process, several layers are aligned together until a shape is formed, by melting plastic that is deposited via a heated extruder. The most common materials used or filaments of this type of process are ABS and PLA.
Another SLS or Selective Laser Sintering uses a laser to sinter powdered plastic material and turn this into a solid model. Normally, this type of technology is a popular choice due to the rapid ability to create prototypes and small-batch manufacturing.
SLM or Selective Laser Melting uses a high-power density laser to melt and fuse metallic types of powder. With his type of technology, the metal material can be fully melted into a solid 3D model. This process also allows for the shape to be created layer by layer and create parts that cannot be easily cast with other conventional methods. The file is sliced into layers on a CAD computer software, normally and .STL file, and then it is loaded onto a file preparation software, then the material is melted using a high- power laser beam until a part is complete.
Continuing SLA or Stereolithography creates parts with high levels of detail, smooth surfaces, flawless finishes, and quality. This type of technology is widely used for applications on the mechanical industry and models.
Finally, DLP or Digital Light Processing is a technique similar to SLA that cures the resin materials by using light through a light projector screen. Because of the light usage, an entire layer can be built at once making this process relatively faster but recommendable for low-volume production runs of mostly plastic parts.
How 3D Printing Works 1. Create a CAD (Computer-Aided Design) fileThe first step to creating a 3D printed object is creating a virtual design with computer software or a 3D scanner.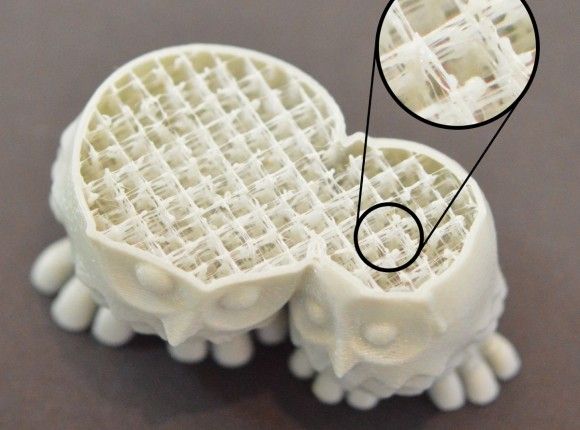 On this, the exact dimensions of the object to build are simulated to see how this will look like when finishing the 3D printing. When designing a 3D object utilizing CAD, fewer errors may result while printing, and fortunately, these can be corrected before the process. There is also another way of creating an object manually, like sculpting where a 3D scanner is needed to collect the data, shape, and appearance of the desired object.
Once the design is being created, the next thing is to convert the file into a format that can be read by the 3D printer. One of the most common files used is STL (standard tessellation language). STL files may sometimes create a larger file due to the number of surfaces. There is also another option of a file format used named AMF, Additive Manufacturing File format that stores information more conveniently.
3. Manipulate the STL fileOnce the STL file is created, and ready to be sent to the 3D printer, the orientation and size for the object to be printed must be set. STL files also allow us to repair any inconsistencies in the original.
Once the digital file is ready to be printed, all materials need to be ready as well to start the printing process. Once the STL file is ready, then it must be processed by a slicing software that aids in the 3D printing process by converting the object into layers and provides the instructions that later will be received by the 3D printer.
5. Build the objectOnce all the mentioned parameters are ready, the printing process can begin. Some printers may take some time to create the final product as this depends on how complex is the object to print. Many printers have high-end capabilities and print faster. When the process begins, the layers start to build the object with an incomparable resolution using a special measure of micrometers. For instance, the thickness of a typical layer is about 100 micrometers.
6. Process the final piece
 Once the object is ready, this must be handled very cautiously. For instance, putting gloves to handle the printed item is recommendable, finally, brush off any residual powder to clean up the piece. One of the advantages of 3D printing is that a piece can be made within hours, compared to traditional processes of manufacturing, this is very convenient and shows faster results.
How does an FFF 3D Printer Work?Fused Filament Fabrication (FFF), is also known under the trademarked term Fused Deposition Modeling (FDM). This technology was invented after SLA (Stereolithography) and SLS (Selective Laser Sintering) techniques were present. The term FFF was initially used as an unconstrained alternative given the fact that FDM is a trademarked term.
To begin with, an extrusion heated nozzle moves over a built platform, at the same time releases molten plastic, then this begins to deposit the thermoplastic material in thin layers, one on top of another onto a print bed, which is where eventually the 3D printed object is formed. The nozzle and the printed bed move while at the same time the plastic is being extruded. In this process, the slicing software is crucial due to this being the one that separates the design into different layers for 3D printing optimization.
3D printing uses a wide range of different variations of materials such as pastes, raw materials, and thermoplastics or filaments, being these the most used and come in different colors, thickness, and sizes to fit the purpose of the 3D printing model. Filament materials used for extrusion include thermoplastics, ABS, PLA, HIPS, TPU, ASA, PETG, PLA, etc.
What can be 3D Printed?3D printing has revolutionized the way models and prototypes are being created for the industry. The idea of rapid prototyping (RP) allows the creation of products usually within hours of days rather than weeks when traditional methods are used. With 3D printing, almost every object you can think of can be printed.
According to Statista, the worldwide market for 3D printing products and services is anticipated to exceed 40 billion U. S. dollars by 2024. This source states that this industry is expected to expand to an annual growth rate of 26.4 percent between 2020 and 2024.
3D printing can create a wide range of applications. Every day, new materials and applications are being discovered and therefore, more companies are relying on this method for quicker prototyping and production of items, including the fact that they already have their printers.
3D printing is actively involved across many important industrial organizations with a significant impact on product development, research, education, and more, and is promising to transform almost every industry as we currently know it.
3D Printing in the Consumer Goods IndustryMany companies and retailers are recurring to the usage of 3D printing due to its significant value on the commercial chain. They can customize and design their products in a quicker manner and keep up with the ever-changing consumer market. By producing pieces faster, they are also able to put their products rapidly in the market.
Some companies have used 3D printing to produce eyewear, footwear, lighting design, furniture, and more. Among the brands that have already produced athletic shoes are Nike and Adidas. In an article published by Nike at news.nike.com, they mention how Nike Flyprint is the first 3D printed textile upper-performance footwear. Nike Flyprint uppers are produced through SDM (solid deposit modeling).
Another application is 3D printing in jewelry. According to SmarTech the industry value of precious metals for additive manufacturing is expected to reach $1.8 billion worldwide by 2028. A famous Australian company Boltenstern, has launched a 3D printed jewelry line recently.
3D Printing in the Medical IndustryIn the medical field, 3D printing has a lot to contribute. While donors are difficult to find, in this video published by Marketwatch, the Rochester Institute of Technology’s engineering department is researching new 3D printing techniques for health-care applications such as the capability to generate organs that can be acceptable to the recipient. Allied Market Research shows that the 3D printing market for healthcare is expected to grow at $2.3 billion by 2020.
With the rapid advancement of flexible manufacturing and innovations, 3D printing is now widely implemented for medical purposes, such as implant designs, surgical planning and training, and prosthetics. See here some articles of 3D printing for medical applications, including a most recent case study of how people are using 3D printing to produce masks to fight COVID-19.
With the rapid advancement of flexible manufacturing and innovations in Biomedical fields, 3D printing is now widely implemented for medical purposes, such as implant designs, surgical planning and training, and prosthetics. You can 3D print with thermoplastics like Polycarbonate, semi-flexible plastics, ABS, which is strong and weather resistant or PLA (Polylactic Acid), which will biodegrade over time, even inside a human body. In this case, 3D printing is used in the field of radiotherapy is used to create custom devices for beam range modulation, 3D Conformal Radiation Therapy (3D CRT), or Brachytherapy application.![]()
In this case, spinal surgeries see Increased success rate with 3D printed guides. The Bengbu Hospital is the top-grade hospital in the Anhui Province. Since the end of 2013, Director Niu launched 3D printing application research for vertebrae in the clinical field.
Here is another case, where 3D printing has reduced costs and help the creation of prosthetic hands. Founder Mike Li worked in the IT industry up until 3 years ago when he was inspired by a video that highlighted a unique use of 3D printing for children’s prosthetics. Motivated to apply medical 3D printing for prosthetics to help others, he and other local makers volunteered their time to create and customize prosthetics for patients.
3D Printing in the Automotive Industry3D printing is also transforming the automotive industry, evolving from printing relatively simple prototypes of low production parts to 3D printing entire cars. In-car auto designs, auto parts can also be created using 3D printing. Sometimes, a scale small model is printed to gauge scale before the assembly process. This technique also helps the industry by producing rapid prototypes and reducing money and time for production. Some other automotive companies are dedicated to creating customized auto parts for special model cars. Read here more case studies about 3D printing in the automotive industry.
In the aerospace industry, 3D printing has remarkable uses as well. To name a few, Airbus is utilizing 3D printing technology to create plastic parts on commercial A310 and A350 XWB test aircraft. In this video, metal parts for wing slats, a section of the tail wing and door hinges are claimed to be produced by this company. The development and manufacturing of potential parts using 3D printing can be conceived as lighter, stronger, and with 70% less time to make it and 80% less expensive compared to others. Aside from this, Airbus also mentions how 3D printing contributes to the environment as it has reduced up to 95% of its metal waste.
Research shows that the market for 3D printing dental applications is expected to grow significantly. Dental 3D printing applications include the creation of crowns, aligners, bridge models, retainers, and even orthodontic models. Read here about Dental 3D printing in Orthodontic models.
3D Printing for ProstheticsThe impact of 3D printing on the medical field has made positive advancements such as fast processing times, low costs, and the ability to create efficient prototypes and parts that require customization, such as 3D printed implants and prosthetics. 3D printing is producing hands, feet, legs, and more.
Albert Fung, a talented biology illustrator from Canada, first designed a CAD template for the initial prosthetic. Using this as a base, he and his team were able to optimize the model for each patient’s situation.
An organization named e-NABLE is currently doing work in this area.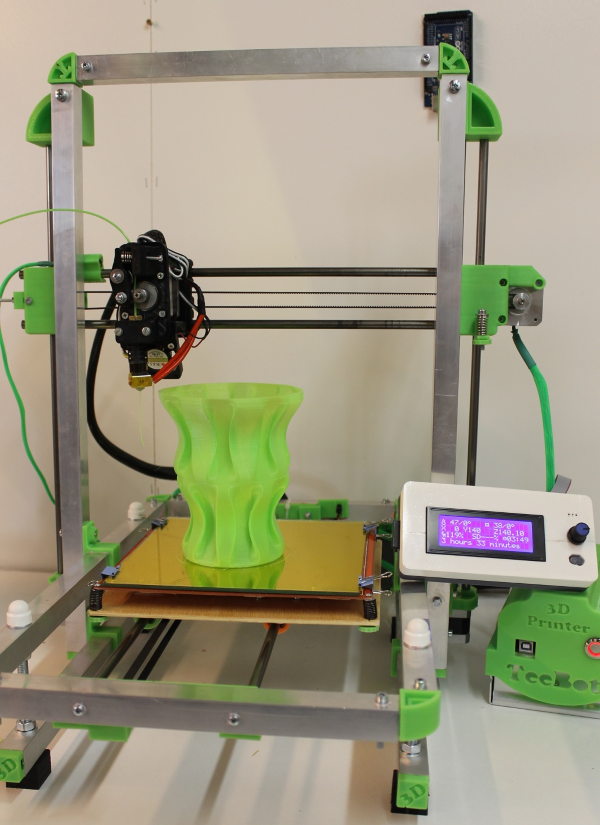 Albert Fung and Dr. Choi created five versions of the initial prosthetic design and optimized the design to accommodate individuals in Sierra Leone within one year. Read here a 3D Printing prosthetics case study.
In this field, 3D printing allows us to quickly create an architectural model, and this is ideal because a physical model is much favored than a computer presented a model on the screen. Any architectural application can rapidly create scale models in a faster and cheaper way now. There are also other astonishing applications of 3D printing in the architectural industry, to name a few it is possible to create entire buildings and urban structures. In Madrid, Spain the first 3D pedestrian bridge was printed. This structure crosses a stream in Castilla-La Mancha Park in Alcobendas, Madrid. The structure is printed using micro-reinforced concrete and measures 12 meters in length and 1.75 wide.
3D Printing in Archeology3D printing for museums and archeology is helping with the reproduction of exact copies of artifacts that can travel the world to help researches in their developments. Archeological pieces can also be scanned and created for students to do research. This technology is widely used by museums because ancient pieces are at a high risk of being broken or damaged when transported and by the usage of scanning and 3D printing, restoration is possible. This including fossil reconstruction.
Although restoration is a field dedicated to preserving the past, some sculptors are turning to 3D printing to help facilitate their restoration work. A great example of this is the Scuola di Alta Formazione (SAF) of the Instituto Superiore per la Conservazione ed il Restauro (ISCR). This institute is the leader of the restoration of masterpieces of the Italian heritage. Teachers at the institute decided to use 3D scanning and 3D printing with excellent results for their restoration projects. Read here 3D printing in the restoration of Italian classical art.
Another example of this great use is a project called “Elastic Minds” by the MOMA, the Museum of Modern Art in New York, the artists were using 3D printing in a project to create art and furniture such as chairs at a complete scale. In this video about the exhibition, pieces of furniture were created by sketches in the air with laser technology and then a camera scans this to capture the movement and captures this as a drawing that then is sent into a 3D printer machine.
In forensics, the usage of 3D printing is creating a breakthrough in solving cold case files, by printing skulls, shoe prints instantly, and more. Daryl Ricketts is a forensic anthropologist and a professor of anthropology at Indiana University that uses 3D printing for education and research purposes. He uses the resources of 3D printing to create forensic pieces for his students. By using CT scans, fetal specimens, fetal skeletons to do virtual autopsies. He also uses facial 3D printing for facial reconstruction from different hominids.
Furthermore, at the University of South Florida, forensic artists have sculpted 3D printed skulls with clay to reconstruct the faces of more than 900 missing and unidentified homicide victims. In this video published by CNN, artists from around the world work along with the Forensic Anthropology Laboratory to reconstruct faces to identify these victims.
In the film industry, movie labs and companies now are using more widely the technology of 3D printing for makeup preps and special effects to create characters. As an example, artists Steve Yang and Eddie Wang from Alliance Studio are using 3D printing for a new era of special effects and sculpture creation. In this video, they shared their story of how they started to work with 3D printing when everything was using traditional methods and how this technology changed their way of creating things in a way that was not seen before.
Also in this article, Rick Baker the Star Wars famous makeup artist uses 3D printers for the creation of monsters and props. Rick Baker has been able to create parts and scaled copies of his movie characters by using the technology of 3D printing. This technology along with the digital design has helped to decrease the overall time spent for the creation of the movie models.
Many companies around the world are using 3D printing to create exceptional high-precision models for prototyping and industrial manufacturing. 3D offers a less expensive and a very affordable process due to most models being produced using plastic and other variety of materials. Moreover, this innovative method utilizes less material for manufacturing and prototyping compared to traditional techniques.
3D Printing in EducationIn the fields of education, there are countless applications of 3D printing technology with such interesting applications. The past decade has seen explosive growth in STEM education in progressive schools, as theoretical textbook knowledge is being replaced by experiential, project-based learning. When students shaped by this innovative learning ecosystem join the workforce, they are scaling new heights to help transform our manufacturing processes as well.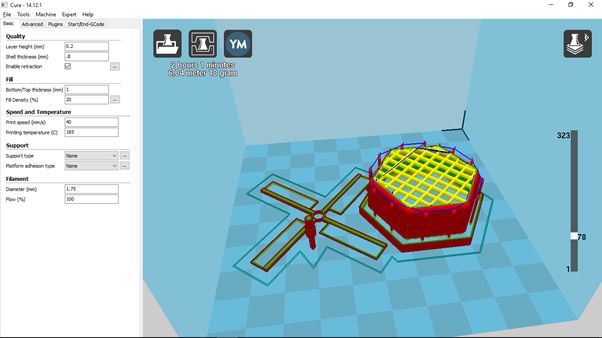 Where appropriate, additive manufacturing technologies like 3D printing are now replacing traditional methods to bring more flexibility, design innovation, and cost savings to production processes.
For instance, in this case Lift 3.0 is using 3D printers in Russia to teach kids the value of additive manufacturing with remarkable results.
Traveling to California, here is the case of John Gardner is a student at Foothill High School in Tustin, CA, who has a great passion for engineering and technology. Once introduced to 3D printers he began to develop his prototypes for an electric skateboard, custom-fit prosthetic limbs, and more. If you are interested in more cases of 3D printing in education, visit here.
Many companies around the world are using 3D printing to create exceptional high-precision models for prototyping and industrial manufacturing. 3D offers a less expensive and a very affordable process due to most models being produced using plastic and other variety of materials. Moreover, this innovative method utilizes less material for manufacturing and prototyping compared to traditional techniques.
To learn more about, why companies are using 3D printing, click here
How to Print with a 3D Printer?
3D printing is changing the way that objects are being produced. To start in the process of 3D printing, you will need to take some steps and considerations. Read on a few below to have an idea of what you need to set up your creation!
The first step is to contemplate your 3D printer options and choose the one that better fits the purpose of your needs. There are a lot of alternatives and manufacturers, you can always compare models, but make sure to choose a printer that has the right features for your projects and plans.
For instance, there are 3D printers that are affordable and rightly designed for education, engineering, and small-batch manufacturing. Make sure your printer has dual extruders that can print simultaneously for a better production capability. This way you can reduce printing time for rapid prototyping. There are particularly good printers that also come with high-resolution cameras, video-assisted calibration systems, and important safety features.
Some other 3D printers are made to build larger industrial originals. These printers are more advanced and have fully enclosed capabilities. Industrial grade 3D printers permit the printing of complex parts and support a variety of filaments and improve even more printing speed. If you need to choose a printer like this, make sure it offers characteristics such as motion controllers, remote user interface, and interchangeable nozzles. If you are looking for a more comprehensive guide on how to choose a 3D printer, visit our 2020 printer buying guide.
Step 2: Choosing a 3D Slicing SoftwareTo create a 3D printed object modeling software is needed. There are a lot of websites and providers that offer free downloadable software programs to design and model, and others that offer a variety of 3D models or mockups that other people have used to create their replicas. Research and look for a slicing software that is intuitive, user-friendly, and has customized advanced features. One important point too is to make sure that the software that you prefer also supports a multi-lingual interface in case you need it.
The next step is to set the design ready for the printer. When the printer receives the data from the software it sends the signal to the printer to start building the item using a filament that is like a cord that passes to the plates of the printer. The most commonly used file format for 3D printing designs is STL, (Standard Triangle Language). The original design when being printed is translated into several triangles in a 3D printing space, which sets up for the printers and related hardware to construct the resulting object. The resolution of a file is recommended to be in an optimal size so the machines and software can work smoothly to create your final product.
In this last process, the object is created through layering. One layer by another is added until the shape and final object is formed. The process of repeatedly printing over the same area is called Fused Depositional Model (FDM). The most common material for 3D printing is plastic, but there are a lot of other materials that can be used and adopted by 3D printers such as PLA, ABS, HIPS, carbon fiber enforced, flexibles, and much more.
Where to Find 3D Printing Files?If you are looking to obtaining files for 3D printing, there are a lot of websites that offer these files, some of them for free. A variety of STL files, 3D printed models, 3D printed files and 3D printing designs in other file formats can be found if you surface the website. Shown below, here is a brief list of some sites that provide files and resources for 3D printing.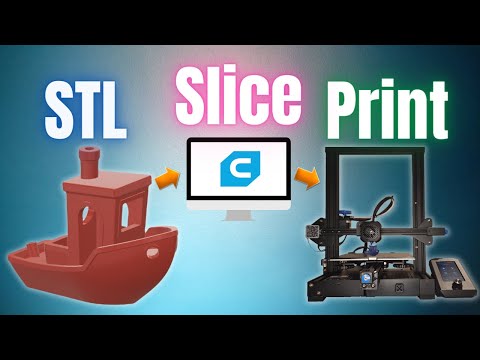
- ALL3DP visit site.
- Pinshape visit site.
- MyMiniFactory visit site.
As time progresses, there are more and more uses for 3D printing that shows light of phenomenal events thanks to the usage of 3D printers. Many people believe 3D printing will announce a revolution in the manufacturing industry and the world economy. Although 3D printing has certain limitations, this advanced technology is now universally adopted by big corporations as a crucial mainstay of the manufacturing industry.
Connect with Raise3D:
Have you had a great experience with Raise3D that you would like to share? Please contact us at [email protected]. We look forward to hearing from you.
For more information about Raise3D printers and services, browse our website, or schedule a demo with one of our 3D printing experts.
Ultimate Beginner's Guide to 3D Printing
You've probably heard of 3D printing. It was supposed to be the new "Industrial Revolution." People would be able to fabricate anything in their own homes! An upgrade for your car could be printed in a matter of minutes. It hasn't taken over the world just yet, but I'm here to talk you through everything you need to know to get started.
Before getting started, let's clear one thing up. It will not be plug and play! No machine is without issues, or requires no maintenance or work. It's not always the easiest hobby, but it is very enjoyable. If you are still interested, then read on. If you want all the benefits of 3D printing (without any of the hassle), look into online printing services 3D Hubs and Shapeways.
What Is 3D Printing?
3D printing is a form of additive manufacturing. Objects are built in small layers, stacked on top of each other one at a time. It can be quite a slow process, but it does have many benefits. For comparison, a subtractive manufacturing process starts with a solid block of material, and removes bits until the final product is born. Some examples of this are marble sculpting and CNC milling (that's computer numerical control). 3D printers are technically a type of CNC machine, but they are rarely referred to as such -- it can get confusing!
3D printing has been around for a long time. Ever since the 1980s, designers and engineers have had access to commercial 3D printers -- these often cost tens of thousands of dollars, and sometimes mandate expensive support contracts for routine maintenance. The recent explosion of "hobby" 3D printing has occurred due to a patent expiry. 3D printing techniques will continue to grow as more patents expire in the near future. Nowadays you can buy a 3D printer for your home for around $1,000 or less.
Take a look at this model of the Eiffel Tower. Notice how it emerges as the bed moves down. This is fairly representative of what 3D printer models look like.
Terminology
Before digging too deep into 3D printing, here is some common jargon you may encounter along the way.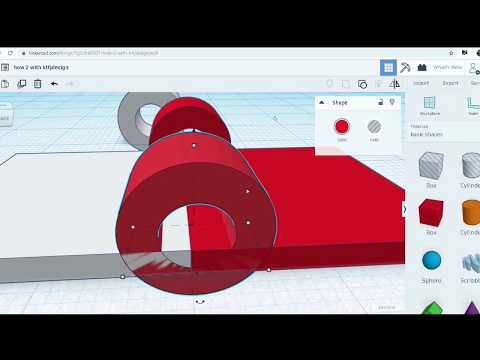
Filament -- A material (often plastic) manufactured into a long strand (like a cable). These are used by some types of 3D printers to manufacture objects.
Extruder -- The part of the machine where the material is melted.
Nozzle -- A small hole from which melted filament is pushed ("extruded") out of.
Bed -- The surface on which a 3D printed object is produced.
Heated Bed -- A print surface that is heated to provide better adhesion.
Stepper Motor -- A precise and powerful motor used to move the various parts of a printer.
RepRap -- An open source 3D printer movement.
G-code -- Instructions for a machine describing every movement required to manufacture a part. Not specific to 3D printing.
Slicer -- A piece of software used to convert 3D models to G-code.
Axis -- A reference line for movement.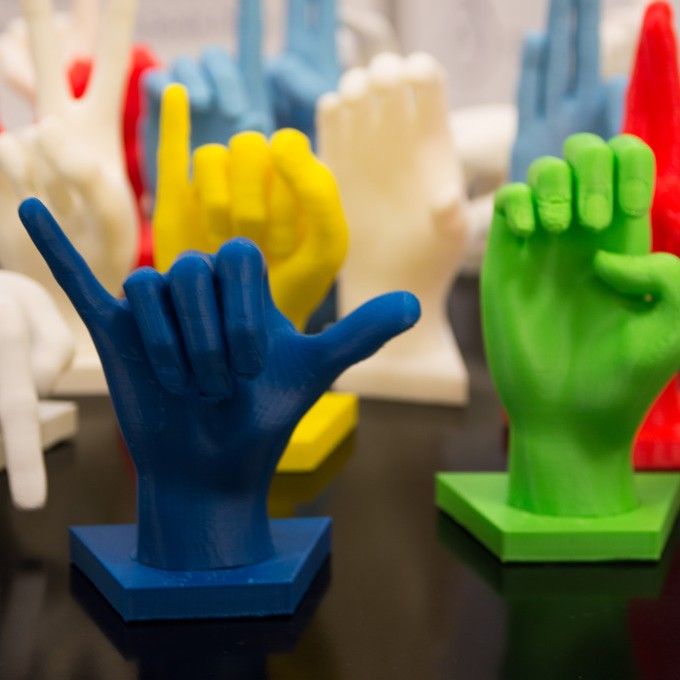 A 3 axis machine can move in X (left to right), Y (front to back), and Z (up and down).
Carriage -- A moving part that the extruder sits on.
What Can Be Made
Nearly anything! 3D printed parts won't be replacing traditional manufacturing techniques for mass production anytime soon -- no printer is fast enough, or capable of producing the required quality. Where 3D printing really shines is in the prototyping and home production markets. Say the dial on your washing machine breaks, and the manufacturer quotes your $30 for a tiny piece of plastic plus shipping. Why not design your own replacement and be up and running within a day, at a fraction of the cost?
Take a look at these ways you can make use of a 3D printer at home for some more inspiration.
There's a reason the Ford Motor Company have 3D printed over 500,000 prototype car parts. Having the ability to modify a component and then print it again is a huge time saver -- even if that part takes five hours to machine, it's still a very quick process.
There are fun things too, like these six games you can print at home.
Types of Printer
Now that you know what 3D printing is, let's look at the different types of machine. There are two types of printing process: Fused Deposition Modelling and Stereolithography. These have their own strengths and weaknesses, so here are the basics.
Fused Deposition Modelling
Fused Deposition Modelling, or FDM, is the simplest and most popular method of printing. The printing material is pushed through a hot tube. This tube is pushed around to draw the required shape, just like piping a message onto a cake. The temperatures vary depending on the material, however 200C/392F is about average for consumer machines printing in plastic.
Popular models:
- RepRap Prusa I3
- Makerbot Replicator
- Ultimaker 3
This is currently the most popular printing process. Prices range from $200 up to several thousand dollars. There are a myriad of different manufacturers and models for FDM machines. They print plastic in layers, each building upon the previous, lower layer. Machines start at the bottom and build upwards. This can mean complex shapes or objects without a flat axis on which to start may be difficult to produce.
Models often have "lines" where each layer has been built. This can be smoothed afterwards if required.
Approximate cost per 1kg/2.2lbs of material: $25.
Stereolithography
Stereolithography (SLA) is very different to FDM. This starts with a container of special liquid plastic (known as photopolymer resin). An ultraviolet laser is directed at the top of the resin, causing it to solidify (not the whole lot, just a small layer). Just like FDM, each layer is "drawn" and cured successively. These machines work from the top down, pulling the object out from the liquid.
Models produced using SLA are extremely smooth, with an incredibly high resolution. They are faster to print than FDM machines, however they are less common, more expensive, and rely on expensive resin.
Popular models:
- Formlabs Form 2
- 3D Systems ProJet 1200
- XYZ Printing Nobel 1.0 [Broken URL Removed]
Approximate cost per 1kg/2.2lbs of material: $100.
Prices vary per model, although the average is a lot higher than FDM machines, approximately $1,500.
This guide will focus on FDM machines, due to their relative ease of use, and popularity.
Aside from the manufacturing process, there is one other critical specification to know: the coordinate system. This is how each printer moves the hot end around the bed. The two main variations are known as cartesian and delta. There are other systems (like polar), as well as several unique designs, although it is best to stick to a popular system. Using a coordinate system that several thousand other people have used makes it much easier to troubleshoot any potential problems.
Cartesian
Much like a traditional inkjet or laser printer, cartesian machines are fairly straightforward. They have an X-axis, Y-axis, and a Z-axis, with one or more stepper motors to drive each one. They will have a square or rectangular bed, and it would not be uncommon to have the entire bed move in one axis. Here's what a cartesian printer looks like:
Image Credit: John Rood via Flickr.comDelta
Delta printers also utilize X, Y, and Z axis, however there is one important difference. Delta machines suspend the extruder from three arms in a triangle arrangement. They will nearly always have a circular print bed that does not move. These machines were designed to print parts fast!
Image Credit: John Rood via Flickr.comThey are perfect for tall, narrow models. They are only slightly more expensive and complex than traditional cartesian machines, so they represent an excellent alternative choice.
Printing Materials
Just as there are hundreds of different printer styles, sizes, and prices, there are dozens of printing materials (filament for FDM machines). The main two you should focus on right now are ABS and PLA. There are other materials gaining popularity (Nylon for high strength, and wood-based for different textures), however these are not always as simple to use.
Polylactic acid (PLA) is a biodegradable plastic derived from renewable resources, such as sugarcane or corn starch. As a result, printing with it gives off a semi-sweet smell. It is one of the easiest materials to print with, while still maintaining high strength. PLA can be "stringy," making it prone to clogging. Ensure you follow any and all manufacturer recommendations.
ABS, or Acrylonitrile butadiene styrene, is the stuff Lego bricks are made from. Derived from fossil fuels, it is strong, and hard wearing.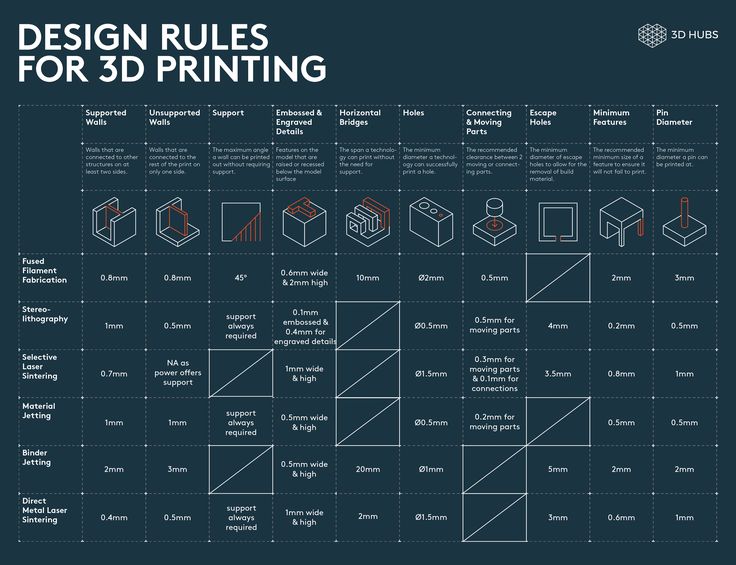 It is not biodegradable, and printing with it can give off a strong "burning plastic" smell. While it can be challenging to print with, it is still one of the more popular material choices. A heated bed is often required to prevent warping and poor bed adhesion. Parts printed with ABS can be sanded and smoothed quite easily.
Both PLA and ABS can be purchased in a wide variety of colors. PLA can be found in partially translucent colors if required.
FDM machines use plastic in filament form. Often provided on reels or spools of 500g (1.1lbs) to 1kg (2.2 lbs).
Choosing a Machine
When making a decision, it's important to choose the right machine for you and your needs. Are you buying the cheapest model on the market? Are you buying the most expensive one? What's the customer support like? Is there an active support community, of which users may have solved common problems?
Decide upon the features that are the most important to you. Reliability should be pretty high on your list, as should quality.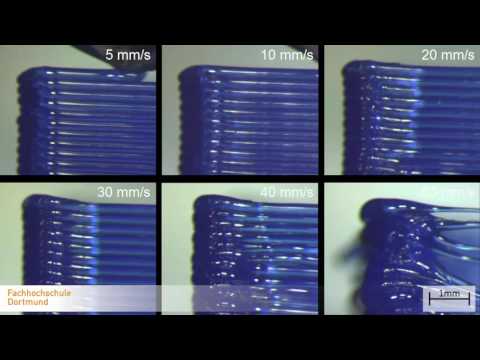 There are machines that can print very fast, and others that can print huge objects. While not every machine can do everything very well, some models can do a reasonable job at many things
Choosing a printer should not be done on a whim, or the spur of the moment. I have owned three 3D printers, and deeply regret purchasing my first one, for reasons outlined below.
One important factor to consider is maintenance. Most machines use a belt driven X and Y axis, with a lead screw driven Z axis. Not all machines operate like this, but it is a fairly common design choice. Belts need to be calibrated and tightened, so if there is no way to do so, maybe that model is not the best choice for you.
My first machine was reasonable, however, over time the belts worked loose, and regular maintenance and calibration was needed (as is the case with all printers). When I went to tighten the belts, there was no way to do so, and the manufacturers had ceased trading. Not only that, but as there was no community around this machine, there was not a lot of information about this particular design.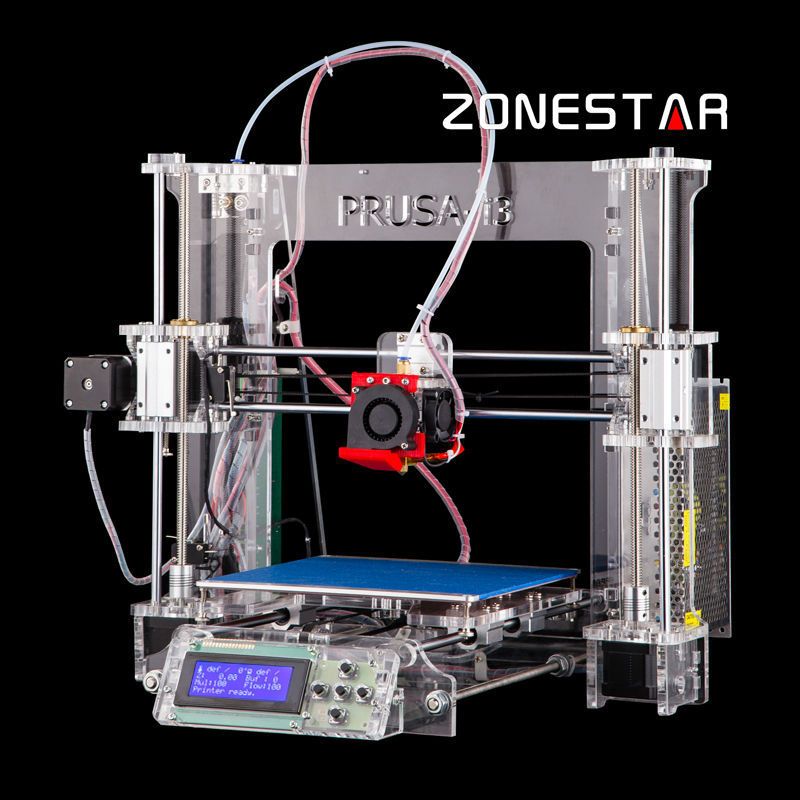
This leads to another important factor: community. With many of the popular models, huge online communities exist, often with solutions to common problem. This information is invaluable to improving the quality of your prints, and maintaining your printer.
The final important feature to consider is cost of running. As shown above, filament is reasonably cheap to purchase. Many different manufacturers produce a whole range of materials and colors, for nearly every use and budget imaginable. A few select manufacturers have attempted to introduce proprietary filament "cartridges," which lock you into only purchasing filament from that company. This is great at making money for the company, but a terrible deal for consumers. I recommend you stay away from any machine that forces you to use a proprietary filament design.
For more discussion on this, see our guide to the best budget 3D printers.
RepRap
The RepRap project is an open source 3D printer movement. Many of the machines use 3D printed components, and the rest are readily available (usually in hardware stores). The RepRap community is huge, and many problems have been resolved thanks to this community.
A RepRap is one of the best machines you can purchase. Not only is there a massive support community, but there are many tried and tested designs. Machines can be bought in kit form, or fully assembled. Hundreds of retailers sell their own take on popular kits, and replacement parts as well as upgrades can be cheaply purchased from Amazon or Ebay.
Image Credit: Simon Bradshaw via Flickr.comMany kits are sold at a very low price. While some of these may not be bad in themselves, poorly assembled components or cost cutting in the wrong places (such as the power supply), can lead to trouble. 3D printer fires are rare, they do happen, and while any 3D printer has the potential to cause a fire, this risk can be reduced by purchasing from a reputable retailer, and choosing a machine that has good reviews on the whole.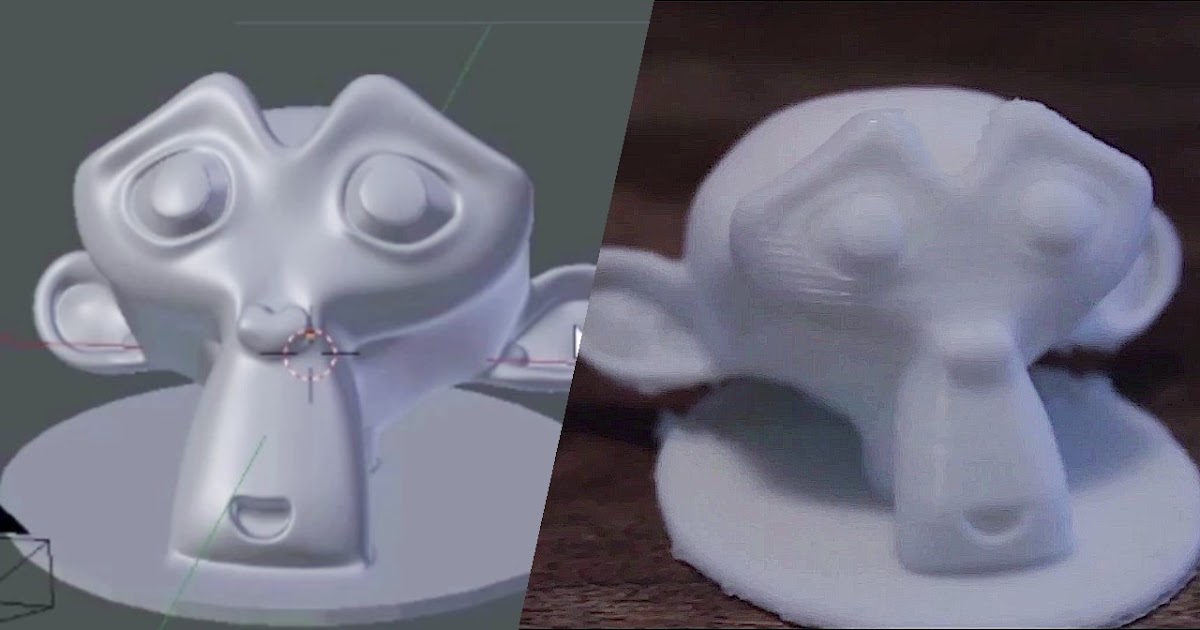
If you are going to purchase a RepRap, I recommend the Prusa I3 MK2 from Prusa Research. There is a vast number of users, with hundreds of modifications and improvements available. This particular printer is available in kit or pre-built form, and is highly calibrated. Prusa Research designed the Prusa models themselves, and while this is not one of the cheapest machines around, the design and configuration in this machine really will save you a lot of trouble later on.
First Print
Now that you have chosen a machine, and it's been delivered and setup, it's time to start 3D printing! I'm afraid buying the machine is only the start of the process. Most machines run off an SD card, or your computer. You could install Octopi, a Raspberry Pi Distribution written for 3D printing, but that's a bit advanced for today. Learn the basics first, then you will know everything you need to configure an internet controlled printer.
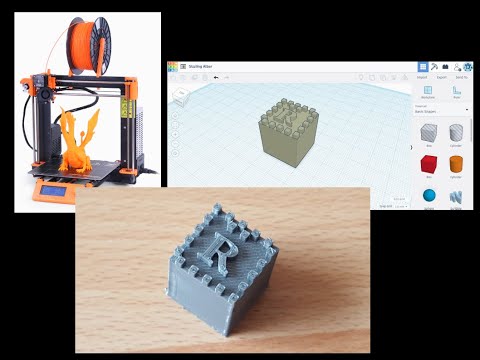
Regardless of how your machine is controlled, every machine gets instructions in the same way. It's a several-step process:
- Design or obtain 3D model.
- Convert 3D model to STL format.
- Use a "Slicer" to convert STL model to G-code.
- Print model using G-code.
3D Models
The first thing you need is a model to print! Thingiverse is one of the more popular websites for sharing models, with most models already available as STL files. You will want to start with a test cube or calibration model to ensure everything is configured correctly. If you are feeling adventurous, you could design your own models. Many programs can do this. Google Sketchup is a popular free tool, and it's easy to learn:
Make sure you read our introduction to Sketchup first. Blender is another excellent tool, and one that is slightly more geared towards artwork, rather than product design. Checkout our compilation of fantastic tutorials for Blender beginners.
If you're like me, and not so good at art, then have no fear! OpenSCAD is another free tool that lets you design models using code! It's simple to use, I designed this hollowed out cube with only five lines of code:
The specified language : clike does not exist'Code generation failed!!
' Convert to STL Format
Now that you have a model to print, it needs to be converted into the STL format. This stands for STereoLithography and it is a fairly universal 3D model format for 3D printing. Many tools can save files in this format. Nearly all Thingiverse files can be downloaded as STL. If you are using Google Sketchup, you will need to download the sketchup-stl extension to be able to export STL files.
Using a Slicer
You may have heard of a slicer. These pieces of software convert your STL file into a set of instructions called G-code. G-code has been around for a very long time and is used on industrial machines as well as 3D printers. G-code will often be specific to your machine.
There are many different slicers available. They mostly function the same, and when you're just starting out with simple models, it does not really matter which slicer you choose. The manufacturer of your machine may recommend one, and even better if they provide a default or getting started configuration file!
Some popular choices are:
- Cura
- Repetier
- Slic3r
There are many settings in your choice of slicer. Here are some common ones and what they do.
Layer Height
This determines how thick each layer is. A lower number results in more layers, and a higher quality print (at the expense of speed). A good tradeoff is 0.15 or 0.2mm. Very high quality prints may use a 0.05mm layer height, but this will be very slow! It's often advisable to use a slightly thicker height for the first layer, as this helps things stick better.
Here is a comparison between different layer heights. From left to right goes fine to coarse:
Shell Thickness
This is how thick the outer walls should be. You will want this to be a decent size, otherwise the fill may show through. Anywhere between two and four wall thicknesses would be good, depending on your model.
Retraction
Retraction helps to keep prints neat by slightly pulling the filament back into the nozzle when not printing (ie, when moving across a gap in the model). It can sometimes be difficult to fine tune, so stick to the default or manufacturers recommended setting.
Bottom/Top Thickness
3D printed objects are rarely 100 percent solid on the inside. This is done to save plastic, and increase printing speed. The top and bottoms layers are solid, so you can specify how thick these should be. Six layers is a reasonable number. Go too low and you may notice the semi-hollow fill showing through or bubbling on the surface.
Fill Density
Expressed as a percentage, this is how solid the interior should be. Model designers will usually specify this figure, as some parts may require a higher strength fill. A value of 20 percent to 30 percent will usually be sufficient.
Fill Pattern
A fill pattern is used for the semi hollow interior. Hexagons or a honeycomb design is fairly common, but as this won't usually be seen, stick to your printer/slicer default for now. Here you can see a honeycomb fill pattern on this cross section of a print:
Print Speed
Print speed is a very important setting. Printing too fast will nearly always result in a lower quality print. Printing slowly will improve the quality (but it may not always be practical). This should be set to a middle ground between speed and quality. Stick to your slicer default. Print speeds of 70mm/second would be fairly fast. A speed of 40mm/s would be quite slow, but very high quality. This video highlights the differences in printing speeds:
Printing Temperature
Temperature is another setting that has a big impact on quality..jpg) Unfortunately, it varies based on a lot of factors. Maybe your thermistor (digital temperature reader) is only accurate to +/- 5 degrees. Different materials have different printing temperatures, and even different colors and manufacturers of the same filament can vary in ideal temperature. Start with your slicer defaults (approximately 210C for PLA, 230C for ABS). If the temperature is too hot, models may look squished, or possibly even burnt. Reduce the temperature 5 degrees at a time until a good level is found. You may have to do this for every different filament you use.
Unfortunately, it varies based on a lot of factors. Maybe your thermistor (digital temperature reader) is only accurate to +/- 5 degrees. Different materials have different printing temperatures, and even different colors and manufacturers of the same filament can vary in ideal temperature. Start with your slicer defaults (approximately 210C for PLA, 230C for ABS). If the temperature is too hot, models may look squished, or possibly even burnt. Reduce the temperature 5 degrees at a time until a good level is found. You may have to do this for every different filament you use.
Bed Temperature
If your machine has a heated bed (not all of them do), then set it to the slicer default. Heated beds are required for printing in ABS, but are not always needed for PLA.
Heated beds keep the bottom of your prints warm (usually about 70C). Without a heated bed, you may find the bottom of a large part cools, and becomes unstuck. This is called warping, and if the part becomes 100 percent unstuck, the print will usually be ruined. Think of a traditional printer or photocopier: how would the ink be in the correct place if you wobble the paper around?
Support Type
Support is another setting you may not initially need. If you are printing a complex model, maybe a figure or curved object with overhangs greater than 90C, a support structure is needed to hold up the parts that will not print otherwise. Think of it like scaffolding for 3D printed parts. This often leaves minor marks on prints that need cleaning off. Support is not needed for simple shapes and calibration parts. In the image below you can see the support structure as a concertina of thin plastic.
Image Credit: Creative Tools via Flickr.comPlatform Adhesion Type
There are two main adhesion types here. The first is a raft and is exactly as it sounds. This prints a small raft first, and then prints your model on that. This reduces problems with an uneven print surface. Rafts were widely used when hobby 3D printing first started, but now that machine quality has improved dramatically, they are not often needed.
Brims are still used regularly. These are like a skirt or outer layers on your model. They increase the surface area, and can help to reduce warping. They are usually only one or two layers high.
Filament Diameter
Filament is mainly sold in two diameters: 1.75mm and 3.00mm, with 1.75mm becoming increasingly common as it is quicker to heat up. Your printer will be designed for one size only. It's not possible to mix different sizes without changing the hotend and extruder. Nearly all filament sold has some variation in its diameter; higher quality filament has less variation. Filament with a wildly varying diameter may work inconsistently, and possibly cause clogging.
This filament diameter setting allows you to tweak the exact diameter of your filament. Measure your filament diameter in three places across one meter and average the results. Enter this average diameter.
Flow Percentage
Flow percentage is used to adjust how much plastic will come out. This will be 100 percent by default, but you can increase or decrease this as required to reduce over extrusion, or fix under extrusion.
Nozzle Size
Most machines come with a 0.4mm nozzle size. A smaller nozzle will increase print quality, but at the expense of speed. 0.3mm nozzles are becoming more common. It does not really matter what size nozzle you are using, just be sure to enter the correct size here.
If you are not sure what you should start with, many slicers come with default templates for common machines. If you own a popular model, a quick Google search for "Printer model slicer settings" may yield many results. This is where your machine research may have paid off. A printer with very good support, or a large community may mean you can download someone else's settings, or maybe your manufacturer even supplied the settings -- some of them do!
This video shows off a very high quality print. Similar to having a smaller layer height, a smaller nozzle can help to improve quality (but it's not the only way).
G-code
Your slicer will generate G-code. This is a set of instructions for your machine to print the model. This is often specific to you, and contains your settings at the time. The final step is to print your model. You need to upload the G-code to your printer. This is often done directly over USB, although many printers will run G-code from an SD card.
I like to keep my SD cards neat and tidy. I create folders for different projects, and prefix my G-Code files with an estimated print time, along with any specific print notes. Make sure you delete any G-code that produces undesirable results. Most slicers will provide an estimated print time, along with filament usage and rough cost.
Warping
Hopefully by this point, you will have a working 3D printer, and a good knowledge of how it operates. One of the most challenging issues is that of warping. Even on perfect machines it still happens. The main cause of warping is bed adhesion. Sometimes a corner comes unstuck from the bed, and "curls", ruining an otherwise perfect print. ABS can be particularly troublesome for warping.
Some common fixes:
- Reduce the first layer height. How far away is the nozzle from the bed?
- Turn on the heated bed. The part may be cooling at the bottom too rapidly.
- Add a brim to your model.
- Try adding mouse ears to your model.
Sometimes, warping happens even when you do everything right. Some of the most difficult parts to print are those that are large and flat. These can warp even with perfect adhesion and settings. What happens here is a result of contraction. The top of the print cools at a different rate to the bottom. This is enough to be a problem on certain prints. A heated bed helps a lot with this, or you can use a hair dryer to heat and then slightly bend your part after the fact.
Finding Help
It can be very frustrating when you don't know why a print is failing. Here are some useful resources to help you:
- SIMPLIFY3D Pictorial Troubleshooting Guide
- Reddit Fix My Print Community
- RepRap Forums
Why not consider a DIY project for your new printer? Checkout our DIY shortcut buttons or an electronic D20 Die -- two projects that use 3D printed parts!
You should now know (nearly) everything you need to get started 3D printing! What printer are you using? What common problems do you encounter? Let us know in the comments below!
Image Credits: FabrikaSimf/Shutterstock
The Complete Guide to 3D Printing [Part 2]
3D printing is used in a variety of industries, both for rapid prototyping and short-term production.
A key application of 3D printing in various industries is the rapid prototyping of new parts during R&D. No other technology has the capability to instantly produce plastic or metal parts - even in non-factory conditions.
3D printers can be used in-house by companies, while some businesses prefer to order 3D printed prototypes through service bureaus.
Medical
3D printing can be used to make medical components such as titanium implants and surgical guides (SLM), 3D printed prostheses (SLS, FDM) and even 3D bioprinted human tissues. Components for medical equipment and technology - X-ray machines, MRI, etc. - can also be made by 3D printing.
SLA and SLS technologies are also widely used in the dental industry for model making, prostheses and restorations.
Aerospace industry
The aerospace industry has become a major consumer of 3D printing technology because it can produce very light parts with an excellent strength-to-weight ratio. Examples include things as simple as cab bulkheads (SLS) and down to revolutionary engine components (SLM) such as the 3D printed fuel injector tip designed and manufactured by GE.
Cars
Automotive companies regularly use 3D printers to make one-off parts and repairs, as well as rapid prototypes.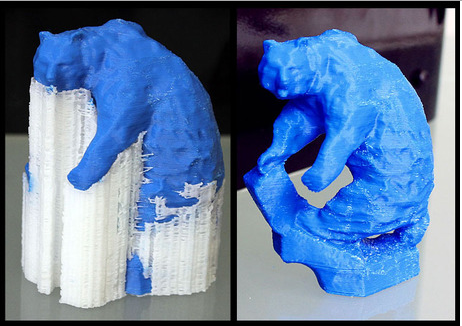 Common 3D printed automotive parts include brackets, dashboard components, and antennas (FDM).
More extreme examples include vehicles with large 3D printed metal structural components, such as early models from automotive startup Divergent.
Jewelry and art
3D printing technologies such as SLA are widely used (as an indirect fabrication process) in the production and repair of jewelry, while almost all types of 3D printers can be used to create art and sculpture.
Construction
Advances in additive manufacturing with high quality workmanship have expanded the scope of applications in construction and architecture. Concrete 3D printing, which is a bit like FDM but with very wide nozzle extruders, plays an important role in this industry, but more common 3D printing technologies such as SLM can be used for products such as bridge structures.
3D printing file formats:
3D printing parts can be designed with standard CAD software, but 3D printers can only read certain file formats.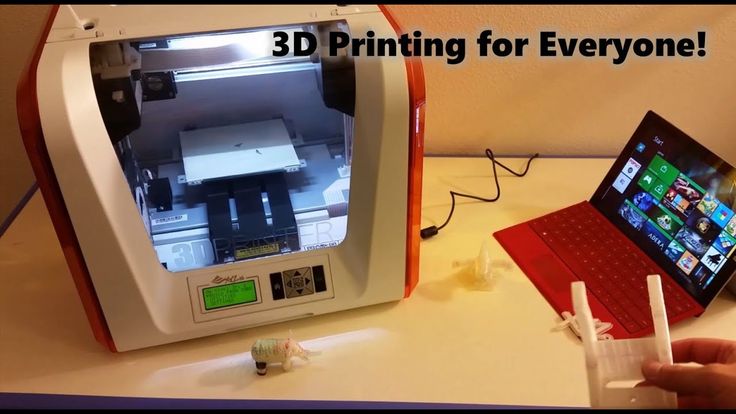 There are four main file formats for 3D printing.
STL: The most common file format for 3D printers, STL contains part geometry information in the form of tessellated triangles. It does not contain information such as color, material, or texture. The file size is proportional to the detail, which can be a problem.
OBJ: Less common than STL, the OBJ file format encodes the geometry of a 3D model and can include curves and free-form surfaces in addition to tessellation. It can also contain color, material, and texture information, making it useful for full color processes.
3MF: Invented by Microsoft, 3MF is an XML-based format with small file sizes and a good level of error prevention. It has not yet been widely adopted, but is supported by companies such as Stratasys, 3D Systems, Siemens, HP, and GE.
AMF: The successor to the STL format, AMF is much more compact and allows you to tessellate both curved and flat triangles, making it much easier to encode parts of various shapes.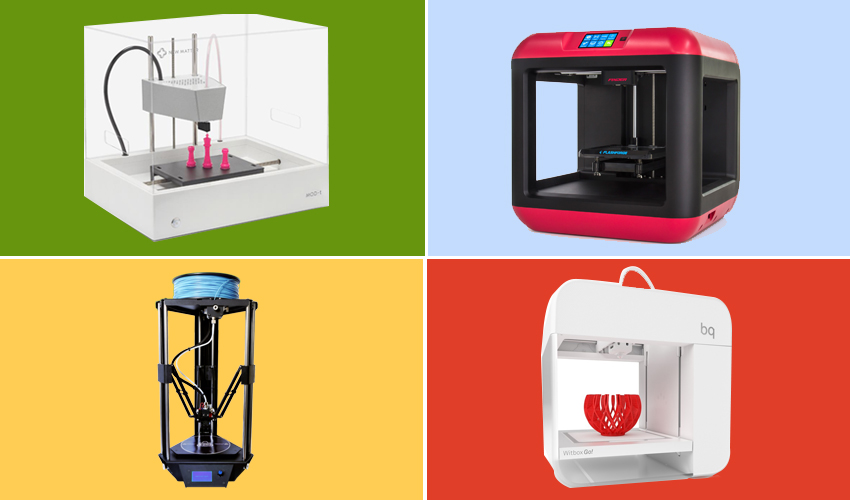 Since its inception, the format has been slowly adopted.
3D printing settings and specifications:
3D printing uses specific terminology that may not be clear to beginners. These terms refer to printer settings and/or specifications that can affect how 3D printed parts turn out.
Infill
When making 3D printed parts, it may be necessary to specify an infill percentage, which refers to the internal density of the part. A low infill percentage will result in a mostly hollow part with minimal material holding the mold together; a high infill percentage will result in a stronger, denser, and heavier part.
Layer Height
Layer height, sometimes referred to as z-resolution, is the distance between one 2D part layer and the next. A smaller layer height means finer resolution (and higher possible level of detail) along the z-axis, i.e. top down. A low layer height is an indication of a high quality printer, but users can set a higher layer height for faster, more economical printing.
Print speed
The printer's print speed, measured in millimeters per second, indicates the speed at which the machine can process the source material. Like the layer height, this value can either be a measure of the printer's maximum speed or be user-defined: slower print speeds usually result in more accurate prints.
Print temperature
When applied to processes such as FDM, print temperature usually refers to the temperature of the hot end, the part of the print head that heats the thermoplastic filament. Some FDM printers are also equipped with a heated print bed, the temperature of which is specified by the manufacturer. In both cases, the temperature is usually controlled by the user.
Resolution
In 3D printing, resolution almost always refers to the smallest possible movement along the X and Y axes (width and depth) of either the laser beam (SLA, SLM, etc.) or the printhead (FDM). This value is more difficult to measure than the height of the layer, and it is not always proportional to it.
Shells
Like wall thickness in injection molding, shell (or shell thickness) refers to the outer wall thickness of the 3D printed part. When 3D printing, users usually have to choose the number of shells: one shell = outer walls as thick as a 3D printer nozzle; 2 shells = twice the thickness, etc.
Color 3D printing:
Since 3D printing is primarily used as a prototyping tool, single color prints are sufficient for most applications. However, there are several options for color 3D printing, including high-end material inkjet printers, multi-extruder FDM printers, and post-processing options.
Inkjet Printing Technologies
Major 3D printing companies such as Stratasys, 3D Systems and Mimaki have developed 3D inkjet printers for printing materials and binders that can print 3D models in full color as well as 2D inkjet printers. However, these machines are expensive and the parts do not always have excellent mechanical properties.
Multiextrusion
Several FDM 3D printers are equipped with two (or more) printheads, allowing you to simultaneously print on two spools of filament - different colors or even different materials - within the same print job. It's simple and affordable, but usually limited to two colors.
Filament replacement
Single extruder FDM 3D printer can produce multi-color prints. To do this, you need to pause printing at certain points and replace the spool of thread with a thread of a different color. This is a very slow method of applying color and does not allow precise control over where each color goes.
Adding color after printing
Many 3D printed parts can be dyed, tinted or painted after printing. While this adds another step to the process, it often strikes the best balance between quality and economy.
Post-Processing 3D Printed Parts:
Many 3D printed parts require at least some level of post-processing after leaving the print bed. This may include important processes such as the removal of supports, or additional cosmetic processes such as painting. Some processes apply to all or most 3D printing technologies, and some are specific to a particular technology.
Support Removal
3D printing technologies such as FDM and SLA require the installation of support structures (vertical struts between the printed layer and the part itself) to keep the printed object from breaking during the manufacturing process.
These supports must be removed when the part is finished. Some printers, such as dual-extrusion FDM machines, can print dissolvable support structures, allowing the support structures to be easily detached from the part using liquid chemicals. Insoluble supports must be manually cut from the part, leaving a mark that may need to be sanded down.
Washing and removing the powder
Some 3D printing technologies (such as SLA) leave sticky marks on parts, while others (SLM, SLS) may leave powder marks.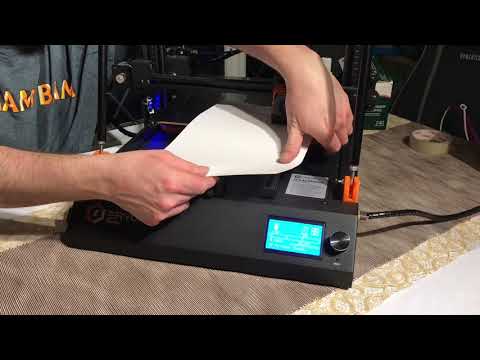 In these cases, the parts must be washed - manually or with a special machine - or the powder removed with compressed air.
Heat treatment
Many of the key 3D printing technologies print parts from materials that are not yet in their final chemical state after leaving the printing mold. Such details are sometimes called "green".
Many 3D printed metal parts require heat treatment after printing to increase layer fusing and remove contaminants. And bonded inkjet 3D printers, for example, produce parts that need to be stripped and sintered after printing to remove resin bond layers from inside metal parts.
Some 3D printed resin parts require post-curing after printing to increase their hardness and make them usable.
Surface Treatment
3D printed parts can be subjected to a wide range of surface treatments, from textural treatments such as sanding and smoothing, to visual treatments such as painting and toning. Some technologies, such as FDM, can create a rather rough surface that requires sanding, while others, such as SLA, produce a much smoother surface.
Combination of 3D printing with other technologies:
3D printing does not have to be used as a separate process. Rather than being seen as a competitor to CNC machining and injection molding, it can actually complement these and other manufacturing processes.
Combination examples include:
- 3D print the main body of the part and then CNC mill the thin parts to tighter tolerances;
- 3D printable master pattern for investment casting or vacuum casting;
- 3D print the part and then injection mold it using injection molding.
There are hybrid manufacturing systems that combine 3D printing with other technologies. For example, Mazak's INTEGREX i-400 AM and DMG MORI's Lasertec DED can perform both 3D printing and CNC milling.
Will 3D printing replace other manufacturing processes?
Analysts have long speculated about whether 3D printing could replace other manufacturing processes, including:
- Processing;
- Molding;
- Casting.
However, despite the desire of AM equipment manufacturers to position 3D printing as an end-to-end manufacturing technology, in practice, 3D printing is still limited to some specific manufacturing operations, especially low-volume production of specific materials.
In some areas, 3D printing has certainly overtaken other processes. For example, rapid prototyping with inexpensive plastics like ABS now dominates 3D printing, as ABS is cheaper to print than machined. 3D printing also seems to have established itself as the ideal tool for making objects such as patient-specific titanium medical implants: the speed and geometric flexibility of 3D printing is hard to beat in these specific situations.
In addition, 3D printing is an ideal tool for making objects such as patient-specific titanium medical implants.
Despite this, processes such as CNC machining currently remain the best for producing high quality parts and prototypes from engineering materials such as POM, PEI, PPS and PEEK, with surface finishes far superior to 3D printing. . In addition, processes such as injection molding are still infinitely faster for mass production of simple plastic parts.
In addition, although additive manufacturing is one of the most significant technological advances in manufacturing, which allows it to take a stronger position in manufacturing in general, more established processes such as CNC and injection molding are also being improved to produce higher quality parts. .
3D printing will continue to take an increasing share of manufacturing jobs, but it will not completely replace other technologies.
What did 3D printing look like 10 years ago?
A decade ago, the nascent 3D printing industry was gearing up for what it believed would be a 3D printing revolution: a 3D printer in every home, allowing families to print new items they might need, such as a spare part for a refrigerator, a new toy for kids, or even components to build a second 3D printer.
In 2012-2014, FDM 3D printer manufacturers such as MakerBot actively promoted their 3D printers in the consumer market, trying to convince ordinary people that a 3D printer can improve their home life and work. However, it was clear that these companies were trying to exploit the novelty factor of 3D printing and that their products had no practical application; a 2012 MakerBot press release seems to prove it: Make an entire chess set at the touch of a button. Friends, classmates, colleagues and family members will see what you are doing and say "Wow!".
Just a few years later, this so-called 3D printing revolution clearly failed, and many 3D printer manufacturers began to rethink their goals, moving from consumer to professional and industrial markets, where there were more concrete (and profitable) applications of additive technology.
In addition, those who were already working in the professional and industrial fields - companies such as 3D Systems and Stratasys - began to try to destroy the idea of 3D printing as a prototyping technology, positioning it as a viable mass production tool (which, obviously, , could be more profitable for the 3D printing industry, as manufacturers would have to fill entire factories with 3D printers, buy 3D printer management software, and hire 3D printing consultants).
What will 3D printing look like in 10 years?
3D printing companies have abandoned the prospect of putting a 3D printer in every home. However, in 10 years, they can expect some form of additive manufacturing to appear in more factories.
Although there is less talk about 3D printing today than in 2012, the technology continues to gain momentum in the professional and industrial world.
According to a recent report, market research firm 3DPBM Research expects the value of additive metal manufacturing to rise from $1.6 billion in 2020 to $30 billion by 2030, and this is largely due to the repositioning of AM as a manufacturing tool and the development of more high-performance engineering materials. (That said, 3D printing will remain a valuable prototyping tool in many industries, and prototyping applications will benefit just as much from technological advances.)
However, not only metal AM is being developed. Technologies such as HP's Multi Jet Fusion have opened up new possibilities for plastic printing, and innovators such as Carbon have developed new high-speed processes in the photopolymerization category.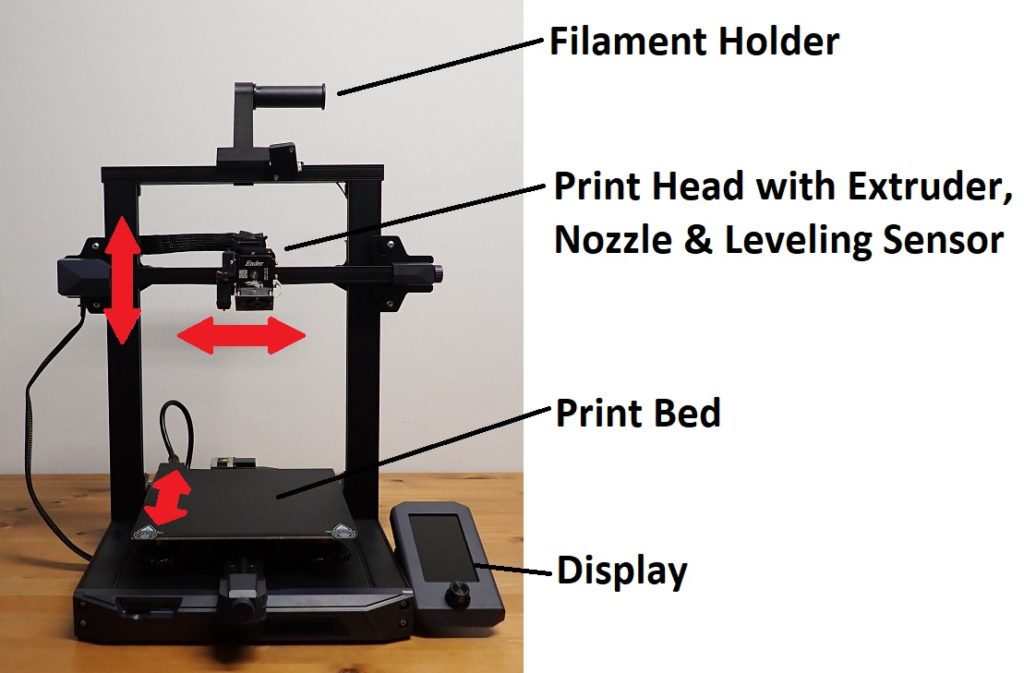 Niche areas such as 3D bioprinting and micro 3D printing are also regularly opening up new opportunities, and composite 3D printing (such as continuous carbon fiber 3D printing) is also on the rise: IDTechEX predicts that by 2030, the market size of composite 3D printing will be $1.7 billion
In short, 3D printing will gradually become a serious competitor to other manufacturing processes in many disciplines.
How to outsource 3D printing services?
Investments in 3D printing hardware and software are not suitable for all businesses, so many successful companies outsource their 3D printing needs to third parties, such as online 3D printing service bureaus (for one-time projects) or prototyping partners and production, such as 3ERP (for one-time projects or repeat orders).
When outsourcing 3D printing services, it is important to consider whether your business needs design and manufacturing services or just manufacturing services. (Keep in mind that a poorly executed 3D model may fail for 3D printing).
In general, though, ordering 3D printed parts from a third party is easier than ever. Many manufacturers can start 3D printing with just a digital 3D model, although more important projects may require a technical drawing to communicate additional information such as materials, colors, and tolerances. Some 3D printing service providers (including 3ERP) will offer advice on suitable 3D printing technologies and materials for your project.
Explore our full range of 3D printing services, including available technologies and materials, or request a quote for your 3D printing project.
instructions how to work from scratch for beginners and dummies, what it looks like
Three-dimensional printing has become increasingly introduced into our daily lives. Thanks to new technologies, it has become possible to easily print from a small detail to a large building. The range of products is also pleasing - today you can find a lineup that includes both affordable devices and more expensive ones.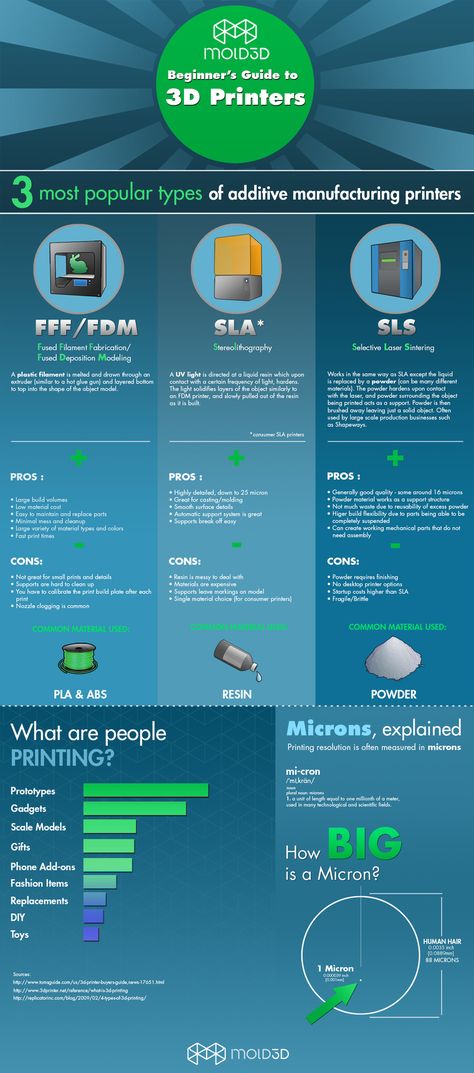 But how to work with a 3D printer? This is a completely normal question that any beginner will have, it is for this reason that we will try to answer it as simply and accessible as possible.
What is a 3D printer and how does it work?
The 3D device consists of the printer itself and a computer that controls all processes. The principle of operation of such a design is to create 3D models by superimposing layers of liquid material. There are a large number of printer models - from large industrial ones to compact ones, but they all have the same principle of operation and component parts:
- Extruder - the print head through which the thread passes. The head heats the thread to a semi-liquid state and evenly supplies the material to the working surface.
- Work surface - a printing platform on which a 3D model is formed.
- Motors - mechanisms responsible for the accuracy of movement and speed of printing.
- Sensors are electronic devices that limit moving parts to specified coordinates.
- The frame is the structure that connects all parts of the printer.
How a 3D printer works: features
Work with the aim of building a three-dimensional model begins with a sketch, which is created in a special program. After that, the software independently generates a plan for the movement of the print head and a print sequence. The 3D model is reproduced by strongly heating the plastic and distributing it evenly.
3D printers are used in many areas. Let's list some of them:
- Architecture - creation of models of buildings.
- Medicine - dental prosthetics, making models of organs for study.
- Construction - production of houses using 3D printing technology.
- Education - a visual aid for learning 3D printing.
- Automotive industry - creation of tuning parts, layout prototypes and other products.
This is a small list of industries where 3D printing is actively used. Today, almost every entrepreneur and just an enthusiastic person can afford a printer.
The following printers are distinguished by design features:
- RepRap - self-reproducing printers that can create their own copies.
- DIY-kit - the device comes disassembled with instructions, the assembly of which will take a sufficient amount of time.
- Ready-Made - models are delivered assembled and ready to use.
- Commercial and industrial - devices capable of printing metal, concrete, polymers and other materials.
How to use a 3D printer: tips for beginners, where to start
Mastering the technique of 3D printing is not difficult if you follow the recommendations and tips. Especially for those who plan to learn the basics of 3D modeling, an up-to-date list of questions and detailed answers to them has been prepared.
Printer Installation
To begin, you will need to carefully unpack the box and remove any stops. The next step is to install the printer on the surface using the building level. This will allow you to place the device as evenly as possible, which will provide better printing.
Note. Some 3D printers come with a level for installation.
Next, you will need to connect the printer to your computer and install the necessary drivers. The software disc comes with the 3D device.
Preparation for work
To get started, you need to calibrate the working surface - without this, printing quality products is impossible. This process is carried out automatically or manually. The attached instructions have detailed information on how to perform manual calibration.
Extruder patency test
The next important step is setting up the extruder. First of all, you will need to check its nozzle. If the printer has already been used, the nozzle should be cleaned of solidified particles that will interfere with the throughput of the material. Refueling the 3D printer The thread is fed into the extruder directly from the spool. But there is one caveat - for this you must first warm it up. To thread the thread, you will have to make a small effort in order to loosen the presser mechanism.
Working with models
Models can be created using a variety of 3D modeling programs. The process of manufacturing three-dimensional parts is creative, requiring careful preparation. The better and more detailed the model is drawn, the better the 3D layout will be at the output.
Start printing
After creating the model in the program and preparing the printer for work, you need to send the file for printing and wait for the result. The print speed varies depending on the printer model and specifications, as well as the media used.
Processing of the finished product
3D products obtained by printing on a printer usually do not please the user with an ideal appearance: the parts have an uneven surface. But this is typical for models of 3D printers on FDM, SLA and DLP devices, which are distinguished by higher print quality. Owners of FDM printers should not despair - a simple processing of products will give products an attractive appearance and make the surface smooth.
Several powerful ways to post-process 3D printed parts:
- Mechanical - carried out by sanding the surface with sandpaper or a special sponge for grinding.
- Chemical - Surface treatment with aggressive solvents such as acetone and dichloroethane.
- Mixed - In this case, the above two processing methods are used.
What are the possible errors and how to avoid them?
3D printing technology can be mastered even by a beginner, but despite this, the production of the first products causes excitement for the user. Simple operation, detailed instructions and recommendations on the Internet will allow everyone to deal with almost any printer model. But there are a few useful life hacks, the knowledge of which will help you avoid typical beginner mistakes:
- Calibrate and test the 3D printer before starting work.

- Be sure to use the correct file extension for quality printing.
- Do not remove the finished product from the printer immediately after processing, as this may damage the part and cause defects.
- If you encounter errors during the 3D printing process, try restarting the device - this usually helps.
- If restarting the printer still does not help, try changing the settings or re-entering the model.
- When assembling 3D printers, please follow the enclosed instructions carefully.
- Use only the correct materials for your 3D printer.
- Subscribe to useful channels on the subject of 3D printing and read articles.
Following the tips above will allow you to set up your 3D printer, get it ready to run and, most importantly, print your first 3D products. Choose a model according to your budget and capabilities, and it will not be difficult to master the basics of 3D modeling and get the first details if you follow the instructions and recommendations.