How to 3d print from onshape
Your Guide to Successful 3D Printing
My colleague, engineer Philip Thomas, is a skydiving instructor on the weekends. CAD is fun, but he’s always looking for an additional adrenaline rush. Philip (the guy in the blue suit in the foreground) recently designed and manufactured the incredible helmet mounting system below using only Onshape and a 3D printer.
The mounting system contains the myriad pieces of electronic equipment that help skydivers communicate with each other and maintain altitude awareness – all laid out in a logical control-panel style setup.
This skydiving helmet mount was designed in Onshape and made with a 3D printer.
If you’re like most of us here at Onshape, you find new manufacturing technology exciting. You’ve probably considered additive manufacturing (aka 3D printing). This technology can drastically reduce the amount of time it takes to get parts made and also can create shapes that are impossible to make with traditional manufacturing processes. 3D printing provides the everyday Joe (or Jane) with the ability to bring a transformative idea to fruition without a large capital investment.
What is your idea that will change the world? Regardless of what you’re building, the first step is a great 3D model. Luckily, anybody with a modern web browser can now create their design with Onshape. So all you need is to design your part and hit print, right?
Well, I don’t mean to be a wet blanket, but it's not as simple as pushing a button and getting your part. There are a few other factors to consider that will make your task easier.
Let’s step back for a second and look at some well known manufacturing principles. Imagine we are building your part with a more traditional manufacturing process. Since it is a high-volume production item, we would most likely design the part in a plastic material and select an injection molding process. When designing a plastic part, certain cardinal rules apply. You need to add draft to the part so that you can pull the part out of the mold, you should not use wildly different wall thicknesses, etc. (By the way, Onshape has great tools for plastic design and mold design right now). Thinking about manufacturability with 3D printing is no different. To have a successfully produced part made, you should consider building in certain design elements to avoid rework and scrap.
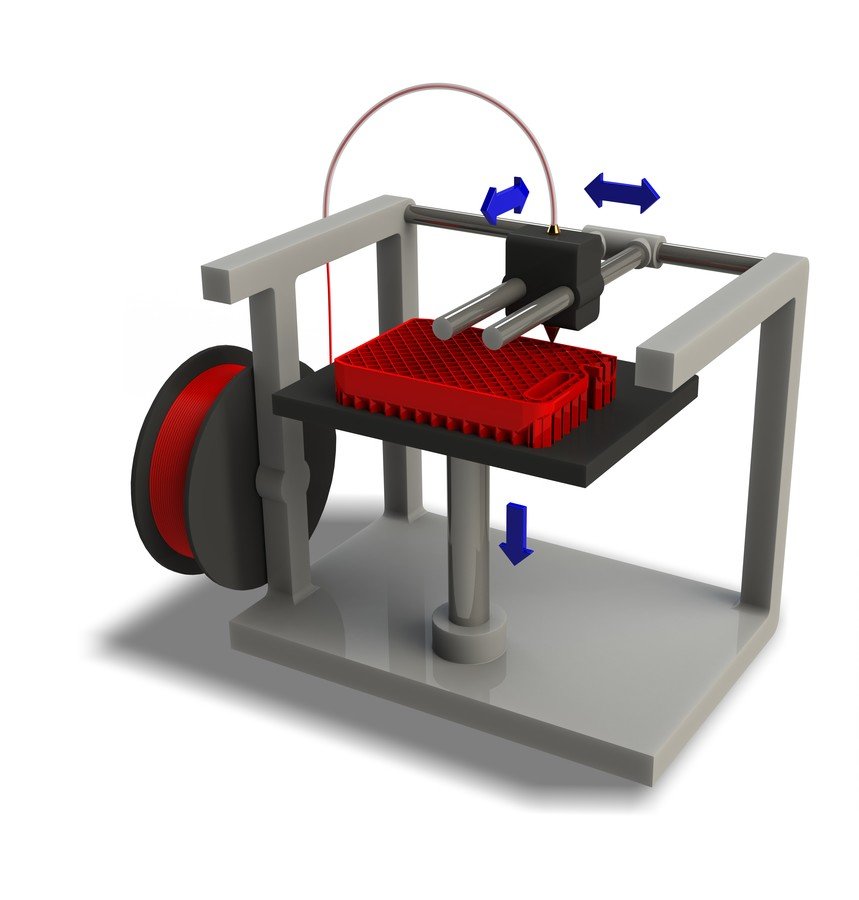
First, know your printer. Each printer employs assorted build methods and has different design restrictions. Since there are so many printers on the market today, I cannot point to each one’s unique considerations, but I will explore a few common items:
- Know your build chamber volume. There are devices on the market today that print relatively small part volumes to very large volumes. If you are looking to print the part shown on a common FDM-style printer, perhaps it needs to be split into several pieces if you want to build it in one go. Luckily, Onshape has a great workflow for this. Design your part as you normally would, all in one piece. If the build chamber is 8” x 8” x 6” and the part would extend beyond those bounds, you can split the part in the Onshape Part Studio quite easily.
- What is the actual printing medium? (i.e. Filament, Resin, Powder) If it is a FDM-style printer, the diameter of the filament will have a direct relationship to the wall thickness that you design into your part. You should always check to make sure that you have several layers of material deposited for thin walls. The Section View tool inside of Onshape will ensure that you can check and measure the walls from any orientation. A quick section view and a measurement will ensure that you are creating wall sections that can be successfully printed.
- When using a photo-resin based system, you should consider that the liquid needs a way to escape from volumes that may trap the resin. To allow resin to escape, especially in respect to expected support structure, make sure to design holes into the part to allow the resin to drain inside of volumes where they may collect. A section view is also useful for interrogating where drainage holes should be located.
 My colleague Darren Henry recently explored all the features of Section View that are available to help in this process.
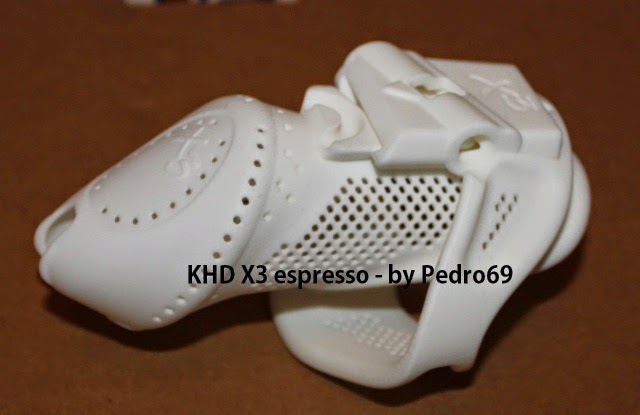
 - What about parts that mate up with a molded-in thread, like a coffee cup with a cover? Design the threads into the part, then design the mating part around the cover. Incorporate a small clearance between the cover and cup to allow the parts to fit together properly.
OK, now that we are ready to actually build the parts on the 3D printer, we need to create a file from Onshape that the 3D printer will understand; an STL file. Think of an STL file like a PDF file of a document. It is meant to be a digital, read-only representation of your part – a snapshot in time. Now you can download the STL file and open the file in your 3D printer’s proprietary pre-processing software for production.
Have fun with that great idea that will change the world!
More Tech Tips
Suggested Content
Tutorial: 3D Printing With Onshape | 3D Printing Blog
Begin typing your search above and press return to search.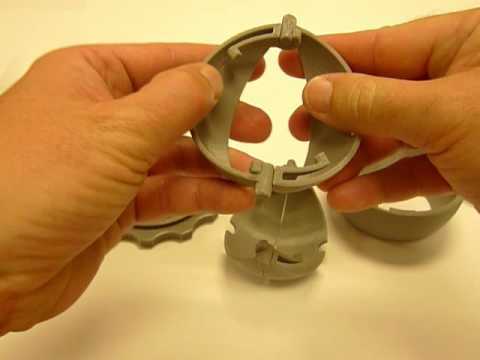 Press Esc to cancel.
by Fabian | December 2, 2016 | Tutorials
Tutorial: 3D Printing With Onshape
by Fabian | December 2, 2016
Onshape is currently making a buzz: it is the first and only complete cloud 3D CAD system that lets everyone on a design team simultaneously work together, using a web browser, phone or tablet. In this video and text tutorial, we will show you how to use this powerful app to create stunning 3D prints.
About OnshapeOnshape is a very powerful and professional 3D CAD system that provides teams with instant access to the same CAD system and data via a cloud-based platform. The 3D data can even be accessed and edited on mobile devices such as the iPhone, iPad and Android smartphones and tablets.
Onshape lets users directly draw, edit and shape new objects in its user-friendly interface. The app is especially suited for creating spare parts, technical parts, parts ready for manufacturing and assemblies.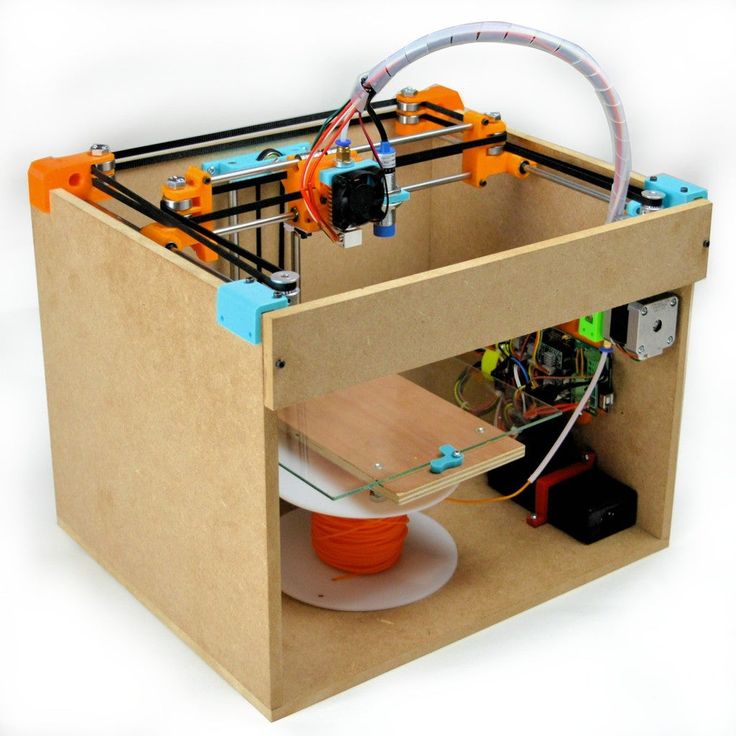
Onshape is free for creating 3D models that can be viewed publically. Pricing for licenses that allow the creation of private 3D models start at USD 100/month. Follow this link to create your Onshape account and get started for free!
Professional 3D Printing with OnshapeIf you want to get your Onshape 3D files printed on industrial machines, we’ve got you covered. You can simply add the free “i.materialise” plugin to your Onshape account and start printing in five simple steps:
- Go to the Onshape website and log into your account or register for free
- Subscribe to the i.
 materialise 3D printing app by visiting Onshape’s “App Store”, where you can search for “i.materialise” and add the plugin by clicking the “subscribe” button
 - Open the Onshape file that you would like to print
- Click on the “+” symbol in the lower-right corner, select “Add application…” and then “i.materialise 3D printing app” from the menu
- Click on the button “Upload to i.materialise”. This will take you to the i.materialise 3D printing service where you can see instant price quotes for over 100 high-quality 3D printing materials and finishes
To make sure that your 3D file is perfectly printable, you need to take the following 3D printing issues into account when it comes to creating your 3D file:
- Wall Thickness: It’s very important that every surface of your 3D model has been assigned a wall thickness. When using Onshape it is possible to design a surface without a wall thickness or a wall that is far too thin for 3D printing (known as paper-thin walls).
 3D printers, however, can only print walls that have a certain minimum thickness. For most materials, you should choose a minimum wall thickness of at least 1 mm for the essential parts of your design. You can learn how to choose the perfect wall thickness for your 3D print here
 - Detail Size: The details, or the small decorative parts of the object such as embossed or engraved text, need to be of a certain size or they will not appear on the printed object. The exact minimum size of the smallest possible features of your design depend heavily on the material of your choice. That’s why you need to carefully read through the design guide of the material of your choice first. This is especially important if you intend to add embossed or engraved details such as text. Sticking to the minimum detail size will make sure that everything is as readable as you intended
- Grouped Models: Unfortunately, so-called grouped models are a common reason for us to cancel orders.
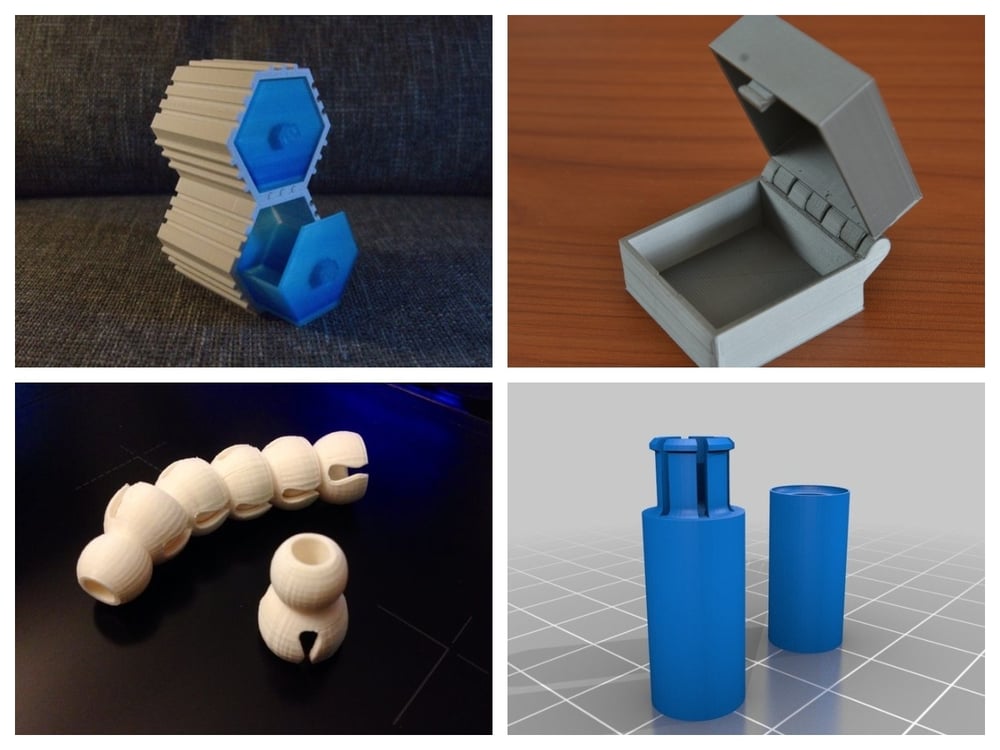
 For example, users that upload a single 3D file that consists of several, separated, unconnected shells will get a notification that their order cannot be processed. Interlocking and moving parts, on the other hand, are possible to 3D print (see next bullet point)
 - Interlocking and Moving Parts: One of Onshape’s coolest features is the fact that you can create designs with interlocking and moving parts. Thanks to Laser Sintering technology our 3D printers can print these parts in Polyamide, Alumide, ABS, and Rubber-Like if you stick to the right space between your moving parts. We recommend choosing a gap of at least 0.4 mm (1 mm for Rubber-Like).
3D printing interlocking parts is possible with Polyamide, Alumide, ABS, and Rubber-Like
Creating and Printing Your First Onshape ModelCreating a new 3D design can seem like an intimidating task at first. However, keep in mind that any Onshape project actually starts out quite simply with a basic geometric shape.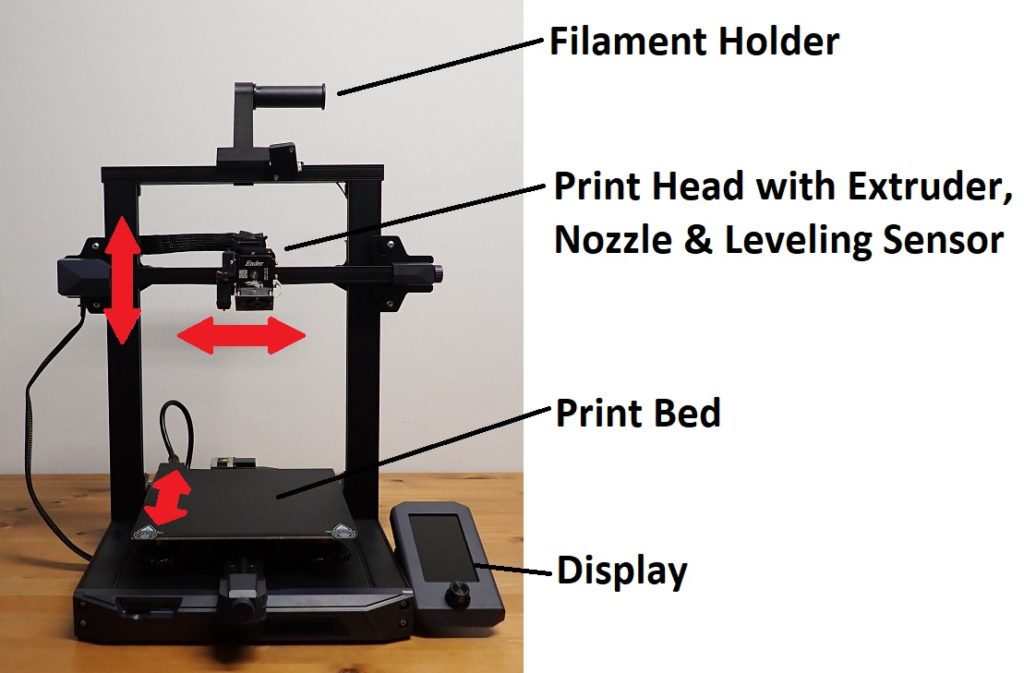 Onshape lets you add more and more features that make your sophisticated design come to life.
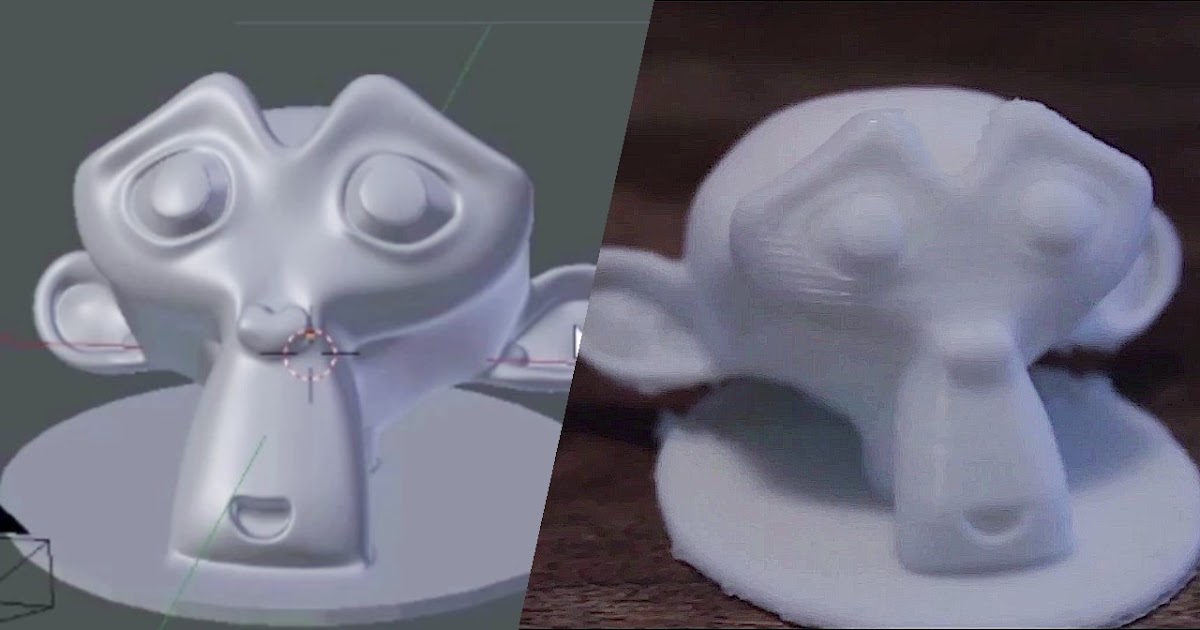
To experience this process, we created a 3D model of the following webcam cover that is publically accessible here.
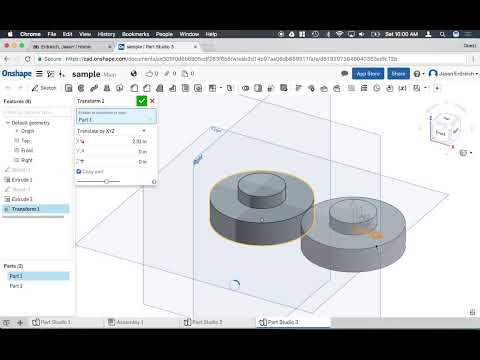
When opening an existing file in Onshape you will notice the “features” list on the left-hand side. It’s a historical track of all edits and modifications that have been made to your model.
Double-clicking on the first feature in the “Sketch 1” list will show you the first step we took – creating a two-dimensional sketch of a triangle:
Double-clicking on “Extrude 1” will take you to the next step. We turned our sketch into a three-dimensional object.
Now let’s jump to “Extrude 3”. You will see that the new sketches and extrusions give us the basic shape of the webcam cover.
“Sketch 6” shows the basic shape of the eye that will be featured on the front side of the webcam cover.
Last but not least, we’ve arrived at the very last item. Going to “Hole 1” shows you the finished product.
With the help of the 3D printing plugin by i.materialise, we ordered our professional 3D print in Alumide, a mix of nylon plastics and sparkling Aluminum particles.
To get started with Onshape, create your free user account now and take a look at our webcam cover demo model. To print your designs in 3D, add our plugin to Onshape and start printing in 100+ high-quality materials and finishes.
How to print to a printer remotely
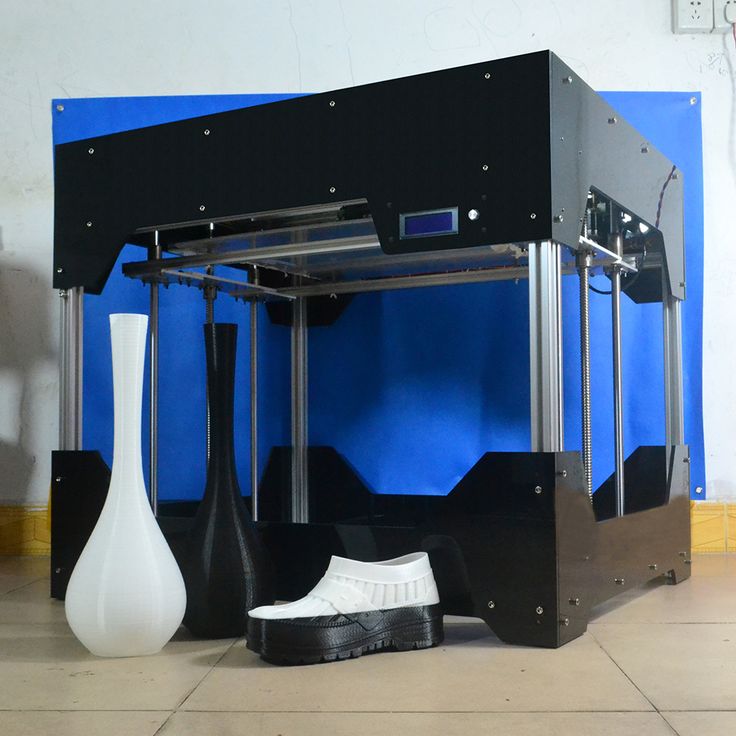
Stone Age, Bronze Age…… Are we living in the era of 3D printing? ? I don't know if this is the future that Star Trek envisioned for us with their matter replicator, but it's clear that the time has come when any of us can buy a 3D printer and have it at home.
After analysis, 3D printer UP! Plus 2 by EntresD, a device that left me with a great impression during the month I tested it, I needed to remotely print a lens hood for a camera, so in this article we are going to outline the general lines so that you know the easiest way to Connect your printer to your home Wi-Fi network to print from anywhere using your Android smartphone . So when you get home, you just need to grab the printed piece and use it.
Index
- 1 Remote printing on a 3D printer, the first steps
- 2 Best Android applications for remote print
- 2.1 Thingverse for Android
- 2.2 ONSHAPE
- 2.3 graphite
- 2.4 Octodrome
- 3 Remote printing on open source computers.
- 4 Remote printing on commercial printers.
- 5 Remote printing with PRUSA I3
- 6 Remote printing with non-Octoprint compatible printers
- 7 Final findings
Remote printing with a 3D printer, first steps
In my case, I went camping and took some pictures on camera when I realized it was a really sunny day and you couldn't take decent pictures if you didn't have an umbrella. Easy, I'll make it on a 3D printer, what do we need?
Let's remember, to get to to print the part on the 3D printer you need:
- Un file with 3D object in STL file format.
- Un software that laminates the object for us which we will print later.
- Un software that moves the printer to draw the layers that make up the object.
Okay, let's go to the Google app store for apps that can help us. Here is what I found:
Best Android Apps for Remote Printing
Thingverse for Android
Thingverse for Android This will allow us to navigate the web portal of the same name, which, as you well know, is one of the most famous repositories of 3D objects that can be downloaded and printed for free.
Onshape
Onshape is a powerful 3D object designer cloud-based. In case we prefer to create our own designs or tweak the objects we have downloaded from the previous portal.
Graphite
Graphite is an application that will allow us to preview STL files directly on our Android device.
Octodroid
Octodroid is a Octodroid web server access client which is always more convenient than exiting directly from the browser. Below I will explain what Octoprint is, but for now, download and install the application.
Remote printing on open source computers.
Still The Open Source community already has an advanced remote printing solution . This is called Octoprint and allows you to connect a wide range of printers.
Octoprint is indeed a web server optimized to manage our printers from the Internet . It can be mounted on Linux, as a distribution on Raspberry, or even on Windows (after installing Python). It allows us to customize it with plugins and we can even include images of the webcam from which we monitor the printer.
is required so that The printer we want to control has a serial port or Wi-Fi connection. To make the connection easier, we can view the list of supported models with the configuration details we need to complete.
Remote printing on commercial printers.
BQ joins the Open Source community development of a plugin to make managing your printers from Octoprint as stable as possible.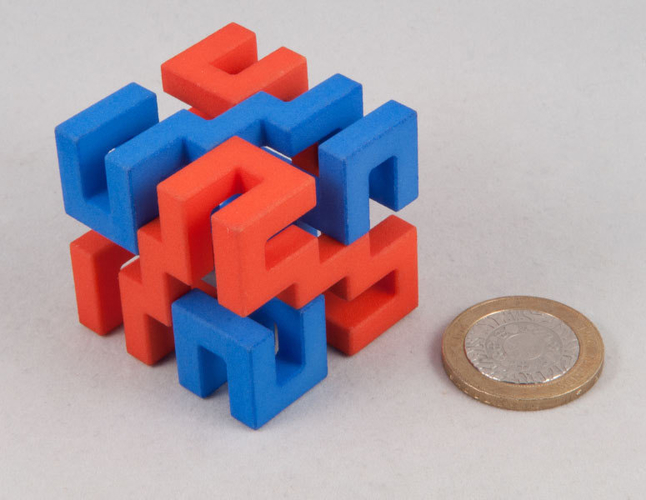 Some other manufacturers have their own applications and many of them are compatible with Octoprint.
Remote printing on PRUSA I3
we must install Octoprint on a computer with OS LINUX, WINDOWS or RAPID. If it is a windows PC (as in my case), follow the guide available on the project web portal itself and connect the printer via serial port.
Remote printing on printers not compatible with Octoprint
For those of you who have a commercial printer and can't connect to Octoprint, we have a alternative solution.
You need to install software on the computer that is printing, which allows us to manage it remotely. For example, Teamviewer Host on a PC and an application from the same manufacturer to be able to control it from a mobile phone. So we will only need to remotely do what we would do sitting in front of the computer to print the part.
Also we can install software that allows you to control the webcam remotely which we set by pointing to the printer.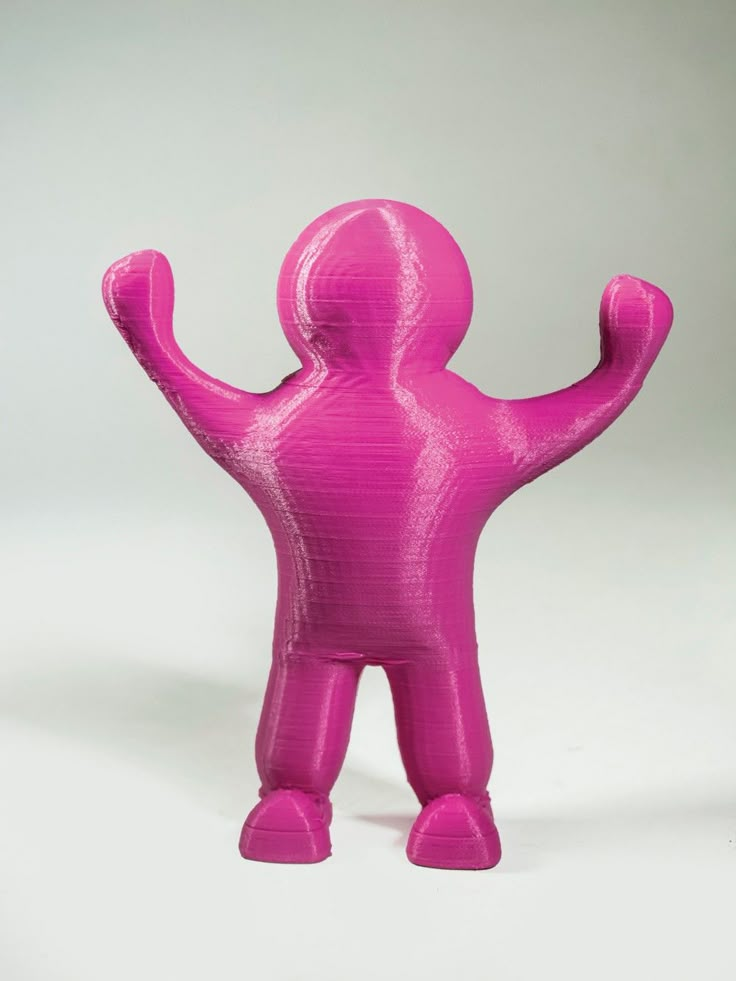 A good open source solution for Windows is Ispy
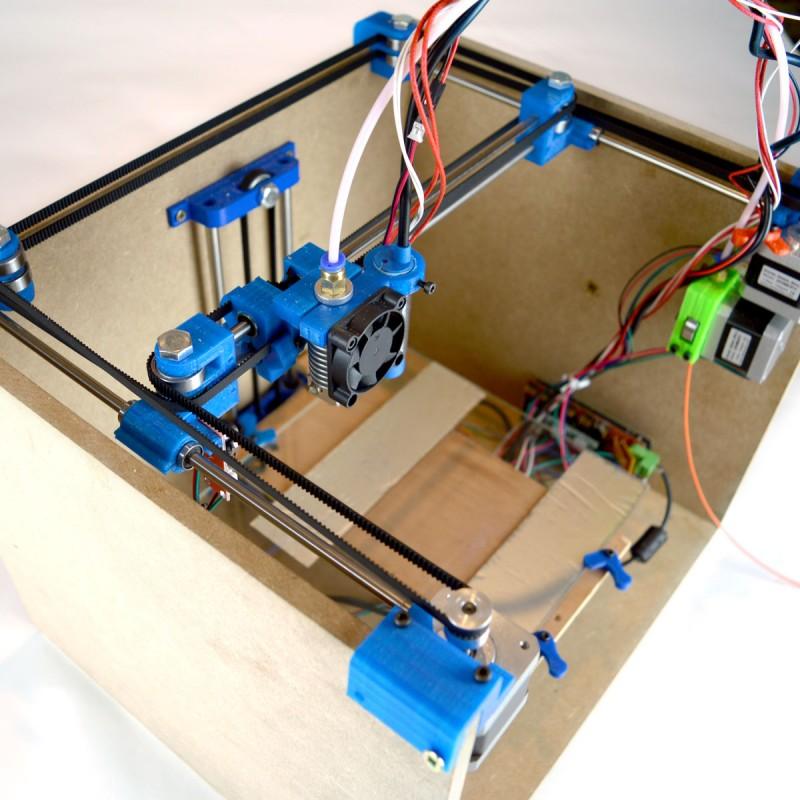
And this is the final result after printing the hood wirelessly following the instructions in this guide to be able to 3D print the from anywhere in the world. As you can see, this is a fully functional umbrella that I was able to print from the mountain without too much trouble. Of course, later I realized that black would be better, but with a spray I will solve the problem soon.
Latest conclusions
Now that domestic 3D printing already has acceptable quality and cost, it's time to look a little further. Mobile printing is the next step in the evolution and as usual the Open Source community is once again taking the lead in making the dreams of many users a reality. Now we have to wait for the standardization of this type of system and we will be able to print remotely quickly and easily using any 3D printer.
By the way, maybe more than one wrinkled their noses when they read that we are getting closer and closer to the Star Trek matter replicator. Do you think it's a far-fetched idea that there's still a long way to go to relive that famous Star Trek chapter in which they print steak and potatoes with the greatest naturalness? Well you know what Coming soon to the market is a food printer called Foodini that comes close to this amazing concept. And yes, you can print your food from work remotely so it's fresh when you get home.
 cooked printed for you. What do you think of this idea?
The 14 Best 3D Printing Software of 2020
3D printing technology has improved a lot over the past decade. And now it is taking by storm more and more sectors of the economy. So far, it has been successfully used in various fields, ranging from medicine and manufacturing to socio-cultural sectors. However, 3D modeling is not easy to master. It can sometimes become frustrating to work with 3D modeling tools, and if you're new, designing and printing a simple structure can take days or even weeks.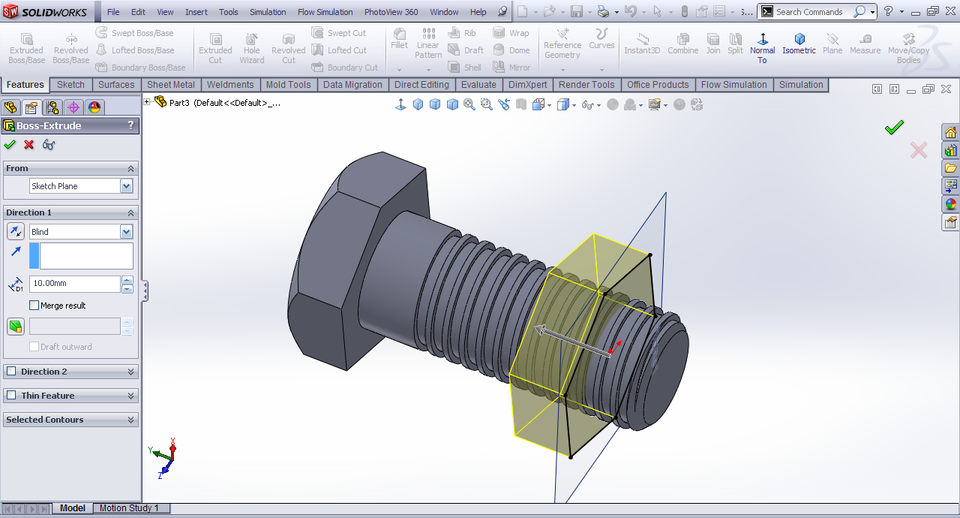
Below you will find easy-to-use 3D printing tools that feature innovative designs, extraordinary features, and seamless integration with computer hardware. We have provided all the information about the skill level and where they can be downloaded.
14. Sculptris
Price: Free Platform: Windows / macOS
Sculptris is a virtual sculpting tool that mainly focuses on the concept of clay sculpting. This would be a great choice if your project revolves around creating statues or characters from comics and video games. Even though the tool is aimed at beginners, it still contains a lot of incredible features that make 3D sculpting very easy. For example, in Sculpt mode, you can edit mesh geometry with simple brush strokes. In paint mode, you can easily draw textures (with brushes) wrapped around the mesh surface. Sculptris regularly analyzes the surface of the model to make sure details are projected correctly and automatically adds polygons as needed. Overall, it provides an impressive gateway to the 3D world. You can create basic models and then refine them in other advanced programs such as ZBrush. In fact, Sculptris is made compatible with ZBrush, so users can import their work into advanced 3D tools when they're ready to take their designs to the next level.
13. Wings 3D
Price: Free Platform: Windows / macOS / Linux
Wings 3D is an open source program that uses an internal data structure to store coordinates and adjacency data. There are four different selection modes for modifying model geometry: Edge, Vertex, Face, and Body. Each has its own set of mesh tools that offer both basic and advanced features.
Standard tools (such as move, scale, rotate, bevel, bridge, cut and weld), virtual mirror (for symmetrical modeling) and smooth preview make it easy to create a 3D model. Although it does not support animation, you can use it to create mid-range polygon models and add textures and materials using AutoUV renderers and OpenGL rendering. After that, you can export the file to external rendering programs such as YafRay and POV-Ray.
12. Vectary
Price: free/premium starts at $9 per month
Platform: web browser
Vectary provides an easy and intuitive way to get started with creating 3D and AR (augmented reality) content . It comes with a large, fast-growing library of free scenes and models, so you don't have to spend a lot of time speeding up your 3D work. There are plenty of high-quality pre-selected and lit scenes for product shots, abstract graphic backgrounds, and a wide range of fully textured materials, from wood and fabric to frosted glass and pavement. Vectary also has viewport navigation, subdivision modeling, composition abstractions, lightning, and rendering. All of them are tuned to optimize your creative expression. You can create your first short with simple drag and drop and get realistic results in minutes.
11.
 Slic3R
Price: Free
Platform: Windows / macOS / Linux
AMF and 3MF). It is capable of processing complex models, generating infill patterns, and estimating G-code printing times. The software is equipped with many configuration options that allow users to customize and have complete control over their projects. You can integrate Slic3r with server applications or use it from the shell (via a powerful command line interface). Users can choose to print thicker infill to benefit from the low layer height around the perimeter while still keeping print time within the required amount. Slic3r will control the print speed so that each layer gets enough time to cool before applying the next layer.
10. PrusaSlicer
Price: Free
Platform: Windows | macOS | Linux
PrusaSlicer comes from a forked version of Slic3r. It has everything you need to create a 3D object: an intuitive interface, convenient keyboard shortcuts, and various controls that make it easy to scale, rotate, cut, and move objects. When installing the software, you will find several modes to customize the settings depending on your skill level. With the built-in Support Enforcer, you can selectively apply supports to individual objects. You can even choose the layer height for each part of the object individually. PrusaSlicer will automatically take care of the anti-aliasing so the output looks its best and print times remain acceptable. It can be used for model slicing for both FDM (deposition deposition modeling) and resin printers.
9. OnShape
Price: From $1,500 per user per year | Free for teachers and students
Platform: Web browser | iOS | Android
OnShape is a one-stop product development platform that brings all your stakeholders together in a single, secure cloud workspace. It makes extensive use of cloud computing, with CPU-intensive processing and rendering performed on internet servers. It is specially designed for professional level users who want version control and the best collaboration experience.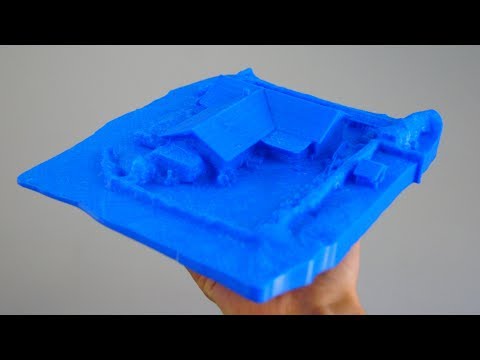 Team members can manage projects without keeping copies or tracks of different file versions. Perhaps the most impressive feature of this tool is its ability to help executives make better business decisions with real-time analytics. This tool has proven to be effective in many industries including 3D printing, mechanical equipment, machine parts, medical devices, consumer electronics, industrial equipment. While the standard version costs $1,500 per year, it's free for educators and students. If you're a hobbyist, you can also use it for free for non-commercial projects in the open source public workspace.
8. PTC Creo
Price: 30-day trial | $2,390 for a one-year license
Platform: Windows
Creo is a suite of CAD applications specifically designed to address the challenges organizations face when creating, analyzing, and sharing information with downstream partners. It is developed by Parametric Technology Corporation, an American software company headquartered in Boston, Massachusetts. Creo introduces a new Generative Topology Optimization extension that lets you create high-quality designs that perform better in the real world. It also contains tools for direct 3D modeling, 2D orthographic imaging, technical illustration, schematic design, and finite element analysis and modeling. The premium version includes manufacturing processing, Modeler options, topology optimization, metal printing, tolerance analysis, and more. All in all, this is a great tool for power users and small businesses.
7. Rhinoceros 3D
Price: Free trial for 90 days / $995 one-time fee
Platform: Windows / macOS
allow users to manipulate points, curves, surfaces, meshes and solids the way they want. There are literally no limits on complexity, degree, or size outside of your equipment. It has an extremely detailed interface that can display countless viewports, perspective working views, floating views, clip planes, two-point perspective, and 3D stereo viewing modes.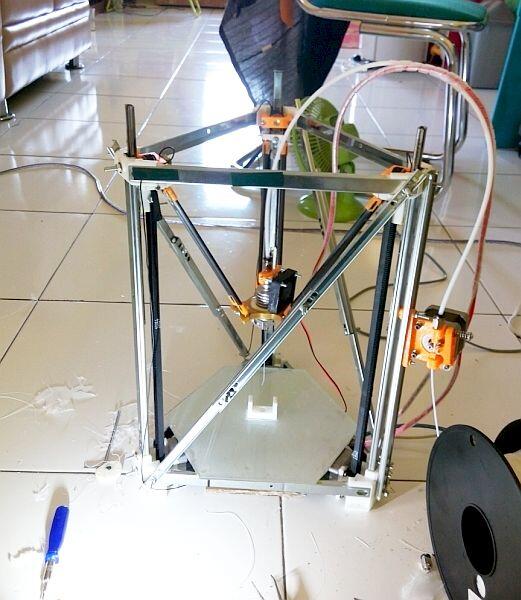 Built-in enhancement tools ensure that the 3D models used throughout the process are of the highest possible quality. In terms of drafting and rendering, the software facilitates the development of 2D and 3D drawings for every discipline in every notation and visual style. You will be able to control rendering, change shadows and lights pretty quickly. 64-bit support and extended support for graphics coprocessors allowed Rhinoceros to work with large point clouds. The latest version is compatible with hundreds of different CAD, rendering and animation products.
6. MeshLab
Price: Free
Platform: Windows | macOS | Linux
MeshLab is an open source program for editing and processing 3D triangular meshes. It contains many functions for checking, editing, texturing, rendering and transforming meshes. With the visualization function, you can graphically represent the smallest details of a 3D model, control the camera's perspective, and use the built-in canonical views. Move different grids to a common frame of reference, restore the shape of any object and easily control its scale, position and orientation. There are many Photoshop-style filters for adjusting vertex and edge colors, such as brightness, contrast levels, gamma, saturation, sharpening, and anti-aliasing. There are also additional filters for calculating volumetric obscuration and external occlusion and matching them with the color of vertices and faces. MeshLab work can be traded with other popular third party tools including SketchFab, Autodesk and Blender. This makes it easy to expand your project and work with multiple 3D programs. MeshLab has been used for rapid prototyping in orthopedic surgery, desktop manufacturing, and in many academic and research contexts such as surface reconstruction, cultural heritage, and microbiology.
5. MatterControl
Price: Free
Platform: Windows | macOS | Linux
MatterControl is a comprehensive software package that allows you to design, cut and manage 3D prints. You can browse existing designs (by visiting Design Apps) or create objects from scratch using the Design Tools. MatterControl has advanced 3D design capabilities that make it easy to create quality models with greater complexity than traditional CAD tools. For example, it has real-time Z-shift modification and built-in controls for dual extrusion using powerful 64-bit processing. If you have a dual extrusion 3D printer, the software makes it easy to choose which extruder will print certain parts. Once a model is imported or created, you have the ability to remove or replace parts, align them to their origin, and tell the printer which extruder to use for certain areas of the design.
4. SolidWorks
Price: Available upon request.
Platform: Windows
SolidWorks is computer-aided design (CAE) and computer-aided design (CAD) software for Microsoft Windows. It is used by millions of designers and engineers in over 100,000 companies. Written on the Parasolid core, the software uses a parametric functional method to develop models and assemblies. It's fairly easy to get to know and comes with a lot of functionality. Although 3D sketches are available for professional users, most people start with a 2D sketch. A sketch contains geometry in the form of points, arcs, lines, conics, and splines. You can add dimensions (to define the location and size of the geometry) and relationships (to define attributes such as perpendicularity, parallelism, tangency, and concentricity). The software automatically generates views from a solid model. You can easily add notes, dimensions, and tolerances to your drawing at any time. Your work is saved in the Microsoft Structured Storage file format, so you can open and modify it on other platforms from other vendors.
3. Fusion 360
Price: 30-day free trial | $495 per year
Platform: Windows / macOS
Fusion 360 is a cloud-based 3D CAD software developed by Autodesk.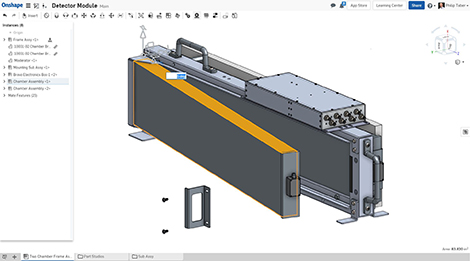 It handles the entire process of designing, testing and executing a 3D structure. The software offers complete control over form design and provides robust features for creating clean and highly detailed modes. This allows prototyping and validation of designs before rapid production. You can even digitally simulate your products to ensure they can withstand real-world conditions. Static Stress and Shape Optimization options allow you to identify stresses caused by static loads on parts and identify unwanted areas in your design for easier weighting. This can greatly reduce the cost of prototyping. Overall, Fusion's complete set of modeling tools makes it one of the preferred products for designers, mechanical engineers, and machinists.
2. CATIA
Price: available upon request
Platform: Windows / Unix
CATIA is probably the best 3D printing software for professional users. This means an automated 3D interactive application.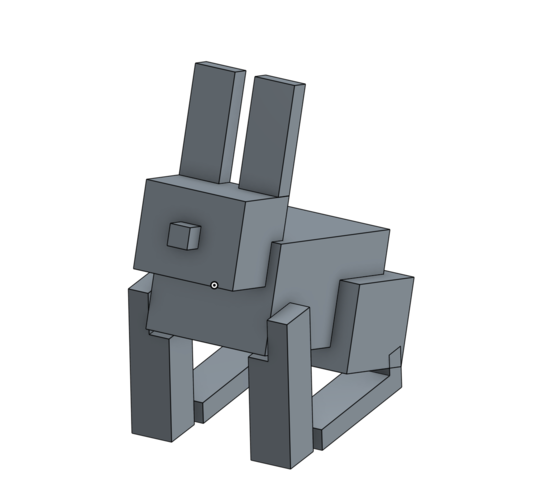 Developed in 1977 by the French company Dassault Systemes, CATIA provides a unique opportunity for modeling complex products. Over the years, it has evolved into something more than a CAD software package: it is now a software package that includes the capabilities of computer-aided design and manufacturing tools. The software has a fully loaded library with all the materials you need to develop projects at different scales. Unlike other 3D modeling tools of its kind that require a powerful PC, CATIA can run on inexpensive desktops and laptops. It is used in many industries, including automotive, aerospace, defense, life sciences, consumer products, and industrial equipment.
1. Cura
Price: Free
Platform: Windows | macOS | Linux
Cura is an open source slicing application for 3D printers. It is available under the LGPLv3 license so you can integrate it with third party CAD applications. Like other 3D printing software, it splits the model file into multiple layers and generates a printer-specific g-code.