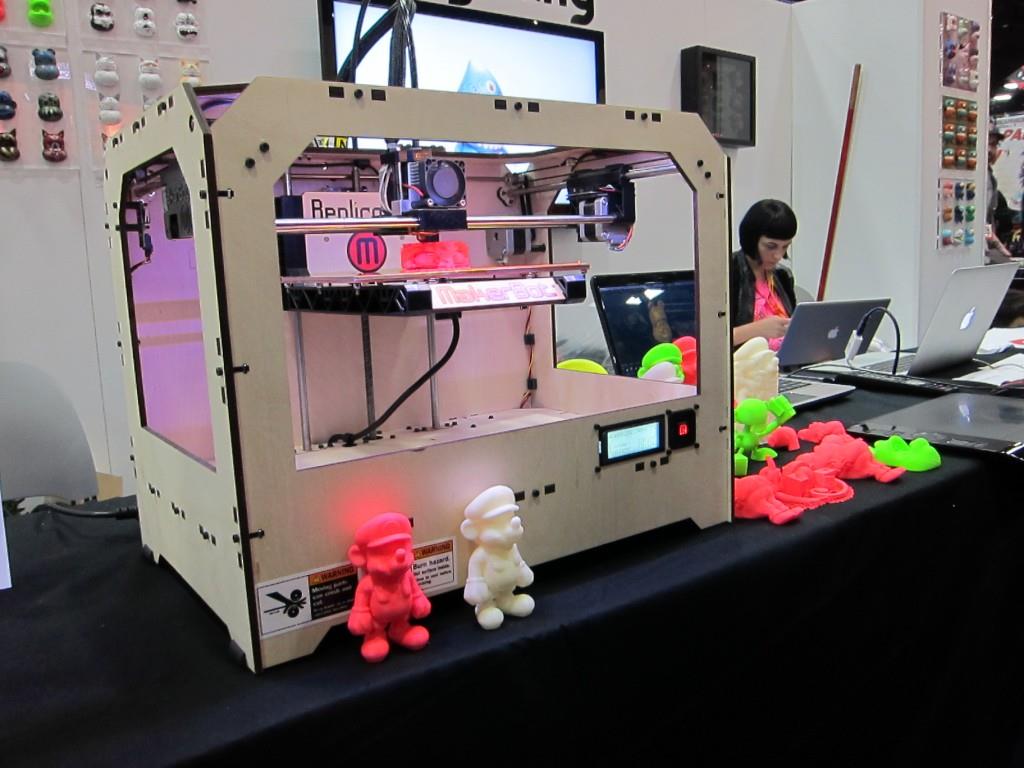
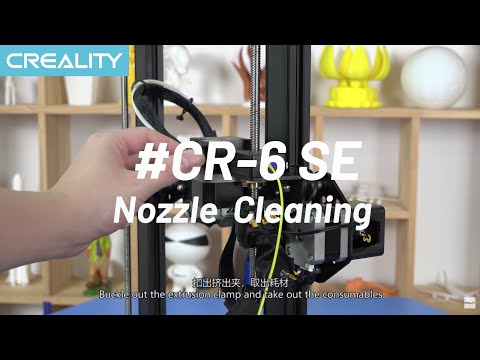
How often to clean 3d printer nozzle
How to Clean a 3D Printer Nozzle (5 Methods) – Clever Creations
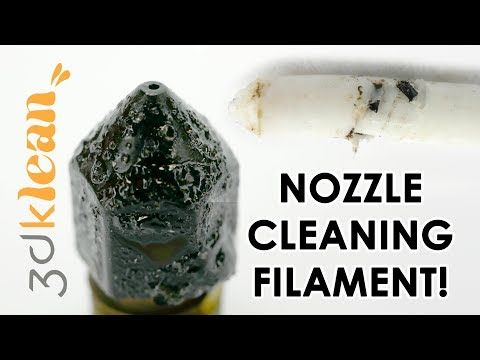
Using a nozzle cleaning kit and a cleaning filament is the most effective way to clean your 3D printer nozzle. You can remove the nozzle and soak it in acetone to remove any traces of filament impurities. A brass wire brush with soft bristles will help eliminate any leftover filament residue.
A 3D printer nozzle is a crucial element in the 3D printing process, and it is responsible for the smooth extrusion of your filament. Any clogs or blockages in the nozzles will directly affect your print quality. Clogged nozzles will lead to under extrusion, inconsistent filament flow, and uneven layers.
Even though cleaning a blocked nozzle is easy, it can be challenging to identify the clog in the first place. In this article, we’ll explain how to recognize a nozzle clog, go over the various cleaning methods and what you can do to prevent nozzle clogging in the future.
Read on to learn how to clean a 3D printer nozzle and get a smooth 3D printing experience!
How Can You Tell If a Printer Nozzle Is Clogged?
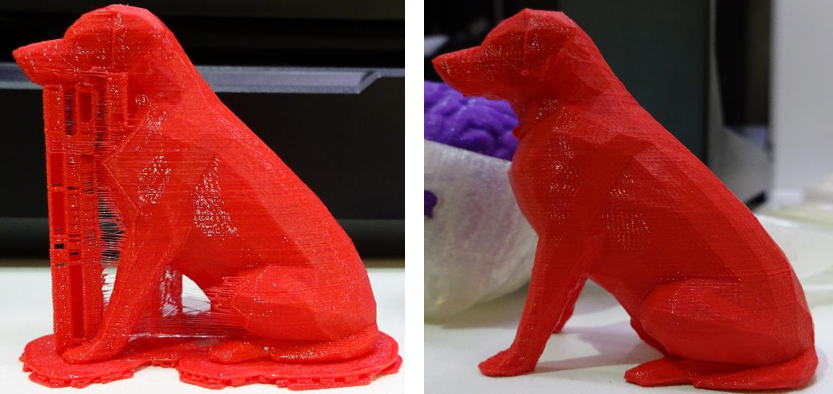
Image: squid-do via Reddit
It can be tricky to attribute print defects to clogged nozzles. However, a few notable indicators will quickly tell you whether you are dealing with nozzle clogging.
The easiest way to detect a nozzle clog is if you notice a decrease in the overall print quality. Inconsistent extrusion, missing layers, and under extrusion are a few of the side-effects of a blocked nozzle. A partial blockage in the nozzle can cause all of these problems. Similarly, a complete jam can occur due to clogged material stuck in the nozzle.
An improper first layer is another sign of nozzle clogging. If the nozzle does not extrude filament during the first layer or there’s an uneven filament flow, you might have a clog in your nozzle. However, it is helpful to eliminate any bed leveling and Z-offset issues before you check for a nozzle clog.
Additionally, filament curling right after extrusion and thinner print lines are also signs of a clogged nozzle. Recognizing these signs will help you quickly clean your nozzle and prevent further degradation of your 3D prints.
How Do You Clean a 3D Printer Nozzle?
If you start to see filament deposits on the outer surface of your nozzle, it is time to clean it. 3D printer nozzle cleaning is easy, and all you need is a brass wire brush and a wiping cloth.
The brass brush prevents damage to your brass nozzles and lets you scrub any stuck printed material from your dirty nozzle.
Before starting the cleaning process, it is helpful to first heat your 3D printer nozzle. Heating the nozzle softens any stuck filament bits and lets you wipe them off more quickly.
Once you’ve scrubbed the nozzle thoroughly, you can wipe away any leftover material from its surface. A soft microfiber cloth is our go-to equipment for this.
3D printer nozzle cleaning is now complete, and you can start printing again. Remember to always keep an eye on the state of your nozzle and clean it regularly to maintain optimal print quality.
Turboom Wire Brush Set Scratch Brush Set for Cleaning Welding Slag...
616 Reviews
Check PriceHow Do You Unclog a Clogged 3D Printer Nozzle?
If your nozzle is already clogged, don’t worry! Cleaning a nozzle is an easy process that can be done through a couple of different methods.
Nozzle Cleaning KitA standard nozzle cleaning kit consists of thin metal needles, tweezers, and a brush. You can use this method to clean out your nozzle by following these steps:
- Start by heating up your nozzle to right under its maximum temperature. This will help to soften any filament that is stuck inside the nozzle.
- Next, use the metal needles to pick out any larger pieces of filament that may be blocking the nozzle.
- Once the larger pieces have been removed, use the nozzle brush to clean out any smaller bits of filament.
- Finally, use the tweezers to remove any final pieces of filament or debris.
3D Printer Nozzle Cleaning Kit - 0.4mm Needles and Tweezers Toolkit...
Check PriceCold Pull
A cold pull or an atomic pull is often used to unclog the nozzle and remove any debris inside it. It is an easy technique and requires no disassembly or cleaning tools to remove the clog.
Using Nylon filament will give the best results. However, you can also use PLA, ABS, or a dedicated cleaning filament (more on this later) if Nylon is not available.
First, you need to heat the nozzle to the printing temperature of your filament. After that, you will have to manually push the filament until it extrudes out of the nozzle. You can now let your hot end cool down while pushing the filament into the nozzle.
In the final step, you need to first remove the extruded material from the nozzle tip. Then set the printer temperature to 85-90 °C. Once it reaches this temperature, slowly pull the filament out of the nozzle completely.
You might have to perform this procedure several times to remove any dirt and filament bits from the inside of your nozzle. You can stop once you notice the cold pulled filament is free from debris.
Soaking the Nozzle in Acetone
A nozzle cleaning kit and cold pull might not always be practical with filaments like ABS, and your nozzle might still be clogged. When it comes to ABS, removing the nozzle and soaking it in acetone is a good way to clear clogs.
Start by heating the nozzle before removing it from the hot end. Heating the nozzle frees it up slightly from the heater block and makes it easy to unscrew. You can use a spanner or a nozzle removal tool to remove the nozzle safely and efficiently.
After you’ve removed the nozzle, soak it in a cup with a layer of acetone for around 30 minutes. The acetone will help to dissolve any ABS filament that is stuck inside the nozzle.
Recommended:
How to Melt and Dissolve PLA Filament
Once the soaking is complete, you can use a wire brush to remove any final bits of filament. Be sure to also clean the nozzle tip as this is where most of the clogs occur.
You can now reassemble your 3D printer and start printing again. Make sure to properly dry the nozzle first. A paper towel or soft cloth is just fine for this.
Remember to always keep an eye on your nozzle and clean it regularly to maintain optimal print quality.
Using a Heat Gun
While an acetone soak is helpful for ABS filament, it is not as effective on other filament materials. Especially PETG and Nylon are fairly non-reactive to acetone.
When dealing with these filaments, a heat gun will help clear your nozzle clog.
The first step is to remove the nozzle from the 3D printer hot end or extruder assembly. This is the same as what you would do for ABS soaking.
Next, you will need to heat the nozzle with the heat gun until the filament inside melts.
Once the filament has melted, you can use a thin needle or a wire brush to remove any debris from the nozzle. Be careful, the nozzle is hot at this point.
After cleaning the nozzle, you can now reattach it to the hot end assembly and start printing again. Make sure that the nozzle is properly cooled down before reattaching it.
Wagner Spraytech 0503038 HT400 Heat Gun, Dual Temperature Hot Air Tool...
Check PriceHow Often Should You Clean a 3D Printer Nozzle?
At a minimum, you should clean your 3D printer nozzle when you change filament materials. It is easy for nozzles to clog from leftover material after a filament change.
For example, when you switch from ABS filament to PLA, some ABS material might be left in the nozzle. As PLA prints at a lower temperature than ABS, the leftover ABS will not melt and result in a nozzle clog.
Another reason for nozzle clogs is dirt and dust particles that enter along with the filament. If you continuously print with dirty filament, the debris can accumulate in the nozzle over time and clog the nozzle.
Because it can be a challenge to keep your filament free from dust and dirt, you can clean the nozzle after every 100-200 printing hours as prevention.
Generally, if you notice a decrease in print quality, that is usually a sign that your nozzle is starting to get clogged and needs cleaning. You can do this regardless of how long or with which materials you have been 3D printing.
How to Prevent 3D Printer Nozzle Clogs
Regularly Use 3D Printer Cleaning Filament
3D printing cleaning filament is the easiest way to clean your nozzles from the inside. It is made up of a material specifically used to clean and purge plastic out of injection molding machines. You need to extrude it at the printing temperature of your filament until you notice a clean white strand of material coming out of the nozzle, free of any debris or filament color.
Even though cleaning filament may seem slightly expensive, it does work effectively and clears out any partial clogs. And you only need a small amount. You can use it after every 100-200 hours of printing for effective cleaning of your nozzles and to prevent nozzle clogs.
NovaMaker 3D Printer Cleaning Filament 1. 75mm Natural,...
Replace Worn-out Nozzles
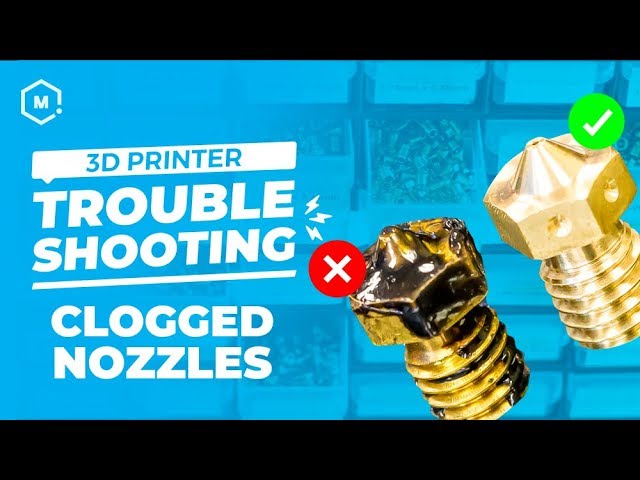
You want your nozzle opening to look round.This nozzle is already showing some signs of wear, but still has some print hours left in it.Brass nozzles undergo a lot of wear due to the constant friction of the filament. This wear accelerates when you use abrasive filaments like glow-in-the-dark, carbon fiber, and metal-filled filaments.
Not only do abrasive filaments wear out the nozzle opening, but the tiny metal particles of the nozzle material can start accumulating. This can block filament flow and lead to filament jams.
If you regularly use abrasive filaments or notice a lot of nozzle wear, it’s a good idea to replace your brass nozzle more often.
Alternatively, you can use stainless steel or other hardened nozzles. These are more resistant to abrasive filaments and have a higher lifespan than your typical plain brass nozzles.
Fix the PTFE Tube Hot End Gap
In a PTFE-lined 3D printer hot end, the tube goes all the way inside and sits right on top of the nozzle.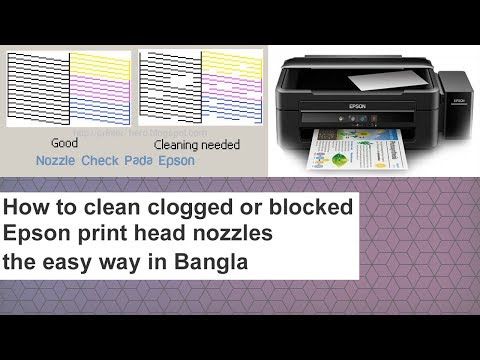 If the gap is not flush between the PTFE tube and the nozzle, the melted filament will ooze out of it. Eventually, there will be a build-up of plastic filament within the hot end, leading to filament jamming.
The gap is caused due to faulty PTFE tube couplings. As the couplings wear out, the PTFE tube starts sliding in and out of the hot end, creating a gap between itself and the nozzle. Extruder skipping and under extrusion are signs of a filament jam in the hot end.
You should immediately rectify the PTFE tube gap within the hot end if you notice these issues.
The first thing here is to make sure that the PTFE tube has been cut flush at a 90° angle. If it has a slope to it, it will never perfectly align with the hot end.
Secondly, it helps to use replace worn-out pneumatic couplings with new ones on both the extruder assembly and the hot end assembly. This ensures that the PTFE tube stays in place over time.
PTFE Bowden Tube (1M) 1PCS+ 6pcs KJH04-M6 Fittings + 6pcs JP4-01.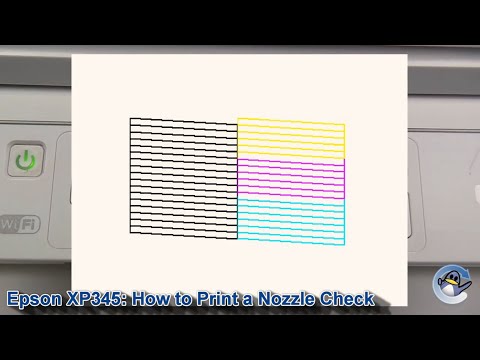 ..
..
Use High-Quality Filament
A high-quality filament will reduce nozzle clogs while also giving you high print quality. Manufacturers of high-quality filament ensure that their product contains little to no impurities, is produced in a dust-free environment, has a consistent diameter, and is properly vacuum packed to reduce as many imperfections in the material as possible.
We have created an overview of the highest quality filament in our Best PLA, Best ABS, and Best PETG articles. We recommend you check these brands out if you suspect your clogged nozzles are caused by low-quality filament.
While these filaments may be more expensive than budget materials, they are often worth the extra money.
They don’t only save time, but their results are better too. If you are looking to sell your 3D prints and make money with your 3D printer, quality filaments can be a worthwhile investment.
Keep Filament Clean and Dust-Free
A clean 3D printing space contributes significantly to preventing nozzle clogs.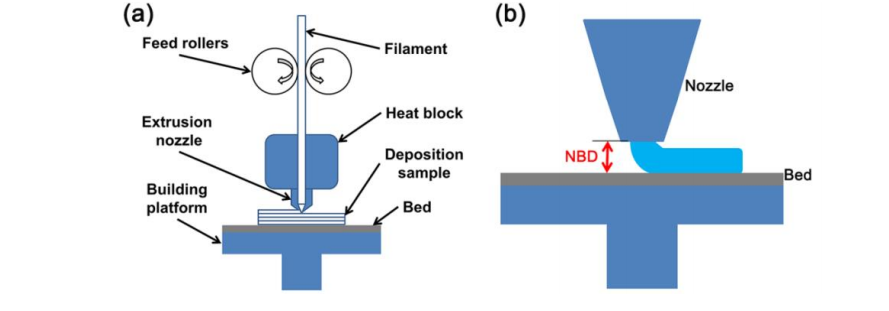 If your plastic filament is exposed to the outside environment while printing, it will pick up dust particles that clog your nozzle. After printing with it, you need to store it away from sunlight and in a storage box to prevent the accumulation of dust on it.
Another way you can protect your 3D printing setup from dust and dirt is by using a 3D printer enclosure. These don’t only keep the current filament in the printer clean, but also the 3D printer itself.
Frequently Asked Questions
How do you clean a clogged nozzle with PLA?
In order to clean a clogged nozzle with PLA, you will need to disassemble the printer and remove the nozzle. Once the nozzle is removed, you can use a small wire, needle, or other small pointed tool to clear any debris that may be blocking the opening. You might need to heat the nozzle up with a lighter to melt the plastic filament.
Be careful not to damage the nozzle while cleaning it.
How do you clean an Ender 3 nozzle after printing?
It’s important to clean your Ender 3 nozzle regularly to prevent clogs and ensure quality prints. After every print, it is advisable to clean the nozzle with a brass wire brush. This will remove any debris or build-up that may have occurred during the printing process.
A clean nozzle will ensure that your prints are of the highest quality and avoid any potential issues such as clogging or poor adhesion.
Conclusion
A clean 3D printer nozzle gives you the best print results and helps prevent damage to the 3D printer caused by clogs. Periodic cleaning of your 3D printer nozzle ensures fewer chances of sudden breakdown and prevents downtimes.
Degradation in the print quality, coupled with under extrusion and inconsistent filament extrusion are some of the indicators of a blocked nozzle. You can quickly unclog the nozzle using a nozzle cleaning kit and a wire brush and periodically use a cleaning filament. Especially the cleaning filament is useful for keeping nozzles clean.
When dealing with ABS filament, you can soak the nozzle in an acetone bath to soften the filament.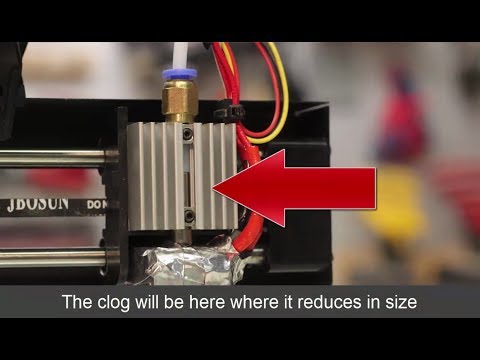 This makes it a lot easier to remove.
Let us know your experience with 3D printer nozzle cleaning. If you find this article helpful, share it with your peers to help them prevent nozzle clogs and keep their 3D printers running smoothly.
How to Use 3D Printer Cleaning Filament (& What Not to Do)
This article is going to simply explain what 3D printer cleaning filament is. We’ll explain why it could be a time (and in some instances a life) saver for you.
Then we’ll cover how best to use it, and what to avoid so it’s as easy for you to use as it should be.
Why you need cleaning filament
You don’t have to have used a 3D printer for long to realise that regular maintenance is a necessary evil.
With plenty of things that can go wrong, and many moving parts, it’s no secret that the better you look after your printer, the less time you’ll spend scratching your head over it.
Or more aptly, experience the “I’m going to chuck this thing out of the window” level frustration of coming back to your machine printing in ‘thin air’, because it stopped extruding part way through your print.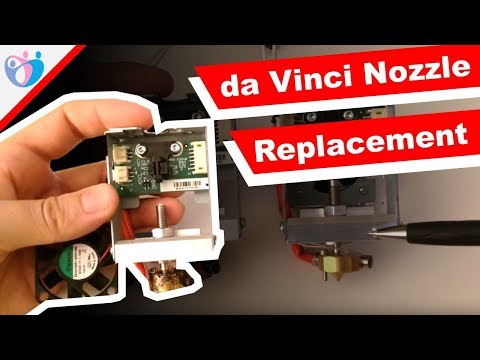
In some instances it’s not a blockage that annoys you the most, but an other-wise perfect print finishing with little specks of your previous colour filament embedded in it.
The extruder and nozzle components of your printer are no exception – in fact they’re arguably the most sensitive parts to your printer.
They need the most maintenance yet they’re traditionally the hardest part to keep in top condition – often you can’t tell a blockage is lurking until it’s too late.
How not to clean your nozzle
Now there are antiquated methods to cleaning your nozzle, which are usually (if you admit it) only done after you’ve experience a blockage.
Before it’s happened though, you don’t really give a conscious thought to that blockage that’s lurking in that nozzle, waiting to happen.
And that’s where cleaning filament comes in. Use it proactively and it’s the best preventative measure, yet it’ll also help to unblock all but a fully clogged nozzle.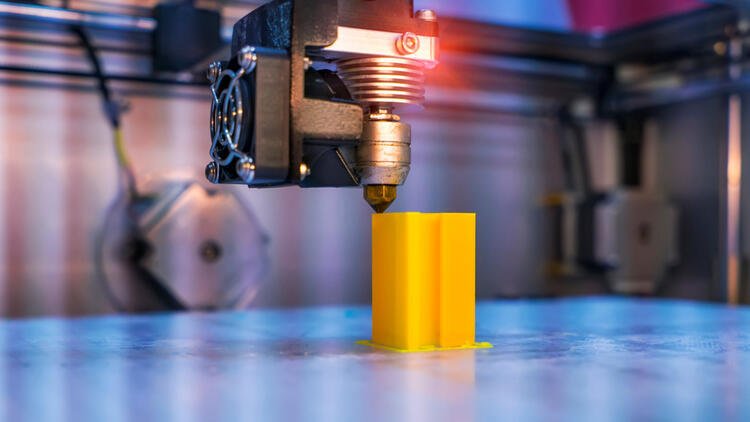
We’ll briefly cover the current after-its-blocked nozzle cleaning methods such as ‘Atomic method’ or ‘cold pull’ technique and the ‘insert micro drill bit the size of your nozzle’ method and then compare them to the newer, proactive method of a cleaning filament review below.
If you’ve currently got a fully blocked nozzle, you can read our full guide to unclogging your nozzle here.
In this article we’re going to cover:
- What is cleaning filament
- Advantages/disadvantages over other methods
- What to look for when buying it (and where to buy it)
- How to use it
Feel free to scroll to the specific section of this guide for the information you’re looking for, although I recommend reading it all so that you get the best help for how to use 3D printer cleaning filament.
It could save you a lot of hassle and time later on.
How does cleaning filament work & what is it?
You’re likely skeptical that cleaning filament is a bit of a gimmick.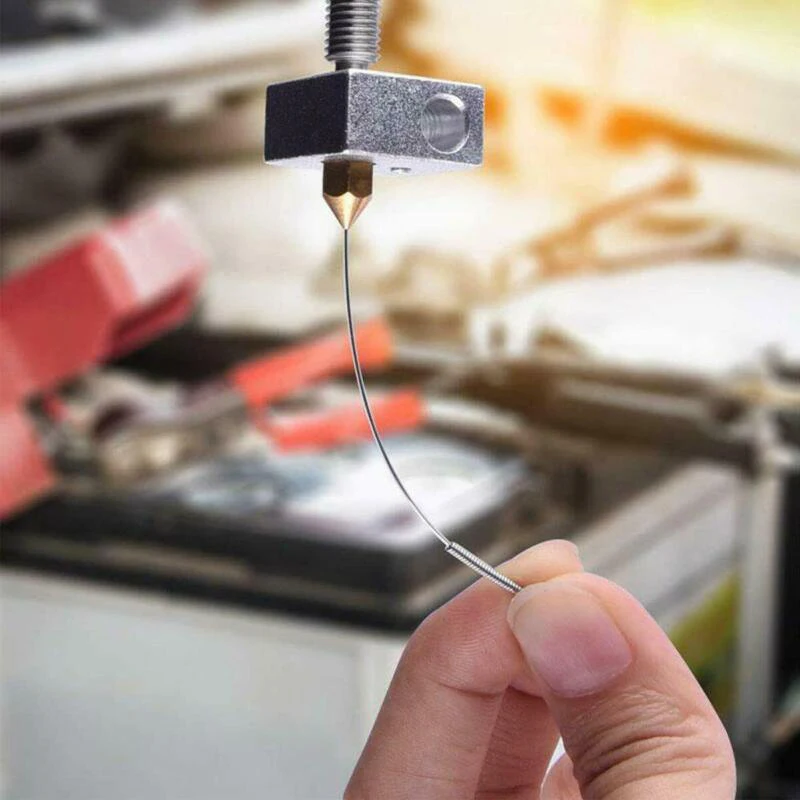 Or just as likely, you’re not convinced you even need it.
Never had a blockage before? I don’t believe you It can happen to anyone at any time.
Some think cleaning filament as just made from Nylon or HDPE filament – which is the material of choice for the cold pull method. It isn’t by the way (and you don’t use the cold pull method with cleaning filament).
Or perhaps it’s just a cheap, highly abrasive material that strips everything out? And presumably erodes the inside of your nozzle over time…
Again, no. It’s actually (we can only speak for ours, of course) a non-abrasive industrial-grade compound for purging hard-stuck chemical residues out of injection moulding machines.
We’ve sourced the best we could find, modified it for a larger range of operating temperatures and extruded it into 3D printer-friendly filament form.
Why use cleaning filament over traditional methods?First on the left, towards a cleaner nozzle on the right. You can see how this can easily take 5-6 ‘pulls’
The well-known ‘atomic method’ or ‘cold pull’ has long been the method of choice to clean out your nozzle.
Often done after you’ve experienced a full or partial blockage, the general method goes like this:
- Heat up your nozzle to around 250°C and insert Nylon filament as far as it will go, then cool the nozzle back down to about 30°C while maintaining the pressure.
- Once cool, quickly pull the Nylon out. Usually takes a good hard yank (you may need one hand on your printer to prevent it being pulled off the desk).
- Do this procedure 3-5 times or until the end of the filament you’re pulling out is clear and has a well-defined tip (indicating a clear and residue-free nozzle).
In our opinion this process is a little bit, well, brutal. The whole process puts a lot of strain on some relatively delicate parts in your machine.
It also takes time heating and cooling your nozzle each time, and waiting around (you don’t want to leave the material hot in the nozzle for too long either; it definitely won’t help your situation).
The other option is if the cold pull method won’t work, you’ll likely need to insert a very thin drill bit or hypodermic needle up there. You’ll want to use the same size as the nozzle.
For 0.4mm nozzles, this is just about possible, but if you’re printing with 0.2mm nozzles or small – you’ll probably be best off just replacing it.
The risk here, apart from the obvious dangers of using very small, thin needles (we don’t recommend it, for the record) is that they can snap off inside the nozzle.
You’ll notice neither of these methods are really fool proof, or that user friendly. Luckily, there’s a better way that’s fairly new on the scene.
3D Nozzle cleaning filament takes far less time to clean out your nozzle. Often in as little as 30 seconds, and you don’t need to do anything out of the ordinary, except changing filament. Which you should be pretty comfortable with by now…
Disadvantages to using cleaning filamentThis wouldn’t be a fair review without telling you what you can’t use it for, and why it’s not for everyone.
- You can’t unblock a fully clogged nozzle with it. You need to have at least some flow rate to work. That’s why it’s always best having and using nozzle cleaner filament before you need it.
As long as some filament comes through with a small amount of force, you should be able to unclog your nozzle. And we promise we won’t stand back, arms folded saying “told you so” the whole time…
- It’s expensive. Well, it isn’t. But at first glance. You see, you really don’t need much. About 0.5 to 1 gram per use, maximum. Luckily you don’t need to buy a whole KG spool of it then (if you did, ours would be £360/KG).
For around £18 you’ll get 50 grams, which will get you a solid 70-100 nozzle purges. That’s just 20p per clean, in 30 seconds. Which compared to 20 minutes yanking your 3D printer around for each clean, well – it’s a no-brainer.
What to look for when buying, and where to buy cleaning filament?
Make sure you know what you’re getting. Some cleaner filaments could just be re-branded cheaper materials that don’t perform as advertised. Make sure you read the reviews, and factor in the price.
There may be cheaper ones on the market, but it’s worth weighing up – you may need more grams per clean if they’re not as effective, so it could end up being more expensive overall.
Other known brands we’re aware of are Lulzbot and eSun cleaning filament, so it may be worth doing your own testing.
Reviews are usually a pretty good indicator that it does as advertised. As for where to get it, you can find a few popular brands on Amazon.
How To Use Cleaning Filament:
This is a screenshot from 3D Printing Revolution’s Youtube Floss Cleaning Filament review videoIf you’ve bought some already and you’re left wondering what to do with this un-printable filament – or you’re just wanting to read up on cleaning filament instructions before you begin, here we explain what you should and shouldn’t be doing with your new one-stop 3D printer cleaning kit.
For most machines, there’s no need to cut the cleaning material, just load and unload like a regular filament.
For other machines or if you have an under extruding partial blockage, you may wish to unplug the Bowden tube to manually push the Floss filament through the nozzle.
When printing with the same material:
- Printing with one material like PLA, all the time? How often you need to use your cleaner filament will depend on how often you print, and the quality of filament that you use. Poor quality or cooked/burned filament can leave residue in your nozzle. Even PLA can solidify in the nozzle over time, so we advise flushing it through at least every 200 – 400 printing hours.
- Depending on your printer design, there are a few ways to use cleaning filament. In most instances, simply unload the previous filament and load your cleaner filament as you would any other filament.
- Keep the printing temperature the same as your printing filament and begin to extrude the new cleaner material into thin air (don’t try to print with it!).
 Many printers will extrude a set amount as part of the loading process anyway. Keep extruding until you cannot see residue of the previous material, or contamination specks. Once it runs clear, simply unload and reload with your printing filament. No need to try a cold pull (although you can if you’re still not convinced it worked).
When printing with different materials:
- Always run the cleaner filament through at the last printing temperature. So if you were using PLA, and you’re changing materials to ABS, run the cleaner through at around 200C, not 230C. Likewise if your last material was Nylon and you’re changing down to PETG, you’d run the cleaner through at around 260C. Our Floss cleaning filament has a temperature range of 200-280C+
- As before, run enough filament through until you’re sure you cannot see any specks or residue. Then just unload and proceed as normal with your new material, ensuring the nozzle is at the correct temperature for the new material before you load it.
And that’s it, that simple. You may need to manually feed it if your nozzle is partially blocked to get some to feed through, just to apply a little extra pressure.
Although don’t force it, if your nozzle is completely blocked unfortunately you’ll just have to use one of the previously mentioned unblocking methods.
Techno Print 3D Company
This is our first review of the most popular and inexpensive 3D printers for 2020. The list will include the best-selling devices in two price ranges (up to 30 tr and up to 60 tr). Printers working with both plastic filament (FDM) and photopolymers (LCD/DLP) will be presented. This list will always be up to date, as it is periodically updated and supplemented. Read more→
The Chinese company Dazz3D announces the launch of the project on KickStarter and accepts pre-orders for Dazz3D Basic and Dazz3D Pro 3D printers. These revolutionary new devices are aimed at both the professional and amateur markets. Read more→
We all know that precise calibration of the 3D printer desktop is the foundation and the key to successful printing on any FDM printer.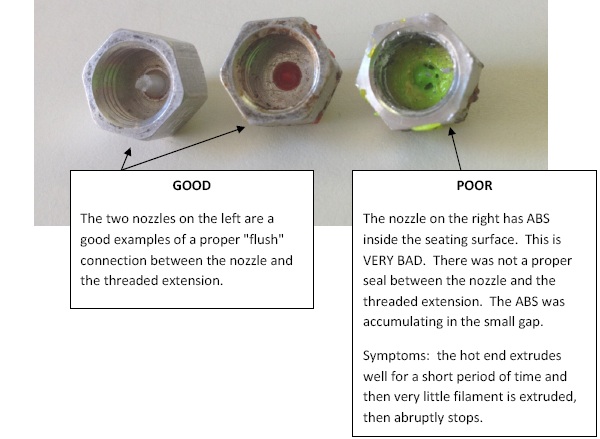 In this article we will talk about the main and most popular ways to level the "bed". So, as mentioned above, 3D printing without desktop calibration is impossible. We face this process Read more→
It's hard to go through a day today without hearing about 3D printing technology, which is bursting into our lives at an incredible speed. More and more people around the world are becoming addicted to 3D printing technology as it becomes more accessible and cheaper every day. Now almost anyone can afford to buy a 3D printer, and with the help of Read more→
The FormLabs Form 2 and Ultimaker 3 are perhaps the most popular 3D printers today, capable of high quality printing with incredible surface detail. Moreover, these two devices use completely different technologies, and therefore, there are a lot of differences between them. Many will say that it is wrong to compare them or Read more→
XYZprinting, best known for its daVinci line of desktop 3D printers, is bringing five new devices to the professional and industrial environment. One will use laser sintering technology, the second full color inkjet printing and three DLP machines. First of all, the novelties will be of interest to dentists and jewelers. Read more→
Cleaning the nozzle of a 3D printer is a fairly common process that any user of such a device has to deal with. This is not at all a complicated procedure that anyone can handle. You can complete this task in 15 minutes, using only handy tools and accessories. Read more→
Acetone steam polishing of ABS plastic is a process for smoothing the surface of 3D printed models. The result of this treatment makes your printed products look as if they were made by a professional mold casting method. If you want to understand how this is done correctly, then read this article. Aceto Read more→
How to clear a clogged extruder nozzle
A clogged extruder nozzle is a problem that inevitably needs to be addressed immediately, and this article will help you diagnose it correctly, as well as solve it in the simplest and easiest way.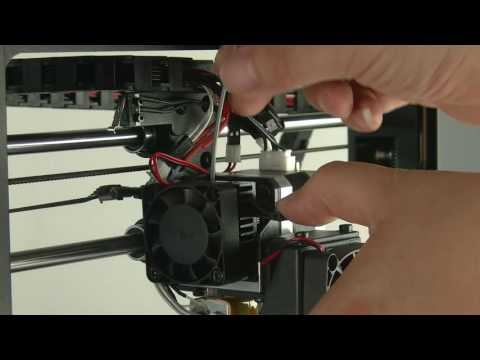
Drill set for cleaning the extruder nozzle in case of blockages.
Unlike many other problems that arise during 3D printing, nozzle clogging negatively affects not only the quality of the print result, but, more often than not, the ability to print at all. Let's take a look at the main causes of a clogged extruder nozzle, and how you can quickly and easily fix this situation.
- 1 Causes of clogging
- 1.1 Extruder temperature too high
- 1.2 Dust and debris caught in the extruder nozzle
- 2 Step-by-step solution to this problem
- 3 Expert comments (Mikhail Shchekochikhin)
Clogging Causes
Extruder Temperature Excessive
When using PLA plastic, the optimum extrusion temperature can be between 160 and 220 degrees Celsius. Trying to print at too low a temperature will most likely result in no extrusion at all, but the reverse can become more problematic.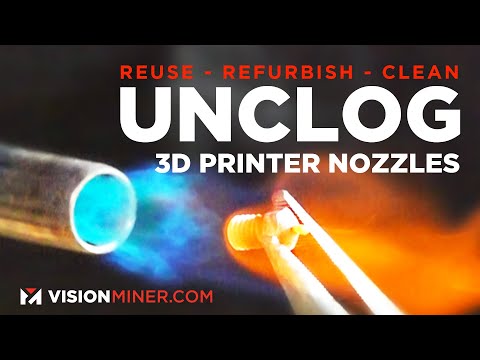 In fact, if you are trying to print at too high a temperature for a given material, your filament may simply vitrify right in the extruder and thus clog it.
Vitrify - turn into a glass or vitreous substance, especially when exposed to high temperatures
Vitrification is a process that causes PLA or other plastics to become extremely hard and clog the nozzle.
The same is true for ABS, nylon, PVA and other plastics.
Dust and debris caught in the extruder nozzle
This often happens after several jobs, as dust and other debris enter the nozzle along with the filament. Accumulating, they begin to clog the extruder nozzle. This debris can stick to the inside walls of your extruder and obstruct the flow of plastic, eventually clogging the nozzle.
Step-by-step solution to this problem
Cleaning the nozzle with a fine drill.
This problem is quite easy to solve, but requires the right tools.
You will need a small <0.35mm drill bit or something else that can serve as a drill but is thin enough to fit into your extruder hole.
It is very convenient to use a 0.33mm thick guitar string for this purpose, which can be easily found in any musical instrument store.
Another alternative is to use resistor or LED legs, as they are thin enough to fit through the hole in the extruder nozzle.
- Remove any remaining filament from the extruder.
- Heat the extruder to the optimum temperature for the material.
- Insert a small drill bit into the nozzle opening and clean it of debris by turning the bit slightly (be careful not to break it!).
Now you can print again!
Comments of specialists (Mikhail Shchekochikhin)
The advice is necessary, but technologically incorrect.
The procedure is as follows:
- stop extruder
- clean the heated nozzle, preferably with special drill
- start the extruder so that the melt flushes the nozzle
- repeat this several times.
Learn more