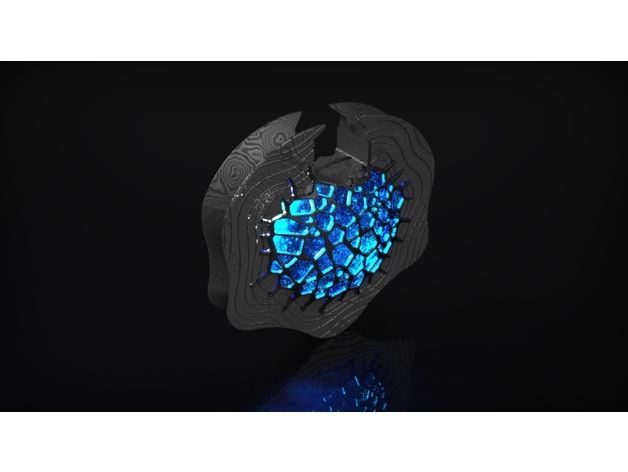
3D printer sand glass
NTU Singapore Researchers Are Using Recycled Glass for Sand 3D Printing
3D printing news News NTU Singapore Researchers Are Using Recycled Glass for Sand 3D Printing
Published on April 29, 2022 by Madeleine P.
Faced with global warming, finding solutions to design environmentally friendly parts is now a problem at the core of many industries. This is why many scientists are working on this subject. Recently, researchers at Nanyang Technological University in Singapore (NTU Singapore) developed a new method to use recycled glass as a 3D printing material, a solution which they hope will help promote a circular economy. Through this innovation, the NTU Singapore research team hopes to 3D print everyday objects, and above all transform production processes.
For this project, the research chose glass as it can be 100% recycled without altering the quality of the material. With recycled glass, the team aims to replace sand in 3D printing processes, a material that is increasingly in shortage today, as its extraction causes heavy pollution. With their solution, they have managed to 3D print an L-shaped bench using a mixture of concrete and glass. The lead researcher of the study, Professor Tan Ming Jen from NTU’s School of Mechanical and Aerospace Engineering (MAE), explains, “The main challenge in formulating 3D-printable concrete mixtures is to figure out just how much of each component to add to obtain a structurally sound structure with minimal defects. Our team has come up with a feasible formula, demonstrating for the first time that glass can indeed be used to 3D-print a bench with excellent structural integrity..”
The components of the mix include recycled glass of various sizes (medium, fine and superfine), commercial cement, water and other additives (photo credits: NTU)
An Alternative to Traditional Materials
The goal of this project is to replace the use of sand with recycled glass. And with this 3D printed bench, they have demonstrated that it is possible to entirely replace sand. In order to use a minimum of material, the researchers conducted a series of tests to determine the optimal parameters of the recycled glass concrete mix for the printing process. In addition, the team explains that because glass is a hydrophobic material, very little water was used to design the concrete.
To design the bench, a 4-axis 3D printer was used, with a printing volume of 1.2 m x 1.2 m x 1 m. Though for the moment only a piece of furniture has been printed, the scientists hope in the future to democratize this process in the construction sector. And to do so, the NTU research team has partnered with Singaporean start-up Soda Lemon to 3D print larger structures and continue to optimize the printing process. You can find out more HERE.
What do you think of the new solution from Nanyang Technological University in Singapore? Let us know in a comment below or on our Linkedin, Facebook, and Twitter pages! Don’t forget to sign up for our free weekly Newsletter here, the latest 3D printing news straight to your inbox! You can also find all our videos on our YouTube channel.
*Cover Photo Credits: NTU Singapore
Discarded glass used to replace sand in 3D-printable concrete
3D Printing
View 1 Image
Concrete is a very popular building material, enough so that one of its key ingredients – sand – is in increasingly short supply. Scientists are thus now exploring the possibility of replacing that sand with glass waste that would otherwise end up in landfills.
Although glass is considered a recyclable material, it quite often doesn't get recycled. This may be due to a lack of properly equipped recycling facilities, or the fact that glass waste frequently takes the form of numerous fragments that are too small to sort by color in a practical fashion – that sorting process is a requirement for recycling.
Seeking a use for non-recycled glass, researchers at Singapore's Nanyang Technological University looked into utilizing it as a replacement for the sand commonly used in 3D-printed concrete structures. After all, glass is made of silica, which is a major component of sand.
For their study, the scientists crushed glass waste into five different fragment sizes – coarse, medium, fine, super fine and "moondust" – to replace the sand and gravel which ordinarily serve as aggregate in concrete. That ground glass was then combined with concrete's other two ingredients, cement and water.
The mixture was subsequently extruded through the nozzle of an existing 4-axis gantry robotic 3D printer, to create a 40-cm tall (15.8-in) L-shaped concrete bench. Once the concrete cured, it was found to be similar in strength to traditional sand-containing concrete. Additionally, the researchers noted that the poured concrete didn't deform or collapse before it cured, plus it was fluid enough to flow easily through the printer nozzle.
As an added benefit, because glass doesn't absorb as much water as sand, less water was required to make the concrete.
"Our research has shown that recycled glass can be used to replace up to 100 percent of the sand in concrete for 3D printing," said the lead scientist, Andrew Ting. "The result is a concrete bench with a mechanical strength that meets acceptable industrial standards. Given that sand is being exploited at a rate much quicker than it can be replenished naturally, the prospect of using recycled glass in building and construction is becoming more attractive."
The research is described in a paper that was recently published in the Journal of Building Engineering.
A 2019 study, conducted by scientists from Australia's Deakin University, indicated that glass could also replace sand in more traditional non-3D-printed structures.
Source: Nanyang Technological University
Ben Coxworth
Based out of Edmonton, Canada, Ben Coxworth has been writing for New Atlas since 2009 and is presently Managing Editor for North America. An experienced freelance writer, he previously obtained an English BA from the University of Saskatchewan, then spent over 20 years working in various markets as a television reporter, producer and news videographer. Ben is particularly interested in scientific innovation, human-powered transportation, and the marine environment.
glass-ceramic, borosilicate and perforated do-it-yourself
3D printers are very popular in many areas. Today, such devices are widely used in dentistry, jewelry, architecture and business. But in order for any printer to print quality parts, you should take care of choosing a surface for your desktop, taking into account the material used. Next, we will tell you how to do it right.
What types of glasses are available for a 3D printer table?
All 3D printers have one thing in common: the desktop. It is on it that a three-dimensional product is created, the quality of which will depend on adhesion with the platform. Usually the desktop is covered with glass, but there may be other options.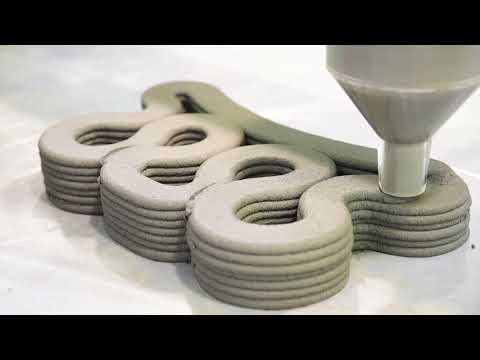
Sitall glass
Sitall glass is one of the most popular adhesion methods to avoid sticking of the product to the desktop and ensure its reliable retention on the surface. The only drawback is the rather high cost of such material.
For reference. Sitall is a crystalline material with properties such as transparency, wear resistance, chemical and thermal stability. It was first developed in the Soviet Union for use in the aviation industry.
The use of glass-ceramic glass in 3D printing allows solving a number of the following problems:
- the ability to print with different types of plastic;
- solid surface mounting;
- no deformation when printing samples even when exposed to high temperatures;
- production of quality parts;
- does not require the use of glue or other adhesive materials.
All you have to do is calibrate the height between the nozzle and the build plate and start printing your first 3D products.
Borosilicate glass
Borosilicate glass has a low coefficient of thermal expansion, making it more resistant to heat than ordinary glass. When printing 3D models on a platform equipped with a similar surface, high-quality products are obtained. This is achieved by tightly attaching the first layer to the site and ensuring good adhesion.
Borosilicate glass is made from tempered materials and is used in medicine, energy and everyday life. It is resistant to temperature extremes and chemical attack. The secret is simple - in the production of borosilicate glass, boron oxide is added to the composition and the content of air bubbles is excluded.
Even a beginner will have no problems installing the glass - it is attached to the desktop of the 3D printer with clerical clips or bolts.
Perforated glass
Special tempered glass with a perforated coating ensures that the future 3D part is firmly attached to the work platform. Another plus is that such material provides easy separation of finished products from the table after they have cooled. Perforated glass is used in a range of heated desktop 3D printers. On such devices it is easy to work with any kind of plastic.
What should I do if the glass comes off the 3D printer table?
Many buyers and beginners in 3D printing are faced with the problem of keeping the model on the desktop or dealing with surface irregularities. In these cases, glass comes to the rescue. It provides a dense fastening of the product with the surface and allows you to produce high-quality three-dimensional models. But in words, everything is easy, but in practice, a beginner may have problems not only with printing, but also with such a problem as glass peeling off the desktop. In this case, you should not panic - it is better to carefully study the possible causes, watch videos on the Internet and take possible measures:0003
- Check table calibration settings - we recommend doing this with the bed and extruder preheated to operating temperature.
- Reduce print speed.
- Eliminate poor adhesion - glue or hairspray is suitable for this purpose, as well as alcohol, which is recommended to degrease the surface.
- Fix the glass with special clamps or screws.
How to work with glass?
If you have recently bought a 3D printer and do not yet know about all the features of this device, then most likely you will have many questions during the first and subsequent use. One of the possible options is what kind of surface to choose for the desktop and how to work with glass correctly. Here are a few helpful tips to get your 3D printing process up and running and produce quality products:
- Remove the protective film from the glass surface.
- Before placing the glass on the workbench, preheat the platform to facilitate easy removal of the protective film from the surface with minimal adhesive residue.
- Remove the sticker carefully.
- If adhesive remains on the platform, remove with acetone or thinner.
- Mount the glass on the work table using the clips.
note . Before you start printing, adjust the table height for your glass thickness and calibrate the platform.
Done right, 3D printed pieces will bring maximum comfort without the risk of them sticking to the platform. You can easily get high-quality models and avoid the risk of platform deformation when heated to high temperatures.
How to make glass with your own hands?
If you decide to save on buying glass, there is another way out - to make it yourself. This method may well become an alternative if there is not enough money to buy or there is no time to wait. We list several options for making glass with our own hands:
- Use blue tape or masking tape. One of the most effective and inexpensive ways to get the product to grip the work surface. Opt for wide rolls for quick surface coverage, and optionally use adhesive to avoid using extra heat when printing.
- Make a table with duct tape and hairspray . This method is suitable for printing with ABS plastic - spray regular hairspray on the surface of the desktop and place Kapton on top.
- Use window glass or a mirror and a sanding disc with grit 53 for the surface. This will create excellent adhesion when working with any plastic. You can fix the structure with ordinary clerical clips.
Mistakes and how to avoid them
Many beginners in 3D printing have problems, in particular with incorrect glass selection or installation. Follow these simple guidelines to avoid common mistakes:
- Select glass according to the plastic you are going to print with. It is best to give preference to glass-ceramic or borosilicate material - this option is not the most budgetary, but the most reliable.
- Before printing 3D models, make sure the desktop is properly calibrated.
- If the product sticks to the desktop surface, use additional methods of adhesion - glue or varnish.

- When making your own desktop surface, use tempered glass if possible and attach it tightly to the platform.
We hope that the first experience of 3D printing and our advice will help you to produce high-quality three-dimensional products with minimal losses!
- April 19, 2021
- 5742
Get expert advice
'U3D Sitall glass' is a 3D printer's best friend. Eliminates the hassle of hairspray, Kapton and blue tape.
Most users do not limit themselves in the choice of material for 3D printing and use, in addition to PLA, ABS, Flex, Wood, and many other types of plastics. Printing from these plastics is impossible without a hot bed. Usually an aluminum plate, mirror or glass is placed on the hot table. But when printing, plastic will not stick to these surfaces just like that.
And here comes one of the main questions:
-'How to make the product stick to the hot table and stay on it until the end of printing?'.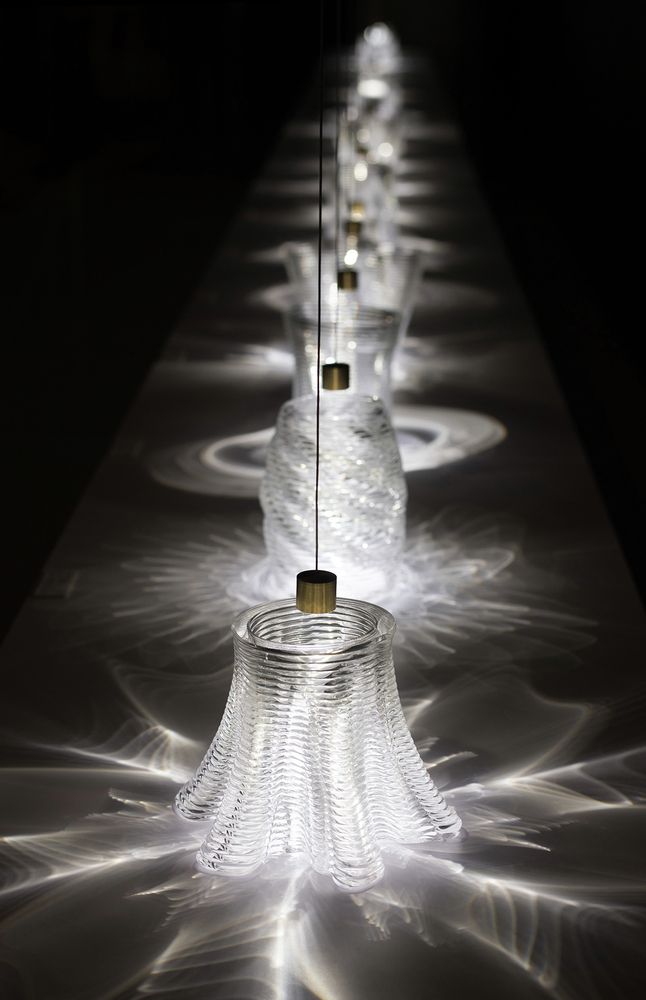
The solution to this issue can be in the application of Sitall glass U3D is unusual glass and is the best option for use in 3D printing. This article will be about him.
But first, let's talk about the traditional methods and subtleties of 'sticking' plastic to understand the advantage Sitall glass U3D .
So, let's start with many already familiar methods of adhesion:
The maximum allowable temperature is about 280C.
If you look at the freshly pasted Kapton, it looks cool, but it was very difficult to do it without small air bubbles. You need to stick it evenly and carefully, because Kapton tape cannot be peeled off and immediately glued back.
If the printer is carefully glued and calibrated correctly, it can be printed. The surface of Kapton is smooth, so the products after printing also have a smooth glossy base.
But if Kapton sticks unevenly, protrudes or there is the slightest inaccuracy in the calibration of the platform, then this will quickly show itself. The layer of adhesive tape will be instantly lifted by the nozzle.
Another drawback is that all adhesive tapes, duct tapes and tapes have a special adhesive. This glue never completely dries. With large print volumes, Kapton peels off quickly. Due to the heat shrinkage of the products, the lower corners of the products rise, the Kapton is damaged and large bubbles form. On average, 14 pieces can be printed before the Kapton needs to be changed. But the procedure for peeling off and washing the surface from the remnants of adhesive tape and glue is very tedious and long.
2. The next option is to use blue tape (painting tape)
A very economical option. For a long time, many 3D printer owners have been using it and reporting good print results.
The most difficult thing you have to observe is the parallelism and symmetry when gluing tape strips to the surface. But unlike Kapton, it can be easily peeled off, trimmed and glued back.
Like Kapton, blue masking tape is great for holding models.
But unlike Kapton, masking tape is not so demanding on table calibration.
The disadvantage is that due to the texture of the adhesive tape, the base of all printed products is ugly.
Also, the adhesive from the tape strongly stains the products.
We only printed 4 pieces before it became necessary to change the masking tape.
Unfortunately, during the 4th print, the adhesive tape stuck to the bottom of the product. I had to remove the residues from the surfaces and wash the glue for a long time.
3. ABS SOC
ABS juice (or ABS glue). Sure sounds interesting, but it's a very smelly solution.
You take pieces of ABS and dissolve them in acetone.
The consistency should be like cloudy acetone, thin like paint.
If applied to a hot bed prior to printing, this should help with non-stick issues during printing. But if you have a printer at home in the room, then this terrible smell of acetone will drive you or your loved ones crazy.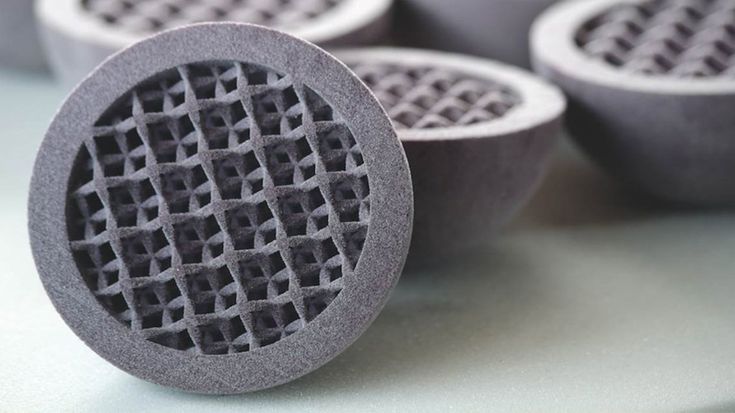
And the biggest headache is tearing off the product and cleaning the table from the old juice. Keep in mind that too much juice (or too thick concentration) can tear out pieces of glass along with the product.
5. Hairspray.
One of the cleaner ways to help your model hold up while printing on a hotbed is to use hairspray.
The choice of varnishes is great, but the product will not stick to everyone. Very often, after the test of the best varnish, the room looks like a hairdressing salon. And each user likes his trusted manufacturer.
And sometimes it even becomes funny to read forums about 3D Printing where users discuss varnishes:
- one writes, which is better than Fructis from Garnier, holds ABS well;
- the other writes that he is better off Taft 3 weather;
- the third writes, , that this is all nonsense, and best of all Syoss - he is professional and therefore holds both ABS and PLA;
That's it )))
With hairspray you can create a sticky layer on the surface - it's a quick and easy process. Before sending your model for printing, apply varnish. It is necessary to apply several thin layers at intervals, allowing the previous one to dry. But be careful, using hairspray can damage the printer.
Remember that you are practically spraying glue on your printer. Be sure to cover important parts of the printer. The varnish will get on belts, shafts, gears, bearings, so if you are not careful, you will eventually ruin the accuracy of the printer or it may completely fail. Shrink edges rarely peel off, but this can happen. Hairspray will gradually come off in pieces and if the print goes into these areas, the product will peel off. On average, you have to apply varnish once every two weeks.
Now it's the turn to talk about Sitall glass and what is it!?
Sitall Glass U3D
Before Sitall appeared, my friends and I used all of the above methods, each had his own. The process of preparing for printing a hot table was not particularly pleasing and satisfied us. 3D Printing is something the whole family can do. And children can participate in it even without the help of their parents. Therefore, my 7-year-old niece, who was presented with a 3D printer, experienced the greatest difficulties in preparing a hot table. You can’t breathe with varnish, acetone, and Kapton with tears and the words: “Give it! I owe everything myself…!!” She doesn't really stick to it. That is why I came to Sitall glass ideologically. And no one expected to sell it.
I started looking for a way to solve our problem. I tried many options for substrates, tiles and glasses, the number of which I'm afraid to even remember. There were antireflective, borosilicate, chemical-laboratory, porous, mirror and many other glasses. I was looking for one that could work with many of the materials commonly used in 3D printing. The search for the right glass led me to one smart girl with a physical and chemical education, who is engaged in astronomical optics, and she told me the right direction.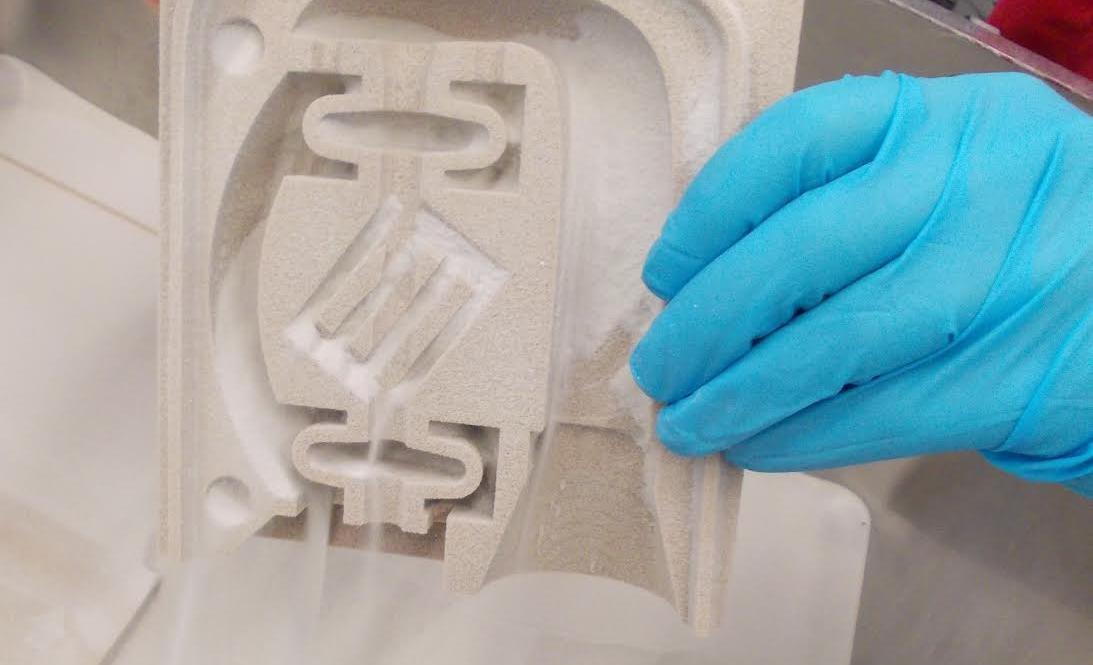
Sitall is a crystalline material.
The birthplace of Sitall is considered to be the Soviet Union, where the very word "Sitall" was introduced into use for the first time. There are a large number of Sitals, the synthesis of which is carried out in advance, based on the specified properties: chemical resistance, mechanical or thermal strength, transparency, wear resistance, etc., and also have a set of necessary properties. The range of these crystalline materials is very wide.
Of the most interesting options, for example: they are used in the aviation industry, in the fairings of missile warheads that are part of the armament of MiG-29 aircraft, Su-27, Su-30, etc.
For creating mirror systems for ground and space-based telescopes. Such property of Sitall as an ultra-low thermal expansion coefficient is an ideal material for astronomical mirrors and other optical parts, in which the absence of changes in linear dimensions and surface shape with significant temperature changes is important.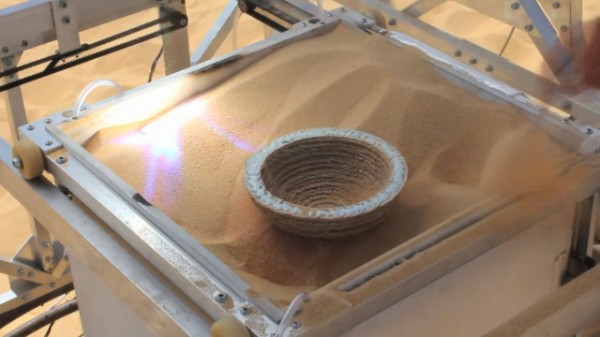
But it turned out that it is not so easy to find this crystalline material, namely Sitall glass with the desired properties. And all that was found was at an inadequate price for 3D use. The same friend I mentioned above helped me. She is in her professional field of activity and suggested where to look.
When I got one of the first Sitall glasses, I simply couldn't believe what was happening. ABS is my most popular plastic, which used to be just not sticky and the way it now holds on glass-ceramic glass without any processing surprises me even now.
ABS tack test on Sitall Glass.
Sitall glass finally saved me from the long torment with the processing of a hot table with varnish, kapton, etc. All you need is just to calibrate the height between the nozzle and the table once and start printing without even wiping the dust off the glass.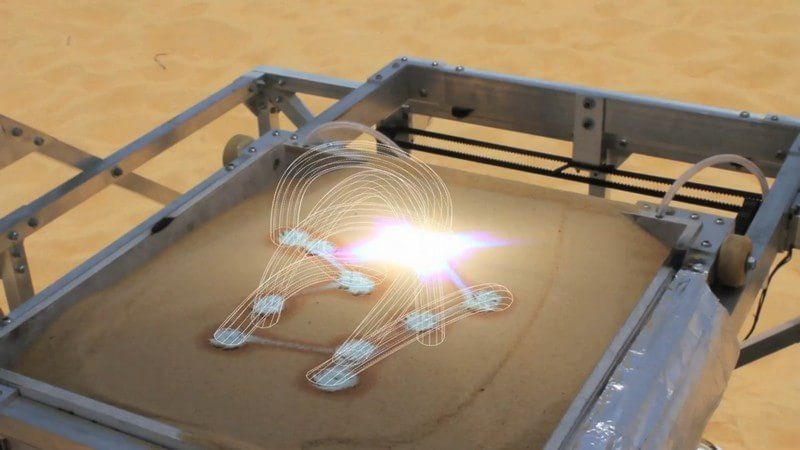
Before the idea to sell Sitall glass appeared, it was tested for a whole year. Various plastics and printing conditions were tested.
Test 1. Printing of an item made of ABS plastic.
Test 2. Printing a product from PLA plastic.
Test 3. Printing a product made of FLEX plastic.
Test 4. Printing of the product with Wood (Wood polymer)
For verification, printing in video occurred without using a BRIM substrate.