Glowforge pro 3d laser printer stores
Glowforge - the 3D laser printer
Pick Your Model
Glowforge Pro
$6,995
Choose the most powerful and capable Glowforge. The Glowforge Pro is the same size but can print enormous objects with the Pro Passthrough slot, and has upgraded cooling for all-day use. It also features upgraded components and increased laser power, with top engraving speeds 3 times as fast as the Glowforge Basic and cutting speeds 1.2 times as fast. The Pro has double the warranty. Class 4 laser product.
Glowforge Plus
$4,995
Our premium home offering for the ultimate personal printing experience. The Plus offers upgraded components and a top engraving speed 2 times faster than the Basic and has double the warranty. Class 1 laser product.
Glowforge Basic
$3,995
The Glowforge Basic creates beautiful prints on dozens of materials right at home. Class 1 laser product.
Glowforge Air Filter
The Glowforge Air Filter uses activated carbon and HEPA filters to clean the air that comes out of your Glowforge printer. It sits on the floor near your printer and comes with handles and wheels so it’s easy to move. It has an on/off switch and a dial to adjust the fan power for maximum filter life.
Dimensions
- Glowforge exterior (Pro, Plus, and Basic): 38″ x 20.75″ x 8.25″ (965mm x 527mm x 210mm)
Work Area
- Maximum material depth: 18" (455 mm) for Basic and Plus; unlimited for Pro
- Maximum material width: 20″ (515 mm)
- Cutting area: approx. 11″ (279 mm) deep and 19.5″ (495 mm) wide
- Maximum material height: 2″ (50mm)
- Maximum material height with tray: 0.5″ (13mm)
Material Capability
Can safely print on any laser-compatible material, with examples below. Glowforge recommends Proofgrade™ materials for automatic settings and perfect results.
Cuts & Engraves
- wood
- fabric
- leather
- paper
- cardboard
- plexiglass (acrylic)
- Delrin (acetal)
- mylar
- rubber
- cork
- sandpaper
- foods
- .
 ..and more
Engraves Only
- glass
- marble
- rubber stamps
- stone
- ceramic tile
- anodized aluminum
- titanium
- corian
- ...and more
Software
- Easy and powerful interface will have you printing in minutes
- Web interface works on Mac, PC, Linux, and many mobile devices (internet required)
- Compatible with JPG, PNG, SVG, PDF, and other file formats. Glowforge Premium includes support for DXF files
- Drag-and-drop layout with live camera preview to position designs on the material
- Automatically scan drawings and print without design software
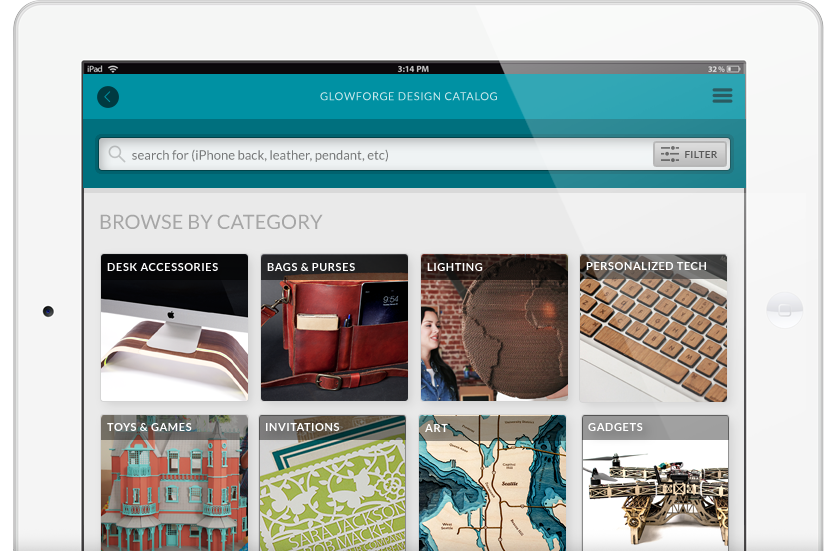
- Catalog of premium, customizable, ready-to-print designs
One Button Print
When used with Proofgrade materials, automatically determines settings for perfect cutting and engraving
Cameras
- Wide Angle Camera — Mounted on the lid, provides a view of the entire printable area, accurate within 0.
 25" (6mm)
 - Macro Camera — Mounted on the head, provides extreme up-close information for autofocus, accurate within 0.004" (0.1mm)
Autofocus
- Exquisitely precise — low-power laser measurement scans the surface of the material to determine the exact height
- Completely Internal — Lens moves internally up and down inside the head to print on materials up to 0.5” (13mm) thick
- Multipass — Focus can be shifted between engrave passes, allowing detailed depth engraves
- Manual focus option — the laser can be focused at a precise height to experiment with a range of techniques
Lighting
- Dual high-efficiency internal LED strips give your work broad illumination for a wide angle view
- Headlights under the lid give point illumination for precise precisioning
Laser System
- CO2 Laser — Custom CO2 glass laser tube capable of continuous operation at 10,600 nm; rated at 45 watts for Pro and 40 watts for Plus and Basic
- Fixed Alignment — Factory calibrated optical system does not require any alignment by the user
- Sealed Optics — Enclosed optical path with cleanable and replaceable windows protects the laser optics to avoid replacement or realignment
Mechanicals
- Case — High modulus injection molded plastic
- Linear System — Custom extruded aluminum linear rails with belt driven v-wheel carrier
- Motion — Dual hybrid stepper Y axis; single hybrid stepper X axis
- Cooling — Closed loop self contained internal cooling.
- Air Assist — Internal air assist with no external compressor hookup required
- Recommended Operating Temperature: 60F-75F (16C-24C) Basic and Plus; 60F-81F (16C-27C) Pro
Requirements
- Wi-Fi required (2.4 GHz b/g/n and WPA2, WPA, WEP, or open)
- Ventilation with either the Glowforge Compact Filter, or an open-able window within 8 feet
- 110/220 VAC, 50 or 60 HZ outlet
- Glowforge Basic, Plus, and Pro have 800W peak power consumption
- Compact Filter has an additional 350W peak power consumption
Miscellaneous
- Precision power settings allow enough control to draw lines on copy paper
- 3D engrave settings carve detailed surfaces
- Positioning precision to 0.001” (0.025mm)
- Engraving up to 1355 DPI
Pro Upgrade
- Pro Passthrough slot allows the use of material that’s up to 1/4″ (6.3mm) high, up to 20” (50.8cm) wide, and as long as desired
- Upgraded solid state thermoelectric cooling
Air Filter Upgrade
- Activated carbon gas filtration
- HEPA grade particulate filtration
- Cartridge full alert
- 350W brushless DC motor rated at 275 cfm
- 60db-70db (similar to a vacuum)
- 4" hose connector
- Rolling wheels
- Exterior dimensions (LxWxH): 16.
 14” x 10.43″ x 16.92″ (410mm x 265mm x 430mm)
 - Weight: 48lbs (22kg)
Warranty
Safety
- Certified to UL standards
- Safety sensors alert in case of bumps or unplanned movement
- Safety sensors warn in case of overtemperature conditions
- Safety sensors notify when fan performance changes
- The Glowforge Basic and Glowforge Plus are Class 1 laser devices with no special training required
- The Glowforge Pro is a Class 4 laser device and comes with all necessary safety training materials
- Certified to UL/ANSI/IEC 60950-1-07 and CAN/CSA-C22.2 NO. 60950-1-07 (R16) by TUV Rhineland
Get Your Glowforge Today
Buy Now
Glowforge - the 3D laser printer
The Glowforge Pro is the ultimate option for home, business, or school. It prints truly enormous objects like furniture with the exclusive Pro Passthrough, allowing you to use infinitely long materials. Upgraded solid-state cooling allows nonstop printing all day long. The powerful 45 watt laser cuts up to 20% faster, and the top engraving speed is up to three times as fast as the Glowforge Basic. Class 4 laser product; place near a window for ventilation.
$6,995
Buy Now
The Glowforge Pro is quick to set up, easy to use, and work with dozens of different materials.
Simple setup in under 30 minutes
Works with hundreds of materials
Live camera preview of your work
Free web-based software
Autofocus and 3D engraving
Compatible with your Mac, PC, tablet, or phone
Safe for home and school
Plus, you'll receive everything you need to make your first print in minutes.
What's in the Box
- Your Glowforge Pro, Plus, or Basic 3D Laser Printer
- The Glowforge laser head with macro camera and autofocus
- Power cord
- Magnetic lens replacement tool
- Steel crumb tray
- Exhaust hose
- Ring clamps for hose connection
- Pro Shields (Pro only)
Proofgrade Starter Pack
To ensure you can start printing immediately with your Glowforge, we'll include a starter pack of our coveted Proofgrade™ materials. It will include $150 worth of products such as:
- Draftboard
- Plywood
- Hardwood
- Acrylic
- Leather
These materials are sourced, encoded, and lab-tested for perfect printing every time and are specially formulated for the Glowforge 3D laser printer.
| Pro | Plus | Basic | |
|---|---|---|---|
| Comprehensive warranty | 12 mo | 12 mo | 6 mo |
| Laser tube power | 45W | 40W | 40W |
| Upgraded hardware for improved speed | |||
| Cut speed | 120% | ||
| Enhanced cooling for all-day use | |||
| Giant-size prints with Passthrough Slot | |||
| Price | $6,995 | $4,995 | $3,995 |
Material Capability
- 19.5” by ∞
Software
- Drag-and-drop with live camera preview
- Works with Mac, PC, iPhone, Android, and more
- JPG, PNG, SVG, PDF, and more
Hardware
- Dual cameras: wide angle & macro
- Custom 45W (Pro) laser
- Precise to 1/1000th of an inch
- Full autofocus
See Detailed Specs
Lasers like your Glowforge require ventilation. All Glowforge printers come with a 4" (10 cm) diameter hose which allows you to use your Glowforge near a window.
Our Air Filter upgrade lets you put your Glowforge anywhere. It sits on the ground near your Glowforge printer and cleans the air, allowing you to operate it anywhere in your home, school, or office!
$1,295
Buy Now
Glowforge Pro laser engraving machine in Moscow
Out of stock
Add to compare
Item added to compare Go
533 000 ₽
nine0002 Notify me of admissionOfficial distributor
We work directly with manufacturers.
Any form of payment
The opportunity to see the 3D printer in action in our demo room.
Own warranty service nine0003
Warranty and post-warranty service of equipment purchased from us.
Permanent 10% discount on consumables
When you buy a 3D printer from us,
, you get a 10% discount on all consumables.
Glowforge - laser engraver . Uses a beam of light the width of a hair to cut and engrave various materials. Can work with a wide variety of materials: wood, paper, leather, acrylic, food, fabric, cardboard, glass, cork, sandpaper, ceramic tiles, etc. Materials are automatically recognized by the device. Allows you to create jewelry, toys, architectural models, leather goods, containers, home decoration and much more. nine0003
Housing made of high modulus injection molded plastic. Equipped with dual Y-axis hybrid stepping motor and X-axis single hybrid stepping motor. Equipped with automatic focusing system, which can cut and engrave materials of different thickness.
Glowforge is highly accurate. It can control movement to within one thousandth of an inch, and the laser can be focused down to the size of a human hair.
The Glowforge catalog allows you to choose from print-ready designs, personalize them, or create your own. You can preview your work in real time. Compatible with Mac, iPad, iPhone, Android, Windows or Linux PC. nine0003
Glowforge is available in three versions. Pro have increased top speed. Pro Model Wattage: 45W. Maximum material depth for: no limit.
Specifications:
- Auto focus and 3D engraving
- Positioning accuracy: up to 0.025 mm
- Engraving: up to 1355 dpi
- Max. material width: 515 mm
- Cut area: 279mm depth and 495 mm width
- Max.
 material height: 50 mm
 - Operating temperature: 16 -24 °C
- Compatibility: Mac, PC, iPhone, Android, etc.
- Dimensions: 965 x 527 x 210 mm
Layout work
- Drag and drop layout with live preview to place designs on the media.
- Automatic drawing scanning and printing without design software. nine0050
- A catalog of high quality, customizable, print-ready designs.
One button printing
- When used with quality control materials, automatically detects settings for perfect cutting and engraving
Cameras
- Cover-mounted wide-angle camera provides a 0.25" (6 mm) view of the entire print area
- Macro - head-mounted camera focuses automatically to within 0.004 inches (0.1 mm)
Auto focus
- Extreme accuracy - low power laser measurement scans the surface of the material to determine the exact height
- Fully internal - lens moves up and down inside the head to print on media up to 0.
 5" (13mm) thick
 - Multi-pass focus can be shifted between engraving passes, allowing engraving with detailed depth nine0049 Manual focus option - The laser can be focused at a precise height to experiment with a range of techniques.
Laser System
- CO2 Laser - Custom CO2 glass laser tube capable of continuous operation at 10,600 nm; rated power 45 W for the Pro model and 40 W for the Plus and Basic models
- Fixed Alignment - Factory calibrated optical system does not require user alignment
- Sealed Optics - Enclosed optical path with cleanable and replaceable windows protects laser optics to avoid replacement or realignment
Lighting
- Dual high performance indoor LED strips give your work ample illumination for a wide angle view
- Lights under cover provide spotlight for fine tuning
Mechanisms
- Housing - high modulus injection molded plastic
- Linear System - Custom Extruded Aluminum Belt Driven Linear Rails on V-Wheel
- Movement - Dual Hybrid Y-Step; one hybrid stepping axis X
- Cooling - closed circuit independent internal cooling.
- Air Assist - internal air assistant without external compressor connection nine0049 Recommended operating temperature: 60F-75F (16C-24C) for Basic and Plus models; 60F-81F (16C-27C) for Pro
Requirements
- Requires Wi-Fi (2.4 GHz b/g/n and WPA2, WPA, WEP or open)
- Ventilate with Glowforge compact filter or open window within 8 feet.
- 110/220 VAC, 50 or 60 Hz output
- Glowforge Basic, Plus and Pro have a peak power consumption of 800 W
- Compact filter has an additional 350 W peak power consumption
Carves and engraves
- wood
- fabric
- leather
- paper
- cardboard
- plexiglass (acrylic)
- delrin (acetal)
- mylar
- rubber
- stopper
- sandpaper
- products
- and more
Only engraves
- glass
- marble
- rubber stamps
- stone
- ceramic tiles
- anodized aluminum
- titanium
- corian
- and more
Scale of delivery
Delivery to all regions of Russia and countries of the Customs Union. nine0003
Free shipping
When you buy a 3D printer (except assembly kits) you get free shipping.
Cash
In our store you can pay for your order in cash.
Online payment on the website
You can pay for orders with a bank card on the website of our online store.
Glowforge GF-ASM-00368 Air Filter Plus and Pro User Manual
GF-ASM-00368 Air Filter Plus and Pro
User Management
1 Introduction
2 Safety
3 General safety
4 Operation Conditions
5 Materials
6 Specifications
7 Marking
8 first steps
9 Check for damage to
10 Unpack the Glowforge Air Filter
11 Connect the Glowforge Air Filter to your Glowforge
12 Print Something Amazing
13 Cleaning, Maintenance, and Relocation
14 Troubleshooting
15 Glowforge Air Filter Won't Turn On
16 Documents / Resources
17 Glowforge 3D printer. With the Glowforge Air Filter, you can do it anywhere.
But before you can do any of this, you need to read the information in this manual. nine0027 It's our job to make sure every part of your Glowforge experience is amazing. Unfortunately, right now you need to read a few pages that are underwhelming: Glowforge Air Filter Safety Information. They are a little dry and a little intimidating. The safety section has been written by our safety team in the simplest possible language to make sure you can operate the Glowforge Air Filter safely.
After talking about safety, we're back to the fun part: unpacking, easy set up... and step by step instructions for using your Glowforge air filter while working with a laser! nine0027 PS: If you see anything that is unclear or seems incorrect, please let us know immediately at
[email protected] .
Preservation
Now it's time to get serious. Improper operation of the Glowforge Air Filter Unit may result in fire and health hazard. This could result in serious injury or even death.
Before you begin
- Read this manual before using the Glowforge Air Filter and make sure everyone who uses it reads it too. nine0050
- Always follow all instructions in this manual, the Glowforge manual and the Glowforge app.
- Use the Glowforge Air Filter with Glowforge Basic, Plus or Pro only.
- Children constantly need supervision and help from adults.
- This product may be subject to regulations and standards, especially if installed in an educational institution or workplace. Make sure you comply with all applicable regulations.
Electrical safety
To reduce the risk of electric shock or fire:
- Do not attempt to service, repair, or modify the Glowforge air filter in any way that is not described in this manual.
- Do not open the sealed parts of the Glowforge air filter or attempt to access the wiring.
Damage caused by opening the case is not covered by the warranty.
- If the Glowforge air filter or its power cord is damaged, unplug the power cord and contact [email protected] immediately. nine0050
- In case of any emergency or malfunction, unplug the power cord at the back of the device.
- Use only a properly grounded 120 VAC outlet that complies with local building codes.
- Glowforge air filter can suck up to 3 amps. Make sure the circuit can support a load of at least 350W. Note: A standard 15A household outlet can support both the Glowforge printer and the Glowforge air filter if nothing else is drawing power from the circuit. nine0050
General Safety
- If you detect a strong, pungent odor that also irritates the eyes, nose, or throat, or if visible smoke comes out of the Glowforge printer when the cover is closed, your Glowforge air filter is not working properly. Follow all instructions in this guide.
If irritation and/or smoke does not improve, discontinue use of the Glowforge Air Filter and contact Customer Support.
- Do not disconnect the hose, open the housing, touch anything inside, or perform any maintenance or operation while the Glowforge Air Filter is plugged in.
- Glowforge air filter has sparkling parts inside. Do not use where gasoline, paint, flammable liquids or gases are used or stored.
- Do not use the Glowforge air filter without the filter cartridge.
- Do not connect the Glowforge air filter when the cover is open or the latches are not fully latched. Doing so may result in electric shock or physical damage to moving parts. nine0050
- Do not use the Glowforge air filter if the filter cartridge is clogged. This will shorten the life of the machine and any resulting damage will not be covered by your warranty.
- Do not modify the filter cartridge for any reason.
- Use only with Glowforge filter cartridges for use with this Glowforge air filter.
Operating conditions
To prolong the life of your Glowforge air filter and reduce the risk of fire or mechanical failure:
- Do not use if ambient temperature is below 40 degrees Fahrenheit (5 Celsius) or above 120 degrees Fahrenheit (48 Celsius).
- Do not use if ambient humidity is below 40% or above 80%. Air with humidity above 80% can clog the filter, which can damage it.
- Do not use the Glowforge air filter outdoors.
- Do not use the Glowforge Air Filter in an environment where it may come into contact with liquids, moisture, grease, excessive dust or fine particles. nine0050
Media
- Use the Glowforge Air Filter only when printing on laser compatible media. Only the manufacturer or supplier of the material can confirm that it is compatible with the laser. Glowforge recommends using Proofgrad® materials with a Glowforge air filter.
- Laser incompatible materials may contain harmful or toxic chemicals that are not processed by the Glowforge Air Filter and could cause injury or death. nine0050
- Laser-incompatible materials may damage the Glowforge air filter.
- Some laser compatible materials such as MDF or Proofgrade blank board may cause the filter cartridge to be replaced more frequently.

- The Glowforge air filter warranty does not cover damage caused by the use of non-laser compatible materials.
Glowforge Air Filter Regulatory Information
This product complies with applicable CE and RoHs requirements. It is suitable for use with Glowforge Basic, Plus and Pro laser 3D printers. nine8134
For more information or support contact [email protected]
Label
This label is located on the back of each Glowforge air filter with the corresponding serial number in the location indicated by the arrow in the diagram below.
| rearview units | rearview units |
Getting Started
Now that you've read all about laser safety! nine0027 It only takes a few minutes to unpack - we can't wait for you to get started either. Of course, if you run into any issues along the way, you can contact our customer service team at support@glowforge. com to help.
Let's get started, shall we?
Check for Damage
If your package or any part of your Glowforge Air Filter is visibly damaged upon arrival, we want to fix it ASAP! Send photos of the damage to [email protected] and wait until you get a response from us. If the Glowforge air filter itself is visibly damaged, do not plug it in or attempt to operate it; contact us immediately. nine0003
Unpack the Glowforge air filter
- Locate the Glowforge air filter.
Your Glowforge air filter must be placed on a flat surface such as the floor. It must be positioned so that the 8 ft (2.4384 m) exhaust hose can be connected to the back of your Glowforge with no more than three 90 degree bends.
Your Glowforge air filter blows air out, so make sure there are no obstructions within two inches (5.08 cm) of the vents on either side. nine0027 - Open the Glowforge air filter box.
Carefully cut off the tape covering the top of the Glowforge air filter box and open it. Remove the power cord and the foam top.
 - Remove the Glowforge air filter.
The Glowforge air filter is heavy, so have a friend help. Grasp the two handles on the top of the Glowforge air filter through the clear plastic bag and remove the filter from the box. Lay it on the floor. nine0050 - Remove the bag.
Lift the clear plastic bag over the filter to remove it.
- Save all packing material, including box, foam, and bags.
If you need to relocate a Glowforge air filter such as a sample to send it back for warranty service, you will need all original packing materials. The Glowforge Air Filter cannot be safely transported without the original packaging. nine0027
Front Glowforge air filter view showing dial
Glowforge air filter rear view showing power switch, plug connection and label
Top of Glowforge view air filter with cap removed showing filter cartridge. The filter cartridge is pre-installed.
Connect the Glowforge air filter to your Glowforge
- Connect the Glowforge air filter to the Glowforge printer using the outlet hose. nine0027 Take the exhaust hose and two amp rings supplied with your Glowforge printer. If you want a new one, you can buy a new one from the Glowforge store: https://shop.glowforge.com/products/hose?taxon_id=57
Your Glowforge printer comes with an accessory kit that includes an exhaust hose and two ring clips.ampc ( shown left)
If you are using an exhaust hose to vent to the outside, you can reuse the hose and you can skip this step
as the hose is already connected to your Glowforge. nine0027 Squeeze the two ends of the clamp ring together to make it bigger, then slide the end onto the hose.
While squeezing the clamp ring again slide the hose and amp over the outlet on the back of the Glowforge printer. clamp pressure will hold it in place.
Release. Make sure the clamp is firmly pressing the outlet hose against the outlet.
Check that the hose does not come off with a slight tug.
- Connect the hose to the Glowforge air filter
Place another clamp around the other end of the hose. Repeat the above procedure to attach the outlet hose to the top of the Glowforge air filter with the cl.amp ring. nine0027 Keep the hose as straight as possible with no more than three 90 degree turns or less.
Check that the hose is not kinked, kinked, kinked, punctured or flattened. If there is excess hose, do not let it sag; wrap it tightly with duct tape to keep the length of the hose as short as possible.
- Connect to the mains.
Make sure the power switch is in the OFF position (side 0 pressed down as shown).
Make sure the filter is installed and the lid is tightly closed. nine0027 Plug the power cord into the back of the Glowforge Air Filter, then plug the power cord into an electrical outlet. A standard household socket with a ground connection works well.
- Enable the Glowforge Air Filter in the Glowforge UI
1) Go to https://app.glowforge.com and log in if needed.
2) On the toolbar, click New and then click New Blank Design.
3) On the top menu bar, click the 3-dot "More" menu, and then click the gear icon, and then enable the "Glowforge Air Filter Connected" option. nine0027 Your printer fans will now run slower to match the speed of the air filter's internal fans. - Turn the Glowforge air filter dial to the correct position.
Glowforge air filter regulator controls fan power. When it is too high or too low, your Glowforge air filter will not work properly.
When using the Glowforge air filter for the first time, set it to NEW. The fan will use the minimum power that is optimal for the new filter. Do not use a higher setting as the higher power will cause the air to move too fast and the smoke and fumes may not be completely removed. nine0027 Some time after using the filter, the filter cartridge will start to fill up. It will take more power to move air through the Glowforge air filter and the NEW setting will no longer reduce smoke and fumes. If you see smoke and fumes at the lowest setting, use the medium setting, halfway between NEW and FULL.
Finally, when the filter cartridge is nearly full, it will stop reducing smoke and fumes again and more power will be required to completely eliminate smoke and fumes. When this happens, turn the dial to FULL. nine0003
Lower setting disabled; the disc rotates clockwise.
First, set the Glowforge air filter dial to NEW.
Your Glowforge air filter is now ready to use, fan off.
Print Something Amazing
Follow these steps for each print.
- Select materials.
Your Glowforge Air Filter has been tested with a wide range of Proofgrade materials and is designed to work with all laser compatible materials. However, some materials, such as Proofgrade Draftboard or MDF, will cause your filter element to fill up and need to be replaced much faster than others. nine0050
 - Turn on the Glowforge air filter.
Use the switch next to the power cord to turn on the Glowforge air filter before each print. - Start printing.
Make sure you are using laser compatible materials such as Proofgrade hardwood, plywood and acrylic. Different materials will fill the filter cartridge at different rates. It is not recommended to use MDF and Proofgrade rough board as they will fill the filter cartridge quickly. nine0050 - Leave the Glowforge air filter on when printing is complete.
Passing air through the Glowforge air filter will extend cartridge life. For best results, leave it on for one minute for every minute of printing. For the former amp, for example, when you finish two 30-minute prints, leave it on for an hour after they're done. - Turn off the Glowforge air filter.
When you're done, use the switch next to the power cable to turn off the Glowforge air filter. nine0027 Materials will have an odor when they are removed. If you prefer, you can reduce this odor by leaving the materials in your Glowforge longer while the Glowforge air filter is running.
Cleaning, maintenance and moving
Before cleaning, moving, replacing the filter cartridge, or any other cleaning or maintenance, unplug the Glowforge air filter.
Replace filter cartridge
You will be notified by an audible alarm when the air becomes slower due to the cartridge being full. You may be able to turn the dial clockwise to increase the fan speed and extend cartridge life a little more. The beep may not always occur when the cartridge needs to be replaced; for example if carbon is used up but airflow is still high. nine0027 If you smell odors while printing, even when the Glowforge air filter control is set to "Full", it's time to replace the filter cartridge. Here's how.
- Turn off and disconnect the Glowforge air filter.
The power switch is located on the back, next to the power cord. Turn it off first and then unplug it from the wall. - Glowforge Air Filter Open
The top of the Glowforge air filter is held in place by four clips. Lift the bottom of all four latches to release them. The outlet hose does not need to be removed to replace the filter cartridge. nine0050 - Remove and discard the old filter cartridge
Grab and lift the metal lip to remove the filter element from the Glowforge air filter.
Dispose of the used filter cartridge in the trash.
- Replace with a new filter cartridge
You can purchase new filter cartridges at https://shop.glowforge.com. Unfold the filter cartridge and inspect it for possible damage. Lower the new filter cartridge in the same way as you removed the old one. nine0050 - Close the cap and check the outlet hose again.
Inspect each latch to make sure it is fully closed. Grasp the lid handles and pull the lid up to make sure it does not come off. Finally, check the outlet hose to make sure it hasn't come loose from either the cap or the back of your Glowforge.
That's it - you're ready to print!
Cleaning
Switch off and disconnect the Glowforge air filter before cleaning. Make sure the Glowforge air filter is closed before cleaning; interior spaces should not be cleaned. You can clean all exterior surfaces with a cloth damp with isopropyl alcohol. Do not spray liquids on the Glowforge air filter as they may get inside. nine0027 Relocation
For protection, the Glowforge Air Filter must be packed in its original packaging when moved to a new location. Whether it's a big move, shipping your Glowforge printer and Glowforge Air Filter to an event or warranty service, you need to properly pack your Glowforge Air Filter with the original box and packing materials. The Glowforge Air Filter cannot be safely transported without the original packaging.
To repackage the Glowforge air filter, turn off the unit and unplug the power cord. Disconnect the outlet hose and hose kl.amp from the cover. Repack in original packaging. nine0003
Problem Solving
Odor Reduction
The Glowforge Air Filter is designed for safe and comfortable indoor use of the Glowforge printer. This will greatly reduce odors, smoke and fumes to safe levels. You should almost not smell the odor coming from the outlets of the Glowforge air filter itself.
Note, however, even when used correctly, odors can occur due to the following factors:
- Opening the cover after printing. A small amount of smoke and smoke remains in the crumb tray and exits when the lid is opened and the material is removed. This can be reduced by leaving the material in Glowforge for a minute or two before removing.
- The materials themselves. After printing, materials may have an odor for a day or two. This can be minimized by using Proofgrade material, removing and disposing of the protective coating (which is responsible for most of the odor), and storing materials for a day.
 nine0050
 - Firefly himself. After many hours of use, tiny particles of dust and tar accumulate on the Glowforge itself. To minimize odor, keep the lid closed when not in use, clean it according to the Glowforge printer user manual, and leave the Glowforge connected to the Glowforge air filter when not in use.
Smoke and Smoke Eliminator
If you detect a strong, pungent odor that also irritates the eyes, nose, or throat, or if visible smoke comes out of the Glowforge printer when the cover is closed, your Glowforge air filter is not working properly. Stop using the Glowforge Air Filter and follow these instructions. nine0003
- Make sure your Glowforge air filter is turned on before each print and is not turned off until the print is complete.
- Check that the outlet hose is securely connected to the Glowforge printer and the Glowforge air filter.
- Check if the Glowforge air filter is enabled in the Glowforge user interface.
 You will only need to do this once. Once enabled, it will be enabled for all users from now on.
 - Make sure when you turn on the Glowforge air filter you turn it on to the correct setting. If the fan rotates too slowly or too fast, the filter will not work properly.
- Check that the hose is properly connected by making no more than three 90 degree turns.
- Check if the materials you are using are compatible with the laser. The Glowforge air filter has been tested with Proofgrade materials; other materials may contain smoke and fumes that are not completely removed by the Glowforge air filter. nine0050
- Replace filter cartridge. If you've been printing for a while, it might be time to replace your
filter cartridge. - Inspect all four latches to make sure they are tight.
- Check the hose to make sure it is not kinked, pinched or kinked.
- Remove the hose and inspect the inside to make sure it is not clogged.
- Review Odor Reduction section above for other odor sources.

If all this fails, you are using a new filter and the New setting and experience eye, nose and throat irritation when using Proofgrade materials with Glowforge Air Filter, stop using Glowforge Air Filter and contact us. Glowforge support.
Glowforge Air Filter Won't Turn On
If the power switch is on, the machine is not running, and the power light is not on, the fuse may need to be replaced.
- Turn off and disconnect the Glowforge air filter.
- Remove and replace the fuse next to the power switch.
We include a free replacement fuse with your Glowforge air filter.
Service
Except for the procedures shown above, the Glowforge Air Filter cannot be serviced or repaired by the user. If service or repair is required, it must be returned to the factory; contact [email protected] for instructions. nine0027 Seeking community and support
Still have questions? Looking for ideas on how to get the most out of your Glowforge and Glowforge air filter? We are here to help you succeed!
community forum
Most Glowforge owners have signed up for the Glowforge Community Forum, where hundreds of Glowforge owners post daily.