3D printer plans diy
Best DIY 3D Printer Kits & Build Plans 2022
Building your own DIY 3D printer can be an affordable option to get started 3d printing as well as a learning experience as one gets familiar with the mechanics or the nuts and bolts of a 3D printer. You learn how it works and how to fix it when it breaks. Building a 3d printer is more challenging than buying a completely assembled machine that’s ready to print. In this article, we review the best DIY 3d printers and list some of the options available. Here’s a guide for the list of considerations when planning your 3d printer build.
- Documentation & Assembly Guides
- DIY Kits vs Pre-Assembled 3D Printers
- Self-Source Parts vs DIY Kits
- Documentation
- Community
- Build Volume
- 3D Printer Kinematics
Table Of Contents
- DIY 3D Printer Build Advantages
- DIY 3D Printer Build Disadvantages
- DIY 3D Printer Kits vs Pre-Assembled Printers
- Complete 3D Printer Kits vs Open Source Build Plans
- Self-Source Parts
- Advantages of Building Your Own 3D Printer
- Challenges In Building Your Own 3D Printer
- Open-Source 3D Printers & Build Plans
- 3D Printer Kits vs Pre-Assembled
- Complete 3D Printer Kits
- Self Sourced DIY 3D Printer Plans
- Railcore II 300ZL
- Pros & Cons
- Hypercube Evolution – H.
E.V.O.
- Voron 2.4
- Rat Rig V-Core 3
- The Evolution of The RepRap Project
- Self-Source Parts vs DIY Kits
- Cantilever Bed vs 3-point Bed Leveling
- Lead Screw vs Ball Screw vs Belt Drive
- Lead Screw vs Belt
- Lead Screw Pitch & Required Torque
- Build volume
- Rods vs Linear Rails
- White Knight: DIY Conveyor Belt 3D Printer
- Best Large DIY 3D Printers 2022
- Modix BIG-40
- Raise3D Pro2 Plus
- BigRep – STUDIO G2
- Piper 2: Piper 3D Printers Made From Conduit Pipe
- Gantry 3D Printer Design – Reducing Moving Mass
- Large Scale 3D Printing vs Batch Printing
DIY 3d printer plans make it easier to get started and are a great option for beginners who want to learn how the mechanics work. The kits usually come with everything you need such as tools, parts, and instructions which take out some of the guesswork when building your printer.
Building a printer can be challenging and time-consuming. There are many things that can go wrong, so it’s important to have some experience with building or repairing electronic devices before starting this project. Also, you may not have all the parts you need, which could lead to delays in printing.
DIY 3D Printer Kits vs Pre-Assembled PrintersThere are pros and cons to each option. If you choose a kit, it’s important to consider how much time you have for assembly, the difficulty level of the project, your budget, versatility options (e.g., build volume or filament types supported), and the quality of the community support.
Complete 3D Printer Kits vs Open Source Build Plans
While many printer designs are available in complete kits some open source designs are currently still self-sourced, meaning that builders will have to source individual 3d printer parts and get it all together which results in complexity as some parts may take long to receive and increases the chance that one might order the wrong part number. With that said, is the price still about the same depending on extruder options print size.
A common option is to source all your own parts. This can be more affordable, but it takes more time and effort to find compatible parts and can be difficult depending on experience level. The advantage of this approach is that you can customize your printer to fit your needs.
Advantages of Building Your Own 3D PrinterThere are several advantages of building your own DIY printer:
- -You learn how the machine works and can troubleshoot problems on your own.
- It can be more affordable than buying a pre-assembled printer.
- You can customize your printer to fit your needs.
- The community is usually very helpful and supportive.
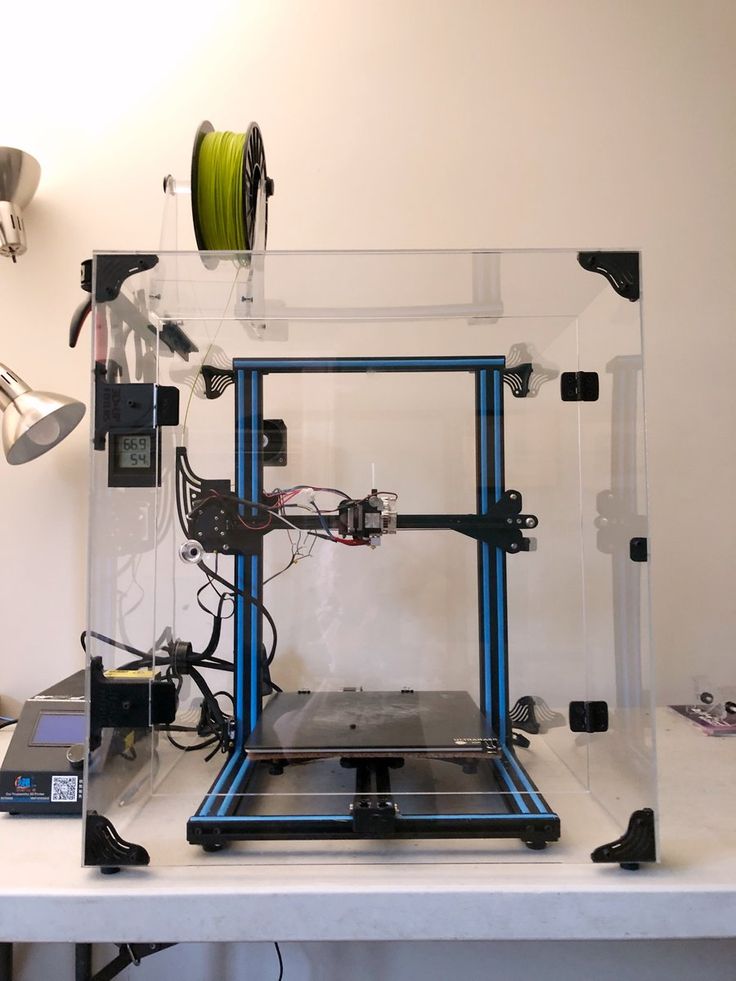
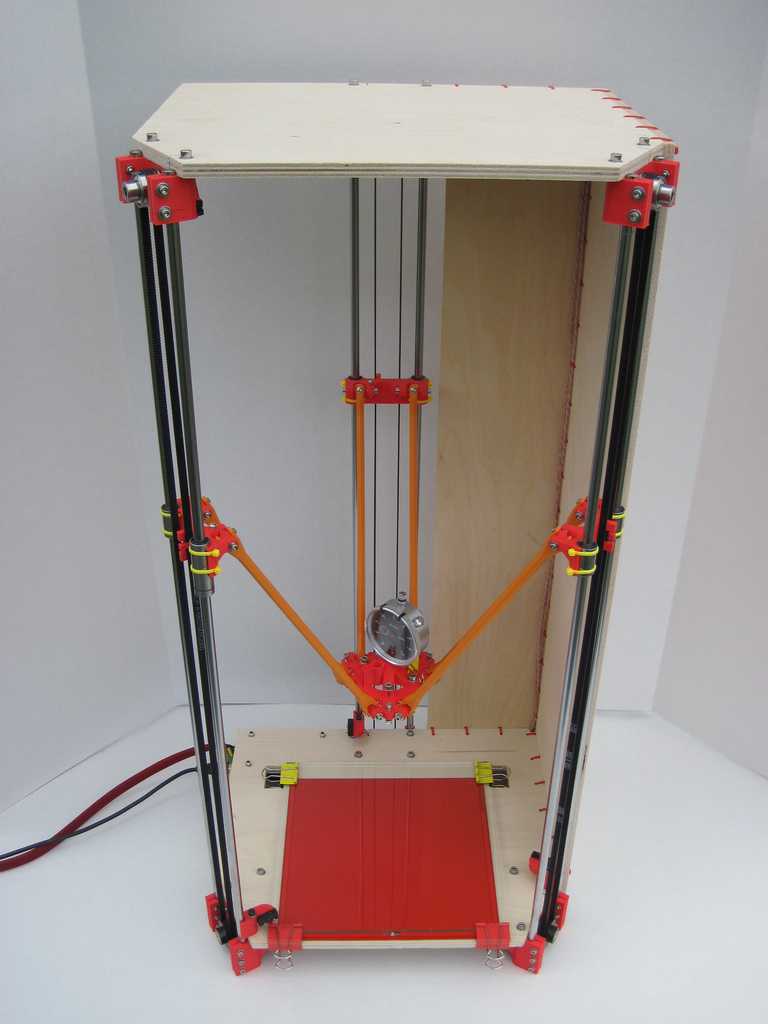
DIY Printer Build
Challenges In Building Your Own 3D Printer
There are also some disadvantages of building your own printer:
- It can be more challenging than buying a pre-assembled machine.
- There’s a higher chance of something going wrong during the build process.
- You may not have all the parts you need, which could lead to delays in printing.
The best DIY printer for your needs depends on your level of experience, budget, and goals. We hope this article provides some helpful advice for choosing the right printer kit for you. Happy building
Open-Source 3D Printers & Build Plans
Documentation is important when choosing a 3d printer to build or buy and effects overall user experience. Poor documentation can lead to downtime as users assemble or troubleshoot their machine to get it printing. Look for kits or build plans that are well documented and comprehensive for your skill level. Good documentation will also include tips and tricks for getting the best 3d prints, troubleshooting common problems that you may experience.
3D Printer Kits vs Pre-AssembledWhen it comes to the Best DIY kit printers, there are many options. The advantages of a pre-assembled machine is that they usually come with some documentation and have been assembled by someone else so you can trust in them being functional machines already. This makes them less complicated than self sourced kits and more appealing to beginners.
If you’re not comfortable with sourcing your own parts from various suppliers, there are also pre-assembled printers available. These machines come with everything or almost everything to assemble a working machine, including all of the screws and tools needed.
Complete 3d printer kits make it easier to get up and running rather than sourcing all the parts yourself from different suppliers with different shipping dates or quality. It is also a great way of saving money on shipping which can be quite costly when buying small amounts of parts.
The downside of a pre-assembled machine is that they can be more expensive than DIY kits, lack upgradability, and might not have the best quality control.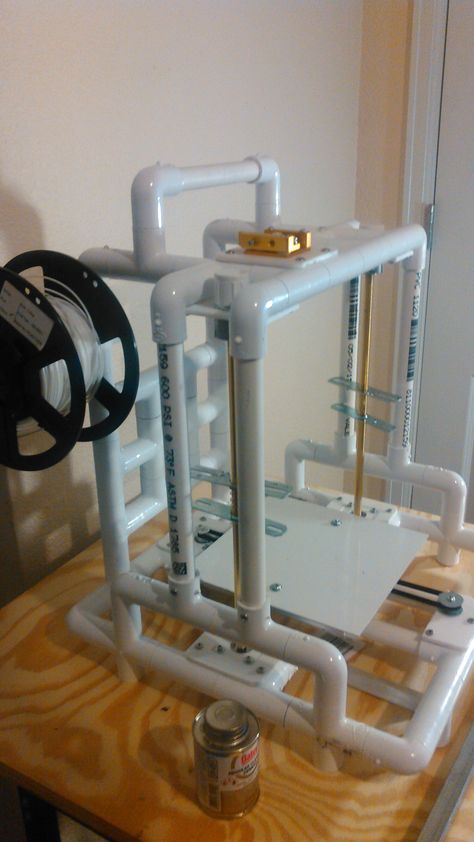
When sourcing your own parts for a printer there are a few things you need to take into account: what type of printer do you want to build, what parts do you need and where can you source them from.
The best 3d printer kits give a great range of options depending on performance needs and budget. Beginners can start off with an unassembled diy kit which is less expensive than pre-assembled machines.
Railcore II 300ZLThis is a pre-assembled machine that comes with an excellent build guide and video tutorial. It uses a CoreXY motion system which gives it good print quality and speed. The kit can be sourced from different sellers, or you could buy the fully assembled machine directly from Printed Solid.
Each of these kits have their own pros and cons, so it’s important to do your own research before settling on a printer. For example, the Rat Rig V-Core uses a corexy kinematics which is known for its speed and accuracy, but can be more difficult to calibrate.
Original Prusa i MKS+
This kit is based on the popular Original Prusa i MKS printer and comes with an excellent build guide. It’s a great option if you want to get started right away with minimal assembly.
Hypercube Evolution – H.E.V.O.This kit is a great option for those looking for an upgradeable machine. It comes with a variety of parts that can be swapped out or upgraded as needed.
Voron 2.4This open source design is great for experienced builders and offers good print quality and speed.
When sourcing your own parts, it’s important to do your research and decide which seller to use and consider shipping rates.
Rat Rig V-Core 3The Rat Rig V-Core 3 is a great option for those looking for a specific size or options as kits can be configured for specific needs or price. The complete printer kit comes in a range of options with a well documented build guide and instructions. The V-core 3 uses the CoreXY motion system which offers good print quality and speed. The v-core 3 kit can be purchased from the Rat-Rig website, or could be self sourced.
The Evolution of The RepRap Project
Self-Source Parts vs DIY KitsWhen sourcing your own parts, there are a few things to take into account: what build volume is needed and type of parts to use which is usually related to how much you’re willing to spend.
There are a range of options for extruders and electronics, so it’s important to decide on the features you need. If you want a machine with high resolution, then you will need more precise parts which can be expensive.
Cantilever Bed vs 3-point Bed Leveling
While many of the original DIY 3d printers used cantilever beds to lift the print bed or build plate constrained POM wheels or smooth rods. The newer 3d printer designs use linear rails and have adopted more functional mechanisms such as belted z-axis, and non-planar 3d printing concepts such as 3-point bed leveling or tilting print beds. Although the simplicity of older Reprap 3d printers were less technical and easier for newbies, the increasing number of options and features can easily be adopted from corexy design platform to another, which has exponentially inspired contributors as they work to identify or fix potential issues or increase overall print volume.
Lead Screw vs Ball Screw vs Belt DriveMechanical components and kinematics are critical to the functionality and can compromise speed or quality. Lead screw which is commonly used to drive the z-axis or lift the print bed is known for backlash but backlash can be eliminated using anti backlash nuts or may not be an issue due to gravity. Lead screw pitch and lead is critical for speed and precision. Issues with speed, resonance, artifacts can be a challenge in any 3d printer build but can be reduced by travel speed and acceleration but is compromised with slower travel speed the longer it takes to print an object.
Quality lead screws and ball screws cost much more but cheap lead screws can have tolerance issues. Longer ball screws may wobble at a distance and need support and rigidity. Although backlash is mostly a problem in XY-axis movements while the z-axis is the preloaded weight of the bed and gravity.
Lead Screw Pitch & Required TorqueLead screws are similar to a gear. When the pitch changes the lead and torque needed to drive the system changes as well. Most 3D printers use 1/16 or 1/32 microstepping but the resolution of 3d printed plastic can only be so precise. Larger motors have more inductance and need more voltage to reach the same RPM. Increasing the step rate for the reduced travel rate of the drive, a higher voltage stepper driver and supply may be needed to reach ideal motor performance.
Build volume
Build volume refers to the print bed size which dictates the maximum size of 3d printed objects.
Rods vs Linear Rails
Many of the earlier 3d printers were designed around cheaper mechanical parts such as carbon rods or stainless steel smooth rods which were once commonly used and recommended. As the cost of linear rails become cheaper and cheaper due to the economy of scale and increasing number of buyers and large volume production of manufactures and suppliers. 8mm steel rods and linear bearings are slowly being somewhat phased out but still used on cheap kits found on Aliexpress.
White Knight: DIY Conveyor Belt 3D Printer
The White Knight 3D Printer is a belt printer designed by Carl from NAK3DDesigns. The Unlimited Z-Axis has a large build area for continuous 3d printing.
Best Large DIY 3D Printers 2022
Large scale 3d printers are becoming more accessible to the average user as open-source designs continue to improve. One challenge of large scale 3d printing is bed leveling and layer adhesion Deciding on a large 3d printer to build or buy is a balance between price and reliability. In this section, we review and list the best large scale 3d printers available.
Large-scale 3d printing is increasing in demand as 3d printing becomes more accessible. Large scale printers allow users to 3d print large objects that would otherwise be constructed from multiple smaller printed objects from smaller machines.
Modix BIG-40
- Made In Israel
- Build Volume 400 × 400 × 800 mm
- Price $5,000
Modix specializes in large format 3D printers that are available in DIY self-assembly kits, which is a much more affordable 3d printer compared to the larger commercial 3d printers on the market.
The Modix BIG-40 is an industrial grade machine that uses a dual-zone heated bed and a PEI print surface with auto bed leveling and an enclosure option.
Raise3D Pro2 Plus
- Made In US
- Build Volume 305 × 305 × 605 mm
- Price $5,999
- Extruder/Hotend Dual Extruder
Raise3D is known for their high quality 3d printers that are made in the USA. The Pro2 Plus is the latest release which offers the largest build volume compared to their other Raise3D models.
The Pro2 Plus has a 305 mm x 305 mm x 605 mm build area and reaches temps up to 300°C which allows users to expand their range of materials to print with.
BigRep – STUDIO G2
Made In Germany
Build Volume 500 × 1000 × 500 mm
Price $60,000
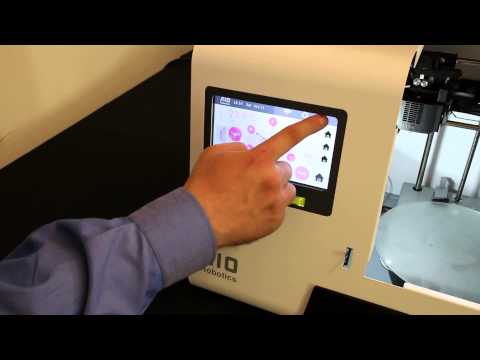
The BigRep STUDIO is a large format 3d printer designed to print engineer grade materials and uses dual extrusion ruby nozzles for abrasive materials. The large machine is equipped with a dual filament chamber with each chamber independent controlled temperature environments and features a touchscreen interface and the BigRep BLADE software.
Piper 2: Piper 3D Printers Made From Conduit Pipe
Piper 2: Piper 3D Printers Made From Conduit Pipe.Piper 2 by Piper 3D Printers is a open source corexy DIY 3d printer design made from conduit pipe.
see Piper 3D Printers
see Midwest RepRap DIY 3D Printer Festival
Gantry 3D Printer Design – Reducing Moving Mass
Many earlier 3d printers kinematics use the classic “bed-slinger” design that originated from the early Reprap designs. As 3d printer builders and designers gradually pushed the limits of scalability, the classic y-axis traveling bed kinematics became more problematic. Although there are large scale 3d printers that work fine with this mechanical arrangement, they are often using industrial grade hardware such as linear rails and ball screws driven with high end servo motors to maintain print head position at all times, print beds that travel laterally, typically along the Y-axis.
While a simple and cheap solution for kinematics that works for countless desktop 3D printers, this potentially poses a challenge to a large-format 3D printer in that it’s putting a lot of moving mass on one of the two main axes engaged in travel during printing. A large moving mass consisting of the print bed, the carriage it’s riding on, and the increasing weight of the print being deposited on it means greater inertia to overcome with each direction change in that axis.
The timing belt tightness and the linear guides may be rigid enough to handle the inertia, but the frequent direction changes can leave artifacts such as ghosting on 3d printed objects. Not only this, a print that has poor adhesion to the print bed, moving vigorously back and forth through the Y-axis, can risk the success of the print.
These problems are not an issue for large-format 3D printers which use a static bed setup that is stationary and moving only through the Z-axis layer changes. While the motion system is more complex it can maintain the mechanical advantage compared to “bed-slinging” designs.
Large Scale 3D Printing vs Batch PrintingLarge volume 3d printers can be considered as a great solution for batch printing, or alternate to multiple smaller 3d printers. A typical sized object or print job can be arranged and stacked for mass production. However, a print farm can complete a large quantity run or job quicker than a single object 3d printed as a batch of 3d printed objects are spread across a number of machines and can decrease the number of failed prints.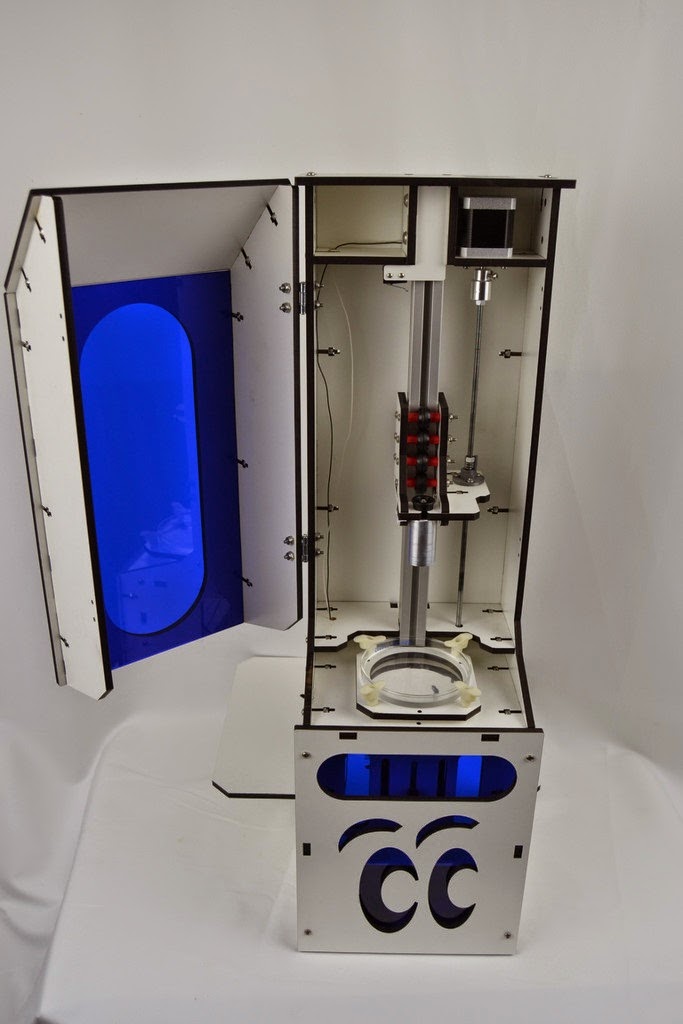 Failed prints are isolated to a single machine without affecting the rest or potentially ruining the entire job.
Like this:
Like Loading...
3D printers DIY plans and build instructions
There are many DIY projects today that can be used to make 3D printers at home, and some of them can be found here.
These are mostly printers based on the RepRap 3D printer, and you can choose to either make one on your own or buy a kit and assemble the parts. What matters is that you can become the owner of a 3D printer by spending just a small amount of money; we have even come across an extruder plan to help you make the filament out of recycled plastic!
- Darwin 3D printer
RepRap 1. 0 "Darwin" is a rapid prototyping machine that is capable of making the majority of its own component parts. Instructions and all necessary data are available completely free under the GNU General Public Licence from this website to everyone.
As RepRap 1.0 "Darwin" copy itself, once you have one you can make others for your friends; or if they have one you can ask them to make one for you. Of course, you can also make as many as you want for yourself; the more you have, the faster you will be able to make other items. RepRap etiquette asks that you use your machine to make the parts for at least two more Darwins for other people at cost, as well as using it to make whatever you or anyone else on the internet can think up...
Darwin consists of a frame made from rods and printed parts. A flat build platform moves vertically in that frame, driven on screw threads by a stepper motor. At the top of the frame there are two write heads that move horizontally (driven by toothed belts and two more steppers) extruding a thin stream of molten plastic to form new layers on the build base. The machine prints layer by layer to form a solid object. The build base then moves one increment down, the second layer is extruded, and so on. There are two heads to allow a filler material to be laid down as well as the plastic. This filler is used to support overhanging parts of the objects being built, and is removed when the process is finished.
- Fisher 3D printer
The RepRap Fisher is an open-source fused deposition modeling 3D printer and is part of the RepRap project. The RepRap Fisher is named after the English statistician and biologist Ronald Fisher, it was designed by RepRapPro.
The RepRap Fisher has a 150mm diameter by 180mm height build volume, uses a bowden extruder and has a print resolution of 12.5um in all directions, it also has a micro SD card and USB and Ethernet connections allowing it to be connected to a network. The printer was praised for its ease of construction and low price and is only available in kit form.
- Huxley 3D printer
RepRap Version III "Huxley" is being developed on this and associated pages. It is based on Ed's original Mini-Mendel design, together with a lot of work already put in by ErikDeBruijn and others. Huxley is named, like all RepRaps, after a biologist: Thomas Henry Huxley.
To clarify, Huxley will be Mini-Mendel with some re-designed parts plus more documentation, defined integrated electronics (with alternatives, of course), and a selection of alternative firmware and host software configured to drive it. We will be integrating as much as possible of the work such as Brutis already done on Mini-Mendel.
The machine uses M6 threaded rods and M3 nuts and bolts (as opposed to the M8/M4 used on Mendel) and NEMA 14 Stepper Motors. The reprapped parts are about 30% of the volume of those for Mendel, which is to say it could reproduce three times faster.
Mendel can print itself, and so will Huxley. In addition, Mendel will be able to print Huxley, and Huxley will be able to print Mendel. We will continue Mendel development to turn it into a multi-material machine.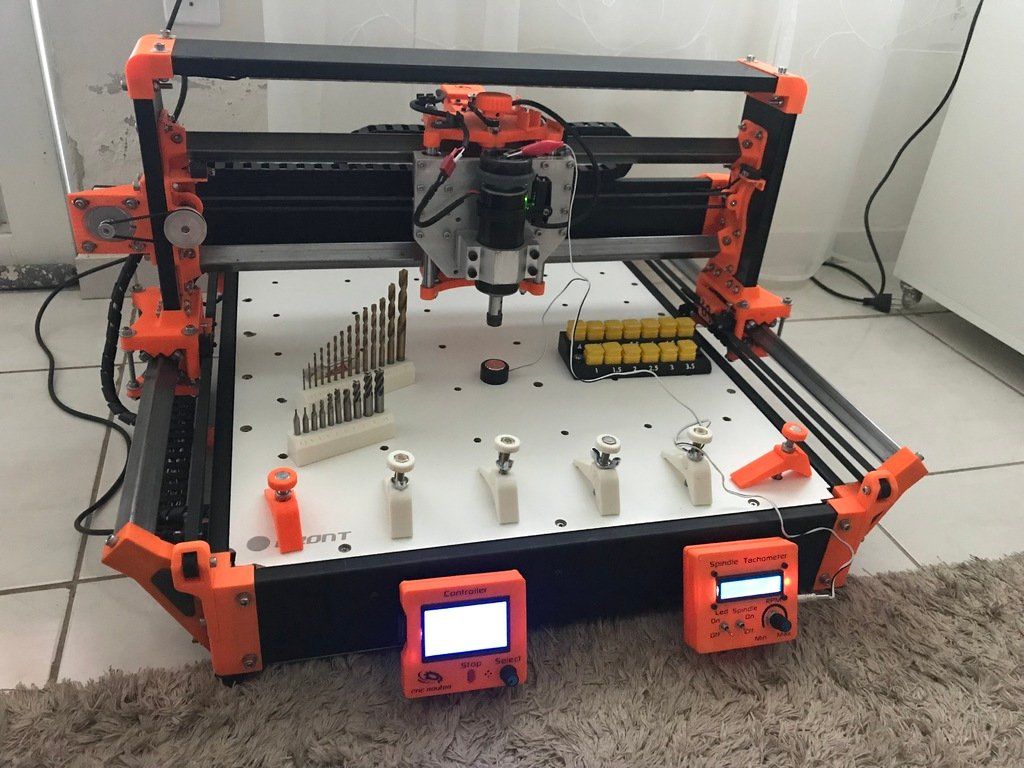 Huxley will be a one-material machine, though we will probably also add a Pen Plotter so we can write etch-resist on PCBs and use an Oil Pen to facilitate separation of Support Material for overhangs.
The idea is to develop both Mendel and Huxley in parallel, with Huxley being as cut-down and minimal as possible, and Mendel being the machine with all the fancy capabilities. Huxley will be the fastest replicator. Mendel will be the most versatile.
- Mendel 3D printer
The machine on the right is the RepRap printer, which we call "Mendel" after the father of genetics. It's the second, improved version of RepRap: small enough to fit on your desk, but with a print volume large enough for you to make big things. The machine is made up of bits bought in from local suppliers or online, and parts which it can make for itself - all the translucent structural components you can see.
In the picture, behind the machine, you can see the RepRap software which you can use to print your thing. We give this, and the designs for the machine away, free - it's all open source (GPL 2). Though you do have to buy in some standard components from... well, whoever you want... which cost about €400. The idea of getting all the materials and building a machine yourself may seem daunting, but this area of the wiki is dedicated to making the whole process as easy as possible.
There are a number of instructional videos distributed through the Mendel documentation. These are also all gathered together in one place here.
- Morgan 3D printer
The RepRap Morgan is an open-source fused deposition modeling 3D printer. The Morgan is part of the RepRap project and has an unusual SCARA arm design. The first Morgan printer was designed by Quentin Harley, a South African engineer (working for Siemens at the time) at the House4Hack Makerspace in Centurion. The SCARA arm design was developed due to the lack of access to components of existing 3D printer designs in South Africa and their relatively high cost.
The Morgan name comes from the RepRap convention of naming printers after famous deceased biologists. The Morgan printers was named after Thomas Hunt Morgan. Their names were used in the development codenames for the first two generations of Morgan 3D Printers.
Morgan printers are now manufactured full-time by the inventor in a small workshop factory in the House4Hack makerspace.
- Ormerod 3D printer
The RepRapPro Ormerod design is from RepRapPro. The machine is a fast to assemble, networked 3D printer with non-contact bed probe for full geometric compensation.
Its primary design goal is to offer a printer which is easy to expand in functionality, fast to replicate, and fast to assemble and to commission. This new model builds on the already established designs and technical advances which have undergone brisk development and heavy testing since the RepRap Project‘s inception in 2004.
The RepRapPro Ormerod is a monochrome 3D printer configured to work with one type of plastic at a time. However, RepRapPro Ormerod is fundamentally designed to work with three deposition heads and an upgrade kit will be available soon for this machine to allow it to print multiple materials and colours.
- Prusa Mendel
Prusa Mendel is the Ford Model T of 3D printers.
Like the Model T, the Prusa Mendel improves on a previous design by being more streamlined for manufacture. The Prusa Mendel is a simpler remix of the original Mendel. By default, it uses printed bushings instead of regular bearings, though options to substitute inexpensive lm8uu linear bearings or other types of bearings or bushings are available. The current version uses three 608 bearings in total, one for the X axis and two for the Y axis. The 624 bearings are gone altogether.
Prusa's main goal is to be the purest and simplest 3D printer you can build.
- It's much simpler to build it.
- It's much simpler to modify it.
- It's much simpler to print it for your friends.
- It's much simpler to repair it.
- Recyclebotrep - 3D printing filament extruder
In order to assist researchers explore the full potential of distributed recycling of post-consumer polymer waste, this article describes a recyclebot, which is a waste plastic extruder capable of making commercial quality 3-D printing filament. The device design takes advantage of both the open source hardware methodology and the paradigm developed by the open source self-replicating rapid prototyper (RepRap) 3-D printer community. Specifically, this paper describes the design, fabrication and operation of a RepRapable Recyclebot, which refers to the Recyclebot’s ability to provide the filament needed to largely replicate the parts for the Recyclebot on any type of RepRap 3-D printer. The device costs less than $700 in materials and can be fabricated in about 24 h. Filament is produced at 0.4 kg/h using 0.24 kWh/kg with a diameter ±4.6%. Thus, filament can be manufactured from commercial pellets for <22% of commercial filament costs. In addition, it can fabricate recycled waste plastic into filament for 2.5 cents/kg, which is <1000X commercial filament costs. The system can fabricate filament from polymers with extrusion temperatures <250 °C and is thus capable of manufacturing custom filament over a wide range of thermopolymers and composites for material science studies of new materials and recyclability studies, as well as research on novel applications of fused filament based 3-D printing.
- Snappy 3 3D printer
Snappy is an Open Source RepRap 3D printer designed by RevarBat from July 2014 to January 2018. It is a true RepRap, using very few non-printed parts. This design needs no belts, pulleys, metal rails, and almost no screws other than to mount parts to the motors. This means that you should be able to put one together for about $216, including the price of plastic to print parts. The entire thing snaps together, and you should be able to assemble it from parts in only a couple hours. The few required non-printable parts are available world wide from a variety of suppliers.
Snappy is an original design, created in OpenSCAD, so many individual design parameters can be altered to fit the end user's specific needs.
- All RepRap 3D printers
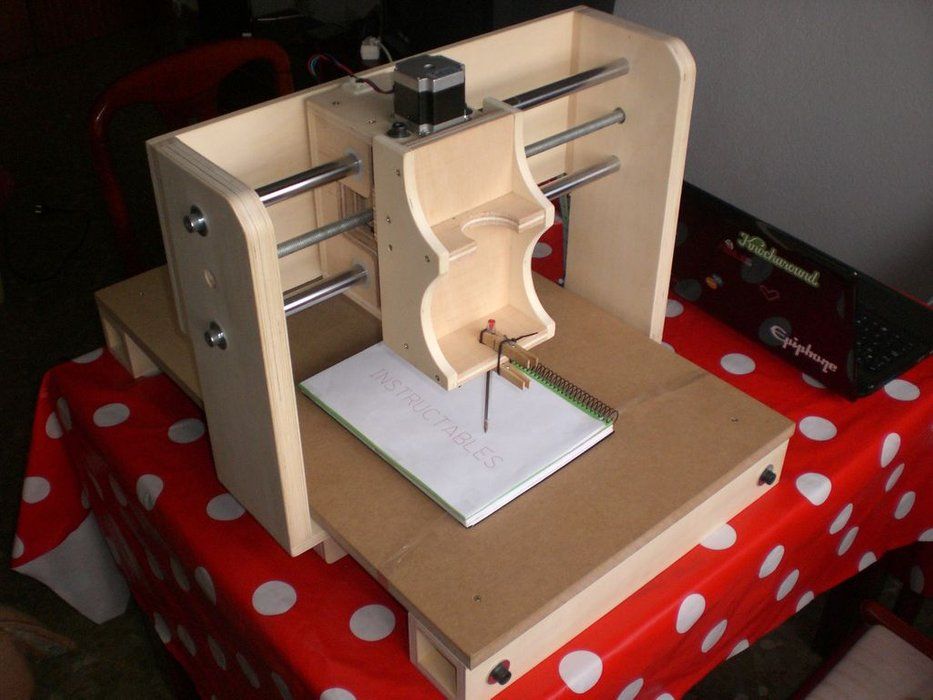
We assemble a 3D printer with our own hands. Step-by-step instruction. Part 3.2.
Friends, hello!
Looking ahead, I will say that I have completed the construction of the printer, and it is already printing.
All materials have been filmed and it remains only to write.
Here is a short video of the first print of this printer:
I am finishing the 3rd part of the Ultimakera assembly epic and also remind our planned plan:
1. Introductory. Purchasing everything you need. 2. Assembling the printer. Part one. Body and mechanics. 3. Assembling the printer. Part two. Electronics. 3.1. Additional photos. 3.2. Connecting the electronics
4. Firmware and printer setup - Marlin.
5. Firmware and printer setup - Repetier-Firmware.
Today we will finish connecting all the printer electronics so that you can proceed to the firmware and printer setup:
And so let's go:
1. Connect the card reader:
.
You also need to make another jumper, it is not marked on the diagram, the information is taken there:
That's what I got - cut the track:
Saved the jumper
Sal 7 wires:
connected to ramps:
2. Connection of the screen:
The scheme took it there:
I need to solder the diode 100 Ohms :
Solder jumpers:
Solder wires:
And plug the whole thing into RAMPS, looking ahead, I combined the GND contact from the encoder with GND from the screen:
3. Connect the encoder:
Scheme - I took it there:
And the whole thing is in RAMPS:
This is where the most difficult thing ended, here's what we got:
4. Connect the backlight:
connect one of the contacts of the LED strip to the switch contact , to the second contact of the switch and the second contact of the LED strip we attach wires with a cross section of 0.22 sq. mm, it will be enough, 20-25 cm long.
Wires from the RAMPS cooling fan, backlight and cooling of the heatsink of the print head are combined, observing the polarity:
And connect to the power supply:
5. Connect the power connector to the power supply. On the power supply and on the power connector, all contacts are signed. It is necessary, in accordance with these signatures, to connect them to each other, while contact L must be passed through the switch and fuse, i. e. we throw the contact from L with a jumper to the switch, and from the second contact of the switch to the power supply:
Do not forget to put the fuse!!!
6. Connecting everything else to RAMPS:
The following scheme, I think, is well known to most:
The only difference from our scheme is that we have one motor on the Z axis.
6.1. Observing the polarity, we connect wires with a cross section of 2.5 sq. Mm. connect RAMPS to the power supply:
The wires at RAMPS are soldered from below:
6.2. We connect the print head heater to RAMPS:
6.3. We connect the heated table to RAMPS:
6.4. We connect the blowing of the printed area to the RAMPS:
6.5. X Axis Motor:
Please note that stepper motors have 2 pairs of wires (two windings):
All of them are easily called with a multimeter, or if a pair is shorted to each other, the motor turns harder than usual.
In my case, by colors:
A - green and red (I associated it with the flag of Portugal for memorization).
B - yellow and blue (and this one was associated with the flag of Ukraine).
As a rule, your colors will also match, but you need to check. nine0003
We put the colors in the connector in the following order green-red-blue-yellow and this is for all engines.
6.5. Y axis motor:
6.6. Z axis motor:
6.7. Extruder motor:
6.8. Print head thermistor:
6.9. Table thermistor:
6.10. Limit switches:
In our case we use:
Z - max
Y - max
X- min
It turned out like this 'parsley'
View of the RAMPS:
General view of the electronics:
That's all for today. After that, if everything is assembled correctly !!! when you turn on the printer, the screen should light up and 3 fans should spin (in the power supply, blowing Ramps and blowing the heatsink of the print head).
I have already started writing a chapter about the firmware, I will try to release it in the near future.
Update
Part 4 . Installing and configuring Marlin firmware. >> http://3dtoday.ru/blogs/plastmaska/collect-a-3d-printer-with-your-hands-step-by-step-instructions-part-4/ Part 5. Updates and additions. >> http://3dtoday.ru/blogs/plastmaska/small-update-ultimaker/Please support this project! Repost our article on your social networks.
Please support this project in social networks. Article repost needed!
Just in case, I'm in touch. nine0003
3D printer for building houses as a business: equipment, cost
Few people know that a 3D printer for building houses as a business can be a very profitable acquisition. 3D printing of houses, which is actively gaining popularity, brings excellent profits: the use of such equipment in construction can reduce the construction time to several days and reduce the cost of the entire process several times.
In this article we will talk about how to buy a 3D printer for printing houses and how to organize a construction business based on such equipment.
Contents of the article:
- How to build houses using a 3D printer
- How fast can you build with a 3D printer
- How much does it cost to build houses using a 3D printer
- Cost of a 3D printer for construction
- Construction models -printers
- Investment and payback
How to build houses using a 3D printer
Contrary to popular belief, recently appeared building 3D printers print houses and building structures not from plastic or silicone, like their usual "brothers", but from concrete.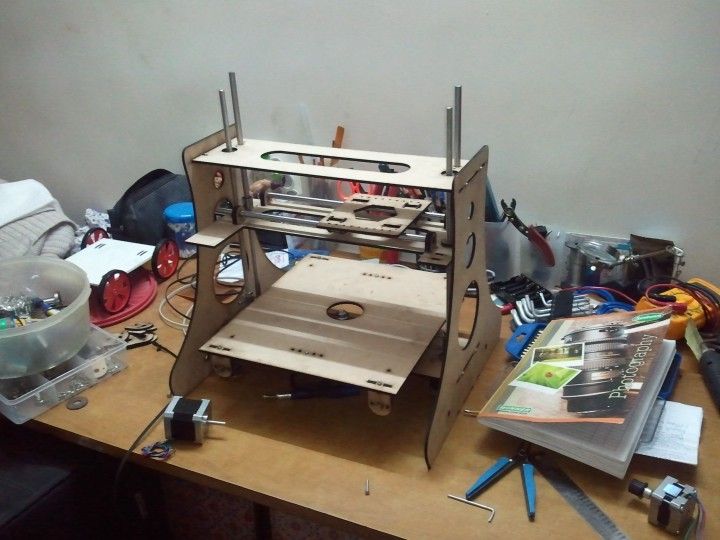
These types of prints typically use standard 500 grade cement-based compounds. These compounds are inexpensive and the components are readily available in any city in the world. nine0210
As in the case of conventional 3D printers, the principle of operation of a construction printer is extrusion. First you need to prepare a mortar, which includes cement, fiberglass, sometimes expanded clay and other materials. The printer then extrudes this solution through special nozzles, applying it layer by layer to the base, , which allows you to erect the walls of a small building in just a couple of hours .
The printer allows you to quickly "print" all walls and other structures, such as stairs, but roofing must be done by traditional methods - printers capable of printing a high-quality roof do not yet exist.
Of course, after the completion of construction, external and internal finishing, laying of communications, installation of windows and doors will be required.
How fast you can build with a 3d printer
The average print speed of a modern construction printer is seven to ten square meters. meters per minute, and China is already actively using devices that can print more than 50 "squares" per minute. nine0003
In just a couple of hours, these machines can print a whole house of 200 square meters. Taking into account the finishing and laying of all necessary communications, construction takes from one month to six months.
How much does it cost to build houses using
3D printer? nine0003
For example : the cost of building a small, about 100 square meters, typical country house is only 2.5-3.5 thousand dollars. The cost of such a house with doors, windows, roofing, communications, with external and internal decoration is about 8-10 thousand dollars.
![]()
A similar brick building will cost at least twice as much. nine0210 You can sell a printed house with a full finish for 16-25 thousand dollars.
Such a low cost of construction is ensured by low prices for materials and their extremely accurate dosing, as well as high quality construction: printing does not give any deviations in the corners, and subsequently there is no need to “finish” anything - all walls, openings for doors and windows almost perfectly even, there are also no cracks - the wall turns out to be monolithic.
Construction 3d printer cost
So far, the 3D printing house building industry is in its early stages of development, and few companies produce equipment.
Cheapest to buy printer made in China . The products of the Russian company CJSC Spetsavia, which is based in Yaroslavl, will cost a little more. In terms of price-quality ratio, they are the best on the market.
Models of construction 3d printers
Consider several models of 3d printers offered by the Spetsavia company: nine0003
- S-4063 : This small device is used to print small architectural forms, individual elements for houses, concrete structures up to 18 square meters.