Fuel3D scanify 3d scanner
Fuel 3D Scanify - 3D Scanner Review
Update June 8, 2017
Fuel3D is discontinuing sales of the Scanify in all regions outside the US & Canada.
As part of this process they have opted to make their Professional software free to use for all SCANIFY users.
In addition, while stocks last customers in the US and Canada can get SCANIFY for a reduced rate of $799.99 + taxes, , until 11th August 2017.
It’s important to note that Fuel3D will still honour all 1-year manufacturers’ warranties on products sold by authorised distributors before 11th August 2017. In addition, Fuel3D will support the SCANIFY product until 31st December 2017.
More info and the unlock code that can be used to upgrade Fuel3D Studio to Pro can be found here.
Fuel 3D is a UK-based manufacturer of 3D capturing technologies. If you keep an eye on the 3D market like I do, you might have read that the company recently received € 1. 7 million EU Horizon 2020 funding to develop a 3D capture solution for eyewear. And just last month, it announced the CryoScan3D—an enterprise-level foot scanner specifically aimed at the orthotic market.
What I’m reviewing here is their $1500 / €1200 (ex VAT) handheld 3D scanner launced in 2015—the Scanify—kindly provided to me by Beglian reseller KD85.com (thanks, Wim!).
The Scanify is an interesting product, because it’s very different from other scanners. And although it’s marketed as an allround 3D scanner, it’s only usable for a few specific purposes. But it does so in an impressive way.
Hardware
Right from the start when browsing through the Scanify website it’s clear that the company has a large emphasis on design. The green-and-grey branding is everywhere, as is the “fire up your creativity” mantra. The devices comes in a very green box with Apple-ish attention to detail. It contains the device itself, a power adapter with every thinkable wall socket add-on, a USB cable, Quick Start Guide and tree target discs—more about those later.
The device itself is manufactured with the same amount of care as the packaging. It’s light-weight, but rock solid plastic with rubber hand grips that photographers will recognize from DSLR cameras. The same is true for the large shutter buttons (two of them) and the standard tripod thread. Let’s take a closer look:
In the background you can see a small selection of my vintage camera collection. I used to actively use them as a hobby, but now I’m only doing digital photography.
The lights you see are the LED Guide Lights. Next to each is a Xenon flash. In the white outline in the center there’s an RGB camera. Another is located in the bottom-center part under a slight angle. According to the specs, they’re both 3.5 megapixel cameras. You can see the power cord and USB cable sticking out of the bottom.
This is where the Scanify differs from other 3D scanners: it has no lasers or a projector that beams infrared (like the Sense and Structure Sensor) or visible light (like the Einscan-S) patterns.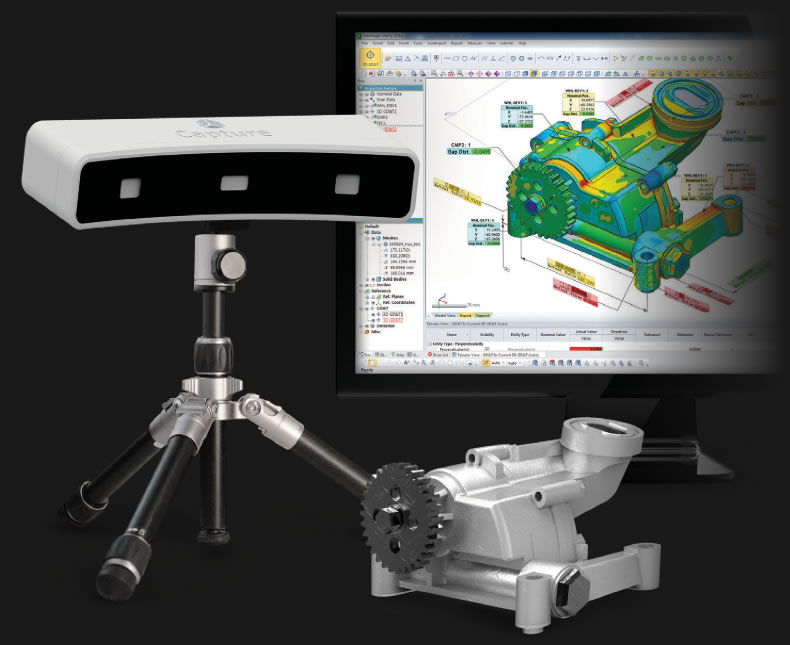 Instead of relying on these depth-sensing technologies, it uses photogrammetry algorithms to distill depth information from multiple photos, all taken within a second. This is the same technology used in software only reality capture applications and mobile 3D scanning apps. So to someone like me that has done a lot of both photography and 3D scanning, the Scanify sits in between a digital photo camera and a handheld 3D scanner capable of capturing objects from all sides in a continuous motion.
The advantage of this is speed: capturing a single 3D image is done in a split-second. This doesn’t require the subject to keep still. Another advantage is that photogrammetry usually delivers higher-quality 3D geometry than entry-level 3D scanners.
Connection-wise it’s plain simple: plug the power supply into a wall socket and the USB cable into a computer—in my case a Macbook Pro Retina with i7 processor, running Windows 10 through Boot Camp. More about the software in a bit.
What is missing from in the box are holders for the target discs—which are present on the photos on the product website. Fuel 3D does offer models of a handheld holder and a 45° stand, but the fact that buyers have to 3D print these themselves—like I did—is a weird contrast for such a polished device. I don’t thinks its main audience is 3D printer owners to begin with.
Software
It’s good to know that the Scanify comes with basic (Studo Starter) software, but there are two more paid, subscription-based options:
Studio Plus is €44.99 (ex VAT) per year and Studio Advanced €89.99. Whether or not you need the paid features will mainly depend on your choice to use other software to edit the meshes or prefer a single-software workflow. And if you want to be able to stitch together a lot of captures into a single model, which I will show you later. Either way, these prices are fair and not a breaking point for professionals in my opinion, as long as Fuel 3D keeps actively developing and improving the studio software. Which it does, because there will be a Mac version this year—something many creative professionals like myself will like.
This review is based on my experience with the 30-day trial of Studio Advanced, which is full-featured except for a limit of the total amount of cloud rendering jobs you can submit. Enough to decide if it’s worth the price.
The user interface of Fuel 3D Studio is well designed in the signature green-grey color scheme. It’s as much a capturing as a project management tool: everything you do can be organized in projects in the left sidebar. On top of that you can add tags to captures to find them later or mark things as favorites.
The thumbnails in the bottom drawer are the captures in the selected project. Here you can rename them and reprocess them—either locally or through the cloud.
The small icons in the bottom right are for exporting (as .STL .OBJ or .PLY) or sharing directly to the popular 3D showcasing website Sketchfab.
Personally I think these icons are a bit small and in an awkward place. If you would want to use this software on a Windows tablet—more about that later—it will be hard to comfortably tap them.
Although I always got this error when exporting to Sketchfab, the uploads were complete and usable.
Capturing Objects
The big green Viewfinder button launches the pop-up you see above (with the Buddha). The guide lights can be switched off, but the flashes are alway on. This is because the flashes appear to be simultaneous but are actually sequential and photos are taken with the light coming from different angles to help the photogrammetry algorithm achieve the highest level of detail. The flashes need a cool-down period of around 15 seconds before you can take the next shot, which isn’t long, but can be inconvenient for making captures from different angles for stitching.
While not very ergonomic, it’s possible to hold the Scanify in landscape mode, but you have to manually rotate the viewport.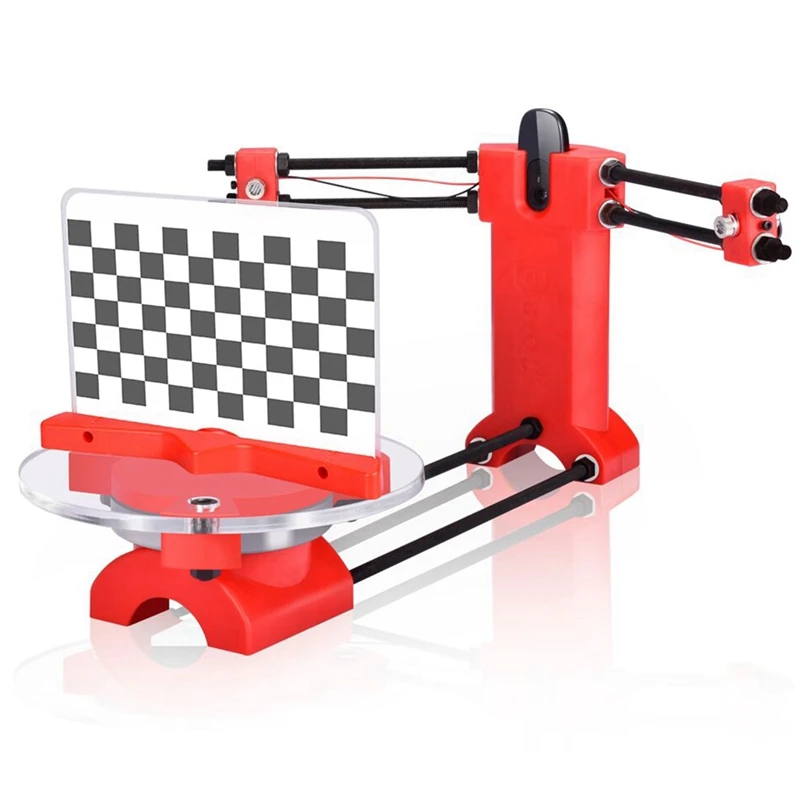 The viewfinder window detects the target disc and will display a green circle around it when you’re at the right distance. This is between 30 and 40 cm. Combined with the narrow field of view of the cameras, this is the main limiter of the practical use of the Scanify. The maximum size of objects that can be captured is about the size of a sheet of A4 or letter paper. The wooden Buddha hanger is 16 cm wide from ear to ear.
Target Detection can be a bit jittery and isn’t always perfect. It also loses a detected target a bit too easily.
There are blue LED indicators on the back of the device, but since you really have to look at the computer screen to frame the picture, these are rather useless. A viewfinder would have been handy—even an analogue one. Keep in mind that you also have to place the target disc somewhere.
I discovered that the lighting in the room has consequences for the resulting 3D capture. I first did the wooden Buddha hanger above with just the flashes in a studio lit through windows during the day:
Buddha Flash-only — Fuel 3D Scanify Review by Nick Lievendag | 3D Scan Expert on Sketchfab
I found the textures of the capture above quite dark, especially considering that the xenon flashes are very intense.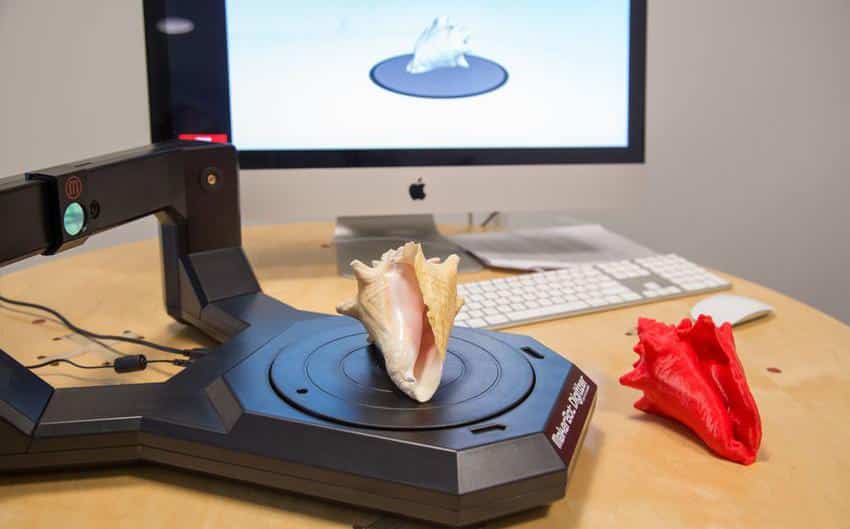 So I tried another capture with the 3 softboxes on that I used to do the photography for this post:
Buddha Studio Lights — Fuel 3D Scanify Review by Nick Lievendag | 3D Scan Expert on Sketchfab
This way the textures are brighter and more natural, but there’s a catch. If you select the MatCap Render option in the two embeds above, you can clearly see that the first capture has a lot more geometric detail. The wrinkles and definition in Buddha’s face are way better. So while some extra lights do improve texture quality, they counteract the way the flashes are used to let the algorithm determine depth (probably relying on comparing hard shadows).
Here’s the result from the scan of the sneaker. It’s a good example of the difference between the high details on the front and lower details sides:
My Sneaker — Fuel 3D Scanify Review by Nick Lievendag | 3D Scan Expert on Sketchfab
While searching for other objects to scan, I realized I haven’t many that fit the field of view of the Scanify—and meet the list of criteria: opaque, bright, matte. So again I had to resort to my toddler daughter’s toy box. Here’s the Teddy Bear you may recognize from my other 3D scanner reviews:
Teddy — Fuel 3D Scanify Review by Nick Lievendag | 3D Scan Expert on Sketchfab
Again: the texture is a bit dull (I’d say a bit 70’s color-wise) but the texture-less MatCap render mode shows that the Scanify did a good job on the knitting pattern. To put this result into perspective (no pun intended), let’s take a look at the same Teddy Bear captured with a regular digital camera (specifically a Sony RX100M2 with 20.2 megapixels) and the Autodesk ReCap 360 software I reviewed earlier—an online solution for calculating 3D data from a set of regular photos through photogrammetry, just like the Scanify:
Teddy — Recap 360 Review by Nick Lievendag | 3D Scan Expert on Sketchfab
If you set both embeds in MatCap render mode, you can see that the geometry of the knitting pattern on the bear has finer details with the Scanify. This proves that Fuel 3D’s flash-based algorithm is one of a kind and indeed capable of capturing impressive 3D geometry within a fraction of a second.
Cropping & Stitching
There’s, however, a big difference between the Scanify’s approach and every other photogrammetry method—or depth-sensor-based 3D Scanners. The others are all designed to generate 3D data by capturing a subject from a wide range of angles, all the way up to 360 degrees. This way they can differentiate between the subject and the background, and separate them. The Scanify results always contain the background. The Teddy Bear was shot standing in front of a white wall, so the geometry on the edges is weirdly stretched.
There’s no way to automatically remove backgrounds in Fuel 3D Studio, so you’ll have to use the manual Cropping Tool. This allows you to create multiple positive or negative cropzones. The selection mechanism automatically connects the points you set to create a shape. This works fine for most simple shapes, but I had quite a few occasions where the selection became a bit of a mess.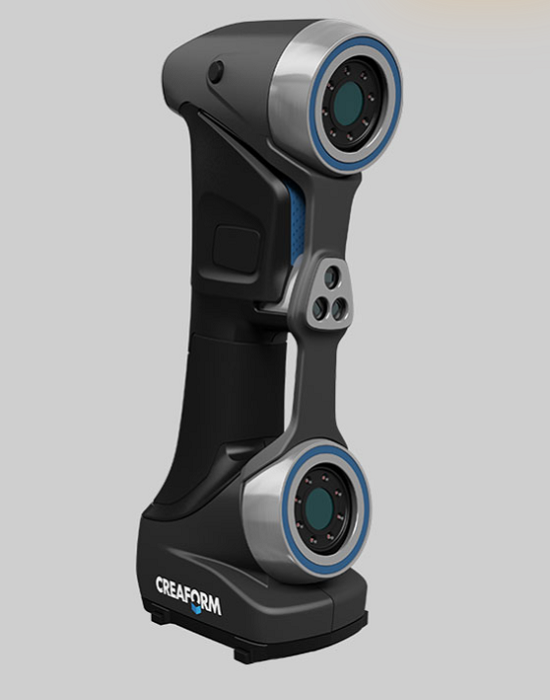
If you do need more geometric details on the sides of your object, the Fuel 3D Studio has a feature to stitch together multiple (6 in the free version and 9 and unlimited in the Plus and Advances paid versions respectively) captures into a single 3D object. This process is semi-automated and to show you how it works I turned to my 3D printed Yoda bust.
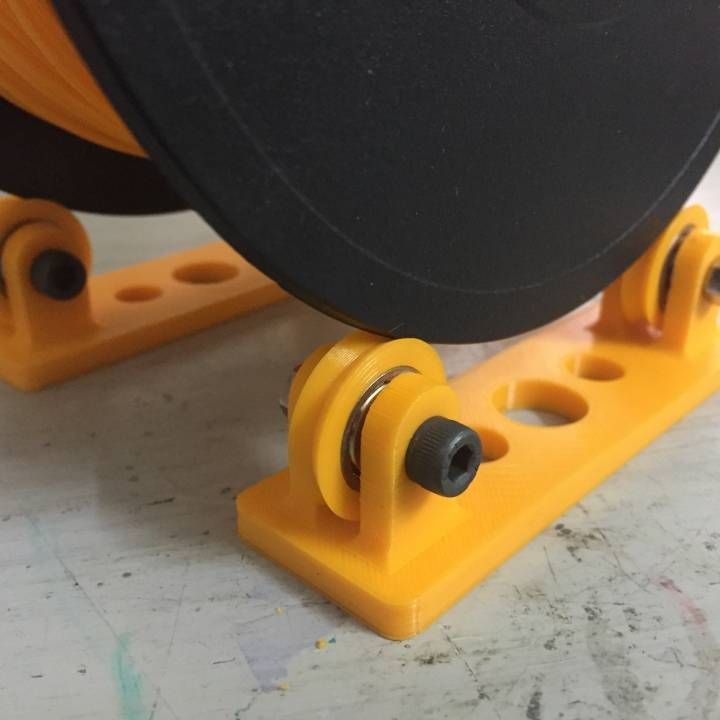
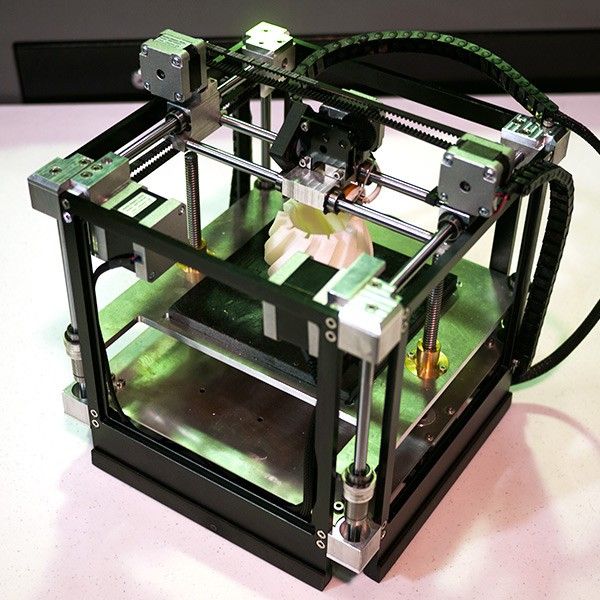
Both the Yoda Bust and and the Target Disk Stand were 3D Printed with the ZYYX 3D Printer I reviewed earlier.
I took 3 shots of Yoda from different angles and manually cropped them with the build in tools. It’s absolutely required to remove both the background and any details towards the sides where the image appears to be stretched. I’m an advanced user of both Adobe Illustrator and After Effects and do a lot of bezier-based design and rotoscoping work with a Wacom Intuos, but it still took me a while to crop Yoda. Mainly because making selections on a 3D object this way depends on an algorithm that wants to connect the dots in ways I had to work against. Personally, I’d rather draw a selection freehand style with my Wacom Stylus for precision. Anyway, here are the crops (I made the actual captures of Yoda on our dark studio floor):
After cropping, you have to add the captures to a so called Scan Pool, so the software knows they belong together. Here you can also put them in the right order to help the stitching algorithm.
In the next step, you have to add the captures to a Stitch Group, from which you can start the automated stitching procedure by clicking the green Stitch button. This works in two phases. In-between you can set some preferences, like you can see in the screenshot below.
Depending on the complexity of the captures, this procedure can take a while. On my 2.6 Ghz Quad Core i7 it took over 15 minutes, which I think is quite long for 3 shots. The alogirthm did a decent job of finding the overlaps in the geometry and fusing the captures accordingly. I was, however, quite surprised to notice that all color information had been discarded! Here’s the result:
Yoda Stitched — Fuel 3D Scanify Review by Nick Lievendag | 3D Scan Expert on Sketchfab
I’ll be honest about this feature: it sort of works and the result is better than I expected. But it’s not perfect: the top part of Yoda’s face is fused okay, but his neck clearly isn’t. This could be a result of the way I cropped the images. And it probably needs a lot more overlapping captures for this angle of almost 180 degrees. But realistically speaking I found the manual part of this procedure very tedious. I wouldn’t want to do this for 6, 9 or an unlimited amount of photos. Especially when there are software and hardware-based solutions that do the whole process automatically.
The above is true for objects that don’t move so you can take an endless amount of photographs from every angle. For things that move, like people, software-only photogrammetry solutions are often not suitable.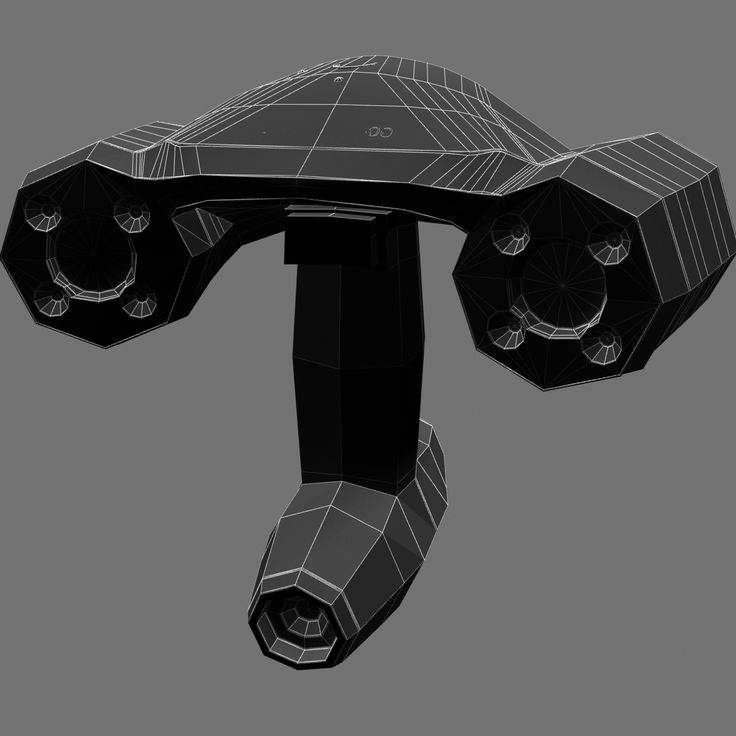 And while scanning people with depth-sensor-based 3D Scanners works pretty well (just check out my itSeez3D Review) it is because they’re often not detailed enough to be messed up by slight movements. Body movements are already hard to control for most people, but controlling facial movements is simply impossible. And this is the very purpose the Scanify excels at…
Capturing Faces
It makes total sense that Fuel 3D got EU funding to develop 3D scanning technology for the eyewear industry when you start capturing faces. Let’s dive right in and start with my favorite human test subject and business partner Patrick (of Animator’s Toolbar for Photoshop fame). I’m grateful that I can use him as an example for this post, because these Scanify captures really do capture a great amount of facial detail…
Patrick Flash-only — Fuel 3D Scanify Review by Nick Lievendag | 3D Scan Expert on Sketchfab
Honestly, I expected a higher resolution texture map from a device that has two 3.![]() 5 megapixel cameras. The texture maps exported with the .OBJ are simply a single photograph (in old-skool .BMP format) of 768 x 512 pixels—a little under just 0.4 megapixels. I’m not sure why the texture is so low-res: the algorithm clearly uses higher-res images to get the geometric detail. There’s a work-around to increase the texture quality by shooting a separate high-res photo and aligning that with the texture image (which isn’t warped in any way) as explained in this example from Scanify user Marc Wakefield. But it would be a lot easier if Fuel 3D makes it possible to export the full 3.5 megapixels of the camera for the texture map.
5 megapixel cameras. The texture maps exported with the .OBJ are simply a single photograph (in old-skool .BMP format) of 768 x 512 pixels—a little under just 0.4 megapixels. I’m not sure why the texture is so low-res: the algorithm clearly uses higher-res images to get the geometric detail. There’s a work-around to increase the texture quality by shooting a separate high-res photo and aligning that with the texture image (which isn’t warped in any way) as explained in this example from Scanify user Marc Wakefield. But it would be a lot easier if Fuel 3D makes it possible to export the full 3.5 megapixels of the camera for the texture map.
That being said, the big upside is the geometric detail! I can really look at the MatCap render mode and think: “How did this happen in a fraction of a second?” I must emphasize that all examples here are done with the cloud rendering option—the locally processed results are simply unusable in most cases. The cloud rendering is pretty fast, too—just a few minutes. And I’m very sure that this cloud algorithm will improve vastly over time, since it was introduced only a few months ago.
It’s a pity that the geometric quality is only present on the planes that face the camera straight-on. The sides of noses, for example, are simply stretched geometry and texture. And even though the Scanify has two cameras, it didn’t capture Patrick’s nostrils (he has them, I checked). Theoretically, you could make two more captures from the sides, like I did with Yoda, but the cool-down period of the flashes prevents you from doing this fast enough for the person to keep still.
Another noticable artefact is the rendering of eyes. The only reflective part of the human face looks very Terminator-ish, probably because of the reflections of the harsh flashes. Pupils are also strangely extruded.
If you follow me on Instragram, you have read that I was wondering if the Scanify is the ultimate 3D Selfie Maker. It’s certainly possible to shoot yourself:
Selfie – Fuel 3D Scanify by Nick Lievendag | 3D Scan Expert on Sketchfab
Before I wrap up this Review, I’ll use this ego shot to get into the last few features of the Studio software—the Remeshing Tools (all part of the paid Plus and/or Advanced version)
Hole Filling, Smoothing and Decimation are obvious and work as expected. The Volumize Tool is especially handy for Scanify captures, because they’re a single layer of polygons instead of a volumetric, manifold 3D object. If you want to use them for 3D printing, for example, using this feature is a must. The results greatly depend on how you cropped the capture beforehand. Here’s my face in Extuded Surface Type (which adds depth, like a mask) and Flat Surface Type (which gives a flat bottom surface, ideal for 3D printing):
The Mirror Surface Type is exactly what you think it is: a face on either side (if you have small children and often wish you had this second pair of eyes in the back of your head… now you don’t anymore—it’s scary).
Practical Uses & Portability
Again, I can totally see the use for this in the eyewear industry, especially tailored (sun)glasses. But for that I think the ears are a necessity. The Scanify is also great for capturing fine textures in small objects, so I can also imagine its use in archeology (fossils) and forensics (footprints).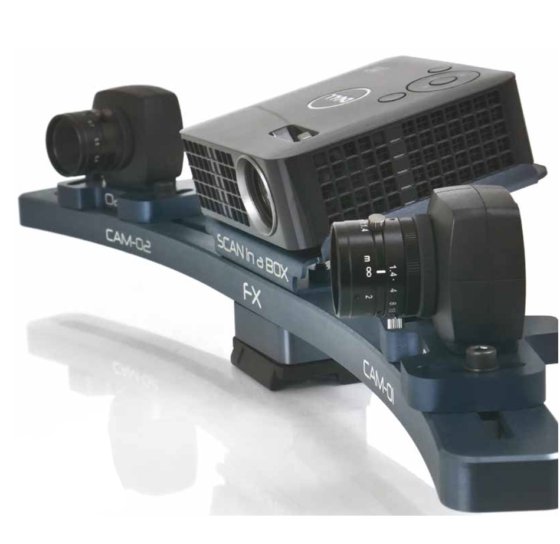 Fuel 3D also sells Press-and-Scan Compound that can be used to create scannable imprints of objects that are otherwise impossible to scan: like reflective, metal objects.
But there’s a problem for any use of the Scanify outside: it’s not portable. I wanted to scan some tree bark outside, but the fact that is has to be connected to a wall socket for power prevents this. But it’s not completely impossible. In fact, because the Scanify draws just 2A of electricity, you can power it with a decent USB power bank. Fuel 3D even sells a special Mobile Package with a short USB-to-power-port and USB-to-microUSB cable. This set could be used to take the Scanify outside with a laptop. Better even, you could also 3D Print a pair of mounts for a Dell Venue 8 Pro Windows tablet (you can get one for as low as $250) and go completely mobile.
Image courtesy of Fuel 3D.
Although I’m not sure how well an underpowered tablet will handle the high-poly 3D objects and must admit that this approach feels a bit hack-and-slash for a product that’s otherwise very polished, I actually think everyone who buys a Scanify should also get the tablet and and do this mod. If only used for capturing on the go, it will give a great amount of freedom to the product that really makes it a 3D Camera. The Cloud Rendering option is great in this scenario, if only it could be set as a default and prevent the local rendering from happening automatically as it would drain the tablet’s battery.
It would be nice if the whole mobile contraption would fit into the Neoprene Soft Case that Fuel 3D sells for a reasonable price, but judging the images this isn’t the case (no pun intended).
Creative Uses
As you might know, I write this blog from the perspective of a creative professional. So I’m always thinking: what can I do with this creatively? Well you could use it for face replacement in 3D, VFX or Game Design work where missing ears fit the scene:
“In 3D Space, no one can hear you scream.”
Created in Maxon Cinema 4D. Space Helmet model courtesy of Tristan Gruet / The Pixel Lab.
Or you could add a different kind of ears to the mirrored model, make a hole in the top and 3D print a narcissistic coffee mug:
Printed on the ZYYX 3D Printer with ColorFabb Natural PLA/PHA on 200 micron.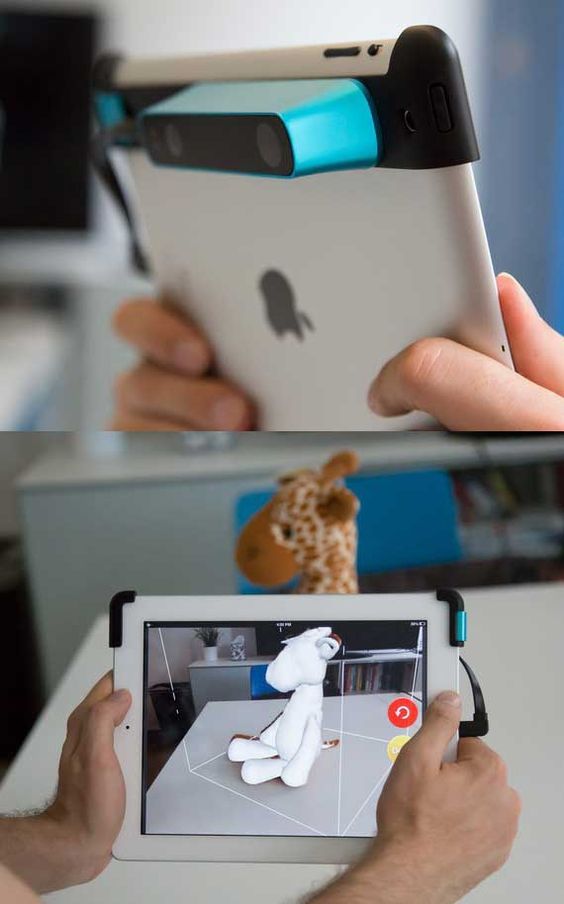
I would love to hear any other creative possibilities in the comments!
Verdict
Let’s start with the fact that for $1500 / €1200 (ex VAT) the Scanify is affordable to any professional that has a specific purpose for it. Even adding a few hundred extra to get the complete Mobility Package with the Dell Tablet and Battery Pack so you can make a dedicated ready-to-shoot device out of it is probably worth a professional’s money.
But you do have to have a very specific purpose for this device. If you want to make full 360-degrees 3D scans, the Scanify is not for you. You can do it occasionally if you have loads of time and patience, but the scanner is actually more appealing to people that don’t. If you want to capture 3D geometry in a snap-second of shallow, textured objects that are not bigger than a sheet of office paper, the Scanify can generate impressive results.
Remember this product just a year old and the software has had a great amount of updates since its release—in particular the great cloud rendering feature.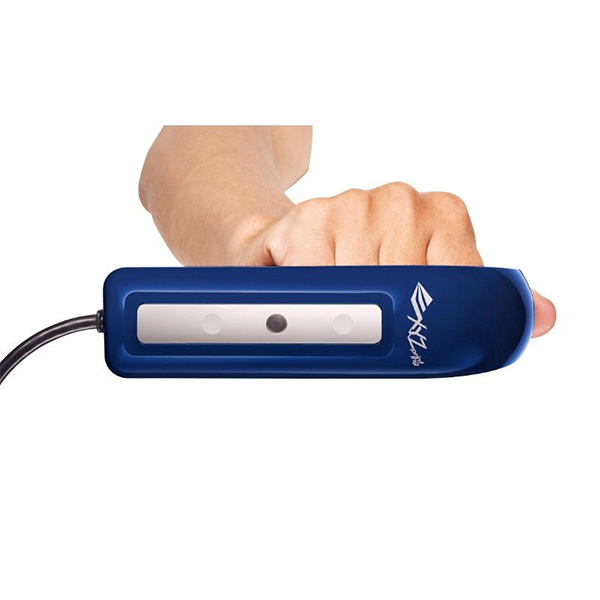 My biggest wishes for the product would be high-resolution texture maps and some kind of automatic background removal. I would have no problem with shooting objects in front of a green screen for this. Finally, I’m no fan of markers in general and I wish the Scanify could work without the discs. If Fuel 3D would add face detection for portraits to determine the ideal distance, maybe it can could drop the targets for that purpose and make face scanning even faster.
I’ll keep following Fuel 3D’s developments, because I’m very curious to how they will use this technology in future products. Hopefully, they’ll also keep making affordable hardware next to their industrial products.
As always, I hope you enjoyed reading this post. If you have any questions, please drop a line in the comments or send me a Tweet. And if you think this article is useful for your friends and followers, I’d appreciate it if you share it by using the buttons below.
Subscribe to my Monthly Newsletter
Get great contents delivered straight to your inbox everyday, just a click away, Sign Up Now.
Email address
The Fuel3D SCANIFY, a lightweight portable 3D scanner
Introduction
Today, we‘re going to test the Fuel3D SCANIFY, an entry-level portable 3D scanner. This article aims to evaluate the performance of this 3D scanner in action and to benchmark it against some of the most famous 3D scanners on the market. The SCANIFY is Fuel3D’s flagship model with a retail price of $1,490.
We’ve been following Fuel3D for a few years now. This is one of the few startups in the 3D scanning/3D printing ecosystem which successfully raised money on Kickstarter ($325,343 to be exact) and actually managed to deliver a working product on time, SCANIFY. It’s also interesting that this UK manufacturer is pretty much the only new company to focus solely on 3D scanners, while there’s been plenty of startups entering the 3D printing hardware space.
A few weeks ago, we asked the Fuel3D team in the UK about testing their SCANIFY 3D scanner. We had already seen the scanner in action at the 3D Print Show in Paris last year, but we never had the opportunity to perform an in-depth test and review. We also wanted to benchmark the SCANIFY against other 3D scanners at various price points, so we performed several tests using the 3D scanners we have access to in our testing lab.
Useful resource: we’ve listed all the handheld 3D scanners currently available on the market in our top portable 3D scanners list.
Enough talk, let’s start this review now.
The Fuel3D SCANIFY is a handheld 3D scanner made by Fuel3D, a manufacturer based in the UK.
The Fuel3D SCANIFY uses a photogrammetry 3D scanning technology embedded into a single portable device. The technology of the Fuel3D SCANIFY combines a number of image processing technologies.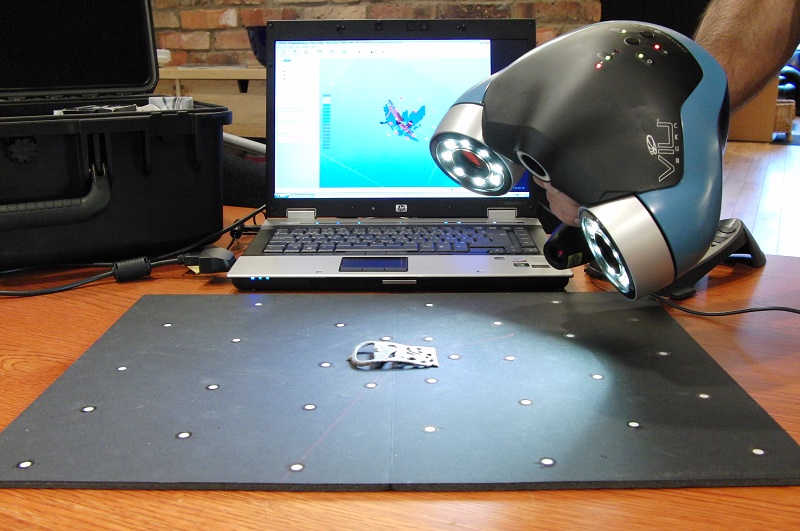 Photometric stereo is used to acquire color and high-resolution 3D detail from the subject, then stereoscopic imaging is used to acquire accurate underlying 3D shape information from the subject. At this step data fusion can be performed to combine the data output of the photometric and geometric processes.
The Fuel3D SCANIFY uses Fuel3D proprietary tracking targets. These are small round black and white markers.
The photogrammetry 3D scanning technology makes the 3D scan of very dark, transparent and mono-color objects with no texture very complicated or impossible.
The Fuel3D SCANIFY is a good product with an interesting performance for specific uses case: 3D face scanning and relatively flat objects (tree bark, leaves). You can read our full test and review of the Scanify for more information.
Contact manufacturer Add to comparison
Packaging
Unboxing: a nice packaging with thick foam and a well protected product
On a beautiful February day, the Fuel3D SCANIFY was delivered to our testing lab in Tokyo. The first thing to be noticed: for an affordable product, the packaging is really nice! The 3D scanner and the accessories are all packaged in sleek-looking cardboards with protective foams.
Instructions manual
Two instruction manuals are provided. They provide the setup steps and how to install the Fuel3D software. The manufacturer also offers a detailed .pdf of these explanations on their website.
Accessories
The SCANIFY is delivered with a USB cable, an AC plug with worldwide adaptors, a microfiber cloth, and 3 round black and white markers. You can also download the STL files to 3D print the target holder, a precision target tracker to ensure scans are taken at the optimum distance.
Overview and setup
Software
Several versions of the software are available: Fuel3D Studio Basic (Free), Fuel3D Studio Plus ($49. 99 annual subscription), and Fuel3D Studio Advanced ($99,99 annual subscription). We tested the Fuel3D Studio Advanced (the free trial for one month). Make sure you use the latest version of the software (2.1 and above), as the performance of the online cloud processing engine dramatically improves the quality of the scans, as we reported in this article.
Hardware
The SCANIFY has two 3.5 MP cameras and 3 xenon flashlights. This 3D scanner works with a technology called photogrammetry. The SCANIFY takes two pictures at the same time on the same scene, from 2 different angles, under different lighting conditions. With the help of a small round black and white marker, the software can reconstruct a 3D model of the object.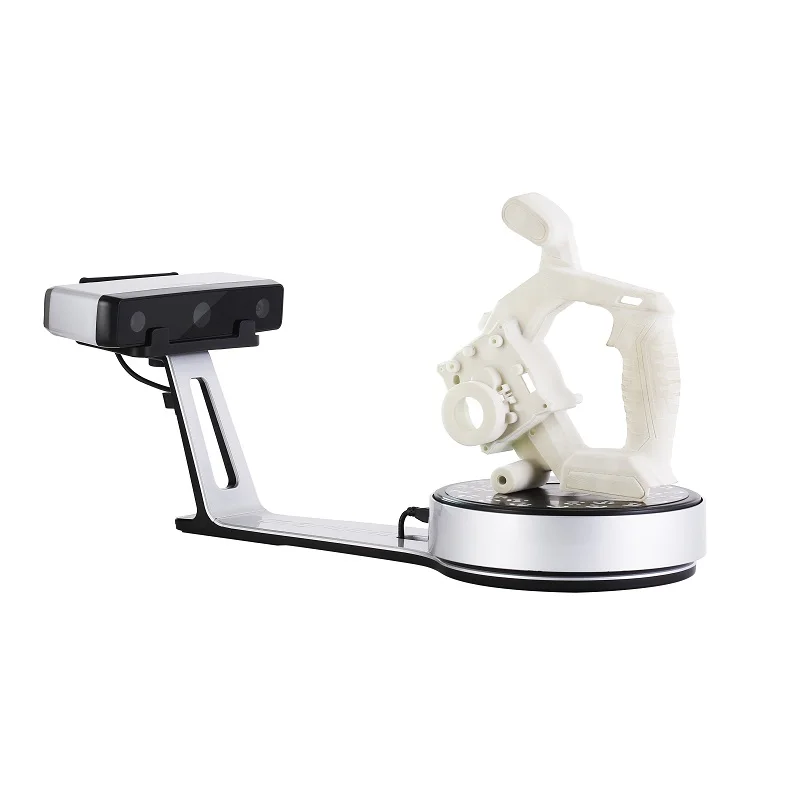
The capture angle is limited to around 60 degrees, so to capture a round object it is required to take more than 6 scans. In our experience, it was closer to 10-12 scans because the scans need to overlap so the software can reconstruct the 3D model.
Before using the 3D scanner, we 3D printed the marker holders on a Zortrax M200. To simplify this step, the Fuel3D team provides a link to their SketchFab 3D files, where you can download and 3D print yourself, two different marker holders. One for 3D scanning faces, the other one to position next to the objects you want to scan.
The 3D printed marker holder on the Zortrax M200Experience
Software
The software is pretty intuitive to use. Not a lot of options and menus are easy to navigate. Each 3D scan requires an extensive amount of work for cropping and stitching together several captures, and cloud computing is slow but paramount to get the best results.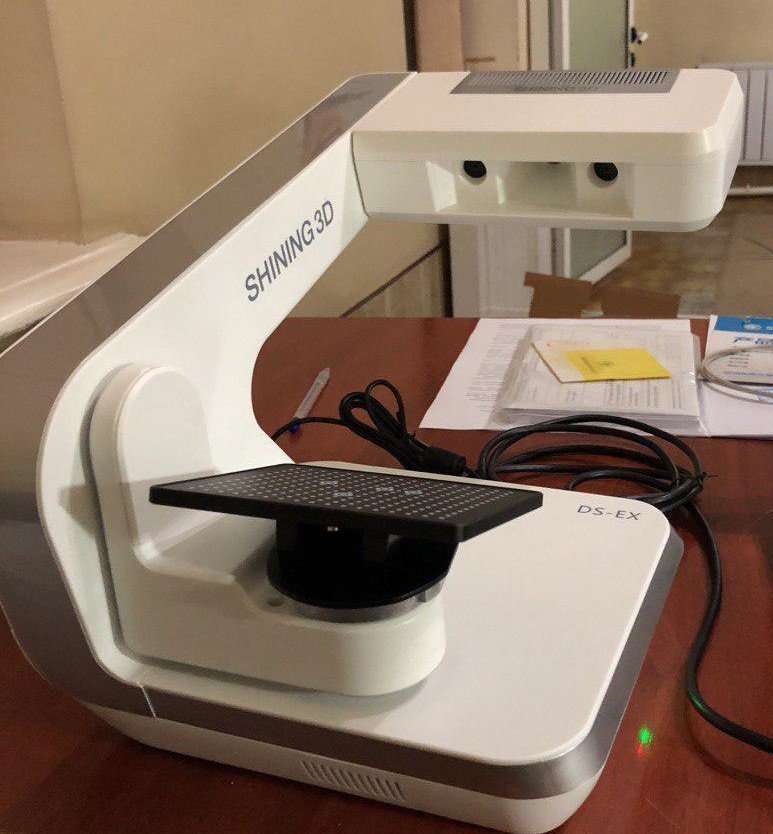 It’s also easy to export 3D scans in STL, PLY, and OBJ formats.
3D scanning
Illustration of the 3D scanning process with a photogrammetry deviceThe process of scanning with the SCANIFY is similar to taking several pictures all around the subject. Then the software does the job of reconstructing a 3D model from all this data. Between each capture, it is required to wait until the flashes cool off, which takes around 4-5 seconds.
It can be quite frustrating when you have several shots to perform to fully capture an object in 3D. Working with good lighting conditions (uniform, not too many strong shadows) is helpful to obtain better results.
Regarding applications and use cases, Fuel3D recommends using their scanner to capture 3D models of the following objects: low relief and sculptures, plants and flowers, and human faces. The SCANIFY is not designed for other use cases such as full-body scanning, reverse engineering, etc. The use cases are pretty limited so you need to take that into account if you’re considering purchasing a SCANIFY.
To capture the scans, the SCANIFY is required to have a good view of the marker, so before scanning, you need to make sure the markers are well-positioned. This is kind of difficult to do because you need these markers to be visible by the cameras, while not hiding the object you want to scan.
At the same time, you need to find the optimal way to hold the scanner, check what it sees and verify the relative position of the marker towards the object. It definitely took us some time to practice and learn how to do this properly.
For face 3D scanning, the process is really intuitive with the marker holder and the fact that the capture is instantaneous (compared to face scanning using a structured light 3D scanner for example).
The scanner itself felt comfortable to hold with its very cool design and its 2 handles. The buttons on the top are used to capture the 3D scans. Pressing any of them takes the shot. It is also possible to hold the SCANIFY with only one hand to scan yourself (3D selfie!).
There is also a standard mount to easily connect it to a tripod. However, the proximity to the connectivity plugs makes it only compatible with smaller tripods (the connectivity slots for USB, power, and future extension plug are positioned right under the tripod mount slot).
The SCANIFY in hand and mounted on a tripodThe scanner is portable but not wireless, as it has to be connected to the computer via USB and to a power plug to work. It’s possible to use the SCANIFY with a tablet for a wireless experience but we haven’t tested this configuration, called the mobile package. This mobile package retails for $50 and contains a battery pack, cables, and 3D printable file for a windows tablet mount.
The wireless version of the SCANIFY with the mobile package3D scanning results
3D scanning human faces: SCANIFY vs Intel RealSense vs Einscan-Pro vs Artec Spider
Human face 3D scanning is one of the highlights of SCANIFY. We’ve compared the results we obtained against face scans from other well-known 3D scanners that we’ve tested before. All these scans were performed under the same conditions, inside an office without specific lighting. We used the software provided by the respective manufacturers and did not perform any additional corrections, except the automatic ameliorations.
- Fuel3D SCANIFY
- Intel RealSense
- Shining 3D Einscan-Pro
- Artec Space Spider
Fuel3D SCANIFY – $1,500
- Mesh Quality: The mesh is really good in the center, the cheeks have fewer details and are more approximate.
- Texture Quality: Excellent quality of textures due to the technology and high resolution of the cameras.
Synthesis: The best-case scenario for the Fuel3D SCANIFY is definitely face 3D scanning, where it delivers an excellent performance. The capture is instantaneous and the user can even keep his eyes open. The marker is the only constraint.
Intel RealSense – $99
- Mesh Quality: The mesh quality is really good. Dense and detailed.
- Texture Quality: Texture quality is quite poor, the resolution of the sensor is limited to 640 x 480.
Synthesis: The 3D scans took a very long time to obtain. A decent result at an affordable price, however, necessitates a lot of practice to get good results.
Shining 3D EinScan-Pro – from $3,999
- Mesh Quality: High mesh quality, hair tends to degrade performance.
- Texture Quality: Good sensor quality. However, the color module is an option and costs an extra $700.
Synthesis: the scan process takes some time. The Einscan-pro is not specifically designed for face scanning but is a very versatile portable scanner.
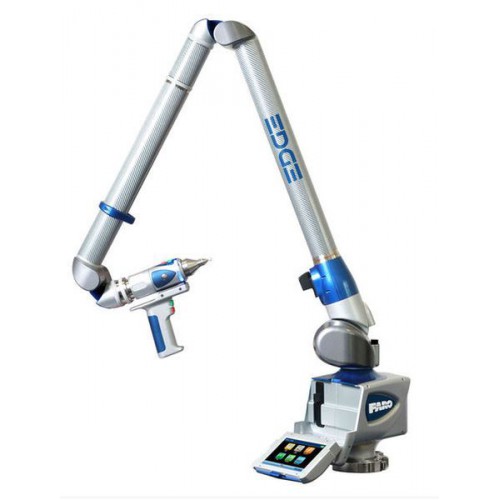
Artec Space Spider – $27,600
- Mesh Quality: Excellent mesh resolution and accuracy.

- Texture Quality: Texture is very detailed and high resolution. Colors are less realistic compared to the SCANIFY. The example is not very good as it is a picture we took with a smartphone of the computer screen.
Synthesis: A product made for metrology and reverse engineering but capable of producing amazing face 3D scans. Its price puts it in an entirely different category.
Conclusion
When it comes to face 3D scanning the Fuel3D gives excellent results. The capture area is limited but in most cases will be sufficient. The textures have very good quality and resolution. There is a huge performance gap when using the cloud version of the software vs the older software version.
3D scanning a plush: SCANIFY vs Makerbot Digitizer
We wanted to test the SCANIFY on a small object and opted for 2 plushies. They are difficult to scan because of their specific texture. Totoro is a famous Miyazaki character, while Fuji-san is the little embodiment of Mount Fuji, the greatest sacred mountain in Japan.
Fuel3D SCANIFY – $1,500
- Mesh Quality: Very good mesh quality on local parts of the object. Extremely difficult to obtain a full 360 scan.
- Texture Quality: Very good quality of the textures due to the rendering technology and high resolution of the cameras.
Synthesis: Not the recommended use case for the SCANIFY but yet good results on a small part of the object.
MakerBot Digitizer – $799
- Mesh Quality: Difficult to recognize the shape of the plush.
- Texture Quality: No texture
Synthesis: This 3D scanner only gives correct results on very specific objects. However, at this price, there are a lot of better options like photogrammetry software, or “low-cost” sensors like the RealSense or Kinect.
Verdict
For 3D scanning 360° around an object, the SCANIFY is not the best suited 3D scanner. The software works fine but a lot of cropping is required to get the most of the scans and the realign feature requires overlapping and similar lighting conditions to be able to properly reconstruct several meshes into one 3D model.
For a smaller area, the results are however very good and the textures are really good. On relatively flat surfaces, the SCANIFY produces very nice results. It is efficient for small leaves, tree bark, so mainly natural textures.
Value
The Fuel3D SCANIFY is an interesting product but limited to very specific use cases: face 3D scanning and low relief. For other situations, there are better (but more expensive) alternatives.
Conclusion: Aniwaa’s opinion
For affordable 3D face scanning, the Fuel3D SCANIFY is among the best products on the market. The process is intuitive and the results are really good compared to both cheaper and more extensive options. The generated files could be used to merge very realistic 3D captures on a stock head and produce a great representation, for animation or video games for example.
We really liked the quality of the hardware with a sleek design and a high-end finish. The resolution of the captured textures is also amazing. On the downside, the markers are a huge constraint and make the scanning process sometimes cumbersome. That said, the use cases where SCANIFY is a performant solution are quite limited and in many situations that do not involve face 3D scanning, it could be worth investing more money to purchase a more advanced 3D scanner.
Fuel3D Introduces Super Fast SCANIFY Scanner at CES 2015
3D Modeling
Today at International CES 2015 in Las Vegas, Fuel3D unveiled a development that has the power to completely turn the world of 3D scanning and printing on its head. Meet the handheld 3D scanner SCANIFY, which not only makes great scans, but also has an incredibly high speed. And with all this, most users of 3D printers can afford it, because it costs only 1490 dollars.
“When we first thought about SCANIFY, we wanted to make a scanner that would give all users the opportunity to experience the magical world of 3D scanning and printing,” explains Stuart Mead, CEO of Fuel3D. “SCANIFY allows you to transform the most complex objects, such as a human face, into a detailed, full-color 3D image, as if you were taking a photograph with a digital camera.”
The scanner, based on technology developed by the University of Oxford, takes 3D scanning to a whole new level and makes it accessible to literally everyone. Following are some of the features of SCANIFY:
- Speed - Capable of capturing 3D objects in 1/10th of a second. Even if the object is moving, SCANIFY converts it into a 3D image. This effect is achieved through a combination of pre-configured stereo cameras and a photometric image.
- Simple operation: if you know how to take pictures with a digital camera, you will definitely cope with SCANIFY.
- Availability: SCANIFY costs $1,490, which means that anyone who can afford a 3D printer can also afford a 3D scanner.
- High quality: Capable of capturing multicolored features up to 350 microns (0.35 mm).
The scanner comes with Fuel3D Studio, which instantly converts scans into files for 3D printing.
Yes, there are other scanners on the market at this price, but they make scans of such poor quality, which then have to be cleaned up, that all the pleasure of working immediately disappears. So check out Fuel3D and we're sure you won't regret it.
Did you like it? Want more? All the most interesting in the weekly newsletter. Join now!
Selected news, contests and discussions in the official 3DToday group.
Article prepared for 3DToday.ru
Subscribe to the author
Subscribe
Don't want
4
Article comments
More interesting articles
22
Subscribe to the author
Subscribe
Don't want
Hello everyone. The heading should not be called 3D modeling, but 3D torment, a joke)) And today we have ra...
Read more
2
Subscribe to the author
Subscribe
Don't want
A friend asked me to model something interesting, in the style of councilpunk or cybercom. ..
..
Read more
Sergey
Loading
03/16/2016
176800
264
Subscribe to the author
Subscribe
Don't want
Hello everyone. Materialise recently published an article about public databases...
Read more
Top 13 3D scanners on the market!・Cults
In the past, 3D scanners were mainly used for industrial and professional applications. For example, scanning architectural objects or creating digital models for films. As technology advances, the price continues to drop. Now, 3D scanning gives the average person the ability to custom-make just about anything they want. With more affordable prices, 3D scanning is becoming more accessible to consumers for personal use.
But first, a basic overview of 3D scanning:
A 3D scanner scans real objects and passes the image data to a 3D modeling program. The object can then be manipulated in the software and - if desired - exported and created on a 3D printer.
1. Select any object (or person!) you want to scan
Why is 3D scanning useful?
Imagine if you could scan your body and see how clothes fit and look online before you order them? 3D scanning technology can do just that. For example, bodylabs uses 3D scanning to understand how products will work for customers based on their body shape and posture.
2. Scan it and customize it in 3D modeling software
After scanning the object, you can reduce its size or edit it with free 3D design software. You can then choose to 3D print the edited file.
3. Export your model and print it in 3D!
After scanning the model and editing it to your liking, you can export it to .stl format and send it to a printer to bring it to life.
We have listed the 3D scanners below in ascending order of price (from cheapest to most expensive). Their rating does not necessarily reflect our judgment of the quality of the product. We've included some handy YouTube videos that go into more detail about each product.
1. XBox Kinect 3D Scanner - $95 USD
If you want to get by on the cheap, there are ways to use your old Xbox 360 or Xbox One Kinect device to get great results! If you have a Kinect.
2. iSense 3D Scanner for iPhone/iPad - $99
This scanner was developed by 3D Systems as part of the Cubify family. Although they don't sell 3D printers anymore, they keep their 3D scanner in the market. Like a structure sensor, iSense attaches to an iPad or iPhone. Its range of motion is 0.5m more than the Sense.
3. XYZprinting 3D Scanner - $139
XYZprinting 3D Scanner is the cheapest portable 3D scanner on the market. At under $200, it's perfect for anyone looking to get into 3D scanning on a budget.
The size of the scanner is 60 cm x 60 cm x 30 cm, so it is best used for small items. It also uses the new Intel RealSense image capture software, which means it can connect to any Windows device with a 4th generation Intel processor.
4. BQ Ciclop 3D Scanner Kit - $199
This open source hardware project has been released under an open source license so that all mechanical design, electronics and software information is available to the community for further development . The full package costs about 199 USD. You can even download the design and print it in 3D!
5. Structure Sensor for iPad - $379
Arguably the best scanner on the market, the Structure Sensor was developed through a Kickstarter campaign that attracted over 3,500 people and raised $1.2 million. Structure Sensor turns your regular iPad into a 3D scanner that captures three streams of data at 30 frames per second.
6. Cubify Sense - $399 USD
Cubify Sense is a portable pen scanner that makes it easy to manually scan 3D objects. This makes it possible to use Sense in quite unique areas, with both advantages and disadvantages. Sense is compatible with Windows and Mac OS.
7. Matter And Form MFS1V1 Desktop 3D Scanner - $467 USD
The first ever crowdfunded 3D scanner, Matter and Form, is a Toronto-based company that has raised nearly half a million dollars to develop this product. It uses a 3D laser scanner with a movable camera head and a 360-degree rotating platform.
MFS1V1 generates a detailed point cloud, which again works very well in some scenarios and less well in others.
8. XYZprinting Da Vinci 1.0 Pro 3-in-1 3D Printer - $810
Da Vinci 1.0 Pro is both a 3D scanner and a 3D printer. It uses a laser diode module with a 2 megapixel camera (higher resolution than 1.2 megapixel iPad scanners). Please note that this machine uses proprietary 3D printing consumables.
9. Einscan-S - $999
Einscan-S has two scanning modes: automatic and free. The first one is the easiest: just place an object on the rotating surface of the Einscan turntable and the machine will scan it in just 3 minutes with an accuracy of . 1mm. For large models, free scan mode works by rotating the scanner on a tripod around the object. Einscan-S generates one STL file that can be sent directly to your 3D printer. Einscan-S produces 3D printable models with greater accuracy (using "Light Structure Phase Shift Technology" instead of lasers) than competitors, providing industrial quality 3D scanning technology within a consumer's budget.
10. IIIDScan PrimeSense 3D Scanner - $1441 USD
Greater accuracy comes at a price. This tripod-mounted 3D scanner is unique in that it uses a short-range image sensor capable of scanning 3D objects in more detail and at a faster rate than other scanners on the market.
11. Fuel3D Scanify - US$1,500
This is a very high speed handheld 3D scanner capable of capturing an object in less than 1/10th of a second. In this regard, it differs significantly from the other 3D scanners on this list. In practice, it's more like taking a 3D photograph than manually scanning an object. Fuel3D Scanify uses a dual laser HD stereo camera combined with photometric data from three xenon flashes to create reasonably realistic 3D scans in the blink of an eye (so to speak). High tech.
12. NextEngine 3D Scanner HD - $2,995 USD
The NextEngine 3D Scanner HD combines portability with very high accuracy - much better than the scanners at the top of this list. Of course, the higher the accuracy, the higher the price! It uses an electro-optical system with a laser array that scans in tandem. The advantage is that the high-precision scanner has no size limits. The scanner comes with its own mesh creation software package, and you can also check out their NURBS and Solid modeling packages as options.
This is the scanner for those who want to get really serious results from their 3D scanning efforts. If you check out the gallery on their site, you can see how much more detailed NextEngine scans are compared to some of the cheaper scanners on this list. Of course, these are the company's own comparisons for marketing purposes, so feel free to take them with a grain of salt!
13.