Flying bear 3d printer
Flying Bear Aone 2 3D Printer – Flying Bear 3D
Main Features
- 1.Dual fan design:Quickly dissipate heat when printing and improve the surface quality of the model.
- Direct extrude: Reduced extruder distance, higher extruder precision
- The Newest Design Extruder:
* Cleaning filament easily: clean the blocked filament inside easily with removable feeding hole.
* Higher extruder reduction ratio: the reduction ratio is kept at 1:7.5, faster and more stable.
* Real-time observation: transparent extruder, directly observe and check the extrusion status.
- Linear guide design: X-axis and Y-axis adopt linear guides, simple structure and stable operation.
- Patented nut design: Z axis runs stably and smoothly.
- 4 pulley design: Increase the rigidity of the Z-axis and the printing accuracy.
- Built-in power supply: Hide the power supply inside the printer, safe and tidy.
- TMC2225 driver: Low noise and high precision.
- Colorful touch screen: New UI design, simple and intuitive operation.
- Power failure recovery function: When power failure, the printer can keep printing less worries about the power off.
- Coated glass hot bed: Strong adhesion,the temperature can reach up to 110°C.
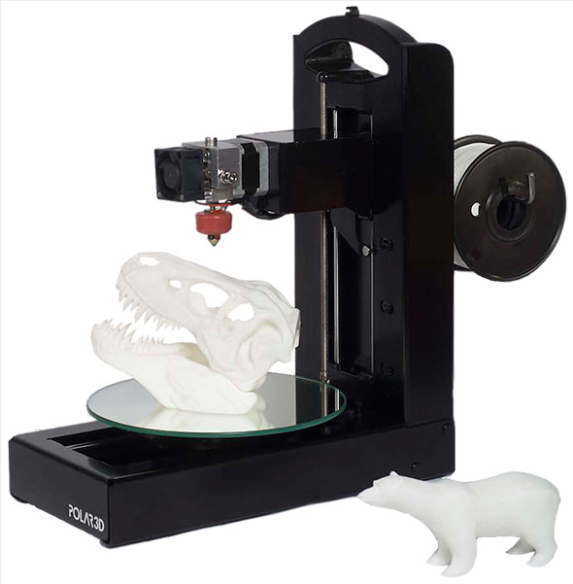
New MINI 3D Printer for Beginners
The Mini 3D printer is designed for beginners and professionals. Print size is 190*190*190mm with the latest upgrade touch screen. Double fan design, can effectively reduce the temperature when printing, to ensure high quality printing models.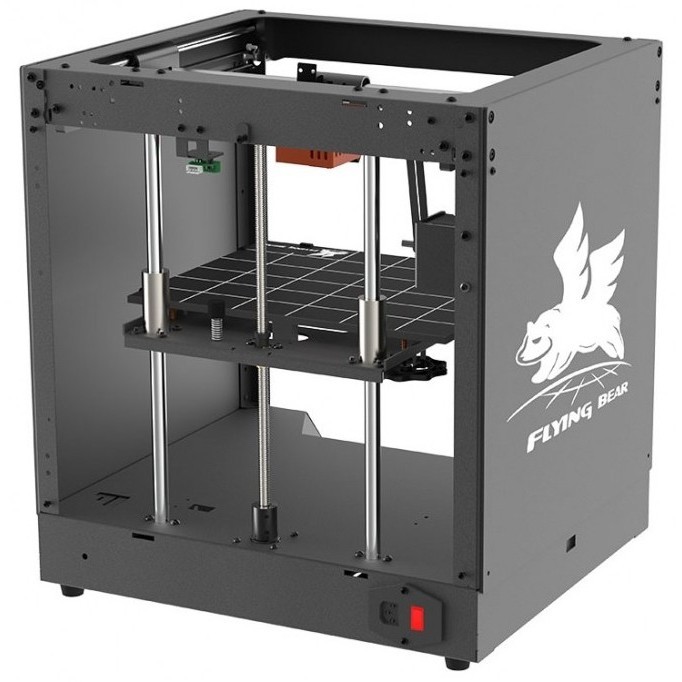
Patented Nut Design
Z-axis operation is more stable and smooth. The baffle can be reached right away for a more stable connection.
The Newest Design Extruder
- Cleaning filament Easily, Removable feeding hole clean the blocked filament inside easily.
- More High Extruder Reduction Ratio, The Ratio keeps to 1:7.5. More fast and stable extruder results.
- Real-time observation.Transparent extruder, watching and checking the extrusion status directly.
Dual Fan Design
The design of direct extrusion can reduce the extruder distance for more high extruder distance.
The Mini 3D printer's dual fan design helps quickly dissipate heat, improving the surface quality of the model. The basic kit comes with two fans and a power supply, as well as an AC adapter for your computer.
What Makes Aone 2 MINI 3D Printer Outstanding?
4 Pulley Design
The 4 pulleys have an overall silent effect. Increase the rigidity of the z-axis and improve the printing accuracy.
Resume Printing
The Aone 2 MINI 3D printer can keep printing if the power failure, less worries about the power off.
Coated Glass, Strong Adhesion
The temperature of hot bed can reach up to 110°C.
The High Running Accuracy
Double linear guide rail is adopted to improve the running accuracy.
2.4 Inch Touch Screen
New Ul design, simple and intuitive operation
Built-in Power Supply
Hide the power supply inside the printer, safe and tidy.
Affordable MINI 3D Printer
Print Size: 190X190X190mm. This Aone 2 3D printer is designed for first-time makers and kids with best budget.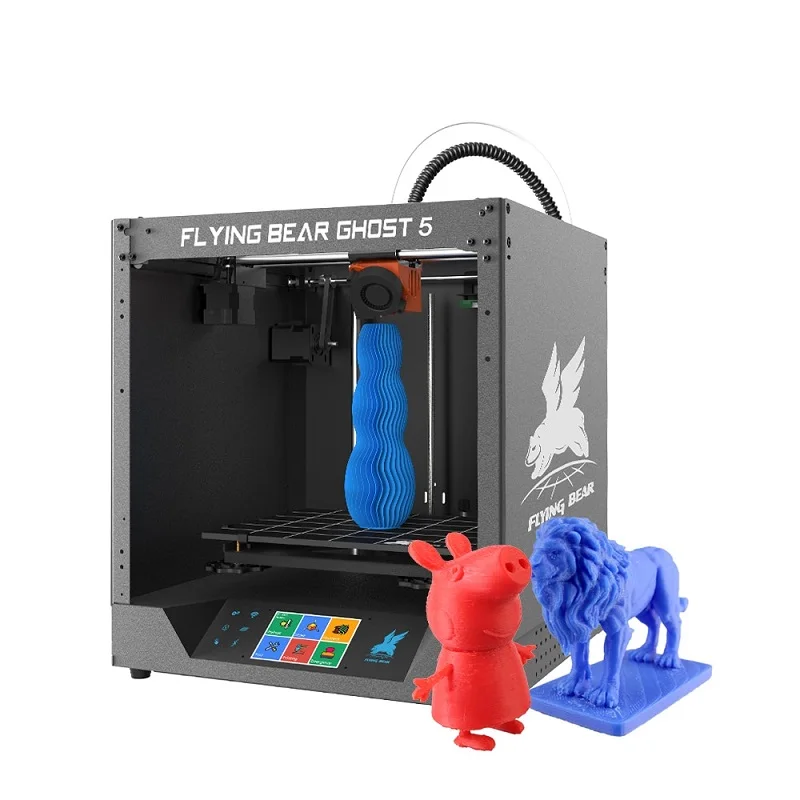
Multi-Angle Fixed
Solve the problem of z-axis vertical. Make the overall structure more stable and improve the printing quality of the model.
Disappointment
I ordered on February 2, 2023, I see that I had to relaunch after 15 days for the printer to be sent. Today it's been 1 month since I ordered and I still haven't received it; I think it is a great pity. Lack of seriousness; no response by email, only by one person on FB.
Flyingbear Ghost 3D Printer | 3D Printer Universe
Price match guarantee:
We work very hard to ensure that we offer the absolute best prices online for all of our printers including Tevo 3D printer kits. If you find another online store that offers a lower price than us on Tevo 3D printers for sale, please let us know and we will refund your original payment for the difference. Read More
30 day price assurance guarantee:
We want you to feel confident that you are getting the absolute best price for the product. If you find that our own website has a lower price for the same item you have ordered within 30 days of your purchase date, we will refund the difference! Read More
Full manufacturer direct warranty:
We are an authorized dealer for all our products and comes with the full manufacturer warranty.
Tax free (except California and Nevada):
The price you see is the price you pay but because we operate in California and Nevada we must charge tax in California and Nevada.
Safe & secure online ordering:
We are certified Level 1 PCI DSS compliant. What this means is that we meet all the requirements defined by the Payment Card Industry Security Standards Council. For additional information on PCI Compliance, visit the PCI Compliance Guide website. We also accept payment via Pay Pal, a leader in secure online payment processing.
Best customer service:
We strive to offer the best customer service we can. If you have any questions please let us know by phone or email.
Exclusive deals:
We appreciate each and every customer that comes to our store. We know you have a lot of choices when it comes to your 3D printing purchase. That's why we'd like to show our appreciation by periodically sending out exclusive coupons and deals to our past customers!
Order Confirmation:
As soon as you place your order you will receive an order confirmation e-mail. This means that we have received your order in our system and pre-authorized your credit card for the purchase. As soon as we receive your order we automatically reach out to our suppliers to confirm that it is in stock and available for immediate shipment. If your item is on backorder or unavailable we will void the pre-authorization and reach out to you via e-mail. If your item(s) are available for immediate shipment (within 5 business days) we will process the charges and submit the order for shipment.
Order Shipment:
If your order is in stock and we process the charges to your credit card, it will ship within five business days from the date of your order. We will send you tracking information within 24 hours of your order leaving the warehouse to the e-mail address you provide when checking out. If you do not receive tracking information from us within six business days of your order feel free to follow up with us at [email protected]
Domestic Shipping:
We do not ship to P.O. Box.
International Shipping:
Please contact us for international shipping rates
We work very hard to ensure that we offer the absolute best prices online for all of our printers including Tevo 3D printer kits. If you find another online store that offers a lower price than us on Tevo 3D printers for sale, please let us know. We want you to feel confident when you buy a Tevo 3D printer or any of our other printers that you are getting the absolute best price for the product.
To request your partial refund simply e-mail us a link to the same product on our website, or on our competitors’ website and we will process the credit accordingly.
Our 100% Price Guarantee has some limitations:
- You must purchase the item from our website before requesting your Price Match Guarantee
- Promotions such as rebates and buy one, get one free offers are not eligible
- The item must be in stock on the competitors website
- The competitor must be an online store, they may not have a retail location
- The item must ship from the same country.
- The website cannot be a discounter or auction website (ie; eBay, overstock, etc..)
- The competitor must be an Authorized Retailer for the product in question
- The Price Match Guarantee includes the item price and the shipping charges, it excludes sales tax or any customs and duties
FLYING BEAR Reborn 3D printer. The rebirth of the bear. More! Better?
The flying bear is back with us! After the "ghost" there was a "revival". He got bigger and smarter. We look at whether it was worth it for him to return to us from the world of shadows. About a hundred photos, oscillograms, a look through a thermal imager and microscope, video - everything is under the cut.
1. Disclaimer
Yes, this printer was sent to me free of charge.
Yes, I know there are a lot of reviews of Flying Bear printers, I have read some and I understand that some people got tired of reading them.
No, I will not praise the printer just because I consider myself indebted to the manufacturer and the store. This printer has already been sent to me, and another one is unlikely to be sent, and it makes no sense for me to write nonsense in my 98th review in order to avoid embarrassment with the Chinese. As everything is, so I write. Do not believe - do not read, it's voluntary.
Until now, I had an Anycubic Mega S printer. I more or less figured out how it works, eliminated the most significant shortcomings, and in principle it suited me. So I did not expect a strong “wow effect” from the new printer. The principle of printing for these printers is the same, and from a technical point of view, the changes in Flying Bear Reborn are more quantitative than qualitative.
2. Important features of the
printer First and foremost is the size. This is both a plus and a minus at the same time. For such a device, it is necessary to provide a suitable place.
But the working space of the printer is appropriate. For example, you can print beach slippers. Or a motor housing from a washing machine. This was not possible on my old printer.
Another important feature is coreXY kinematics.
Additional information
Kinematics is a diagram of the relationship between electric motors and a movable carriage. CoreXY is the most advanced option.
It minimizes the mass of moving parts, distortion moments and vibrations. We can say that this is the crown of kinematic thought. And he is here.
Well, the frame of the printer. In our case, this is a parallelepiped of powerful aluminum profiles.
These three points are the basis. Everything else is relatively easy to upgrade to the desired level of quality and price.
3. Less important features of the printer.
A direct extruder is installed on the printer.
Additional information
i.e. a mechanism that pushes the filament straight into the print block. In contrast to the bowden, which pushes into a flexible tube, the other end of which is connected to a movable carriage.
Direct is good for two reasons. First, it allows you to print with soft filaments. Secondly, it allows you to drastically reduce retracts (pulling the filament back in order to quickly and reliably stop flowing from the nozzle), which in turn allows you to install more advanced nozzles with a narrow throat and, as a result, an effective thermal barrier. As a result, a positive effect on the quality of printing.
Another positive point is the wifi module. Declared the ability to print over Wi-Fi. Not critical, but nice that you can no longer run to the printer with a card.
Finally, the printer already has modern quiet stepper motor drivers.
4. Unpacking and assembly
Size.
Inspires. Weight almost 30 kg.
Box filled with polyethylene foam in three layers. Details are securely fixed, so you don't have to worry about safety.
Top floor doors and walls, instructions. Packing list, where it is hand-marked opposite each item that everything is in stock.
A floor below the assembled frame with the carriage, there is also a hot end, tools, fasteners and spare parts.
Finally, in the back of the box is the print bed, stands, shafts and base with all the electronics.
We noticed the plates on the parts, like this:
I was not too lazy, recognized and translated what it says here:
1
4020 fan rotation without noise
3010 wind station rotation without noise
Can heat the temperature display is normal
And white Teflon tube installed
2
WiFi can be connected
After clicking +Z, the 2 Z motors rotate in pain direction
The switch indicator light is off and the light is off
The material break detection is triggered normally
The control box fan rotates normally
The machine runs for 24 hours without error
3
Contact friend Z1 limit Z1 motor stop
Contact friend Z2 limit Z2 motor stop
Trigger X limit X motor stop
Trigger Y limit Y motor stop
XY rail runs without noise
Aha, the QCD worker is so responsible for quality. Even 24-hour tests are carried out! In my opinion, the Bentley or Aston Martin so. The packing list is also present, with handwritten checkmarks for each item and a signature at the bottom.
On the printer forums, I read that at one time the manufacturer confused M3 and M4 nuts, the buyer had to find his own. Apparently, measures were taken there - my M4 nuts were in place. Everything is packed in neat bags. Includes hex wrenches for assembly. True, poor quality.
The attached booklet contains mainly technical specifications, equipment and QR codes with links to YouTube. Because the assembly instructions are provided in the form of a video on YouTube. A series of several episodes in two versions - computer animation and a living person assembling a printer.
Assembly
I was in no particular hurry and mastered the assembly in two evenings. Along the way, checking everything that has already been collected before me.
First I opened the base and looked inside.
Base:
Flipping:
Opening:
There is plenty of space in the cabinet. Probably, it will be possible to install larger and quieter fans. All connectors are filled with Chinese snot, their thin threads hang everywhere, even on the fan. Which, most likely, never started.
500W power supply with fan, controller board with additional fan, screen, mosfet for platen, switch and connectors. The good news is that the motor drivers are installed in pads, not soldered on the board. This means that they can be replaced if necessary. There are three options for the motherboard, but recently they have been sending just this one.
32 bit controller.
Eight was enough for my old printer, but in such a printer 8-bit would have looked undignified. 32 means there will be no performance restrictions on the part of the chip.
Pulled out the driver:
The TMC2225 v1.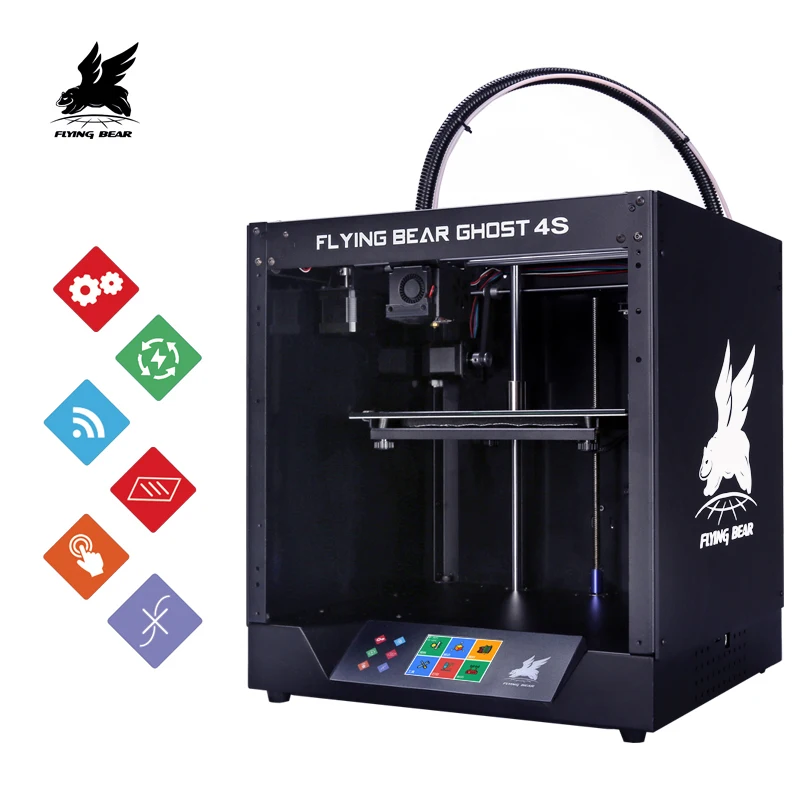 0 driver itself
The power supply is assembled neatly, although the marking “ZL-500” on the outside on the sticker and “ZL PT-400” inside on the board inspires some uncertainty. But maybe just the boards are unified.
Board voltage - 24 volts. This is also progressive: with such a power at 12 volts, there would be too high currents and losses in wires and contacts.
Assembly starts with the installation of the uprights. These are quite weighty profiles, half a kilo each rack. Nuts M4 for their fixation are laid from the end.
Then, a frame with mechanics is put on top of the 4 installed racks.
The upper ends of the uprights are provided with plastic plugs, and the lower ones with rubber feet.
Next we move on to the table frame. It has 4 linear bearings.
The table is raised using two screw columns, rotated by stepper motors. A spring-loaded nut works on the screw post (springs are needed to eliminate backlash).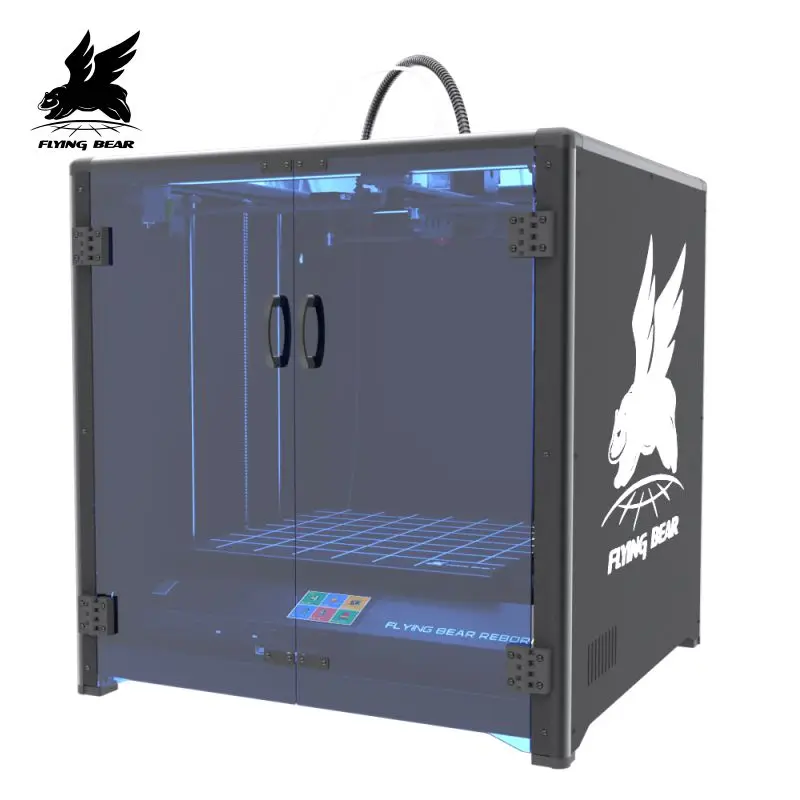 And the table is saved from rolls by linear bearings mounted on ten-millimeter shafts. To be honest, I would prefer at least three screw racks, albeit with three shafts. Archimedes also knew that the plane is defined by three points, and not by two points and four linear bearings. But maybe there is no suitable board for three motors per Z axis. But, "maєmo those who can". Let's see how it will work.
I put the bearings on the shafts - everything seems to be fine. While the printer was driving, I studied the reviews and there someone complained that these same bearings stuck on the first printers. He drove his back and forth - no, they don’t jam.
Checked for curvature. Attached one to the other and looked into the light. The gap, if present, is practically invisible to the eye. And it didn't work out.
Measured diameter 9.98-9.99.
In general, there are no complaints about the shafts.
Collected, and ...
Squeak and rattle.
Lubricant
Mainly noise from screw posts. But I decided to lubricate the bearings at the same time.
Lithium grease is suitable for lubrication, as long as it meets the NLGI-2 standard. I ended up with a Castrol LMX. This one is:
Quite a lot was packed, apparently the bearings were almost dry.
No, there was some kind of (apparently transport) lubricant there, in any case, the shafts were in oil after the bearings worked. But the extra lubrication did the trick, the rustling became quieter, almost inaudible.
Later the same procedure had to be carried out with the guide rail.
There you need to unscrew the two screws, remove the side boot, grease the rails and move the carriage back and forth. Then install the boot back, and wipe off the excess grease from the rails.
We must not forget to lubricate the balls from the bottom side. For this I used a mirror.
There are two opinions about lubrication: someone thinks that rails should be lubricated with oil. Someone - that grease. From the pdf to a similar guide, I learned that both are right. Oil must be used at carriage speeds up to 1 m/s. Below is lube. We are below. We smear with lithium NLGI-2.
Carriage
It's time to figure out the carriage arrangement.
All you need to do is put the wires into the corrugation, install the mechanism on the carriage, and connect the connectors to the basement. The corrugation has a longitudinal section, so there are no difficulties. As for the connectors, this is a very good solution, if necessary, everything can be quickly assembled and disassembled.
Ports 4: D-sub to carriage. XT-60 to the table warmer and two more low-current ones: to the table temperature sensor and limit switches on the printer body.
At first there was concern about the maximum current for the hot end, but I read according to the specifications - d-sub has currents up to 5A. At our 24 volts, this is 120W - more than enough. But what I didn’t like is that all contacts are busy. It would be possible to provide several pairs of unoccupied ones, so that the user can then connect the table adjustment limit switches, or illumination, or even a laser module for burning or illuminating the photoresist. But alas. All contacts are busy. This is all the more offensive, because the connector housing is easily opened and all the wires on the screw terminals are quite accessible.
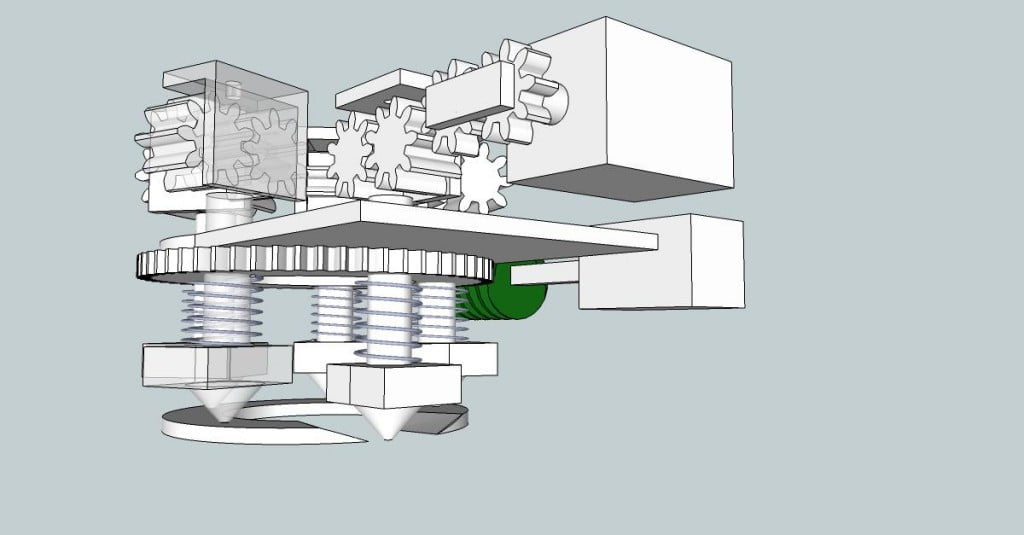
The weight of the printing module (hot end, extruder, electric motor, two fans) - 377 g.
The extruder itself is geared, made of transparent plastic. The spring is tight. When you take away the lever, it becomes directly scary - it seems that the plastic is about to burst. But it seems to hold up. Even with the screw unscrewed and the lever folded back, the filament is pulled out with great difficulty if the motor is blocked.
Noteworthy is the print blower. He himself printed on the printer and glued to the fan. Not a very solid solution, of course.
But the main thing is that it blows in the wrong direction. Later, I put a plate of water under it, and this is what became clear:
In general, the airflow definitely needs some work.
Then I dismantled the hotend.
I liked the nozzle.
No burrs, smooth edges - good nozzle.
The heating element also did not cause any complaints. The signature Reborn silicone sock has a snug fit.
There was one hole missing in the toe for access to the fixing screw, but this is a trifle.
The design of this whole device is such that there is a Teflon tube inside for feeding the filament. It starts almost from the extruder and rests on the nozzle with the other end. It is important that this joint - nozzles and tubes - be as tight as possible. So that cavities and gaps do not form, where molten plastic enters. In our case, the tube clearly turned out to be shorter and there was a gap.
I originally wanted to replace the entire tube. But my tubes were with a clearly large inner diameter.
We don't need extra gaps here, so I cut off only a small ring from my pipe and put it up on the cold side.
That's it, now the lower edge of the Teflon convincingly rested on the nozzle. If there is no spare tube at hand, you can cut off a couple of millimeters from the tube supplying the filament to the extruder, it is here with a good margin.
Body kit
Nothing left: spool holder, filament end sensor and walls with doors. All this is mounted on captive nuts with M3 thread, which can be easily inserted into the profile groove anywhere. Comfortable to say the least. But the location of the coil holder is completely ridiculous. Rear left pillar. Increases the lateral dimension of the printer by the thickness of the spool. Moreover, it increases the depth of the printer by the radius of the coil. Do not put the printer in the corner now. Threading the filament into the sensor with outstretched arms is also extremely inconvenient. Plus, the design of the sensor is not very successful. The thread passes through the sensor, then, after a centimeter and a half, dives into the tube. And now it is necessary, by manipulating the fingers in this gap, to direct it, which has come out of the sensor, into the tube.
I found the whole thing so inconvenient that I didn't even try to install the coil bracket. For the first print, I put the spool inside the printer and unwound a few turns. And I was going to print my reel holder with the second seal.
Walls and doors also seemed optional to me at first. But for the review, I decided to put them all the same. Then it became clear that I was wrong. And the walls and doors are actually very good and definitely worth putting, even if you have a brutal workshop and rough metal is your style. And the dust flies less, and they are well protected from high-frequency noise harmonics, and the look of the printer becomes modern and mysterious. This will fit perfectly into the neat interior of the apartment.
It was-became:
But what is completely incomprehensible - why did the screen, the power key, the memory card slot and even the usb connector end up in the dungeons? With the usb cable inserted, the door cannot be closed at all! And the screen can suffer from temperature if you build a cap for the printer and arrange a heat chamber under it.
I don't understand. Okay, all collected.
Consider the bonuses attached to the printer. Useful filament wire cutters, tweezers, a spare hot end, usb cable, as well as a stylus for the screen, an awl for cleaning the nozzle and a spatula for picking models off the table, which of course is already redundant.
Can be enabled.
WiFi
When turned on, the printer finds a couple of the strongest networks, prompts you to enter a password and receives an ip address from the router.
I rushed to the browser, hoping to see an interesting web interface with a bunch of settings. But alas, at the given address, such a mangy tail was found:
Everything else - only with the help of the Kura plugin.
4. First print
The printer also comes with a 4GB micro SD memory card and card reader. This flash drive already has the first printable model. This is a bolt and nut. On the screen you can see a preview of the model. As it turned out later, not every slicer can do it.
But first, we adjust the gap between the table and the nozzle. This is done by dragging an A4 sheet in this gap. The sheet should experience slight resistance - do not bite or hang out. Under the printing table, nuts with large handwheels, it is a pleasure to turn. The position of the table is very dependent on the temperature of the table and the nozzle, so if you set it to 60 °, and now it is heated up to 90 ° for printing, it is advisable to reconfigure the table.
Everything is ready, the printer lays layers.
And the result:
Not bad for the first time, as for me.
5. Filament Holder and Filament Sensor
Thingiverse has a holder model for mounting the spool inside the printer body. It is good for everyone, but I did not have the bearings of the right size. However, it is full of old bearings from rollers and scooters. So I just made two rollers on two brackets. Fasteners - on the same M3 nuts. Here's what happened:
The filament end sensor easily stood next to it. The wire to it had to be pulled out of the groove of one profile and laid in the groove of another. Still, a handy thing is this profile. At least fasten anything with a nut, at least stretch the wires.
I must say that all the limit switches on this printer are optical. And this is very good. They are not familiar with the bounce of contacts, they cannot accidentally bend the lever and the settings will not go astray. But here is a filament sensor with a mechanical limit switch. Apparently, in order to adequately respond to translucent filaments. Later, when I filled it with polyurethane ("rubber") filament, I could not do it, because. inside, the contact lever deflected the pliable rod inside the case so much that it no longer fell into the outlet. But here you have to choose - either problems with a soft filament, or with a transparent one. In the end, any sensor can be blocked by inserting something there and typing without it.
Yes, and all sensors are equipped with blue LEDs, so it is always clear when the sensor has been triggered.
6. Printing table - geometry and heating
The surface of this printing table is an ultrabase type. First, there are many microscopic depressions on the surface. Plastic gets into them during printing, after the glass cools and shrinks. And since Since the coefficient of linear expansion of plastic and glass is different, then the part simply “pushes” out of the pores of the table. And the table is covered with a special composition, which softens slightly when heated. This adds adhesion when printing. Theoretically, during printing, the details firmly stick to the table, and after cooling they are removed completely freely, as if they were simply put on the table. But this effect did not work for me right away.
Yes, it is important to know that all manipulations with the table - removing printouts, degreasing and dusting are done only with a cold table. Otherwise, you can tear off the part along with this magical coating.
While printing different test patterns over and over again, I noticed that often the edges of the first layer came off the table and curled up. Poor adhesion can be due to incorrect table calibration and underheating.
When selecting table calibration from the menu, the adjustment is made in 4 points. I decided to check how things are at other points and screwed the indicator to the carriage:
This is not to say that the table is completely flat. But within 15 acres is almost the entire area of the table.
I checked the temperature with a thermal imager.
Yes, it's terrible. Firstly, underheating of at least 10 degrees, and secondly, a strong uneven heating from the center to the edges. I found microclamps for pressing the glass to the heating element, I decided to distribute them evenly around the perimeter.
What is called, "took the plug." Then I removed the clamps back, but the heating did not return to the original. The fact is that under a rather thick glass there is a thin pliable aluminum plate, which distributes heat over the glass. But it is not glued to the glass in any way. What did the author want to say? Perhaps the idea was that it is not worth bending glass by thermal deformation of aluminum. To do this, we will make the glass thick, and the aluminum thin and elastic. And we will provide for the movement of one relative to the other. There is double sided tape on the bottom of the glass. But the protective paper has not been removed from it. Thus, the user himself can decide what he likes best: leave everything as it is, press the glass with removable clamps, stick it on the heating element, or even replace it with a mirror. Yes, some do. On reflection, I decided to still use the tape. I took off the glass, turned it upside down with tape and heated it well to a hundred degrees. At this temperature, the protective paper was easily removed, I carefully turned the glass over and placed it on the heating table.
The temperature map has changed:
It seems that we have returned to the original version, but this is not so. First, the heating has become more even. Secondly, the temperature gradient is still much smaller. Yes, now it will be difficult to tear off the glass from the heating pad if I want to replace the heating pad with 220 volts. But I'm not going to do it yet. After sticking, the table heats up to 80 degrees in 5 minutes 20 seconds. But if I still decide to replace the coating - a guitar string and a lot of solvent will help me.
In the meantime, I just decided to add an additional 10 degrees to the table temperature to the usual print settings and everything began to stick perfectly.
7. Electricity
Since we have a thermal imager in our hands, let's see what's in the basement. The power supply heats up quite moderately during operation. The wires are almost cold.
Stepper motor drivers and mosfets are OK:
Checked half an hour after the start of printing.
Power supply current:
I looked at the noise with an oscilloscope:
But this is with a 1:10 divider on the probe.
When the table is heated a little more:
But in all cases it is quite an acceptable value. In vain I was worried about the labeling. Good food.
8. Flow adjustment
Flow adjustment is required for good filling of the first and last layer. The fact is that the extruder sometimes squeezes out the wrong amount of plastic that the g-code requires.
To check, I took off the hot end, aligned the bar with the lower cut of the radiator, connected the printer via usb, and launched the Pronterface program. To issue g-code commands, you can use the built-in printer function, but it is more convenient through the console.
We connect to the serial port (in my case com 95) at a speed of 115200 baud.
The printer regularly executes the M105 command - this is temperature control and it does not interfere with us.
First, let's find out what extrusion setting is now:
M501
We are interested in the underlined line. E800.00 - motor setting, in 1 mm steps. Let's remember. Now we send the following commands to the printer:
M109 S0 // turn off the extruder heat and wait for everything to cool down
M302 P1 //disable check of minimum extruder temperature
G91 //change to relative coordinate system
G1 E150 F100 // extrude 150 mm of filament
And what do we see?
Ba! Yes, it's 146mm!
Underextrusion! Let's call on mathematics.
The new setting is calculated using the formula 800*150/146 = 822 steps per 1 mm.
Next, enter the commands:
M92 E822 //set new step value
M500 // Store data in printer memory
We check again, this time 150 = 150.
After the calibration, I did the same test with a flexible TPU from FDPlast.
This is a very soft rubbery polyurethane. The extruder wheels strongly compress the filament and result in severe underextrusion. Changing the printer settings when changing plastic is too troublesome, but you can enter the appropriate coefficient into the slicer. I found that the plastic feed should be multiplied by 1.25 at the usual position of the extruder screw and by 1.2 at a weak screw tightening. Remember, it will come in handy.
9. Kura: Upload and preview.
When I bought my first printer, like everyone else, I started with Kura as the default slicer. And he suited me with everything, until I ruined several printouts in a row. Moreover, the same pattern was repeated many times in the vertical model. And when printing models on the tenth repetition of the pattern, the same defect came out, so suspicion immediately fell on the chicken. Then I installed Prusa, he generated an excellent code for me, after which I never returned to the chicken. And now they just twist their arms! After all, it is Kura who adds previews to the g-code, which then appear on the printer screen. And for the chicken, a plugin is provided that supports printing via wifi.
Well, what to do - put the chicken and the plugin.
The connection is fully operational, the printer connects quickly, information about the temperature is sent to the kur. The movement buttons work, the contents of the flash drive can be read and run, files can be deleted. The only negative is that the plugin buttons have moved somewhere. But this may be a glitch in my archaic wine7. So, the test cube flew away for printing in a few seconds.
10. Printing examples
After the bolt and nut, of course, I printed the traditional 20 by 20 cube.
Even without special dances with a tambourine, it turned out quite well: It seems that the echo is minimal, and the influxes at the corners are imperceptible. Except for the left near corner, where the printer transitions between layers.
Here are the big pictures:
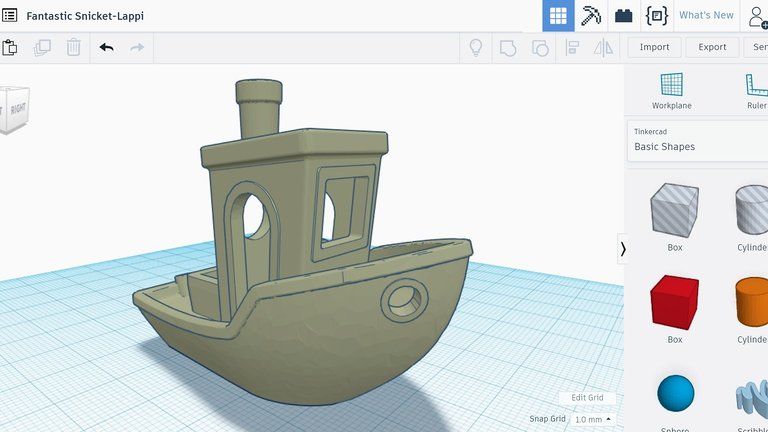
Benchi's boat went into action next. Here is a printout:
A little plastic was blown in the doorway with a curved airflow. This will be fixed over time, of course.
Next positioning and extrusion accuracy test. I decided to print a slug and a crocodile. They are printed assembled, so if something goes wrong, there will be no mobility.
Crocodile:
It was printed very fussy, a lot of small details:
Slug is printed from SBS, raft is better for it.
Both toys became mobile immediately after being removed from the table.
SBS cube:
Large:
Finally, thermoplastic polyurethane, where can we go without it, on the direct? Just to blow off dust particles from the lens, a small camping pear is missing. One bold line in Solidworks, the body rotates along it and you're done - the pear goes to print. It turned out like this:
Large:
Working:
11.
Sometimes you need to print a part in different colors. Or, during printing, insert a nut into the niche. This requires you to pause printing at a specific location. This problem had to be dealt with. No, stopping is easy from the printer screen. But you won't keep track of each layer manually, will you? It turned out that the only working stop command was M25. But she had enough problems. After pressing the resume button, the printer for some reason took the nozzle to another place and continued to print with a shift. And each time the shift was in a random direction. After a dozen ruined printouts, I realized that the point is that the coordinates are knocked down at the moment the limit switches are triggered along the x and y axes. Then I added a code that, before a pause, took the printed node to a different (non-zero) coordinate, then it stopped, and after resuming, the printer searched for and started printing from the same coordinate. The pause setting looks like this:
And now it's possible to print a striped cube!
12. PrusaSlicer - it still works!
Yes, the chicken sliced me well several times into layers of cubes, a boat, perhaps during the year of our parting, she became smarter and more accurate. But it’s still too early to part with Pryusha, so it’s advisable to teach her at least how to use Wi-Fi, since we now have it. After some googling, I found a way. The plugin is downloaded and installed (google “MKS-WIFI_PS_uploader-main”), its call is recorded in the post-processing of the code and voila! Here is the setting:
Only send is available, temperature control and head movement are not available, but this is already good.
13. Perspectives and improvements
Obviously something needs to be done. The minimum program is to print the nozzle of an existing fan that would direct the flow to the right place. The model is on Thingiverse.
Lighting. Depends on the circumstances, if there is good ambient lighting or you are not curious about how the printer prints, you can not do it.
Cap. Two functions: dust protection and creation of a microclimate for printing with "difficult" plastics - nylon, etc.
Quiet coolers . Staff cope with their work, so if the printer is in a non-residential area, you can do nothing. Otherwise - the size is larger, the speed is lower and it will be good.
Thermal barrier. With a regular hotend, printing is quite normal. I would say that hotend upgrade is not needed for technical printing, but if you are going to print figurines, you can get confused for fun. The main thing is that you already have a direct extruder.
Rails. There are different opinions on this matter. Someone thinks that rails are better than shafts, someone thinks that they are a waste of money.
The advantages of shafts are low cost and less demanding on the parallelism of the axes. It is a fact. The rail has less play. This is an assumption. It seems to me that backlash and unevenness (even if they occur) on such a wide shoulder will not have a significant impact on the printing of the model, therefore, if you come across a printer on shafts, you should not invest in a replacement. Authoritative 3D printing enthusiast Dmitry Sorkin, on whose YouTube channel many follow the design of his “dream printer”, has abandoned rails in favor of shafts and convincingly talks about the advantages of the latter. In short, I decided for myself that I would not change the shafts for rails.
Second fulcrum of the roller axles. Perhaps it makes sense, given that it does not require investment. The fact is that with a good tension of the belts and high accelerations, the axes of the rollers bend a little, all the mechanics experience additional vibrations and an echo appears on the walls of the model. The way out is reinforced axles (sold), as well as mounting the axles from the second end, which dramatically reduces deflection under load. There is a model of the bracket that mounts to the frame on Thingiverse, but keep in mind that the profiles that make up the frame come in several (probably three) variations. So not everyone will fit.
Wide straps. They certainly hold the load better and with them there is less echo during high-speed printing. It makes sense in combination with other improvements to increase speed, but not on its own.
Marlin. Alternative firmware for the printer, available on github. Its advantages are Linear Advanced support and many other differences. Perhaps it makes sense, especially since native firmware can always be returned back - in the same place, on the github there is a link to it.
14. Conclusions
The printer prints decently out of the box. The basis of the printer is made soundly and does not demand interventions. The most obvious problems (filament spool holder, airflow) are solved free of charge or almost free of charge using the printer itself. However, the printer is a good basis for upgrades.
Product for writing a review provided by the store. The review is published in accordance with clause 18 of the Site Rules.
A review of the big, solid Flyingbear Reborn 3D printer, as well as a young fighter course for beginners / 3D printers, machines and accessories / iXBT Live
Flying Bear Reborn. This device is equipped with a rigid, aluminum body, has increased accuracy and print area size (350x310x350 mm), which allows owners to create large objects without the need to glue them.
Specifications Flyingbear Reborn
- Print support from: microSD, USB, WiFi
- Power supply: 500W;
- Power supply output voltage: 24V;
- Kinematics: CoreXY;
- X-axis movement: 2 round shafts 8 mm diameter;
- Y-axis travel: profile rail 12 mm;
- Z-axis movement: 4 round shafts Ø 10 mm, 2 screws Ø 8 mm with 8 mm pitch;
- Belts: ring, 6 mm
- Extruder: direct, BMG-like
- Printable area (XYZ): 350x310x350 mm;
- Dimensions: 570x530x580 mm;
- Weight: approx.
22 kg.
Packaging and delivery
The Flyingbear Reborn 3D printer comes in a massive, heavy (about 30 kg) recycled cardboard box, the Flyingbear logo can be found on the box, the box is quite soft. There is no information about the content on it.
The organization of the internal space inside the box is well thought out and built in such a way that none of the elements was damaged during transportation. To ensure reliable fixation of the elements inside the box, polyethylene foam trays are used, inside the box they are neatly laid out one above the other, all elements are fixed rigidly.
Traditionally for this type of device, a 3D printer is delivered unassembled, and the package includes all the necessary elements for its assembly, and we are talking not only about screws, but also about tools. The kit includes hex keys, a screwdriver, wire cutters, a multi-key (similar to an old bicycle key), a spatula, tweezers, cable ties, a stylus, a card reader, a 4 GB micro SD memory card, a brief instruction in English, etc. etc., etc. To facilitate the task of the user, all fasteners are arranged in packages, and the packages are numbered.
Assembly of the device
At the beginning it was planned to describe the assembly process in detail, but after two hours a different decision was made. There is no need to talk in detail about the assembly of the device. The instruction manual contains QR codes with a link to a very detailed video instruction for assembling the device. The instructions are so detailed that there is nothing to add.
If someone has a desire, you can watch the videos by clicking on the link to the official YouTube channel of FlyingBear 3D Printer.
Be prepared that you will have to tinker with the installation of corner profiles (most of the time when assembling the device was spent on this).
On my own behalf, I would like to add that during assembly I did not have any difficulties (with the exception of installing profiles), however, when calibrating the table, a flaw was discovered, which manifested itself in the fact that when adjusting the position of the table along the Z axis, the screw rod periodically scrolled, and to carry out calibration failed. I had to remove the side walls, remove the screw rods and reinstall them (it was possible not to remove the side walls, but it was much more convenient for me).
In this regard, I would like to recommend to all users (especially beginners like me) who will assemble the printer: after the screw rods are connected, do not be lazy, connect the printer to the mains and check how well everything works moving elements, whether they are wedged. If all is well, you can continue the assembly, following the guidelines. Flyingbear Reborn mm. Such placement of the holder is extremely unfortunate. This is due to the fact that it is fixed on the rear support, and as a result, the printer cannot be moved close to the wall, because the reel with plastic will not allow this.
So, the sides of the Flyingbear Reborn are covered with plastic panels, they have ventilation holes, and the Flyingbear logo. As mentioned earlier, on the left side there is a holder for a filament spool. Just above the holder is a filament gauge.
The rear cover of the printer has no design elements.
The front has two transparent acrylic doors (blue). I would like to remind you that the printer is delivered unassembled, and in order for the doors to close well, I had to sweat a little.
We installed four massive rubber feet on the bottom surface.
When assembled, the printer looks very good, one might even say elegant. Here I would like to mention that the manufacturer took care of the aesthetic appearance, in connection with which all the wires to the motors and limit switches are laid in special grooves on the profile, which are then closed with special plugs made in the color of the profiles. The wires from the head are hidden in the corrugation. In this regard, nothing sticks out anywhere and does not bristle.
Opening the doors, we get access to a 3.5-inch touchscreen display, just below it is a slot for microSD memory cards, as well as a USB-B port.
The base of the table is a stamped metal plate 2 mm thick. On the table is glass, 6 mm thick, which has a special coating.
On the lower surface of the table, a heat-insulating plate covering almost its entire area can be placed. Here, in the corners, there are four screw connections with large and very comfortable winglets, designed to level the table.
The Y axis is built on a linear rail, while the X and Z axes move along the shafts on linear bearings. The movement of the table occurs on four shafts with a diameter of 10 mm, which are located in the corners, 8 mm screws with a thread pitch of 8 mm are responsible for moving the table up / down. To ensure a higher quality of work, anti-play nuts are installed on the table.
Two motors with belts drive the extruder. If necessary, the belts can be tightened. For this, a special hole for screws is provided near each motor, by screwing which the motor moves back, thereby tensioning the belt.
Even in the lowest position, under the table there is a large enough space that allows you to easily store various small things there.
The transparent plastic body of the extruder makes it easy to control the position of the rod during its installation.
After removing the basement cover, you can see the control board (MKS Robin Nano v1.3) and four removable TMC2225 drivers. Some surprise was delivered by the fact that the yellow sticker with the inscription WiFi is here for a reason. When looking at the inside of the cover, you can see that under the sticker the metal case has a window, and the antenna of the WiFi module is glued to the sticker itself.
I would like to note that in order to achieve a better result when printing, the air duct was replaced during operation.
Testing
When printing, the device uses advanced CoreXY kinematics, which provides the printer with excellent stability and print speed with a positioning accuracy of about 0.002 mm along the Z axis, and 0.01 mm along the X and Y axes. In fact, at the current time, CoreXY is one of the most advanced systems, due to the use of which the mass of moving parts is minimized, and as a result, vibrations are reduced. Flyingbear Reborn's printing layer thickness ranges from 0.05mm to 0.3mm, and the print speed can reach 150mm/s. The use of new, low-noise, high-precision TMC2225 drivers also has a positive effect on print accuracy. During operation, most of the noise is made by the fan, and not by the drivers, which are actually very quiet.
Flyingbear Reborn's extruder uses the proven and easy-to-maintain BMG transparent extruder with a maximum temperature of 260°C, making it easy to process PVC, ABS, PLA, TPU, and other filaments .
A powerful 40x20 radial fan is responsible for cooling, while the 370x325 mm print bed is capable of almost uniform heating in the range from 60 to 110 °C. The table is made of glass and equipped with a special coating to improve adhesion.
I would also like to note that FlyingBear Reborn has the ability to print objects from various sources. the device is equipped with a port for microSD memory cards, has USB-B (for connecting and printing from a personal computer), and is also equipped with a WiFi module, which allows you to send objects for printing by wireless transmission of information. The FlyingBear Reborn 3D printer supports the most popular formats such as STL, OBJ, DAE, AMF. The printer is controlled using a 3.5 inch touch screen with an intuitive interface.
To thread the printer with filament, the filament must be cut at an angle, after which it must be manually pushed up to the motor.
Special thanks for the low filament sensor and auto-resume feature after a power outage.
The table needs to be calibrated before printing. It is desirable to do this when the table reaches the operating temperature. In most cases it is 60 degrees. Calibration does not take much time and is a real pleasure, because. the lambs, mounted on the bottom surface of the table, spin easily and conveniently. The calibration procedure boils down to the fact that after selecting the appropriate menu section, the nozzle alternately moves to four points on the table, after the nozzle is set at a given point, it is necessary to insert a sheet of paper between the nozzle and the table surface and raise the table until the sheet is move with difficulty, and do not clamp the sheet too quickly. This procedure is repeated for four points.
Speaking about the operation of the device, I would like to note that the table warms up somewhat unevenly. The edges warm up much better than the cent.
This situation can be easily corrected by pressing the bottom thermoplate against the center of the glass (bottom).
The device was tested on stock settings. The objects have been written to the memory card.
This method is the simplest and most convenient in most cases, especially when it comes to printing large files. However, this is not the only way to print with this printer. The device can be connected to a personal computer via USB or WiFi. In this case, the Cura application is used, which is pre-configured to work with a specific device. Moreover, to print via WiFi, you need to install an additional plug-in, after which it becomes possible to control the printer from the application.
Once again returning to the print quality, you should pay attention to the fact that in the process of blowing the workpiece with a standard blowing system, the air is not directed to the workpiece, but in front of it, and this is wrong. For more correct operation, you need to download another air duct and glue it to the extruder fan, which, in fact, was done after a week of using the device with a standard cooling system.
Course for a young soldier. Or what problems an inexperienced user might face
Perhaps the very first problem that can be encountered with 3D printing is poor adhesion of the table surface. This is manifested in the fact that the filament is not fixed on the surface, but drags after the extruder, etc. There are several ways to solve this problem. One of them is to reduce the print speed (which is not entirely correct), and the second is to apply an additional layer on the surface of the table, which will provide a reliable adhesion to the filament. There are many different solutions, such as gluing masking tape, applying hairspray, but in our opinion, the most correct option is using BF-2 glue and isopropyl alcohol. In this case, it is necessary to mix these two ingredients in a ratio of 50 to 50, mix thoroughly, and then apply a thin layer on the surface of the table. Next, the table must be heated to operating temperature (about 100 degrees), and allowed to cool to room temperature. Now the hitch will be excellent and you can get to work.
The next step is to print a special calibration temperature scale (this must be done before each use of a new type of filament, or filament from another manufacturer). By printing this scale and looking at it, we can easily select the required temperature regime for each type of plastic.
Of course, there are many more difficulties with 3D printing, and at the stage of preparing the review they were, but we will talk about them in more detail in the following reviews.
Advantages
- Use of high precision, low noise TMC2225 drivers;
- Uniform table heating;
- Using a good fan on the printer bare;
- Powerful cooling fan;
- BMG transparent extruder;
- Print thickness 0.05 to 0.3 mm;
- Print speed up to 150 mm/s;
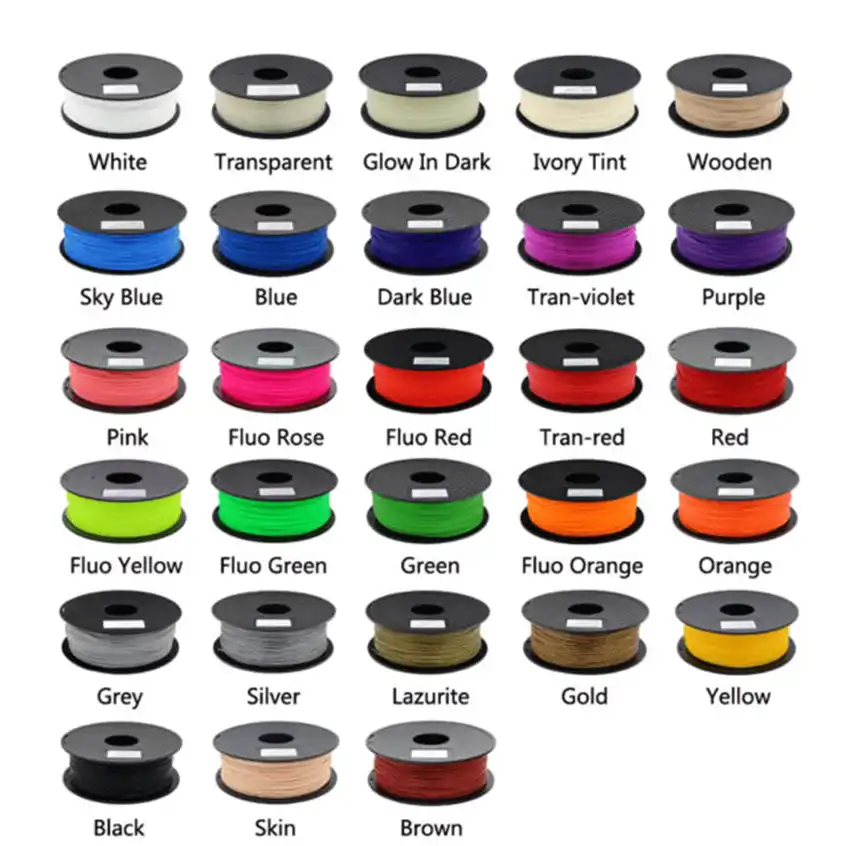
- Ability to work with PLA, ABS, TPU materials, as well as with PVC and other types of filament;
- End of filament sensor;
- Function to automatically resume printing in the event of a sudden power outage.
Learn more