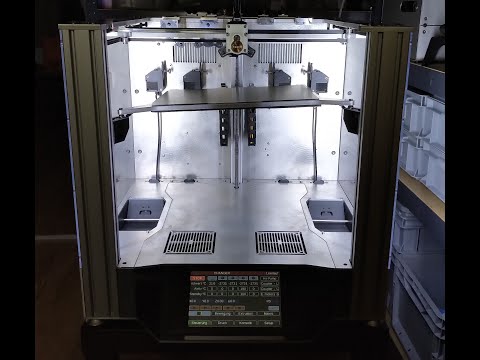
3D printer tool changer
ToolChanger & Motion System Bundle – E3D
Loading product options...
- Product description
- Documentation
- Reviews
- Related products
Please note, this bundle does not include Tools, Extruders or PTFE, for a full 4 tool machine you'll need to purchase those separately, please see links below:
4 x 1.75mm Tools
80 units x Bowden PTFE Tubing
24V Hemera Extruders (only for Bowden tools, our Direct tools include extruders)
The lead screw has been updated to feature a 4mm pitch.
Motion system
A Fabtotum inspired CoreXY Motion system provides a fast, precise, and sturdy platform. With no flying motors, no crossed belt paths, and an incredibly lightweight moving mass.
The Motion System is built for high speeds and quick accelerations. Moon’s motors and Genuine Gates 2GT Belts produce fast, reliable and longer-lasting performance.
To ensure the high accuracy of the Motion System the three main axes come pre-assembled, allowing for a simple assembly experience with no additional need to tension.
ToolHead
The ToolChanger ToolHead is the core mechanical component of the tool changing system. Bolting directly onto the Motion System’s X-Carriage it provides the pickup and drop-off action enabling the use of different ToolHeads using the standardised E3D tool plate.
Electronics
The Duet2 wiring kit provides a neatly managed, plug & play solution for running the Motion System, ToolChanger ToolHead and up to four V6 Bowden HotEnd Tools. Whilst designed for the Duet2 WiFi / Ethernet in mind, it should be generally applicable to any microcontroller capable of controlling four tools.
Please note:
The 400W ToolChanger power supply is not suitable for use with the E3D Varipower bed, if you do plan on using a Varipower bed you will need to source a higher wattage power supply.
Motion System Key Features:
- CNC milled aluminium top-plate.
- CoreXY Fabtotum-style motion system.
- Genuine Hiwin rails & carriages.
- Genuine Gates belts, pulleys & idlers.
- Partially assembled.
- 200mm x 300mm x 300mm build volume.
ToolChanger ToolHead Key Features:
- Six-point exact-constraint kinematics.
- High-tension spring locking mechanism.
- Integrated Z-Axis endstop.
High-Temperature Heated Bed Key Features:
- 110VAC or 240VAC (depending on region)
- Max operating temperature: 200°C
- 3mm aluminium plate (Alloy: 6000 series)
- 104-GT2 thermistor
Kit includes:
- 1 x Motion system
- 1 x Duet wiring pack
- 1 x ToolChanger ToolHead
- 1 x 4 mm borosilicate glass 314 x 264 mm
- 1 x DueX5
- 1 x SSR
- 1 x High temperature Heated bed 110V or 240V
- 1 x Duet main board WiFi or Ethernet
- 1 x 24V switching power supply
- 10 x Swiss clips
Documentation
ToolChanger & Motion System Assembly
View article
ToolChanger & Motion System CAD
View article
Customer reviews
ToolChanger & Motion System Bundle inc Tools & Hemera Extruders – E3D
Loading product options. ..
..
- Product description
- Documentation
- Reviews
- Related products
PLEASE NOTE - Printed parts are not included in the bundle, you will need to print them, files can be found here.
The lead screw has been updated to feature a 4mm pitch.
Duet Control Options:
WiFi: Remotely connect to your ToolChanger via Computer, Laptop, or Tablet.
Ethernet: Is your machine in a garage or shed with an unstable WiFi signal? Ensure a reliable connection by hardwiring your computer or laptop to your ToolChanger.
Tool Options:
Direct: Leverage the full power of Hemera with direct drive toolheads, providing top class filament control with short filaments paths and uncompromising grip with dual drive hobbs. Perfect for challenging materials such as TPE's and TPU's
Bowden: Do you need lightweight tools for super-fast speeds with no vibration artefacts such as ringing? Opt for the Bowden setup for powerful reliable extrusion from Hemera extruders paired with lightweight V6 toolheads.
Motion system
A Fabtotum inspired CoreXY Motion system provides a fast, precise, and sturdy platform. With no flying motors, no crossed belt paths, and an incredibly lightweight moving mass.
The Motion System is built for high speeds and quick accelerations. Moon’s motors and Genuine Gates 2GT Belts produce fast, reliable and longer-lasting performance.
To ensure the high accuracy of the Motion System the three main axes come pre-assembled, allowing for a simple assembly experience with no additional need to tension.
ToolHead
The ToolChanger ToolHead is the core mechanical component of the tool-changing system. Bolting directly onto the Motion System’s X-Carriage, it provides the pickup and drop-off action, enabling different ToolHeads using the standardised E3D tool plate.
Electronics
The Duet2 wiring kit provides a neatly managed plug & play solution for running the Motion System, ToolChanger ToolHead and up to four V6 Bowden HotEnd Tools. Whilst designed for the Duet2 WiFi / Ethernet in mind, it should be generally applicable to any microcontroller capable of controlling four tools.
Please note:
- The 400W ToolChanger power supply is not suitable for use with the E3D Varipower bed, if you do plan on using a Varipower bed, you will need to source a higher-wattage power supply.
- Printed parts are not included in the bundle. You will need to print them, files can be found here.
- The lead screw has been updated to feature a 4mm pitch.
Motion System Key features:
- CNC milled aluminium top-plate.
- CoreXY Fabtotum-style motion system.
- Genuine Hiwin rails & carriages.
- Genuine Gates belts, pulleys & idlers.
- Partially assembled.
- 200mm x 300mm x 300mm build volume.
ToolChanger ToolHead Key Features:
- Six-point exact-constraint kinematics.
- High-tension spring locking mechanism.
- Integrated Z-Axis endstop.
High-Temperature Heated Bed Key Features:
- 110VAC or 240VAC (depending on region)
- Max operating temperature: 200°C
- 3mm aluminium plate (Alloy: 6000 series)
- Thermistor
Motion System Includes:
- 1 x Motion system
- 1 x Duet wiring pack
- 1 x ToolChanger ToolHead
- 1 x 3 mm borosilicate glass 300 x 200 mm
- 1 x DueX5
- 1 x SSR
- 1 x High temperature Heated bed 110V or 240V
- 1 x Duet Main board WiFi or Ethernet
- 1 x 24V switching power supply
- 10 x Swiss clips
Direct Hemera Tool Kit bundle includes:
- 1 x Motion system
- 1 x Duet wiring pack
- 1 x ToolChanger ToolHead
- 4 x Hemera tool upgrade kits
- 4 x Hemera extruders (24V)
- 80 x Units of PTFE
- 1 x 4 mm borosilicate glass 300 x 200 mm
- 1 x DueX5
- 1 x SSR
- 1 x High temperature Heated bed 110V or 240V
- 1 x Duet main board WiFi or Ethernet
- 1 x 24V switching power supply
- 10 x Swiss clips
Bowden V6 Tool Kit bundle includes:
- 1 x Motion system
- 1 x Duet wiring pack
- 1 x ToolChanger ToolHead
- 4 x V6 bowden tools
- 4 x Hemera extruders
- 80 x Units of PTFE
- 1 x 4 mm borosilicate glass 300 x 200 mm
- 1 x DueX5
- 1 x SSR
- 1 x High temperature Heated bed 110V or 240V
- 1 x Duet main board WiFi or Ethernet
- 1 x 24V switching power supply
- 10 x Swiss clips
Documentation
ToolChanger & Motion System Assembly Instructions
View article
ToolChanger & Motion System Firmware
View article
ToolChanger & Motion System CAD
View article
Customer reviews
Are extruders the only possible tool change tool?
Changing tools in 3D printers is no longer something avant-garde; it spreads. E3D offers a high quality tool changer and motion system kit, our very own Joshua Vasquez shared details on the Jubilee open source tool changer design, and most recently Prusa3D officially announced the Prusa XL which promises tool change with up to five different extruders.
It's safe to say that 3D printer tool change has come to the fore, but what's next? What tools other than extruders are suitable for a 3D printer?
First, let's explain what makes individual extruders great tools. The ability to change extruders on demand while printing allows you to do things like real multi-material printing. Printing with multiple colors or materials will no longer be done by pushing different filaments through the same nozzle, which limits printing to materials that are extruded under the same conditions and temperatures. Changing tools really means being able to print on multiple materials, even if they have different requirements, because each material has its own extruder.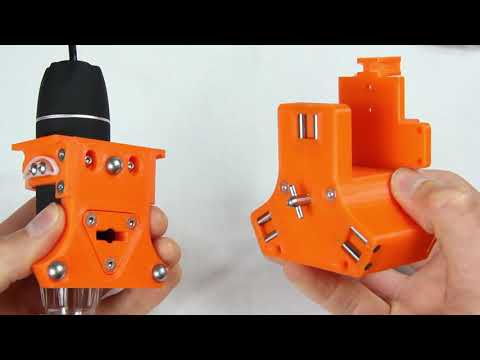 This is an obvious advantage, but what about tools other than extruders?
3D printers are often modified to do more
Cutting tools and lasers are two common 3D printer modifications that could probably be tool replacement candidates, but they are not without problems. Lasers require eye protection and ventilation, and cutting tools create nasty dust and debris. However, over the years we have seen quite a few 3D printers modified into lightweight laser cutters or converted into CNC engravers. It doesn't end there; we've seen an extruder inserting copper wire into prints, and even printers being turned into through-hole soldering machines.
As smart as they are, some just reuse the 3D printer for something else, and the results have little to do with extruding plastic to create objects. But others seem to be really focused on improving the 3D printing process by adding new features and could be interesting candidates for 3D printer tool changers. But which ones are practical?
The best tools may be the ones we haven't seen yet
Probably the most useful tools are those that help the 3D printer do its job better or more efficiently. For example, E3D has demonstrated quite clearly that a cutting tool as a secondary processing step can add real value to 3D printing under the right conditions.
Another example of improving prints is ironing, which uses an extruder nozzle to smooth the surface of prints. When it works, it looks fantastic, but since this link explains reliability, results may vary. Maybe a special tool specifically designed for ironing can smooth out prints more reliably and efficiently than an extrusion nozzle? Such a tool can even come in handy for embossing prints.
A more ambitious goal would be to find a tool that can throw material such as nuts or magnets at the print as it is being made. 3D prints containing hidden material no longer require the participation of a human operator; a boon for using 3D printers in a production role.
Of course, the possibilities are not endless. The tool will be limited to a certain size and shape, and the frame and design of the 3D printer will also play a role in what is feasible. For example, a cutting tool requires the machine to press the tool into the workpiece, but such force is not required to move the extruder during 3D printing. The capabilities of the machine may limit what can be done with the tool. But the enthusiasm with which hackers have been doing it so far makes me suspect that there is much more to where it all came from.
Do tools other than extruders make sense?
Perhaps the robust and open tool change will not only bring the feeling of working with multiple materials to the desktop. Perhaps his real contribution will be that he will continue to encourage hackers to enthusiastically experiment with modifying 3D printers and bring about things that we have not even seen yet. In the meantime, extruders seem to be enough to worry about.
What is your experience with changing tools? Are things like pens, lasers, and cutters on a 3D printer just a gimmick, or can they really enhance and enhance the job of making useful plastic parts? We're listening, so let us know what you think in the comments.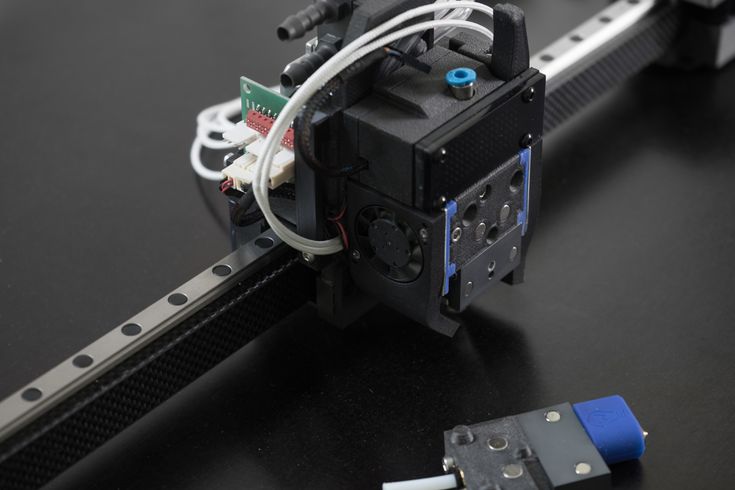
Custom 3D printer with ToolChanger (Part 2)
Hello everyone.
In one of my previous posts, I talked about my 3D printer with ToolChanger. A year and a half has passed since then (how time flies). Now I would like to share my impressions of the operation of this design, as well as talk about the modifications that have been made during this time, and the results of their implementation.
First of all, there are no complaints during operation. Everything works clearly and without problems. The heads are removed without errors, the positioning of the table does not go astray (even automatic compensation for unevenness of the table is not needed). This is very good, because the calibration of the table is doubly important for a printer with interchangeable print heads (PH). The only thing that was planned to be modified initially was the design of the print head and the type of print head lock mechanism.
Both of these modifications were made at the same time.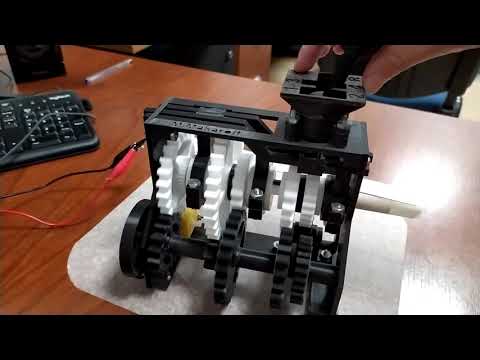 I really wanted to try a cable drive as a locking mechanism. More details about this design can be found in the project https://www.thingiverse.com/thing:3805144. I took it as a basis, slightly altered. I posted a video about the operation of this system in the last topic, just in case I will duplicate it.
As for the operation of the cable drive itself, I can say that it is quite working, no failures were noticed. But still, I liked him less than the server. This is due to the massiveness of the drive itself on the frame (motor plus pulleys with limit switches inside), as well as the peculiarity of the operation of this mechanism (Figure 1). The fact is that the force of pressing the head to the carriage in it is regulated by a spring wound on the pulleys, and this spring, as for me, does not provide such a good pressure as a servo. Plus, in a mechanism with a servo, this pressure could be easily adjusted, and in a wide range.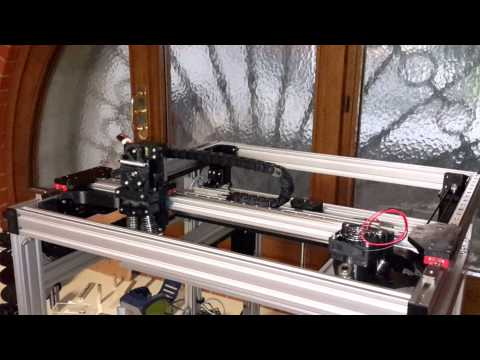 If the head is heavier than it is now, it may not be possible to securely attach it to the carriage.
Figure 1 – Drive of the SG locking cable mechanism.
Also redid the print head. This time, the possibility was considered to abandon the standard E3D hotend, and make the radiator combined with the blocking mechanism in one piece. In principle, such a head also worked perfectly without any complaints.
Figure 2 – Milled part of PG.
As a result, in the Direct modification, I decided to return to the server and the standard E3D hotend. Well, now, in fact, more about this modification.
ToolChanger: Direct Drive version
Since the rest of the printer components work fine for me, the modification only affected the X-axis carriage and the print head. They will be discussed.
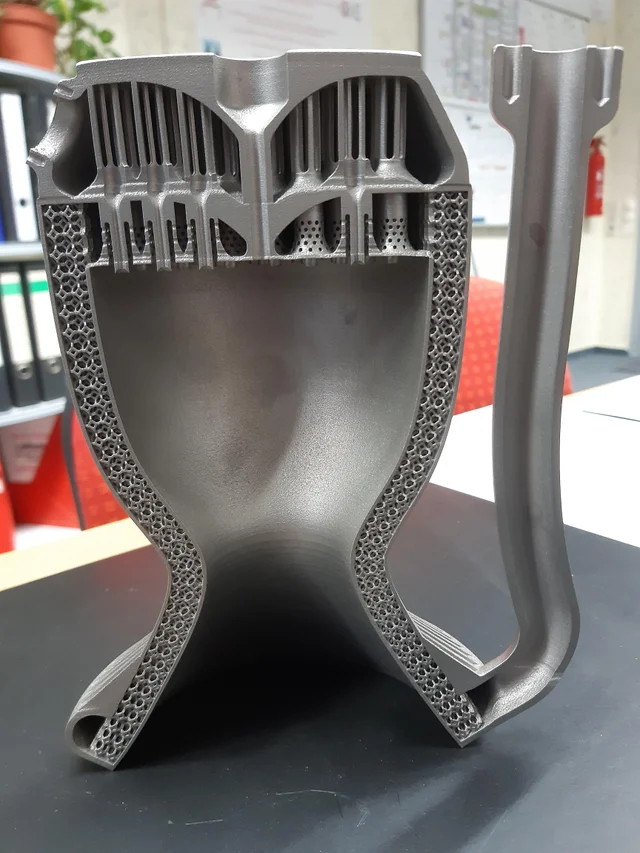
E3D developed a special head with Direct filament feed for its concept, calling it Hemera (not to be confused with Himera).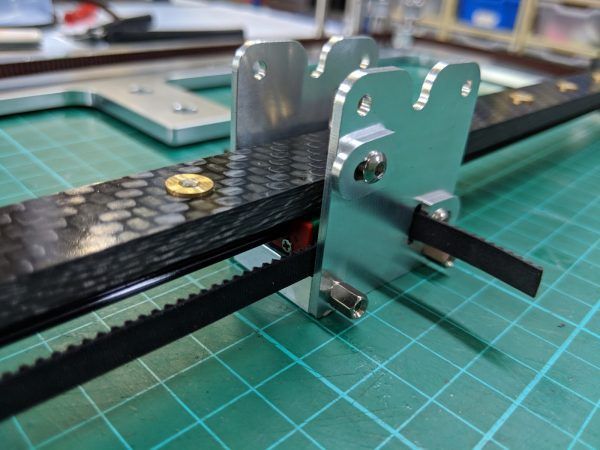 The bottom line is that the extruder is part of the motor, and for the motor, all this is attached to the head. Personally, I don’t really like the idea of \u200b\u200bfencing the motor on a replaceable head. But in the concept of the E3D multifunctional device, where a replaceable head can have either a PG, or a milling cutter, or a laser, or something else, such a variant of the head is justified.
Figure 3 - E3D Hemera Direct Drive Hotend
details. I took the rear milled part from the first version, the front one was completely designed from scratch.
Figure 4 - Milled carriage and head parts
Figure 5 - Front and rear X-axis bottom bracket assembly.
Otherwise, the design of the carriage is the same as in the first version. Except that it now houses the extruder motor. Well, and all the wires going to the carriage are now laid in the cable channel. I took an average NEMA 17 motor in size, its weight is about 250 grams.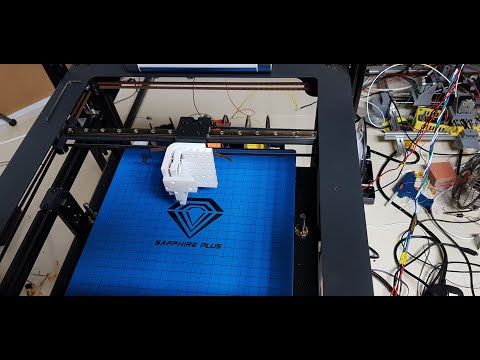 In principle, you can try the smallest size of the motor, if it does not skip steps.
Figure 6 - X-axis carriage assembly.
As for the design of the PG, now each of them is a standard BMG Extruder and E3D V6 hotend, which were used in the first version of the printer. I redid the milled part, but took a replaceable locker from the first model - a part that engages with a shaft with a pin of the locking mechanism. And now, as it turned out, the manufacture of this part separately was a very good decision. And you can change it if it suddenly wears out, and you don’t need to make it every time you change the design of the head.
Figure 7 - Milled part of the PG assembly and locker.
Fans for blowing the hot end and the printed model with air ducts, as well as the head fixation system on the docking station, are attached to the printed part. The weight of the head assembly is 255 grams.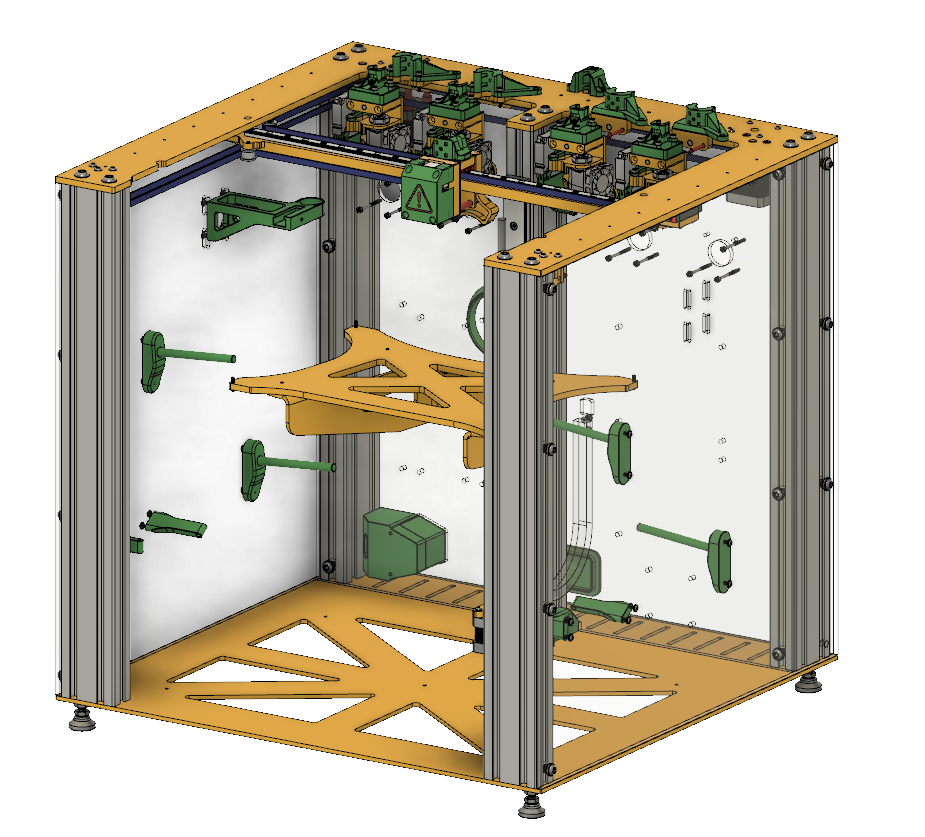
Figure 8 - Appearance of the print head.
Figure 9 – Print head weighing.
The principle of capturing the head remains the same as in the first version. But there is a peculiarity in the design with Direct drive. Those who assembled the BMG extruder probably know that the gaps in the gears on the shaft of the motor and the driven extruder are minimal and there is no backlash. In the design of the change of heads, which I did, an unpleasant situation can arise when the carriage tries to grab the head. Namely, the gear of the motor shaft can rest against the driven gear of the extruder with all the ensuing consequences - skipping steps along the Y axis, false head capture and, as a result, damaged printing. To avoid such situations, the design of the head seat on the docking station was made in the form of a special profile with a spring-loaded element, and the position of the head on the docking station was 1 mm lower than its design position on the carriage. Thus, when capturing the head, the gears engage with a gap of 1 mm, which excludes their contact, and when the fixing shaft is turned, the head is attracted to the carriage in two directions simultaneously - along the Y axis and along the Z axis. In this case, the gears do not engage in longitudinal direction, but in the transverse direction.
After all the necessary settings, I naturally started printing. And already on this option I decided to try full-fledged color printing. Prior to that, I had practically never printed anything multicolored. And faced with an unexpected moment. Namely, the Cura slicer in multi-color printing prints a cleaning tower for all extruders that are in the printer, even if the extruder is disabled in the program itself. Because of this, it is not possible to properly clean the nozzle when changing the head with all the consequences. While the head is at the station, plastic leaks a little from it and then this snot gets on the model. Also, due to leaked plastic, there is a local underflow on the model at the start of printing.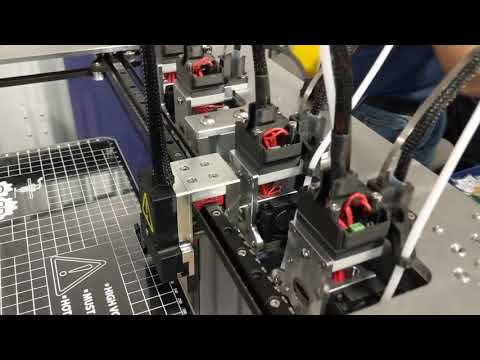 In general, I will deal with the settings of the slicer, or I will make a system for mechanical cleaning of the nozzle - it has been asking for a long time already, but still my hands do not reach.
The second problem I encountered was the servo. During multi-color printing, there is a frequent change of tool, respectively, a large load on the servo with frequent switching. So, printing a colored lizard, a cheap serva died. It died gradually - losing power, and as a result, in one of the switching cycles, it simply could not capture its head. The problem was solved by replacing the servo with a more powerful one. It was not easy to find one in this format. There is also the same one, but for 10 kg, I will take a reserve just in case.
Figure 10 - New servo.
I immediately filmed a video of the work. The principle of operation remains the same as before.
But now it's a direct extruder.