Fdm 3d printer definition
Compare Filament and Resin 3D Printers
The 3D printing and additive manufacturing market has undergone rapid change in recent years. No longer primarily the domain of hobbyists, highly capable desktop machines have developed into essential tools for businesses. After becoming the go-to tool for prototyping and product development, 3D printing use has expanded across manufacturing, dentistry, jewelry, and much more.
Fused deposition modeling (FDM) and stereolithography (SLA) are the two most popular types of 3D printers on the market. Both 3D printing technologies have been adapted and refined for the desktop, making them more affordable, easier to use, and more capable.
In this comprehensive buyer's guide, we take a closer look at FDM and SLA 3D printers (also known as filament and resin 3d printers), and how they compare in terms of print quality, materials, applications, workflow, speed, costs, and more, to help you decide which technique is ideal for your business.
Video Guide
Having trouble finding the best 3D printing technology for your needs? In this video guide, we compare FDM, SLA, and SLS technologies across popular buying considerations.
Watch the Videos
Fused deposition modeling (FDM), also known as fused filament fabrication (FFF), is the most widely used type of 3D printing at the consumer level. FDM 3D printers work by extruding thermoplastic filaments, such as ABS (Acrylonitrile Butadiene Styrene), PLA (Polylactic Acid), through a heated nozzle, melting the material and applying the plastic layer by layer to a build platform. Each layer is laid down one at a time until the part is complete.
Watch how FDM 3D printing works.
FDM 3D printers are well-suited for basic proof-of-concept models, as well as quick and low-cost prototyping of simple parts, such as parts that might typically be machined.
Stereolithography was the world’s first 3D printing technology, invented in the 1980s, and is still one of the most popular technologies for professionals. SLA 3D printers use a laser to cure liquid resin into hardened plastic in a process called photopolymerization.
See how SLA 3D printing works.
SLA resin 3D printers have become vastly popular for their ability to produce high-accuracy, isotropic, and watertight prototypes and parts in a range of advanced materials with fine features and smooth surface finish. SLA resin formulations offer a wide range of optical, mechanical, and thermal properties to match those of standard, engineering, and industrial thermoplastics.
Resin 3D printing a great option for highly detailed prototypes requiring tight tolerances and smooth surfaces, such as molds, patterns, and functional parts. SLA 3D printers are widely used in a range of industries from engineering and product design to manufacturing, dentistry, jewelry, model making, and education.
White Paper
Looking for a 3D printer to realize your 3D models in high resolution? Download our white paper to learn how SLA printing works and why it's the most popular 3D printing process for creating models with incredible details.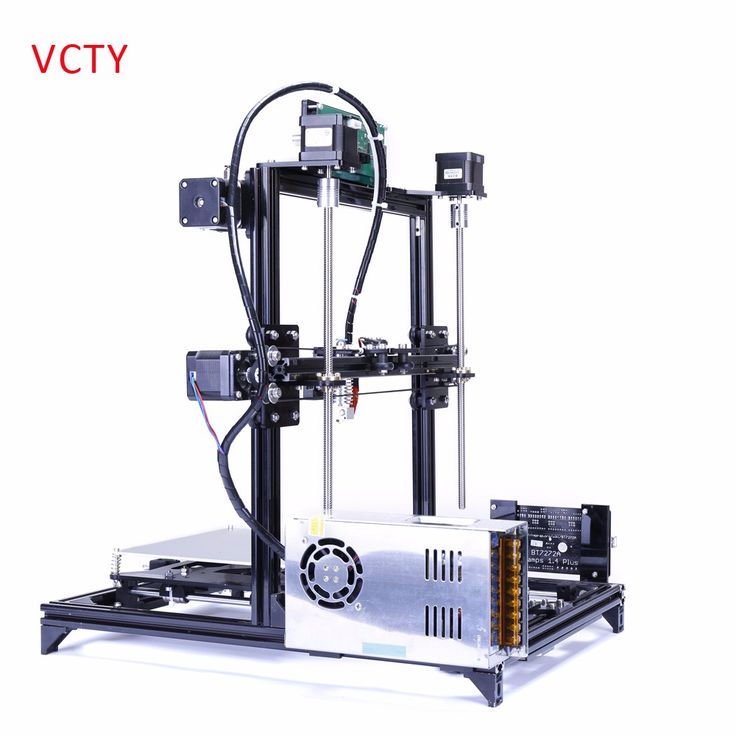
Download the White Paper
When additive manufacturing processes produce parts layer by layer, each layer also introduces an opportunity for inaccuracy. The process by which layers are formed affects the surface quality, level of precision, and the accuracy of each layer, and consequently, the overall print quality.
FDM 3D printers form layers by depositing lines of molten material. With this process, the resolution of the part is defined by the size of the extrusion nozzle and there are voids in between the rounded lines as the nozzle deposits them. As a result, layers may not fully adhere to one another, layers are generally clearly visible on the surface, and the process lacks the ability to reproduce intricate details that other technologies can offer.
In SLA 3D printing, liquid resin is cured by a highly-precise laser to form each layer, which can achieve much finer details and is more reliable to repeatedly achieve high-quality results. As a result, SLA 3D printing is known for its fine features, smooth surface finish, ultimate part precision, and accuracy.
Accuracy, precision, and tolerance in 3D printing are complex and often misunderstood terms. Learn more about their meaning to better understand 3D print performance.
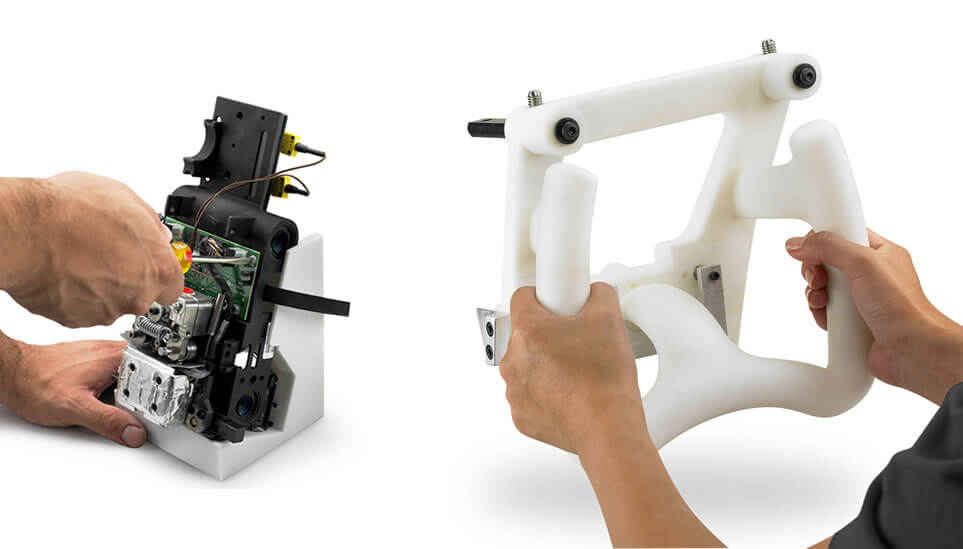
SLA parts have sharp edges, sleek surfaces, and minimal visible layer lines. This example part was printed on the Formlabs Form 3 desktop SLA 3D printer.
The use of light instead of heat for printing is another way SLA printers guarantee reliability. By 3D printing parts at close to room temperature, they don't suffer from thermal expansion and contraction artifacts, which can happen during the FDM printing process.
Thanks to the highly precise laser, SLA 3D printers are better for manufacturing complex parts (FDM part on the left, SLA part on the right).
While FDM printers produce a mechanical bond between layers, SLA 3D printers create chemical bonds by cross-linking photopolymers across layers, resulting in fully dense parts that are water and airtight. These bonds provide high degrees of lateral strength, resulting in isotropic parts, meaning that the strength of the parts does not change with orientation. This makes SLA 3D printing especially ideal for engineering and manufacturing applications where material properties matter.
The difference in quality is less visible on relatively simple parts. However, SLA parts are dense and isotropic, which makes them better suited for many engineering and manufacturing applications (FDM part on the left, SLA part on the right).
Sample part
See and feel Formlabs quality firsthand. We’ll ship a free sample part to your office.
Request a Free Sample Part
Plastic extrusion 3D printers work with a range of standard thermoplastic filaments, such as ABS, PLA, and their various blends. The popularity of FDM 3D printing in the hobbyist space has led to an abundance of color options. Various experimental plastic filaments blends also exist to create parts with wood- or metal-like surface.
Engineering materials, such as Nylon, PETG, PA, or TPU and high-performance thermoplastics like PEEK or PEI are also available, but often limited to selected professional FDM printers that support them.
FDM filaments and blends offer various color options. (source: All3DP.com)
SLA resin materials have the benefit of a wide range of formulation configurations: they can be soft or hard, heavily filled with additives like glass and ceramic, or imbued with mechanical properties like high heat deflection temperature or impact resistance. Various resin formulations offer a wide range of optical, mechanical, and thermal properties to match those of standard, engineering, and industrial thermoplastics.
SLA 3D printers offer diverse materials for engineering and manufacturing applications.
In some cases, it’s this combination of versatility and functionality that leads to companies to initially bring SLA 3D printing in-house. After finding one application solved by a specific functional material, it’s usually not long before more possibilities are uncovered, and the printer becomes a tool for leveraging the diverse capabilities of various materials.
Some material properties that are unique to SLA include:
SLA is the only 3D printing technique that can produce transparent parts on the desktop. Ideal for getting visibility into complex assemblies, (micro)fluidics, mold making, optics, lighting, and any parts requiring translucency.
Learn More
Parts printed in this material look and behave like a molded silicone part, and are durable enough to use for multiple cycles.
Learn More
Offers a heat deflection temperature (HDT) of 238 °C @ 0.45 MPa, the highest heat resistance of any material in desktop 3D printing.
Learn More
A 20% wax-filled material for direct investment casting and pressing for dental and jewelry applications.
Learn More
Specialized materials for dental applications like biocompatible surgical guides, splints, fixed patterns and models, clear aligner models, and full dentures.
Learn More
3D print parts with a stone-like finish and fire them to create a fully ceramic piece.
Learn More
Interactive
Need some help figuring out which 3D printing material you should choose? Our new interactive material wizard helps you make the right material decisions based on your application and the properties you care the most about from our growing library of resins.
Recommend Me a Material
See how to go from design to 3D print with the Form 3+ SLA 3D printer. This 5-minute video covers the basics of how to use the Form 3, from the software and materials to printing and post-processing.
The workflow for both FDM and SLA 3D printing consist of three steps: designing, 3D printing, and post-processing.
First, use any CAD software or 3D scan data to design a model, and export it in a 3D printable file format (STL or OBJ). 3D printers then require print preparation or slicer software to specify printing settings and slice the digital model into layers for printing.
Low-cost FDM or SLA 3D printers are not really user friendly and often require many hours of tweaking and experimenting to dial-in the correct print settings. Still, the results might change with each new design or material and the chance of failed prints remains high. This not only delays projects, but can also lead to messy failures that require a lengthy cleanup process.
Professional SLA 3D printers, like the Form 3, and some other professional FDM printers come with their own proprietary software and predefined settings for each material that have been thoroughly tested to ensure the highest print success rate.
Setting up prints with advanced print preparation tools like PreForm is plug and play. PreForm is a free download, try it now.
Once the 3D printing process begins, most 3D printers can run unattended, even overnight, until the print is complete. Advanced SLA 3D printers like the Form 3 offer a cartridge system, that refills the material automatically.
The final step of the workflow is post-processing. SLA parts require rinsing in isopropyl alcohol (IPA) or alternative solvents to remove any uncured resin from their surface. Using the standard workflow, this involves first removing parts from the build platform, then manually soaking them in a bath of solvent to clean off excess resin.
Professional solutions such as the Form Wash automate this process. Parts can be transferred directly from the printer to Form Wash, which agitates the solvent around the parts to clean them and automatically raises parts out of alcohol bath when the process is finished.
After rinsed parts dry, some SLA materials require post-curing, a process which helps parts to reach their highest possible strength and stability.
The FDM process has the benefit that it doesn’t require cleaning; unsupported finished parts are ready for use or further post-processing once the printing process is complete.
Both FDM and SLA processes use support structures to facilitate 3D printing more complex geometries and their removal represents the last step in post-processing.
Supports on FDM parts need to be manually torn away or dissolved in water, depending on the support material.
Supported FDM prints require additional post-processing to achieve a high-quality finish (source: 3D Hubs).
Support removal for SLA parts requires cutting away the support structures and lightly sanding the parts to remove support marks. Formlabs’ Low Force Stereolithography (LFS)™ technology offer light-touch supports, which allow an entire object to be torn away from its support base in seconds, leaving minimal markings and reducing time spent post-processing.
When further post-processing is required, both FDM and SLA parts can be machined, primed, painted, and assembled for specific applications or finishes. FDM parts, however, require additional sanding before priming or painting and need higher infill levels to be machined or bored.
Webinar
In this webinar, Matt Lewis and Ricky Hopper walk you through an overview of the improved SLA line, and give a hands on demo of the new products.
Watch the Webinar Now
How much does an FDM or SLA 3D printer cost and how much time and cost can you actually save with it for your business? Calculating cost per part requires accounting for the costs of equipment ownership, material, and labor.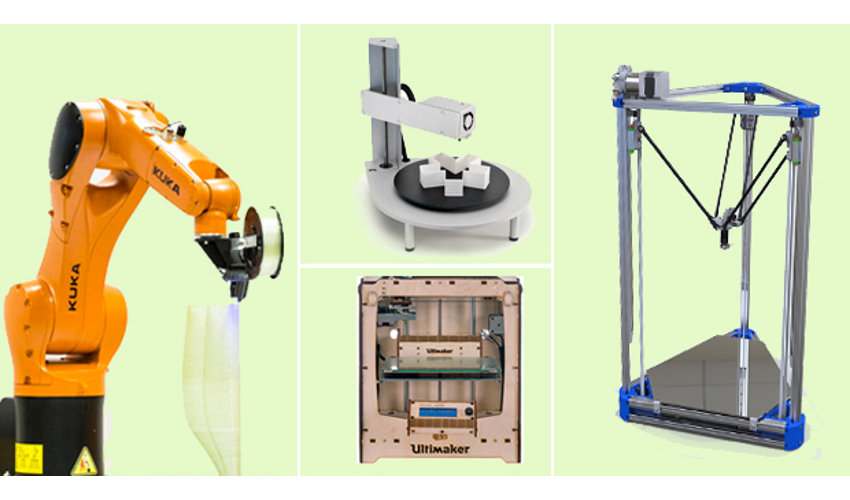 It’s helpful to understand the factors that influence each of these cost components, and the questions to ask to evaluate alternative production methods and uncover hidden costs.
One of the main selling points for FDM 3D printers is the low machine cost. With entry-level FDM printers available for only a few hundred dollars, hobbyists and small businesses can try FDM to see if 3D printing is something worth adding to their toolset. For those unsure of where to start, the lower cost of an entry-level FDM machine is often persuasive enough to justify a purchase. However, these low-cost FDM printers can be unreliable and often require an expert to keep running in the long term.
Professional desktop FDM printers are easier to use and more tailored to businesses, with prices ranging from $2,000-$8,000. These 3D printers generally provide better reliability, higher print quality, and larger build volumes. While these machines are suitable for producing functional parts, competition at this price point is fierce, as SLA machines offer a wider range of applications and better quality prints.
SLA 3D printers start around $3,750 with Formlabs offering the only accessible large SLA 3D printer solution starting at $11,000.
In terms of materials, FDM filaments are also relatively low cost compared to materials for other 3D printing technologies. Common FDM materials like ABS, PLA, and their various blends generally start around $50/kg, while specialized FDM filaments for engineering applications can be $100-150/kg. Soluble support materials for dual extrusion FDM 3D printers sell for $100-200/kg. In comparison, most standard and engineering resins for SLA 3D printers cost $149-$200/L.
Labor costs are the final—often forgotten—part of the equation. For simple designs that require no supports to print, FDM requires almost no post-processing. Supported FDM prints and parts that require a high-quality finish, however, require lengthy manual post-processing.
SLA parts require washing and, depending on the material, also post-curing, but both of these processes can be mostly automated with accessories to minimize labor time.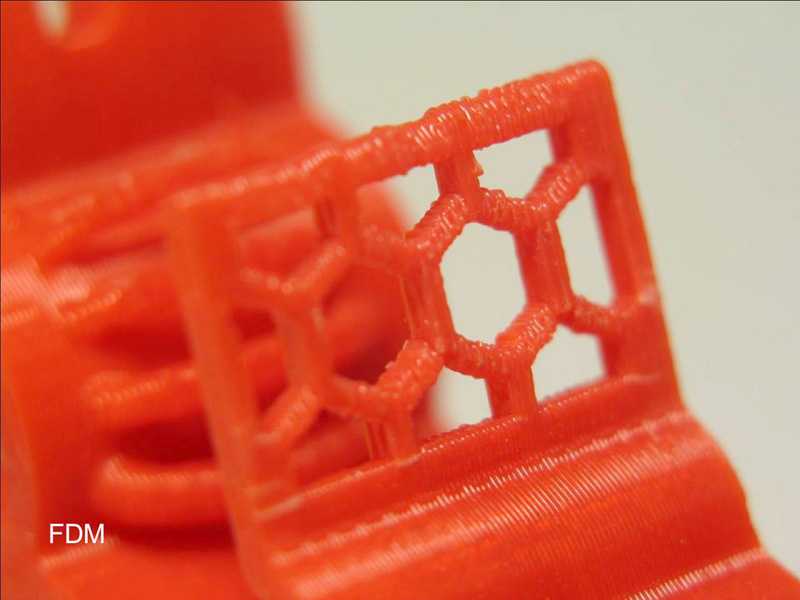 Supported SLA prints only require a bit of sanding to remove support marks and achieve a high-quality finish.
As a rule of thumb, FDM 3D printers will create the cheapest parts if you’re printing only relatively simple prototypes in limited numbers. SLA resin 3D printers offer higher resolution, better quality, and a wide variety of 3D printing materials at a slight premium, but the difference quickly diminishes when you print complex designs or larger batches due to the less labor-intensive post-processing.
Interactive
Try our interactive ROI tool to see how much time and cost you can save when 3D printing on Formlabs 3D printers.
Calculate Your Savings
Draft Resin is a fast-printing SLA material that can create parts up to 5-10X faster than FDM 3D printers. With a 200-micron layer height, Draft Resin is accurate enough to meet prototyping needs while enabling faster design iterations. Larger models that take up most of the build volume of an SLA printer (around a 15 cm cube) take only around nine hours to print with Draft Resin. Printing the same part at 200-micron layers on an FDM printer can take 80-90 hours. This is ideal for applications like rapid prototyping, where it allows users to quickly evaluate success and move on to another print or project.
FDM and SLA printing speed becomes comparable when printing parts at similar layer heights with other materials. But note, that a part printed at 100-micron layers on an FDM printer looks vastly different from a part printed at 100-micron layers on an SLA printer, because of the way the layers are built. Achieving comparable quality with FDM parts will require lower layers height —thus two to four times longer printing time— or significant and time-consuming post-processing to improve surface finish.
Webinar
Looking to learn more? Listen to the product managers who helped develop Draft Resin materials in this on-demand webinar.
Watch the Webinar Now
One area where FDM printers traditionally reigned used to be build volume.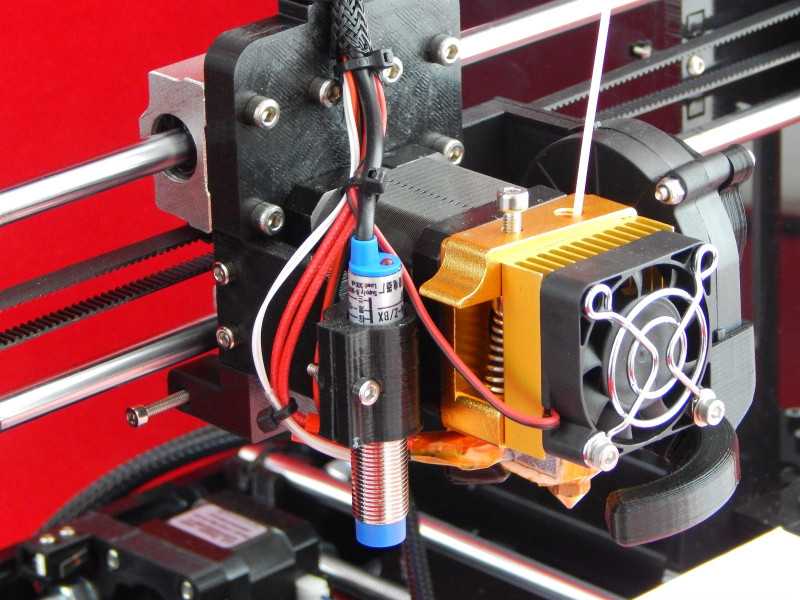 Due to the differences in technology, developing larger FDM machines is less complex. There are numerous larger FDM solutions on the market for applications that require 3D printing bigger parts.
The inverted SLA process behind desktop SLA printers reduces footprint and cost, but heightened peel forces introduce limitations around materials and build volume, and larger parts require sturdy support structures to print successfully.
With the introduction of the Low Force Stereolithography (LFS) print process that powers the Form 3 and Form 3L, Formlabs has completely re-engineered our approach to resin-based 3D printing to drastically reduce the forces exerted on parts during the print process. Uniform linear illumination and the low forces from the flexible tank mean Low Force Stereolithography technology can seamlessly scale up to a larger print area built around the same powerful print engine.
The first affordable large format resin printer, the Form 3L delivers large parts fast, using two staggered light processing units (LPUs) that work simultaneously along an optimized print path. Delivering a build volume five times larger than current SLA printers, the Form 3L removes size restrictions that sometimes hinder workflows on smaller desktop devices, while maintaining a competitive price point.
The Form 3L offers five times larger build volume than current SLA printers while maintaining a competitive price point.
Webinar
Want to learn more about the Form 3L and Form 3BL ecosystem, and the new large format post-processing machines?
In this demo, Kyle and Chris will expain how to navigate the Form 3L end-to-end workflow, including post-processing.
Watch Now
Each 3D printing technology has its own strengths, weaknesses, and requirements, and is suitable for different applications and businesses. The following table summarizes some key characteristics and considerations when comparing resin vs. filament 3D printers.
| Fused Deposition Modeling (FDM) | Stereolithography (SLA) | |
|---|---|---|
| Resolution | ★★☆☆☆ | ★★★★★ |
| Accuracy | ★★★★☆ | ★★★★★ |
| Surface Finish | ★★☆☆☆ | ★★★★★ |
| Throughput | ★★★☆☆ | ★★★★☆ |
| Complex Designs | ★★★☆☆ | ★★★★☆ |
| Ease of Use | ★★★★★ | ★★★★★ |
| Pros | Low-cost consumer machines and materials Fast and easy for simple, small parts | Great value High accuracy Smooth surface finish Fast printing speeds Range of functional applications |
| Cons | Low accuracy Low details Limited design compatibility | Sensitive to long exposure to UV light |
| Applications | Low-cost rapid prototyping Basic proof-of-concept models | Functional prototyping Patterns, molds, and tooling Dental applications Jewelry prototyping and casting Modelmaking |
| Price | Budget printers and 3D printer kits start at a few hundred dollars. Higher quality mid-range desktop printers start around $2,000, and industrial systems are available from $15,000. Higher quality mid-range desktop printers start around $2,000, and industrial systems are available from $15,000. | Professional desktop printers start at $3,750, large-format benchtop printers at $11,000, and large-scale industrial machines are available from $80,000. |
| Print Volume | Up to 300 x 300 x 600 mm (desktop and benchtop 3D printers) | Up to 300 x 335 x 200 mm (desktop and benchtop 3D printers) |
| Materials | Standard thermoplastics, such as ABS, PLA, and their various blends. | Varieties of resin (thermosetting plastics). Standard, engineering (ABS-like, PP-like, flexible, heat-resistant), castable, dental, and medical (biocompatible). |
| Training | Minor training on build setup, machine operation, and finishing; moderate training on maintenance. | Plug and play. Minor training on build setup, maintenance, machine operation, and finishing. |
| Facility Requirements | Air-conditioned environment or preferably custom ventilation for desktop machines. | Desktop machines are suitable for an office environment. |
| Ancillary Equipment | Support removal system for machines with soluble supports (optionally automated), finishing tools. | Washing station and post-curing station (both can be automated), finishing tools. |
After comparing the two technologies, we can conclude that FDM and SLA printers both have similar, often complementary features. But the two types of 3D printers are not always competing; many businesses use both as FDM and SLA 3D printers alongside one another. This can mean the best of both worlds: low-cost rapid prototyping coupled with high quality, functional parts for a wider range of applications.
A few practical examples:
-
In product development, FDM parts, or SLA printing with Draft Resin are both ideal for basic proof of concept models and rapid iterations. As a project moves forward in the development, SLA 3D printing is ideal for detailed concept models or functional prototypes might require better quality and materials with different properties.
-
Both FDM and SLA 3D printing are commonly used in manufacturing to create jigs, fixtures, and other tooling. FDM is better for large, simple parts, while SLA is a better solution for complex jigs, highly accurate tooling, and molds.
-
The education industry has seen success in deploying both FDM and SLA machines. Many education institutions start with FDM printing as its low cost is ideal for students who need quick drafts and some hands-on experience with the technology. SLA is the preferred choice for many technical schools, universities, research institutes, and in dental and jewelry education due to the higher quality and wider range of applications.
The University of Sheffield Advanced Manufacturing Research Centre (AMRC) uses a fleet of 12 SLA 3D printers for most engineering and manufacturing applications and reserve five industrial FDM printers for larger parts.
Download our white paper for a detailed overview of SLA ecosystems and the step-by-step 3D printing workflow.
Curious to see the SLA quality firsthand? Pick from our list of applications and request a complimentary sample part to find a material that meets the requirements for your project.
Request a Free Sample Part
What is FDM (fused deposition modeling) 3D printing?
Interested in learning the basics of FDM 3D printing? In this article, we explain why this technology is an efficient and cost-effective choice for rapid prototyping and other applications.
Fused deposition modeling (FDM) 3D printing, also known as fused filament fabrication (FFF), is an additive manufacturing (AM) process within the realm of material extrusion. FDM builds parts layer by layer by selectively depositing melted material in a predetermined path, and uses thermoplastic polymers that come in the form of filaments.
Composing the largest installed base of desktop and industrial-grade 3D printers worldwide, FDM is the most widely used technology and likely the first process you think of when 3D printing comes up.
Curious about the price of FDM 3D printing?
Our FDM 3D printing services Upload a CAD for a free, instant FDM quote
In this article, we cover the basic principles and key characteristics of this popular additive technology. We also explore the differences between FDM machines built for desktop and industrial applications and provide tips and tricks for engineers to get the best results from FDM 3D printing.
Watch before you read: how to prototype like a pro with FDM 3D printing
This video breaks down how to use FDM 3D printing for rapid prototyping.
How does FDM 3D printing work?
An FDM 3D printer works by depositing melted filament material over a build platform layer by layer until you have a completed part.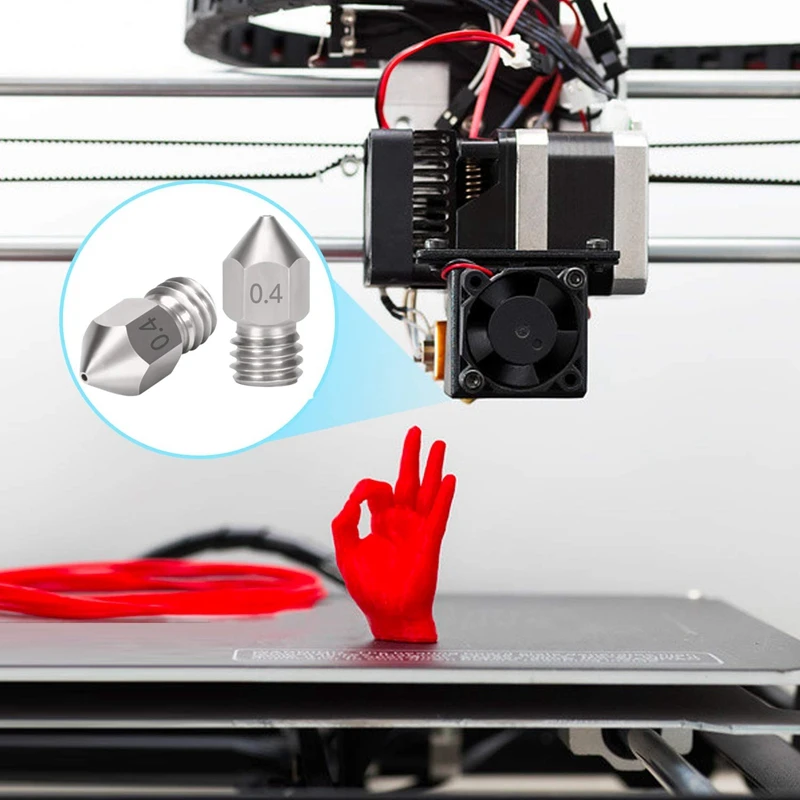 FDM uses digital design files that are uploaded to the machine itself and translates them into physical dimensions. Materials for FDM include polymers such as ABS, PLA, PETG and PEI, which the machine feeds as threads through a heated nozzle.
To operate an FDM machine, you first load a spool of this thermoplastic filament into the printer. Once the nozzle hits the desired temperature, the printer feeds the filament through an extrusion head and nozzle.
This extrusion head is attached to a three-axis system that allows it to move across the X, Y and Z axes. The printer extrudes melted material in thin strands and deposits them layer by layer along a path determined by the design. Once deposited, the material cools and solidifies. You can attach fans to the extrusion head to accelerate cooling in some cases.
To fill an area, multiple passes are required, similar to coloring in a shape with a marker.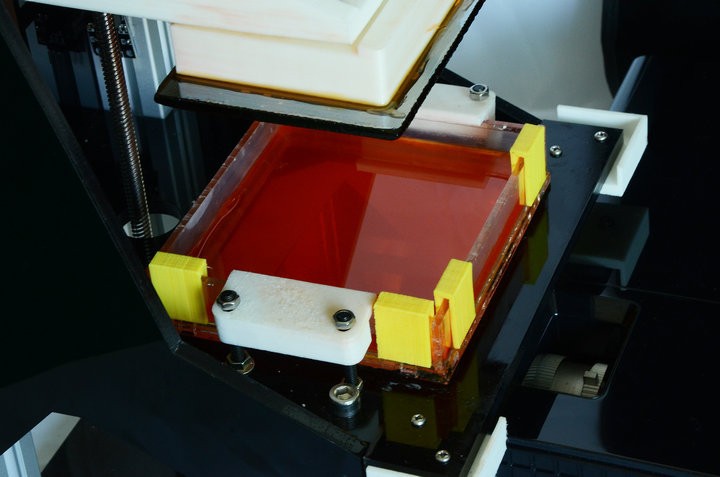 When the printer finishes a layer, the build platform descends and the machine begins work on the next layer. In some machine setups, the extrusion head moves up. This process repeats until the part is finished.
What are the print parameters for FDM 3D printers?
Most FDM systems allow you to adjust several process parameters. These include the nozzle and build platform temperatures, build speed, layer height and cooling fan speed. If you’re a designer, you normally don’t have to worry about these adjustments, as an AM operator probably already has that covered.
Factors that are important to consider, though, are build size and layer height. The common build size of a desktop 3D printer is 200 x 200 x 200 mm, while industrial machines can reach sizes of 1,000 x 1,000 x 1,000 mm. If you prefer to use a desktop machine to print your part, you can break down a big model into smaller parts and then reassemble it.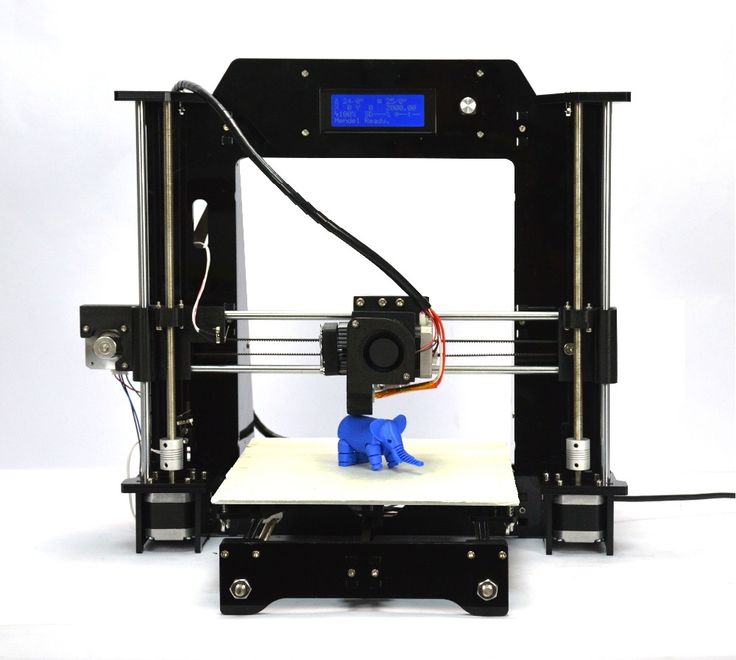
FDM’s typical layer height ranges between 50 and 400 microns. Printing shorter layers produces smoother parts and more accurately captures curved geometries, though printing taller layers means you can create parts quickly and for a lower price tag.
Design tip: A smart compromise we recommend is to print layers 200 microns thick. Want to know more? Check out our article on the impact of layer height on 3D printed parts .
Is there a difference between desktop and industrial FDM printers?
FDM printers generally fall into two main categories: industrial (also called professional) and desktop (also called prototyping) machines. Both printer grades have distinct applications and advantages, though the main difference between the two technologies is their scale of production.
Industrial FDM 3D printers, like the Stratasys 3D printer, are far more expensive than their desktop counterparts - desktop machines being mostly for at-home, consumer use - so using them for your custom parts will run up a higher tab.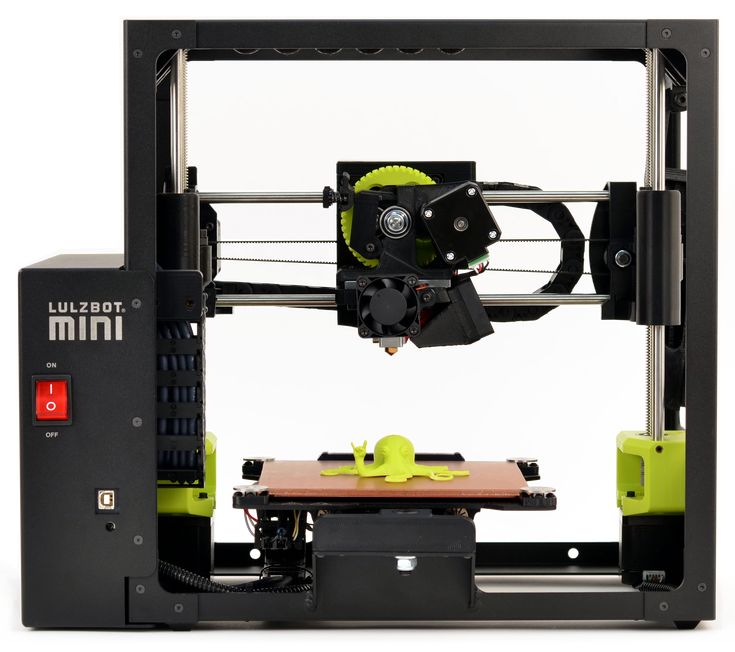 As industrial machines are more efficient and powerful than desktop FDM printers, they are more often used for tooling, functional prototypes and end-use parts.
As well, industrial FDM printers can complete larger orders much faster than desktop machines. They are designed for repeatability and reliability and can produce the same part over and over with minimal human intervention. Desktop FDM printers are not nearly as robust. With desktop machines, you have to perform frequent user maintenance and regular calibration.
In the table below, we break down the main differences between a typical desktop FDM machine and an industrial one.
| Property | Industrial FDM | Desktop FDM |
|---|---|---|
| Standard accuracy | ± 0.15% (lower limit ± 0.2 mm) | ± 1% (lower limit: ± 1.0 mm) |
| Typical layer thickness | 0.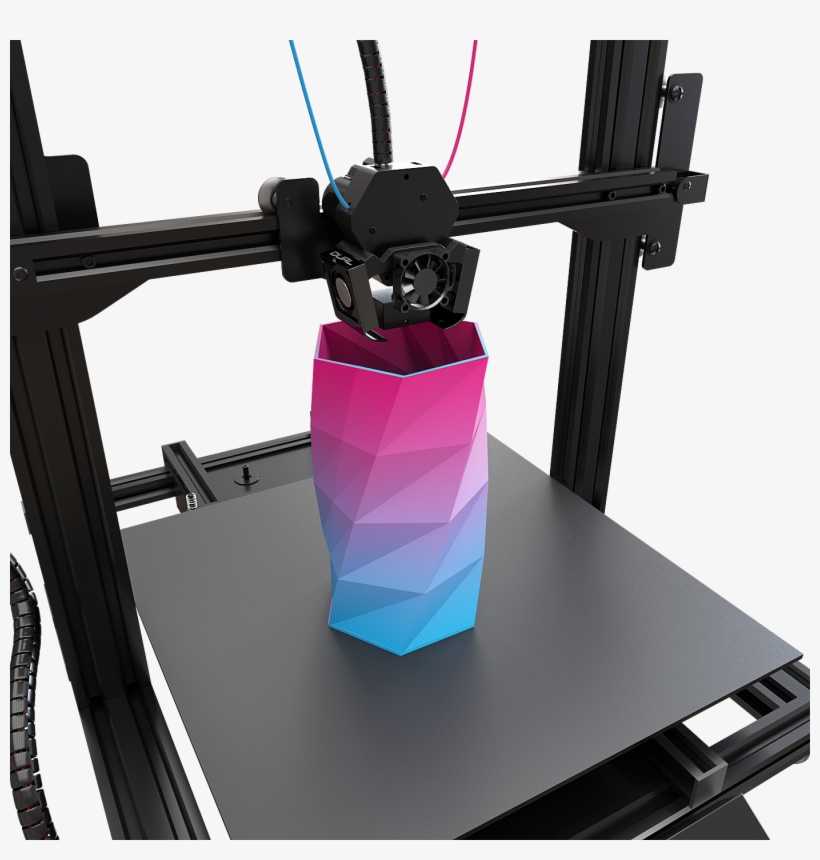 18 - 0.5 mm 18 - 0.5 mm | 0.10 - 0.25 mm |
| Minimum wall thickness | 1 mm | 0.8 - 1 mm |
| Maximum build envelope | Large (e.g. 900 x 600 x 900 mm) | Medium (e.g. 200 x 200 x 200 mm) |
| Common materials | ABS, PC, ULTEM | PLA, ABS, PETG |
| Support material | Water-soluble/Break-away | Same as part (typically) |
| Production capabilities (per machine) | Low/Medium | Low |
| Machine cost | $50000+ | $500 - $5000 |
What are the characteristics of FDM 3D printing?
While FDM 3D printers vary in terms of their extrusion systems and the part quality you get from various machines, there are common characteristics that you can expect from every FDM printing process.
Warping
Warping is one of the most common defects in FDM. When extruded material cools during solidification, its dimensions decrease. Since different sections of the printed part cool at different rates, their dimensions also change at different speeds. Differential cooling causes the buildup of internal stresses that pull the underlying layer upward, causing it to warp.
There are several ways to prevent warping. One method is to closely monitor the temperature of your FDM system, especially the build platform and chamber. You can also increase the adhesion between the part and the build platform to mitigate warping.
Making certain choices during the design process can also reduce the likelihood of your part warping. Here are a few examples:
-
Large, flat areas - like you’d see on a rectangular box - are more prone to warping. Try to avoid these whenever possible.
-
Thin protruding features - think of the prongs on a fork - are also prone to warping.
 Adding extra guiding or stress-relieving material at the edges of thin features to increase the area that makes contact with the build platform helps to avoid this.
 -
Sharp corners warp more often than rounded shapes, so we recommend adding fillets to the design.
-
Every material has its own susceptibility to warping. For instance, ABS is generally more sensitive to warping than PLA or PETG, for instance.
Layer adhesion
Secure adhesion between deposited layers of a part is critical in FDM. When an FDM machine extrudes molten thermoplastic through the nozzle, this material presses against the previously printed layer. High temperature and pressure cause this layer to re-melt and enable it to bond with this previous layer.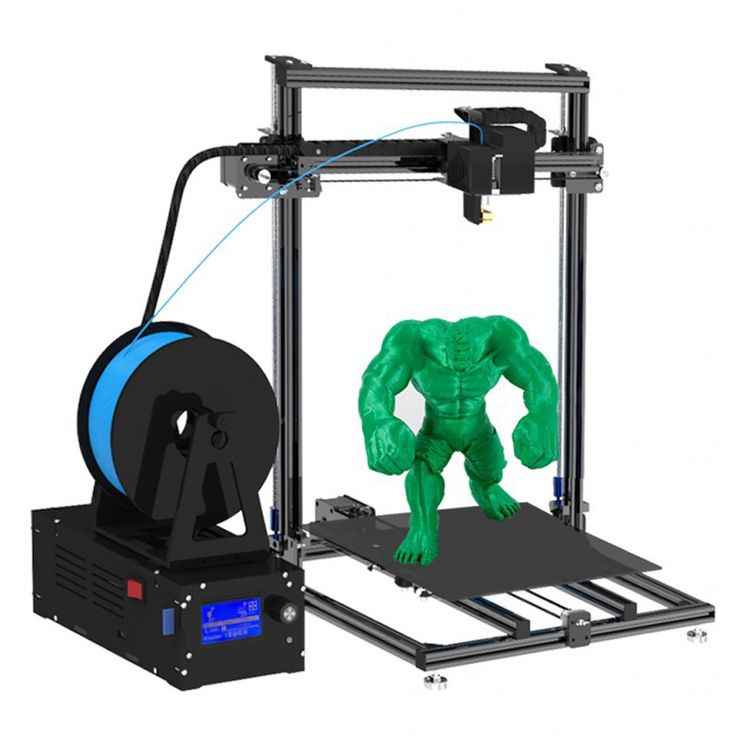
And since the molten material presses against the previously printed layer, its shape deforms to an oval. This means that FDM parts always have a wavy surface, no matter what layer height is used, and that small features, such as small holes or threads, may require post-processing.
The FDM material extrusion profile.Support structure
FDM printers can’t feasible deposit molten thermoplastic on thin air. Certain part geometries require support structures, which are usually printed in the same material as the parts themselves.
Oftentimes, removing support structure materials can be difficult, so it’s often far easier to design parts in such a way that minimizes the need for support structures. Support materials that dissolve in liquid are available, but you generally use them in tandem with higher-end FDM 3D printers.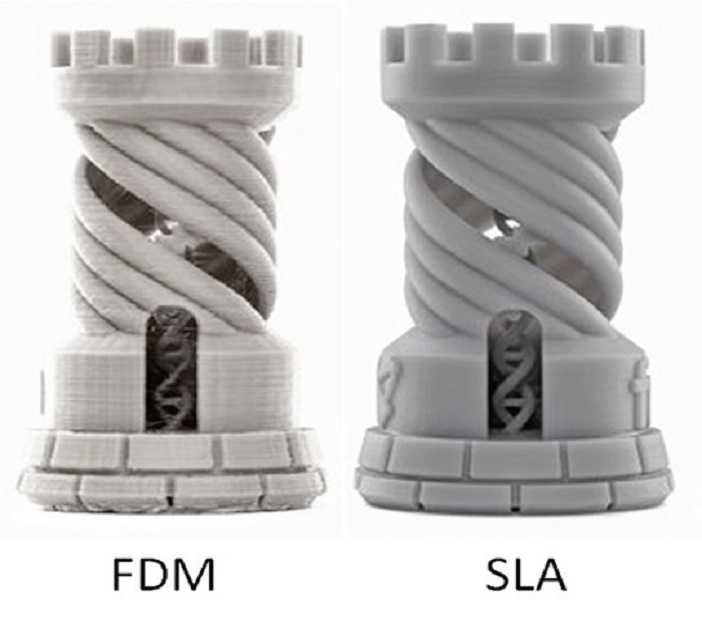 Be aware that using dissolvable supports will increase the overall cost of a print.
Infill and shell thickness
To reduce print time and save on materials, FDM printers usually don’t produce solid parts. Instead, the machine traces the outer perimeter - called the shell - over several passes, and fills the interior - called the infill - with an internal, low-density structure.
Infill and shell thickness significantly affect the strength of FDM-printed parts. Most desktop FDM printers have a 20% infill density default setting and 1 mm shell thickness, which provides a suitable compromise between strength and speed for quick prints.
The internal geometry of FDM prints with different infill densityThe table below summarizes the main characteristics of FDM 3D printing.
| FDM | |
|---|---|
| Materials | Thermoplastics (PLA, ABS, PETG, PC, PEI etc) |
| Dimensional Accuracy | ± 0. 5% (lower limit ± 0.5 mm) - desktop 5% (lower limit ± 0.5 mm) - desktop± 0.15% (lower limit ± 0.2 mm) - industrial |
| Typical Build Size | 200 x 200 x 200 mm - desktop 900 x 600 x 900 mm - industrial |
| Common layer thickness | 50 to 400 microns |
| Support | Not always required (dissolvable available) |
What are common materials for FDM 3D printing?
One of the key advantages of FDM (both desktop and industrial) is the technology’s wide range of materials. This includes commodity thermoplastics such as PLA and ABS, engineering materials like PA, TPU and PETG and high-performance thermoplastics, including PEEK and PEI.
PLA filament is the most common material used in desktop FDM printers. Printing with PLA is relatively easy and can produce parts with finer details. When you need higher strength, ductility and thermal stability, you normally use ABS. However, ABS is more prone to warping, especially if you are using a machine that doesn’t have a heated chamber.
Another alternative for desktop FDM printing is PETG, which is comparable to ABS in its composition and how easy it is to print with. All three of these materials are suitable for most 3D printing service applications, from prototyping to form, fit and function, to low-volume production of models or functional parts.
Industrial FDM machines, on the other hand, mainly use engineering thermo-plastics, including ABS, polycarbonate (PC) and Ultem. These materials usually come equipped with additives that alter their properties and make them particularly useful for industrial needs like high impact strength, thermal stability, chemical resistance and biocompatibility.
Printing in different materials will affect your part’s mechanical properties and accuracy, as well as its cost. We compare the most common FDM materials in the table below.
| Material | Characteristics |
|---|---|
| ABS | + Good strength + Good temperature resistance - More susceptible to warping |
| PLA | + Excellent visual quality + Easy to print with - Low impact strength |
| Nylon (PA) | + High strength + Excellent wear and chemical resistance - Low humidity resistance |
| PETG | + Food Safe* + Good strength + Easy to print with |
| TPU | + Very flexible - Difficult to print accurately |
| PEI | + Excellent strength to weight + Excellent fire and chemical resistance - High cost |
For more details, see this review of the main differences between PLA and ABS —the two most common FDM materials—and an extensive comparison of all common FDM materials.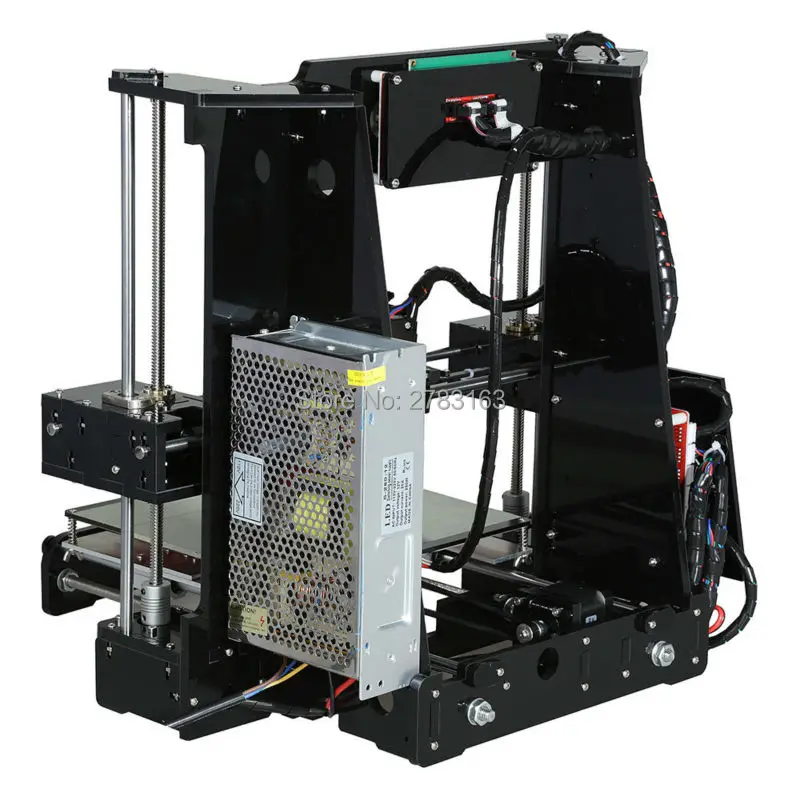
Post-processing for FDM 3D printing
FDM 3D printed parts can be finished to quite a high standard via several post processing methods, including sanding and polishing, priming and painting, cold welding, vapor smoothing, epoxy coating and metal plating.
Interested in exploring all the post-processing options for your next production run of FDM parts? Read our extensive guide to what’s available.
What are the best practices for printing with FDM?
-
FDM can produce prototypes and functional parts quickly and cost effectively.
-
There is a wide range of materials available for FDM.
-
Typical build size of a desktop FDM 3D printer is 200 x 200 x 200mm. Industrial machines have a larger build size.
-
To prevent warping, avoid large flat areas and add fillets to sharp corners.

-
FDM is inherently anisotropic, so it is unsuitable for mechanically critical components.
-
The minimum feature size of FDM machines is limited by the diameter of the nozzle and the layer thickness.
-
Material extrusion makes it impossible to produce vertical features (in the Z direction) with geometry smaller than the layer height (typically 0.1 - 0.2 mm).
-
FDM typically can’t produce planar features (on the XY plane) smaller than the nozzle diameter (0.4 - 0.5 mm).
-
Walls have to be at least 2 to 3 times larger than the nozzle diameter (i.e. 0.8 - 1.2 mm).
-
If you’re looking to produce smooth surfaces and very fine features, you may need additional post-processing, like sandblasting and machining.
 Another AM technology like SLA may be more suitable in this case.
Ready to get your parts into production? Head to the Hubs platform and we'll build an instant quote for all your FDM 3D printing needs.
Ready to transform your CAD file into a custom part? Upload your designs for a free, instant quote.
Get an instant quoteFDM technology. How it works.
Hello everyone, 3DTool is with you!
In this article on 3D printing, we will look at the basic principles of FDM (Fused Deposition Modeling) technology. Let's deal with the basic mechanics of this process. Its advantages and limitations.
FDM technology
Overlay printing (FDM) is an additive manufacturing process that is realized through the extrusion of materials. In FDM, an object is built by applying molten material according to a predetermined algorithm, layer by layer. The materials used are thermoplastic polymers and are filament-shaped.
FDM is the most widely used 3D printing technology. FDM printers are on the market in a wide variety. It's basically the first technology people come across when they start working with 3D. The following will introduce the basic principles and key aspects of this printing method.
An engineer who designs a 3D model should take into account the possibilities of technology when manufacturing a part with FDM, this knowledge will help him achieve the best result.
Process FDM printing
Here is how the FDM process works:
A spool of thermoplastic filament is loaded into the printer. Once the nozzle reaches the required temperature, the filament is fed into the extruder and into the nozzle where it is melted.
The extruder is attached to a 3-axis system that allows it to move in the X, Y and Z directions. The molten material is extruded in thin filaments and melted in layers at predetermined locations where it then cools and solidifies. Sometimes the cooling of the material is accelerated by the use of fans attached to the extruder.
The extruder requires several passes to fill the printable area. When the layer is finished, the platform moves down (or, as in some printer models, the extruder moves up), and a new layer is welded onto the already set one. This process is repeated until the entire model is printed.
FDM printer specifications
Most FDM systems allow you to adjust several parameters of the printing process. Such as nozzle temperature, platforms, print speed, layer height and cooling fan speed. These are usually set by the printer operator and do not bother the modeler.
What is important from a modeling standpoint is to consider the size of the table and the layer height of the part itself:
The standard printable area of a desktop 3D printer is usually 200 x 200 x 200 mm, while for industrial machines it can be up to 1000 x 1000 x 1000 mm. If a desktop 3D printer is preferable (e.g. for cost reasons), the large model can be broken down into smaller pieces and then reassembled/glued together.
The typical layer height used in FDM varies from 50 to 400 microns and can be determined during the software slicing step. A lower layer height will provide a smoother detail and more accurately represent complex geometry, while a higher layer height will print the part faster and at a lower cost. The layer height of 150-200 microns is optimal in terms of the ratio of printing time and its quality.
Part deformation
Warp is one of the most common defects in the FDM printing process. Some plastics shrink during cooling after extrusion. Since different regions cool at different rates, their dimensions can also change at different rates. Differential cooling causes an accumulation of internal stresses that pull the layer, the one from the bottom - up, deforming it, as shown in the figure below.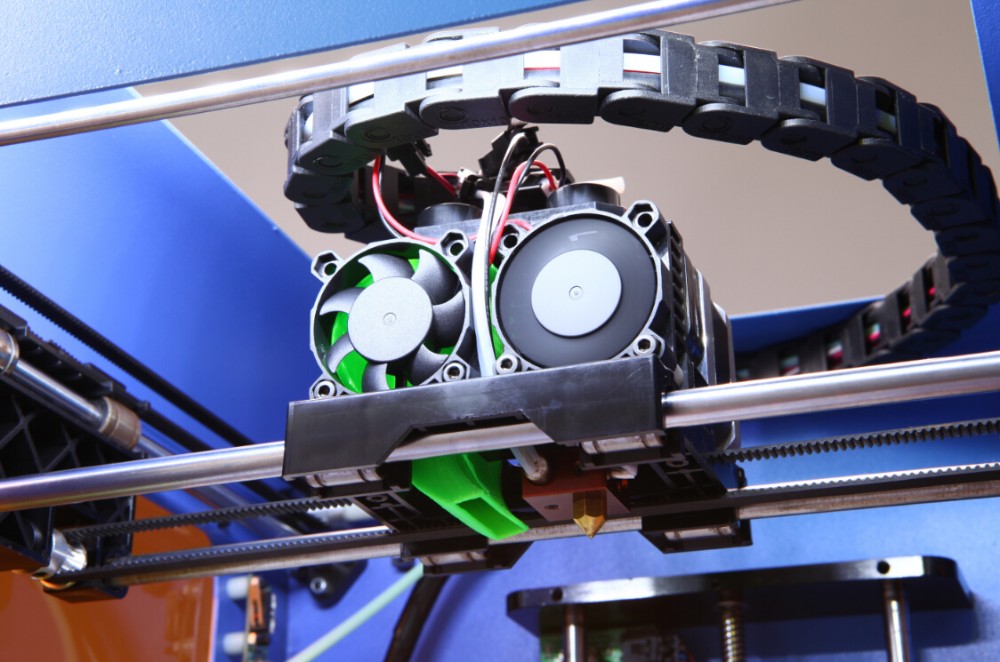 From a technical point of view, deformation can be prevented by more careful control of the temperature of the platform and the chamber as a whole. By increasing the adhesion between the part and the platform.
The modeler can also reduce the chance of peeling and other warp-related defects:
Large flat areas (such as a rectangular box) are more prone to deformation and should be avoided if possible.
Thin protruding elements (for example, battlements, spiers) are also prone to deformation. In this case, it can be avoided by adding some support material around the edge of the thin element (for example, a 200 micron thick rectangle) to increase the contact area.
Sharp corners deform more often than rounded shapes, so smoothing the corners slightly can achieve a good result.
Different plastics are more susceptible to deformation: ABS is generally more sensitive to this factor than PLA or PETG due to its higher glass transition temperature and relatively high coefficient of thermal expansion.
Adhesion between layers
Good adhesion between layers is very important for an FDM printed part. As the molten plastic is extruded through the nozzle, it is pressed against the previous layer. High temperature and pressure remelt the surface of the previous layer and allow the new layer to bond with the old one.
The strength of the bond between different layers is always lower than the basic strength of the material.
This means that FDM parts are inherently anisotropic: their Z strength is always less than their X/Y strength. For this reason, it is important to keep the orientation of parts in mind when designing.
For example, tensile test specimens printed horizontally with ABS at 50% infill were compared with test specimens printed vertically and found to have nearly 4 times higher tensile strength in the X, Y axis compared to the Z axis ( 17.0 MPa compared to 4.4 MPa).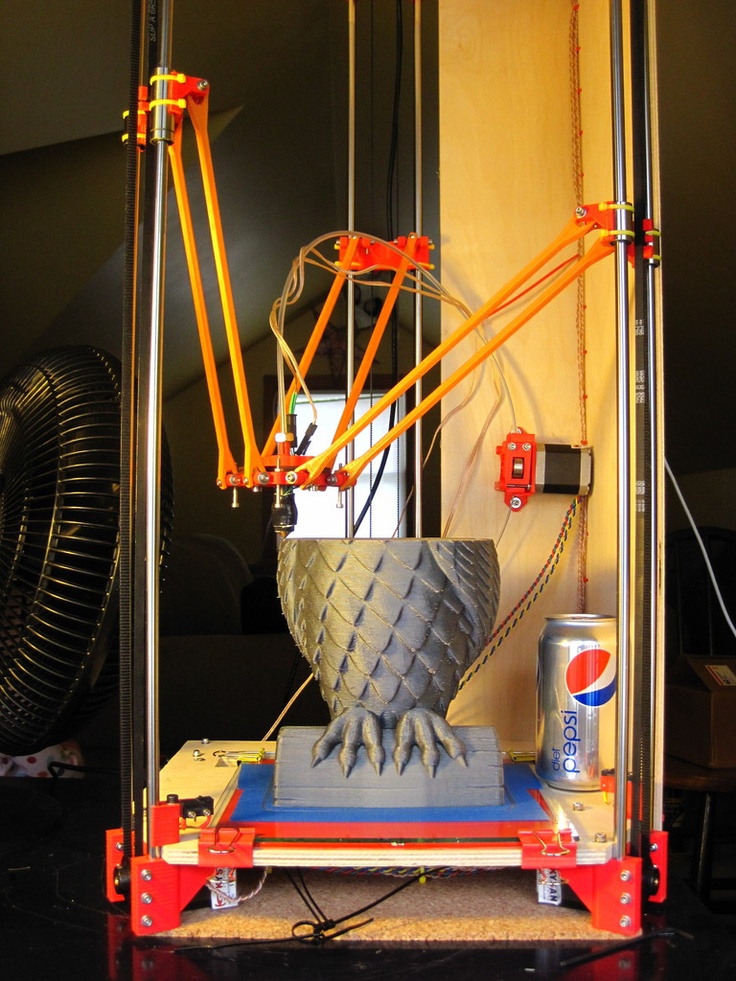 Such a part is stretched to failure, almost 10 times more (4.8% compared to 0.5%).
Moreover, since the molten material is pressed against the previous layer, its shape is deformed to an oval. This means that parts will always have a wavy surface, even at low layer heights, and that small features, such as small holes, may need post-printing post-processing.
Supports
The support structure is essential for creating tab geometries. Because plastic cannot be applied to air, some geometries require a support structure.
Surfaces printed with supports are usually of lower quality than the rest of the part. For this reason, it is recommended that the part be modeled in such a way as to minimize the need for support.
Supports are usually printed from the same material as the part. There are also special materials that dissolve in a liquid, but they are mostly used in high-end desktop or industrial 3D printers. Printing on soluble supports greatly improves the surface quality of the part, but increases the overall cost of printing because a special printer with two print heads is required and because the cost of soluble material is relatively high.
Filling and shell thickness
FDM parts are usually not printed full in order to reduce printing time and save material. Instead, the outer perimeter is made with several passes, it is called a shell, and the inner part is filled with a low density structure called infill.
The filling and thickness of the body greatly affect the strength of the part. For desktop FDM printers, 25% infill density and 1mm body thickness are mostly suitable. Usually, these are the standard settings for fast printing and a good compromise between strength and speed.
Above you can see the internal geometry of parts with different degrees of filling
FDM Essential Consumables
One of the strengths of FDM printing is the wide range of materials available. They can range from conventional plastics (such as PLA and ABS) to engineering plastics (such as TPU and PETG) and high strength materials (such as PEEK).
Below is a pyramid of materials most available in FDM printing.
The material used directly affects the mechanical properties and accuracy of printing, as well as its price. The most common FDM printing materials are listed below. We will also consider the pros and cons of certain plastics. An overview of the main differences between PLA and ABS, and a detailed comparison of all common types of filament is a very extensive topic and can be found in special articles on the Internet and on thematic forums.
ABS
pros
· Durability
Good temperature resistance
Minuses
Shrinks when printed
PLA
pros
Excellent visual quality
Easy to print
· Unharmful.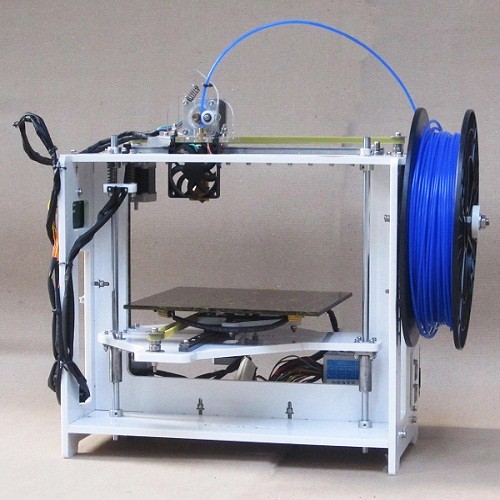 May come into contact with food
Minuses
· Low impact strength
· Longevity
Nylon
pros
· Very high strength
Excellent wear and chemical resistance
Minuses
· Actively absorbs water
PET-G
pros
· Unharmful. May come into contact with food
Sufficiently strong
Minuses
Capable of precise temperature print settings
TPU
pros
· Very flexible
Minuses
Printing accuracy is very difficult to achieve
PE EK
pros
· Extremely durable and lightweight
Excellent flame retardant and chemical resistance
Minus
· High price
Need a specialized 3D printer whose extruder is capable of reaching temperatures above 300C
Postprocessing
FDM parts can be processed to high standards.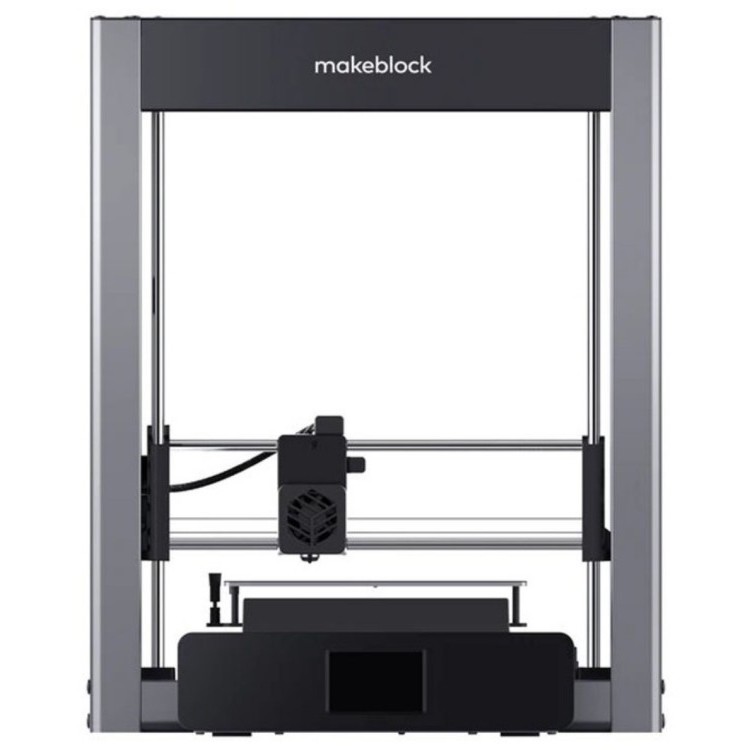 When using various methods such as: sanding, polishing, priming, painting, cold welding, acetone bath (to smooth the surface and create a glossy surface), epoxy coating and plating.
Advantages and disadvantages of FDM printing
+
· FDM printing is the most economical way to produce custom thermoplastic parts and prototypes.
· FDM printing lead time is acceptable. The technology is quite affordable these days.
Wide range of materials suitable for both prototyping and some non-commercial functional applications.
-
FDM printing has the lowest dimensional accuracy and resolution compared to other 3D printing technologies, so it is not suitable for models with complex geometry and fine details
The final product will have visible layer lines, so post-processing is required for a better look
Layer adhesion mechanism makes FDM printed parts anisotropic
Highlights
· With FDM printing, prototypes and functional parts can be produced quickly and at a low cost. There is a wide range of filaments on the market with different physical properties.
· The typical platform size of a desktop FDM 3D printer is 200 x 200 x 200mm. Industrial machines are much larger. From 1000 x 1000 x 1000 mm
· To prevent part warping, cornering, etc., on plastics that have a shrinkage percentage, avoid large flat areas and add support at sharp corners greater than 45 degrees.
· An FDM printed part is inherently anisotropic, so it is not recommended to use such parts for mechanically important components.
Well!, And that's all we have! 3DTool was with you, see you in the next articles!
See 3D printers powered by FDM technology here
You can make a purchase, ask a question, or track your order on our website,
By mail: [email protected]
Or by phone: 8(800) 775-86-69
Don't forget to subscribe to our YouTube channel:
And to our groups in social networks:
In contact with
FDM 3D printer
- 1 Description
- 2 General process
- 3 Structural elements
- 3.
 1 Housing
 - 3.2 Extruder
- 3.3 Working platform
- 4 Preparing digital model
- 5 Seal
- 6 Application
Description
Fused Deposition Printing (FDM) technology has become widespread among individuals and small businesses due to its wide range of features, relative simplicity and good affordability. The popularity of this method deserves a more detailed description of the process and the printers used. In this section, we will look at the nuances of the design of printers and the application of technology in practice.
General process
Like all 3D printing methods, FDM belongs to additive manufacturing technologies. The term "additive" is an Anglicism from the word "additive", meaning "addition" or "by addition". The term is intended to separate technologies for the production of complex three-dimensional products that differ from the usual "subtractive" ("subtractive" - "due to separation") methods - milling, drilling, grinding, etc.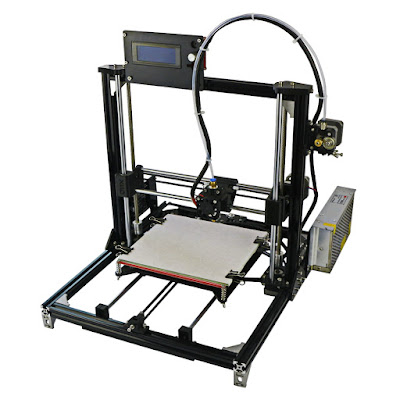
FDM can be considered one of the most technologically simple 3D printing methods. The process is based on the successive layering of a thin thread of molten plastic up to the creation of a solid three-dimensional object. A plastic thread wound on a spool is used as a consumable. Occasionally, individual bars of plastic are used. The standard thread diameter is 1.75mm or 3mm.
The printing process consists of a number of steps:
- Create or import a digital 3D model
- Processing a digital model for printing with the addition of support structures
- Location and orientation of the digital model on the desktop
- Slicing - cutting a digital model into separate layers with data conversion into instructions for the printer, called the G-code
- Direct print
- If necessary, physical or chemical treatment of the finished model
Structural elements
Enclosure
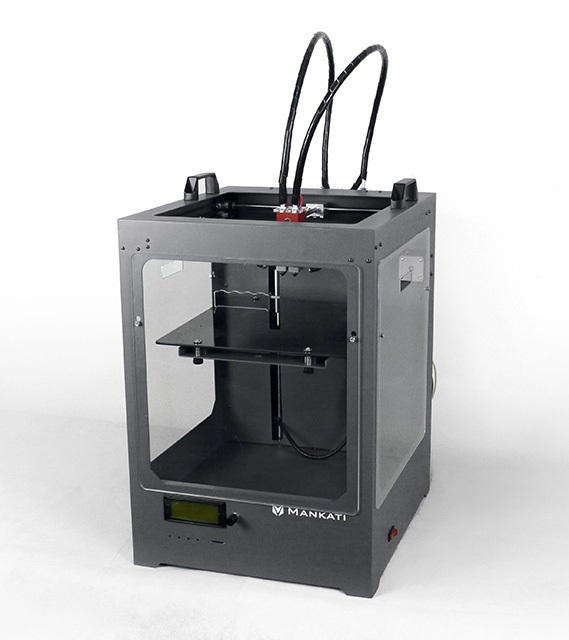
Ultimaker 3D Printer with exposed wooden case
Many elements are important in the construction of an FDM 3D printer, which are not always obvious to the inexperienced person. So, the material of the case matters in the event that it carries the load. Many FDM printers are available with wooden cases - this solution seems cheap and unsightly, but in fact it helps to absorb vibrations during printing, which has a positive effect on the quality of the manufactured models. On the other hand, a steel or aluminum frame ensures the durability and impact resistance of the device.
The open or closed design of the printer also matters. A well-ventilated working chamber is useful when printing with polylactide (aka PLA plastic), as this material vitrifies for a long time. If the printed layers do not have time to solidify and seize, they may spread, or deformation of the underlying layers under the pressure of the upper ones.
On the other hand, many popular materials (such as ABS and nylon) have a high degree of shrinkage. By "shrinkage" is meant the reduction in volume of the material as it cools. In the case of the same ABS plastic, excessively fast and uneven cooling of the applied layers can lead to their twisting, or deformation and cracking of the model as a whole.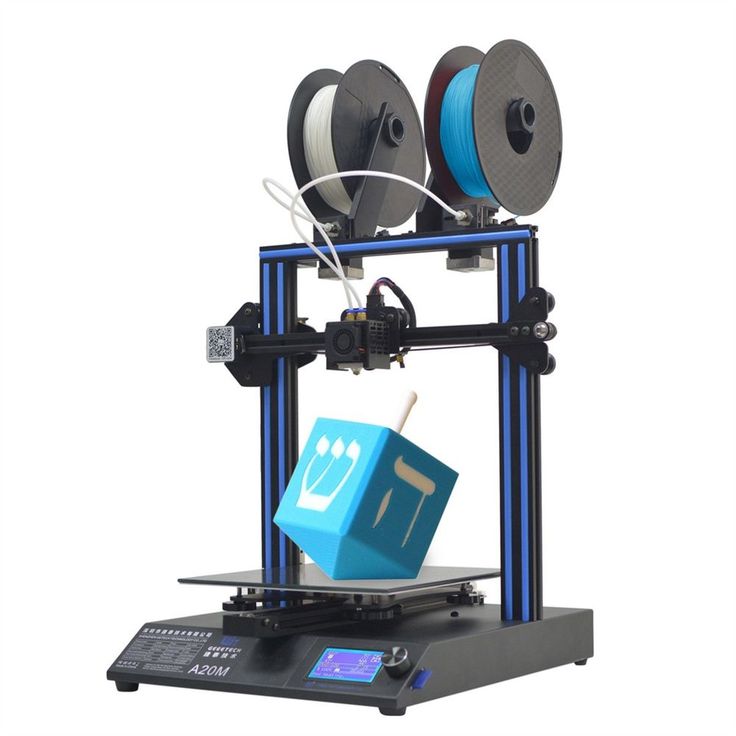
PICASO Designer 3D printer with closed plastic case
In this case, the case with closed cladding comes in handy, allowing you to achieve slow, uniform cooling of the material.
Finally, the shape of the FDM printer can also be linked to the coordinate system used.
Thus, the most popular option is the Cartesian or, more accurately in most cases, rectangular coordinate system.
Recently delta coordinate systems are gaining popularity - such devices are called "delta robots" and offer certain benefits in terms of printing accuracy and ease of expanding the vertical size of the construction area.
Structural elements and rails are usually made of aluminum or steel. The extruder and platform are driven by belts or screws.
3DPrintBox printer extruder, partially disassembled. You can clearly see the pink plastic thread and the pulling mechanism - two gears with grooves in the teeth
Extruder
The next important element is the extruder, that is, the print head of the printer.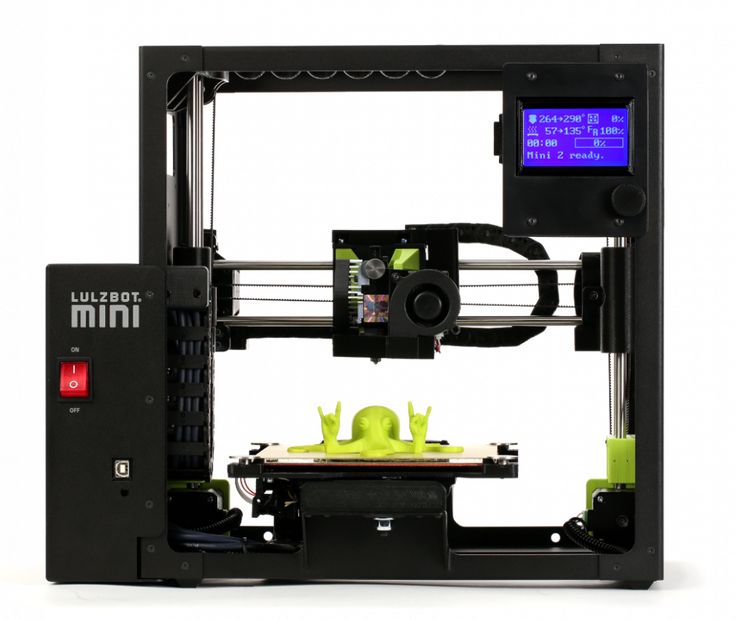 These devices may vary in design, but generally contain the same basic components:
- Feeder to feed the thread into the nozzle
- Nozzle used to melt the filament and extrude the molten material
- Heating element for heated nozzle
- Fan
As a rule, the pulling mechanism consists of gears or screws driven by an electric motor.
Obviously, the electric motor drives the gears to feed the filament into the nozzle. In the nozzle, the thread is melted, followed by extrusion of a viscous material.
An extremely important point is the sharp temperature gradient between the bottom and top of the nozzle - for this purpose the fan is installed.
At the transition of the glass transition temperature, the plastic becomes soft, but not yet viscous, expanding in volume.
3DPrintBox extruder assembled. The electric motor of the traction mechanism is visible (top), double fan (middle) and nozzle with attached electric heating element (bottom)
In this state, the friction of the material with the inner walls of the nozzle increases.
If the length (and, as a result, the area) of this section is too large, then the total coefficient of friction may become unbearable for the pulling mechanism.
Thus, the length of the nozzle section with unmelted filament and the length of the section with molten material do not really matter, but the length of the plastic section at the glass transition temperature should be as short as possible.
The most effective solution to this problem is the use of heat sinks and fans to cool the filament and the top of the nozzle.
In fairness, the residence time of the plastic in the molten state should also be minimized, since many thermoplastics lose their plasticity after prolonged exposure to high temperatures, and the resulting solids can clog the nozzle.
Diagram of the transition of a plastic filament from a solid to a viscous state. The length of the middle section should be as short as possible to prevent problems with material push through
Typically, this kind of problem does not occur in normal, stable extrusion because the nozzle length is too short.
Clogging of the nozzle can occur due to internal irregularities or errors in the manufacture of the thread: the resulting stagnation leads to the gradual formation of grains, which are then carried away by the flow of molten plastic and clog the outlet.
The most common nozzle materials are aluminum and brass.
Hole diameter may vary, but average is 0.3mm.
Smaller bores allow for higher resolution, while larger bores increase build speed and reduce the risk of nozzle clogging.
Work platform
The 3D Systems Cube 3D printer bed moves in the X and Z axes, and the extruder moves in the Y axis
The work platform serves as a surface for building models.
Depending on the coordinate system used, the platform can be movable or static.
Typically, in printers using the Cartesian coordinate system, the movement of the platform in the vertical plane is responsible for the vertical positioning of the extruder relative to the platform itself.
Some models also add movement of the platform along one of the axes in the horizontal plane, which allows you to slightly reduce the dimensions of the device, provided that the case is open.
An example of such printers is the popular 3D Systems Cube.
The delta work platform remains in place. Positioning of the extruder in three planes is carried out solely by the movement of three manipulators
Delta printers ("delta robots") use static platforms.
The positioning of the print head in all three dimensions is carried out exclusively by the movement of the extruder itself.
As a rule, the extruder is suspended on three manipulators, whose coordinated movement along vertical guides moves the die.
Asymmetrical movement controls the positioning of the extruder horizontally by changing the angle of the manipulators, and symmetrical movement - vertically.
Alternatively, a movable platform and a stationary extruder can be used, but these designs are not yet widely used.
Experimental Quantum Delta Printer uses "inverted" design with movable bed and stationary extruder
A distinctive feature of all Delta printers is the cylindrical shape of the build area. One of the advantages of such designs is the ease of building up the working area. So, to increase the height of the building, you only need to install guides and cables of increased length.
However, even static platforms cannot be called completely immobile. Before starting printing, platform calibration is required, that is, the elimination of a possible tilt. Calibration mechanisms can be either manual or automatic, depending on the printer model.
In the case of manual calibration, the user will be required to sequentially position the nozzle at different points on the platform.
To measure the distance, special templates are used, and in the cases of the most simple or home-made designs, simply sheets of office paper, whose thickness corresponds approximately to 100 microns.
More advanced devices like the MakerBot Replicator use special sensors to accurately measure distance. Tilt adjustment is made by rotating the spring-loaded screws on which the platform rests.
Calibration of the platform is often done with adjustment screws, although most printers help with this task by moving the extruder to different points of the platform in succession.
If the nozzle height is too low, extrusion will simply not occur.
If too large, the filament will not adhere to the surface and the printer will print "in the air", creating intricate filaments that have nothing to do with the given model.
The result of platform tilt can be a combination of these two effects. No matter how perfect the design of the printer, users are encouraged to trace the construction of the first few layers of the model.
Perforated printer worktable Up! Plus 2 provides good adhesion of plastic to the surface, but requires careful maintenance, as the holes are easily clogged
Depending on the design, the working platform can be equipped with a removable table.
This solution is often used in printers with closed housings that make it difficult to remove models from the platform or clean the surface.
In the case of perforated tables, this solution is simply necessary, since the surface is cleaned by soaking in solvents.
The disadvantage of removable tables is the possibility of play if the fasteners or clamps are sufficiently weak.
Heated aluminum platform with removable glass worktable for PICASO Designer 9 printer0427
When printing on certain materials such as ABS or nylon, the bed is equipped with a heating element. The purpose of the heating is to slow down the cooling of the lower layers in order to prevent their twisting caused by the shrinkage of the thermoplastic. You can read more about this phenomenon and methods of struggle in the section "How to avoid deformation of models during 3D printing".
The materials used to make work tables are very diverse. Among them, aluminum, steel, acrylic can be mentioned - the presence of heating, of course, narrows the choice of materials. Glass has recently become a popular choice due to its high resistance to deformation and the ease of achieving a perfectly flat surface during production. Some manufacturers even use volcanic glass because of the low thermal conductivity, which slows down the cooling of the initial layers of the model.
Preparing a digital model
Popular open source slicer ReplicatorG
Creating digital 3D models is not part of the 3D printing process. To create models, conventional computer-aided design systems (“CAD” or “CAD” in English terminology) are used, including 3D editors such as SolidWorks, AutoCad and LightWave, among many.
The process of preparing a model for printing begins with importing a 3D model in .STL format into a special program called a slicer. Such programs perform the functions of graphical editors, allowing you to add reference elements necessary to support model attachments. Many slicers allow you to add support structures automatically without requiring any effort on the part of the user. In addition, slicers allow you to place models on the desktop and change their spatial orientation.
Advanced programs also allow you to change fine print settings - the thickness of the applied layer, nozzle temperature, take into account the consumable used.
The capabilities of slicers are closely related to the capabilities of the printers themselves. Some models have a "closed code" that requires the use of branded slicers. Some of the more popular open source slicers include Repetier-Host, ReplicatorG, and Skeinforge.
Building model support structures in Repetier-Host 9 slicer0427
After the digital model is placed on the virtual desktop, the necessary supports are created and the settings are made, slicing is performed directly - cutting the three-dimensional model into virtual layers with a thickness corresponding to the thickness of the applied plastic layers. Each such section will serve as a template for building a specific layer of the physical model. The end result is provided in the form of a G-code, a set of commands for a 3D printer that determines the movement of the extruder and platform during the printing process. G-code can be transferred directly from a computer using a direct connection, or written to a memory card or USB stick for offline printing, provided that the printer is equipped with the necessary interface and control module.
Printing
Some 3D printing enthusiasts make their own scrapers to remove finished models from the worktable
Printing can take quite a long time, often in hours. The duration depends on the speed of printing and the size of the models being produced. Print speed, in turn, depends on the complexity of the model, the perfection of positioning algorithms, layer thickness and nozzle diameter. Interrupting the printing process may result in the loss of the model. Although some printers allow you to temporarily stop the process to replace the consumable, a long pause will cause the upper layers to cool.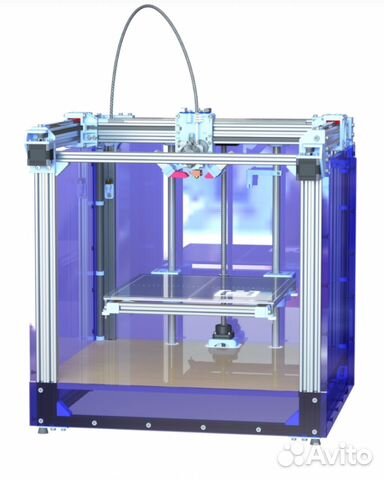 When printing is resumed, subsequent layers may not "grab" with those already printed.
Thin scrapers are used to remove finished models from the table. At the same time, it is recommended to wait for at least partial cooling of the model in order to avoid damage to still soft layers or burns when touching still hot plastic. In addition, if you have enough patience, you can wait for complete cooling and shrinkage, which in most cases automatically leads to the separation of the model from the table.
Demonstration of support structures as part of the finished model
Depending on the working plastic, mechanical or chemical processing may be possible. Thus, models made of ABS plastic can be processed with acetone vapor, which leads to smoothing of roughness and printed artifacts, but can also lead to the loss of the most delicate features of the model. Basically, processing is reduced to the removal of supporting structures of hinged elements of the model. When printing on printers with a single extruder, the supports are made of the same material as the model itself, complicating the process somewhat. When using printers with two or more print heads, it is possible to build supports using water-soluble polyvinyl alcohol (PVA plastic). For more information on the plastics used in FDM 3D printing, see the FDM Consumables section.
Applications
3D printed controller prototypes for the Xbox One game console
The relative cheapness of FDM printers and consumables makes this technology widely popular. First of all, such devices are used for rapid prototyping. Various plastics allow you to create functional models of various products. Thus, ABS plastic, which is popular in FDM printing, is widely used in the mass production of various household products, automotive parts, tools, toys, souvenirs, etc. The sufficiently high accuracy of 3D printing makes it possible to obtain functional prototypes that practically do not differ in workmanship from traditional cast products.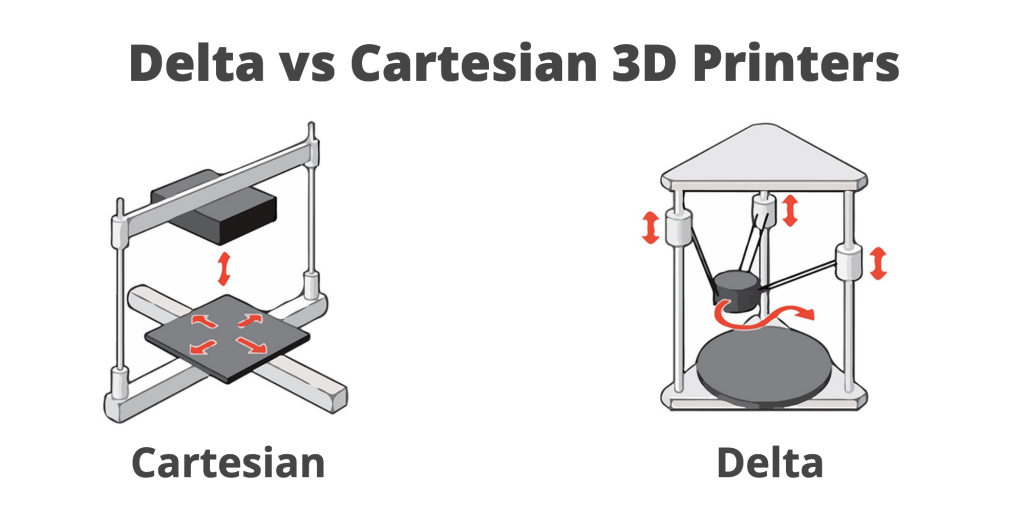
The MakerBot Mini 3D Printer was designed for use in the home and educational environment
This application of technology allows significant savings in the development of new designs. Microsoft used 3D printing to create about 200 prototypes of the Xbox One controller, while Dell placed an order for 5,000 M200 FDM printers from Poland's Zortrax for use in affiliates around the world.
Although the productivity of FDM 3D printing is quite low, the relative cheapness allows the use of FDM printers for the production of small batches of finished products - souvenirs, toys, etc.
Improvement in technology and a significant reduction in the cost of devices allows FDM printers to gradually take root in everyday life. The benefits of 3D printing at home are clear—even fairly simple devices are capable of producing household appliances or broken plastic parts as needed. The cost of home production already makes such an application profitable in comparison with the purchase of finished products. The only significant obstacle to the widespread adoption of 3D printers in everyday life can be considered the reluctance of most people to go into the details of three-dimensional digital design. This barrier is gradually being eroded with popular services such as Thingiverse, Shapeways and Cubify offering a variety of print-ready 3D designs. Many of the available digital models are provided free of charge.
The 3D printed Liberator pistol called into question the ability of government agencies to regulate the circulation of firearms
The Liberator pistol made a lot of noise. The design of this weapon includes one single metal element - the striker, which can be used as an ordinary nail. All other design elements can be printed. The design of the pistol has been released to the public.
Finally, the development of FDM 3D printing allows the development of an entire industry of 3D design and print-to-order. 3D boutiques are already becoming commonplace in many countries.