3D printing missing layers
3d Prints Missing Layers - 3D Printers - Talk Manufacturing
Robert_Lerman
#1
I am Printing using my CTC i3 3d Printer and my prints come out missing layers. Any Ideas?
I am printing with simplify3d. Here is my FFF Profile:
http://pastebin.com/eJ68hTGU
Thanks for Reading
Robert_Lerman
#2
Why is my post still unpublished?
wirlybird
#3
Check this out. It is a big help.
https://www.simplify3d.com/support/print-quality-troubleshooting/
I find I have to contact support here every time I make a post to get them to actually publish it. It is pretty ridiculous!!
shahramrobotics
#4
Probably under-extrusion, decrease the filament diameter in simplify3d like 0.3 mm and reprint it.
1 Like
3drapidprints
#5
Hi Robert! Two issues come to my mind. The first is under-extrusion. Set your flow rate to 100% and make sure your filament size is correct. If that does not work set the flow rate to 105% and re-print. If that doesn’t work your nozzle may be clogged. There are multiple ways to try to unclog it. What you want to do is heat it up untill all the filament can drip out. You can use a blow torch to do this if your hot end can’t get hot enough.
Good luck!
Simon_SushiBoy
#6
I had the same problem managed to narrowed it down the filiment not being pulled into the extruder from the spool properly you can actually hear it sticking I managed fix it by ditching the feed tube and suspending the spool above the printer on a bar held in place with a pair of a frames hope this helps
Perry_1
#7
1. Is this a new printer, or something that started after a long time printing? More information on your current situation would help alot.
If you have been printing a long time - ptfe tube, or need to replace stepper motor wire on the extruder, as it has broken inside and intermittently fails.
If this is a new printer, then software settings.
It could still be software settings. Is it doing it with all files, including files that worked in the past? If so, it is not software.
How to Fix a 3D Printer Skipping or Missing Layers – 3D Printerly
With a 3D printer, different situations can occur which can lead to your printer skipping layers. This in return negatively affects the print quality and hence results in an unsuccessful print. This article is going to aim to tackle the problem of a 3D printer skipping layers. It will guide you through why it happens and how to fix it.
The rest of the article will go through the troubleshooting process of skipped layers, as well as some other issues that are linked to this problem.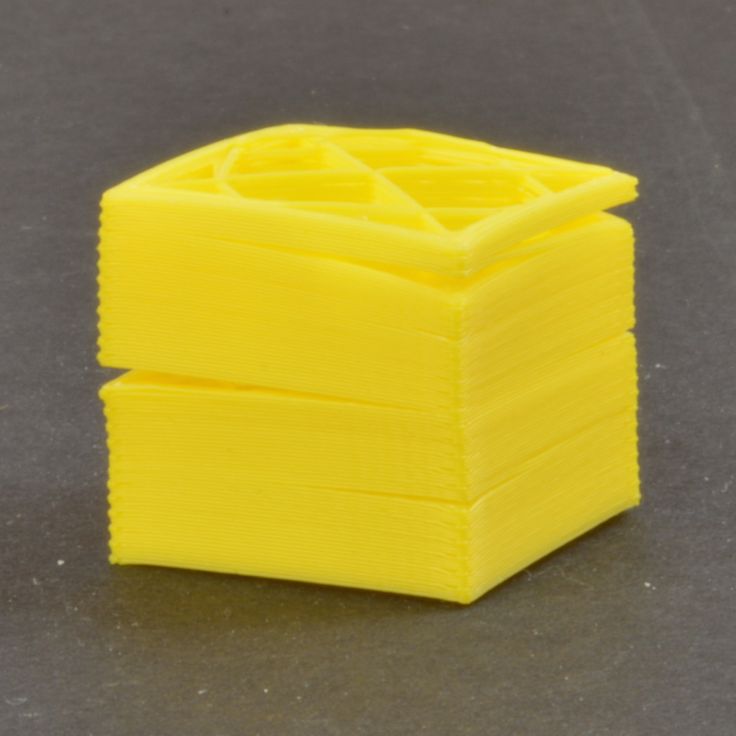 You are requested to read the complete article.
Why is My 3D Printer Skipping Layers?
Finding your final product with skipped layers is truly a very upsetting experience. Skipping layers or missing layers in your 3D prints is a common problem faced by many users of 3D printers.
There are many reasons why a 3D printer skips layers and hence, jeopardizes the quality of the print.
The first reason is the printer being temporarily under extrusion. The second reason is the misaligned or stuck bearings and rods. Another reason is the uneven print bed.
Being Under Extrusion Temporarily
When the appropriate amount of filament is not provided by the 3D printer to print a 3D model, it can cause problems. Until any sort of filament is detected, the printer will continue on and hence you might end up with skipped layers. This can also occur if your filament gets stuck by any means.
It comes down to flow rates and not being able to keep up with the physical demand of the extrusion.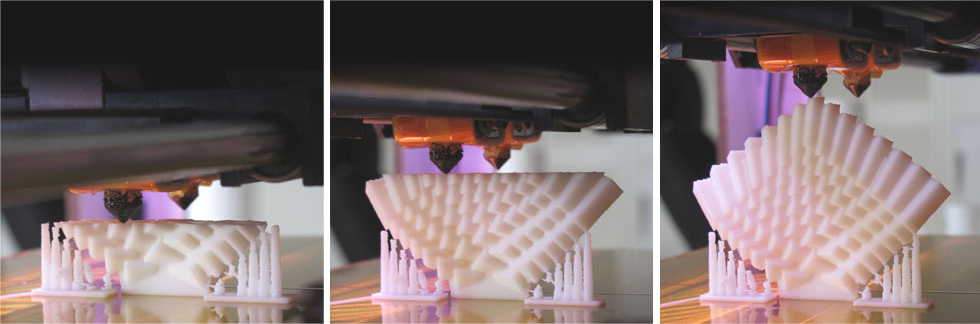 This could be down to some kind of blockage, low temperature, too much cooling, or a worn out nozzle.
Sometimes, a simple nozzle change to one of high quality can quickly fix these under extrusion issues and result in prints that don’t skip layers.
Misaligned or Stuck Bearings and Rods
3D printers experience friction in the moving parts, these parts include vertical rods and bearings that help in holding up the print bed. However, when these bearings and rods are worn out or get stuck, this results in skipped layers in the 3D model print.
You should do some troubleshooting and try to replace parts which have been operating for long periods of time without changes. Consumables like belts, bearings and fans can contribute to this.
Uneven Print Bed
The printing surface of a printer assumes a significant job in making the final look of the first layer of your model. If it is not levelled properly, your first layer could very easily be messed up to quite a huge extent.
When you think about the technology and movement of a 3D printer, it assumes that it is printing on a flat surface, unless there is some kind of auto-leveling feature which accounts for uneven level differences.
Your print bed can easily start to warp after being heated up, so you definitely want to check whether your print bed is experiencing this. Many people heat up their print beds then use a metal ruler across it to see if it’s flat the whole way through.
If not, you can actually place sticky notes underneath the lower areas, implement a BL-Touch or just replace your print bed altogether. This choice is really up to you, but if this is your cause the fix isn’t too troublesome.
How to Fix a 3D Printer Skipping Layers?
The best way to fix a 3D printer skipping layers is to inspect the bearings, timely belts, bearings and pulleys regularly. It would be great even if you go through this process before executing a print task. This process of inspection helps you in preventing not only this but many other common 3D printer problems as well.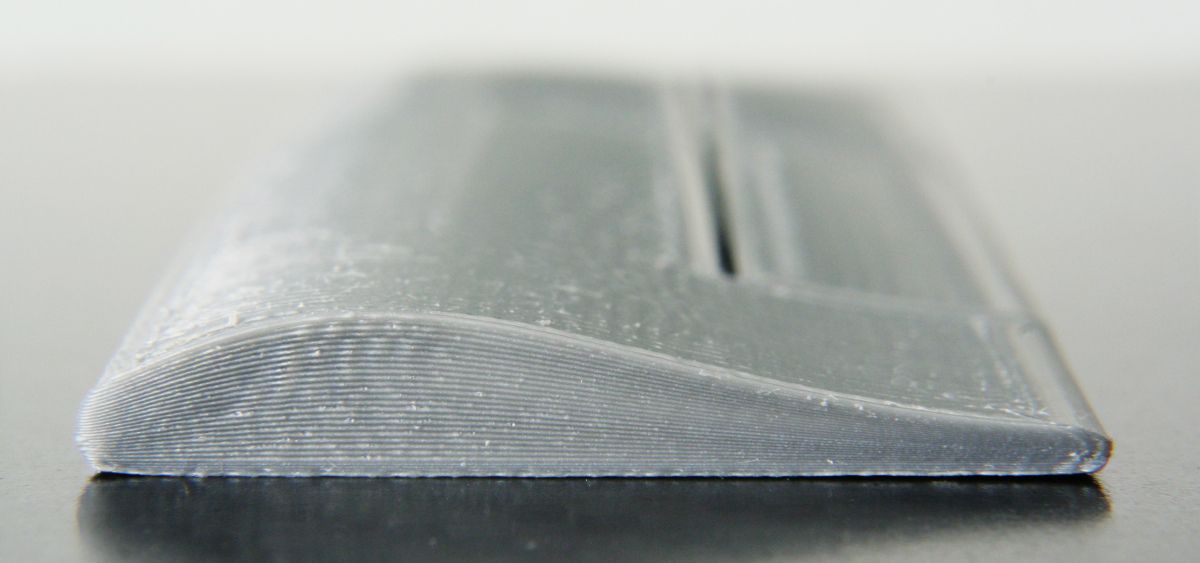
Certain different measures can be taken in order to deal with these problems. It should be manually ensured that the rods of the 3D printer are seated well in the bearings. The clips should be adjusted and the screws should be tightened.
Other than that, check that the bearings of your 3D printer are in good condition. If they are broken or have been worn out, you shall replace them.
You need to clean different moving parts of your printer and provide lubrication to them. The lubrication can be given with sewing machine oil which works pretty well since it’s a fairly light oil and you’ll only need a drop or two.
Furthermore, filament issues are realized, then these can easily be resolved. If your filament has run out or is nearing the end, that is not a problem and can be easily resolved.
The extrusion pathing might have more pressure on it due to the spool of filament being closer to the middle of the roll.
I remember when assembling my 3D printer, I placed the spool holder quite some way from the extruder, which added unnecessary pressure to my filament.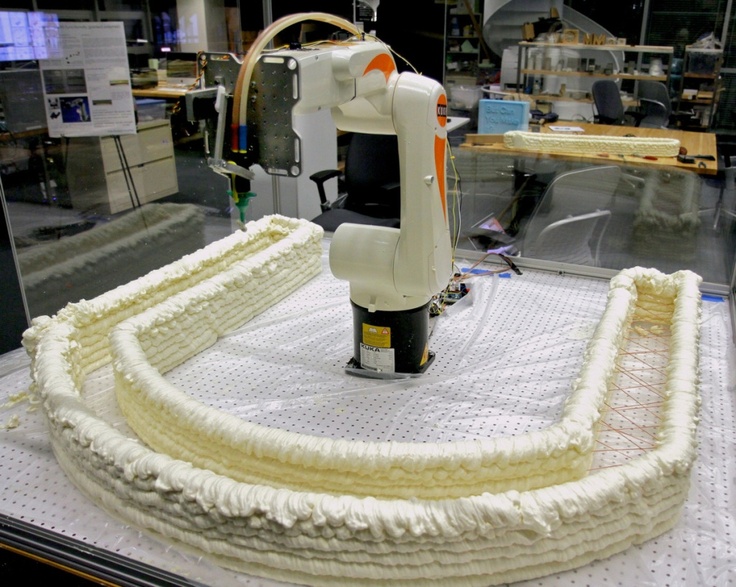 When the filament got near the end of the spool, it would reduce my print quality due to bad pathing.
If the changes happened through using a different roll of filament, I would recheck your temperatures are correct, since each roll isn’t always made the same and have slight differences.
People decide to use a temperature tower each time they change filament spools to get a precise temperature level to operate at.
Fixing Layer Separation in PLA, ABS, PETG & More
Layer separation or delamination refers to the process of adjusting 3D printed layers so that they could firmly stick together.
This is done to ensure the good quality of the final print as it prevents layer separation. Several steps can be taken in the process of layer delamination. Some of these are listed down below.
Increase Printing Temperature
One of the steps towards the prevention of layer separation is to increase the temperature of the printer’s extruder. The layers stick to one another by combination at high temperatures.
Adjust Fan Cooling
Another step is the adjustment of print cooling. If you reduce the fan speed, it has almost the same effect as the increasing extruder temperature.
Increase Extrusion Flow Rate
If the extrusion flow rate is increased, the more molten filament will be allowed to flow out and hence there are better chances of sticking as more thread flows out of the nozzle. With this, if the correct nozzle size is used, it can also prevent layer separation.
Increase Printing Speed
Other than that, if the printing speed is adjusted, it can also contribute to the prevention of layer separation. Having a faster print speed gives your filament less time to be cooled by your fans, which means your filament doesn’t set very nicely for the next layer.
How to Fix Inconsistent Layers & Walls in 3D Prints
To fix this issue, flow rates can be adjusted to different levels. These depend upon the model of the printer and the type of print that you desire to get. Along with that, the optimal temperature should be set up.
Again, this temperature is to be adjusted according to the print model that you desire. A possible reason for the inconsistent layers could also be the overtightening of the wheels that hold the X gantry together. Swapping them out could solve the problem.
How to Fix Inconsistent Extrusion in 3D Printer
Inconsistent extrusion is a process where either too little or too much filament is extruded from the 3D printers hot end. It doesn’t happen frequently but when it happens, it’s in the form of blobs in filament or missed layers.
There are quite a lot of issues but with possible solutions as well. We will be discussing both of these down below.
The issue of partially clogged nozzles is one of the issues. This issue can be fixed in many ways. You can install a good filament filter and use a 3D printer cleaning filament.
Other than that, the nozzle can be replaced as well. The issue of extruder gears slipping can be fixed by cleaning the filament and making sure that the spring lever isn’t broken.
Rather than sticking with the plastic stock extruder, upgrading to an all-metal extruder has positively changed the printing experience of several 3D printer users out there. Many would recommend that this is one of the first things you change in your 3D printer.
Another common issue is filament binding. It can be fixed by making a clear path for the filament to flow in the hot end.
You should also ensure that there is no knot on the filament roll. Heat creep is also amongst the issues. It can be fixed by making sure that the cooling fan at the hot end is clean and is working properly.
Reasons for shifting layers in 3D printing.
Dear friends, welcome! This article is devoted to the factors one way or another leading to displacement of layers in 3D printing. But before we start, let's remember a little theory about the stepper motor. This is important for a complete picture of what is happening.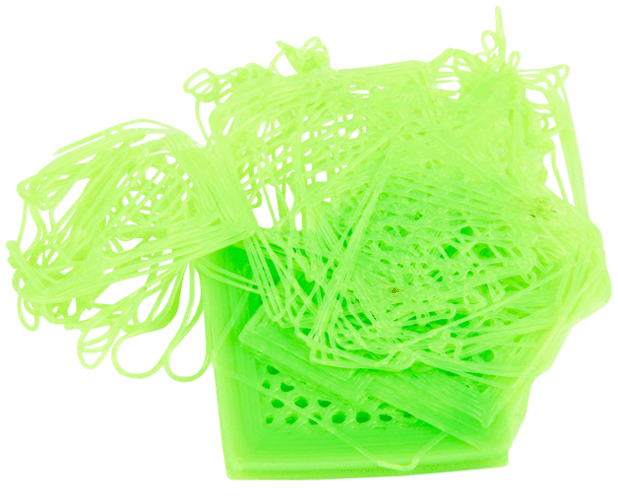
And so, the driver on the board supplies current to the motor winding, causing the rotor to lock. Sequential activation of the motor windings causes a discrete angular movement of the rotor, which we perceive as the rotation of the shaft. The shaft transmits rotation to the pulley, which turns into a linear movement of the belts. And they set in motion the kinematics of the printer.
Every motor has a torque. Different engine models have different torque. In simple terms, motor torque is expressed in terms of how much force it can withstand while the rotor remains in a fixed position due to the magnetic field. If the strength of the magnetic field is insufficient to hold the rotor, then it starts to rotate. As a result, cases where the motor + driver is to blame for the displacement of the layers are most often associated with the fact that the motor torque is insufficient to allow angular movement to occur, which leads to skipped steps. And since the driver sends current to the motor blindly (an encoder is needed for feedback), the printer does not know that there was a skip on the rotor.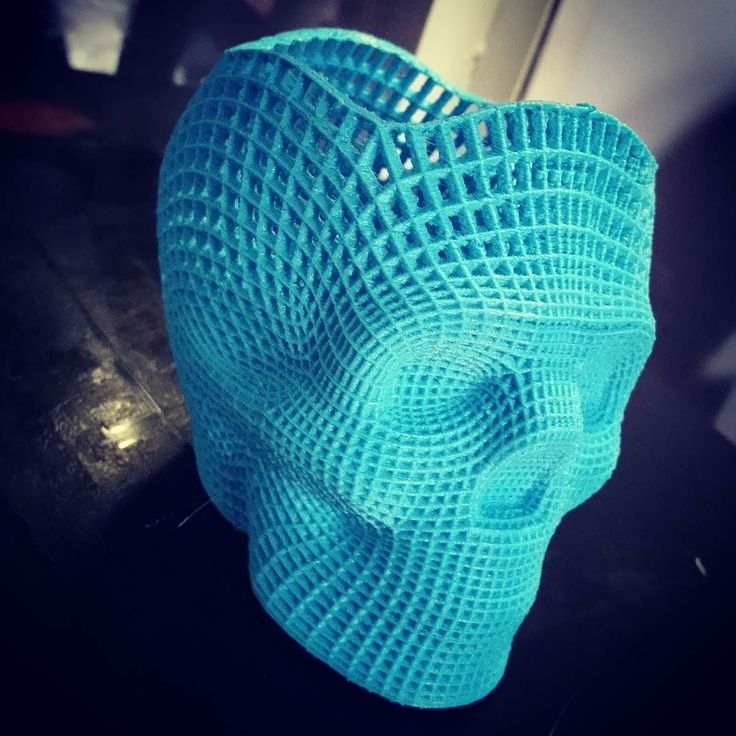 And consequently the shaft did not turn and the extruder did not reach the desired coordinate. And when we look at the print, for us it looks like an offset along one of the axes. By the way, for coreXY kinematics, the displacement occurs diagonally.
So for proper operation, the engine torque must overcome the total amount of factors opposing the rotation of the shaft in the form of friction, seizing, overheating of the motor, high accelerations, and so on. It is these factors that we will talk about.
1) Motor thermal offset. Due to the fact that the efficiency of no motor can be one hundred percent, part of the current that is supplied to the motor is converted into its heating. As the engine heats up, it loses torque. Therefore, the situation may look like this - you put the part to print, everything was printed remarkably for several hours, and suddenly a shift occurred. This may be due to the fact that the engine gradually warmed up and after a while its torque dropped so much that it could not overcome the total amount of resistance acting on it. Part of the company in the manufacture of engines are repelled by the standards of the national association of electrical manufacturers. abbreviated as NEMA (National Electrical Manufacturers Association). They have a range of temperature limits of 105/130/155/180 degrees. But this does not mean that all manufacturers strictly adhere to their temperature standards. The heating limit of cheap engines can be significantly lower. You can find on sale engines with an operating temperature not higher than 65 or even 50 degrees. Therefore, if possible, it is better to familiarize yourself with the technical specification of your engines (you can find the datasheet by the engine model) in order to understand above what temperature the torque will begin to decrease significantly. If there is no technical specification (or there is no engine model name), then you can play it safe and, for example, take a temperature of 50 degrees beyond which you should not go. To counteract overheating, a cooling radiator can be placed on the engine.
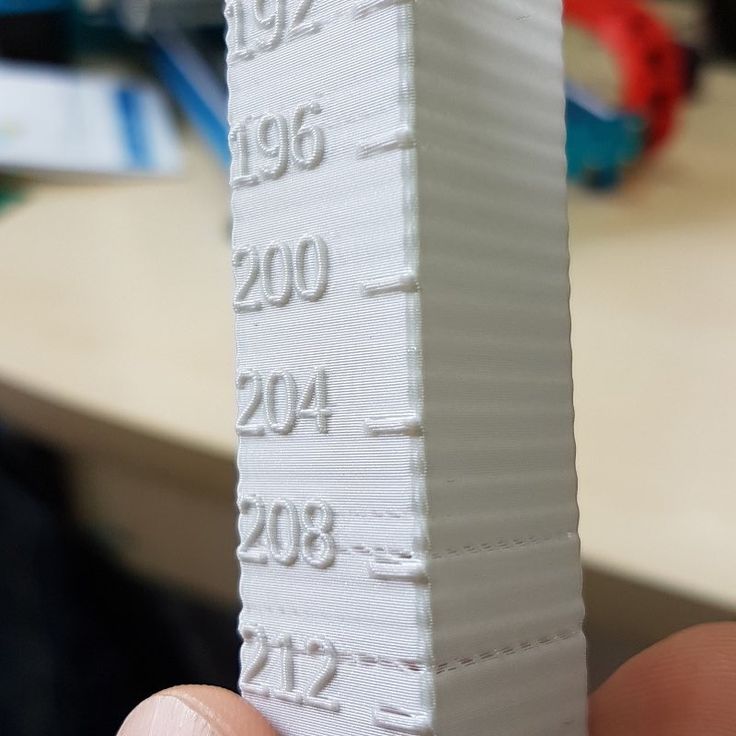 In completely problematic situations, an additional cooler can be put on the radiator. But this is in extremely desperate cases. Almost always, just installing a cooling radiator is enough. In case you still want to put a cooler on the engine, make sure that it does not blow heated air out of the print area. Otherwise, shrinkage may occur and the ensuing negative consequences in the form of delamination of the part, raising the edges, warping, and so on.
2) Driver overtemperature offset. Both motors and drivers heat up while the printer is running. The torque on the motor also drops due to overheating of the driver. I recommend that you always install cooling radiators + air cooling in the form of a large cooler for all drivers on the board at once.
By the way, the reason for the displacement of the layers can still be, if the current on the driver is not set correctly. The motor torque depends both on the capabilities of the motor itself and on the driver, as well as on the current set on it.
3) Displacement due to high accelerations. The working and idling during printing is as follows: first, from point A to point B, acceleration occurs, then it moves at maximum speed, then it slows down and stops at point B. Most of the torque goes to overcome the inertia of the moving nodes. The higher the acceleration and weight of the moving parts, the more torque must be applied. Of course, you can give simple advice about reducing acceleration, but this is not a way out of the situation. By the way, cheating by reducing acceleration, but leaving high speed is also not what you need to strive for. Because with low accelerations, but high speed, the printer will not be able to please with high-quality printing.
But if the engine's original factory torque is not high or there are weak drivers, then high accelerations cannot be set on such a printer. Do not forget that the Printer is a CNC machine and it is the person who sets the print modes in the laser that must understand the capabilities of his printer.
The conclusion here is the following - in order to avoid layer shifts, do not exceed the acceleration that the printer manufacturer sets by default.
If you are not aware of factory limitations, then it is better to experiment with accelerations as follows: you can place 2 small models at a great distance from each other and do several tests, along the way, monitor the printing process. With each new print in the slicer, you need to slightly increase the values \u200b\u200bof accelerations. At some point, the motors will not be able to work correctly and the layer will shift. Remember the parameters and in the future do not set more than 70-80% of the maximum possible acceleration. A small margin is definitely needed, because. do not forget that the motors during operation will heat up to operating temperature, slightly reducing the torque.
If you want to print at higher accelerations, then you should focus on what can limit them, namely: motors, drivers, quality of kinematics and rigidity of the printer frame. It is these 4 points that can limit the increase in accelerations. Which point is the weak link in the system depends on your printer and is found empirically by monitoring printing (with increasing accelerations).
By the way, some manufacturers underestimate the acceleration in the firmware itself and the printer will not exceed them, even if you change them in the slicer. If you have just such a printer, and you want to put acceleration higher. Then you need to reflash the board, setting higher acceleration values. I remind you that in order to flash the board, you must have the original firmware, which you can edit. But still, before flashing the board, I recommend that you consider whether everything is clear to you in this procedure. And even if everything is clear in the printer firmware, still think for what reason the manufacturer underestimated the acceleration. Maybe the problem is just that the very design of the printer with all its elements will not be able to withstand more than the restrictions that are laid down by the manufacturer.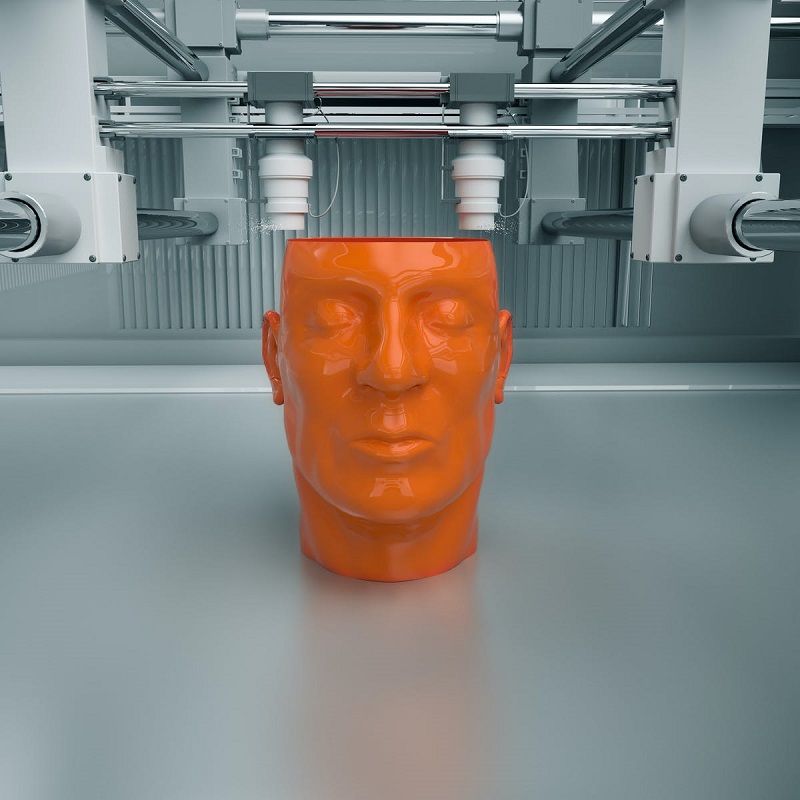 Perhaps for increased accelerations, you will have to not only reflash the printer, but, for example, install more powerful motors or take some other action. So think carefully about all your steps.
4) Layer displacement due to high speed. It is worth noting that the torque of most motors drops sharply at speeds above 200-2000 mm per second. Such a spread in speeds is associated with the quality of engine components + the quality of its assembly. Therefore, again, it is worth knowing the engine model and carefully familiarizing yourself with the technical specification and then starting from the factory specifications.
5) Misalignment due to tight movement or jamming of the kinematics. There are several options at this point. The problem may be due to dry friction in the guides. It can also be due to poorly fitted or assembled knots. After a while, the kinematics can get used and the resistance during movement will decrease. But if the assembly is of very low quality, then the kinematics will constantly go tight.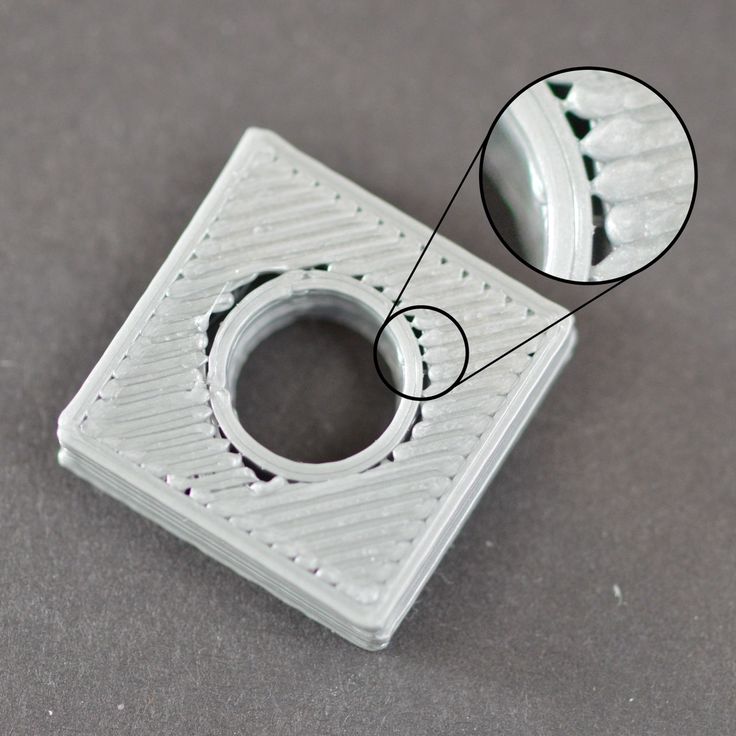 Also, tight kinematics can be associated not only with the quality of the assembly, but also with the quality of the parts themselves. If you assemble the printer on low-quality linear bearings and shafts or low-quality rail guides, then not only tight movement is possible, but also jamming, which has all the same consequences in the form of layer displacement.
What can be done? With the printer turned off, move the axes manually. They should walk smoothly and without jamming. Before this, you can also disconnect the motors from the board, since without power, but to the connected board, the motors can add resistance during the test. If something is tight or sticky, then you will have to dig deeper yourself. It can be: a) running dry, in the absence of lubrication. b) poorly assembled kinematics c) jamming of the guides d) rubbing of the belts against the sides of the pulleys e) low alignment of the bearings e) low perpendicularity of the guides in relation to each other and so on.
6) Offset due to mass buildup of the part itself when printed. This applies to printers, where one of the axes moves the table on which the part is printed. Usually such kinematics is called "drygostol". And the minus of such kinematics is that the weight of the table gradually increases during printing. If, for example, a part is printed that should weigh 1 kg, then this mass will be added to the table in the last hours of its printing. The result is a large mass, which has a large inertia, which means that the motor torque must also be large. And do not forget that with the constantly growing mass of the table, the engines also heat up. Therefore, when printing large parts, it is better to set moderate accelerations if you are not sure about your printer. After all, the displacement of layers in such cases occurs precisely after the printer prints a sufficiently large part of the part, until the mass of the part together with the table becomes critical.
7) Irrational selection of motor and driver. There are two kinds of problem here. It may be that you have installed a powerful driver and a weak motor. In this case, the motor will constantly overheat. I met such a problem with the TMC2208 and TMC2209 drivers + motors shorter than 46 mm. It may also be that you have installed a powerful motor, but a weak driver. For example, the LV8729 driver, although quiet, and the short motor does not overheat, but it is quite difficult to get high accelerations on it. Therefore, it is worth familiarizing yourself with the characteristics of both motors and drivers. Also an important point is the Z-axis motor and the plastic feed is usually a little weaker. Sometimes the drivers on them may also be different. Don't forget about this when you put accelerations in slicers.
So we have already gone through 7 points that can lead to displacement of the layers. And here I want to draw a dividing line from the last four. The section is that to solve all the problems described above, you can put an encoder and it will add missed steps. But the problems that will be described below - the encoder will not be able to influence them, since unwanted changes in coordinates will not occur due to motors.
8) Displacement due to the fact that one or more nodes in the system are weakened. In this case, the displacement of the layers does not look like a sharp change in coordinates, but "smoothly", sometimes with a return to the original coordinates. In this case, it is necessary to check the tightness of all threaded connections of the axis along which the displacement occurs.
9) Pulley slip offset on motor. In this case, you just need to tighten the screw on it.
10) Offset at low belt tension. If you are not sure about the tension, then you can watch the belt work in the area of \u200b\u200bit contact with the pulley and if you see how the belt deviates from its u-shaped path and partially loses engagement with the pulley, then the belt can be tightened a little. But don't overdo it. Otherwise, the kinematics will start to move tightly and instead of slipping the belt, the steps will be skipped on the engine, which again will lead to a displacement of the layer.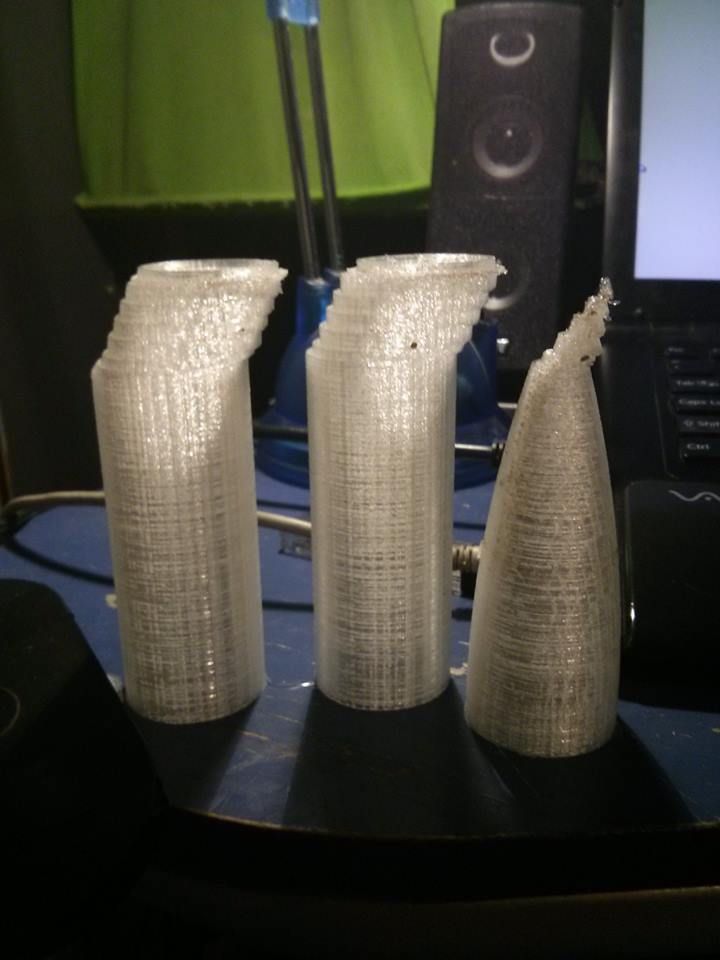
11) Z-axis screw runout. This factor is not considered layer offset in 3D printing, because there is a separate term for it - "wobbling" (wobbling). But beginner 3D lovers may not be aware and look for a problem in layer displacement, so I added this item as well as this one to the article. Wobling is expressed in a repeating small pattern on the part. The drawing looks like a slight shift to the side and returning it back.
The solution to the problem is to increase the alignment accuracy of the motor along the Z axis and the screw on it. You can only increase the alignment accuracy after you find out the cause of the poor alignment. The reason may be due to the poor build quality of the printer and / or the poor quality of the screw, as well as a low-quality coupling (it connects the motor and the screw).
So this was a list of the main reasons why layer shifts can occur, but it is worth emphasizing that the problem can be either in one thing or in the sum of factors.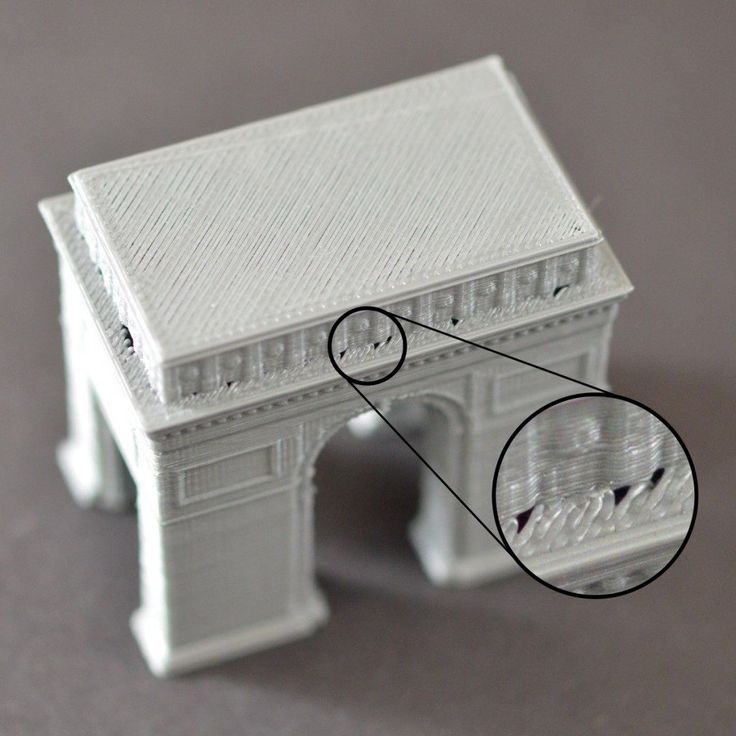 It can be, for example, overheating of motors + tight kinematics. Or maybe just badly tensioned belts.
Thank you for your attention, I hope the material was useful, I wish you all the best!
Possibilities of 3D printing: art, fashion, medicine
Sculpture by Monika Gorchikova (Czech Republic)
Expressive sculptures by contemporary artists, dresses for fashion shows, architectural models and parts of the human body - a short guide on how to use 3D printing was compiled by Artyom Dezhurko.
3D printing was invented by American Chuck Hull in 1984. Modern 3D printers are capable of printing large objects, up to a car body; and use different printing techniques (stereolithography invented by Chuck Hull is just one of them). However, whatever the technique may be, the essence is the same: the printer creates an object by building up the material in layers. Thus, you can create an arbitrarily complex shape. 3D printers print from different materials: plastic, cellulose, ceramics, metals, sugar.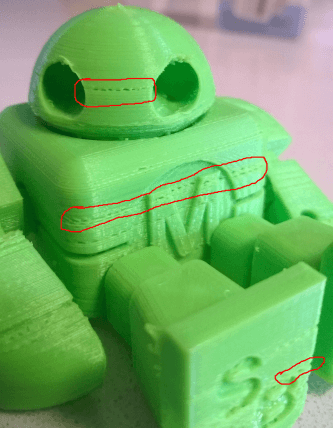
This material is an illustrated overview of how 3D printing is used today in various fields: art, architecture, technology, fashion, medicine.
Richard DuPont, USA
Nick Erwink, USA
"Princess", Eric van Straten, Netherlands
A modern 3D printer prints layers so thin that they can no longer be seen with the naked eye. Therefore, sculptors love it: 3D printing is the same casting, but technologically simplified and allowing endless replication of the object. Sculptures with her help are very different: from photographically accurate images of famous football players to the vicious postmodern statuettes of Eric van Straten.
Michael Hansmeyer and Benjamin Dillenburger. Digital Grotesque, 2015
Study paper by Andy Zheng and Christina Eromenok at RPI School of Architecture
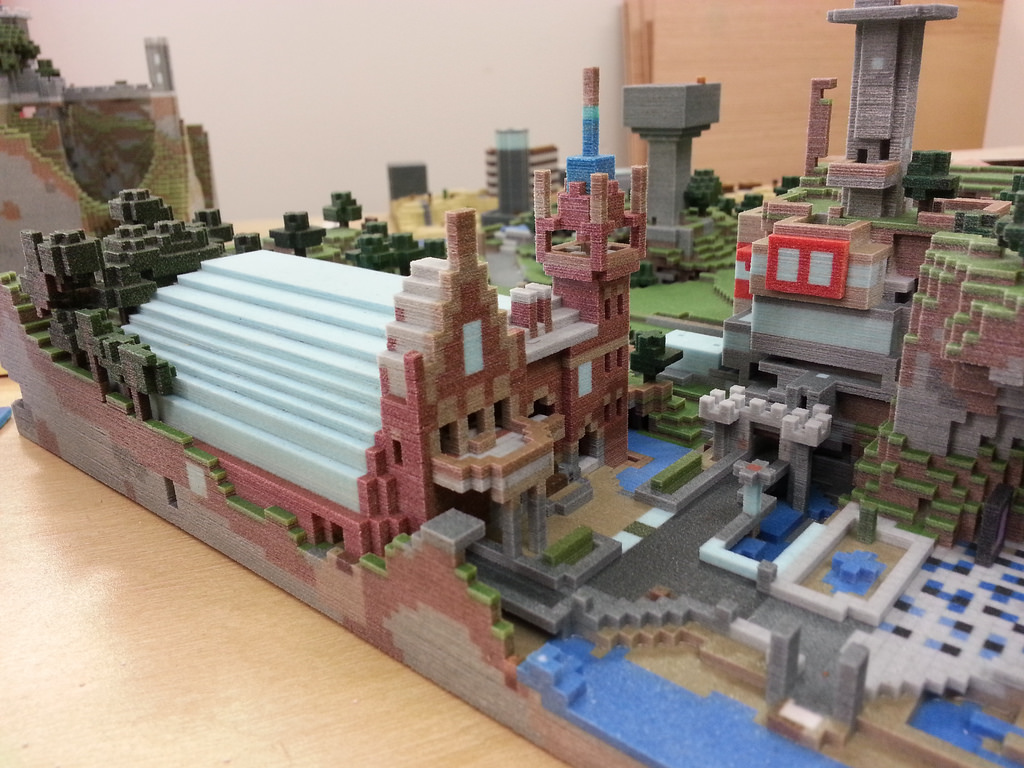
PTW Architects. Model of the Beijing National Water Sports Center, 2007
Most often, 3D printing is used for rapid prototyping - creating models of mechanisms and, especially often, architectural models. In addition, now 3D printers have begun to be used to produce large parts from which prefabricated houses are created. The Chinese company Winsun is experimenting with this technology.
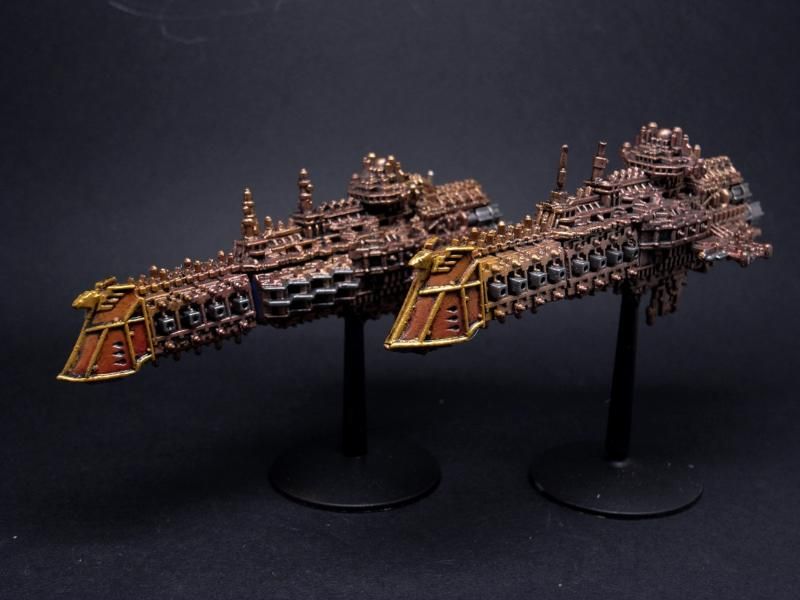
In the automotive industry, 3D printing scale model production is widespread and seems to have completely supplanted the old plasticine sculpting technique. A model of James Bond's car from the movie "Skyfall" was printed on a 3D printer. And in 2010, a prototype of the Urbee car was created, the entire body of which was printed on a 3D printer.
ideas2cycles, Finland, The Fixer, 2012
Several bicycle frames have been created using a 3D printer (and even an entire Airbike bike - developed by EADS), but in their case there is no talk of mass production yet. More promising is the printing of couplings made of durable plastic, with the help of which in small "garage" bicycle workshops it is possible to assemble frames from factory metal tubes.
Gaudi chair (Bram Genin)
A mold is printed on a 3D printer, which is then used to cast the supporting structure of the chair.
Hot Pop Factory
Sculpture of Charles and Ray Eames DSW chairs scanned and 3D printed.
LINK system
Christian Sjöström, Sweden, 2015.
Prototype Node
Modeling in Grasshopper. Charles Freed, UK, 2015.
3D printed as whole furniture (e.g. Gaudi chairs, designed by Bram Genen, 2009) and piece by piece (designed by Benjamin Vermeulen), as well as connections with which prefabricated furniture can be assembled without using bolts and nuts. Such joints have been made before, but 3D printing has greatly simplified their production.
Noah Raviv. Hard copy collection. 2014
Noah Raviv. Hard copy collection. 2014
Chromat. Formula 15 collection. Spring-summer 2015
Michael Schmidt, Francis Bitonti. Dita Von Teese dress. Laser printing (SLS). 2013
Iris van Herpen, Julia Koerner, Voltage Show. Print materialize. 2013
Iris van Herpen. Crystallization Collection. Summer 2010
Iris van Herpen. Autumn-Winter 2013-14
Elements can be printed on a 3D printer, from which plastic fabric is then woven. Either from this fabric, or directly from plastic, dresses, bathing suits, shoes are created. Iris van Herpen has released several collections of 3D printed dresses and shoes. United Nude prints shoes designed by famous designers and architects: Zaha Hadid, Rem Koolhaas, Ross Lovegrove. But the most famous piece of clothing created using this technology is Dita Von Teese's mesh nylon dress.
#Cast is a custom tire consisting of the letters that the patient most often typed on Twitter. Manufacturer FATHOM, designer Eva DeCapri (USA). 2014
Prosthesis on the model of the patient's skull. Photo from Walter Reed Hospital in Washington
Arm splint. The developers are UCLA School of Architecture and Urban Planning students Nicholas Solakian, Peter Nguyen and Derek Buell. 2013
Medicine is the most promising application for 3D printing. By scanning the surface of the body, it is possible to create fixation bandages that exactly match the anatomy of a particular patient, “custom” prostheses and implants that reproduce lost parts of the skeleton. One unfortunate man who lost half of his face had the missing half printed on a 3D printer. There is no photo of this person here, but you can easily find it if you wish.
Printer self-reproduction
There are printers that can print parts of themselves. Undoubtedly, in the coming years they will learn to breed.
Growing donor organs
3D printing technologies for living tissues and organs are being developed. Living cells are used as the material, with which the printer "seeds" the matrix.
The text was first published in the online magazine of the Rizoma Design School, edited by Tatyana Bakina.
Artem Dezhurko
Art and design historian, exhibition consultant and curator, architectural journalist.
More
Fashion Architecture
Field of study
Fashion field at the HSE School of Design
HSE School of Design is a meeting place for the most talented students in Moscow and Russia who see their careers in the fashion industry.