Face scanning for 3d printing
How to Make a 3D Printed Selfie With Your Phone
(Image credit: Tom's Hardware)If you’ve ever been interested in 3D scanning, you might be surprised to find out that you may already have a 3D scanner in your pocket. Using the front-facing TrueDepth camera on the iPhone X and newer (sadly, Android is not supported), you can create a 3D scan of your face, export it as a 3D model, and create a copy using a 3D printer. In this article, we’ll go over the process of how to create a 3D selfie using your phone and how to 3D print it. No 3D sculpting experience is required, as the app we’ll be using creates a fully printable model with no modifications required.
We’ll be using the iPhone app FaceApp by Bellus3D for this article. The app is free to download and use, and you can create unlimited scans with it for free. The app costs $0.99 to export a 3D model for printing, but you can take as many scans as you want before printing to get the hang of the scanning process.
What You’ll Need
- 3D Printer: In this article, we’ll be using the Anycubic Vyper FDM 3D printer, one of the best 3D printers you can buy in 2021.
- Filament: For quickly printing models on the Vyper, PLA is a great material choice. We’ll be using Begonova brand PLA for this article.
- Slicer App: Ultimaker Cura is the slicer app we’ll be using with the Anycubic Vyper, but your slicer may be different depending on your printer. Most of the steps are similar for all slicers, so you should be able to follow along regardless of what you’re using.
- iPhone: Most 3D scanning apps require a LiDAR sensor (like the front-facing TrueDepth camera on the iPhone X and later), so you’ll want to check to make sure this is a feature you have on your phone. We’ll be using an iPhone 11 Pro in this article, but the app we’re using is compatible with iPhone X and later.
- Bellus3D FaceApp: There are many 3D scanning apps you can use to make a 3D model of your face, and most use a similar process.
 We’re going to use the Bellus3D FaceApp for iOS which gives fast and easy results.
 - SD Card: The Anycubic Vyper requires an SD card to transfer sliced files from your computer to your printer, so you’ll want to make sure you have one on hand. If your printer has Wi-Fi, however, you can also transfer your STL file that way.
Getting Started
(Image credit: bellus3d.com)Before we get started, you’ll need to download the FaceApp scanning app on your iPhone, as well as the slicer app for your 3D printer.
1. Download the FaceApp scanning app from the iOS App Store . This is a free app to download and use, so you can experiment with the software without buying any scans or subscriptions.
2. Download the slicer software for your 3D printer. We’ll be using Ultimaker Cura, a free app, with the Anycubic Vyper but other slicer apps for FDM 3D printers such as PrusaSlicer, Simplify3D, FlashPrint and others will have similar workflows.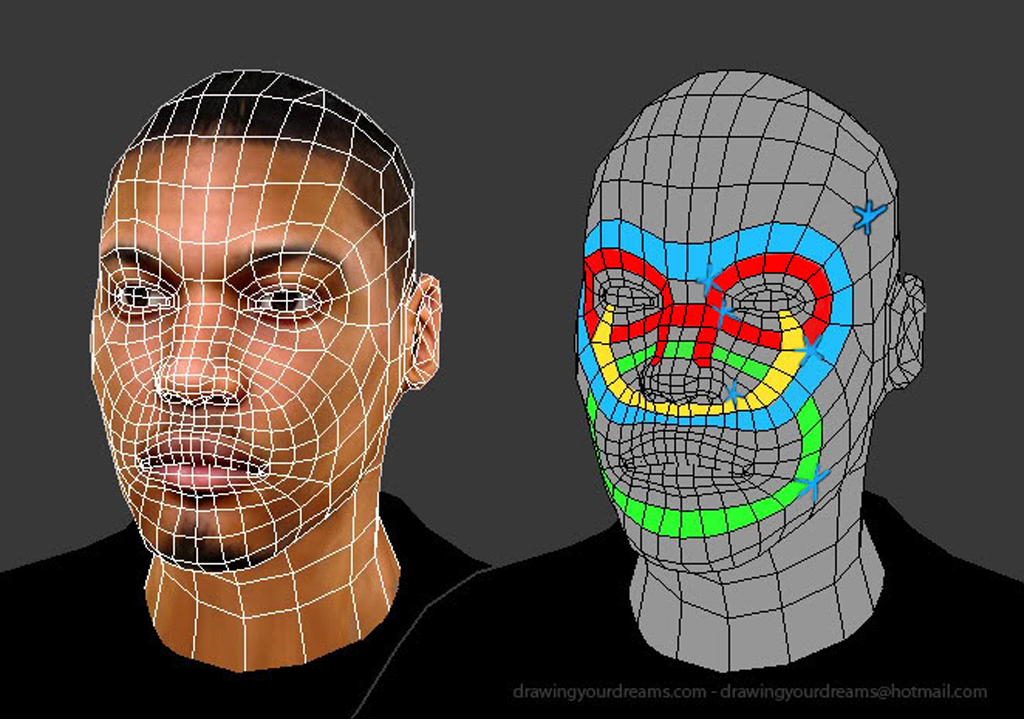
Part 1: Create a 3D Selfie Using Bellus3D FaceApp
(Image credit: Bellus3D)The first part of this project is going to be creating a 3D model of your head to 3D print. The model we create needs to be 3D printable, so we’re going to make a full model of your head and ensure that it is in a file format that your 3D printing software can use after exporting it. By the end of this step, you should have a 3D model that’s ready to use.
1. Open Bellus3D FaceApp on your iPhone and take note of the different scan options. FaceApp offers three separate modes for scanning: Face, Face + Neck, and Full Head.
2. Select the Full Head option to create a 3D model that can be printed.
(Image credit: Bellus3D)3. Follow the prompts from FaceApp and rotate your head to the sides, up, and down to allow the app to fully capture your face. FaceApp will take this scan data and automatically generate a mesh of your face while extending the side edges to create the back of your head.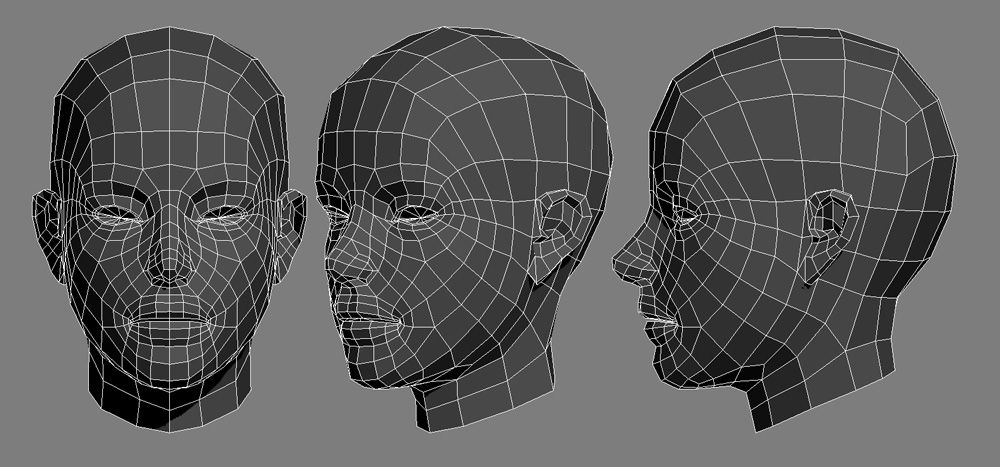
Image 1 of 3
(Image credit: Tom's Hardware)(Image credit: Tom's Hardware)(Image credit: Tom's Hardware)4. Select ‘Light’ then ‘Surface’ once the scan has finished to see the mesh of your 3D scan. The mesh is the actual geometry of the model without the colored texture wrapped around it. This is what we’ll be 3D printing, so we want to make sure it looks satisfactory before continuing. If you’re not happy with the mesh, you can redo the scan until you have one you’re satisfied with.
(Image credit: Tom's Hardware)5. Unlock the model for 3D printing by selecting ‘Unlock’. Once unlocked, the scan can be shared as a 3D model or just a link to see the scan in 3D.
(Image credit: Tom's Hardware)6. Toggle the Watertight setting to create a solid 3D mesh. This will create a solid base for your model, which allows it to be 3D printed.
7. Select HD for mesh resolution to create a high resolution mesh.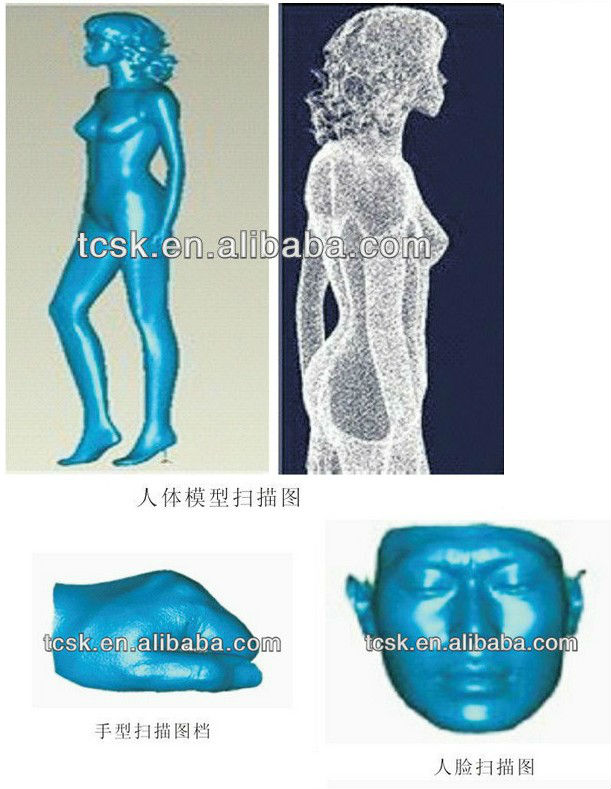 This will have more detail at the expense of a slightly higher file size, but it will result in a sharper 3D model.
8. Select export STL file to export a 3D printable file. Once exported, this file can be loaded into your slicer app to prepare for 3D printing.
Part 2: Preparing the 3D Scan for 3D Printing
In this step, we’ll be creating a 3D printable file from our 3D scan. If this is your first time printing a 3D model, you can learn more about the process in our guide to making your first 3D print from an .STL. Once exported from FaceApp, the 3D scan is ready to be sent to your slicer app to prepare it for 3D printing. The model itself will export from the app as watertight (not requiring any holes to be filled), so no additional sculpting is required.
(Image credit: Ultimaker)1. Import the 3D Scan .STL file by dragging it into the Cura workspace. Notice that the model imports at full size (the size of your actual head), so we’ll need to resize and angle it before printing.
2. Scale the model so it fits entirely inside the build volume of the 3D printer. We scaled this model down to 35% for this article, but you can make it bigger or smaller.
3. Rotate the model to reduce the amount of support material generated. By rotating the model on the Y axis so it’s facing upwards, the amount of support material generated underneath the eyes and nose is minimized. Rotating about 45 degrees should give the best results without making the model unnecessarily difficult to print.
(Image credit: Ultimaker)4. Slice the model to preview the full toolpath before printing. You’ll want to make sure you have selected ‘Supports’ to generate support material before printing. You can see the difference in amount of support material generated between the original model and the rotated model, which results in a faster, cleaner print.
Image 1 of 2
(Image credit: Ultimaker)(Image credit: Ultimaker)5.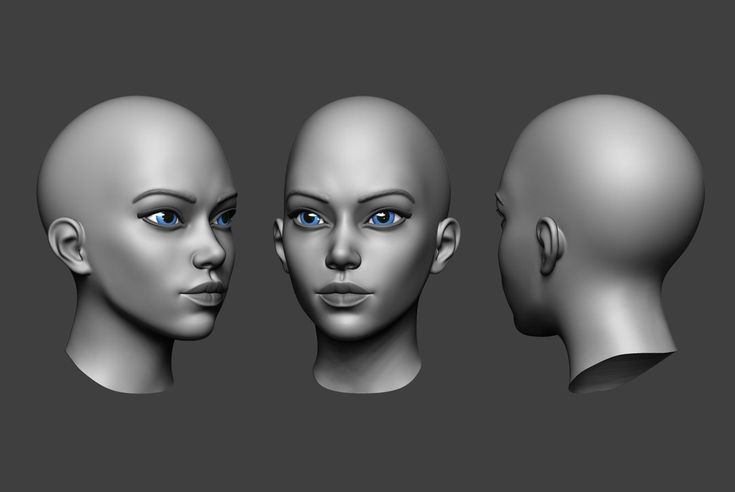 Examine the toolpath to check for any issues before printing. This model was sliced using the default slicer app settings included with the Anycubic Vyper, with only some minor changes made to speed up the print.
6. Save and export the model to the SD card once it has been sliced and prepared for printing. Once this step is complete, your 3D scan is fully prepared for 3D printing.
Part 3: Printing the 3D Selfie
Once the model has been sliced and is ready for export, it’s time to transfer the file to the printer and begin the printing process. In this step, we’ll go over what’s required to load the model in the printer and start the print. These steps are specific to the Anycubic Vyper 3D printer, but most FDM 3D printers will be prepared in a similar fashion.
1. Load the PLA filament into the printer and make sure the bed has been properly calibrated. Properly calibrating the bed of the printer is a critical step of the 3D printing process, and you can read about the process in more detail in our guide to printing your first model.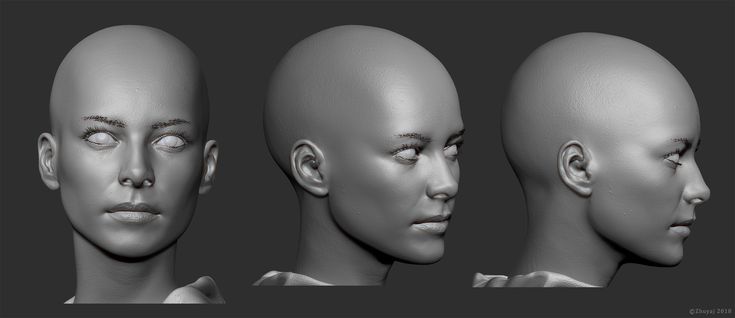
2. Insert the SD card into the printer and select the exported model to begin the printing process. At 35% of life size, this print took five hours and 26 minutes to complete.
(Image credit: Tom's Hardware)3. Remove the model from the bed once the print has completed. On the Anycubic Vyper, this is easily accomplished by flexing the textured platform and allowing the part to easily detach.
(Image credit: Tom's Hardware)Part 4: Removing Support Material and Final Steps
In the final step of this article, we’ll remove the support material from this print and prepare it for display.
1. Remove the support material from the model while being careful not to damage the surface of the model or your hands. The support material should detach from the surface of the model without leaving any marks or defects.
Image 1 of 2
(Image credit: Tom's Hardware)(Image credit: Tom's Hardware)2.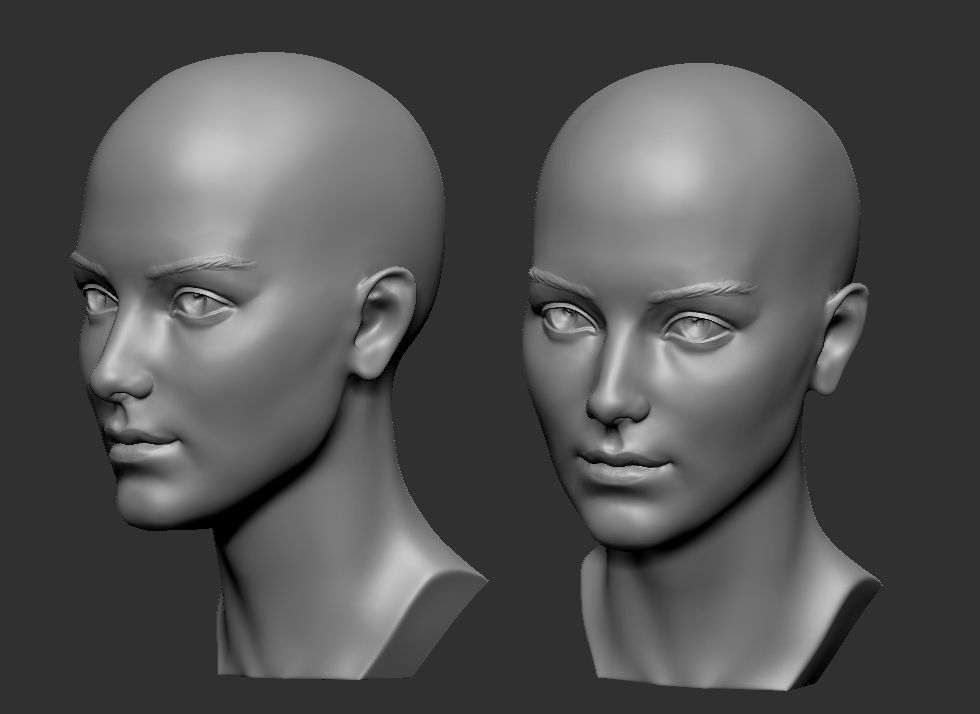 Check the model for any defects or areas that didn’t print correctly. At this point, your 3D selfie is complete and ready for display.
Once the part is finished, you will have successfully created a 3D selfie of yourself using a 3D scanner app and a 3D printer. You can take this idea even further by using this 3D selfie as part of a chess piece, creating a custom bobble-head for your friends, or making a family portrait by scanning your family and printing their 3D selfies.
(Image credit: Tom's Hardware)Andrew Sink first used a 3D printer in 2012, and has been enthusiastically involved in the 3D printing industry ever since. Having printed everything from a scan of his own brain to a peanut butter and jelly sandwich, he continues to dive ever more deeply into the endless applications of additive technology. He is always working on new experiments, designs, and reviews and sharing his results on Tom's Hardware, YouTube, and more.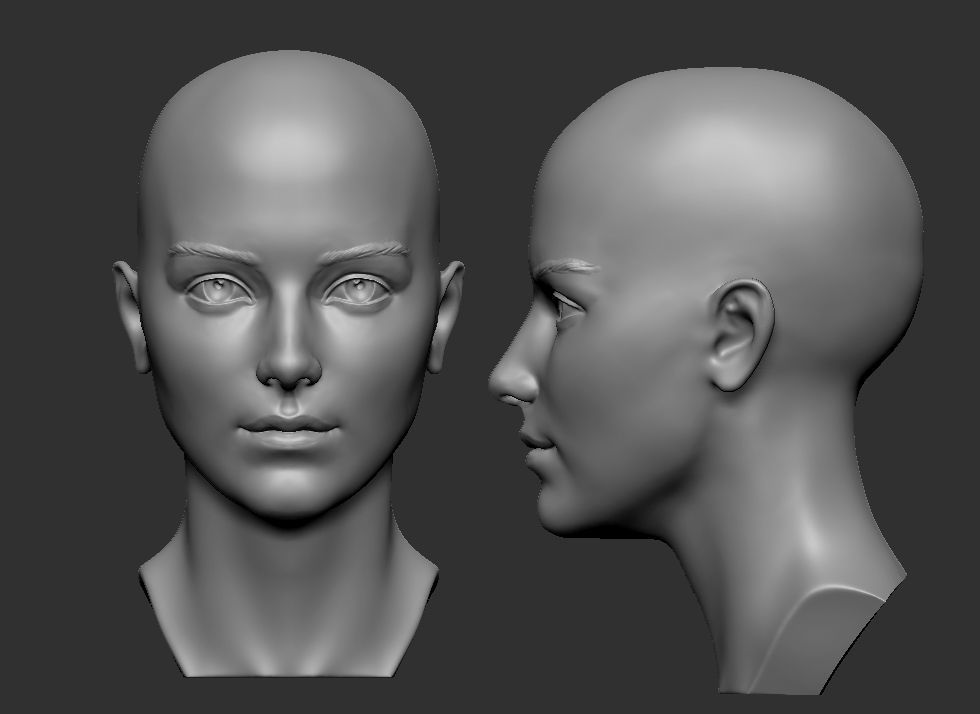
Topics
3D Printing
A 3D Printed Selfie – What It Is and How to Make One
3D Insider is ad supported and earns money from clicks, commissions from sales, and other ways.
Turning your phone camera to your face and taking a photo – a selfie – is so 2010. It’s now 2021, so it’s time to add a new dimension to your selfie game.
There are now various online services that can make a “3D printed selfie” for you. What exactly is a 3D printed selfie and how is it made? Can you make one yourself if you own a 3D printer?
What is a 3D printed selfie?
In a nutshell, a 3D printed selfie is simply a miniature 3D model of yourself. It can be a reproduction of just your face or an entire body model. Of course, you can also make a 3D model of another person – the word “selfie” is only being used in this context to make the concept easier to market.
3D printed selfies are products of the combined technologies of 3D scanning and 3D printing. They have become quite popular in the last couple of years as personalized gifts, mementos, or souvenirs for guests at events.
Making your own 3D printed selfie
If you already own and use a 3D printer, then you have almost all the hardware you will need to come up with a 3D printed selfie. The only question now is how to transfer a human face into a digital 3D modeling platform.
Scanning your face
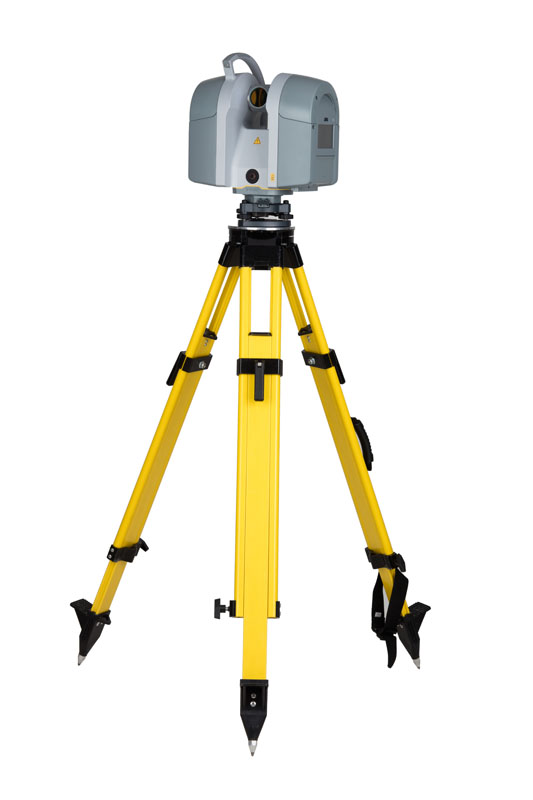
The first step in making a 3D printed selfie is making a 3D scan of your face or your subject. There are two ways to do this – using a face scanning app on a smartphone, or by an actual commercial 3D face scanner.
If you’re just doing this for fun, then downloading a free face scanning app will be a lot more practical. The most common recommendations are Bellus3D Face App for iOS and Sony 3D Creator for Android. If you have an iPhone with a LiDAR sensor, you can also consider the much more powerful Scandy Pro 3D Scanner.
Companies that offer 3D printed selfies as a product will likely use standalone 3D scanners.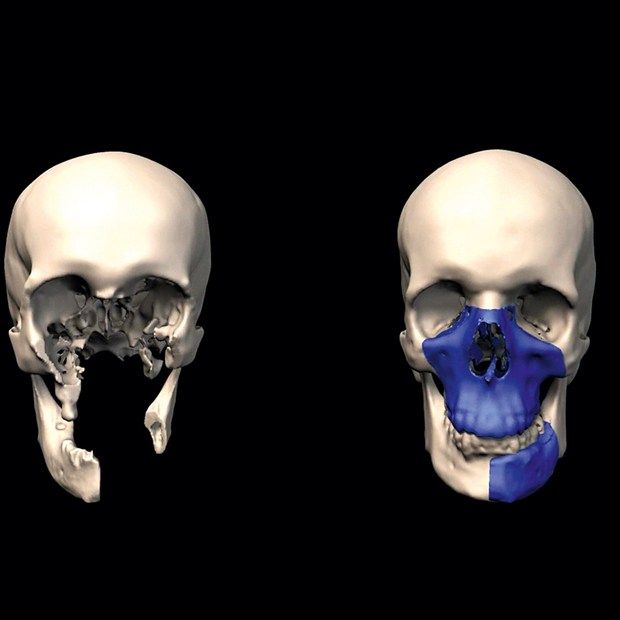 Compact 3D scanners can be used for facial scanning. Full-body 3D scanning, on the other hand, is typically done using an array of sensors that scan different parts of the human body simultaneously.
If this is your first time doing a face scan, you will likely need to experiment with your app’s settings to get a good result. You will want to make sure that the 3D model is watertight, as it cannot be 3D printed otherwise. Set the resolution of the 3D model to the highest possible value. When it comes to face scans, you will want the model to be as detailed as possible.
Once the results look good, export the file as an STL file. You will then have to open this using a slicer software.
Preparation for 3D printing
With your face now fully modeled in 3D, you will then need to prepare the file for 3D printing. This is done using slicer software. There are lots of equally good software options out there. Good recommendations include Simplify 3D and Ultimaker Cura. Prusa Slicer is also worth considering if you’re looking for a slicer that is free and open-source.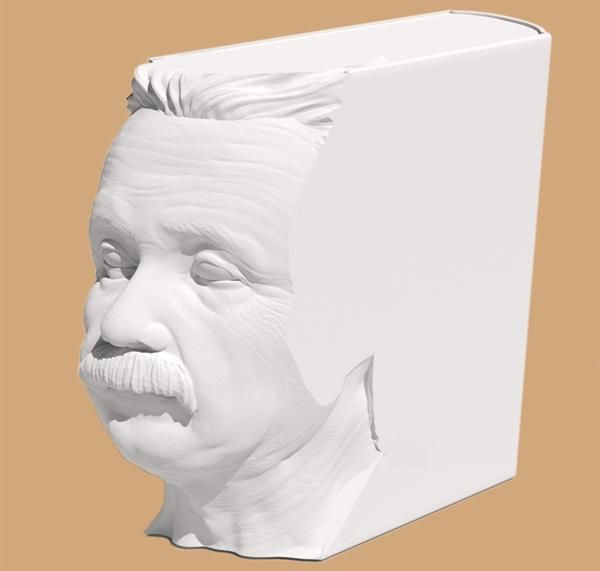
If you have exported your model as an STL file, it should be immediately compatible with your slier. Your model should already be watertight at this stage. If not, you can fix this easily in the slicer.
You will then want to scale down the model to fit your 3D printer and to change its orientation to reduce the number of supports. The best way to do this is to orient the model so that the face of the model is facing away from the build plate. This means that the supports will be attached to the back of the head, which is much less visible.
You should be fine with the default settings for infill, layer thickness, and wall thickness. If you’re making a “miniature” figure, then you can go ahead and set 100% infill.
If you have done a final inspection, then save and export the sliced model to an SD card or directly to your printer via wired or wireless connection.
3D printing and finishing
Before getting started with the actual 3D printing, make sure to do the usual maintenance work first. The most important things to do are to level the print bed, make sure that the nozzle is clean, and use filament that has already been dehydrated. 3D printed selfies are very detailed and have little room for error.
A 3D printed selfie can take between 5 to 12 hours to print depending on the size and level of detail. Most people use PLA for 3D printed selfies as it is much easier to work with and can be printed at higher speeds.
After 3D printing, you have the option of sanding, polishing, or painting the 3D printed selfie as you see fit. The amount of work that will go into post-processing will largely depend on the size of the 3D printed selfie and the level of detail you’re going for.
3D printed selfie services
Do you want to have a 3D printed selfie but can’t be bothered to make one yourself? 3D printed selfies are so popular nowadays that several companies offer them as a service. You can either send in a 2D photo of your face for digital reconstruction or have your body 3D scanned using one of their professional full-body scanners.
Shapify is one of the more popular companies in this market. The approach of Shapify is multi-pronged. Enterprise customers can purchase the Shapify Artec booth – a full-body 3D scanning booth that can scan a person in 12 seconds and produce a detailed 3D model right after. Shapify also sells a handheld version of this 3D scanner, called the Eva.
Shapify also offers the option of sending in your own 3D scan so they can do the printing for you. They have a free software download on their website. The only caveat is that you will need a Microsoft Kinect camera to use the software.
My 3D Worlds further simplifies the process by only requiring customers to send in a 2D photo of any person they want to be modeled. Using the picture as a reference, the company constructs digital models which then have to be approved by the customer before printing.
Although this business model adds a lot of work for the service provider, it allows My 3D Worlds to cast a larger net over their potential market.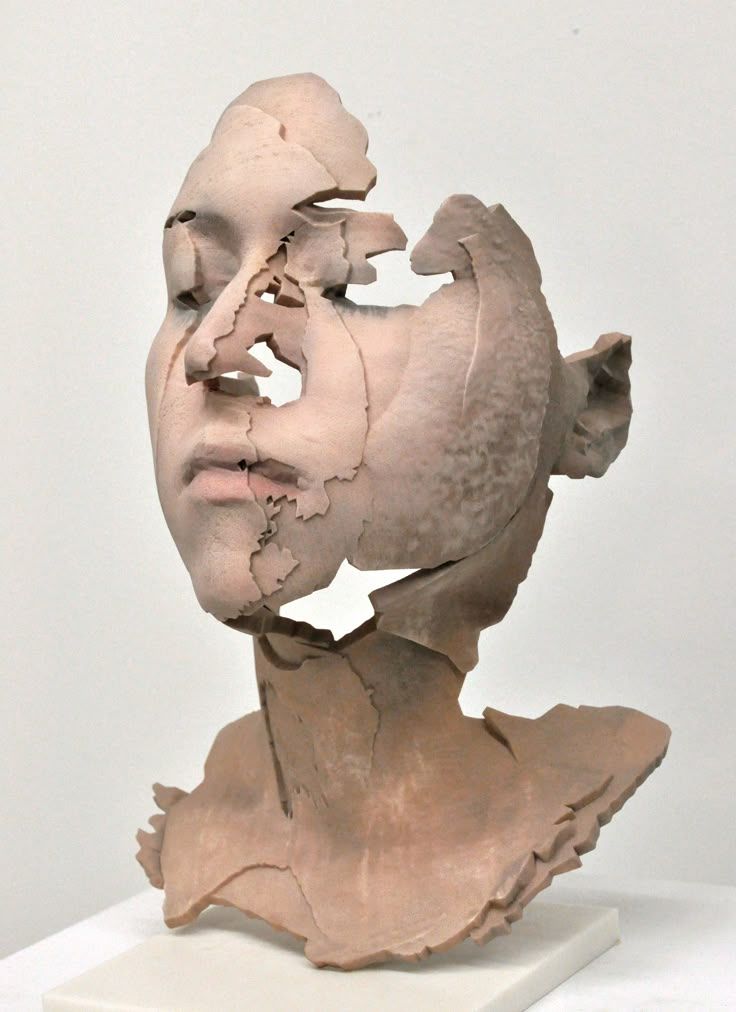 After all, convenience is an essential factor for customers nowadays.
Few other businesses are offering similar services such as Holodeck 3D Studios, Reconstruct Me, and Twindom. Again, the services these companies offer can range from on-site full-body 3D scanning to 3D reconstruction from standard 2D photos.
Most 3D printed selfie services that can produce an output within a few minutes do so by using gypsum as the base material for 3D printing. Using binder jetting technology, a full-color gypsum reproduction can be made in around 5 to 10 minutes. The biggest downside of gypsum is that it’s a fairly fragile material – think of it like a porcelain figurine but still much more brittle and prone to cracking.
Final thoughts
It’s easy to see the appeal of a 3D printed selfie, as it’s essentially a miniature figure of yourself. 3D printed selfies make excellent keepsakes and will certainly catch the attention of people in any event.
If you’re curious about 3D printed selfies and have a 3D printer at home, then you can take a stab at making your own.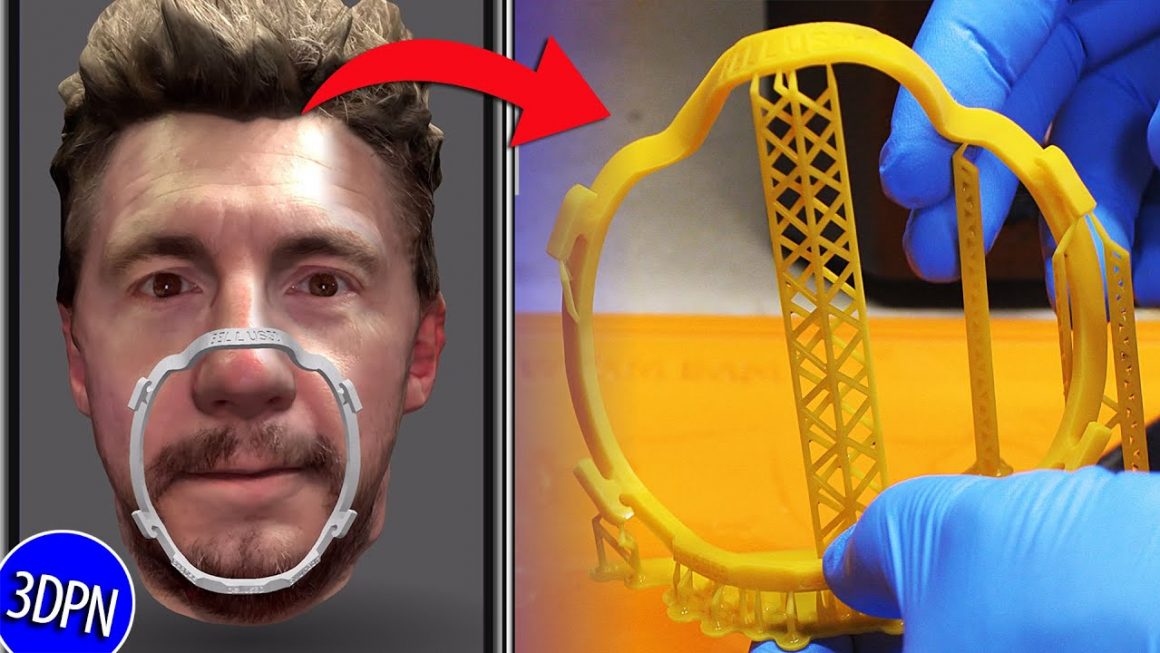 The great thing about modern 3D scanning is that you can do it using just your phone. Professional 3D scanning equipment, on the other hand, is so much more precise and faster to use.
3D printed selfies are huge businesses now. Try and get in touch with a company that’s near you to see what they can come up with.
Warning; 3D printers should never be left unattended. They can pose a firesafety hazard.
how to quickly create prostheses and other unique products
Reverse engineering
Implementation stories
Medicine
Author: Aleksey Chekhovich
Author: Aleksey Chekhovich
Video: Real-time 3D Face Scan | Order a free test scan | 3D scanner helps victims | 3D scanning of the human body in great detail
Creating prostheses using 3D technologies: the era of new possibilities
As technology improves and becomes more accessible, there are new opportunities to solve the most complex medical problems.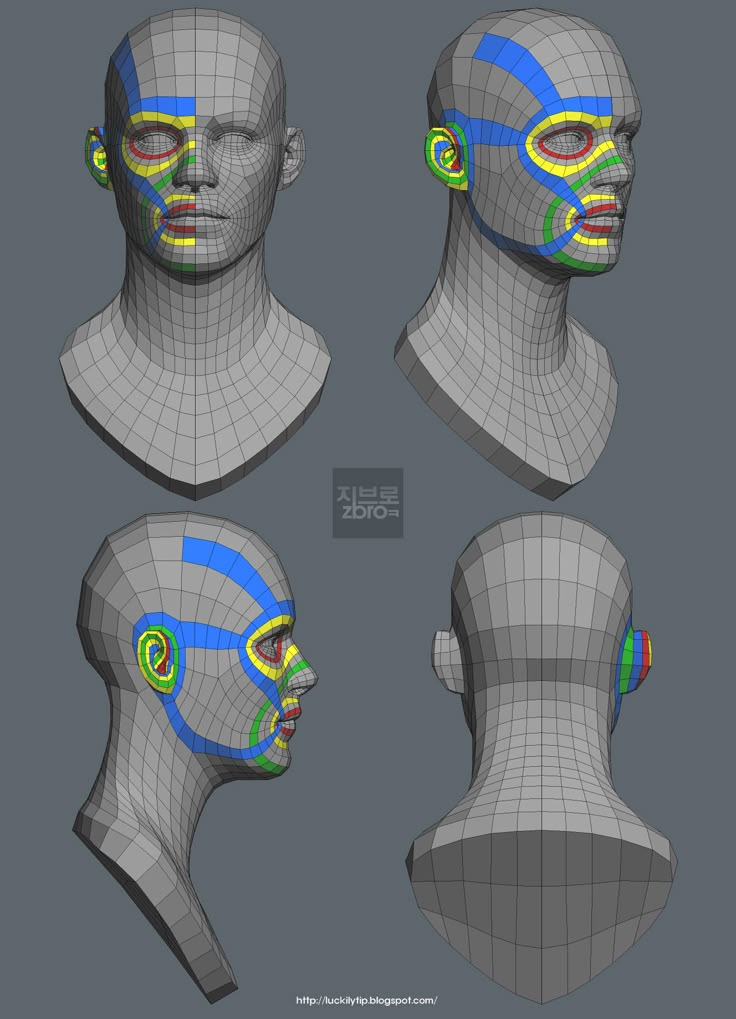 A team of researchers from the company Chabloz Orthopedie (France) managed to create a unique and truly revolutionary prosthesis.
Chabloz Orthopédie worked with Denis Gauthier, who had his forearm amputated. First, the experts performed a 3D scan of the patient's healthy arm using a peel 3d scanner to obtain its mirror image. This was done so that the designed product ideally repeated the proportions of a healthy limb. The rest of the amputated arm was also scanned to achieve a comfortable and ergonomic fit for the prosthesis.
Denis Gaultier with finished prosthesis
The team then proceeded to design a CAD model and develop a myoelectric prosthesis. Batteries, sensor cables and an artificial hand were integrated with the fabricated forearm. The prosthesis itself was designed in CAD and printed on a 3D printer. HP Jet Fusion technology was used to print various components of the forearm. After manufacturing, all parts were finished and painted.
The use of 3D scanning and 3D printing guarantees not only the correct fit of the fixture, but also gives complete freedom of movement.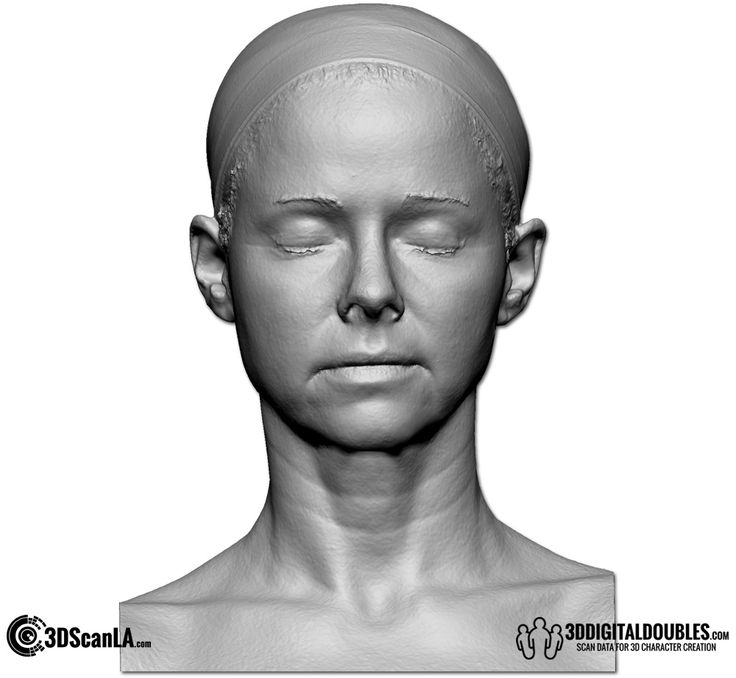 A new approach to prosthesis design allows professionals to develop solutions that are lightweight and highly customizable. Did you know that 3D printed parts are 20% lighter than their carbon or fiberglass counterparts? Such products also have the necessary rigidity, hardness and durability.
Later, this innovative prosthesis was combined with the BeBionic hand, one of the most advanced bionic limbs, and a state-of-the-art myoelectric forearm and hand was custom-made. Gauthier's case is a great example of the innovative use of 3D measurement and 3D printing technologies.
The video shows the complete process of digitizing the face and ears using the Creaform Go!SCAN 20 portable 3D scanner (its analogue in white peel 2 is now being produced).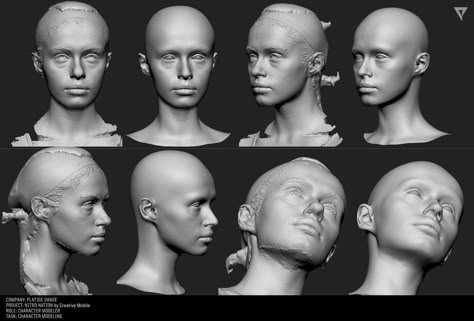 This solution provides a detailed digital model for use in areas such as plastic and reconstructive surgery, in particular, facial prosthetics.
Order a 3D test scan for free!
3D scanner helps victims
Unfortunately, tragedies inevitably occur around the world, and those affected need help. But, fortunately, there are organizations such as Médecins Sans Frontières (Doctors Without Borders) that do their best to provide them with the necessary treatment and care. Since 2016, the organization has been working tirelessly to solve the problem of providing prostheses to those in need around the world. The goal is to help amputees regain independence. The solutions that are used in this case are 3D technologies.
Upon completion of the medical examination of the patient, doctors determine his needs and expectations. Using the peel 3d scanner, with minimal discomfort for the victim, a high-precision digital model of the injured limb is created.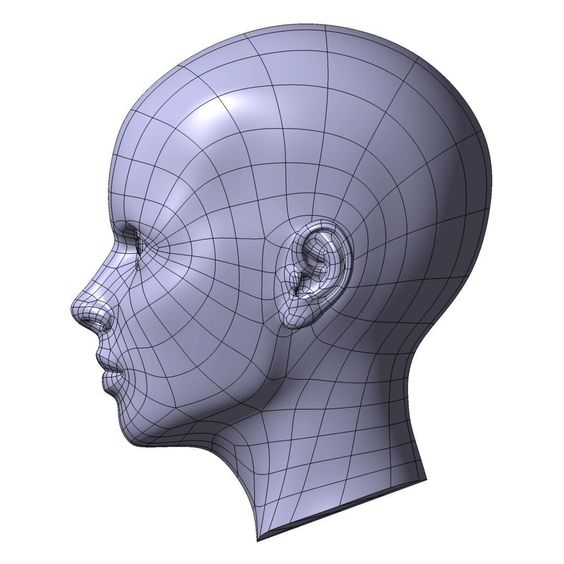 Compared to traditional impression making, 3D scanning is significantly faster and does not require contact. The result of the 3D scan is then transferred to the virtual sleeve and prosthesis design software. The developed component is made on a 3D printer and installed on the patient's limb. If necessary, during the installation process, the prosthesis and sleeve are finalized. After three months of use, the patient is invited to evaluate the comfort of the prosthesis.
MSF has also developed a similar procedure to create compression masks for burn patients. Here, the use of non-contact technology also provides significant advantages over traditional plaster bandages, not only making the procedure less painful for the patient, but also speeding it up, allowing for a much larger number of people in needy countries to be treated.
Physiotherapist Pierre Moreau scans a patient with head burns. Then, based on the scan, a transparent pressure therapy mask is created / Photo: Elisa Oddone, Al Jazeera
Pierre Moreau, a physiotherapist from Médecins Sans Frontières, says: “The purpose of the 3D project is to help patients in need of special rehabilitation care. We launched this project in Amman in 2017, where we started providing upper limb amputees with 3D printed prostheses. But simply printing a prosthesis is not enough - we try to understand the needs of the victims, find individual solutions and keep them in their new position for as long as possible. We are assisted by an interdisciplinary team of rehabilitation workers and engineers. Then our specialists helped more than 30 patients in Jordan.
In 2018, we began to use the technology in another direction - for patients with burns, especially on the face and neck. Skin complications are a very serious problem for burn victims. Hypertrophic scars may form, and pressotherapy is needed. This requires transparent masks, but they are quite difficult to produce on site. Therefore, we started to explore 3D scanning, 3D printing and computer modeling in an attempt to help our team in the production of these devices for patients who so desperately need them. Now we provide more than 50 transparent facial orthoses.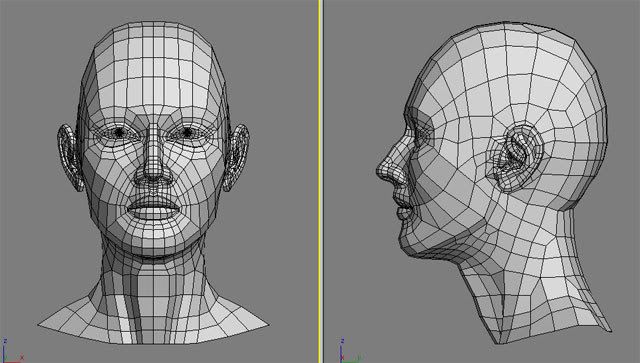
When I think about this project, I always remember one story that demonstrates its development. In 2017 in Jordan, we had a small patient with burns and an amputation - she had no arm, and the condition of her remaining part was too complex to develop a prosthesis. Then we couldn't help her. But she came back the following year and we were finally able to make a prosthesis for her. For the first time, she was able to use her hand. This is one of our best memories of the project and a measure of its success.”
3D scanning of the human body in great detail
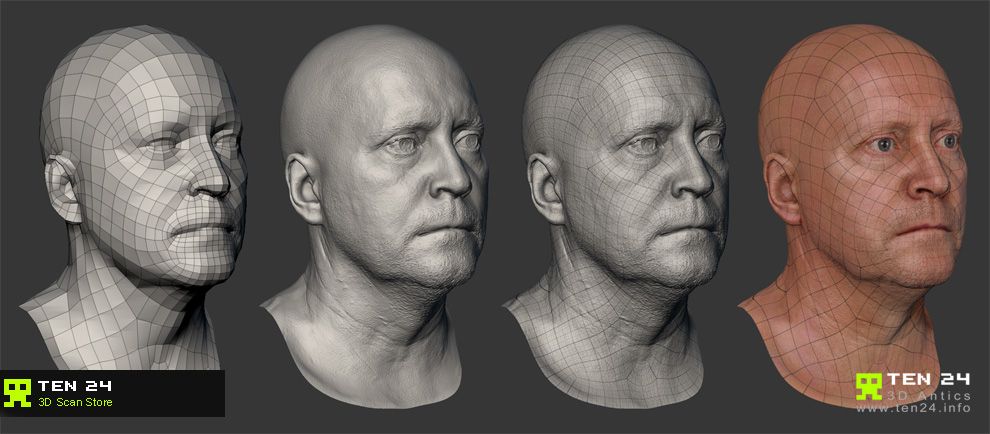
There are already more than 7.5 billion people on Earth, and although some are very similar to each other, there are no completely identical people. With such a variety of faces, it is not at all surprising that in the process of evolution the human brain became masterfully recognizing the smallest details that help to distinguish them. To get as close as possible to the original, the 3D scan of the statue must be extremely accurate and have a high geometric resolution.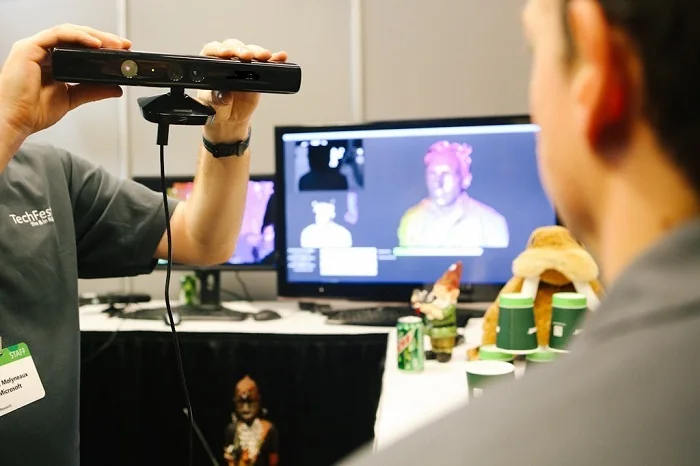
3D copies: 2013 Kinect scan (left figure) and peel 3d (right figure)
To improve the quality of scanning, the Canadian company USIMM has begun using peel 3d. The company specializes in the machining of non-metallic materials and is constantly involved in artistic projects. The main goal was to show the evolution of CNC machining by comparing the results of a 3D version of one employee made a few years ago with current results.
According to USIMM's Leia Lepage, scanning a living person is not an easy task: “Scanners are usually quite sensitive to the smallest movements, even if it's just breathing. Scanning a person is very difficult.” In order to accomplish such an extraordinary task, the USIMM team needed a 3D scanner that was immune to certain movements - but at the same time had high resolution and accuracy. Peel 3d possesses such qualities: a resolution of up to 0.5 mm and a volumetric accuracy of 0.5 mm/m.
The team scanned the same employee in the same pose as they did a few years ago.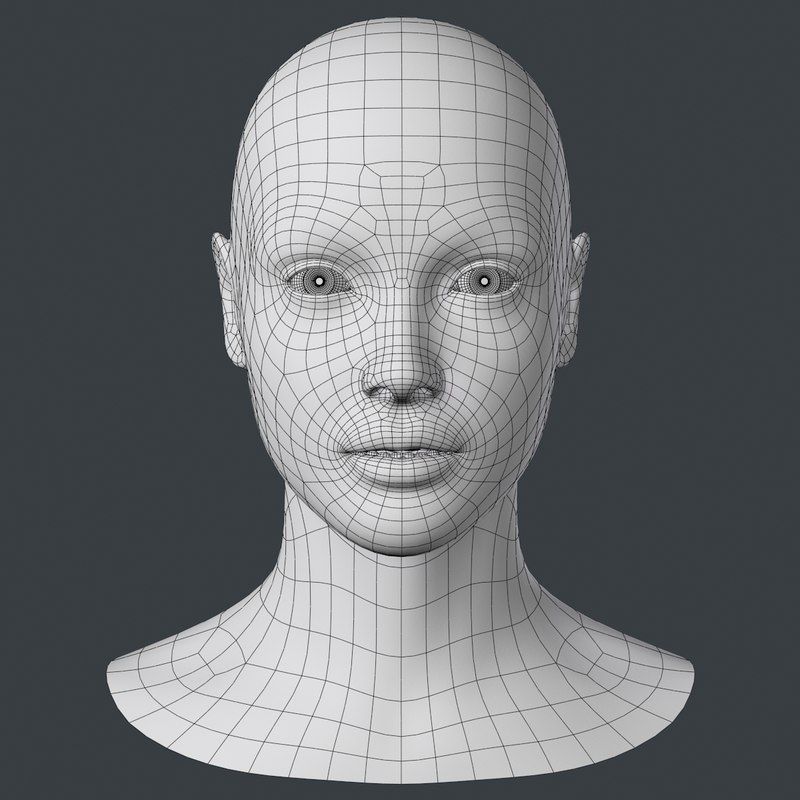 The resulting 3D scan data was sent to a five-axis CNC machine, and then a full-size replica of a person was created from polystyrene. The results were incredible.
The scan results obtained earlier by the Skanect device did not stand next to the peel 3d results. “The difference between the past and current results of the project is enormous,” commented Lea Lepage. The new copy turned out to be much more realistic and more accurately conveyed the original.
Materials provided by Creaform. Screensaver photo © Elisa Oddone, Al Jazeera
Article published on 12/08/2020, updated on 03/03/2022
3D face scan with 3D scanner
Solve individual problems in medicine and cosmetics
Test scan
- Applications
- 3D Model Examples
- Scanning tips
- Hardware and software
- Where to buy?
In the field of modern technologies, the terms "personification", "individualization" are increasingly used. The solution of these problems becomes possible with the use of 3D scanners.
3D scanning is increasingly used by specialists in the field of medicine, health and beauty - cosmetologists, dentists, prosthetists, surgeons. In their work, they trust 3D scanners to solve problems such as the creation of individual prostheses, implants, surgical templates.
Also, 3D scanning of the face and body is used in the entertainment industry, in design and advertising to create souvenirs, individual packaging.
3D scanner transmits
the smallest details
The peel 3d line of 3D scanners was created to digitize various structures, including the human face, skin and its defects with an accuracy of 0.1 mm.
Applications
Plastic surgery
- 3D facial imaging for maxillofacial surgery
- simulation of the results of plastic surgery
Facial prosthetics
- creation of individual prostheses, surgical templates, implants
- visualization and modeling of the result of transplantation and prosthetics
Advertising, entertainment
- production of promotional items, including 3D printing
- 3D visualization of art objects
- creation of digital models for computer games and other programs
Souvenirs, designer accessories
- making figurines of real people for printing
- production of personalized accessories and jewelry
- digitization of mini-copies of real objects, sculptures, busts
Project examples
Lincoln's face
human ear
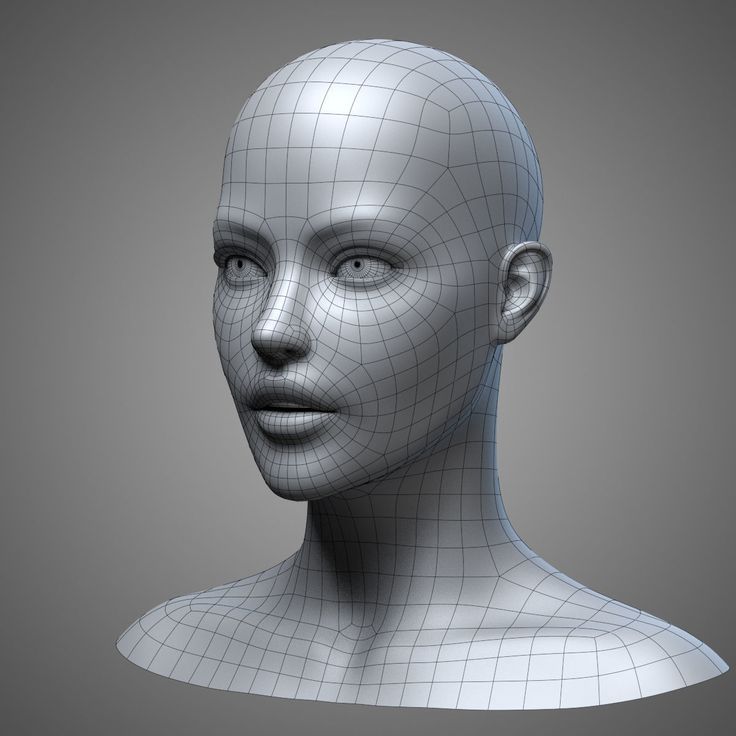
Human face in high resolution
More cases in different industries
Test the scanner for free and see how it performs for your needs Test scan
Human face scanning tips
Do you want to test the 3D scanner?
Order a scan in our office or make an appointment
for an online demo.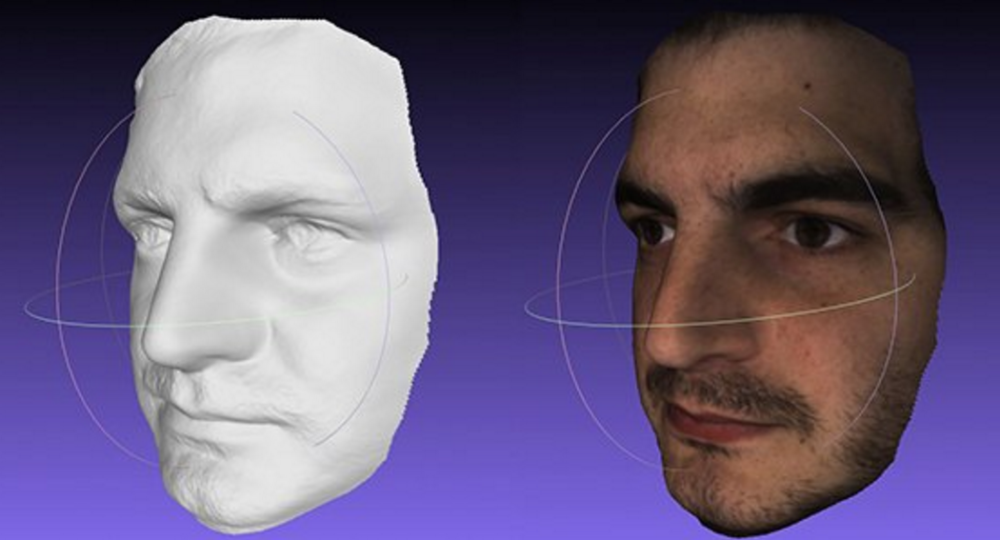
3D Face Scan Solutions
3D peel 3d scanner Face scanning is fast, easy and safe!
The compact peel 2, peel 2 CAD, Go!SCAN 20 scanners are professional solutions for digitizing objects up to 3 m with an accuracy of 0.1 mm and the ability to capture texture and color.
Go to catalog
Software Unleash your creativity with this powerful 3D modeling software!
The peel 3d software product allows you to solve all the main tasks when processing scanned data.
Go to catalog
Why order
solutions from iQB Technologies
Exclusive distributor of peel 3d in Russia
Professional
3D scanners at the price of budget counterparts
Free trial
3D scan of your part
Demo hall in Moscow: more than 10 scanners and 3D printers
Services for the implementation, maintenance and repair of 3D equipment
Training in the use of 3D scanners in prof.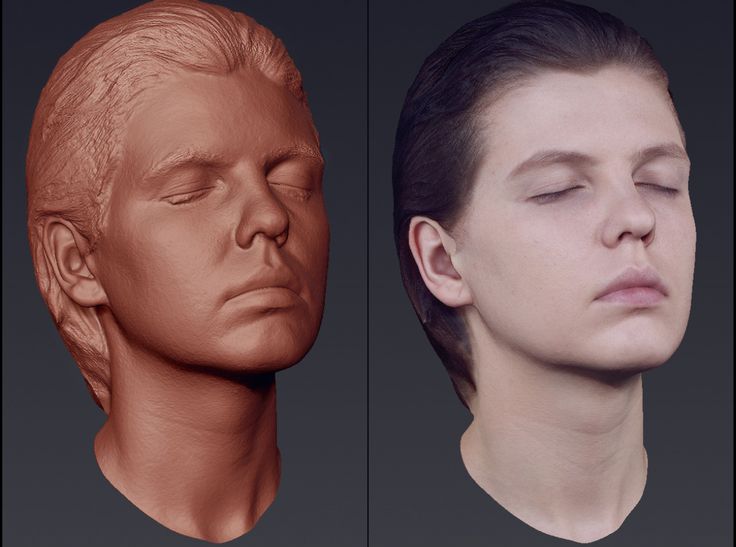 activities
3D scanning services based on our own fleet of equipment
About
3D scanner applications
3D scanning technology continues to gain popularity, and today the 3D Scanner (3D Scanner) It is used not only in production, but also for scanning a person's face. 3D scan first (3D Scanning) faces used for biometric access control systems, but now the technology is in demand primarily in dentistry, plastic and maxillofacial surgery, and cosmetology.
Scanning a human face with the peel 3d 3D face scanner can be done almost under any angle, unlike complex measurement methods such as magnetic resonance imaging (MRI) and computed tomography (CT). This greatly simplifies the process of creating a 3D model.