Export solidworks to 3d printer
How Do I 3D Print from SOLIDWORKS
TriMech Video Tech Tips, 3D CAD, SOLIDWORKS, Tech Tips
By David Cano-Mejia on
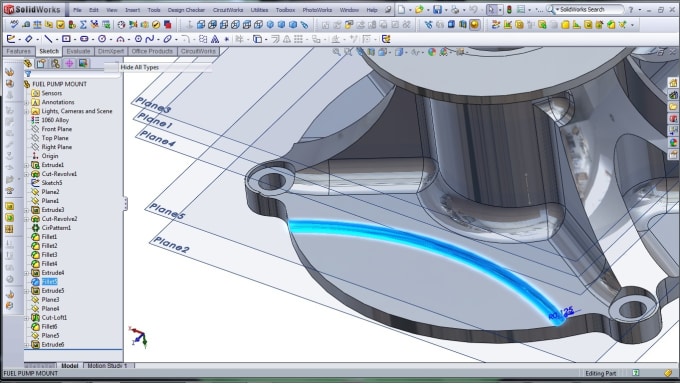
As 3D printing becomes more common in the workplace, users are turning to SOLIDWORKS to better understand their designs in the context of 3D printing. SOLIDWORKS offers several 3D printing visualization and analysis tools and all of them can be accessed through the Print3D tool (File > Print3D). Let’s take a look!
Does My Part Fit on My Printer?
The first step in analyzing your design for 3D printing is to ensure that it will fit inside the print area. Under Printer, you can select the 3D printer that you will be using. If this is your first time using the Print3D command, you will need to add your printers to your favorites list. Click on Manage Favorites to browse all available 3D printers. SOLIDWORKS has added a comprehensive list of 3D printers with up-to-date envelope information so you can quickly find your most used printers and add them to your Favorites for easy access. If for some reason your 3D printer is not listed under this library, you can define a Custom Printer by manually inputting the print volume dimensions.
Under Print Bed Location select a plane, or planar face, to be defined as the bottom plane of the model. This will automatically orient your model on the print bed. If the model is larger than the print volume, the geometry outside the print volume will be highlighted in red and you will not be able to print. If you need to change the orientation of the model, you can use the translation controls, manually type in the desired print bed angle and offsets in the Print3D PropertyManager, or click Orient to Fit to let SOLIDWORKS orient your part or assembly for you.
Under Scale, you can also choose to print your design at a scale other than 1, which is the current size of the model in SOLIDWORKS. To do so, type a value for the scale factor. The new value is saved as a document property in the SOLIDWORKS file so if you print the model again, the saved value is used still there. The Scale to Fit option sets the scale to the largest value that will still fit inside of the print volume.
Can I Analyze My 3d Print?
Sure! You just have to switch over to the Preview tab in the Print3D PropertyManager. There are several analysis tools that you can use to get a better understanding of the design to be printed.
- Build Analysis
- This allows you to preview the faces of your model that may require supports. Depending on the printer being used, at a certain overhang angle, the print quality is greatly affected unless supports are used. Type in the maximum angle for the faces that will require support.
 I recommend changing the Support face color to red and checking Show As Transparent to make it easy to visualize all of the faces that will need support.
- This allows you to preview the faces of your model that may require supports. Depending on the printer being used, at a certain overhang angle, the print quality is greatly affected unless supports are used. Type in the maximum angle for the faces that will require support.
- Layer Height
- This option lets you visualize the height of each print layer in order to determine whether the print resolution is sufficiently fine to produce the desired print. Type in a layer height and turn on Show Striation Lines in order to get a preview.
- If you are planning on exporting your file as a .3MF (3D Manufacturing Format), you can choose to let SOLIDWORKS generate the slices for the 3D print and embed those into the .3MF file instead of slicing the model using the printer’s slicer software
- Thickness/Gap Analysis
- If you are using FDM (Fused Deposition Modeling) for your prints, this calculates the ideal wall thickness/gap based on the material that you set and the layer height.
How Do I Export the File to Be 3D Printed?
When you are done analyzing and visualizing your design, you are ready to export the 3D print files. You can export part and assembly files to STL (.stl), 3D Manufacturing Format (.3mf), or Additive Manufacturing File Format (.amf) files.
- STL (*.stl)
- This ASCII or binary format file describes only the surface geometry of a 3D object as a raw, unstructured triangulated surface.
- 3D Manufacturing Format (*.3mf)
- This is a 3D focused file format that contains 3D model, material, and property information for sharing full-fidelity 3D models to other applications, platforms, services, and printers.
- Additive Manufacturing File (*.amf)
- This xml-based file lets you select export options that store the color, scale and materials of the object to be 3D printed in the .AMF file, as well as the geometry of the model.
Under Save To File, select your desired format and click Save File. Once you have one of these files, you can import it into your printer’s slicer software to generate the G-code that the printer will use to print your design.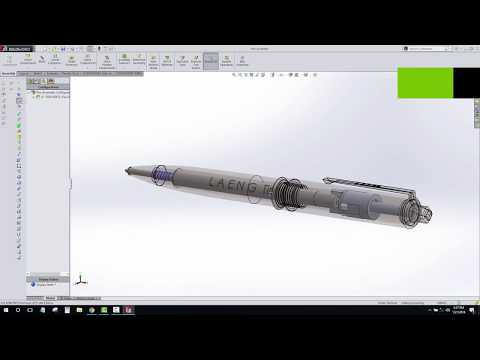
Can I Print Directly From SOLIDWORKS?
Yes, but only if your 3D printer manufacturer uses the SOLIDWORKS 3D Print API. As soon as you finish using the Print3D command and click OK , the 3D printing rapid prototyping dialog box will open to ensure that your printer’s build area is empty. The printer will start to warm up get ready to print. If your 3D printer does not use the SOLIDWORKS 3D Print API, you can still export the file as described above and import it into your printer’s slicer software.
How Do I Set My 3D Printing Options?
If you are planning on printing directly from SOLIDWORKS, you can set the 3D printing options that you would typically set in the slicer software. Job Quality corresponds to the print layer height and is the printer’s approximation to match that resolution. Infill Percentage lets you select the percentage of the part that is solid. You can select between 0%, 10%, 40%, 70%, and 100%.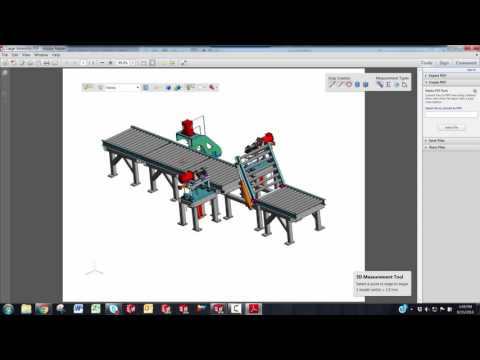 Infill percentage can greatly affect print times and part strength. Include Raft builds the print output on top of a raft of disposable material that you can remove after printing. This option is cleared by default. Include Supports adds supports for model faces that are in open space with no part of the model supporting the face. This option is selected by default and resets to the default each time that you open the Print3D PropertyManager.
The tools available inside of the Print3D command are easy to use and set up. Even if a different slicer software ends up being used to send the model to the printer, these tools can serve as a great starting point to understand the 3D printing requirements that your specific design may have.
Ready to learn more about SOLIDWORKS? Explore the different training options that we have to offer.
SOLIDWORKS 3D Printing. Do I still need to export a file?
The short answer to this question is yes, you can use SOLIDWORKS for 3D Printing. With SOLIDWORKS you are able to save your Part file as an STL (standard triangulation/tessellation language) file and a professional 3D Printer with it’s 3D printing software will be able to work with your SOLIDWORKS model in STL format.
In this article we’ll start with the STL file creation process as that is the traditional method of creating files for 3D Printers. But we will also discuss a new method of SOLIDWORKS 3D printing files using new free software called GrabCAD Print.
Traditional Method: Saving/exporting an STL file
STL is the standard file type used by most 3D printing systems. An STL file is essential the triangulated language representation of a 3D CAD model and provides instructions for your 3D printing software to build the model, an extract from an STL file is listed below:
Solid test Facet normal 0 1 0 Outer loop Vertex 0 4 0 Vertex 0.517638 3.93185 0 Vertex 0.5 3.93185 -0.133975 Endloop Endfacet Endsolid test
How to create an STL file
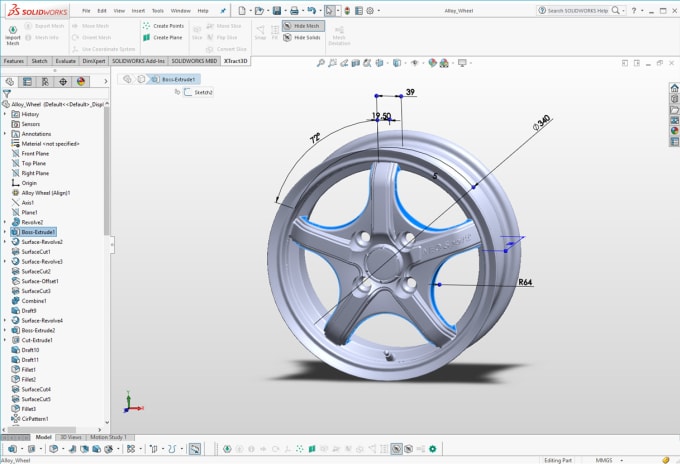
To save a SOLIDWORKS part file as an STL file simply select File > Save As and choose STL from the list of file types:
Save As STL File
STL file options and resolution
STL files convert your SOLIDWORKS part geometry into triangles which means faceting of the geometry. Depending on the number of facets and the accuracy of your 3D printer will determine the smoothness of your final 3D printed model. When outputting the model from SOLIDWORKS you pick the Options button and then to decide on the resolution of the model will be.
STL Export Options
Output as
First as a default you should pick Binary as the output type, this generates a smaller file size. With ASCII the file will be larger because you will be able to read the STL file code, but you likely won’t need to, and your 3D printing software will recognize the binary file.
Coarse Resolution
For the resolution you can control the facet number with the slider bars. If you pick the default setting and choose coarse, as shown in the example image below, this will produce less triangles resulting in:
- Smaller file size as larger triangles are used to represent the geometry
- Shorter build time as there is less geometry to print
- But the model with have a rougher surface finish.
Coarse STL File produces larger triangles, rougher finish
Fine Resolution
With the fine resolution, as shown in the figure below, you can create a smoother printable file and this will produce more triangles resulting in a:
- Larger file size as there are more triangles used to represent the geometry
- Larger build time as there is more geometry to print
- But the model with have a smoother surface finish
Fine STL file produces a smoother model
Summary
You cannot build the model any better or smoother than the STL file produced from SOLIDWORKS, so if the STL is coarse and faceted, that is what you can expect in the final model. Typically you should use the ‘fine’ option with models from SOLIDWORKS, but 3D printing a few benchmark SOLIDWORKS models with different STL settings will determine the best settings for your machine.
New Method: Using GrabCAD Print
As I mentioned earlier a new method of 3D printing SOLIDWORKS files is by using GrabCAD Print. Which is a new FREE cloud-based solution that brings connectivity and accessibility to 3D printing. GrabCAD Print was only recently released and is still in beta as of writing this article.
The traditional workflow for 3D printing with STL files is fine if you have been using your 3D printer and 3D printing software for a while. But GrabCAD Print has recognized that this 3D printing process can be overly complicated as shown in the diagram below:
Traditional 3D Print Workflow
GrabCAD Print simplifies the process so you don’t need to create an STL file, allowing your team to get quality prints faster.
GrabCAD Print Workflow
Watch the video below to learn more about the new software:
GrabCAD Print your SOLIDWORKS files
The new process is pretty simple, download and activate GrabCAD Print. Then in GrabCAD Print select File > Insert File and choose your SOLIDWORKS part file. No need to save/export an STL file. SOLIDWORKS 3D printing is now much easier.
GrabCAD Print SOLIDWORKS File
A smooth SOLIDWORKS 3D printing workflow
With GRABCAD Print you can get the 3D printed parts you want, obstacle-free.
- Print directly from CAD: GrabCAD Print allows you to print directly from your favorite professional CAD formats, saving hours of time usually spent converting and fixing STL files.
- Get started fast: Lean on smart default settings, tooltips, and notifications to guide you through a seamless printing process.
- See what you’re making: Work with detailed views of your model, tray, and slice preview so you can make necessary adjustments before going to print.
GrabCAD Print Preparation
Get more from your 3D printer
Optimize your resources with a management view of all printers and jobs.
- Organize print queues: Maximize print scheduling based on machine availability, estimated job duration, and other key considerations.
- Monitor material levels: Know how much material remains for each printer so you can plan and budget.
- Stay up to date: Notifications let you know when your print is complete (or if an error has occurred) so you can act accordingly.
GrabCAD Print Schedule
3D Print from anywhere
Let anyone on your team experience the benefits of 3D printing.
- Print from any device: GrabCAD Print is cloud-connected so you can access it directly from any browser on your device of choice.
- Schedule and monitor remotely: Access and print to any supported printer in your company, even if it’s in a different geographic location.
- Minimal training required: A straightforward interface makes professional 3D printing as easy as loading a part and clicking print.
Give GrabCAD Print a try
GrabCAD print is currently in beta, but you can sign up for free at the GrabCAD website.
Note that GrabCAD Print currently supports the following Stratasys 3D printers: uPrint SE, uPrint SE Plus (both uPrint machines are on SALE at the moment) Fortus 250mc, Dimension Elite, Dimension 1200es (SST & BST), with more coming soon.
Of course if you want to learn more about SOLIDWORKS 3D printing then you should plan to attend our 1 day 3D Printing Essentials training course. The course will teach you how to optimize your CAD files and 3D print your SOLIDWORKS models more cost effectively.
How to export a 3d model to STL format
3D printing is possible only on 3d models in certain formats, often in STL format. We also accept other formats (STP, STEP, IGS, OBJ), but later they are converted to STL. In order to avoid possible errors and (automatic) model changes during conversion, we recommend that you immediately send us the STL format. Below you will find information on how to export/convert your 3d model to STL format in the most popular 3d modeling programs. Please note that your models must be designed in accordance with the requirements of 3D printing modeling.
When selecting from ASCII and Binary .stl, it is recommended to select Binary as the file size will be smaller. As a rule, the size up to 20 MB is more than enough. After exporting, we highly recommend viewing your model in one of the STL viewers such as viewstl, Autodesk 123D Make or 3DViewerOnline to make sure everything was exported correctly.
How to export STL for 3D printing from Autodesk AutoCAD:
Export to STL format is only possible for solid (closed) 3D objects
* Enter DISPSILH on the command line and set the DISPSILH parameter to 1.
* Enter ISOLINES on the command line and set the ISOLINES parameter to 0.
* Enter FACETRES on the command line and set the FACETRES parameter to 10.
* Move the export object to a positive octant (all 3 coordinates: X-Y-Z must be positive).
* Select the export object and enter STLOUT on the command line (For AutoCAD Desktop files - AMSTLOUT). .stl extension.
* Choose a location, enter a name and save the file.
How to export STL for 3D printing from Autodesk 3D Studio MAX:
* First of all you need to merge all normals and make them positive. In the Surface properties column, click Unify and make sure the normals are in the correct position.
* Remove extra vertices. Select all the vertices and from the Edit Mesh menu select Weld.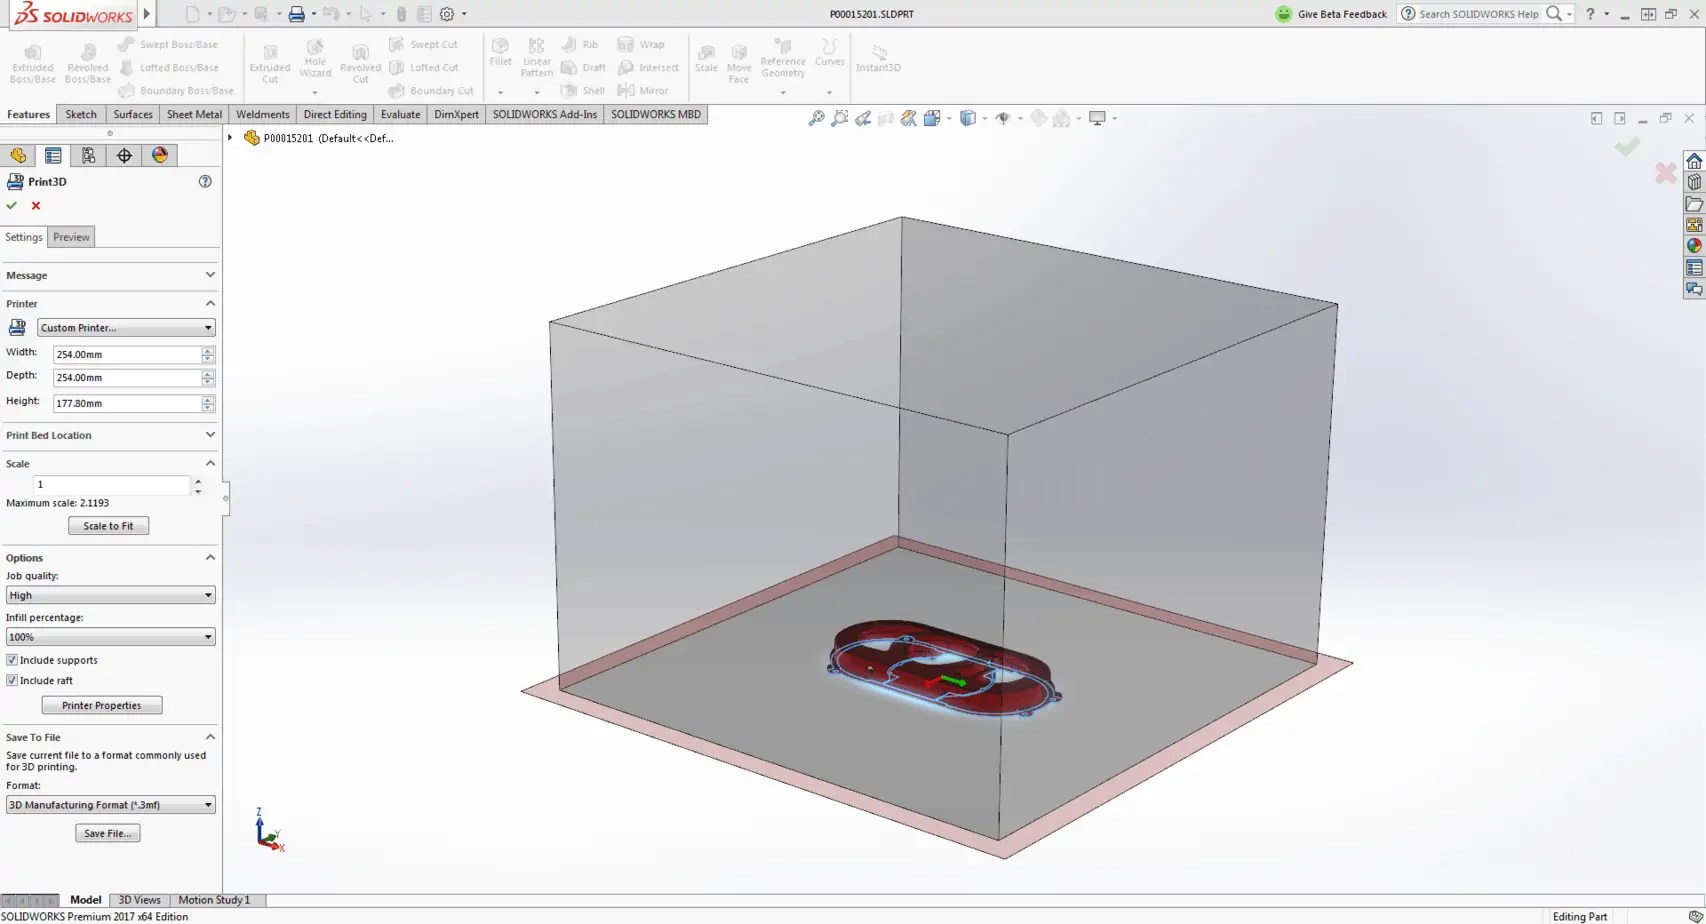
* Check the model. Run the STL check command from the Modifier list. If the model has errors, it may not export correctly. To check, you need to exit the edit mode.
* File > Export> select file type “StereoLitho [*.STL]”
* Enter file name and save location
* Select Binary file type and save the file
How to export STL for 3D printing from Autodesk Inventor:
* File > Save as > Save Copy as
* Select STL
format * Assign a name to the saved file
* Format Binary
* Select inch (inches) or mm (millimeters). The latter is preferred. to avoid confusion
* Select high resolution (Resolution > High)
* Click save button
How to export STL for 3D printing from Blender:
* File> Export > STL
* Assign a name to the saved file
* Select save location
* Click the save button (export STL)
How to export STL for 3D printing from Catia:
* In order to export the entire assembly as a single STL file, you will need to do the following:
* Select entire branch of files
* Tools>Generate CATPart from product
* Assign name
* Merge all volumes of individual files into one volume without checking.
* Click OK
* Accuracy (resolution) of the STL file match the accuracy of the working window settings
* Tools > Options > General > Display
* Select Performance tab
* In the 3D accuracy column, select Fixed
* Set the parameter to 0.02mm (.0008in)
* Set Curve accuracy to 0.2
* File > Save As
* Assign a name to the saved file
* Select STL
format * Click the save button
How to export STL for 3D printing from Google Sketchup:
* Google Sketchup cannot save to STL without installing a special plugin (for example here)
* After installing the extension, the STL format will be supported for both export and import
* Select an object (without selection, the entire model will be exported)
* File > Export > STL
* Assign a name to the saved file
* Click save button
How to export STL for 3D printing from Rhino:
* File > Save As
* Select STL
format * Assign a name to the saved file
* Save
* In the STL Mesh Export Options window, set the Enter Tolerance to 0. 02 mm (0.0008 inch), click OK.
* Select type Binary
* Uncheck Uncheck Export Open Objects
* Ok
How to export STL for 3D printing from Solidworks:
* Tools > Options > Export or File > Save As
* Select STL
format * Open Options
* Select format Binary
* Select a good resolution (Resolution > Fine > Ok)
* Assign a name to the saved file
* Click save button
How to export STL for 3D printing from Solid Edge:
* File > Save As
* Select STL
format * Open Options
* Conversion Tolerance set to 0.0254 mm (0.001 inch)
* Surface Plane Angle set to 45.00
* Save file
How to export STL for 3D printing from Pro Engineer:
* File > Export > Model
* Select STL
format * Set Coordinate System Standard to
*Set Chord Height 0
* Install Angle Control 1
* Save the file
How to export STL for 3D printing from ZBRUSH:
* To convert, you need to install a plugin, for example 3D Print Hub
* After installing the plugin, you need to make sure that your PolyMesh 3D
model * Select model ZPlugin >3D Print Hub
* Click Update Size Ratios, a window will appear with several options for working area sizes, select the one that suits you.
* Select mm or inches (inch)
* Select 1 coordinate to determine the size of the object to be exported
* In the Export options box, select that. what you want to export (all objects, visible objects or selected objects)
* Select STL
format * Save the file
How to export STL for 3D printing from Maya:
* You cannot export STL directly from Maya, but you can export OBJ format (using a plugin), which is also suitable for 3D printing.
* First of all, make sure the model has a closed volume (watertight) without holes, and all normals "look" in the same direction
* Windows > Settings/Preferences > Plug-in Manager
* In Plug-in Manager find OBJExport and make sure the plugin is loaded, check the box to automatically load
* After making sure the download click Refresh and close the window
* Select file to export
* File > Export Selection
* In the window that appears, select the file type and scroll to OBJexport
* Click Export Selection
Additive Manufacturing & 3D Scanning Blog - Globatek
Additive Manufacturing & 3D Scanning Blog - Globatek3D Equipment Supplier Since 2010
3d@globatek. ru 90AppOrder a call 646-15-338 800 333-12-82
 3D scanners3D printersSoftwareServices
About companyClients and projectsDemo hallPublic procurementDeliveryService3D Encyclopedia
BlogContacts
Globatek Blog: all about additive manufacturing and 3D scanning
Keep up to date with the latest developments in the world of additive manufacturing and 3D scanning: manufacturer news, reviews of the best new 3D equipment, case studies of 3D scanners and 3D printers
3D -printer
3D scanner
RangeVision
4/14/2022
Equipping the workshop "Additive Manufacturing" in the technical school, Syktyvkar
0003 Read Completely
SLM Solutions
3D printer
3D-scanner
3D Systems
2/11/2020
GLOBATEK set equipment for the Moscow Transport Children's Technopark
Full-color 3D printer and professional 3D-3D- scanner will help students of the Industrial Design laboratory
Read moreArtec3D
New version of Artec Studio 15 released with quality control and reverse engineering functions
SLM Solutions
3D printer
SLM Solutions introduced NXG XII 600, the most productive 3D-printer for metal
ARTEC3D
3D-scanner
RAY-new laser 3D scanner from ARTEC 3DC 3D Systems0003
Projet MJP 2500W-new high-precision wax 3D printer
3D Systems
3D printer
Figure 4-finished products instead of prototyping
Stratasys
STRATASS presented two new materials for 3D-prints
Artec3D
3D scanner
Artec Leo 3D scanner: a new standard in precision and convenience
Stratasys
Stratasys F270
Stratasys F370
3D printer
New 3D printers from Stratasys: Available Plastic
Artec3d
A new version of the ARTEC quality control 9000 9000 9000 9000 9000 9000
3D Printer
SLM Solutions Introduces NXG XII 600, Highest Performance Metal 3D Printer
Artec3D
3D Scanner
RAY-new 3D scanner from Artec 3D
3D Systems
3D printer
New multimaterial 3D printer Projet MJP 5600
3D Systems Projet 2500W
9000 3D Systems 9000 3DTTER 3DTTER 3DTTER 3DTTER 3DTTER 3DTTER 3DTTER 3DTTER 3DTTER 3DTTER 3DTTER 3DTTER 3DTTER 3DTTER 3DTTER 3DTTER 3DTTER 3DTTER 3DTTER 3DTTER 3DTTER 3DTTER 3DTTER 3DTTER 3DS
ProJet MJP 2500W - new high precision wax 3D printer
3D Systems
3D printer
Figure 4 - finished product instead of prototyping
Stratasys
STRATASS introduced two new materials for 3D printing
Artec3D
3D-scanner
3D scanner LEO: new accuracy standard and convenience
STratasys
STRATASYS F2702 STRATASYS
3D Printer
New Stratasys 3D Printers: Affordable Plastic Printing
Subscribe to Newsletter
Once a month, we will send you a selection of fresh articles about professional 3D printers and 3D scanners
I confirm the accuracy of the information I entered and agree to the processing of my personal data in accordance with the privacy policy and user agreement.