Ev3 3d printer
Build Your Own 3D Printer from Lego Blocks & EV3 Servo Motors - 3DPrint.com
Everyone has to start somewhere, they say — and that’s especially true for those in the maker movement. Every maker remembers his or her first build as a monumental achievement, and a viable springboard for them to dive deeper in and hone their skills.
Instructables user William (W1ll14m) has just posted his first contribution to the design-sharing site, and it’s a very impressive initial creation. William, who has a penchant for all things robot, maintains a YouTube channel devoted to his Robot Friends.
Really, this design is already his second iteration of his design, as the first “was a prototype and the result wasn’t that great.” I’m glad to see he reworked his homemade 3D printer and is now at a sharing point, as this design clearly has solid potential as he continues to work it further and now has opened it up for feedback from the Instructables community.
This DIY 3D printer is built from Legos, and version 2. 0 has a leg up on its predecessor, per William’s description. When he posted a video of the first iteration, he noted that this 3D printer is “easy to build and to program. However, it’s not very precise and won’t print anything useful,” and made sure to point out that it was “still cool though.”
When he set to work a few months after the initial version, William knew the areas he wanted to focus on for improvement. Some of the notable tweaks from the first prototype were creating a racked track for the X and Y axes to enhance printing precision, as well as modifying the extruder for efficiency.
“My first project is this Lego Mindstorms 3D printer. I’ve already built a prototype before this version, but the results were well…mediocre,” William wrote of the project. “This is the 2.0 version. It’s more precise, more efficient and the printed objects are better than in the previous version, although far from perfection.”
While William still isn’t necessarily thrilled with this design, it has certainly already advanced nicely beyond his first attempt, and that kind of learning curve can only mean promising future improvements. With comments already pouring in from other like-minded makers on Instructables, William has surely found a good community to help out if he reaches a sticking point in his design process.
In creating the Lego EV3 3D printer, which features a Lego block design and a glue gun for the actual printing, William found most of the materials needed already in his own home, and provides step-by-step instructions so the project can be recreated.
The single most important components that run throughout all steps of the process are the Legos that form most of the track and crane for the 3D printer: “Lots of Lego blocks,” as he simply notes in step three. Among required shapes are blocks, “those Lego cranes” (like those found in certain Lego building kits), plates, gears, pins, gear racks, Lego Technic blocks with holes, and tires. A couple of EV3 servo motors from Lego will also be needed to power the device, one large and one medium.
Once the entire structure has been built and assembled, it’s ready for programming.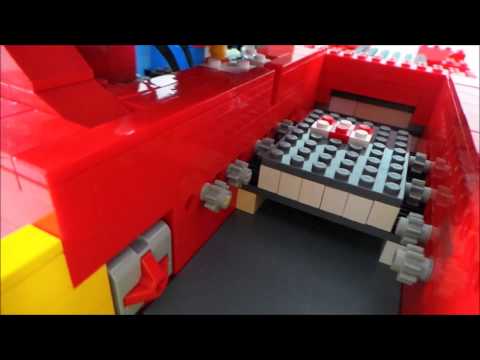 Without going into specifics, William notes that he programmed his Lego 3D printer to create a glue square, and shows his code. The finalized printer also requires a counterweight to ensure proper balance.
Still, he says, “This printer is a lot better than the first one, but it’s far from good enough.” He adds, though, that “Eventually, I might build a 3rd version — at least I hope so.”
This sort of homemade 3D printer really showcases the ingenuity representative of the maker movement. I know I hope that he will continue on with future generations of this 3D printer — I’d love to see what it would be able to create in another generation or two.
The 3D printed glue square is a neat proof-of-concept, but as William noted himself, it isn’t necessarily very useful or precise. It goes a long way in proving that the printer will work as described, though, and especially now that he’s added the design to Instructables, it will be very interesting to see what he can come up with if he incorporates some suggestions from that community.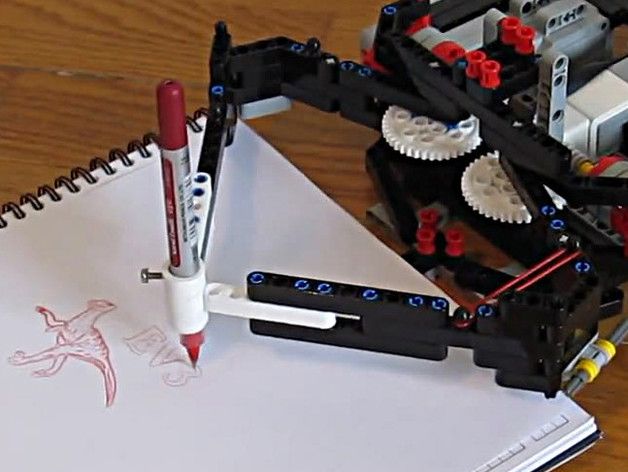
What do you think about this Lego-based design? Let us know if you’ll try your hand at one over in the 3D Printing Lego Machine forum thread at 3DPB.com. Check out the video below of the Lego EV3 3D printer in action, and some more photos of the design.
Stay up-to-date on all the latest news from the 3D printing industry and receive information and offers from third party vendors.
Tagged with: diy 3d printer • EV3 • hot glue gun printing • instructables • lego • lego 3D printer • legos
Please enable JavaScript to view the comments powered by Disqus.
3D Printers Made with MINDSTORMS
The maker movement has given inspiration to many talented builders and programmers.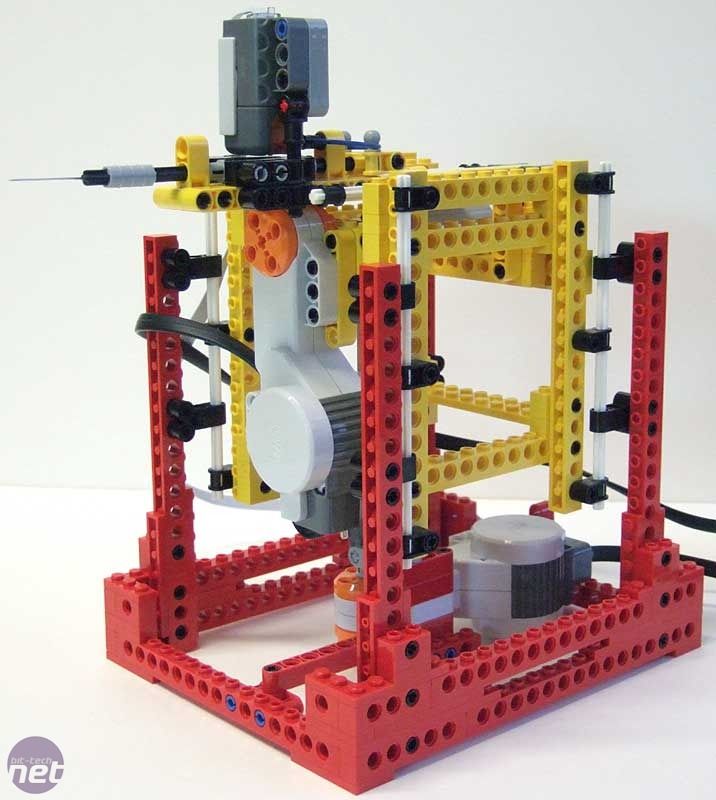 LEGO® and MINDSTORMS® have become a perfect platform for unleashing the creativity of many makers. Recently, we have seen LEGO machines that solve Rubik’s cubes, print photographs and cards, weave scarves, play games, and more. Here are three innovative 3D printers made with LEGO MINDSTORMS from makers in Montreal, California, and Pennsylvania.
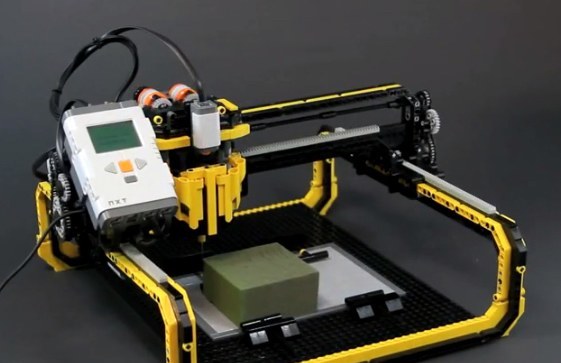
EV3Dprinter by bazmarc
Inspired by 3D printers at World Maker Faire, Marc-André Bazergui (aka bazmarc), in collaboration with Thomas Madeya, created the first 3D printer made with MINDSTORMS. For Marc-André, the most fun part of this project was working with someone in a different part of the world: Thomas lives in Germany while Marc-André lives in Canada.
Dubbed EV3Dprinter, this amazing machine is able to print a variety of shapes by selecting the parameters on the EV3 programmable brick. In 2016, Marc-André updated this printer to use the FUNWELL® 3D Printing Pen V3.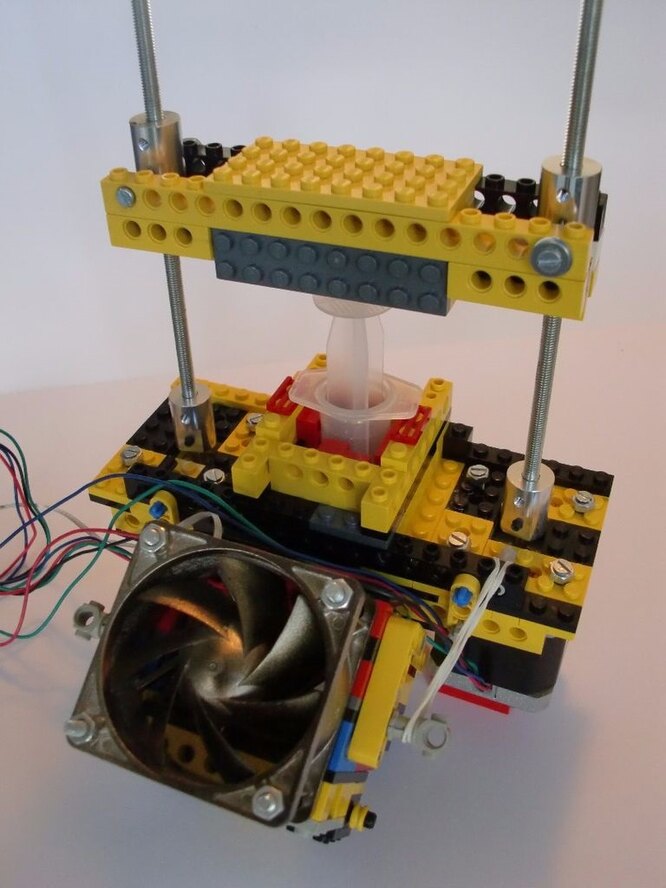 He added the ability to create your own coordinates and was then able to start printing text and any other design. Marc-André’s work has inspired others to make different versions of 3D printers made with MINDSTORMS.
In addition to the EV3 programmable brick, the key LEGO elements in his printer are three medium motors, one large motor, gear racks, and two large linear actuators.
Marc-André has modeled his printer in LEGO Digital Designer (LDD), and made the LDD file as well as the code file available for others. Take a look at his post on Instructables.com. LDD is a free LEGO CAD software and can be downloaded online.
To see a video explanation of the EV3Dprinter, watch the [bazmarc]session. To learn more about Marc-André, visit his website.
G-Code Pars3r by Cyrus
In 2016, a young maker in California, Cyrus Cuenca, created his version of a LEGO Mindstorms 3D printer in collaboration with Xander Soldaat. He used an inexpensive 3D pen, and wrote a custom G-Code interpreter. Since his printer accepts G-Code, his printer is able to print models like a conventional 3D printer. It uses four LEGO MINDSTORMS motors: three motors for the three axes, and one for the extruder. The printer is programmed in Robot-C.
Cyrus uses the Soyan Standard 3D Printing Pen. He has his code and other instructions for this project on his post on Instructables.com.
To learn more about Cyrus, visit his blog site.
EV3D Pi.G Print3r by Seshan Brothers
Sanjay and Arvind Seshan (aka Seshan Brothers) have been building dot-matrix printers (PIX3L PLOTT3R) out of LEGO MINDSTORMS since early 2016. Inspired by an actual 3D printer they received in December 2016, they began building a 3D printer out of MINDSTORMS in January 2017.
Their goal was to create a MINDSTORMS printer that resembled their Alunar iPrusa Clone in features and functionality.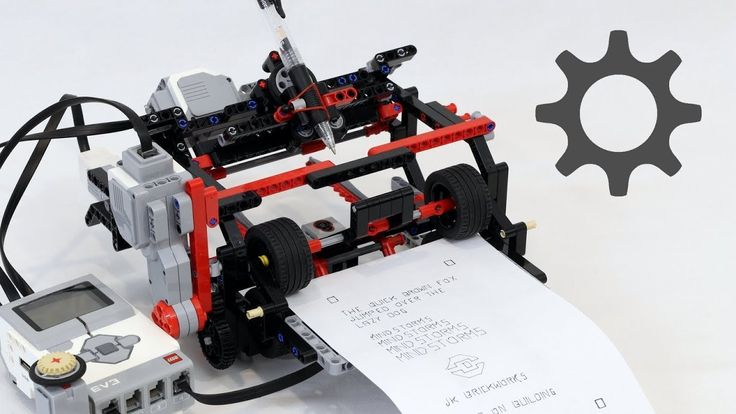 As a result, their printer features a large print bed with an 8-inch PEI plate on top. The PEI plate is largely to protect the LEGO from accidental melting when in contact with the tip of the 3D printing pen. The 3D printing pen they use is the Monoprice MP Select 3D Printing Pen.
From a programming perspective, the key requirement for their project was that it accept G-Code files which is used in traditional 3D printers. However, they also wanted the printer itself to be programmed in EV3-G, the standard programming language for MINDSTORMS to make this project more accessible to others. To accomplish this, they wrote their own file converter that would could interpret the G-Code into a file readable in EV3-G. This conversion process is done in Python.
As an added feature, they include a Raspberry Pi and small touch screen to the printer to support a user interface. The interface lets the user select prints.
To learn more about the development of this printer, follow EV3D Pi. G.Print3r on Facebook. Code and build instructions will be shared through this page as soon as they are available.
To learn more about the Seshan Brothers visit their website.
Where can you see these 3D printers?
Next weekend (May 19-21), all three of the above 3D printers made from LEGO MINDSTORMS EV3s will be featured at the 2017 Bay Area Maker Faire. Stop by their booth in Zone 2 to meet the ROBOT MAK3Rs in person, learn about how you can make one, and pick up a special collectible tile.
In addition, follow the MINDSTORMS EV3D Printers Page for updates and future events. Feel free to share your MINDSTORMS printer with this page.
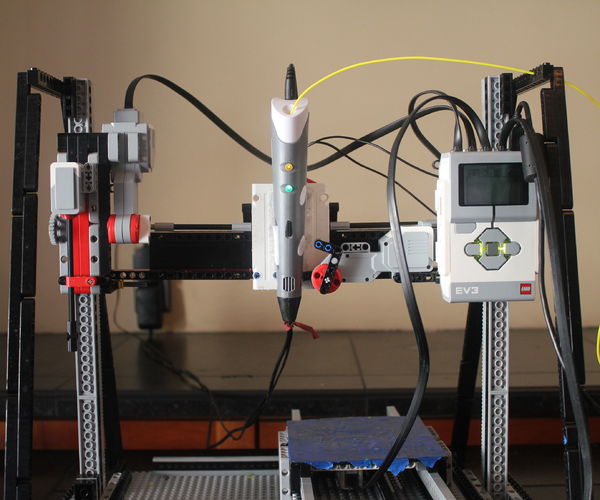
EV3 Print3rbot Artist Robot
I really liked the EV3 Print3rbot Artist Robot project, which, unfortunately, uses non-standard parts that need to be printed on a 3D printer. I decided to build the same robot, but using parts only from the LEGO Mindstorms EV3 educational set (45544).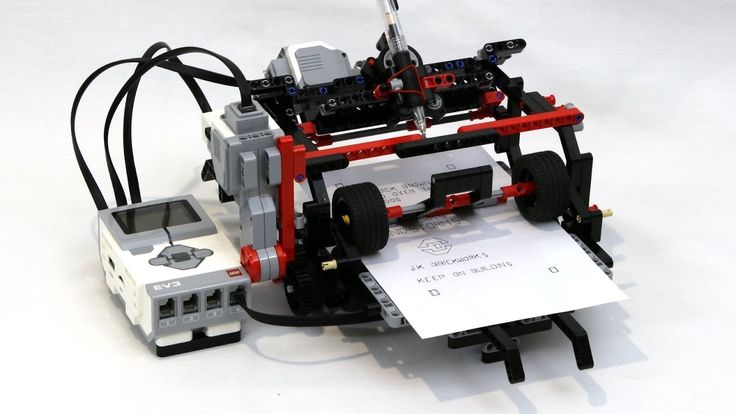 And I did it, however, I had to add more rubber bands.
You can watch how the robot draws the ProgHouse website logo in the following video:
Designed by Christophe Avenel. You can find the project page here. The original design of the robot uses parts from a home kit, plus two gears from an educational kit, and three parts printed on a 3D printer. My design is the same, but I built this robot using only parts from the basic educational kit. At the same time, the sizes of the hands are the same and you can use the original author's control program without changes.
Assembling the EV3 Print3rbot artist robot
First, I will immediately give the assembly diagram of the EV3 Print3rbot artist robot, and then I will write how to animate it. In addition to the LEGO Mindstorms EV3 Basic Education Set (45544), you will also need a 8mm marker pen and 4 rubber bands.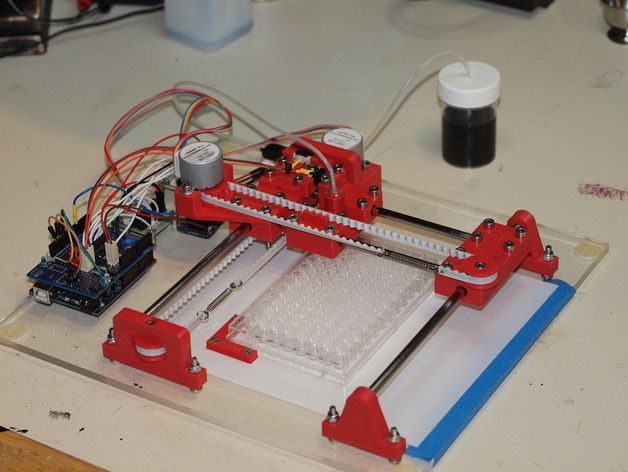 A thinner felt-tip pen will not work, because. it will stand unevenly, and will dangle. So, here is the robot assembly diagram:
Files:
| Instructions for assembling the robot artist EV3 Print3rbot Version: from 03/24/2017 | |
| Instructions for building the EV3 Print3rbot artist robot from the LEGO Mindstorms Education EV3 Building Kit (45544). In the version of 03/24/2017, forgotten necessary parts were added. | |
| 03/23/2017 9.55 MB 105400 |
Insert the pen from top to bottom, and after you have pushed it far enough, pull it back up a little so that it is firmly fixed. After that, fix it with rubber bands, as shown in the picture, so that it does not hang out. The rubber bands that hold the felt-tip pen should be well stretched.
Two other rubber bands are needed to keep the robot's arms from playing. These two elastic bands should also be well stretched. If you pull back on the robot's arms, these rubber bands should bring them back.
Installing ev3dev
The daemon runs on ev3dev firmware, so you need to install that firmware on your EV3 first. How to do this is described in the article "ev3dev - install and configure Debian Linux on LEGO Mindstorms EV3". It also says how to execute commands on EV3 and how to copy files on EV3, so be sure to read this article.
Note that the ev3dev version must be ev3dev-jessie-ev3-generic-2017-02-11 or later.
Installation of the control program
The control program is written in the programming language Python (Python). To install the program, you just need to copy the necessary files to EV3. There are two ways here.
1. If EV3 is connected to the internet, you can run the following command:
git clone https://github.com/cavenel/ev3-print3rbot.git
This will copy the latest version of the required files to your EV3 directly from the project repository. After copying, the files will be in the /home/robot/ev3-print3rbot folder.
Copying over HTTPS didn't work for me when I connected the EV3 to my computer via a USB cable. And when connected to the Internet via Wi-Fi, everything was copied without problems. Therefore, if for some reason the command failed, use the second method.
2. You can download the ev3-print3rbot folder with all the necessary files from the project page (to do this, click on the "Clone or download" button and select the "Download ZIP" item) to your computer.
Or download the slightly older version of the files I used from the link below.
| EV3 Painter Robot Print3rbot Version: from 03/23/2017 | |
| Control program for the EV3 Print3rbot artist robot. | |
| 03/23/2017 22.36 KB 8478 |
Once downloaded, unpack the ev3-print3rbot-master.zip archive, rename the "ev3-print3rbot-master" folder to "ev3-print3rbot" and copy it to the /home/robot directory on the EV3.
Image preparation
The control program works only with SVG vector drawings, and only with SVG files that do not contain transformations. To convert any SVG file, you can use the Inkscape program. To do this, download and install Inkscape on your computer. Then run the program, select the menu "Edit -> Options", in the settings dialog find "Behavior -> Transform" and make sure that the save mode of transformations is "With optimization". After that, close the options window and close the Inkscape program.
You can now convert the file with the following command:
"C:\Program Files\Inkscape\inkscape.exe" image1.svg --verb=EditSelectAll --verb=ObjectToPath --verb=SelectionUnGroup --verb=FileSave --verb=FileClose --verb=FileQuit
where "C:\Program Files\Inkscape\inkscape.exe" is the path to the Inkscape program on your computer, image1.svg is the path to your file, and everything else is these are the actions that Inscape will do. After executing the command, the file will be prepared so that the artist robot can use it.
The drawing will be resized to the size of the drawing area before drawing begins, so the actual size of the image does not matter.
Copy the finished file to the EV3 folder /home/robot/ev3-print3rbot/images.
Starting the control program
Before starting the program, change the current folder, if you have not already done so, using the command:0003
wri.draw_image(image_file = 'images/test.svg',max_speed=35)
Here test.svg is the file that the artist robot will draw. The test.svg file is already in the images folder, so without changing anything, you can immediately run the program and see what the artist robot draws.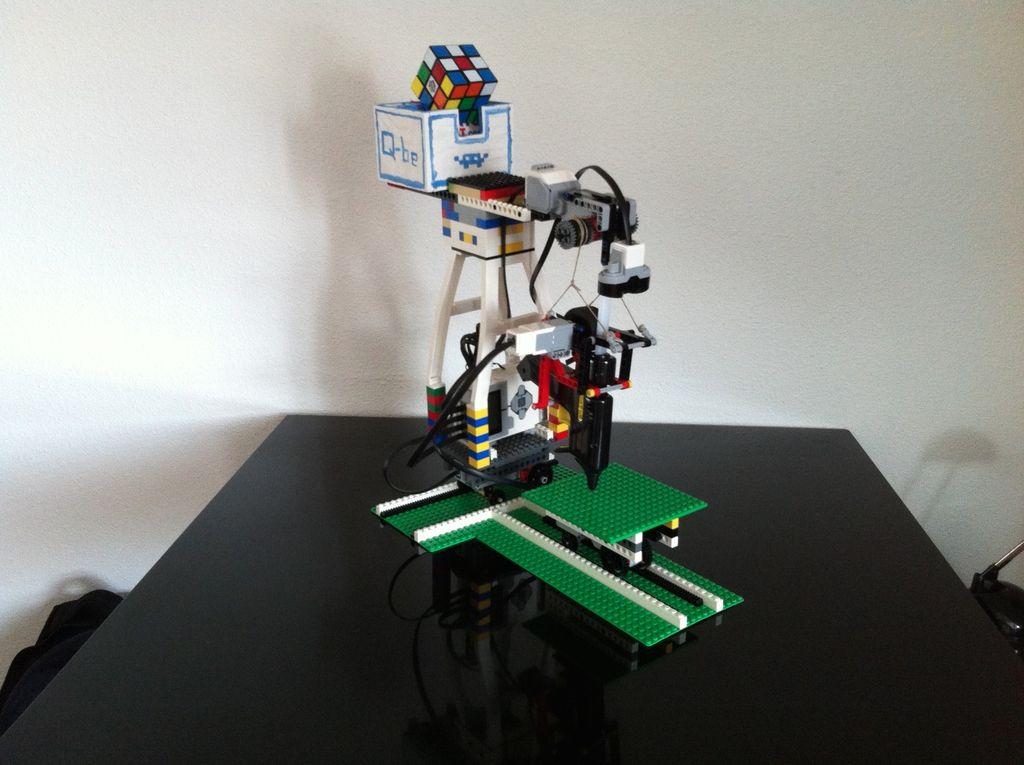 To have the robot draw another drawing using your SVG file, replace the name test.svg with the name of your file, for example, image1.svg. Please note that before starting the program, your SVG file must be prepared and copied to the images folder, as described above.
You can download the file that the robot draws on the video here:
| ProgHouse logo in SVG format for the EV3 robot artist Print3rbot Version: from 03/23/2017 | |
| ProgHouse logo in SVG format for EV3 Print3rbot artist robot.
| |
| 03/23/2017 3.93 KB 3193 |
Run the control program with the command:
python3 writer.py
After that, the robot will raise its arms up, then fold them and start drawing.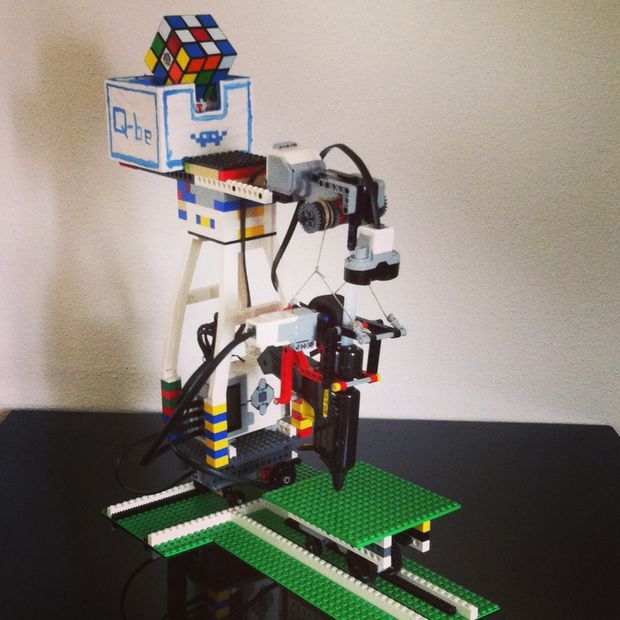
Starting the daemon from the ev3dev menu
In addition to the method described above, you can start the daemon directly from the ev3dev menu. To do this, use Explorer to find the writer.py file and select it (i.e. press the EV3 Center Button). After that, the control program will start.
Add a comment
Lego Mindstorms EV3 robot in Moscow
Lego Mindstorms EV3 robot in Moscow - Techno 3D storeLego Mindstorms EV3 Robot
Lego Mindstorms EV3 is a set that allows you to build and program five initial robot models. A programmable power supply as well as servo motors and color, touch and infrared sensors help the robot move and communicate. Programmable power supply, color sensor, touch sensor, infrared sensor, remote infrared beacon, motors. Over 550 Lego Technic elements. Instructions for five models: SPIK3R, EV3RSTORM, R3PTAR, GRIPP3R and TRACK3R.
- Includes over 550 innovative Lego Technic building pieces.
- Many schools have Lego Mindstorms clubs.
- There is a large online Lego community to share your creations with.
| All features of |
price on request
Request a Quote
Please note that this website is for informational purposes and under no circumstances is it a public offer determined by the provisions of Article 437 (2) of the Civil Code of the Russian Federation. For detailed information on the availability and cost of these goods and (or) services, please contact the site manager using a special contact form.
Free education
Delivery across Russia
Customer Service
Warranty for all models
Any form of payment
Found cheaper?
Your e-mail
Your phone
URL of the page with a cheap product
By clicking on the button, you agree to the privacy policy of
Request a call back
Telephone
By clicking on the button, you agree to the privacy policy of
Item added to cart
Go to cart
Product added to comparison
Compare products
Cannot compare more than 4 products
Invoice or quotation request
Organization name:
Your e-mail
Your phone number
Name of contact person:
Legal address:
Comment:
By clicking on the button, you agree to the privacy policy of
Goods on the way, find out when the delivery is
Your name:
Your e-mail
Your phone
By clicking on the button, you agree to the privacy policy of
Contact us
How to call
By phone +7(495)155-45-19. Your call will be answered by an answering machine. We won't call back if you don't speak up. Each request is processed, we contact clients in accordance with requests. Prepare the information you want to report, send it to the answering machine and we will call you back. We kindly request: do not be silent and do not hang up, this is just an answering machine. 🙂 Other most effective ways to get in touch:
- Write to Telegam @techno3dru
- Write to Whatsapp +74951554519
- Write Email [email protected]
Is the product in stock
On the product page, under the product name, there are 3 statuses:
- In Stock - We have this item in stock. Make a purchase with the Buy button.
- Pre-order - goods on the way, delivery soon. Find out about delivery times by clicking on 'Delivery times' or make a purchase using the Buy button.

Learn more