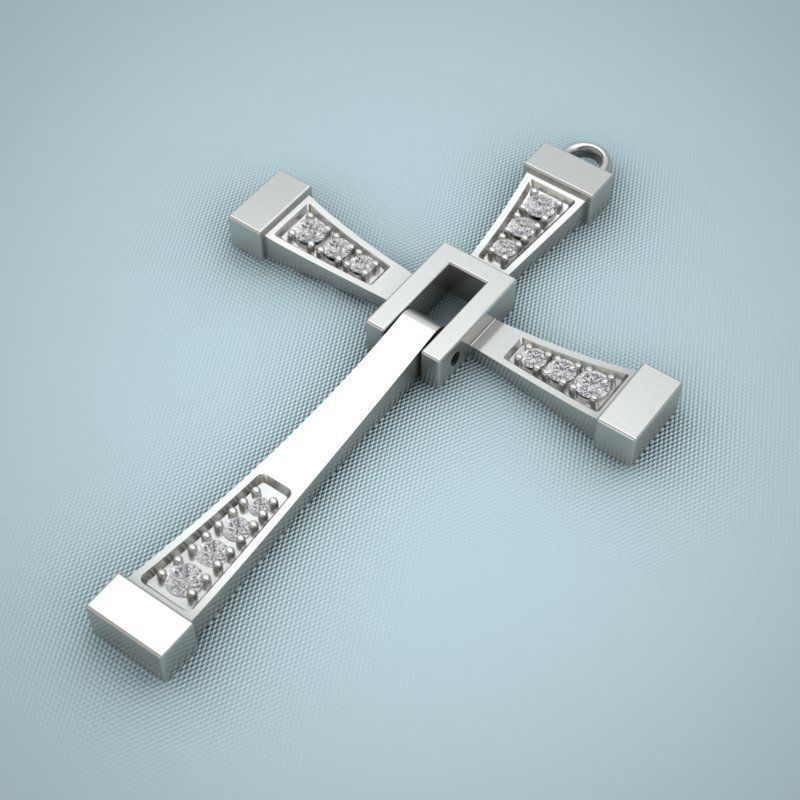
3D printed cross
Cross best STL files for 3D printer・Cults
Gokai Cross Armor
€8.08
Crucifix Box Support Free
€1.43
rails skate
€3
Cross claws stones 2.75
€2
skateboard tail bone
€3
Spark Holder
€0.50
MEDIEVAL CRUSADER SHIELD - COMPLEMENT FOR PLAYMOBIL
€1.85
Celtic Cross
€0.50
Cross Baptized In Christ, Bible verse, Christian gift, Baptism, First Communion, Confirmation, cross decoration
€1.01
kit comunion confirmation goblet cross cookie cutter impression cake design decoration boy girl baby
€2. 50
Christian Love Cross with Bible verse and word Pray highlighted, Everlasting Love of God, Eternal Love, Eternity, spiritual gift, wall spiritual decor, fridge magnet, keychain, pendant, desk decoration, personalized cross, spiritual symbol, Christian gift
€1.01
Cross with dove outline, Holy Spirit symbol of peace, Christian topper, Church logo
€0.51
Cross with heart and angel wings, Forever in our heart, Memorial statue, decorative religious gift, condoleance gift, Remembrance Gift
€1.12
Christian Love Forever Cross, Cross made of Hearts, Everlasting Love of God, Infinity symbol, Eternal Love, Eternity, gift, wall spiritual decor, fridge magnet, keychain, pendant, desk decoration, spiritual symbol
€1.32
Christian Love Forever Cross, Heart, Infinity symbol, Everlasting Love of God, Infinity symbol, Eternal Love, Eternity, gift, wall spiritual decor, fridge magnet, keychain, pendant, medallion, personalized cross, spiritual symbol
€0. 61
61
Lock switches for SOG XR locks
€1.76
Communion Key Ring
€2.83
cross 3D print model
€29
X Surface Design Vase
€0.85
Heart with Religious Cross Figurine, Christian Gift, Home Decor, Wedding gift, Christmas gift
€1.62
Nail cross tray
€1.19
Inverted Cross Pendant STL, Cross Outline, Upside Down Cross Silhouette
€0.95
windshield cross
€5.07
Cross 32”
€0.92
Angel Wings With Cross Diamond Stone Pendant 3DM - STL files 3D print model
€11
ON THE CROSS
€3. 80
80
Stamp for Sweets and Snacks - Religious - with 3 units
€0.92
Stamp for Sweets and Snacks - Cross
€0.64
CHRIST ON THE CROSS UNDER POLY
Free
Cross-shaped cookie cutter
€1.13
Angel
€3
Toyota Yaris Cross 2021
€15
Logan VF-8-ROBOTECH
€4.91 -20% €3.93
VF-8 LOGAN BATTROID MODE (ROBOTECH/SHOUTHERN CROSS) 1/72
€9.50
Glastonbury Cross
Free
ER pack Hospital - Ambulance, asclepius rod, cross, pulse - cookie cutters
€2. 80
80
Celtic cross sword
€25
Fan wheel moped
€4.06
Cross 290921
€10
Greek Orthodox Cross
€3.50
Christian Love Forever Cross, Hearts with angels wings, Everlasting Love of God, Infinity symbol, Eternal Love, Eternity, gift, wall spiritual decor, fridge magnet, keychain, pendant, desk decoration, personalized cross, spiritual symbol,
€1.12
Cross ring with patterns
€25
Air cross pattern
€25
quadlock for everything stick on it
Free
Cross ring with stones
€15
Cross 7 V2
€8
Volkswagen Atlas Cross Sport R Line 2021 Printable Car
€12.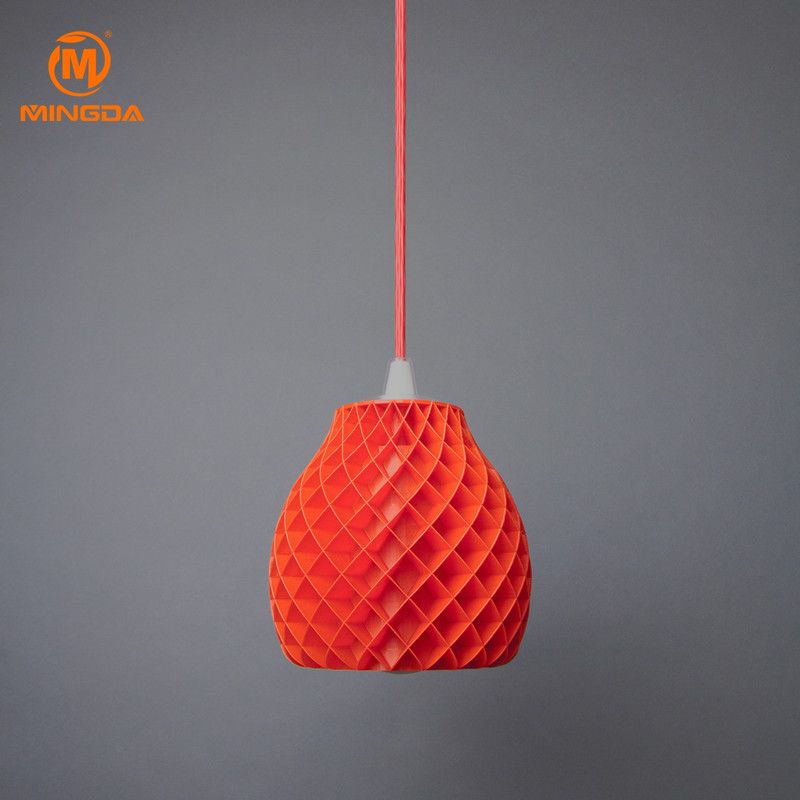 50
50
COOKIE CUTTER CROSS
€0.95
3d Printed Cross - Etsy.de
Etsy is no longer supporting older versions of your web browser in order to ensure that user data remains secure. Please update to the latest version.
Take full advantage of our site features by enabling JavaScript.
Find something memorable, join a community doing good.
(1,000+ relevant results)
Allium 50x50
Catalog
Advanced Search
Find
Store search:
Price (₽):
Code:
Text:
Select category:
All Coloring by numbers (main range) HERE! » Sale coloring by numbers Diamond mosaic 40x50, 30x40, 50x50, 50x65 HERE! » sale diamond mosaic without stretcher » ICONS (LAYING WITH DIAMONDS, RHINES) » Diamond mosaic (mini) 30x30, 20x25, 20x30, 20x20, etc. Cross-stitch » Embroidery pictures - printed cross » Embroidery on cushion covers - printed cross » Embroidery pictures - counted cross » cross stitch sale Embroidery with ribbons, beads, satin stitch, etc. " embroidery ribbons » Sale of embroidery with beads Carpet weaving technique (pillows, rugs) Coloring pages - antistress (pillow covers, albums, etc.) Accessories for creativity and needlework, stationery Children's creativity Board games, puzzles, jigsaw puzzles " Board games » Puzzle " Educational games for children » puzzles and jigsaw puzzles
New:
Vsedanet
Special:
Vsedanet
Results per page:
5203550658095
Home Cross stitch Embroidery on cushion covers - printed cross Allium 50x50
Previous Next
Rating:
SKU: 5db0093
China
Embroidery method
partial
Dimensions
50x50
All parameters
Compare
The composition of the set in the technique of the printing cross, with the 3D effect:
- a pillow cover:
The front side: canvas (11 cout) with a background pattern and color contrasting (water -soluble) symbolic scheme for embroidery;
back: fabric with zipper; multicolor color.
Embroidered field 186*190
- Thread floss - 100% cotton, corresponding to the DMC numbers; the threads in the sets are completed in sufficient quantity and placed on the organizer, according to the symbolic scheme of the image;
number of colors 15
- Needles - 2 pcs.;
- Colored paper duplicate of the original embroidery pattern;
Embroidery method
partial
Dimensions
50x50
tags:
flowers, cushion cover
Similar
Quick view
Lilac
China
Quantity:
Quick view
Delicate roses
China
2 116 ₽
Quantity:
Quick view
For you
China
2 116 ₽
Quantity:
Quick view
Roses in the palm of your hand
China
Quantity:
Quick view
Delicate flowers of cosmos
China
2,054 ₽
Quantity:
Quick view
Pink peonies
China
2 116 ₽
Quantity:
3D Printing Caliper Structures - Complete Guide
An Easier Approach to Caliper Structures
Caliper Structures for 3D Printing - The Complete Guide
Everything you need to know about caliper structures used in 3D printing. Feel free to use overhangs and bridges in your models!
Caliper Structures: If you have a lot of experience with FDM 3D printing (FDM - Fused Deposition Modeling), you may have found yourself in situations a couple of times in which you had to use such structures. An FDM 3D printer creates a 3D object by sequentially applying layers of thermoplastic materials. In this case, each new layer rests on the layer below it. If the model has an overhang that is not supported from below, it will likely sink or even fall off, and you will need to print additional support structures to ensure successful printing.
Caliper structures are seen as a necessary evil in 3D printing. On the one hand, they are absolutely necessary for models with dangerous overhangs or bridges. On the other hand, the cost of materials rises, finishing work is added, and there is a risk of damage to the surface of the model. Therefore, proper application of printed caliper structures is a very important aspect of 3D printing complex models.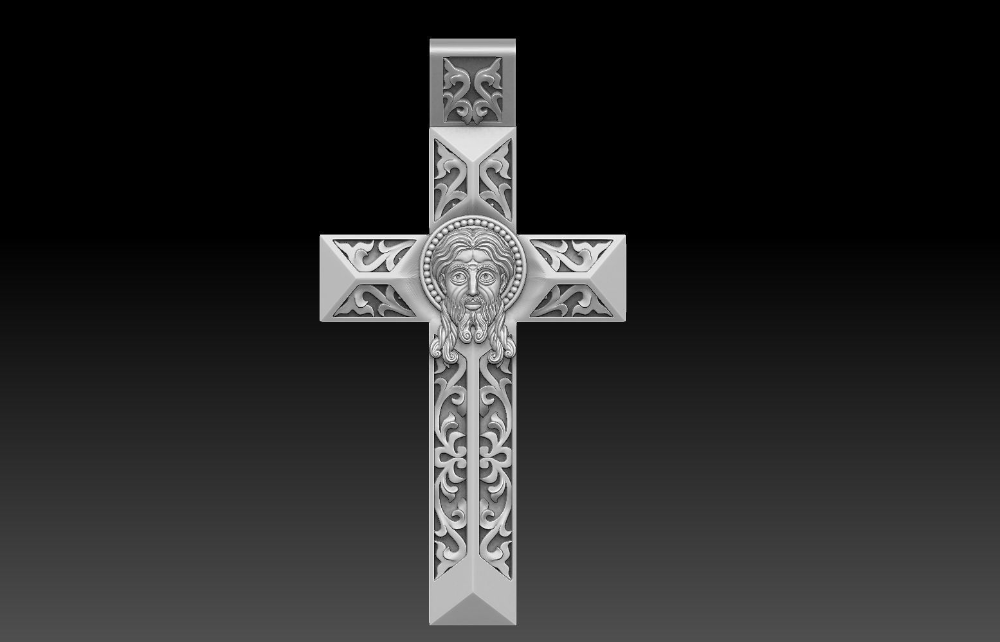
Caliper structures in 3D printing: 3 easy steps to success
In this article, we will cover everything you need to know about support structures used in 3D printing. Detailed explanations are provided later in the text.
WHEN DO YOU NEED THEM?
In general, when a model has an unsupported overhang or bridge, caliper structures may be required to enable 3D printing. The figure below shows overhangs and bridges using the letters Y, H and T as an example.
A classic example of overhangs and bridges using the letters Y, H and T as examples.0003
Support structures are not required for all overhangs - 45 degree rule
Support structures are not required for all overhangs. As a general rule of thumb, if the overhang slopes less than 45 degrees from vertical, it can be printed without the use of caliper structures.
Support structures are required for overhangs greater than 45 degrees from vertical.
3D printers provide a slight (barely noticeable) horizontal displacement between successive layers, i.e., the applied layer is placed on the previous one with a slight displacement. This ensures that overhangs are printed that do not deviate too much from the vertical. Anything less than 45 degrees can be supported by previous layers, and anything above that number can't. A value of forty-five degrees is considered a break line.
This statement is best supported by the examples of the letters Y and T. The two slanted parts of the letter Y have an angle of less than 45 degrees with respect to the vertical. Therefore, if necessary, the letter Y can be printed without using any caliper structures performed by 3D printing.
For overhangs in the letter Y, printing of support structures is not required. But for overhangs in the letter T - yes. (source: 3DHubs online production platform)
On the other hand, the protruding parts of the T are at an angle of 90 degrees from vertical.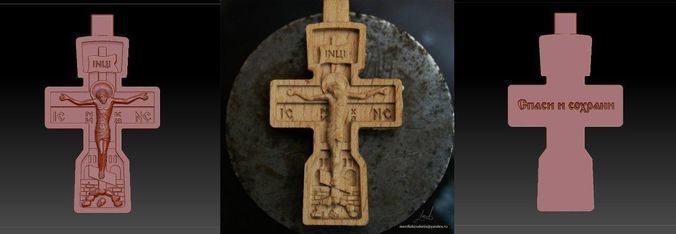 Thus, in this case, for the 3D printing of the letter T, the use of support structures is a necessary condition, otherwise the result will be a nightmare (see the figure below).
Without caliper structures, it is not possible to properly print the letter T (source: 3DHubs online manufacturing platform)
2
Not all bridges need supports - the 5 mm rule.
As with overhangs, supports are not required for all bridges. A rule of thumb that has been proven in practice is that if the bridge length is less than 5 mm, the printer is able to print it without the need for a caliper structure.
This uses the 'bridging' printing method, in which the printer stretches the hot material over short distances and prints it with minimal sag.
However, if the bridge length is greater than 5 mm, this method does not work. In this case, it is necessary to additionally print support structures.
Bridges longer than 5 mm cannot be printed without support structures.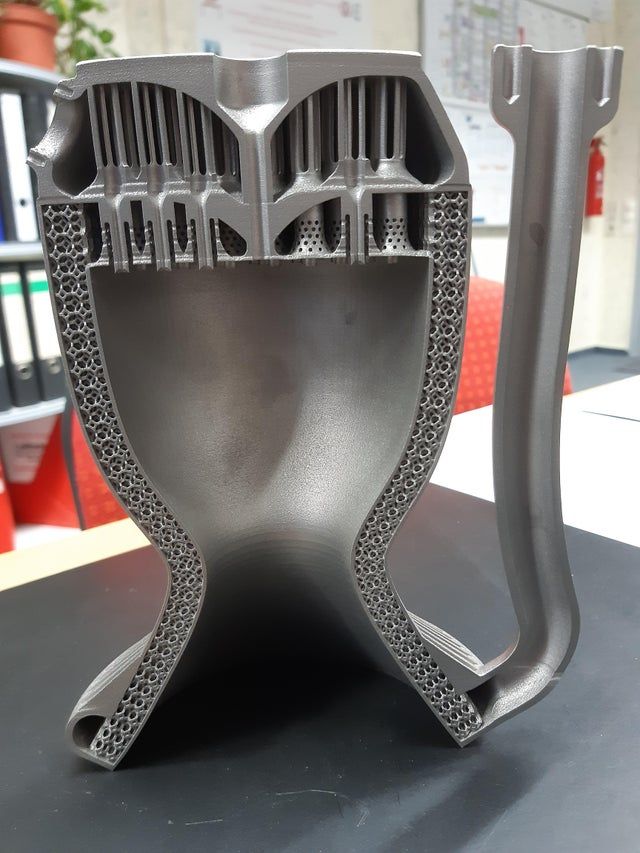 Notice how they warp and deform.
TESTING PRINTER'S ABILITY TO PRINT OVERHEADS WITHOUT SUPPORT
The rule of thumb that if an overhang slopes less than 45 degrees from vertical, it can be printed without the use of support structures is just a rule of thumb. Much depends on the printer, its condition and the materials used. Printers that are in poor condition may not print 35 or 40 degree overhangs from vertical.
Before printing a model with overhangs, it is recommended that you evaluate the printer's ability to print small overhangs.
This is easy to do. Simply download the Massive Overhang Test print model from the Thingiverse website and print it. This model presents overhangs from 20 to 70 degrees in 5-degree increments.
Overhang print test model from Thingiverse website (Source: Thingiverse website)
Determine the angle at which the printer starts to print abnormally. This is the maximum overhang angle at which the printer can print without support. It is recommended to remember it for making further decisions on the need to use support structures.
DISADVANTAGES
Like many things in our life, the use of support structures in 3D printing has certain weaknesses. There are several of them, so let's look at them.
1
Increased material costs
Support structures require additional materials. In this case, these designs after printing must be removed and thrown into waste.
When using 3D printing at the manufacturing level, the focus may be on the cost per model. If this is your hobby and you are limited in funds, then, for sure, this is also not indifferent to you.
3D printing of support structures means an obvious additional cost per model. Caliper structures require material that is subsequently removed and discarded, so any 3D caliper structures go to waste, which increases the cost of the printed product.
2
Print time increase
3D printing of support structures also increases print time as the printer prints additional volumes. It is quite obvious that the additional time spent depends on the number and height of the caliper structures.
3
Additional finishing
Additional finishing is required when printing support structures. (source: Formlabs)
3D printed support structures are not part of the model. They are used as a support for parts of the model during printing. This means that at the end of printing, there is an additional need to remove these structures before the model is ready for use.
In a production setting, extra work means additional costs for the model.
4
Risk of product damage
Left: Printing with supports. Middle: Removal of calipers with product damage. Right: Removal of calipers without significant damage to the product. (source: 3DHubs online manufacturing platform)
3D caliper structures come into contact with the walls of products and often stick to them. They are the only means of providing support under overhangs and bridges. If care is not taken when removing 3D caliper structures, defects may remain on the surface of the product. In the worst case, part of the model may break off along with the 3D support structure.
In general, there are significant drawbacks when using support structures. Therefore, here is another rule that has been proven by experience: minimize the use of 3D support structures and add them only when necessary . The following sections will explore the application of this principle, starting directly from the computer-aided design (CAD) stage and ending with printing.
GEOMETRY OF THE CALIPER STRUCTURE
Two types of support structures are commonly used: tree-like (“tree”) and linear / “accordion”.
Tree calipers
The tree caliper is a tree structure that serves as a support for the overhangs of the model. Calipers of this type only come into contact with the overhang at certain points.
3D caliper tree structures (source: Flashforge)
The advantage of using a 3D caliper tree structure is that it can be removed more easily without significant damage to the underside of the overhang. However, it should be noted that this type of caliper is only suitable for non-flat overhangs, such as the tip of the nose, toe or arch. For flat overhangs, it does not provide sufficient stability.
Linear support or "accordion"
This is the most commonly used type of support in 3D printing. It consists of vertical posts that are in contact with the overhang over the entire surface. This type of caliper is suitable for any overhangs and bridges. However, it is more difficult to remove without damaging the surface of the model.
Linear 3D support structures (Source: Flashforge)0076
Tear-off 3D support structures
Single-extruder printers use tear-off support structures by default.
If you have one extruder, you have to use the same material to 3D print the support structures that is used to print the model. Of course, the density of the caliper structures can be adjusted to be much lower than the density of the model, but this is the only remedy that can be applied to the material of the caliper.
Since the model and 3D caliper structures are made from the same material, the only way to separate them is to either break off the caliper by hand or carefully cut it off with a knife.
These removal methods carry a high risk of damage to the model, and during removal, you must use the proper methods and be extremely vigilant and careful.
2
Dissolvable 3D calipers
Dissolvable calipers are easier to remove, but requires a printer with two extruders.
If you have a dual extruder printer, you have a better choice. You can load one extruder with PLA for model printing and the other with water soluble material such as PVA or limonene soluble material such as HIPS (polystyrene) for caliper structure printing. At the end of printing, it is enough to simply remove the support structure by washing off by immersing the model in water or limonene.
This removal method reduces the risk of model damage and simplifies finishing, making it ideal for complex prints.
HOW TO REMOVE 3D CALIPER TEAR-OFF STRUCTURES
Because 3D tear-off calipers are difficult to remove and can damage the model, here are some tried and tested techniques for removing them properly.
- First you need to determine which support structures are completely open and can be easily reached with your fingers. Try prying these calipers off with your fingers. Exercise caution. Extreme caution. If this operation is performed correctly, most caliper structures should come off without much effort.
- Then take a tool to remove 3D support structures that are difficult to reach. There are many opinions about which tools are best. You can use needle-nose pliers, a spatula, or a utility knife. You can also use all these tools together.
- When using a knife or scraper, it is a good idea to heat up the model or blade.
 This contributes to better delamination of the 3D support structures. A small butane torch will help, but care must be taken not to damage the model.
 - Handle utility knives with care as they are very sharp.
- Sandpaper is also excellent for removal. When wet grinding with fine-grained sandpaper (from 220 to 1200), not only the removal of 3D caliper structures is performed, but also the model is polished. For best results, it is recommended to spray the part with water and sand in smooth, light strokes until the desired surface finish is achieved.
Wet sanding can be used to remove residual 3D caliper structures and smooth the surface of the model (Source: Formlabs) scratches and surface defects. Nail polish is great for partially or completely covering these marks.
If you are interested in how other users solve this problem, it is recommended that you view the web page on the best ways to remove supports, calipers and filament structures - Best ways to remove foundations, caliper structures and other external filaments.
MINIMIZING 3D CALIPER STRUCTURES WITH SMART DESIGN
Integrating 3D caliper structures into the model
One way to avoid the use of caliper structures in 3D printing is to use additional elements in the model that perform a similar function. Sculptors have been using this technique for centuries. As an example, consider the sculpture "Venus the Conqueror" by Antonio Canova.
"Venus the Conqueror", sculptor Antonio Canova
Here the right arm is an overhang but rests on pillows. The left leg is another overhang, but here the folds of the toga serve as a support.
The next example is the Guardian model by @fantasygraph. As a support for the legs and buttocks of the model, he guessed to use a dress flowing in folds. The left hand rests on the spear lowered down.
@fantasygraph's Sentinel is a prime example of how support structures can be integrated into a model.
Integrating 3D support structures into a design is more art than science. It is necessary to find such elements that fit into the overall design and at the same time can be a support for overhangs or bridges. If done correctly, the model will be more beautiful and the printing process will be freed from unnecessary 3D caliper structures, which means saving time, money and labor.
Bevels
Another way to get rid of 3D support structures is to use bevels. With proper chamfering, dangerous overhangs can be turned into innocuous structures with angles less than 45 degrees.
For example, if you have a smoothly falling or folded edge, you can replace it with an edge with an angle that does not require supports. Such an angular pattern is called a bevel.
Left: Gradually rounded edge that requires supports. Right: A beveled edge that can be printed without 3D caliper structures (Source: Rigid Ink)
Similarly, if your model has a hole, you can turn it into a beveled teardrop hole. For the most part, this won't ruin the overall aesthetic of the model, but will help reduce the amount of 3D support structures needed to print the model.
Beveled hole (source: Markforged)
MINIMIZING 3D SUPPORT STRUCTURES BY REORIENTATION
. For example, it is much better to print the open box shown below with the open side up.
You can often minimize the use of 3D support structures by properly positioning the model on the build plate (source: Markforged)
Below is a more non-trivial example, again from designer @fantasygraph. This is a model of a man with a horizontally outstretched arm pointing forward and to infinity.
If you print the model as it is, you will need to support the left hand. And it, in fact, is a long overhang with an angle of 90 degrees.
Removing the supports will most likely leave imperfections on the underside of the arm. To avoid this, you can rotate the whole model by 45 degrees and simply add a support for its base. In any case, the quality of the basis of the model does not really matter. Thus, it is possible to print a model with fewer 3D caliper structures and save the left hand from damage.
A simple and ingenious solution. Maybe you can do it too?
PRINTING OVERHEADS AND BRIDGES WITHOUT 3D SUPPORT STRUCTURES
In the previous sections, attention was drawn to the fact that, if possible, you should try to use as little 3D support structures as possible. However, this means that it will often be possible to find yourself in a difficult situation in which the risk of model instability is inevitable. To minimize these risks, here are a few general tips.
- Make sure the 3D printer is in optimal condition.
- Cool the printed material as quickly as possible. The longer the material cools, the more likely it is that the bridge or overhang will warp or fall off. To do this, it is necessary to maximize the cooling capacity of the layers by cooling fans. Also, reduce the print temperature to the lowest possible.
- Reducing the print speed also speeds up cooling and is especially helpful when printing longer bridges and complex overhangs.
- It is recommended to print with the minimum layer thickness. Less layer thickness means less weight applied with each pass of the printhead. In addition, it contributes to faster cooling of the material.
SUPPORT STRUCTURE SETTINGS IN CURA
Sometimes 3D support structures are simply indispensable. But even in this case, every effort must be made to ensure the stability of the 3D support structures, so that they do not consume a lot of material, they are easily removed and do not damage the surface of the model.
The layering manager has many additional functions for fine-tuning support structures. Most layering programs can automatically create calipers, but they also have a manual mode that lets you add or remove calipers anywhere. In addition, the layering manager has many different settings to control the following aspects of the caliper structures.
- Location of 3D supports
- Durability of 3D supports
- Easy removal after printing
- Damage to the printed surface
In this article, we decided to focus on Cura, one of the most popular free layering software.
Cura has a number of settings related to support structures located in the Support section of the Custom Settings menu. With the correct setting of these settings, you can create 3D support structures that meet most of the basic requirements.
1
Enable automatic creation of 3D support structures for unstable models
Let's start from the beginning. How can I check if a model needs additional supports?
Cura makes this easy. Immediately after importing the model into Cura and placing it on the virtual working base, you should pay attention to the areas colored in red. These are the areas where Cura found instability. It should be noted that, possibly, areas without supports will not be visible until the camera is rotated.
If the bottom of the part is painted red where the model touches the work base, there is no need to worry that there is no support under this area. This problem will be solved by a working base. Small red areas at the top of holes or between two structures are called bridges and Cura will process them automatically.
You should start to worry if there are other parts highlighted in red. First you need to activate the automatic creation of support structures in order to ensure that these red areas are successfully printed. To do this, just check the Generate Support checkbox in the Support section.
So, the function of automatic creation of support structures is activated, but no external changes to the model occur. The reason is that Cura does not show support structures in the default Solid view. To view the generated 3D support structures, you must change the view mode to Layer View (View layers). The material of the calipers (lines and volume) will be displayed in turquoise. You need to move the layer slider up and down to see where the support is added to the model.
2
Selecting a tree or linear support
Tree support structures in Cura
By default, Cura creates 3D linear support structures. Version 3.2 beta of Cura provides the option to use tree supports instead of the default linear ones.
3
Controlling the position of 3D supports
Two types of support structures in Cura: Everywhere and Touching Build plate
When you activate the option to create support structures, the Placement item automatically appears in the Support section. The Placement option provides the ability to control the approximate location of support structures. There are two options: Everywhere and Touching Build plate. The Everywhere option is selected by default.
When the Everywhere option is selected, Cura 3D attempts to create support structures where they are needed. This means that not only 3D caliper structures will be created that will be placed on the working base, but also caliper structures that will be based on the details of the model. This is the rational choice for most cases, as it guarantees the necessary support for all unstable areas.
However, if you select the Everywhere option for very complex models, the model may be completely covered with the material used for the calipers. If there is no such intention, you just need to set the Touching Build plate option in the Placement settings. This option will create 3D caliper structures under the hanging parts of the model only between the working base and the model.
4
The Enable Support Roof option can improve the surface finish of overhangs, but will incur some additional cost.
Since the overhang of the model is always printed on top of the 3D support structures, the optimal surface finish of the parts is not always guaranteed. And in this case, the hidden setting Enable Support Roof can help.
The arch of the support is a dense layer in the upper part of the caliper structure, which does not detract too much from the quality of the surface of the overhangs. When this option is activated in the Cura 3D program, by checking the appropriate box, a better quality finish is obtained. But this improvement comes at a cost, as removing the caliper structures becomes more difficult than usual when choosing this option. This option is only recommended if the surface quality of the overhang is important to the finished part itself.
5
Prevent 3D support structures from damaging the outer walls of the model by using the Support X/Y Distance setting
wall and leave traces on the outer surface of the model. This can be avoided by using the hidden Support X/Y Distance setting in the Support section.
In Cura, the Support X/Y Distance setting generally controls the minimum allowable distance between the model's vertical walls and the support structure in the X-Y plane. If the 3D support structure damages or sticks to the walls, you can increase this value in 0.2 mm increments until the walls are smooth. However, it is highly recommended to ensure that there are no small overhangs protruding from the outer walls, which would be left unsupported by leaving a small distance between the support and the walls. With these small overhangs, you may even need to decrease the X/Y distance instead of increasing it. Otherwise, printing will fail.
6
Z Distance setting to allow easier removal of 3D support structures model layers. The Cura software creates this weaker connection by leaving a certain space between the top and bottom of the support structure and the model - this space is known as the Z distance.
By setting the hidden Z-Distance settings in the Support section, the 3D support structures can be more easily separated from the model. The default value of this setting is equal to the height of the layer. So if the layer height is 0.1mm, the default Z distance will also be 0.1mm.
If the support material is difficult to separate from the model, it is recommended to increase this value in increments of layer height until it separates cleanly. Cura may or may not provide additional support for any particular layer. Unfortunately, half layer values do not exist. That is, if the Z Distance value of 0.2 mm is too large for printing with a layer height of 0. 1 mm, and the Z-Distance value of 0.1 mm is not enough, there are no other options for setting the Z Distance value.
7
Selecting the right 3D caliper structure to strike the right balance between strength and ease of removal
Support patterns in Cura
Cura provides one of seven 3D caliper patterns. The pattern can be changed using a hidden setting called Support Pattern in the Setting section.
In most cases, the default pattern, Zig Zag, provides the best balance between strength and ease of removal. Other scheme options: Triangles (Triangles), Lines (Lines), Grid (Lattice), Concentric (Concentric), Concentric 3D (Concentric 3D) and Cross (Cross). If the default schema doesn't work, you can experiment with other options. Each provides a different balance between strength and ease of removal.
Caliper structures are a necessary evil in 3D printing. They are needed to print complex overhangs and bridges on the model.