Drop in auto sear 3d print
▷ ar15 drop in auto sear 3d models 【 STLFinder 】
AR - 15 Drop in Full Auto Sear
thingiverse
Pulled these specs from some old mag, bear in mind it is illegal to make and or possess one of these...FOR YOUR INFORMATION ONLY! ... To work, this requires a spring and pin to hold the two pieces together to function
AR15 Target Style Sear
grabcad
Sear that accompanies the target style hammer for an AR15
Auto Sear for AKM
grabcad
Auto Sear for AKM
EZ Glock Auto Sear
cults3d
. .. system. The disconnector is to be made from 18 gauge steel. You can keep the backplate on and just screw the auto sear in whenever you want to. You tension the auto sear with the nut in the rear. ...Tighten to engage and loosen to disengage.
hk417 Auto Sear
grabcad
hk417 Auto [email protected]
AR15 Sear
pinshape
Print on its side, 100% infill
SEAR
grabcad
SEAR 3d model
AKM Auto Sear
grabcad
Came across some old blueprints, this is pretty close to the real deal other than errors readng dodgy russian drawings.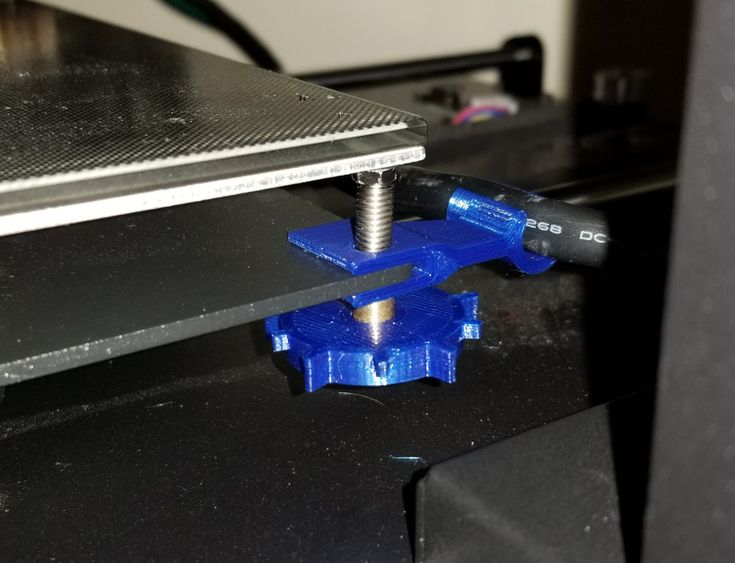
Glock Auto Sear
thingiverse
Four educational purposes only please follow all local laws
switch auto sear
grabcad
Step. StL. ...format files.
Glock auto sear
grabcad
For design purposes only...
Sear&Auto Sear SPRING for Ak-47
grabcad
these springs are used for akm or ak-47 based on blueprint
ar15
grabcad
ar15
AR15 Full Auto Link
cults3d
Files you receive with the purchase: -2 Machining Blueprints -2 STL 3D printable files
AR15
grabcad
AR15 built from picked up parts
Drop In Sink
grabcad
Drop in sinkStainless steel hand sink15 x 15
Pencil Holder, Drop-in
thingiverse
This drop-in pencil holder fits the cutouts (cable access) of a HON brand desk.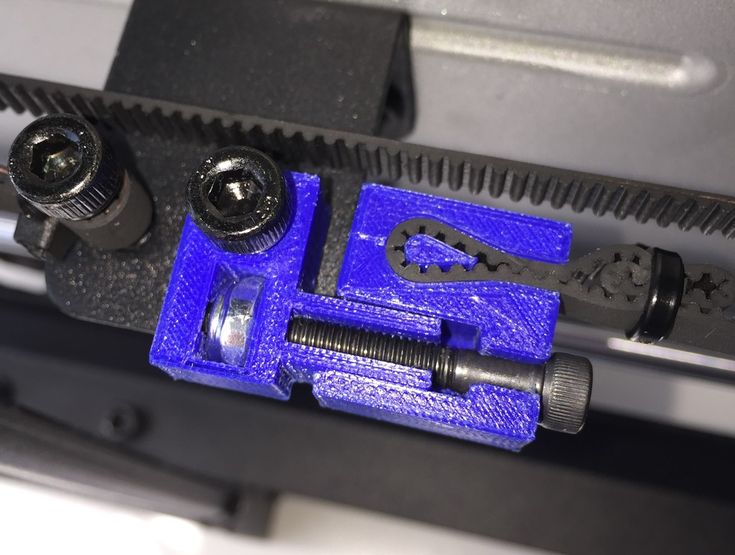 ... Remove the annoying, unwanted hole plug(s) and drop this in instead.
2x4 Drop-in Support
thingiverse
This is a replacement of the 2x4 drop-in support for the Centipede sawhorse.
Ar15
sketchfab
Game ready model of a AR15 assault rifle complete with animaitons.
Tealight drop-in
prusaprinters
A simple drop-in for small LED tea lights for the Ghost model by @djedje-zr7 The light can be fixed with glue (e.g. ...T9000, highly recommended) or hot glue. </p>
</p>
Drop-in Cup Holder
thingiverse
Designed this simple cup holder for a temporary couch table. ...Just cut a hole 91-99mm wide and drop it in! Haven't printed it yet, but my biggest concern is the strength of the lip. ...May have to make that thicker.
Dishwasher Grid drop-in
thingiverse
When your dishwasher grid for utensils breaks apart, use this to drop it in and fix it! A smaller version can be found here: http://www.thingiverse.com/thing:1568108 Print Settings Printer: Da Vinci 1.1 Plus ...
Drop-in Flashlight holder
thingiverse
I wanted a drop-in light holder for my flashlight.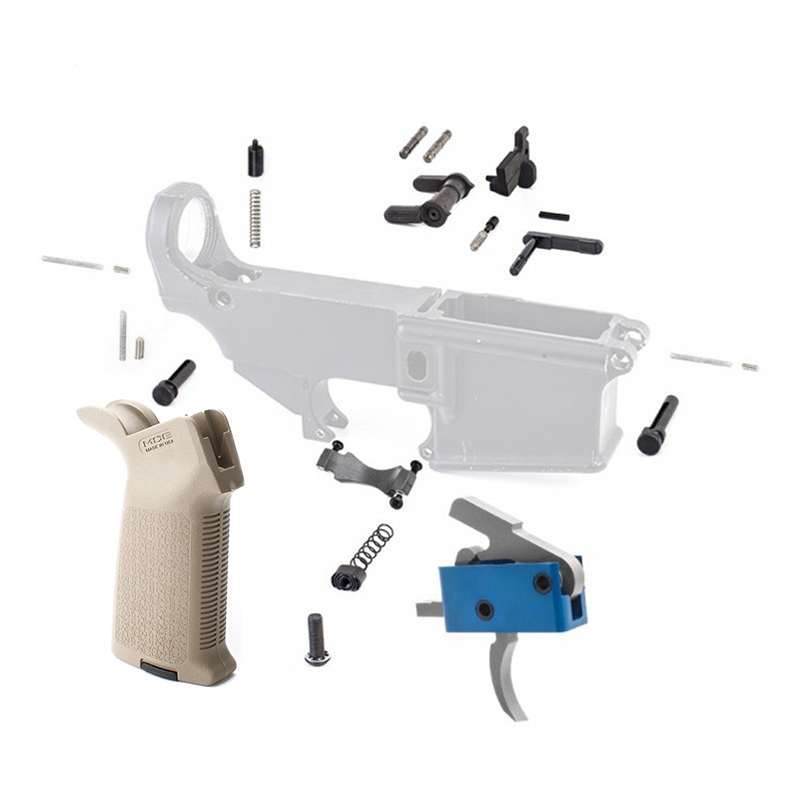 Putting it on the Molle webbing behind my seat of my vehicle. It is designed to clip onto Molle webbing or screwed to something or a single zip-tie. Spots for all kinds of mounts! It should work...
Y-Stage Drop-In
thingiverse
History x-y lowrider by twotimeshttp://www.thingiverse.com/thing:2845 Drop-In Y-stage for Batch 9 Cupcakes. Printable in 1 sheet (only 6 pieces) Uses minimal hardware (see instructions) Solves issues of: bolts jammed against guide rods Y timing belt...
Drop-In Door Holder
prusaprinters
<p>Easily drops into the hinge of a common residential door to hold it open. ...Be careful as it would be very easy to destroy this by trying to force the door closed. </p>
</p>
20x40mm Drop in Nut
thingiverse
With the drop in nut any place on the rail can be accessed. The nut fits the slot but when turned it locks in position. At first I had my doubts about making this. It is so small and it may be too weak. I was wrong on both counts. With my Prusa...
Printable Drop-in Paxtruder
thingiverse
... a plunger thing to push against the plastic like the original. Put it together. (Self explanatory, but if you need help head over to www.thingiverse.com/thing:1351) Mount it to your Dinos. Start extruding on your new Printed Drop-in Paxtruder!!
20x40mm Drop in Nut
cults3d
With the drop in nut any place on the rail can be accessed.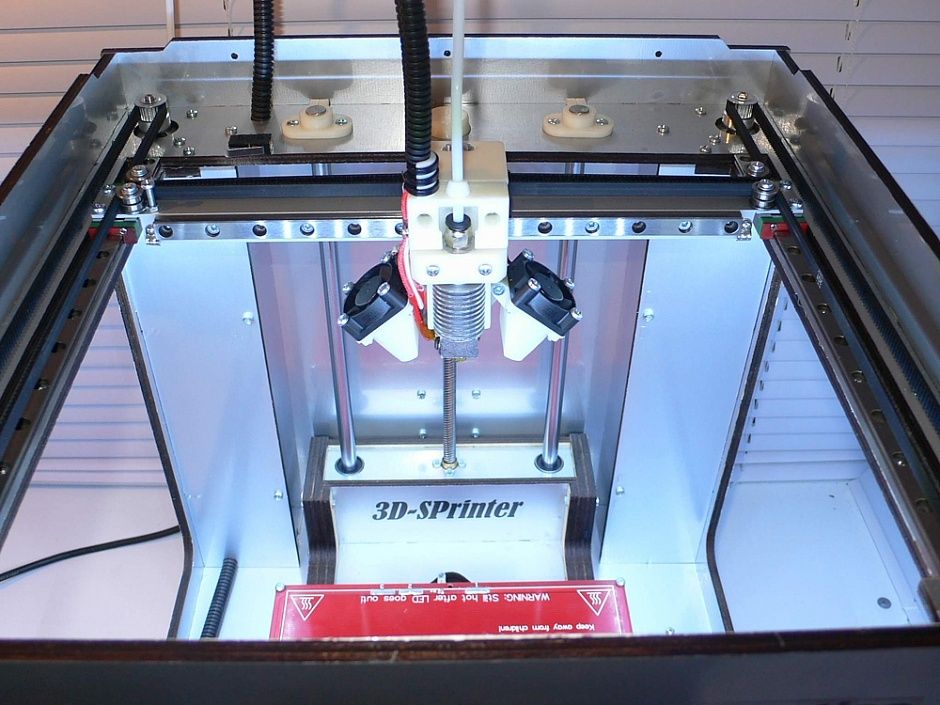 The nut fits the slot but when turned it locks in position. At first I had my doubts about making this. It is so small and it may be too weak. I was wrong on both counts. With my Prusa...
GoPro Drop In Bracket
thingiverse
I have been using the original go pro bracket housing to film my 3d prints but the original housing doesnt allow for charging while its in the housing as the flap cannot be accessed. So i needed just the face plate with some side support just to rest...
AR15
sketchfab
Have a look at my comprehensive tutorials and 3D assets on my website at www.chamferzone.com You will also find free tutorials and weapons there that you can use in your projects. Questions? ...Message me through www.facebook.com/chamferzone Cheers!,...
3D Printed AR-15 Part Linked to Extreme Right Boogaloo Group - 3DPrint.com
When the topic of 3D printing guns comes up, it’s always difficult to know what to do. On the one hand, we can cover it and add to the scaremongering around the topic. Or we can ignore it and let a potentially newsworthy story slip by. However, as the trend has evolved, it may become increasingly difficult to look past it, as demonstrated by a recent criminal complaint filed against a West Virginia resident accused of selling over 600 3D-printed plastic parts that convert semi-automatics into fully automatic rifles.
The FBI has claimed that Timothy Watson used a website, Portablewallhanger.com, to sell what is known as a “drop-in auto sear” that makes it possible to turn an AR-15 semi-automatic assault rifle, legal in the U.S., into an automatic machine gun, banned in the country for over 20 years. The federal investigators suggest that Watson was disguising the device as a wall hook. Once an extra bit of 3D printed plastic was removed, buyers were left with a 3D-printed auto sear.
An Instagram commenter refers to “red coats”, code for the enemy of the Boogaloo Boys. Image courtesy of Wired.
For the over 600 units Watson sold, customers included multiple members of the Boogaloo group, the FBI claims. The far-right movement is the latest manifestation of newer right-wing extremists that have emerged leading up to the 2016 presidential election in the U.S. The group was said to have been responsible for the murder of multiple police officers. The Boogaloos have been involved in inciting violence at racial justice protests that erupted in the U.S. in the summer of 2020 in response to the police murder of George Floyd.
Most alarmingly, among those Boogaloo customers was Steven Carrillo, according to the FBI. Carrillo is accused of shooting Santa Cruz police officers and two Oakland courthouse security guards in May and June, which resulted in the deaths of one police officer and one guard.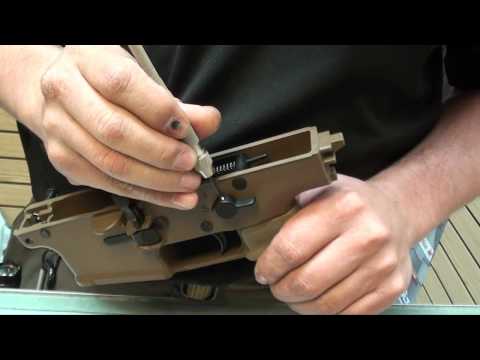
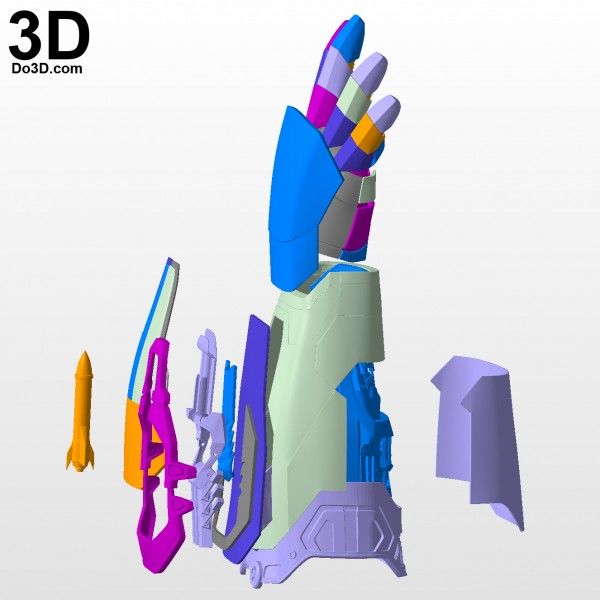
The 3D printed auto sear works by preventing the bolt within an AR-15 from stopping when fired. As a bullet is fired from the weapon, the gases within the chamber push the bolt back to retrieve a new round from the magazine. The bolt pushes a spring in the gun’s stock down before propelling forward. The auto sear stops the bolt and causes the hammer to push the firing pin once more. This allows the gun to continue firing without any further pulling of the trigger.
Once the extra black portion is removed, the red hook fits into an AR-15 to convert it into an automatic rifle. Image courtesy of Wired.
As we’ve covered in the past, 3D printed guns have so far posed little threat to the public at large due to the fact that the plastic parts are easily destroyed by the extreme forces of the weapon upon firing. They have been capable of firing but are dangerous to the users for this reason. However, this latest story represents a growing trend in the 3D printing of arms.
A consultancy group called Armament Research Services published a report in March 2020 noting that the current trend for DIY gun enthusiasts has grown to include individual components and not entire weapons. This has resulted in hybrid guns, made up of a combination of 3D printed and traditionally made or off-the-shelf parts, and market-bought weapons with 3D printed receivers. The report notes:
“At present, the material limitations of consumer-grade 3D printers, and the high cost of those small number of industry-grade printers capable of producing objects in metals, means that certain essential pressure-bearing components must either be fabricated from metals using alternative methods or substituted for commercially made parts. In the case of a Glock-series handgun, for example, the frame and magazine body may be printed from PLA while the slide, barrel and trigger would usually be original, factory-made parts. The emergence of other technologies such as ECM and desktop/micro-CNC milling machines have bridged the technological gap, and now mean that viable, capable self-loading hybrid firearms such as the FGC-9 can be produced by the home gunsmith without using any regulated components.
Other areas for development, such as the production of 3D-printed ammunition, remain in their infancy.”
The auto sear part itself doesn’t take the stress of the bullets being fired, meaning that it can be used successfully even if made out of plastic. The piece would eventually wear away but could easily be replaced. With the price of industrial-grade polymer printers now dropping, it may be increasingly possible to print an auto sear from materials that can withstand the heat and impact of bullets firing.
In some cases, the 3D printing of guns or gun parts may just be a hobby or a means to procure weapons outside of government control. The Ghost Gunner from Defense Distributed, for instance, was focused specifically on CNC machining the lower receiver for an AR-15 so that it might not be traced by government authorities.
Watson was specifically selling a component that would convert an AR-15 into a fully automatic rifle. U.S. legislation frames the auto sear itself as an automatic weapon, making anyone who 3D prints one a potentially culpable in a federal crime. However, groups like Deterrence Dispensed have released their own files for 3D printable auto sears.
While there may be a plethora of reasons for crafting guns or procuring guns outside of government scrutiny, 3D printable weapons and guns rights activists have seemingly been aligned with the right wing of the country. Ghost guns have been involved in more than one mass shooting in the US since 2013. Just this October, a far-right terrorist in Halle, Germany used a homemade submachine gun to murder two people following an attempt performing a mass shooting at a synagogue.
One of the key creators of the 3D printed gun movement, Cody Wilson, is a self-identified libertarian that has been described as right wing and founded Hatreon, referred to as an “alt-right crowdfunding platform.” Wilson himself was charged with sexually assaulting a minor when he allegedly met a 16-year-old on a site, SugarDaddyMeet.com, and paid her $500 in exchange for sex. This led him to step down as CEO of Defense Distributed, the leading site for 3D printable gun files.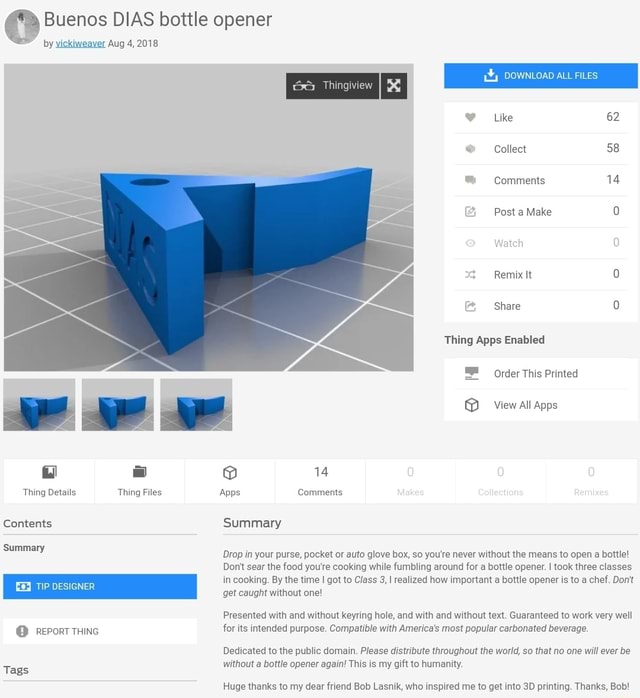 However, news of Timothy Watson’s 3D printed auto sears suggests that the far right and the 3D printed gun movement continue to commingle
A screenshot from the Portable Wall Hanger website.
As detailed in a recent Wired article on the subject, the FBI claims that one witness in the case was a Boogaloo member who told the federal agency that he learned of Watson’s product from ads on a Boogaloo Facebook group. Portablewallhanger.com also advertised that it would donate 10 percent of its proceeds to Duncan Lemp, a militia member killed by police in March 2020.
Jon Lewis, a research fellow at the George Washington University Program on Extremism, told Wired:
“To the best of my recollection, there has been very little in the way of tangible evidence that domestic extremist groups have successfully used 3D printing to modify guns, until now. When you have individuals who so strongly support the second amendment—pro-gun, anti-government individuals trying to evade any kind of gun control measure—it makes sense for them to shift to this kind of technology.
”
Stay up-to-date on all the latest news from the 3D printing industry and receive information and offers from third party vendors.
Tagged with: 3d print guns • 3D printed AR-15 auto sear • 3d printed gun parts • 3d printed guns • 3D printed weapons component • Boogaloo Boys • cody wilson
Please enable JavaScript to view the comments powered by Disqus.
Your first 3D print with Prusa i3 MK3S / Amperka
The 3D printer needs to be checked and configured before printing. With the Prusa i3 MK3S, you don't have to manually level the table: the manufacturer has taken care of everything and added auto-calibration at the firmware level. However, when you turn it on for the first time, you must wait while the printer performs self-diagnosis and self-calibration.
Automatic printer test on first start
First make sure that the table sensor is a short distance from the surface of the print platform. If it is lower, then the sensor will scratch the table. nine0003
Turn on the printer. At the first start, the program for checking the components of the printer is activated. This will help to identify possible assembly errors or defective components.
Please note that the ✖ button below the encoder is used to emergency stop printing and restart the printer when something goes wrong. Don't press it for no reason.
Agree to the automatic check by pressing the encoder.
The fan test will run first, then the table, hot end and printer axes test.
Printer Calibration
After self-testing, the printer will prompt you to automatically search for reference points to calibrate the table. This will take about 12 minutes. Remove the removable metal sheet from the table and start the process.
Place a sheet of paper under the nozzle to prevent the printer from scratching the table. If the nozzle starts to scratch the sheet, then you have fixed the magnetic table sensor too high. In this case, press the reset button and lower the sensor closer to the table surface. nine0003
Then put the metal sheet on the platform and proceed with the calibration.
For better adhesion, it is worth smearing the coating with the adhesive stick from the kit. Try to apply an even layer. Instead of the glue from the kit, you can use other means to improve adhesion, for example, hairspray, masking tape or BF-2 glue.
Next, you need to load the plastic into the extruder. When the filament sensor is installed correctly, the filament should retract automatically. If you are having trouble loading bar stock, go to Filament Sensor Setup at the end of this manual. There you will find a life hack that will help you with the correct installation. nine0003
Next you need to specify the type of plastic. The printer comes with a spool of PLA plastic, so we will choose it.
Install the spool of plastic on the holder. Insert the end of the filament into the hole on the extruder.
The printer will automatically retract the bar to the end and extrude some plastic from the nozzle.
Make sure that the plastic of the color of the installed coil is pouring out of the nozzle. If you change from one color filament to another, then you can squeeze out a little more plastic in the menu to remove the remnants of the previous color. nine0003
After that, you need to adjust the print height of the first layer. The printer has already automatically determined and compensated for the tilt of the table, but the distance from the nozzle to the surface must be set manually.
Turn the encoder to adjust the distance between nozzle and table. By changing this gap, achieve the best quality of the first layer. Then save the set parameter by pressing the encoder.
The nozzle must not be too close to the table.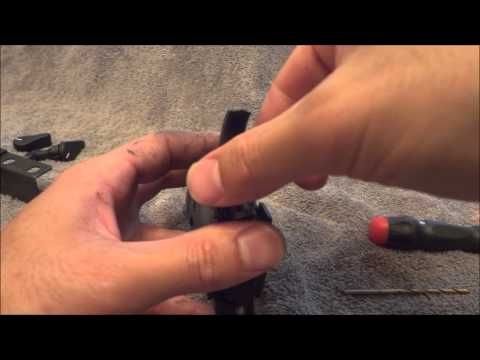 Ideally, the first layer should adhere well to the surface (as in the top line), but not smudge or fade (as in the bottom line). nine0003
Check that the square printed well at the end of the calibration.
If you have not set the optimal layer thickness, you can repeat the calibration operation again.
Printing a model from a memory card
Insert an SD memory card into the slot on the side of the display module. There are already prepared files for printing on the card from the kit - choose what you like best. Note that each file name has an estimated print time. nine0003
So, we will print the 3DBenchy boat, which is already on the memory card.
After selecting the model file, the printer will start heating the bed and extruder. Encoder during printing, you can adjust the speed.
Always wait until the table top has cooled to room temperature before removing the model. Then remove the metal sheet from the platform, bend it a little, and the part will bounce off by itself.
Quiet printer mode
If you are bothered by the noise of the motors, try setting the printer to quiet mode. This disables skip-step tracking, which helps print at high speeds, but the noise is noticeably reduced.
To activate the silent mode, go to the "Settings" section.
Next, switch the "Mode" item to the "Stealth" mode. The printer will then print in quiet motor driver mode.
Change of plastic
To change the plastic, select the menu item "Unload filament".
The printer will ask you for the type of filament and start to heat up the change nozzle.
After heating, press the encoder to confirm the removal of the bar from the extruder.
Plastic is loaded automatically. Insert the filament into the hole on the extruder and the printer will push the rod towards the nozzle.
Model Slicing
You can use any slicer to prepare models for the Prusa i3 MK3S - for example Cura.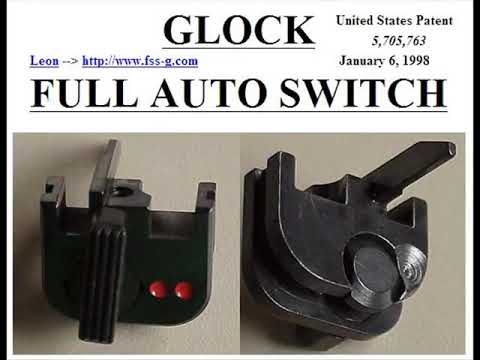 nine0003
For simplicity, we will use the manufacturer's native program. Download and install Prusa Slicer from the official site.
Please select your preferred language during installation.
Next, specify which slicer components you want to install. You can leave them as default.
After installation, you will see the program window. It has a switch of operating modes: "Advanced" and "Expert" increase the number of parameters available to the user. nine0003
In the tab on the right, you can change the pre-configured plastics and printers, enable support and change the filling.
Open the 3D model in .stl format with the program. It will appear in the workspace. For example, take the 3DBenchy boat model.
The tools on the left allow you to scale and move the model.
The tabs at the top are print settings that can be left at default.
Press the "Cut" button.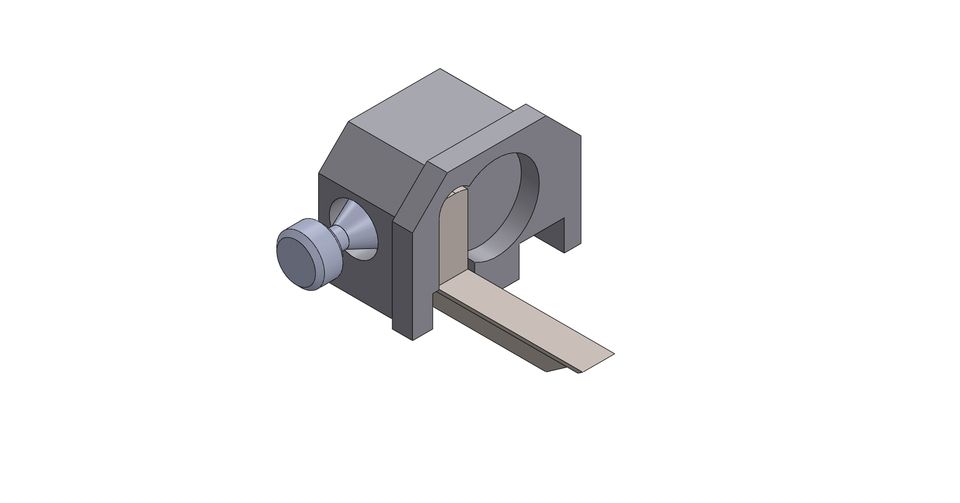 The model will be displayed in layers, and the slicer will generate the appropriate G-code for the printer. At this stage, you can look at the nozzle trajectory and see the slicing errors, if any.
Click on the "Export G-code" button and save it to a file. If you have connected a memory card, you can save the file directly to it by pressing the button with the SD card icon.
Filament sensor setting
If the plastic cannot be loaded automatically, it means that the filament sensor is crooked. Follow our tips to install it as evenly as possible and achieve reliable operation. nine0003
Unscrew the cap from the top of the extruder.
Go to the "Support" menu item.
Select "Sensor info". The status of the sensors will be displayed on the screen.
Adjust the position of the filament sensor so that when the bar is lowered into the extruder, the state of the sensor changes. You may need to place a piece of paper folded several times under the sensor to raise it a little.
After adjusting the sensor, screw on the extruder cap. Ready! nine0003
Automation in FDM. What prevents us from printing 24/7?
The 24/7 production of parts using FDM technology is hampered by the high labor intensity of each action taken, as well as the need for an operator to be near the printer.
If we compare the most common modern FDM 3D printers on the Russian market with ordinary office printers, then in terms of automation level they are closer to a manual printing press than to an MFP.
The FDM 3D printer will be idle if the operator has not removed an already finished part from the worktable or if he has run out of material. In the event of a technical malfunction, the operator spends more time finding the malfunction itself than fixing it. nine0003
If the production is small (up to 10 printers, up to 1000 parts per month), then these problems are not noticeable. Typically, such a pilot plant is run by a single specialist who has a thorough knowledge of the printers entrusted to him, but even an experienced print specialist cannot work 24/7 and produce a large product range with high quality if it changes frequently (for example, in 3D printing service farms).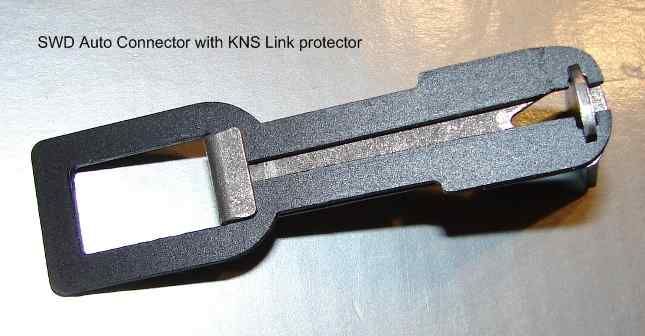
If an enterprise needs to increase the productivity of its 3D printing department, then this is usually followed by an increase in the staff of operators, an increase in the number of printers, an increase in technical costs (manufacturing defects, technical and technological downtime). When deadlines are pressed, there is a need to work first in two shifts, and then in three. nine0003
Over the past three years of running serial orders at our St. Petersburg 3D printing services farm, we have identified the most costly operations in terms of productivity and labor intensity:
requires the presence of an operator.
2. Preparation of the working area, calibration - in case of operator error, it leads to marriage, time is lost for reprinting. nine0003
3. Media Inspection - When finished during the printing process, the printer is either idle or the product is rejected.
4. The printer is idle until the operator removes the product from the worktable.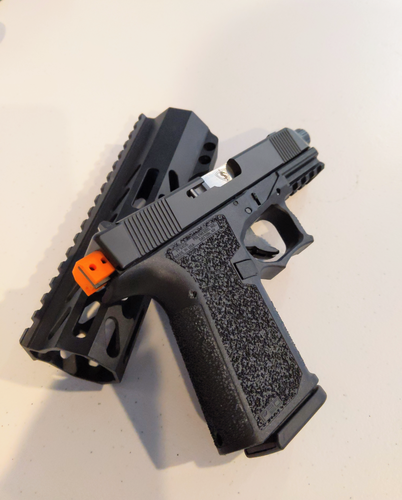
5. The printer is idle while the operator is looking for a problem or waiting for a response from technical support. The problem applies to printers whose manufacturer does not provide detailed technical documentation. A large fleet of printers requires a dedicated service engineer. nine0003
6. The increase in the number of orders for production requires the appearance of a technician to solve routine auxiliary tasks (for example, replacement and control of the availability of material), otherwise the workload on operators increases, rejects become more frequent, equipment is idle.
7. Delegation between operator shifts often results in overproduction of parts or loss of order information. To combat this, investments in accounting systems or the hiring of additional administrative staff are required. nine0003
It follows from this:
2. An increase in the number of orders is a non-linear increase in the labor intensity of production.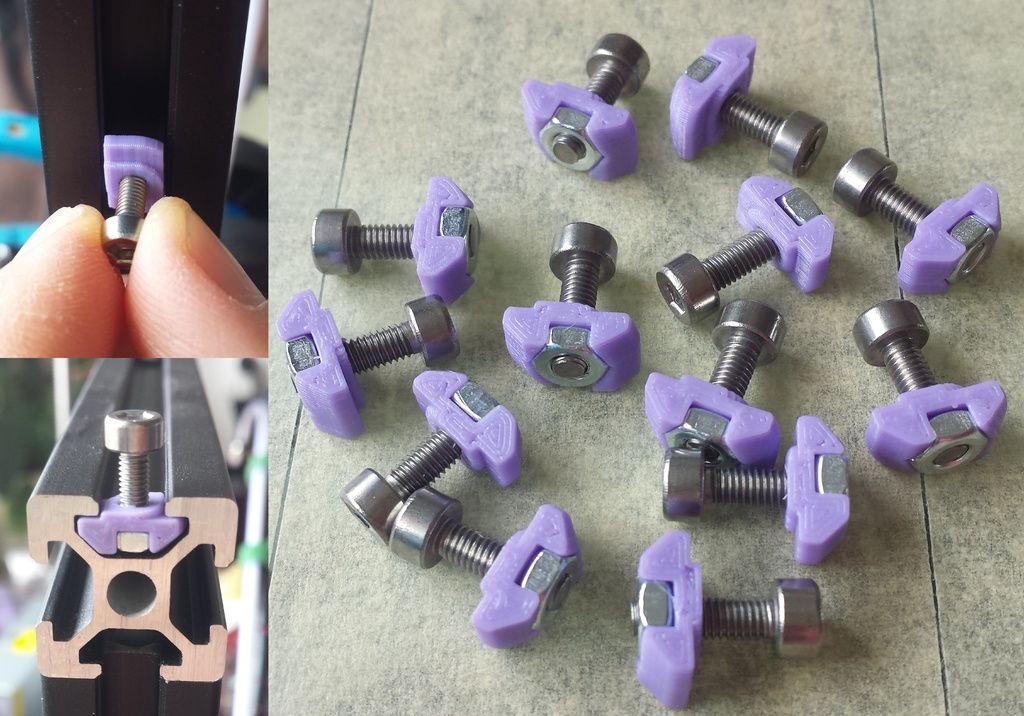
3. Staff expansion - growth of non-production costs.
4. Increasing the labor intensity of production - increasing the terms of product readiness.
5. Lack of automated accounting tools - increased costs for scrap and re-sorting.
6. Shift schedule - increased staff and increased costs for marriage and regrading.
7. Round-the-clock work - increase in staff, decrease in the level of responsibility for quality.
Thus, FDM 3D printing is scaling at a significant cost and is accompanied by an increase in staff, an increase in payroll costs, and a non-linear increase in production and administrative costs. Added to this are the difficulties with organizing in-line printing, the lack of analytics and statistical data on production, material consumption, and data on equipment loading. nine0003
The reason is the lack of technical and software automation of routine actions in FDM printing.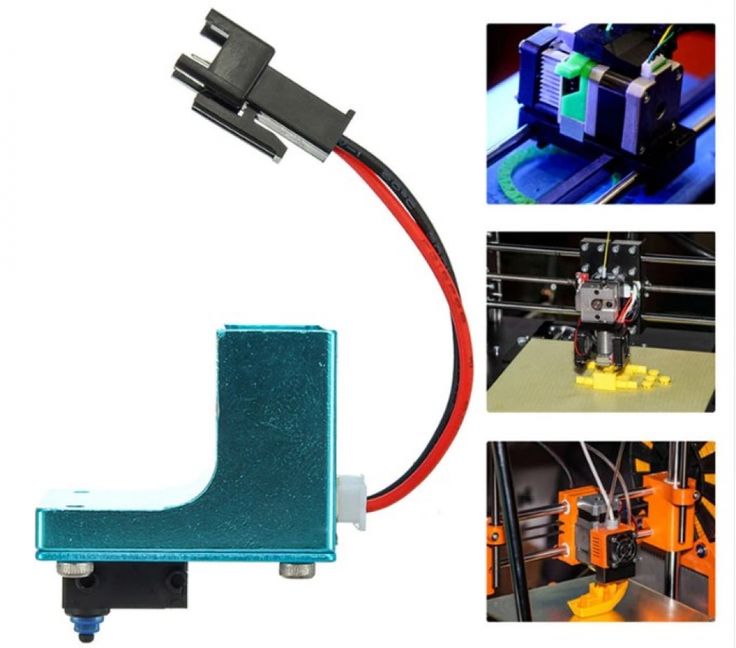
To solve the above scaling problems, in the spring of 2020, we started the development of an automated FDM 3D printing complex.
The following development goals were identified:
1. Automate the routine removal of finished products and material replacement, eliminating the need for the constant presence of the operator near the printers. nine0003
2. Have complete information about the technical condition of the printer without visual control and operator presence.
3. Ensure the scalability of production without increasing non-production costs.
4. Reduce the labor intensity of production planning, control and accounting of printed products.
5. Reduce the risk of technical failures and downtime for service and recovery. nine0003
6. Ensure compatibility with the most common thermoplastics and composites and reduce changeover downtime, reduce downtime between operations.
7. Collect and analyze data on the printing process and equipment status, display analytics not only for production, but also for administrative staff, including material consumption and manufacturing defects.
8. Predict project deadlines as accurately as possible by using real time to print the first samples in a batch. nine0003
9. Implement a management system with two-way exchange with third-party CRM (Bitrix24) and accounting systems (1C: UNF) for end-to-end analytics of the effectiveness of investments in the additive unit.
In this article, we present a comprehensive solution to the task of automating FDM 3D printing - the Redfab additive manufacturing hardware and software system.
Redfab 3D printer solves existing problems in the following way:
1. Automatic Selective Feeding and Media Change
The system allows you to selectively feed, remove, cut and rewind media autonomously or at the operator's command. Up to 5 D300 2.25 kg spools or up to 8 D200 1 kg spools are simultaneously connected to each print zone. Main extruder and sub extruder each have 4 slots for 1.75+/-0.15mm bar. Having loaded the coil compartment once, the engineer may not return to the issue of refilling the material for a long time, up to 8 days of continuous printing at a flow rate of ~50 cm3/hour, or 4 days at a flow rate of ~100 cm3/hour. At the end of plastic on the coil, the system automatically switches to the next one. This uses the media specified in the print job. nine0003
2. Automatic ejection of finished products
The part is printed on a film pressed by vacuum to the worktable. After printing is completed, the film is pulled through the cooling system, the part is separated and dumped into a container. After the finished batch is reset, the printer autonomously starts the next print. Since the parts are ejected from the hot table, reheating is not required.
3. Automatic table plane calibration
4-point print plane and 20-point table calibration with correction factors entered into the control system (MESH). The milled table has no internal stresses, as it undergoes a heat treatment procedure.
The table is thermally decoupled from the power frame of the printer, due to which it does not warp when heated up to 140°C.
Calibration is performed automatically without the participation of a specialist.
4. Automatic print queue
The user sets the print parameters, the control system automatically forms a queue of projects and jobs for production according to the parameters specified by the user. The availability and availability of material, nozzle parameters, production priorities are taken into account.
5. Automatic service operations
The control system detects failures and accidents based on sensor readings, and then attempts to independently maintain and restore the printing process in cases where it is possible. A well-thought-out control system prevents false failures and gives the user flexibility in making decisions. The printing process will not be stopped if a failure occurs in the auxiliary system. Thus, the complex will try to complete the current print, after notifying the user. nine0003
6. Easy Maintenance
Modular design, quick-detachable extruders and easy access to all equipment components allow periodic maintenance to be carried out quickly. You can write a request to technical support directly from the control system. When requested and authorized by the user, our technical support service can remotely connect to the control system and both carry out a complete diagnosis of the system settings and track the printing process itself thanks to the built-in video camera. Since we produce most of the components ourselves, we are ready to promptly provide the customer with spare parts. nine0003
The Redfab 3D printer is equipped with the advanced control system, which allows real-time analysis of production processes, which is indispensable for assessing the current work and making decisions on the development of FDM printing. 1. Statistics, accounting and analysis carrying out maintenance with the output of reports and comparison of periods. nine0003
2. Production time control
The system allows you to visualize the production time on the Gantt chart and calculates the order readiness for delivery based on the actual time of printing the first copy of the print job. This allows you to predict the completion time of the entire project with high accuracy.
3. Remote monitoring of the printing process
The user gets access to the video stream from the camera located in the working area. At the beginning and at the end of printing, a control picture is taken, which allows you to track the readiness of the product and the absence of defects. In the future, we plan to automate this aspect of work, using vision algorithms. nine0003
4. Access control and accounting
Authentication system, setting group rights, setting roles (trainee, technician, operator, administrator, technical support), logging user actions in the control system. This functionality allows you to ensure that the system is closed to third parties and restrict access to production and accounting data in accordance with the client's privacy policy.
| Parameter name | Value |
|---|---|
| Print area (X/Y/Z), mm | 250*430*250 |
| Number of printing areas in 1 complex, pcs. | 3 |
| Number of extruders per print area, pcs. | 2, direct, quick release |
| Maximum extrusion temperature, °С | 450 |
| Maximum air temperature in the active heat chamber with forced circulation, °С | 80 |
| Maximum heating temperature of the working table, °С | 140 |
| Parts Cooling Systems | Material cooling at nozzle exit. Cooling of the layer over the entire print area. |
| Performance at maximum practical printing speed, cm 3 / hour | up to 150 (for ABS Standard Filamentarno) |
| Supported file format | gcode, slicer of user choice |
| Data interfaces | LAN Ethernet, USB, Wi-Fi |
Our equipment is running 24/7 on our own 3D printing farm, so we can confidently provide you with a 2 year warranty on your Redfab 3D printer.
To calculate the profitability of purchasing our printer, we suggest using the calculator on our website www.redfab.ru.
The calculator allows you to estimate the rate of return on investment.
For large-scale productions (from 20 units of 3D printers), we recommend considering a one-time purchase of 4 units of Redfab printers at once for leasing at a special price.
Learn more