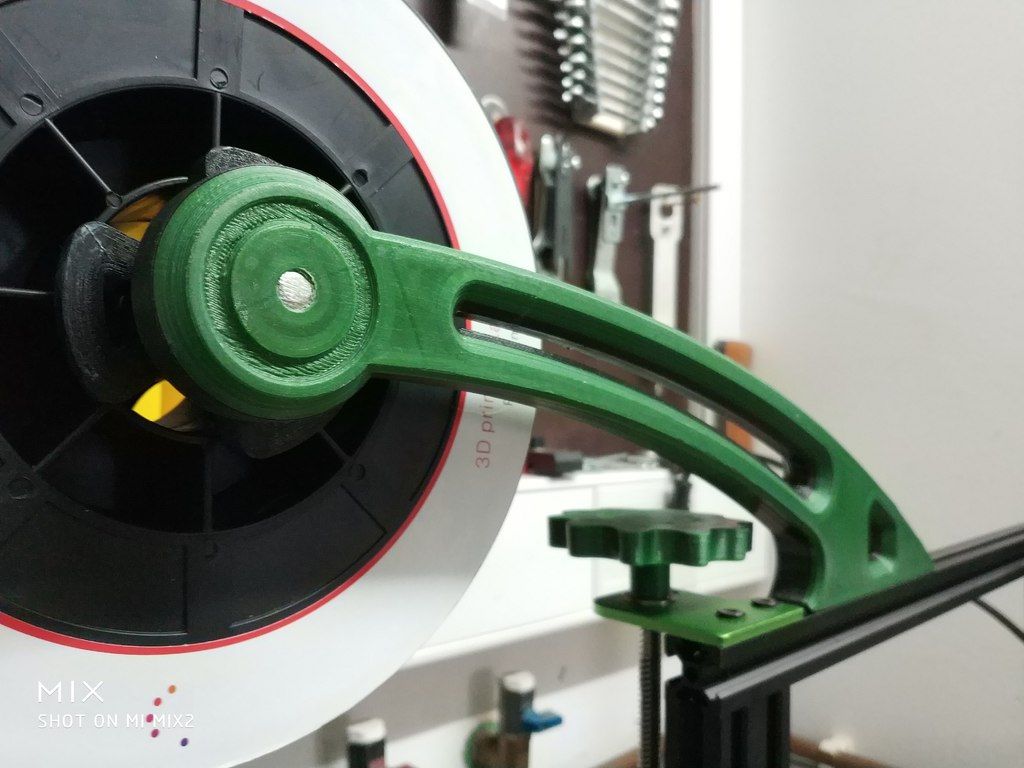
Delta 3d printer auto bed leveling
3D Printering: Is Hassle-Free Bed Leveling Finally Here?
3D printers have come a long way over the past several years, but the process of bed leveling remains a pain point. Let’s take a look at the different ways the problem has been tackled, and whether recent developments have succeeded in automating away the hassle.
Anycubic Vyper, with an auto-leveling feature we decided to take a closer look at.Bed leveling and first layer calibration tends to trip up novices because getting it right requires experience and judgment calls, and getting it wrong means failed prints. These are things 3D printer operators learn to handle with time and experience, but they are still largely manual processes that are often discussed in ways that sound more like an art than anything else. Little wonder that there have been plenty of attempts to simplify the whole process.
Some consumer 3D printers are taking a new approach to bed leveling and first layer calibration, and one of those printers is the Anycubic Vyper, which offers a one-touch solution for novices and experienced users alike. We accepted Anycubic’s offer of a sample printer specifically to examine this new leveling approach, so let’s take a look at the latest in trying to automate away the sometimes stubborn task of 3D printer bed leveling.
Why is Bed Leveling an Issue?
In 3D printer terms, bed leveling (or simply “leveling”) is a broad term for a process whose end result is getting the first layer of a print deposited optimally onto the build platform. A good first layer is the foundation of a successful print.
To accomplish this, the nozzle needs to remain a constant distance from the build platform across its whole range of movement. If the nozzle is too close to the bed in some places, but too far away in others, that leads to poor quality and failures. Adjusting the printer’s bed until it is parallel to the nozzle’s range of motion is called leveling. (Machinists would correctly call the process tramming, because nothing actually has to be perpendicular to the earth’s gravitational field. )
)
The next step is first layer calibration. This adjusts the Z-axis offset, or the distance between the tip of the nozzle and the surface of the build platform. There needs to be just enough space for the critical first layer of plastic to be deposited evenly, in a uniform thickness, and pressed into the build surface well enough to remain stuck during printing.
Complicating this is the fact that no build platform is perfectly flat. When fractions of a millimeter count, even small imperfections cause problems. High spots or low spots in a build platform are problems because no amount of tilting the print bed will adjust them away. This is one of the reasons leveling problems have persisted over time.
No individual part of bed leveling is particularly complicated, but the many interconnected factors can make it a complex, fiddly task. It’s no surprise that people have tried different ways to make the whole process as easy and repeatable as possible.
Some Attempted Solutions
Rafts (a type of sacrificial build platform) were an early method of dealing with bed imperfections, but most solutions now revolve around mesh leveling.
Mesh leveling is a method of compensating for an imperfect print bed in software, but it requires a way to measure the build platform. By taking measurements with a sensor, a software model representing the build surface, and its imperfections, can be created. This model modifies the path of the print head as it lays down the critical first layer, adjusting for an imperfect surface by attempting to follow those imperfections, instead of moving as though they don’t exist.
One way to accomplish mesh leveling is by using an inductive sensor to sense the build platform without touching it. Prusa printers use this method to take measurements in a 3 x 3, or optionally 7 x 7, grid before every print. Manually determining an appropriate Z-axis offset for a particular build sheet is still up to the user.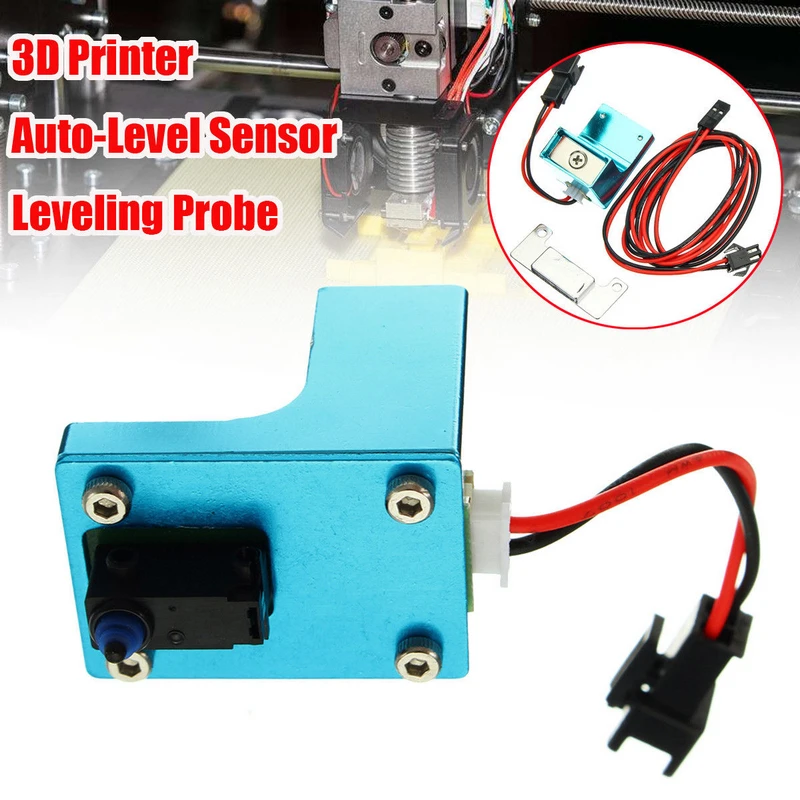
Another option is a physical probe. The BLTouch, for example, is a popular sensor that comes into physical contact with the build platform. Its success as an aftermarket add-on, as well as how often it has been copied, is a good indicator of how much bed leveling remains a pain point for 3D printer owners.
The Latest Approach: Integrating a Strain Gauge
The printer’s nozzle acting as a touch sensor.This method uses the tip of the nozzle itself as a sensor. Not only is it easier to take measurements from the point where extrusion actually happens, but doing so opens the door to automatically setting an appropriate Z-offset as well.
One way to do this is by integrating a strain gauge into the extruder itself, turning the hot end into a kind of load cell. We saw this approach in a DIY project that used SMD resistors as strain gauges, and the method is also used in the Smart Effector for delta printers.
Two recent consumer 3D printers, the Anycubic Vyper and the Creality CR-6 SE, implement their own factory-made versions of the idea. We accepted a sample Vyper printer from Anycubic specifically to examine this feature, so let’s take a closer look.
How It Works
Vyper’s extruder, cover removed. Colored wires to the left go to the strain gauge built into the hot end mount.The Anycubic Vyper’s extruder assembly contains a fork-shaped metal mount for the hot end which has a strain gauge built into it. This turns it into a load cell similar to what would be found in an electronic scale.
Any force exerted on the hot end will slightly deform the mount, and the strain gauge turns this deformation into an electrical signal that can be measured and quantified. Even very light pressure on the hot end can be detected in this way.
Thanks to this functionality, the nozzle itself becomes a touch sensor. When the machine is directed to auto-level itself, the extruder is repeatedly lowered toward the build platform until the nozzle comes into contact with it. Even a light touch can be reliably detected, so this process doesn’t involve much force.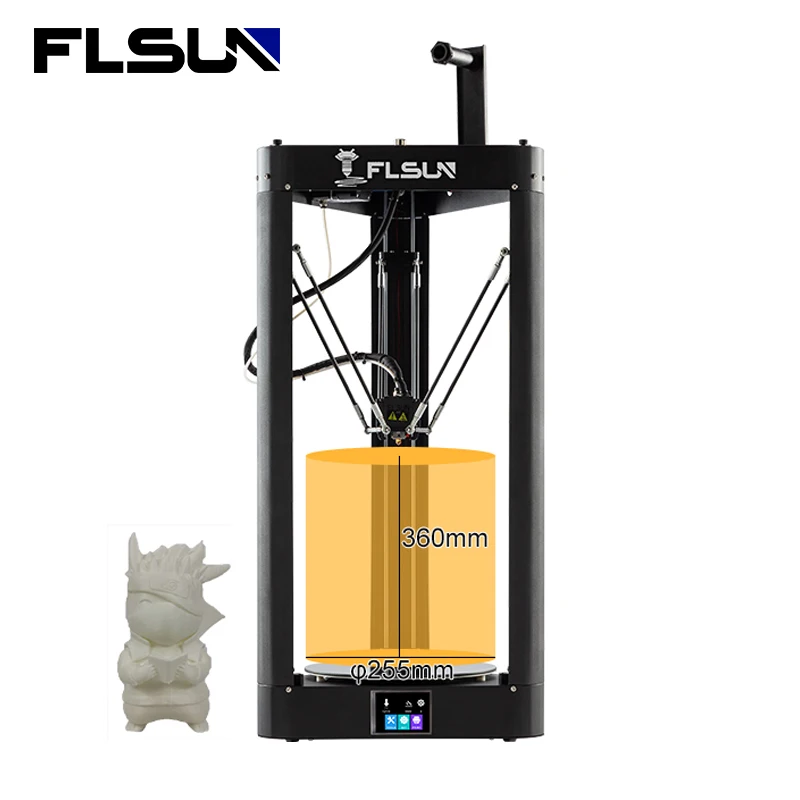
By taking multiple measurements in a grid pattern, mesh leveling can be implemented. Also, since the physical distance between nozzle tip and build surface can be sensed, a reasonable Z-axis offset can be implemented automatically, leaving the operator to worry only about fine tuning.
The fork-shaped mount has a strain gauge built into it.
Strain gauge visible as a white patch under the mount.
Hot end removed from fork-shaped mount.
A light touch on the mount triggers the touch sensing.
It’s a neat idea, and the extruder has clearly been designed around the feature.
Results? Perfectly Serviceable
A perfectly serviceable first layer. Fine tuning can be done in +/- 0.05 mm increments.How well does it work? I’m happy to say the feature appears to work as advertised, including the automatic setting of an effective initial Z-offset.
One simply installs the build plate, makes sure the nozzle and the build surface are clean, then instructs the printer to perform the auto-leveling process.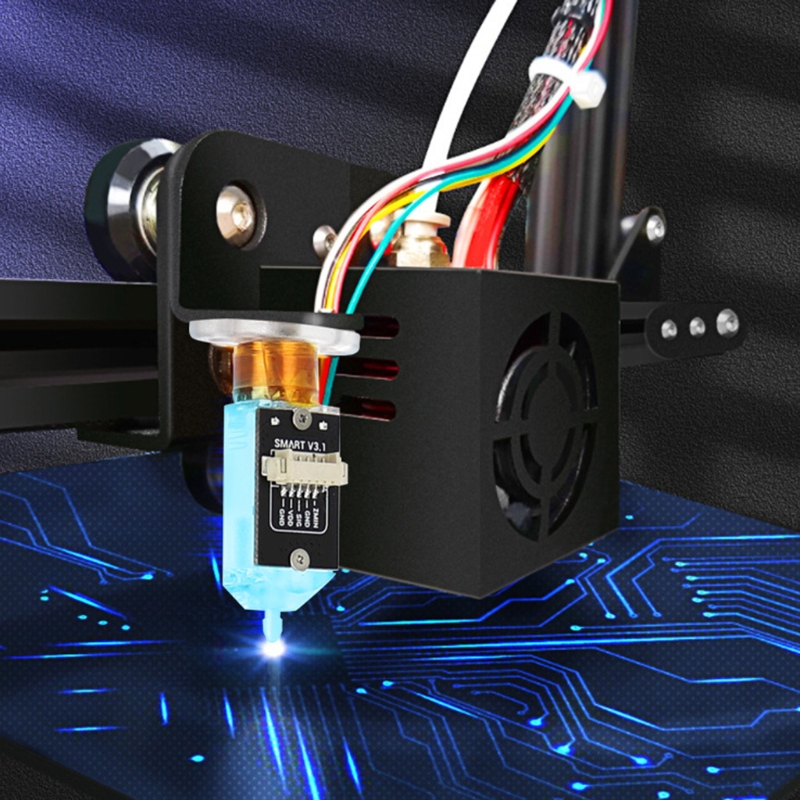 The machine will pre-heat, ensuring calibration is done under printing conditions instead of cold, and then the nozzle touches the build platform in a 4 x 4 grid pattern, after which it silently applies mesh leveling and an initial Z-offset that can be fine-tuned if desired. In theory, the process doesn’t need to be repeated unless the build platform changes, but the user can trigger the process whenever they wish.
There Are Limits
The auto-leveling works as advertised, but there are limits to what it can do. First of all, problems related to the quality or type of filament, or the material of the build platform, are separate issues that can still trip up a novice. These are not fixed by an auto-leveling feature.
Both the print surface and the nozzle tip must be clean in order to get the best results, so it’s best to unload filament from the hot end before auto-leveling. Because the machine pre-heats and touches each grid point twice, a loaded nozzle leaves little dabs of molten plastic at each point, and this extra material between the nozzle and the build surface can affect the accuracy of measurements. Indeed, this might be the Achilles heel of all nozzle-based sensors.
There is a limit as to what can be sensed and modeled with a 4 x 4 grid of touch points. A build surface with serious imperfections might not get modeled accurately. I briefly tested this by using shims to simulate mixed high and low spots of up to 0.8 mm in the build sheet before running the auto-leveling process. Unsurprisingly, a 4 x 4 grid of touch points was insufficient to accurately model where exactly these imperfections started and stopped, but I was pleased to see that the resulting first layer was at least still serviceable, if a bit thin and overly-squished around some of the high areas. It would be nice to have an option to increase the number of measurement points, or perhaps manually refine the mesh, as a way to better deal with special cases.
Lastly, the machine’s firmware is not very verbose about the details of its auto-leveling process. There seems to be no way to modify the sensitivity, no way to see the actual measurements taken, and no way to manually fine-tune anything other than the Z-offset, which can be changed up or down in 0. 05 mm increments.
Is This The Way?
The Vyper’s auto-leveling and initial Z-offset work as advertised and give serviceable results, even if the firmware is a bit quiet about what exactly is going on under the hood. It’s awfully convenient, the strain gauge integration looks solid, and as a whole it’s a clever system that’s nice to see in a factory offering.
What do you think about this method of automating away the dull drudgery of bed leveling and first-layer tuning? Is turning the hot end into a load cell the right way to go? We want to know what you think, so let us know in the comments.
Best 3D Printers with Automatic Bed Leveling (ABL)! – 3D Solved
If there’s one thing that’s hard to get right when first getting into the world of 3D printing, it’s leveling the bed. Luckily, there’s printers out there that feature built-in automatic bed leveling capabilities, and the best thing about it is that they don’t necessarily cost more than any other printer out there.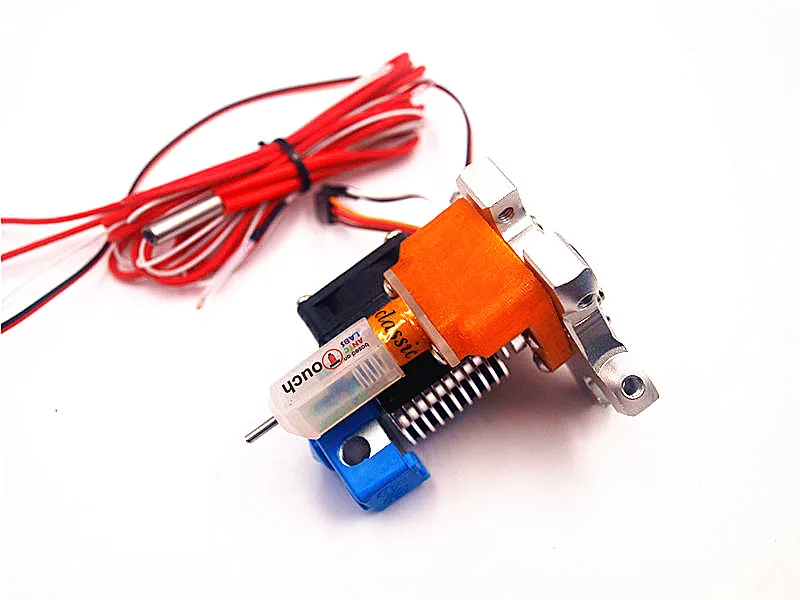
So, in this article I will be going over 10 printers that come with automatic bed leveling that will make your life a lot easier, especially if you’re just learning about 3D printing.
Table Of Contents
- Artillery GeniusPro
- Anycubic Vyper
- Creality CR-6 SE
- Anet ET5X
- Original Prusa i3 MK3S+
- LulzBot Mini 2
- Prusa Mini
- TRONXY XY-2 Pro
- FLSUN Q5 (Delta Printer)
- Creality 3D CR-10S Pro
- Honorable Mention: Flashforge Adventurer 3 Lite
- My Top Recommendation
- Check out our recommended products section
Artillery GeniusPro
Artillery GeniusPro.The Artillery GeniusPro is an updated version of Artillery’s Genius 3D printer which comes with a couple upgrades, such as a 32-bit mainboard, a Titan Extruder, auto bed leveling, and more.
One of the standout features about the GeniusPro is how fast it can heat up the bed, since most printers take over 5 minutes to reach temperatures around 100°C, while the GeniusPro takes less than two.
The bed leveling sensor that comes with the GeniusPro is a Physical Hall Effect Sensor that uses a mechanical probe to measure the distance between the nozzle and the bed. The advantage of using such a sensor type is that these work on any surface, which means that if you want to change the build surface and use a magnetic one, etc., you can do so and it will always work flawlessly.
Another thing worth mentioning, especially if you’ve never used a Direct Drive printer, is that you can use a much wider variety of filaments than if you went with a Bowden-style printer, and Direct Drive systems are especially good for printing with flexible filaments, such as NinjaFlex.
While the GeniusPro may be marketed as a very quiet printer, I found it to be almost as loud as my Ender 3 Pro, which isn’t really that quiet, but it’s definitely manageable.
Lastly, the touchscreen interface is absolutely fantastic and looks stunning, plus it’s really intuitive and fast, not like on other printers where you tap on something and nothing happens for a couple seconds.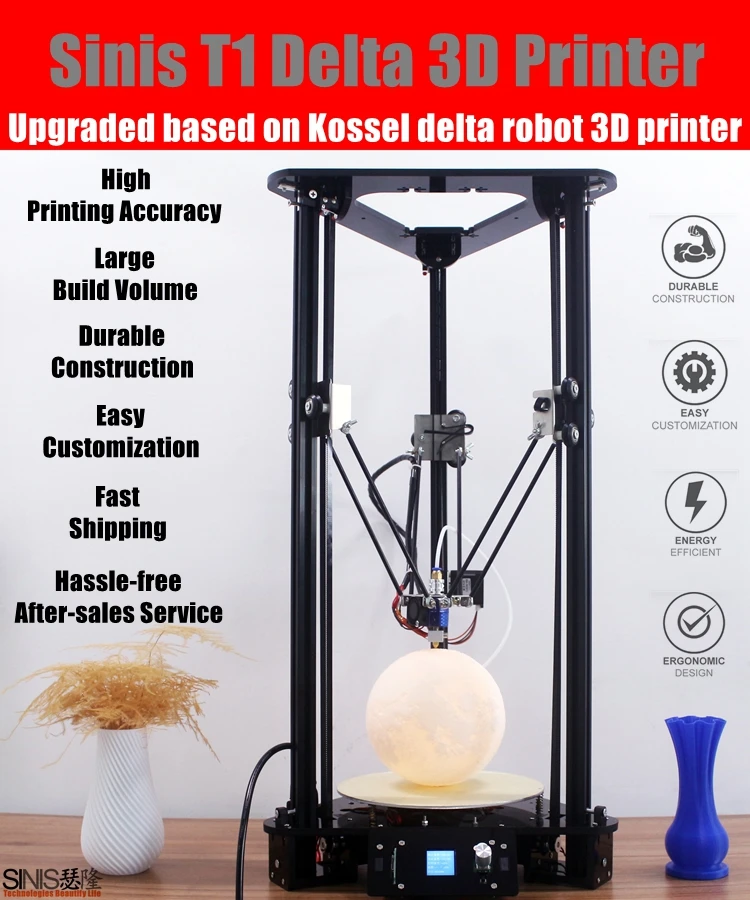
| Extruder Type: | Direct Drive (Titan Extruder) |
| Bed Leveling Sensor Type: | Physical Hall effect Sensor (Mechanical) |
| Filament Runout sensor | Yes |
| Build Volume | 220mm X 220mm X 250mm |
| Bed Type | Tempered Glass |
You can find the Artillery GeniusPro here: Amazon, Banggood, 3D Printers Online.
Anycubic Vyper
Anycubic Vyper.The Vyper is Anycubic’s latest affordable FDM 3D printer release and it comes with an integrated automatic bed leveling system that works straight out of the box.
It uses a pressure sensor that activates when the nozzle hits the bed, and that way the printer can calculate the distance between the bed and the nozzle. The only con the Vypers’ bed leveling system is that it’s quite slow, but it probes the bed at 16 different spots and works really well, and since it uses a metal build surface that magnetically attaches to the bed, removing the prints is extremely easy and re-leveling the bed isn’t that necessary since you don’t have to remove the prints applying a lot of pressure.
One thing to note is that the Vyper features a Bowden extruder system which does have some advantages as well as disadvantages when compered to a Direct Drive system, mainly being able to print faster before artifacts, ringing and ghosting appear on the print.
However, Bowden printers don’t usually handle flexible filaments well, as well as more abrasive filaments, which means that if you want to be able to print with something like NinjaFlex, you’ll probably be better off going with a printer that has a DD extruder, such as the previous printer on this list.
It’s worth mentioning, however, that the extruder on the Vyper is much better than the ones you can find on Printers like the Ender 3, and alike, which makes printing with flexible filaments easier since it’s much harder for the filament to get tangled up.
The Vyper is a relatively silent printer and the fact that it’s a Bowden-style printer means that it can print fast without any visible loss in detail, making it an ideal choice for anyone who mainly prints with PLA, ABS, or PETG, or any other rigid and non-abrasive filaments.
| Extruder Type: | Bowden |
| Bed Leveling Sensor Type: | Pressure sensor (Piezo) |
| Filament Runout sensor | Yes |
| Build Volume | 245mm X 245mm X 260mm |
| Bed Type | Flexible Metal Bed |
You can find the Anycubic Vyper here: Amazon, Banggood, 3D Printers Online.
Creality CR-6 SE
Creality CR-6 SE.The Ender CR-6SE comes with a Strain Gauge sensor that is used to level the bed. A Strain Gauge is a sensor whose resistance varies with applied force; it converts force, pressure, tension, weight, etc., into a change in electrician resistance which can then be measured.
These types of sensors are known for being extremely precise, which means that your bed should always be very well leveled.
Just like all the previous printers on this list, the CR-6SE comes with a filament runout sensor which is there to detect if you’re out of filament, which instantly stops the print and allows you to insert new filament to resume the print without having to start over.
Lastly, the CR-6 SE is a Bowden-style printer, which means that it can print faster and with better print quality than a Direct Drive extruder (generally speaking, of course), but at the cost of not being able to print with as many filament types.
However, the CR-6 SE is one of the best performing printers I’ve tried as far as printing quality goes, and it also very quiet! Resuming a print works flawlessly and the spot at which the print was resumed is much less noticeable than on my Ender 3.
| Extruder Type: | Bowden |
| Bed Leveling Sensor Type: | Strain Gauge (Piezo) |
| Filament Runout sensor | Yes |
| Build Volume | 235mm X 235mm X 250mm |
| Bed Type | Tempered Glass |
You can find the Creality CR-6 SE here: Amazon, Creality Website, 3D Printers Online.
Anet ET5X
Anet ET5X.Featuring a Bowden Extruder system, a 300*300*400 build volume, a filament runout sensor and auto bed leveling, and all of this for about $290, the Anet ET5X has a lot of things going for it.
As far as the bed leveling goes, it uses a capacitive sensor which is a non-contact sensor that works by measuring the capacitance, which is how much energy the capacitor can hold, that changes when its sensing face is placed near an object. The only con to this kind of sensor is that it can be quite sensitive to changes in temperature, humidity and build surface type.
Any slight change in these three will affect its sensing distance and therefore, the level of the bed.
Many users claim that the bed leveling on this printer isn’t a flawless process and that sometimes their nozzles would crash into the bed multiple times without the sensor being able to pick anything up, and the printer had to be turned off and back on again.
Another con is that it’s a fairly loud printer, plus it comes with an off-brand power supply that you might not feel comfortable leaving running unattended at night.
However, aside from that, the print quality is great and the build volume is huge, and all of this for well under $300.
| Extruder Type: | Bowden |
| Bed Leveling Sensor Type: | Capacitive |
| Filament Runout sensor | Yes |
| Build Volume | 300mm X 300mm X 400mm |
| Bed Type | Glass |
You can find the Anet ET5X here: Amazon, Banggood.
Original Prusa i3 MK3S+
Original Prusa i3 MK3S+.The Prusa i3 MK3S+ is a printer that is regarded by many to be the best FDM printer on the market, which is also why it’s consistently being used in printing farms because of its reliability and print quality.
It comes with a SuperPINDA (inductive sensor) probe for automatic bed leveling, which is a bit slower than Prusa’s previous PINDA sensors, granted, but it’s also a lot more accurate at setting the distance between the bed and the nozzle and temperature, humidity, etc., won’t affect it.
It comes with a Direct Drive extruder, a filament runout sensor, removable print sheets, and more. However, what makes the Prusa printers stand out is the entire ecosystem that Prusa has created for them, since they have their own slicer that is tailored specifically for their printers with additional profiles for each filament type, etc.
In addition to this, it’s a very reliable printer that uses high-quality parts and that will need a lot less maintenance and troubleshooting than other printers, which is why most people who run a 3D printing farm use them.
Lastly, it’s probably the quietest printer I’ve ever tried, and it can print with a lot more materials than other printers can, such as Polycarbonate and Nylon.
| Extruder Type: | Direct Drive |
| Bed Leveling Sensor Type: | Inductive |
| Filament Runout sensor | Yes |
| Build Volume | 250mm X 210mm X 210mm |
| Bed Type | PEI spring steel sheets |
You can find the Original Prusa i3 MK3S+ here: Official Prusa Website.
LulzBot Mini 2
LulzBot Mini 2.Coming in at just under $1500, the LulzBot Mini is by far the most expensive printer on this entire list.
It offers a direct drive extrusion system, allowing you to use a much wider array of filament types, from regular PLA to really flexible TPUs, and even abrasive filaments like Polycarbonate and Nylon with a max printing temperature of 290°C.
This is a very small printer that is designed to be portable, plus it’s marketed as being extremely quiet, however, I found it to be much louder than the Prusa MK3S+, both in terms of the fans and the stepper motors.
As far as print quality goes, it’s absolutely perfect, as you would expect for a machine at this price point.
However, some users have been complaining about an X-Axis sag problem which happens every time the printer homes itself, requiring you to disable the steppers and to manually move the X-Axis all the way down and re-home the printer.
Aside from that, it’s a great machine!
| Extruder Type: | Bowden |
| Bed Leveling Sensor Type: | Piezo |
| Filament Runout sensor | No |
| Build Volume | 160mm X 160mm X 180mm |
| Bed Type | borosilicate glass/PEI |
You can find the LulzBot Mini here: Amazon.
Prusa Mini
Prusa Mini.Despite being called “Mini”, the Prusa Mini isn’t as small as you might think since it has a build volume of 180x180x180, which is pretty close to the build volume of the Prusa MK3S+.
Now, the Prusa Mini utilizes the same SuperPINDA sensor for auto leveling the bed as the MK3S+, but it doesn’t come with a filament runout sensor pre-installed and you need to get it separate, and what’s even weirder is that it only has one Z axis, which means that it only uses one Z axis motor as well as linear guides on only one side. At first, I thought that this might be a cause for concern, but the printer works flawlessly!
Where the Mini also differs from the MK3S+ is that it uses a Bowden-style extruder, which means faster print speeds at the cost of versatility since it can’t print with the same variety of filaments, especially flexible ones.
The Mini doesn’t come with a slot for an SD card but rather one for a USB drive, and it even shows you the image of the file you’re going to be printing on the colored screen, if you sliced it using PrusaSlicer, which is a lot more useful than you might think and it’s something 99% of the printers out there can’t do.
| Extruder Type: | Bowden |
| Bed Leveling Sensor Type: | Inductive |
| Filament Runout sensor | No (Bought separately) |
| Build Volume | 180mm X 180mm X 180mm |
| Bed Type | PEI spring steel sheets |
You can find the Prusa Mini here: Official Prusa Website.
TRONXY XY-2 Pro
TRONXY XY-2 Pro.Another addition to this list is the TRONXY XY-2 Pro, which looks to be an Ender 3 clone but one which comes with some additional features, such as auto bed leveling and a filament runout sensor, already built in but without costing more than an Ender 3.
While this may be an entry-level printer, it really does offer more than most other budget 3D printers out there, plus it comes with a flexible build plate that makes removing the models a breeze, it’s also got a one-cable design, which means that you only need to plug in one cable instead of five or six like you would with other printers, and it also comes with power loss recovery (99% of printers feature that as well, however).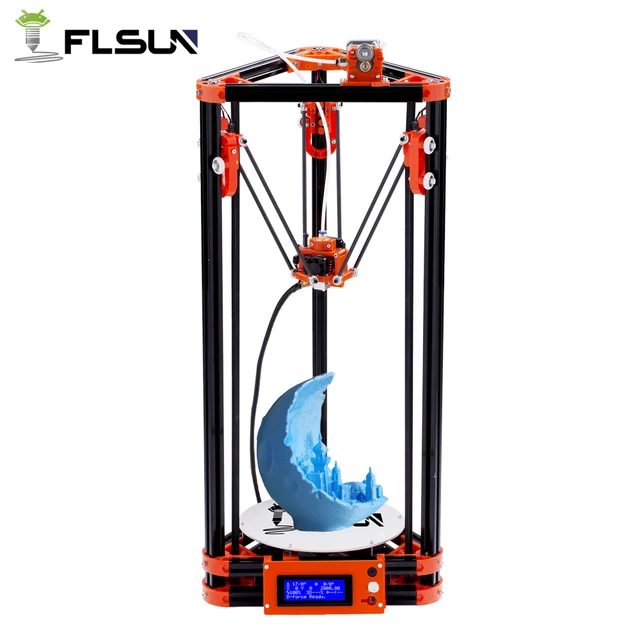
Another feature that sets the TRONXY XY-2 Pro apart from printers such as the Ender 3 is its color touch screen that just works, and it even shows you a preview of what you’re going to print, just like the Prusa Mini.
Now, over to the one drawback of the TRONXY XY-2 Pro: It’s a very loud printer, and I mean VERY loud, since you can not only hear the fans but also the stepper motors every time they move.
Lastly, this is a Bowden-style printer, and even though it’s marketed as being able to print with flexible filaments, it uses a very similar extruder system to the Ender 3, which means that you will only be able to print with filaments with a shore hardness of 98a, but not with super flexible stuff like NinjaFlex (shore hardness of 85a).
| Extruder Type: | Bowden |
| Bed Leveling Sensor Type: | Inductive |
| Filament Runout sensor | Yes |
| Build Volume | 255mm X 255mm X 260mm |
| Bed Type | Flexible |
You can find the TRONXY XY-2 Pro here: Amazon, Banggood, 3D Printers Online.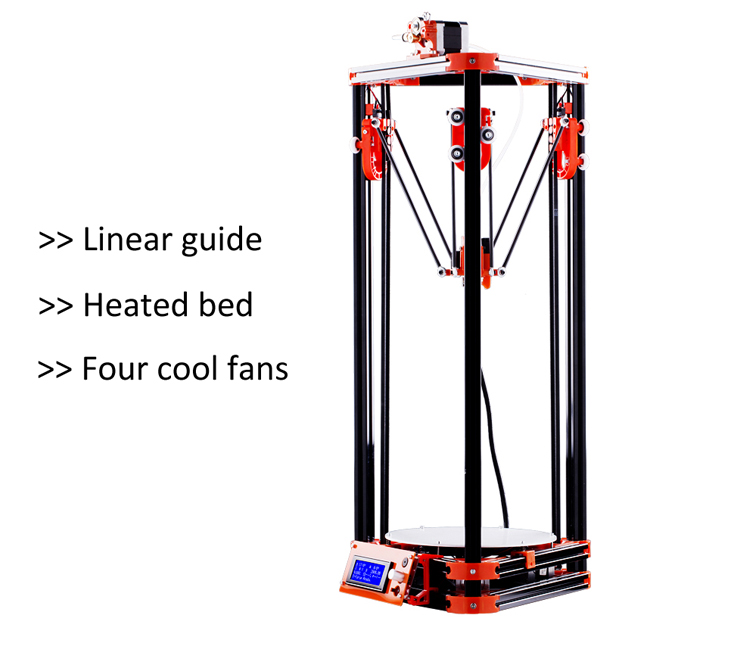
FLSUN Q5 (Delta Printer)
FLSUN Q5.The FLSUN Q5 is a Delta printer, which means that it uses three arms to support the extruder instead of having X, Y, and Z Axis, and each arm can only move up and down, but by moving each arm independently the extruder is able to move in all directions.
Delta printers are known for their high print speeds, and the FLSUN Q5 Delta is no different, plus they are more fun to watch when printing.
The FLSUN Q5 feature a 27-point auto bed leveling system, a 32-bit mainboard, power loss recovery (resumes print without having to start over), and it is a Bowden-style printer, which means that you’ll be a bit more limited on the materials you can use (PLA, PETG, ABS, some TPUs).
The cooling fan is a bit loud and it’s the first part I’d recommend you upgrade once you get the printer, but the stepper motors are very quiet thanks to the mainboard drivers.
Delta printers are known for printing fast, and on paper this machine can print really fast, however, the lack of linear advance results in over- and under-extrusion artifacts at fast speeds, and if you’re not printing huge parts, then the maximum stock acceleration of 1000mm/s² will hinder you quite a bit.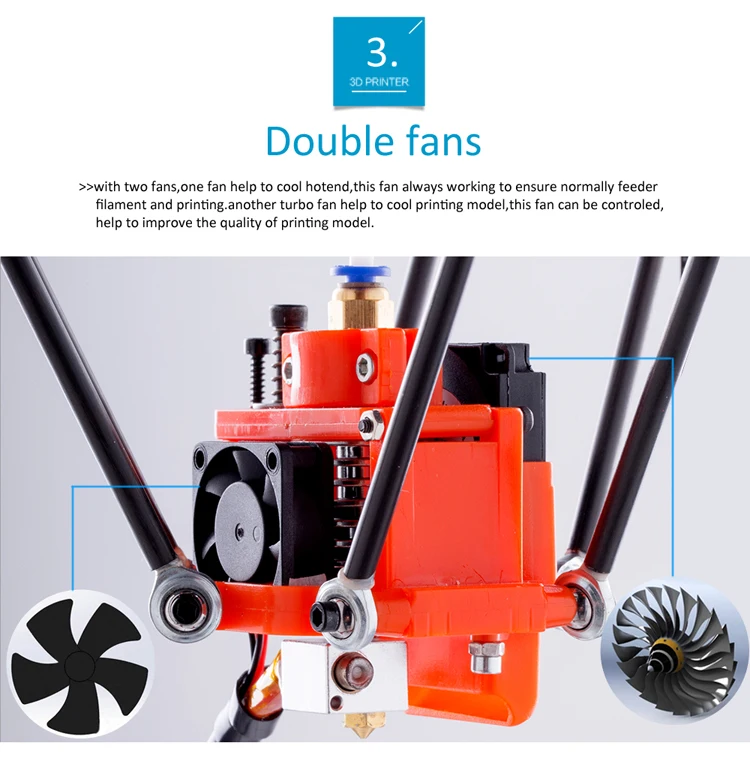
One additional issue is that the screen is handled directly by the mainboard and not by a separate controller, which means that when you update a setting the printer moves may stutter and cause artifacts.
Other than that, the FLSUN Q5 is an amazing printer considering the low price of about $250.
| Extruder Type: | Bowden |
| Bed Leveling Sensor Type: | None |
| Filament Runout sensor | Yes |
| Build Volume | 200mm(diameter)*200m |
| Bed Type | Glass with ceramic goating |
You can find the FLSUN Q5 Delta here: Amazon, Banggood, 3D Printers Online.
Creality 3D CR-10S Pro
Creality 3D® CR-10S Pro.The CR-10 is one of Creality’s most successful printers ever, and this pro version is the exact same but with a couple additional features, such as automatic bed leveling, a built-in filament runout sensor, and more.
This printer offers the largest build surface out of all the printers on this list (with the Anet ET5X) with a whopping 300mmx300mmx400mm, it comes with the upgraded blue Capricorn tube instead of the traditional white PTFE tube, it has a dual gear extrusion system which makes the filament feeding process a bit smoother, and it features a touch LCD screen.
Now, it uses a capacitive sensor for leveling the bed which is highly sensitive to temperature and humidity changes as well as surface type and may affect the sensing distance, and this is something that many users reported since some were getting excellent results while some other reported having the nozzle to far or too close to the bed and had to do some adjustments to get the first layer right.
As far as the filament runout sensor goes, while it definitely works, it’s too close to the extruder which makes removing the filament a bit more complicated than it needs to be, since you will require pliers to grab it.
However, those are the only cons to this machine, and the print quality is absolutely excellent and it’s a very quiet printer, probably the quietest one on this list after the Prusa MK3S+.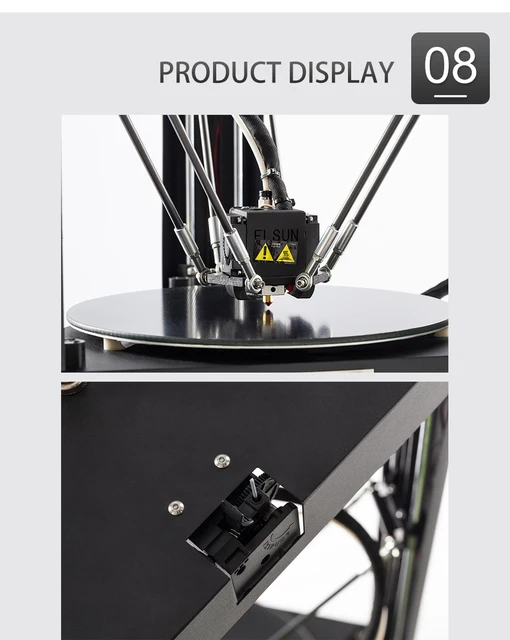
| Extruder Type: | Bowden |
| Bed Leveling Sensor Type: | Capacitive |
| Filament Runout sensor | Yes |
| Build Volume | 300mm X 300mm X 400mm |
| Bed Type | Magnetic |
You can find the Creality 3D® CR-10S Pro here: Amazon, Banggood, 3D Printers Online, Creality Website.
Honorable Mention: Flashforge Adventurer 3 Lite
Flashforge Adventurer 3 Lite.The Adventurer 3 Lite is the first printer on this list to come with a built-in enclosure, which means that printing materials such as ABS should be a breeze on this machine since it will keep it from warping.
It’s worth mentioning, however, that even though it might not seem like a small printer, this is only because of the enclosure and because the filament spool is held inside of the printer, but the build volume is actually not as big as you might think since it’s only 155mm x 150mm X 150mm.
A Bowden extrusion system is used as the filament feeding mechanism, meaning the integrated motor is mounted away from the printhead and the material is driven through a PTFE tube to the nozzle in the print head, and like I mentioned earlier, Bowden setups allow for faster print speeds without compromising on quality as much as Direct Drive systems.
One standout feature about the Adventurer 3 Lite is its detachable nozzles which can be removed extremely easily, and it also comes with a flexible and easy to remove build plate, as well as automatic bed leveling which uses a 9-point calibration system (you used to be able to only adjust the distance between the nozzle and the bed in the center of the bed, but now it uses more contact points).
Even though it’s not strictly an automatic bed leveling printer, it almost works like one, which is why I included it in this list.
Another interesting feature is its automatic filament loading and unloading capabilities which allows you to just press one button and you can swap out the filament easily.
As far as the cons go, it’s a printer that can’t really be upgraded or modded, but that’s about it since it works well and produces high quality prints, plus it being an enclosed printer also adds a couple points in my book!
| Extruder Type: | Bowden |
| Bed Leveling Sensor Type: | None |
| Filament Runout sensor | Yes |
| Build Volume | 150mm X 150mm X 150mm |
| Bed Type | Magnetic |
You can find the Flashforge Adventurer 3 Lite here: Amazon, Banggood, 3D Printers Online.
My Top Recommendation
I’m going to be basing this recommendation in terms of cost-efficiency, since I we don’t all have an unlimited budget.
The Prusa Mini takes the win here in my opinion, since it’s a very reliable machine made by one of the best companies in the 3D printing space, which means that you’ll get extremely high-quality support should anything go wrong, plus it prints extremely well and comes with a huge number of built-in features.
However, if you’re on a really tight budget, then maybe you should consider the TRONXY XY-2 Pro, since even though it’s a really loud printer, it does offer outstanding print quality and loads of built-in features.
Here are some inks where you can get both printers:
- Prusa Mini: Official Prusa Website.
- TRONXY XY-2 Pro: Amazon, Banggood, 3D Printers Online.
We created a recommended products section that will allow you to remove the guesswork and reduce the time spent researching what printer, filament, or upgrades to get, since we know that this can be a very daunting task and which generally leads to a lot of confusion.
We have selected just a handful of 3D printers that we consider to be good for beginners as well as intermediates, and even experts, making the decision easier, and the filaments, as well as the upgrades listed, were all tested by us and carefully selected, so you know that whichever one you choose will work as intended.
Flsun SR Super Racer 3D Printer Fast 200mm/S FDM Delta Linear Guide Pre-assembly with Auto Cv Alignment Print 1.75mm Print Size 260x260x330mm
Share In:
- Description
- Reviews (0)
Descriptions
Key features
Print size: 260mmx330mm. The size of the 3D printer in a wide range of audience groups is carried away by the size of the region, to meet the needs of a wide range of audience groups.
Full color capacitive touch screen, equipped with retractable cable and movable touch screen, the experience is more humane, more convenient and convenient to use.
Triaxial linkage, printing speed is 2-3 times as a result of the I3 market, the same model, in the same exact precision and surface quality, can be reduced to half the time, which is the main selling point of the machine.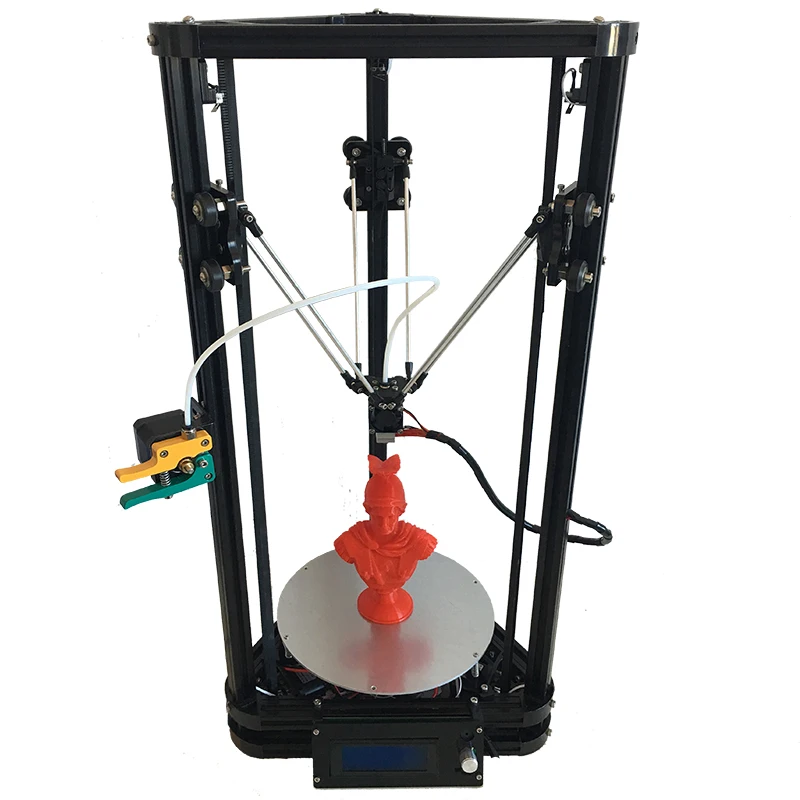 nine0015 With broken material detector power failure extension function.
32-bit CPU motherboard, more stable, more efficient, TMC2209 power drive ground drive motor control module, the quiet effect belongs to the top level desktop printers on the desktop.
Module effector installation: double turbo fan + 4010 ordinary fan A total of 3 fans, heat dissipation blowing effect is very good.
Motion guide is an industrial wire to ensure more accurate and stable printing. nine0015 Automatic leveling system, one key leveling, permanent memory.
Crystal lattice Glass hot bed, heating the hot bed during printing, the model can stick to the platform better, after printing is over, and the hot bed cools down, it is easier to take off the model.
double gear extruder (double drive extrusion mechanism), more torque, stronger extrusion, more stable and more durable.
3k high-strength carbon fiber parallel arm, more efficient to ensure movement accuracy, stability. nine0015 Modular assembly, customers need 10-15 minutes to complete the assembly experience.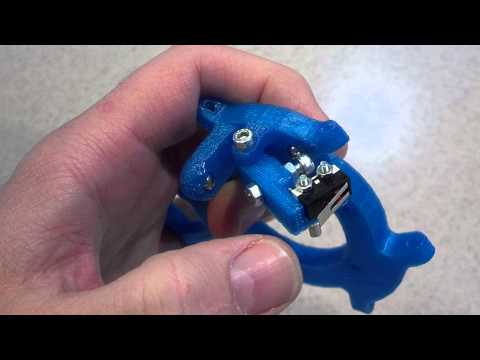
The machine is equipped with a parts box, commonly used parts can be stored in the parts box, more humane, more convenient maintenance.
high-strength customized aluminum side panel, can ensure that the machine in the high-speed printing process to maintain a stable body.
Belt is 10mm high abrasion resistance belt to provide the customer in 3D printing high-speed motion state of long-term use. nine0015 Features
Technology: Deposition Modeling for Deposition (FDM)
Year: 2021.
Assembly: Partially assembled
Mechanical arrangement: Deltaprinter
Manufacturer: Flsun.
3D printer properties
Build volume: Ø260 x 330mm
Print speed: 100-200mm/s
Feed system: Bowden
Printhead: separate nozzle
Nozzle size: 0.4mm
Max. Hot spot temperature: 260℃
Max. Heated bed temperature: 100℃
Print Bed Material: glass
Frame: N/A
Bed leveling: automatic
Communication: USB, SD card
Print Recovery: Yes
Thread sensor: yes
Camera: No.
materials
Thread diameter: 1.75mm
Third Party Filament: Yes
Filament Materials: Consumer Materials (PLA, ABS, PETG)
Software
Recommended Sliqer: Cura, Repetier-Host
Operating System: Windows, OSX, Linux
File Types: STL, OBJ, AMF
Dimensions and weight
Frame dimensions: 440 x 390 x 960 mm
Weight: 13.6 kg
Specification
More
- All (0)
- Photo (0)
- Video (0)
- Sort by: All
All Popularity Most Helpful Most Recent
-
Translate to English
Get G points! Be the first to write a review! nine0003
Your recently viewed items
Pre-Sales Support
Techno Print 3D Company
This is our first review of the most popular and inexpensive 3D printers for 2020. The list will include the best-selling devices in two price ranges (up to 30 tr and up to 60 tr). Printers working with both plastic filament (FDM) and photopolymers (LCD/DLP) will be presented. This list will always be up to date, as it is periodically updated and supplemented. Read more→
The Chinese company Dazz3D announces the launch of the project on KickStarter and accepts pre-orders for Dazz3D Basic and Dazz3D Pro 3D printers. These revolutionary new devices are aimed at both the professional and amateur markets. Read more→
We all know that precise calibration of the 3D printer desktop is the foundation and the key to successful printing on any FDM printer. In this article we will talk about the main and most popular ways to level the "bed". So, as mentioned above, 3D printing without desktop calibration is impossible. We face this process Read more→
It's hard to go through a day today without hearing about 3D printing technology, which is bursting into our lives at an incredible speed. More and more people around the world are becoming addicted to 3D printing technology as it becomes more accessible and cheaper every day.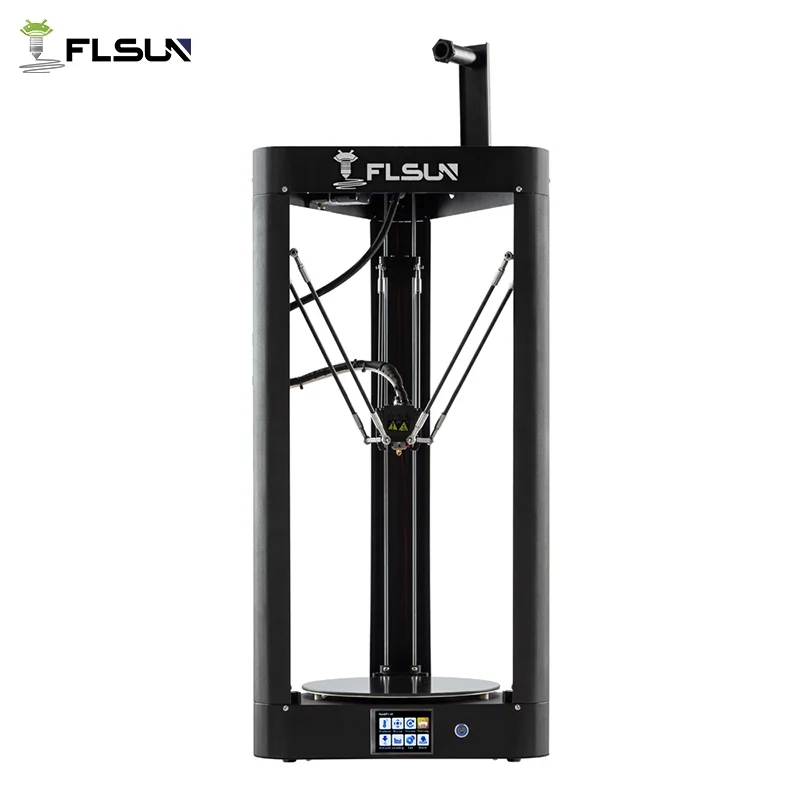 Now almost anyone can afford to buy a 3D printer, and with the help of Read more→
The FormLabs Form 2 and Ultimaker 3 are perhaps the most popular 3D printers today, capable of high quality printing with incredible surface detail. Moreover, these two devices use completely different technologies, and therefore, there are a lot of differences between them. Many will say that it is wrong to compare them or Read more→
XYZprinting, best known for its daVinci line of desktop 3D printers, is bringing five new devices to the professional and industrial environment. One will use laser sintering technology, the second full color inkjet printing and three DLP machines. First of all, the novelties will be of interest to dentists and jewelers. Read more→
Cleaning the nozzle of a 3D printer is a fairly common process that any user of such a device has to deal with. This is not at all a complicated procedure that anyone can handle. You can complete this task in 15 minutes, using only handy tools and accessories.