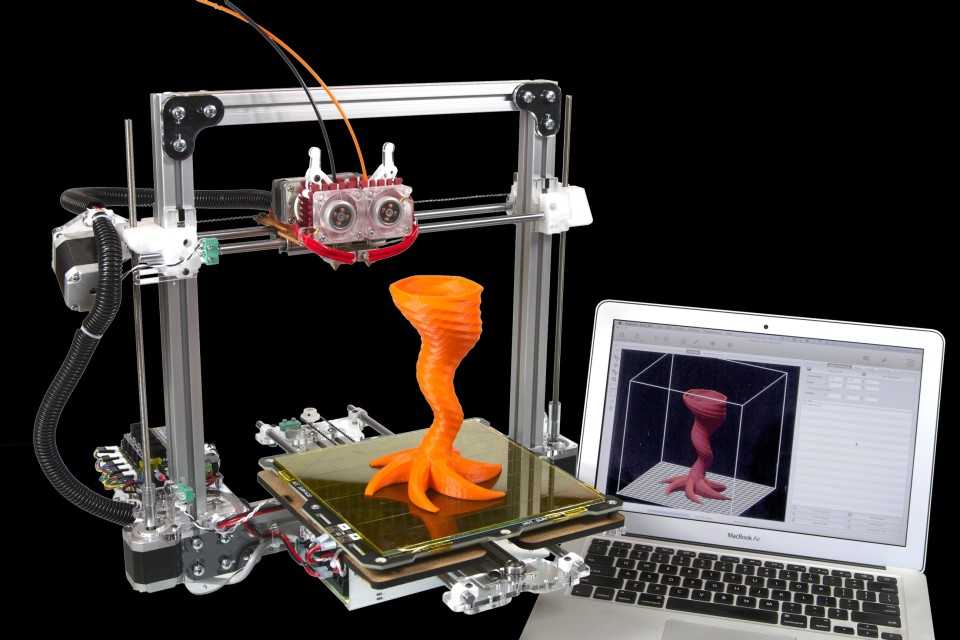
Is 3d printing strong
How Strong Are 3D Printed Parts? Central Scanning
How strong 3D printed parts are depends on several key aspects, including:
- The material you use for printing, and
- How you design and print your 3D parts.
Why 3D Printing Materials Matter
Your 3D print will only ever be as good as the material you use.
This means selecting a quality material from a reliable supplier. But, also ensuring that the material you select will be right for the intended purpose of your finished part.
There is a broad range of 3D printing materials available. In addition, the options will depend on the properties you want the material to have.
For example, you might want your part to be:
- Impact resistant
- Chemically resistant
- Flexible
- Rigid
- Heat resistant
- Water resistant.
PLA OR POLYLACTIC ACID
One of the most popular materials users select for desktop 3D printing is PLA, or Polylactic Acid.
Why do so many people choose PLA as their 3D printing filament?
It provides ease of use at a low cost and, importantly, it is reasonably strong. Additionally, you can print with PLA at a low temperature, without a heated bed, but it has a tensile strength of 7,250 psi. However, PLA is also biodegradable, so while it is environmentally friendly, it is unlikely to be suitable for bearing heavy loads, as it can become brittle.
ABS – ACRYLONITRILE, BUTADIENE AND STYRENE
A more advanced engineering material for 3D printing is ABS. ABS is the combine polymers Acrylonitrile, Butadiene and Styrene. It is widely used in everyday household items and in cars. It is an engineering-grade material and more stable than PLA. There is a catch here though. When it comes to actual tensile strength, ABS is weaker than PLA.
There are other alternative 3D printing materials out there. For example, there is a type of nylon suitable for 3D printing that is stronger and more durable than either PLA or ABS.
NYLON
Nylon filament is flexible when thin but with excellent adhesion between layers. It has a high melting temperature and a low friction coefficient. Nylon is suitable for various functional applications and parts such as hinges.
POLYCARBONATE
Another strong 3D printing material is polycarbonate. It offers a high level of toughness and a very good thermal and dimensional stability. In addition, it is ideal for high-strength, functional components. For instance, it is commonly used in manufacturing bullet-proof glass.
Matching Material with Design and Production
To ensure you have sufficiently strong 3D printed parts you need to make sure they are well designed and that you use appropriate print settings.
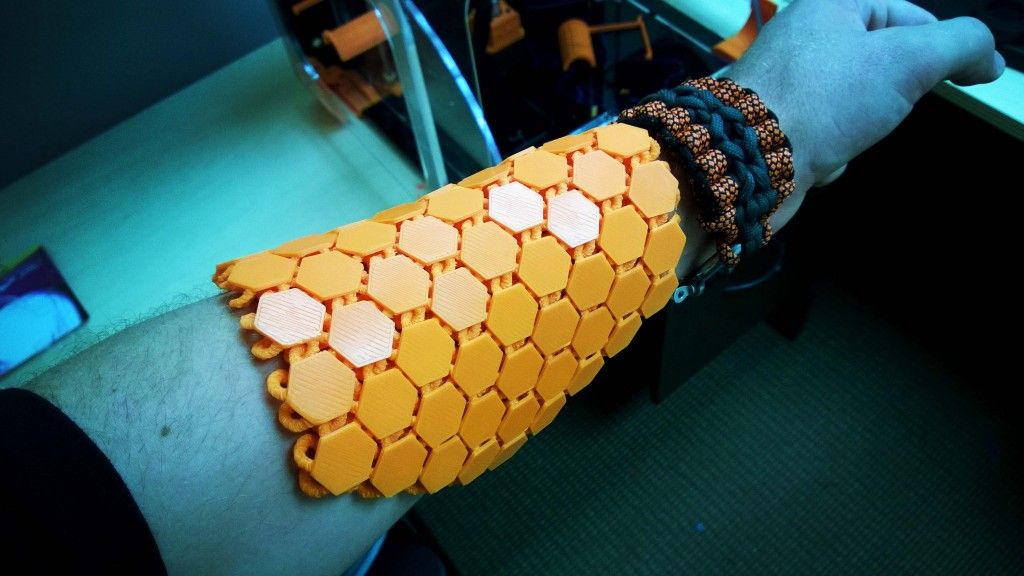
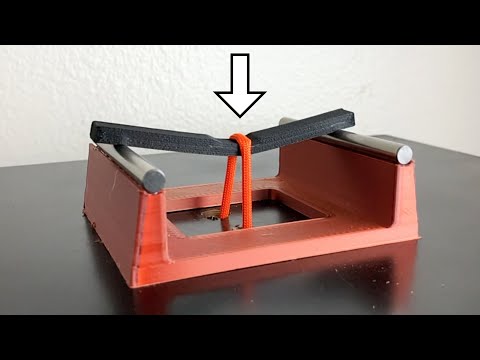
- First, select a suitable infill pattern. This is the printed material inside the walls of your print. Selecting a naturally strong infill design pattern, such as honeycomb or rectilinear, will add strength to the finished 3D part, regardless of the material you choose.
- Next, you should ensure your print settings are of a sufficient quality, as this can influence the final result.
- Finally, choose the right orientation for your 3D print. You will find that 3D parts tend to be weakest along the z axis. Therefore, you must make sure that the areas of the part receiving the most stress will not be along this axis.
The strength of 3D printed parts is relative to their function and the material you choose should reflect this.
For more information about our 3D printing solutions, please use our online contact form, or call us direct on 01527 558 282.
Are 3D Printed Parts Strong & Durable? PLA, ABS & PETG – 3D Printerly
Companies worldwide have recently turned to 3D printing to create technical parts quickly while saving some money in the process. But, developing 3D versions of pieces involves using new materials that might not be as durable. So, are 3D printed parts strong?
3D printed parts are very strong, especially when using specialized filament like PEEK or Polycarbonate, which is used for bullet-proof glass and riot shields. Infill density, wall thickness and print orientation can be adjusted to increase strength.
There’s a lot that goes into the strength of a 3D part. So, we’re going to be reviewing the materials used during 3D printing, how strong they really are, and what you can do to increase the strength of your 3D printed parts.
Are 3D Printed Parts Weaker & Fragile?
No, 3D printed parts aren’t weaker and fragile unless you 3D print them with settings that don’t give strength. Creating a 3D print with a low level of infill, with a weaker material, with a thin wall thickness and low printing temperature is likely to lead to a 3D print that’s weak and fragile.
How Do You Make 3D Printed Parts Stronger?
Most 3D printing materials are rather durable on their own, but there are some things that can be done to increase their overall strength. This mostly comes down to the minor details in the design process.
Most important would have to be manipulating the infill, wall thickness, and the number of walls. So, let’s take a look at how each of these factors can impact the strength of a 3D printed structure.
Increase Infill Density
Infill is what’s used to fill in the walls of a 3D printed part. This is essentially the pattern within the wall that adds to the density of the piece overall. Without any infill, the walls of a 3D part would be completely hollow and rather weak to outside forces.
Infill is a great way to increase the weight of a 3D part, also improving the strength of the part at the same time.
There are plenty of different infill patterns that can be used to improve the strength of a 3D printed piece, including a grid infill or a honeycomb infill. But, just how much infill there is will determine the strength.
For regular 3D parts, up to 25% is likely more than enough. For pieces designed to support weight and impact, closer to 100% is always better.
Increase Number of Walls
Think of the walls of a 3D printed part as the support beams in a house. If a house only has four exterior walls and no support beams or interior walls, just about anything can cause the house to collapse or give under any amount of weight.
In the same way, the strength of a 3D printed piece will only exist where there are walls to support weight and impact. That’s exactly why increasing the number of walls inside a 3D printed piece can increase the strength of the structure.
This is an especially useful strategy when it comes to larger 3D printed parts with a greater surface area.
Increase Wall Thickness
The actual thickness of the walls used in a 3D printed piece will determine how much impact and weight a part can withstand. For the most part, thicker walls will mean a more durable and sturdy piece overall.
But, there does seem to be a point at which it’s difficult to print 3D printed parts when the walls are too thick.
The best part about adjusting the wall thickness is that the thickness can vary based on the area of the part. That means the outside world probably won’t know that you’ve thickened the walls unless they cut your piece in half to dissect it.
Generally speaking, extremely thin walls will be quite flimsy and won’t be able to support any exterior weight without collapsing.
Generally, walls that are at least 1.2mm thick are durable and strong for most materials, but I’d recommend going up to 2mm+ for a higher level of strength.
The Strength of Materials Used to Create 3D Parts
3D printed parts can only be as strong as the material that they’re made of. With that said, some materials are a lot stronger and more durable than others. That’s exactly why the strength of 3D printed parts varies so greatly.
Three of the more common materials used to create 3D parts include PLA, ABS, and PETG. So, let’s discuss what each of these materials is, how they can be used, and how strong they really are.
PLA (Polylactic Acid)
PLA, also known as Polylactic Acid, is perhaps the most popular material used in 3D printing. Not only is it quite cost-effective, but it’s also very easy to use to print parts.
That’s why it’s often used to print plastic containers, medical implants, and packaging materials. In most circumstances, PLA is the strongest material used in 3D printing.
Even though PLA has an impressive tensile strength of about 7,250 psi, the material does tend to be a little brittle in special circumstances. That means it’s a little more likely to break or shatter when placed under a powerful impact.
It’s also important to note that PLA has a relatively low melting point. When exposed to high temperatures, the durability and strength of PLA will severely weaken.
ABS (Acrylonitrile Butadiene Styrene)
ABS, also known as Acrylonitrile Butadiene Styrene, isn’t quite as strong as PLA, but that doesn’t at all mean that it’s a weak 3D printing material. In fact, this material is much more capable of withstanding heavy impact, often flexing and bending rather than shattering completely.
That’s all thanks to the tensile strength of about 4,700 PSI. Given the lightweight construction yet impressive durability, ABS is one of the best 3D printing materials out there.
That’s why ABS is used to make just about any type of product in the world. It’s quite a popular material when it comes to printing children’s toys like Legos, computer parts, and even piping segments.
The incredibly high melting point of ABS also makes it able to withstand just about any amount of heat.
PETG (Polyethylene Terephthalate Glycol-Modified)
PETG, also known as Polyethylene Terephthalate, is usually used to develop more complex designs and objects when it comes to 3D printing. That’s because PETG tends to be much denser, more durable, and more rigid than some of the other 3D printing materials.
For that exact reason, PETG is used to make plenty of products like food containers and signage.
Why Use 3D Printing at All?
If 3D printed parts weren’t at all strong, then they wouldn’t be used as an alternative production method for many supplies and materials.
But, are they as strong as metals like steel and aluminum? Definitely not!
However, they are quite useful when it comes to designing new pieces, printing them at a lower cost, and getting a good amount of durable use out of them. They’re also great for small parts and have a generally decent tensile strength given their size and thickness.
What’s even better is that these 3D printed parts can be manipulated to increase their strength and overall durability.
Conclusion
3D printed parts are definitely strong enough to be used to make common plastic items that can withstand great amounts of impact and even heat. For the most part, ABS tends to be much more durable, though it does have a much lower tensile strength than PLA.
But, you also need to take into consideration what’s being done to make these printed parts even stronger. When you bump up the infill density, increase the number of walls, and improve the wall thickness, you’re adding to the strength and durability of a 3D printed piece.
3D printing for "dummies" from the "teapot" - Personal experience on vc.ru
1001 views
I recently became the owner of a 3D printer, before that I knew practically nothing about 3D printing, so I decided to share my experience with the same "dummies", people who are far from this technology. My article is intended precisely and only for such people. The advice of “3D printers” with experience for beginners may turn out to be useless, due to their complexity or certain specifics. I think that my post, based on personal experience (and personal mistakes), not overloaded with technical details, will be very useful to a wide audience. Also, my description is based on personal experience with the Creality Ender 3 Pro 3D printer. The information below may not be useful for models from other companies. Unfortunately, I am not aware of the current Russian realities, and therefore everything described below applies to 3D printer models that are popular in the United States. I also apologize in advance for some words and terms in English (I honestly tried, but could not always find an adequate term in Russian). nine0003
First, I will give a few “maxims” and refuted stereotypes, perhaps, however, only mine:
- “3D printing is a complex, expensive, and requires special knowledge” - this is absolutely not true! Perhaps this was once the case, but at the moment a 3D printer is a consumer device that is no more complicated (but rather, even much simpler!) TV, smartphone, computer. In addition, it is quite cheap, by modern standards, a hobby - one of the cheapest, probably. Special knowledge for 3D printing at home is not required, or rather, no more, which can be gleaned in a short time from the FAQ on the official website, as well as in user forms. nine0012
- “The 3D printer needs a special room because it stinks and makes a lot of noise” - this is also not true (or, more precisely, not quite true). There are plastics such as PLA and PETG that emit virtually no odor when printed, as well as printer models equipped with near-silent fans.
 However, the noise from the entry level models is not “fatal”, but, say, like from a gaming desktop / laptop in a “fancy” 3D game.
 - “3D printing can make a lot of money by printing at home and selling fun crafts on eBay, well, or save a lot of money by printing things you need for the home, like auto parts, etc.” – unfortunately, this is also not true. Yes, there are a lot of 3D prints for sale on eBay, but as you can imagine, the competition is up to par. The simplicity and affordability of this technology has now brought 3D printers to millions of homes; it is clear that a lot of people have made a "brilliant discovery" about the possibility of earning money by selling what they print. Consider 3D printing only as an interesting and low-cost hobby (set yourself an initial budget, for example, no higher than $200-250) that can please you, your family, as well as friends and acquaintances with original crafts and gifts. nine0012
- “For 3D printing, you need to know a 3D modeling program or a CAD system - not at all necessary! There are a huge number of sites offering all kinds of 3D models for printing: scans of famous and not so famous sculptures, and busts of historical figures, and all kinds of figures of cartoon characters, films and computer games, and original witty crafts, like a sundial that shows time in digital form, and most of the models can be downloaded for free - at most, you will be asked to register for downloading! However, owning a CAD program is a very good skill (and, especially, for a DIYer - it was one of the “points” for buying a printer for me), but I haven’t gotten to that yet - but once I master it, I’ll definitely I will describe my experience0012
So, as I wrote above, I got an Ender 3 Pro printer from Creality. Entry level printers from this company are among the most popular in the United States, due to good quality, both manufacturing and printing, low prices, and wide community support. Well, and I will not hide it, a great "deal" in our local Microcenter-e (this is a computer store located in Cambridge, MA) played a significant role: they were sold for $99 at a promotion, plus a $10 off coupon for filament (a plastic thread for print), which I managed to use as many as three times 😊. For the printer itself, I also had to ride a couple of times to the store: they diverged, in the words of the classic, “like meat pies at a vegetarian lunch”! nine0003
The printer comes neatly packaged as a DIY kit.
However, assembly, greatly facilitated by the video (paper instructions are also useful, but the video is much more visual), attached to the micro SD-card that comes with the printer, will take you no more than an hour or two maximum, after which the printer is literally ready to work ! What you should pay attention to when assembling: this is the location of the "limit switch" of the vertical axis (Z) - he strives to stand in, as it were, the place allotted for him, but everything is not so simple. This sensor is very important (however, they are all important, so it is important to follow the assembly instructions punctually, and understanding what exactly you are doing), because it determines the distance of the print head nozzle (hot end) from the print bed (heated / print bed). nine0003
The main elements of the 3D printer
And this distance is very important: if it is large, you will not be able to correctly calibrate the position of the print head, and if it is too small, then the print head may damage the surface of the printing plate. As I did (however, this can be found in a bunch of online manuals, and, probably, on the official website in the FAQ - but I did not look): after assembling the printer, I set all four calibration "lambs" under the printing table to a "relaxed" state , and the “endstop switch” of the Z axis was fixed at a deliberately greater distance so that the print head (hot end) was guaranteed to be at a distance from the printing table. Then I turned on the printer, and chose the command from the “Auto Home” menu. After the printer set the head to the “home” position, I turned it off, and rotating the motor (stepper motor) of the Z axis by hand, as well as carefully moving the “limit switch”, I ensured that the “click” of the “limit switch” (and this means the sensor is triggered) was heard by touching the head of the table surface, after which he fixed the “limit switch” tightly with a key. Then, taking a sheet of ordinary paper, and rotating the “lambs” of the calibration screws, as well as moving the print head across the entire surface of the desktop, he ensured that it moved, slightly “scratching” the sheet. But, unfortunately, such a “cold” calibration will not be enough for a successful print, so I will recommend the “hot calibration” or “battle check” method. Here in this video you can see how the calibration process takes place, as well as download the necessary files (the link is in the video description). There is also a link to print profiles for Ender 3 Pro - I also recommend downloading them (and what they are for, I'll tell you later).
 nine0003
After assembly and calibration is complete, your 3D printer is ready to go! If you stocked up with a kilogram coil with PLA plastic in advance (PLA filament, more about the plastics used for printing will be in the next part), then you can safely install it, and if not, then a small skein of plastic filament comes with the printer (but it’s better to buy a coil right away, because filament is also required for calibration!). On the micro SD card that came with the printer, there are several models ready for printing - these are files with the extension .gcode (G-code is a programming language for CNC devices, understood by most 3D printers. Don't worry, you won't need to learn features of this language - special programs called "slicers" (slicer) will take care of this for you, so that you load the filament (plastic thread from the spool) through the extruder (extruder, filament feeder into the print head) through a small hole in the extruder ( pressing the clamp with your hand and directing the thread through the feed tube, move the thread all the way into the print head), insert the micro SD card into the printer, and select the model in the form of a .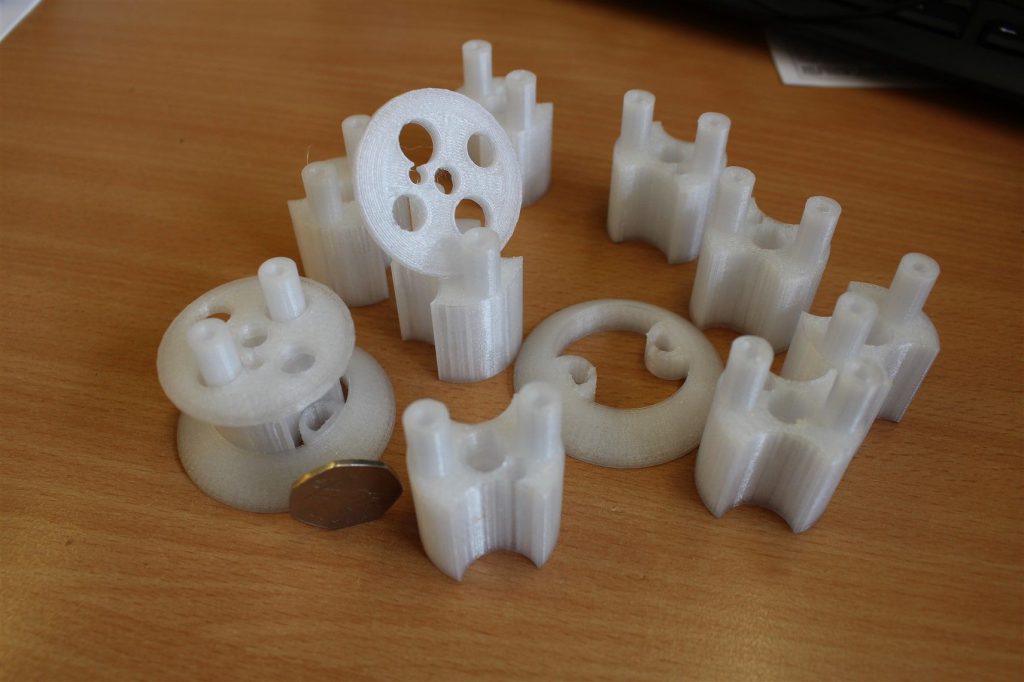 gcode file, you can safely start printing! nine0003
Models in gcode bundled with Ender 3D Pro
You can print anywhere - in the office, in the dining room, in the living room, in general, where you assembled the device. Later I will tell you where it is better to place the printer on a permanent basis, but any place is suitable for test printing - there will be no unpleasant smell or much noise.
But here's one thing you need to consider beforehand: 3D printing takes a hell of a lot of time! Even a small model can be printed for several hours (and a large one for several days!), Depending on the selected slicer settings, speed and printer settings. So, when starting to print, take this into account - the printing process, of course, can be paused (and then resumed), but for a start, I would recommend bringing the process without interruptions - well, to see a real good result, and feel confident in on their own, as well as the capabilities of the printer. nine0003
It should be noted that Creality uses the open source Marlin software as the firmware for its entry level 3D printers, but unfortunately pre-installs a very outdated version. If you are a programmer, or just “on you” with a computer for a long time, then it will not be difficult for you to assemble the latest version of Marlin yourself, for example, through VSCode, and then “flash” it via an SD-card (you just need to clear the card, and copy the release file with the .bin extension there). Otherwise, you can use my build - download, unzip, copy to a blank SD-card, turn off the printer, insert the card, turn on the printer. After a short time, the new firmware will be installed on your Ender 3 Pro (other printer models may require different builds). However, you can postpone this option for later - the printer is ready to work right out of the box. nine0003
Here I want to mention a few more useful printer improvements that will be useful for a beginner (however, these improvements are optional).
First, I recommend that you install and connect the open source OctoPrint software to your printer - you will need a Raspberry Pi with a camera for this. I used a cheap Raspberry Pi Zero W (with built-in WiFi) which, while not officially supported, works great. OctoPrint will add to your entry level printer far from entry level "features" - the ability to remotely control and manage the printer via a web interface, as well as from a great smartphone application. nine0003
This application is actively developed and well supported, has a very large and friendly community; many useful features are implemented either directly out of the box or using plugins; the documentation is also extensive and comprehensive. Installation, as well as connection to the printer, are extremely simple: download the sd-card image, edit the configuration file (specify the credentials of your WiFi access point), copy it to the card, connect it using a micro USB ↔ micro USB OTG cable to the printer - and profit! nine0003
My RPi Zero W with camera and temperature sensor connected to Ender 3D Pro
Secondly, I recommend that you immediately get spare surfaces for printing (build surface plate, this is a removable surface that is installed on a heated bed (heated bed), and on which, in fact, printing takes place). The printer comes with a "standard" flexible magnetic surface, and I assure you: you'll have to get a new one soon enough! So, it's better to take care in advance, because their cost is low, on Amazon they ask for $9.99 for a pack of two. You can also “upgrade” to a glass plate (it costs a little more), it has both its advantages and certain disadvantages, I will list them briefly. Advantages of the stock flexible magnetic plate: thanks to the magnet, it is easy to attach and remove from the heating bed for cleaning, thanks to the flexibility, it is very easy to remove finished models. Disadvantages: the plastic coating, on which, in fact, the printing takes place, is quite easily damaged and deformed both by the “regular” printing process itself and by the print head, in case of incorrect calibration, as well as by excessive heating of the heated plate - in general, a short-lived part. But, due to its low cost, it may well (and should!) be considered as a “consumable”. The advantages of glass plate include greater durability, cleanliness and "adhesive" properties of this surface.
 Disadvantages: slightly more difficult to attach to a heated bed (usually it is recommended to use ordinary office clamps for this, but personally I don’t recommend it because of their size; it’s much easier to buy special small clamps, they cost a penny on Amazon), and the difficulty of detaching printed models - you can't bend a glass plate. By the way, glass plates are also very inexpensive; nine0003
Thirdly (albeit looking ahead a bit), I would like to recommend this small "update", namely, glue for "sticking" models. Such glue is cheap (for 6 "sticks" they ask for $ 13), it is completely environmentally friendly, unlike popular home-grown products (there will be a story about them later), it is washed off with ordinary water, it does not smell. When using it, there are also a couple of “nuances”: you should not apply it to a cold surface, and you should not apply too little, because it will lose its adhesive properties when heated, and requires some practice in determining the optimal amount, but the ease of use of glue more than covers everything it. nine0003
Now I want to share my thoughts on where is the best place to place your new 3D printer you just bought. 3D printing is actually a “heat-loving” process, so it is highly desirable to place the printer in a heated room with room temperature (at least 20 ° C - 3D printing traditionally uses temperatures in degrees Celsius - well, or 70 Fahrenheit). As I already wrote, at the very beginning, when printing with some types of filament, for example, PLA, there are no unpleasant odors, and the noise from the fans is comparable to the noise of the fans of a gaming desktop or laptop during a fancy 3D game. Those. in the absence of a special room (workshop in the basement or garage), it is quite possible to install a printer in the office, or even a children's playroom, or family room. What's more, there is a way, by purchasing a printer enclosure, to reduce or even eliminate both possible odors and likely noise. I will talk about this in more detail later. nine0003
I personally installed the printer in my "workshop" in the basement. We do not heat much there, but we maintain the temperature just below room temperature. Keep in mind that the printer, by itself, takes up a certain amount of space; you will also need a place to place spools of filament, a place to process models. But, if you are going to work with ABS plastic, and deal with the "finishing" of ABS models by means of an "acetone bath", then it is definitely better to work in a non-residential area. I will talk about the properties of some plastics used in 3D printing in the next part. nine0003
To be continued.
The material was prepared by the ITSOFT data center - hosting and renting servers and racks in two data centers in Moscow. Over the past years UPTIME 100%. Hosting GPU farms and ASIC miners, renting GPU servers, communication licenses, SSL certificates, server administration and website support.
3D printed. What are we breathing?
Hello dear. In this article, I will try to tell you about what and in what quantities can be released from plastics during the FDM 3D printing process. The issue will be considered not from the side of global environmental pollution, but from the side of possible pollution of the room or workshop in which the FDM 3D printer directly operates. nine0003
I recommend that you read at least the fourth and fifth sections. Link to the video version of the article at the end. Here is the content of the article:
1 What and how much is released from plastics?
2 At what point in time is the emission of suspended particles maximum?
3 Influence of print settings
4 Particulate matter and VOC control methods nine0062
5 Pins
I must say right away that all the data is again for foreign plastics. In the comments, you write to me that it would be interesting to read about our materials, and not about foreign ones. Yes, I agree, perhaps the conclusions drawn from my work may not be applicable to "our" plastics. But in defense, I note that, firstly: the conditional foreign ABS should not radically differ from “our” ABS. Secondly, our major producers say that they buy raw materials from European firms. In this regard, I believe that the voiced data should be relevant for domestic filaments. nine0003
1 What and how much is released from plastics?
Two types of air pollutants are emitted from any plastic during operation of a 3D printer. Firstly, these are ultra- and finely dispersed (or suspended) particles, the size of which ranges from several nanometers to several micrometers. The second is volatile organic compounds.
In fact, the first group is micro dust, consisting of fragments of plastic, as well as fragments of fillers. In [1], an analysis was made of the release of suspended particles from various plastics during printing of a cylindrical sample with a duration of 60 minutes. Plastics PLA, PVA, ABS, PC, ASA, nylon were analyzed. An analysis of the results showed an interesting regularity in the intensity of the release of suspended particles during the operation of a 3D printer. Look at this graph: nine0003
Zero is the start of printing. It is clearly seen that it is at the very beginning of printing that there is a sharp increase in the concentration of suspended particles, then the concentration gradually decreases. The researchers attribute the initial peak to the nozzle's heating period to operating temperature. At this point, the plastic, which is motionless inside the nozzle, is subjected to prolonged heating and, consequently, thermal degradation. It can be seen from the graphs that such a picture is typical for absolutely all plastics. In support of this, the researchers from [2] come to similar conclusions. nine0003
Now let's look at each plastic separately. I think it will be most interesting for you to find out which plastics are leaders in terms of the number of emitted particles. ASA took first place, followed by nylon, PC and ABS, respectively. PLA and PVA turned out to be the most environmentally friendly.
This is how the size distribution of emitted particles looks like when printing a sample for pollution leaders:
And this is how the graphs for PLA of various companies and PVA look like: nine0003
The difference in the graphs is obvious.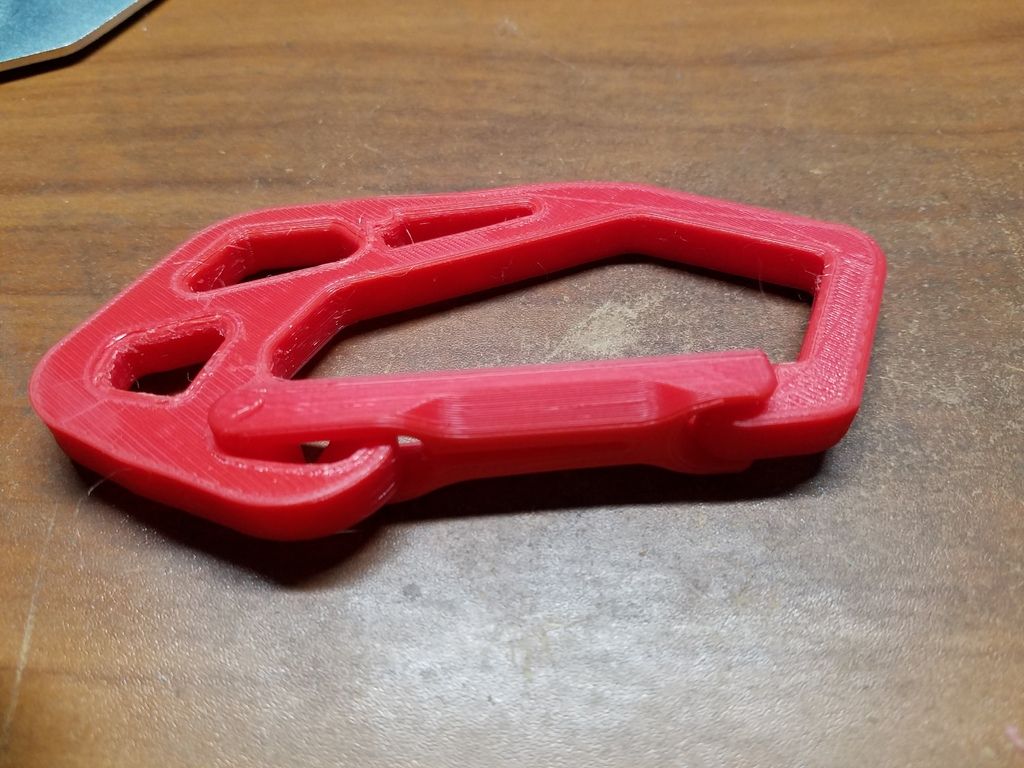 Please note that PLA and PVA emit particles at the very beginning of printing, and then, after a while, the release of particles almost stops.
Here are the results of measurements made by the authors of another study [3]:
On this graph, manufacturers and the type of plastic are labeled at the bottom, and the intensity of the release of suspended particles is measured along the vertical axis. Again, ABS and PC are among the leaders in terms of pollution. Additionally, HIPS and nylon joined them in this study. The most environmentally friendly again turned out to be PLA. nine0003
As far as carbon or fiberglass reinforced plastics are concerned, they are practically unexplored. In one of the works [4], along with other plastics, I was able to find this:
Underlined in red is PETG with 8-12% fiberglass. As you can see, such plastic is the leader in the selection of large particles. Once again I will say that this is the only result that I could find, so I can’t draw serious conclusions here, but anyway I decided to add it to the publication. nine0003
Now let's move on to the isolation of volatile organic compounds. In short, when printing with almost any filament, dozens of different compounds are released. Here, for example, is a table from [4]:
Plastics are signed in the table above. The first column lists the names of the chemical compounds. If there is no number for some connection, it means that it was not fixed by the device during printing with a specific plastic. Analyzing the table, we see that ASA and ABS plastics again become leaders in the anti-rating (ULTRAT is ABS with the addition of 3% polycarbonate). PETG becomes the most environmentally friendly (GLASS Transparent is also PETG, but with the addition of fiberglass). nine0003
Now let's turn to the results of research from another work [3], which examines a slightly different set of plastics:
This figure shows two histograms. The left histogram shows plastics with a maximum release of volatile organic compounds up to 40 micrograms per minute, and on the right - with an intensity of more than 40 micrograms per minute. The name of each column indicates the printer on which the material was printed.
Polycarbonate and TGlase (PETT plastic) are the most environmentally friendly. PLA looks a little worse. And nylon turned out to be the worst in terms of the number of emissions. It is interesting to note that for ABS plastics, the amount of emissions is highly dependent on the 3D printer on which they are printed, and can differ by as much as five times. nine0003
Pay attention to polycarbonate. If it is one of the most polluting in terms of the release of suspended particles, then it is the most environmentally friendly in terms of the release of volatile organic compounds.
2 At what point in time is the emission of suspended particles maximum?
Let's look at two graphs from [5]:
The left graph shows the particulate concentration inside the MakerBot 3D Printer, while the right graph shows the particulate concentration in the room where the 3D printer is located.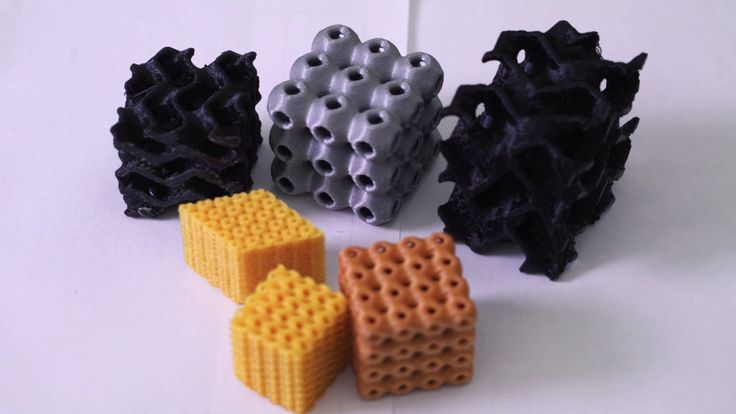 Two peaks on the graphs mean two consecutively printed parts. Again, we see that a sharp increase in the number of suspended particles occurs at the very beginning of the printing of the part. nine0003
And here is another graph from another work [2]:
Shown here are three graphs showing the change in the concentration of suspended solids when printed with ABS plastic. According to the legend, the graphs differ in nozzle temperature. As in the previous work, it can also be seen here that after heating, at the moment of printing, an increase in the concentration of suspended particles occurs. From these graphs, another interesting point is visible.
3 Influence of print settings nine0008
These three graphs show that as the temperature of the nozzle increases, the concentration of suspended particles increases. However, the difference between the charts is significant. Other scientific works [4] confirm this:
This graph shows particulate matter concentration versus ABS nozzle temperature.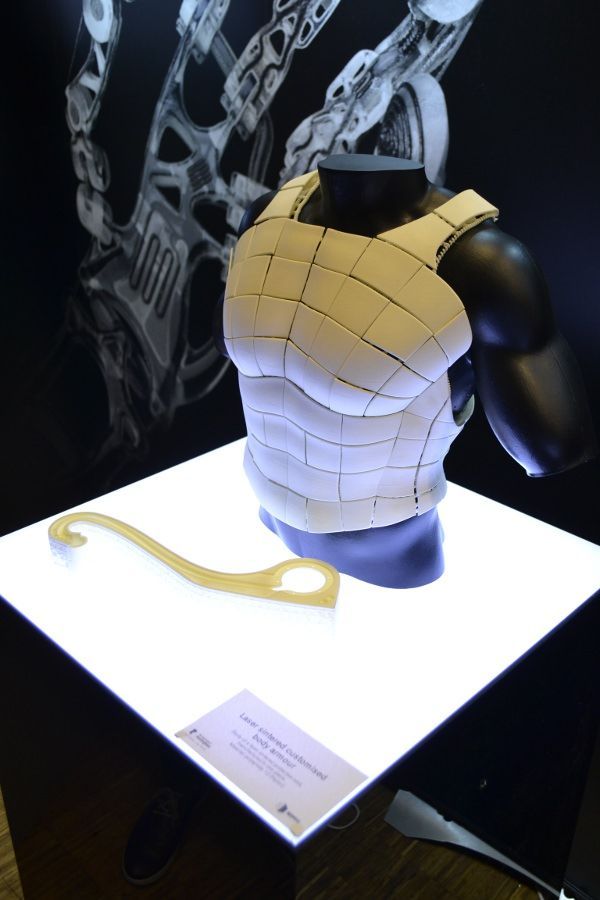 It can be seen that at a nozzle temperature above 250 degrees there is a sharp increase in the number of ejected particles.
It is interesting to note the effect of printing speed on the concentration of suspended particles. Here is a graph from [2]: nine0003
These graphs show the dependence of the concentration of suspended particles when printing with ABS plastic at different print speeds. We compared printing at speeds of 30 mm/s (FR30 in the graph), 60 mm/s (FR60) and 90 mm/s (FR90). It is interesting to note that the maximum concentrations are observed at an average printing speed. In this case, the minimum concentration is observed for a speed of 90 mm/s.
4 Particulate matter and VOC control techniques nine0008
4.1 Studies have shown that reducing nozzle temperature reduces the amount of suspended particles released. Therefore, do not raise the nozzle temperature unnecessarily.
4.2 Increasing the print speed reduces the concentration of suspended particles. Another positive effect of increasing the printing speed is to reduce the printing time, which leads to a decrease in the time during which suspended particles are released. nine0003
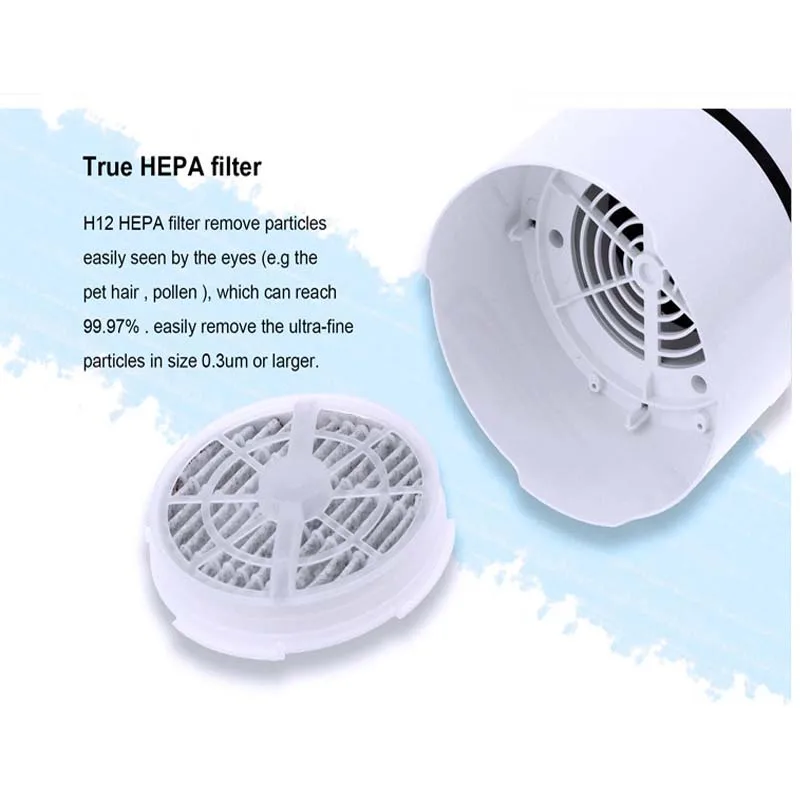
4.3 Filtration. HEPA filters are effective for almost all sizes of particulate matter, but to be useful, you need a 3D printer with a closed chamber. In addition, HEPA filters do not capture volatile organic compounds at all, which, as it turns out, are emitted in abundance from some plastics. They need charcoal filters.
4.4 Ventilation or ventilation. I think this is the most efficient way for most conventional FDM 3D printers used at home and in workshops. Here are pictures from [5] showing the distribution of the concentration of suspended particles in a room with a 3D printer: nine0003
In a well-ventilated room, the concentration of particles is an order of magnitude lower and at a distance of more than a meter from the printer, only slightly higher than the background level.
4.5 Optimize printer performance. In paragraphs 4.1 and 4.2, I have already touched on the printing modes, but the authors of the scientific work [2] went further and proposed an interesting way to reduce the amount of suspended particles released. Its essence lies in the fact that we first heat up the empty nozzle to operating temperature, then load the filament and immediately start printing. After printing is completed, remove the filament. Here are graphs from [2] showing the result of such manipulations: nine0003
Both graphs show the emission of suspended particles when printing ABS with a nozzle temperature of 240°C and a speed of 60 mm/s. The top graph is printing without loading/unloading the filament.
5 Conclusions
As a conclusion, firstly, I note that such plastics as ASA, ABS and nylon are leaders in the number of emitted particles and volatile organic compounds. The average highlights are polycarbonate and HIPS. The most environmentally friendly and in terms of suspended particles and volatile organic compounds are PLA and PETG. nine0003
Second, print in well-ventilated rooms or ventilate the room when printing. Try not to increase the temperature of the nozzle unnecessarily.
You may have noticed that I didn't say a word about how harmful it all is. The fact is that the assessment of the harmfulness of all this required quite a lot of time. I haven't been able to get definitive answers yet. Now I’ll just say that it’s rather harmful, especially with regular contact. Therefore, in this article, I deliberately did not touch on the topic of harmfulness. I hope that I will be able to deal with this issue to the end and then I will publish all the results. nine0003
Video version of the article:
That's all for now.
Sources:
1. Chýlek, R., Kudela, L. , Pospíšil, J., Šnajdárek, L. (2019). Fine particle emission during fused deposition modeling and thermogravimetric analysis for various filaments. Journal of Cleaner Production, 117790. doi:10.1016/j.jclepro.2019.117790
2. Deng, Y., Cao, S.-J., Chen, A., Guo, Y. (2016). The impact of manufacturing parameters on submicron particle emissions from a desktop 3D printer in the perspective of emission reduction. Building and Environment, 104, 311–319. doi:10.1016/j.buildenv.2016.05.02
3. Azimi, P., Zhao, D., Pouzet, C., Crain, N. E., Stephens, B. (2016). Emissions of Ultrafine Particles and Volatile Organic Compounds from Commercially Available Desktop Three-Dimensional Printers with Multiple Filaments. Environmental Science & Technology, 50(3), 1260–1268. doi:10.1021/acs.est.5b04983
4. Gu, J., Wensing, M., Uhde, E., Salthammer, T. (2019). Characterization of particulate and gaseous pollutants emitted during operation of a desktop 3D printer. Environment International, 123, 476–485.