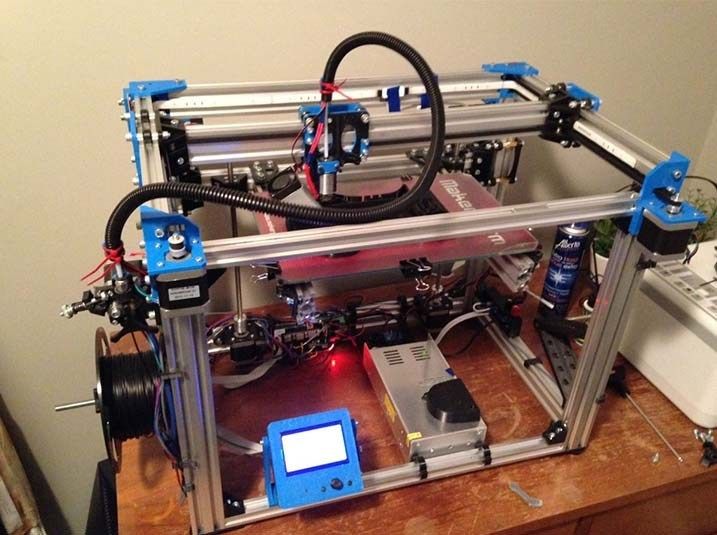
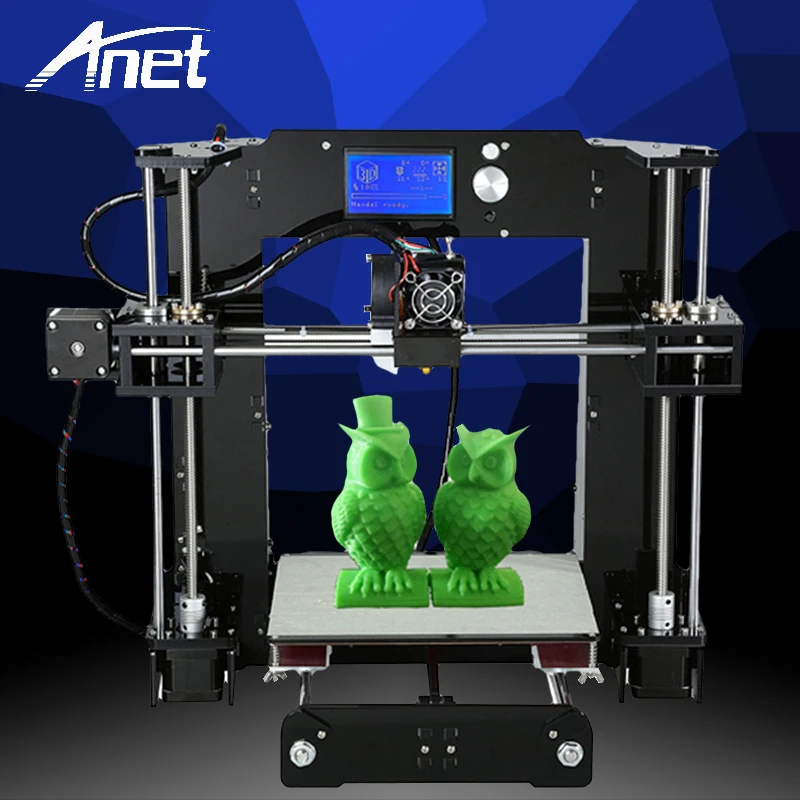
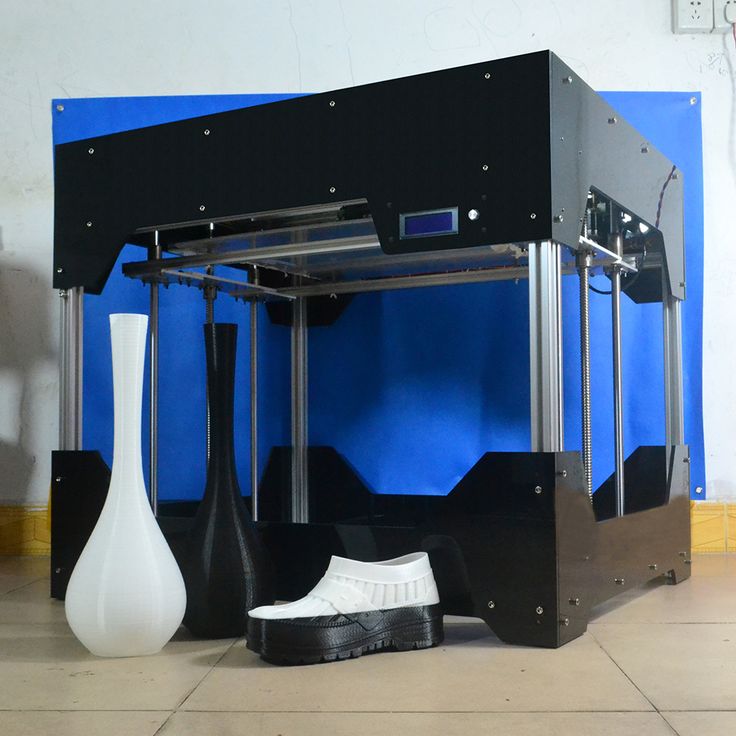
3D printer acrylic bed
gMax 2 PRO Aluminum Reinforced Acrylic Bed
Definitions
Company – gCreate, LLC, a limited liability company having a corporate address at 141 Flushing Ave., Brooklyn, NY 11205.
Customer – Any purchaser of Company’s products or services, or any entity represented by the purchaser.
Products – Any device or accessory produced by Company, or purchased from Company or from a Company-authorized reseller, including, but not limited to, the gMax 1.5+, gMax 2, and gMax 2 PRO Large Format Desktop 3D Printers and Products purchased via 3D Printing Services.
Services – Any service provided by the Company, or purchased from Company, or from a Company-authorized contractor, including, but not limited to, 3D Printing Services, gMax Printer Tech Support, Consulting Services, and gCreate Customer Service.
Limited Warranty
Company represents and warrants to the Customer that the Products, as defined above, are free of defects and materially conform to the published Product specifications as displayed on Company’s website and associated documentation. Company shall warrant heated pads, solid state relay (SSR), electronic components, BLTouch auto-bed leveling sensor, and other extruder parts for factory defects for ninety (90) days. Company shall warrant all remaining non-consumable components on gMax Printers for any factory defects for a period of one (1) year from delivery. This warranty applies to all original components installed by gCreate as part of fully assembled gMax 1.5+, gMax 1.5 XT+, gMax 2, and gMax 2 PRO 3D Printers. Hot-ends, nozzles, print surfaces (actual build plates, top surfaces, flex plates, adhesives), BLTouch pins, and other consumables are not covered by warranty. Any after-market additions or modifications performed by Customer, or on customer’s behalf by a third party, are not warranted.
For replacement of damaged Products purchased via 3D Printing Services, the Company will cover standard shipping costs within the Contiguous United States. Notification of damaged Products must be made to the Company within two (2) business days from delivery date. Any valid warranty claim must be substantiated with original proof of purchase of the Product, along with a return of the original defective part or Product for inspection by the Company. Company’s liability is strictly limited to the replacement or cost of the Products purchased by Customer. Company is not responsible for delays due to shipping, manufacturing, or other issues outside its control.
For gMax Printer missing or replacement components, the Company must be notified within two (2) business days from delivery. Company shall be responsible for any transportation costs within the contiguous United States associated with replacement of parts covered by warranty. Any valid warranty claim must be substantiated with original proof of purchase of the Product, along with a return of the original defective part or Product for inspection by the Company. Company’s liability is strictly limited to the replacement or cost of the Products purchased by Customer.
No warranty shall apply to any Product: 1) if the Products have been modified by the Customer, including repairs or servicing performed without the permission of the Company; 2) if the Products are misused; 3) if the damage to the Product results from intent, negligence, or carelessness on the part of the Customer; 4) damage resulting from the normal wear and tear caused by use of the Product; 5) if the Product was purchased through a third party; 6) if the Product or component was purchased as refurbished by Company unless otherwise noted; 7) if the Product or the defective portion was lost; 8) if the Product or component has already been replaced under this warranty; 9) if the Product is a previous version that has been upgraded and/or modified by either the Customer or the Company;
For Products shipped outside of the contiguous United States, Customer is responsible for all costs associated with shipping, duties, Value Added Tax (VAT), custom’s fees or charges, taxes, and shipping insurance.
THIS WARRANTY IS THE SOLE AND EXCLUSIVE REMEDY WHERE PERMITTED BY LAW. COMPANY MAKES NO OTHER WARRANTIES WHETHER EXPRESS OR IMPLIED BY LAW, COURSE OF PERFORMANCE, USAGE OF TRADE, OR COURSE OF DEALING, WITH RESPECT TO ANY PERFORMANCE OF ANY PRODUCT. COMPANY MAKES NO WARRANTY OR REPRESENTATION WITH RESPECT TO ANY OTHER MANUFACTURER’S PRODUCT.
IN NO EVENT SHALL COMPANY BE LIABLE FOR INCIDENTAL, CONSEQUENTIAL, SPECIAL, INDIRECT DAMAGES (INCLUDING, WITHOUT LIMITATION, CLAIMS FOR LOST BUSINESS PROFITS OR REVENUE, OR THE COST OF THE PROCUREMENT OF SUBSTITUTE GOODS OR SERVICES) OR FOR PUNITIVE OR EXEMPLARY DAMAGES WHETHER AS A RESULT OR BREACH OF CONTRACT, WARRANTY, TORT, STRICT LIABILITY, STATUTE OR OTHERWISE.
Furthermore, any claim against the Company can only be brought by the Customer. Customers cannot assign any rights under this Agreement to another party and in no circumstances shall another party who did not obtain the Products from the Company have any rights or claims against the Company.
Return Policy
Company will accept returns of any fully assembled gMax Printers in new or like-new condition ordered from Company within thirty (30) calendar days after the date of delivery. Accessories that accompany the gMax 3D Printer series, such as the enclosure and rolling cart, are final sale and not eligible for return. Company will not accept any returns of individually purchased components or accessories. Pre-orders are fully refundable up to ten (10) calendar days after purchase unless otherwise noted. After ten (10) calendar days, canceled pre-orders will be refunded less ten percent (10%). No exceptions.
To return a gMax 3D Printer, Customer must request and obtain an official return merchandise authorization (RMA) form from the Company. After thirty (30) calendar days, Customer’s gMax Printer purchase becomes final and no return will be accepted.
To return any other Product purchased from gCreate, Customer must request and obtain an official Return Merchandise Authorization (RMA) form from the Company. Only unused Products in their original packaging will be accepted for return.
Customers will be required to cover shipping costs, as well as a restocking fee equal to twenty five percent (25%) of the returned Products retail price. All gCreate Products must be returned in their original packing material and boxes.
Missing or Damaged Parts
Customer has two (3) business days from delivery to notify the Company if any portion of the Product was missing from shipment or has arrived damaged or defective. This also applies to individual components and accessories. Company will ship replacement parts without cost to Customer at Company’s discretion. All promotional items must be returned in brand new, unused condition with any return or the retail cost of the promotional item will be deducted from the final refund.
gCreate allows returns or replacements for Products purchased via 3D Printing Services if Products contain physical defects or arrive in damaged condition. Products purchased via 3D Printing Services have a seven (7) calendar day return policy from date of delivery. To be eligible for a return, all items must be unused, in their original condition, and returned in their original packaging. Customer is responsible for return shipping. After inspection, approved refunds will be given back to the customer in the manner in which original payment was received.
Company reserves the right to refuse a return of any Product where an authorization form has not been obtained, where the Product has been damaged by the Customer, or where the return is sought beyond the number of days of the return window allotted for the Product. Alternatively, the Company reserves the right to reduce the amount of compensation provided to the Customer for the refund at its discretion upon inspection of the returned Product. Company is not responsible for any damage to Product caused by the return shipping process, nor is Company responsible for providing insurance on any return shipping.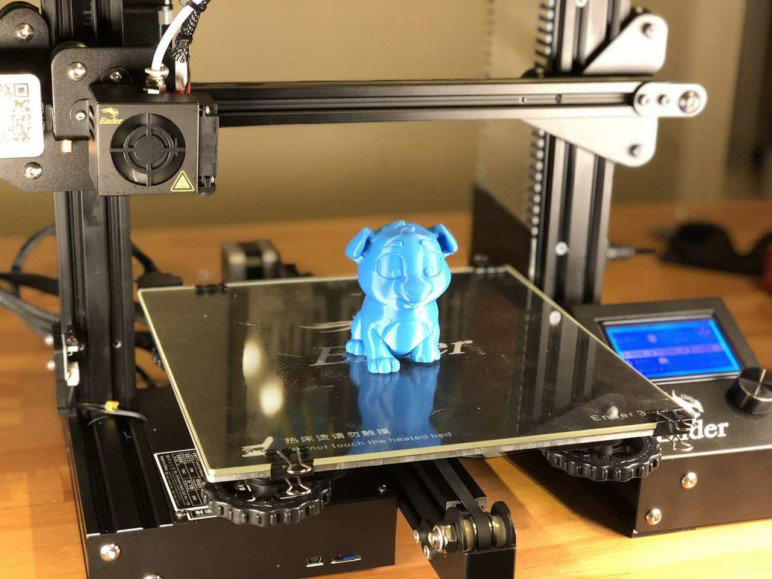
gMax Pro Support Plan Offer
Customers have the option to purchase a gMax Pro Support Plan with their gMax 2 PRO 3D Printer up to thirty (30) calendar days from the delivery date of their gMax 2 PRO 3D Printer for the duration of one (1) or two (2) years.
gMax Pro Support Plan offerings include a free, one (1) hour gMax Printer set up video call, unlimited phone and video technical support, and a ten percent (10%) discount on all replacement parts, including consumables, during the duration of the plan.
Full details of the gMax Pro Support Plan are here: https://www.gcreate.com/pro-support-plan
gMax 2 PRO 3D Printer Standard Technical Support with Enhancement Option
Customers who do not opt-in to the gMax Pro Support Plan are still eligible to receive technical support from the Company. Company offers free phone and video support by appointment for the first thirty (30) calendar days from delivery of the gMax 2 PRO 3D Printer. Phone and video appointment requests can be made via the gCreate ticketing system at the bottom of this page: https://www.gcreate.com/gmax-resources-and-support
After thirty (30) calendar days, free email support for all gMax 2 PRO 3D Printers will be offered for twelve (12) months from the date of delivery. Support tickets begin via the gCreate ticketing system at the bottom of this page: https://www.gcreate.com/gmax-resources-and-support
If additional phone or video support is requested after thirty (30) calendar days from the delivery date of the gMax 2 PRO 3D Printer and a Pro Support Plan was not purchased during this time, Customers who purchased their machines directly from gCreate or an authorized reseller have the option to purchase enhanced technical support via phone / video call on an hourly basis. The cost for live technical support is one hundred dollars ($100) per hour. While the support technician will do their best to diagnose and troubleshoot any outstanding issue(s) on a call, without having the physical machine in front of them to inspect and work on, results cannot be guaranteed.
The hourly fee covers the live consultation but does not cover the cost of any suggested or necessary components, and/or shipping. There are no refunds for paid technical support calls or used components*, and all calls must be booked and paid in full in advance. Cancellations and rescheduling requests must be made at least twenty four (24) hours before the scheduled call, otherwise the time will be forfeited and billed in full without refund.
gMax 2 PRO 3D Printer Servicing & Repair
Any gMax 2 PRO 3D Printer customers have the option to send their printer(s) back to gCreate for evaluation, servicing, repair, and testing to restore back to factory settings. Upgrades and modifications from original factory settings requested by customer request are subject to gCreate’s approval.
gMax 2 PRO customers who return their printers to gCreate for servicing / repair are responsible for all shipping and shipping replacement costs. Evaluation, servicing, and repair are billed on an hourly basis of one hundred dollars ($100) per hour and parts replacement is calculated on a per part basis and the responsibility of the customer. There is a ninety (90) calendar day warranty for factory defects on components minus consumables for serviced printers. Printers outside of the thirty (30) calendar day return window of the original gMax 2 PRO purchase cannot return their printers. All sales are final.
gMax 2 3D Printer Standard Technical Support, Enhanced Phone and Video Support, and Upgrades
Free, unlimited email support for all gMax 2 3D Printers will be offered for twelve (12) months from the date of delivery. Additional support resources can be found on our Resources and Support page, gMax Articles and Updates page, and the gCreate Online Forum.
Support tickets begin via the gCreate ticketing system at the bottom of this page: https://www.gcreate.com/gmax-resources-and-support
Any gMax 2 3D Printer customers who purchased their machines directly from gCreate or an authorized reseller have the option to purchase enhanced technical support via phone / video call on an hourly basis.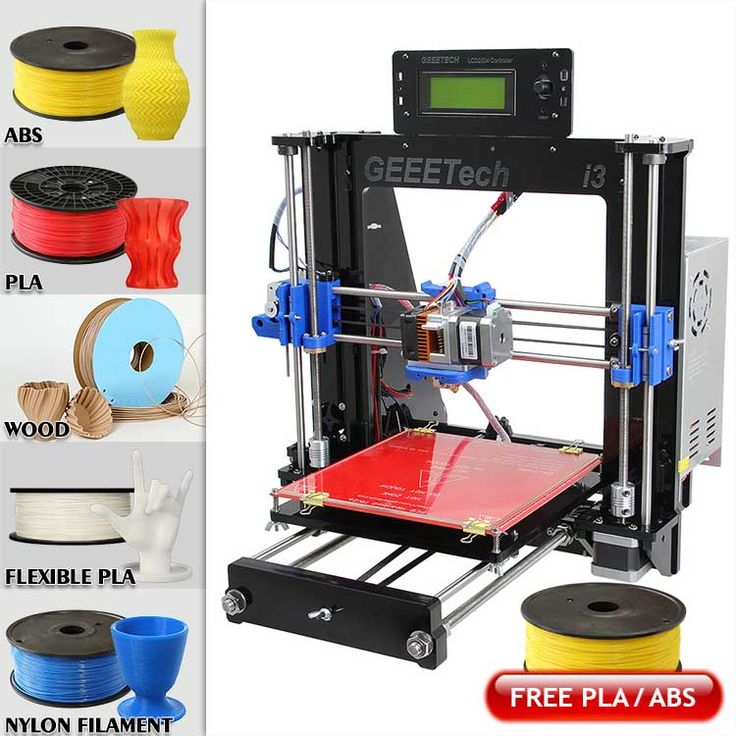 The cost for live technical support is one hundred dollars ($100) per hour and while the support technician will do the best to diagnose and troubleshoot any outstanding issue(s) on a call, without having the physical machine in front of them to inspect and work on, results cannot be guaranteed. The hourly fee covers the live consultation but does not cover the cost of any suggested or necessary components, and/or shipping. There are no refunds for paid technical support calls or used components*, and all calls must be booked and paid in full in advance.
Any gMax 2 3D Printer customers, regardless of when or where it was purchased, have the option to send their printer(s) back to gCreate for evaluation and upgrading their machines to a gMax 2 PRO at their own expense. Rebuilt / upgraded printers have a ninety (90) calendar day warranty for factory defects on components with the exception of consumables** for serviced printers. All sales are final.
gMax 1.5+ and Earlier 3D Printer Support
The gMax 1. 5+ 3D Printer Series became a legacy product in 2019. Free resources for discontinued models prior to 2020 can be found and discussed on the gCreate Online Forum.
Indemnification
Customer agrees to indemnify, defend and hold harmless Company and Company’s parent, subsidiaries, affiliates, partners, officers, directors, agents, contractors, licensors, service providers, subcontractors, suppliers, interns and employees, harmless from any claim or demand, including reasonable attorneys’ fees, made by any third-party due to or arising out of Customer’s breach of these Terms of Service or the documents they incorporate by reference, or Customer’s violation of any law or the rights of a third-party.
This includes, but is not limited to, any 3D Printers, Accessories, 3D Printed Models, and Personal Protective Equipment (PPE) sold by gCreate.
Limitations
Customers are prohibited from making unauthorized modifications to the Products. Customers are also prohibited from using the Products in any unauthorized manner including using unauthorized parts and materials.
Severability
In the event that any provision of these Terms of Use is determined to be unlawful, void, or unenforceable, such provision shall nonetheless be enforceable to the fullest extent permitted by applicable law, and the unenforceable portion shall be deemed to be severed from these Terms of Use, such determination shall not affect the validity and ability to enforce any other remaining provisions.
Confidentiality Agreement for 3D Printing Services
Your access and use of any website owned by the Company constitutes your consent to be bound by this Agreement. All 3D models uploaded to websites owned by the Company will be kept confidential and will not be shared without Customer’s written consent. This policy also applies to Potential Customers who upload 3D models to websites owned by the Company but do not complete the path to purchase.
Entire Agreement
The failure of Company to exercise or enforce any right or provision of these Terms of Use shall not constitute a waiver of such right or provision. These Terms of Use and any policies or operating rules posted by Company on Company’s website or in respect to Products constitutes the entire agreement and understanding between Customer and Company and govern Customer’s use of the Products, superseding any prior or contemporaneous agreements, communications and proposals, whether oral or written, between Customer and Company (including, but not limited to, any prior versions of the Terms of Use). Any ambiguities in the interpretation of these Terms of Use shall not be construed against the drafting party.
Governing Law
All matters arising out of or relating to the sale of the Products are governed by, and construed in accordance with, the Laws of the State of New York, United States of America, without regard to the conflict of laws provisions thereof to the extent such principles or rules would require or permit the application of the laws of any jurisdiction other than those of the State of New York. Any and all disputes arising under these Terms shall be decided by a binding arbitration in New York using the American Arbitration Association as the arbitrating entity.
Changes to Agreement
Customers can review the most current version of the Terms of Use at any time at this page. Company reserves the right, at Company’s sole discretion, to update, change or replace any part of these Terms of Use by posting updates and changes to Company’s website. It is Customer’s responsibility to check our website periodically for changes. Customer’s continued use of or access to Company’s website or Products following the posting of any changes to these Terms of Use constitutes acceptance of those changes.
Company reserves the right to modify the Product prior to shipping. Company has the right to change the prices for any Products sold at any time. Orders placed before any price increase or decrease will not be affected by the price change.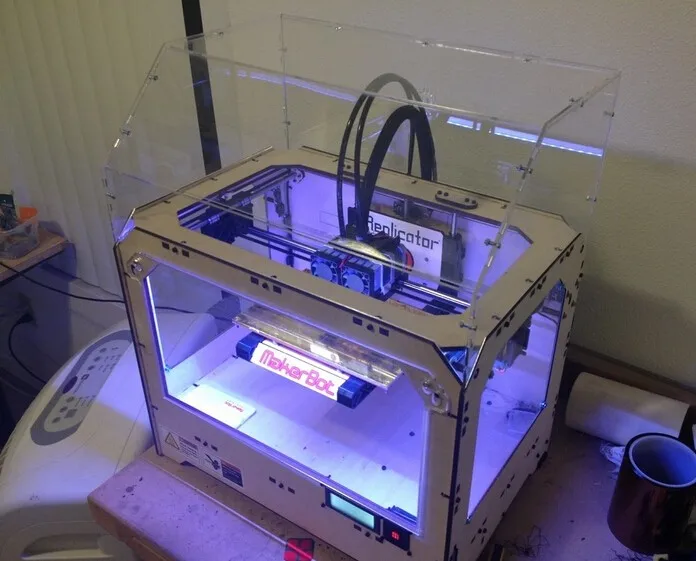
*components include any individual portion of any gMax 3D Printer or accessory
**consumables include hot-ends, nozzles, print surfaces (actual build plate, top surfaces, flex plates, adhesives), BLTouch pins, and 3D printing materials.
v.220427
Choosing the Best 3D Printing Bed Surface
From general purpose print beds to tips and tricks with acetone, finding the right bed surface to print on is an important step in the 3D printing process.
Posted on December 21, 2016
by
Tyler Anderson
The key to a successful 3D print is a good first layer, and the key to a successful first layer is choosing the right print bed surface for the material you are 3D printing. In this guide, we will go through the most popular 3D materials to print with and describe the best techniques for getting them to stick to the bed and achieving a stellar first layer.
BuildTak and FlexPlate
BuildTak is a popular all purpose 3D bed surface. It comes as a sheet with an adhesive back. Simply peel the protective film off and then stick it to your bed.
In addition, the FlexPlate System makes utilizing BuildTak sheets even easier. Available in many sizes to fit all kinds of 3D Printers, simply add the Magnetic Base on top of the existing print bed and the FlexPlate with attached BuildTak sheet will magnetically connect. After a 3D Print is finished the top two sheets easily slide away from the print bed and with a twist the part releases cleanly. Replace the FlexPlate and BuildTak sheet to the magnetic base and you're ready to print your next part!
BuildTak on the Ultimaker 2+
3D Gloop
Both an adhesive for finished prints and for bed surfaces, 3D Gloop does a great job at holding onto 3D prints. There are specific formulations for multiple 3D printing filaments, so you'll want to make sure to only use the ABS formula with ABS. Make sure you are using this on a glass bed only, because while it'll pop off with a little help from a spatula on glass, Buildtak and PEI could permanently weld to your 3D print. To apply, simply squeeze the tube onto the glass plate and spread with a business card or if using the brushtop bottle just brush it on. 3D Gloop recommends printing ABS with a bed temperature of 60°C for successful prints (which is incredibly low for ABS), but it's possible for it to work at room temperature as well!
Disclaimer: Be sure to use 3DGloop! in a well-ventilated area and to wear PPE (Personal Protective Equipment) when using this product.
3D Gloop in Squeeze Tube form
Magigoo
It doesn’t matter if you’re using PLA, ABS, PETG and more - Magigoo works for them all. This easy, no-mess solution was born from the frustration of occasional print bed adhesion issues. One of the best things about Magigoo - it cleans up with just a damp cloth or water!
Magigoo in Action
3D printers come in many shapes and sizes, but one thing is certain - they all have a print bed. Print beds can be made of different materials, such as glass, acrylic, or metal, usually with an added compound layered across where your filament will stick. We prefer a 3D printer with a glass print bed due to its hardness, rigidity, and smooth surface.
PLA Filament
PLA (Polylactic Acid) is the most common 3D printing material because it is easy to use and is made from renewable resources and thus, biodegradable. PLA filament is useful in a broad range of 3D printing applications, has the virtue of being both odorless and low-warp, and does not require a heated bed.
Blue Painter's Tape
Blue painter’s tape is our preferred fallback solution for many 3D materials, especially PLA filament. It is simple, cheap and effective. Just cover the bed with strips of the tape. We recommend traditional 3M brand blue tape. It can even be bought in very large rolls, making it easy to cover your whole bed. Do not use the newer type of tape with a glossy finish. You may also want to apply some Elmer's glue stick the first time for extra adhesion. Using this technique, no bed heating is required.
Heated Glass Print Bed
Many people like printing directly on glass because it is easy to remove your print when done and leaves a nice glossy finish on the bottom of the 3D part. 3D Printing on glass should be done with moderate heating (60 C). You should also make sure the glass is clean. Use some Windex on it if necessary. Prints with very thin sections may be pulled off easily. To prevent this, you might try adding a brim.
ABS Filament
ABS (Acrylonitrile Butadiene Styrene) is another commonly used 3D printer material. It's best used for making durable parts that need to withstand higher temperatures. In comparison to PLA filament, ABS plastic is less ‘brittle.’ It can also be post-processed with acetone to provide a glossy finish.
Kapton Tape + Hair Spray
Kapton tape is a high temperature adhesive tape with a translucent gold tint that works great for ABS filament. It is famously used on spacecraft, but also makes a good protective surface for 3D printing. Apply Kapton tape to the bed, then spray on hair spray as if you were spraying cooking oil onto a baking sheet. Generic hair spray is fine. We typically use non-scented Aqua Net, which comes in a purple can and can be bought in bulk.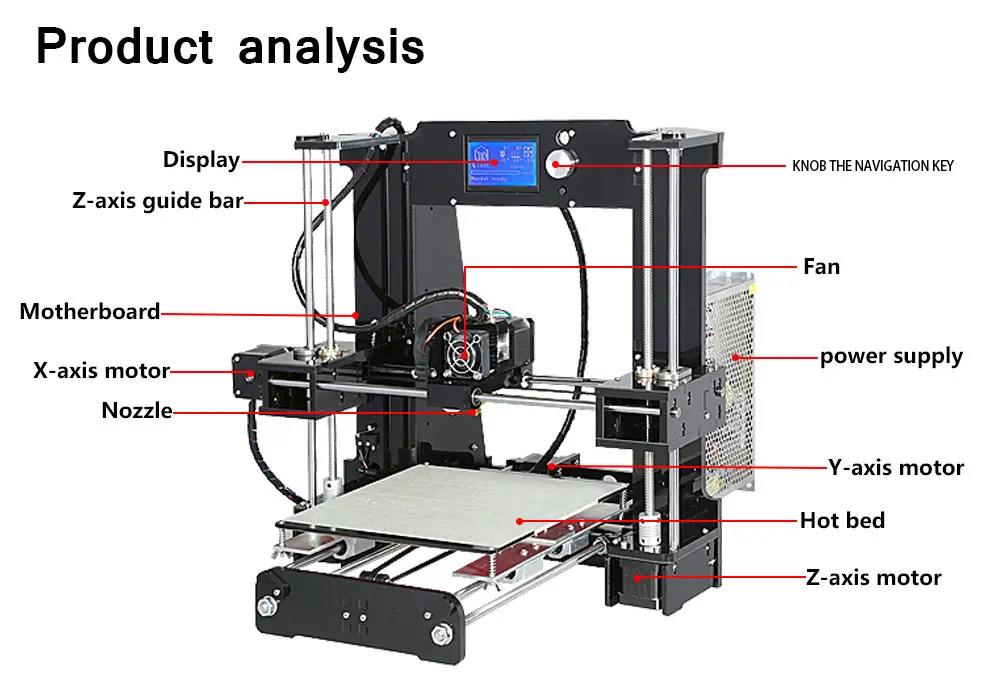
ABS Juice
For the most stubborn ABS filament prints, you might use ABS juice instead, which is a mixture of ABS and acetone. To make ABS Juice, start with 2-3oz of acetone and 6-7 inches of ABS 3D printing filament, then adjust as needed. More ABS plastic dissolved in the acetone equals greater bed adhesion. The ideal consistency is thicker than water but thinner than milk. If your mixture is too thick - like paste or yogurt - just add some more acetone to dilute.
Wolfbite
Wolfbite is a very potent solution for sticking ABS to glass. Wolfbite holds firmly while the bed is hot, but as it cools off, it slowly releases. At room temperature, the print is not attached to the bed at all. Apply the Wolfbite directly to the glass in a thin even coating. Caution: Use sparingly. Otherwise, when you remove your print from the bed it may take chunks of the glass with it. Do not try to remove the print until the bed is cold.
PET Filament
PET (polyethylene terephthalate) is an industrial strength filament that is much stronger than PLA filament. It is FDA approved for food containers and tools used for food consumption, it barely warps, and produces no odors or fumes when printed.
For PET filament you generally want to use the same surface as you would for PLA, except with a little more bed heating. I recommend 75 C.
Nylon Filament
Nylon is an incredibly strong, durable, and versatile 3D printing material. Flexible when thin, but with very high inter-layer adhesion, nylon lends itself well to things like living hinges and other functional parts. Nylon filament prints as a bright natural to white with a translucent surface, and can absorb color added post process with most common, acid-based clothing dyes. Nylon filament is extremely sensitive to moisture, so taking drying measures during storage and immediately prior to printing (using desiccant, vacuum, or elevated temperature) is highly recommended for best results.
Garolite
This is the type of bed surface used in the Markforged Nylon composite 3D printer. Garolite is a fiberglass/epoxy laminate similar to the material used for making circuit boards. There are many types of garolite and certain ones are especially well suited for printing Nylon filament. No bed heating is required with this surface. Usually, no other compounds are necessary, although a little glue stick may help on occasion.
The garolite surface on the Pulse XE
TPU Filament
TPU (Thermoplastic Polyurethane) is an elastic, oil/grease resistant, and abrasion-resistant material with a Shore Hardness of 95A. TPU Plastic has several applicable uses including automotive instrument panels, caster wheels, power tools, sporting goods, medical devices, drive belts, footwear, inflatable rafts, and a variety of extruded film, sheet and profile applications. It is also commonly used in mobile phone cases.
Blue Painter's Tape
You would think that a flexible material like TPU filament would require some special 3D bed adhesion solution, but it's actually quite similar to PLA filament. We recommend following the Blue Painter's Tape steps in the PLA filament section above to get a great first layer with flexible TPU.
Blue Painter's Tape on the Pulse 3D Printer
General Purpose Surfaces
In addition to the specialized surfaces listed above, many 3D printers come out of the box with general purpose surfaces to get you started.
PEI
PEI film comes stock on many printers, like the LulzBot TAZ 6. It works with both ABS, PLA, and many other 3D materials. It makes it easy for beginners to start printing as soon as they take their machine out of the box. However, for printing more difficult (i.e. large) objects we recommend using different bed surfaces suited specifically to the 3D plastic you are printing with.
PEI film on the LulzBot TAZ 6
Silicon Wafers
Silicon, with its high thermal conductivity, makes an excellent heat spreader. Most heated beds will be warmer in the center than near the edges, and the difference can be extreme (20 C). Using a silicon wafer allows the heat to be distributed more evenly over the bed surface.
The silicon wafers can be used as either a heat spreader underneath your glass plate or as a replacement for the glass altogether. Be careful when using silicon as a replacement for glass, since it is more fragile.
Silicon wafer on SeeMeCNC Orion
We hope that this guide for selecting the right 3D print bed surface was helpful. If you have any other suggestions, please feel free to leave them in the comments below.
Happy Printing!
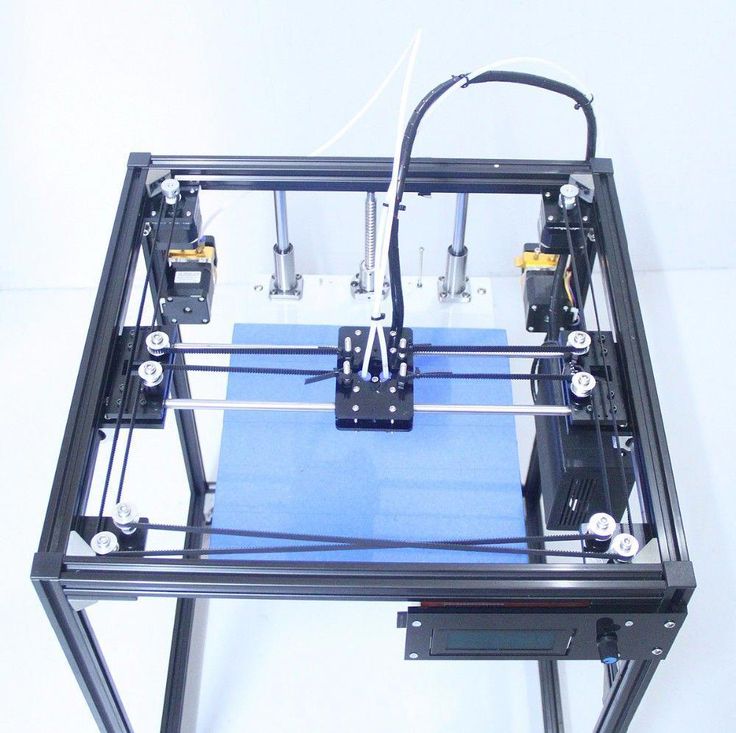
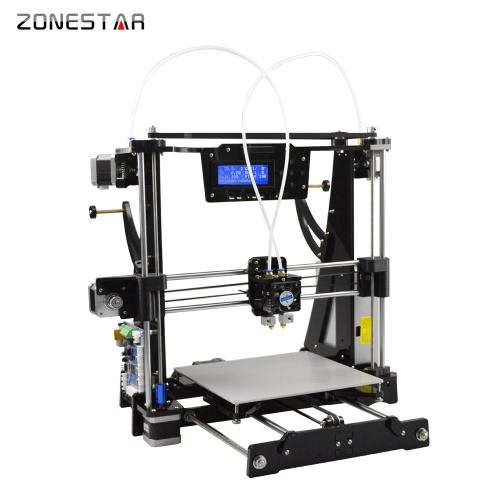
How to 3d print another 3d printer
Already have a 3D printer? Want another one?!
Why is this needed?
Well, let's say you have your own large printer and you can print fairly large objects. Do you believe in the idea of the reprap movement, the printer should be able to reproduce itself!
Or you want to challenge yourself and finally understand how the 3D printer works. nine0005
Or your current 3D printer is just sitting around gathering dust in the corner of the room, because you have already printed everything that came to mind, and the most difficult task that worries all 3d printing professionals is how to clone existing equipment on itself.
Step 1: Preface
Let's be honest... the is not the ultra cheap printer. This is not Chery 3D printer for $60. This not is a way to save money or time. This is not first printer.
Now let's talk about what is .
B 3Dtje mini 3D printer is:
- Damn easy to print
- Printed parts from PLA
- Everything fits within 200x200 print volume
- Most parts can be printed in 100x100 print volume
- Most parts are printed without supports , only in some cases they may be needed to improve quality
- Very few few needed tools
- Unlike most crafts that require a laser cutter, CNC
- You can probably get away with a drill and a hacksaw to prepare 2 rods of the required size nine0053 No source of MDF, or wood, or acrylic sheets or aluminum profiles, which can be expensive
- This design is not new, nothing revolutionary, but it is reliable, prints well and works with any slicer
- All model files can be downloaded free of charge
- You can download them and modify them as you like
- You can even sell them if you need to!
- 19 models
- All parts are different and look very interesting together
- All parts are connected with M3 screws and nuts.
- Cutting 2 to 4 metal rails
- Some 3d printed parts are assembled intuitively , you can even ignore photo
- Small, portable, low moving parts! This printer can print fast! (when properly configured)
- This 3D printer you will DIY , completely!!
Let's get started!
Step 2: Prerequisites
You will need a 3D printer , well, or find someone with this device.
- Printable area must be at least 200x200mm XY and maybe 200mm Z if you want to print with refills
- PLA 1 kg, can be different, but this is the most convenient option
- I honestly don't know how much it will take. Likely 500g or so
- Tools
- Screwdrivers for screws
- Pliers, cleaning tools for printed objects (a clerical knife is sufficient)
- Metric drills for opening / cleaning the printed hole (you can also use a screwdriver)
- Knowledge on how to build a 3D printer from scratch
- These are not hard requirements, but knowing how to deal with common printer problems will reduce the amount of swearing when things aren't perfect the first time.
- If you understand firmware Marlin it would be very cool to talk about this, as there is a desire to improve some things. nine0058
- These are not hard requirements, but knowing how to deal with common printer problems will reduce the amount of swearing when things aren't perfect the first time.
Step 3: Parts
Right off the bat, I've made a list of exactly what you need and what you can buy to make the best possible quality. But it will be more expensive. Therefore, you choose which set to buy - in principle, they will not differ. In addition, you can order all this from China, it will be cheaper, but the wait will be longer. In any case, you need to look for all the components in English, so we take them from the table and, for example, insert in alliexexspress search .
The table is located at this link.
Step 4: Printing Parts
Now let's move on to the most interesting part, in my opinion - prototyping models. To be honest, I really like to print different things, you feel that you can handle any task when you have a 3d printer at hand. Okay, it's all lyrics.
Here is the project itself, where you can download 3d models for printer for free . Download and start preparing for printing.
The most important thing is to arrange the parts correctly on the table . The idea is to make the models have as few parts hanging in the air as possible. This will allow to drop support for . After all, they spoil the quality very much if you do slicing through Repetier Host with their auto-generation, and not draw them yourself.
You can watch a video showing the optimal arrangement of parts. Print settings I think you know how to do it, if not - there are articles about it with configuration files.
Step 5: Mounting
Let's assume that we have printed everything. Someone may have decided to use metal guides, buying them, for example, from IKEA, and cutting them into sections of the desired length. In any case, writing how to assemble this 3d printer does not make much sense, and it's too lazy, to be honest. In my opinion, there is nothing better than pictures! nine0005
Frame assembly
First, I'll lay out how our miracle should look like at the moment of medium readiness. Then we will see how the modules were assembled.
Assault Axis Y
This Axis drives The so -called bed . First we need to install the motor, put a pulley on it . Then we install a freely rotating pulley on the other side and measure 9 for them0003 belt .
And now we will install the bed itself, which will fasten the two ends of the belt to us. Just don't forget to tighten the pulleys and anything that isn't tight yet. The substrate will be massive and it will be inconvenient to crawl there already. The connection will require 200mm x 6mm bolts, so have them ready right away.
It should be noted that the belt must be very tight . This will greatly affect the print quality of . If you cannot do this at the time of assembly, you can use special tensioner . It's basically a simple spring. As for the axes, in this case they are printed, although this is far from mandatory, just the name of the project obliges))
X-axis assembly
Depending on your printer, you may need to make a hole with a 3mm drill in the belt tensioner. This hole should be quite free. nine0005
- Attach the motor to the end of the x axis with the connector down
- Attach 20T gear
- Insert 6mm rods 6mm x 180mm into the holes on the motor side. You need to cut these rods if you bought 200mm.
- Assemble the x-axis tensioner with either your own or printed tensioner bearing.
 Make sure the m3 nut is in the tensioner before proceeding.
 - Pass the belt from the left side (engine side), through the gearbox, through the idler bearing to the right side
- At this point, install belt tensioner to the right of the x-axis on the rods
- If you are happy with the length (make sure the x-axis of the tensioner is recessed quite a bit) you can cut the belt. Don't forget to leave extra belt length
- Attach LM6UU bearings in bottom bracket x
- All assembled, attach the straps to the carriage x
- Then it remains to adjust everything a little to make sure that nothing touches each other
Assembling the Z axis
Now we assemble the Z axis. If you have not installed the engines in the course of past work, it's time to do it. As you understand, they should stand on the left and on the right. We will install adapters for screw rods on them, where we will put them, holding them with a hexagon.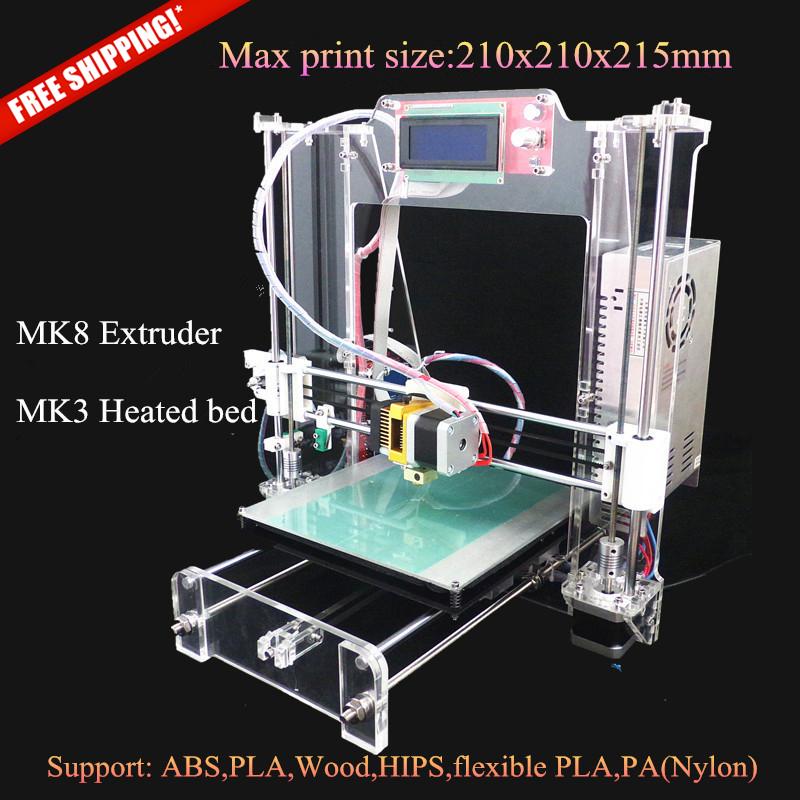
We stick the guides (parallel to the screw rods). We can say that we have finished assembling the case.
Step 6: Assembly of the electrical circuit.
How to lay the wiring is everyone's business. Here the options will be shown in the photo, but it's up to you to decide. The most important thing is to connect everything correctly. I'll also lay out the scheme, but it's better to see how this is done in ordinary 3d printers. For example, in order not to go far, you can go over the following articles directly on this site:
-
Exploring the features of a 3D printer
-
3D printer setup and calibration
-
Ramps 1.4 connection in 3d printer
It is not necessary to read everything - you can see the key places from the pictures and delve into their study.
The picture below shows the green power terminal.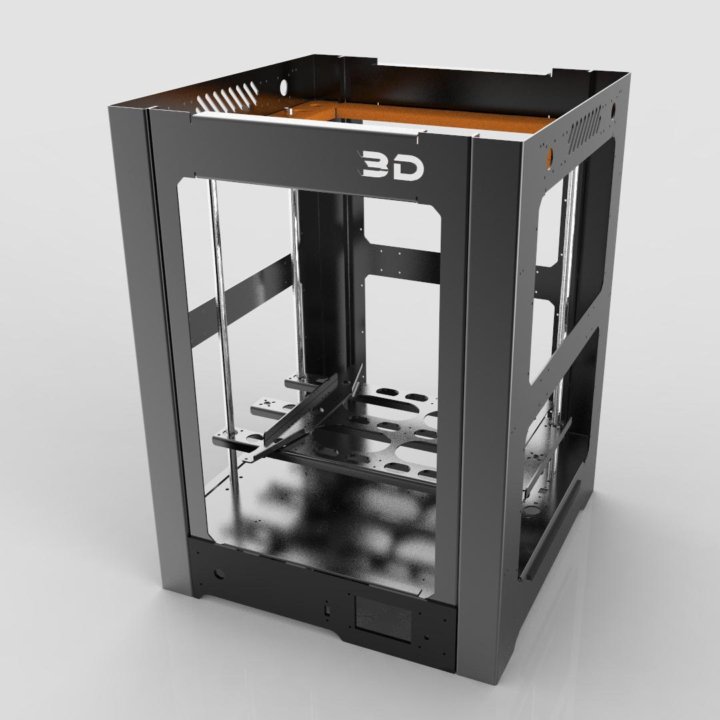 This is a very dangerous and unreliable thing that sometimes ignites - it is dangerous to leave a working 3d printer at home unattended. Therefore, in an article about Ramps, it is better to read how to be in this case. nine0005
Step 7: Firmware
Since you will (most likely) have an Arduino Mega as the brain of a 3d printer, uploading firmware to it will be quite simple. All you need is the Arduino IDE. The most standard firmware from Marlin. The main thing is to choose the correct configs for the board. I have not seen an article about the firmware on this resource, but it can be easily found on the Internet. Here are useful links:
- Firmware Marlin manual
- May be useful to someone info about reprap electronics, how is it functioning
Step 8: Testing
Finally time to print something! We note right away that the table must be covered with molar tape or Kapton, since we have it without heating.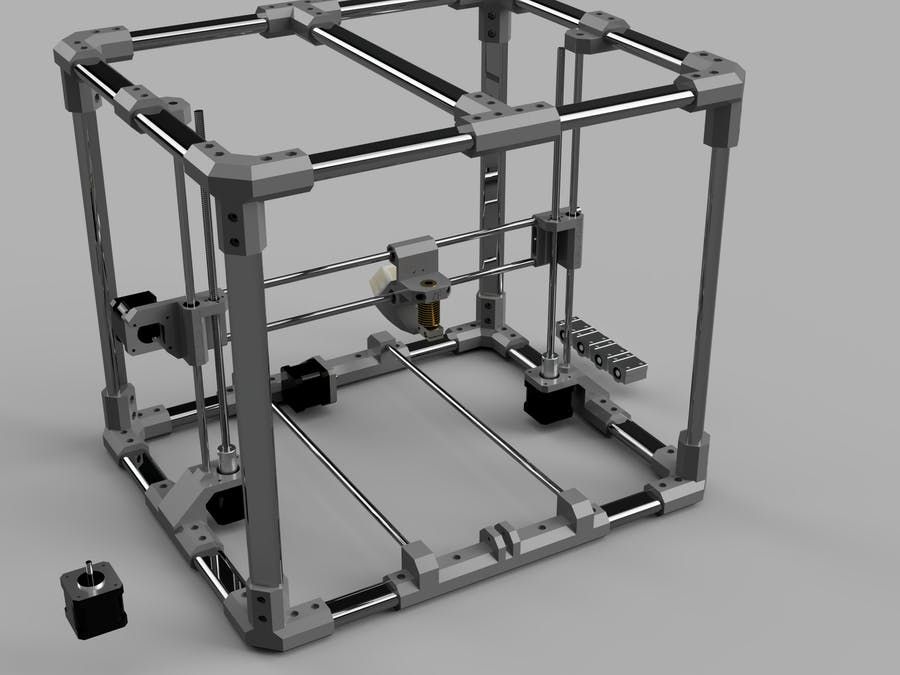 Otherwise there will be no adhesion. Also, before printing, be sure to correctly adjust the distance between the nozzle and the bed . How to do it correctly is discussed here. 3d printer calibration - our everything!!! nine0004
Since you were able to print parts for this printer, you can also slicing your own models for its small copy, assembled by yourself. Therefore, we will not talk about the slicer, just do not forget to reduce the print area!
And so that's what each of you can have at the end of this article!
Types of tables for 3D printer
Contents
-
- Materials of the printing platform0058
- Table without heating.
- Table surface
- Calibration types
- Automatic calibration
- manual calibration
- Calibration of the 3D printer Cartesian kinematics
- Generated Delta Delte 9003
- The correct calibration of the 3D printer bed, or as it is also called Hot Bed, is very important.
 The first layer is like a foundation for a house, if the foundation is fragile, then the house will not stand for a long time. nine0005
 If the plane of the printed surface is uneven, then the model may be partially peeled off or deformed. The first layer may not stick to the printing platform at all, and the result of many hours of printing will not be a neat 3D model, but plastic noodles.
Print failure example
Therefore, it is very important to properly calibrate the table. Printing platforms can be conditionally divided into two types - adjustable and not. nine0005
The adjustable table is attached to the printer with spring-loaded screws. It is not rigidly fixed in height and with the help of screws it is possible to calibrate the plane and the gap between the 3D printer table and the nozzle.
Adjusting screw
Unregulated is a printing platform that is rigidly fixed to the printer body.
 This solution is used in delta printers. Calibrate them only programmatically. nine0005
 Non-adjustable delta printer table
Print platform materials
The material from which the table is made may vary depending on whether the table is heated or not.
Heated table
There are several types of heating elements for a 3D printer platform - aluminum, textolite, silicone and kapton. Each of them has its pros and cons. nine0005
Textolite heater - inexpensive, but fragile and can be strongly bent when heated.
Silicone heater - can not be used alone. Usually used in conjunction with a metal base.
An aluminum table is expensive, but it heats up more evenly and is less subject to thermal deformation than other platforms.
The Kapton heater is very expensive and cannot be used on its own. Usually glued to a metal base. Can be heated up to 200 degrees. nine0005
Types of heated printing surfaces
Most often, an aluminum heating table or a silicone heating pad is used in conjunction with an aluminum plate.
 Low price, ease of processing and high thermal conductivity make aluminum the most popular material for the manufacture of heated printing tables.
 The main advantage of heating the printed surface is to increase the adhesion (stickiness) of the first layer of plastic. If the printer is with a closed case and a heated platform, a “passive thermal chamber” is created inside. Due to this, plastics with high shrinkage do not crack in layers during printing, the adhesion of layers (interlayer adhesion) increases, and internal stress is more evenly distributed during cooling. nine0005
But there are also disadvantages - when heated, a metal table expands a little, and since it has nowhere to expand, it begins to bend. For a printing platform up to 200x200 in size, deformation will not be very critical, but for larger tables this becomes a tangible problem.
Each manufacturer of 3D printers with a large printable area solves the problem of deformation of the metal table in its own way.
 For example, in Raise 3D, the table is fixed along the entire plane with pins at 13 points. nine0005
Heated table fixing Raise 3D
Table without heating.
An unheated printable surface is often used in 3D printers designed to work only with PLA and other low temperature plastics. For example - printers for children or large printers with an open case.
An unheated printable surface is often used in 3D printers designed to work only with PLA and other low temperature plastics. For example - printers for children or large printers with an open case. nine0005
Children's printer with acrylic print bed
Tables without heating are made of aluminum or acrylic. If the table is aluminum, then glass or any other coating should be used on top. Aluminum is a soft metal and even a brass nozzle can scratch or damage it if not properly adjusted.
Heating table with aluminum base and mirror
Acrylic tables are often used in inexpensive 3D printers designed for kids.
 Acrylic is difficult to damage or break. You can print on an acrylic table without glass or other coating.
Free Shipping
Add to compare
Product added to compare Go
Manufacturer Raise3D nine0558Add to compare
Product added to compare Go
Manufacturer Raise3D Add to compare
Product added to compare Go
Manufacturer Raise3D Free shipping
Add to compare
Product added to compare Go
Manufacturer FlashForge Tabletop
In order for the first layer to adhere to the table tightly, different surfaces are used that increase adhesion. It is more convenient to remove the model from the removable surface. If you need to immediately start printing another model, you can simply quickly change from one removable surface to another.
 nine0005
 The most popular table surface is the regular tempered glass or mirror. It is not expensive and available. It is believed that the accuracy class of the mirror is higher, but for small working areas (up to 200x200 mm), ordinary tempered glass is enough.
Glass itself does not hold the first layer well, so various adhesives or stickers are used to increase adhesion.
Ordinary glass can burst from a temperature difference or “crumble”, then the model comes off along with pieces of glass. Good thing it's easy to replace. nine0470
A piece of glass came off with model
Sitall glass - in fact, it is ordinary glass with the addition of boron oxide. This makes it stronger than ordinary glass and resistant to temperature changes. But the cost of such glass is much higher than ordinary or tempered glass.
Sitall glass
Perforated table - mainly used for printing ABS plastic.
 Thanks to the perforation, the plastic adheres firmly to the print platform. In order for the bottom of the model to turn out to be even in the slicer settings, you need to enable printing on a raft (substrate). nine0005
Perforated table used in UP printers!
Stickers - There is a huge variety of stickers for printing platforms. It can be either ordinary masking tape or a specialized surface (rough with an adhesive surface).
The finished model is easier to remove from a flexible substrate than, for example, from glass. With some substrates, the model can be easily removed after the printing platform has cooled down. For some, you need to heat the table and only then tear off the model. nine0005
Separately, you can select a variety of compositions that are applied to the surface of the printing platform to increase the adhesion of the first layers. 3D varnishes, 3D adhesives, etc.
 Probably every 3D maker has his own special recipe for the same composition that almost everything sticks to. It can be BF glue mixed with a solvent or alcohol, ABS diluted in acetone, kvass with sugar, glue stick, etc.
 Do not spray varnish or other sprays inside the printer. Glue particles can settle on mechanisms, fans, and even get on electronics. This can lead to damage to the 3D printer. Simply remove the platen surface from the printer and apply the adhesive. nine0005
Add to compare
Product added to compare Go
Manufacturer Raise3D Add to compare
Product added to compare Go
Manufacturer FlashForge Add to compare
Product added to compare Go
Manufacturer FlashForge Calibrations
In addition to choosing the surface of the print platform, it is important to correctly level the plane of the table and set the correct gap between the table and the nozzle.
 Calibration can be automatic or manual.
 Printers with large print surfaces, such as the Raise 3D Pro 2 and Pro 2 Plus, are calibrated at the factory. The user only needs to check the gap between the table and the nozzle, because it may go astray during transportation. nine0005
Automatic calibration
Automatic calibration is performed using a sensor (optical or contact), which is mounted next to the extruder. The printer checks several points on the print platform one by one and remembers the values. The first layer will be printed correct for the curvature of the table.
You can meet the calibration using a conductive substrate that is placed instead of the printed surface. This method is rare, but still has a place to be. It is commonly used to calibrate 3D printers with delta or delta robot kinematics. nine0005
Automatic calibration allows you to quickly and effortlessly level the table. It becomes especially indispensable for printers with delta or delta robot kinematics.
 Optical sensors "do not see" glass, so for printers with an optical sensor, it is better to use other surfaces of the print platform.
 Some printer models have a menu with hints to help you properly set the platform plane and gap. It is enough to launch the “assistant” and follow the instructions on the screen. This is not exactly automatic calibration, but with such help it becomes much easier for a beginner to correctly calibrate the table. nine0005
An example of a 3D printer with automatic calibration is Raise E2. The Raise E2 extruder has a contact sensor to determine the distance between the nozzle and the printed surface. The resulting values help to correct the print height of the first layer. You can calibrate not the entire table, but only the area on which the model will be located.
Manual calibration
Manual calibration is when the user sets the plane of the table and the gap between the table and the nozzle himself.
 To do this, under the printing platform there are screws or winglets with which you can adjust the height of the printing platform. nine0005
 Calibration screws
The standard gap between the platform and the nozzle, for most printers, should be - 0.1-0.2mm. If there is no set of probes at hand, a standard A4 sheet folded in half can replace it. Before calibration, the print surface (if it is heated) and the nozzle must be heated.
Sometimes manufacturers of 3D printers recommend a gap between the table and the nozzle - 0. Therefore, read the instructions before calibrating. nine0005
We will consider the calibration of the two most common kinematics - Cartesian and delta.
Cartesian kinematics is based on the Cartesian coordinate system and the movement of the 3D printer's head along the x, y, z axes.
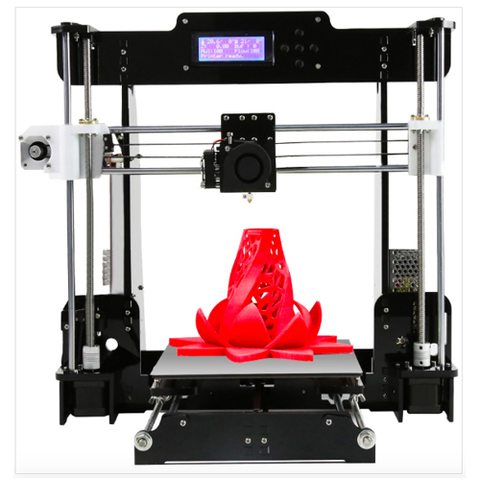
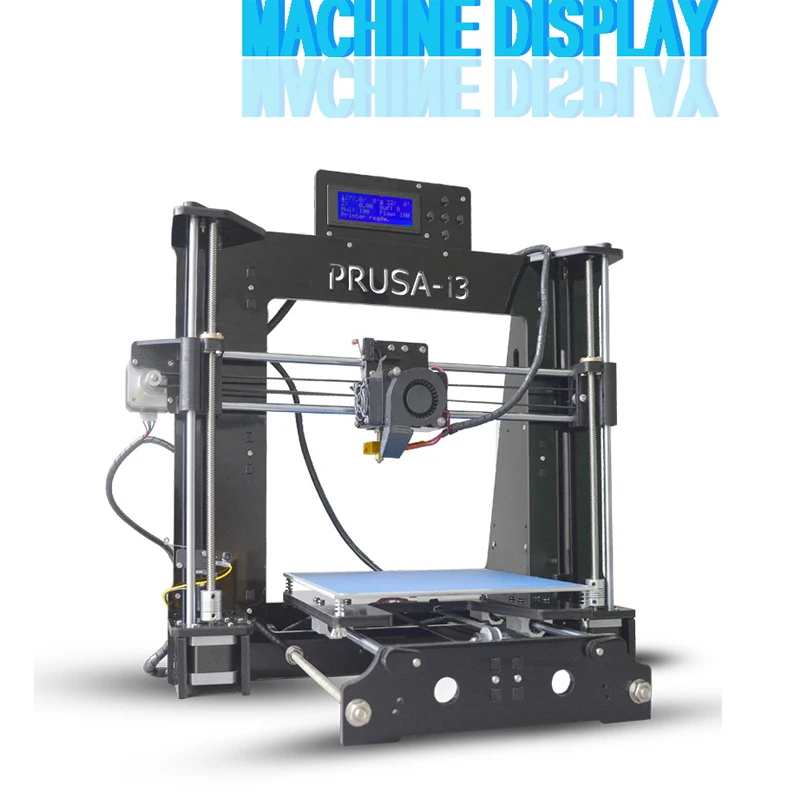
Printer example with Cartesian kinematics
In deltas, the extruder moves along 3 identical axes using carriages moving along vertical guides.
 The delta printer can be called a simplified delta robot, but these are still two different kinematics. nine0005
Example of a printer with delta kinematics
3D printer table calibration with Cartesian kinematics
Different manufacturers may have slightly different calibration instructions. We will consider here the calibration of the printer with standard kinematics.
-
Heat up the table and nozzle. When heated, the metal expands slightly, so the gap between the printing platform and the nozzle may differ between the “hot” and “cold” ones. nine0005
-
Through the printer menu, send the table and extruder to the "home" or zero position in all axes. Usually the zero point is the near left corner of the extruder and the top position of the print platform. Be sure to make sure that the 3D printer does not rest the nozzle on the table and does not damage it. If this is the first calibration, use the nuts to lower the table as low as possible.
-
Through the printer menu or manually (for this you need to turn off the motors through the menu), move the extruder so that the nozzle is above the adjusting screw. nine0005
-
Use a feeler gauge and adjusting screw to set the gap between the print bed and the nozzle.
-
Repeat all steps for all calibration screws. Usually there are 3 or 4 screws.
-
After aligning the plane above the screws, move the extruder to the center and check the gap. If the gap matches the feeler gauge, then the table plane and platform distance are correctly calibrated. nine0005
Delta printer table calibration
Calibrating a delta printer is a very large topic, so here we will only describe the general principles.
The delta printer does not have the x, y and z axes we are used to. Instead, the delta printer has 3 towers - A, B, C, on which the carriages move.
Since the delta table is static, it is calibrated programmatically.
 The gap is calibrated by 3 points (at the columns) and the lens (center) of the table. The lens can be concave or convex. nine0005
Before calibration, check the mechanics of the printer - the belts must be tensioned evenly, there must be no play in the carriages and the effector (the plate to which the extruder is attached). If the belts are loose or uneven, it will be problematic to calibrate the printer.
Some 3D makers check belt tension with a tuner. Evenly tensioned belts will sound the same, but the correct “note” is found empirically. nine0005
There are a huge number of programs for delta calibration, but one of two is usually used - Pronterface or Repetier-Host. Using them, you can directly access the printer using special commands and change the values in the firmware.
As auxiliary programs, you can use a virtual calculator and from there transfer the values \u200b\u200binto the firmware or download the finished GCode.
 They need to specify the parameters of your printer - firmware (usually Marlin or Repetier), diagonal length, circumference, etc. These parameters can be taken from the firmware or measured with a caliper. It is important to specify all the parameters as accurately as possible, otherwise the printer will not be able to calibrate. nine0005
First, 3 points are aligned at towers A, B, C, and only then the lens in the center of the table is corrected.
Manual delta calibration is tricky, but it doesn't have to be repeated often. Typically, the printer only needs to be recalibrated after some mechanical parts, belts, or print bed cover have been replaced.
Totals
The calibration process may seem tedious and complicated, but in fact, once you do it yourself, the process will no longer seem so intimidating. In addition, most manufacturers try to help novice users and equip their printers with auto-calibration sensors or try to simplify this process as much as possible with detailed menu prompts.
Learn more
-