3D printer filament brittle
How To Fix PLA Filament Getting Brittle ?
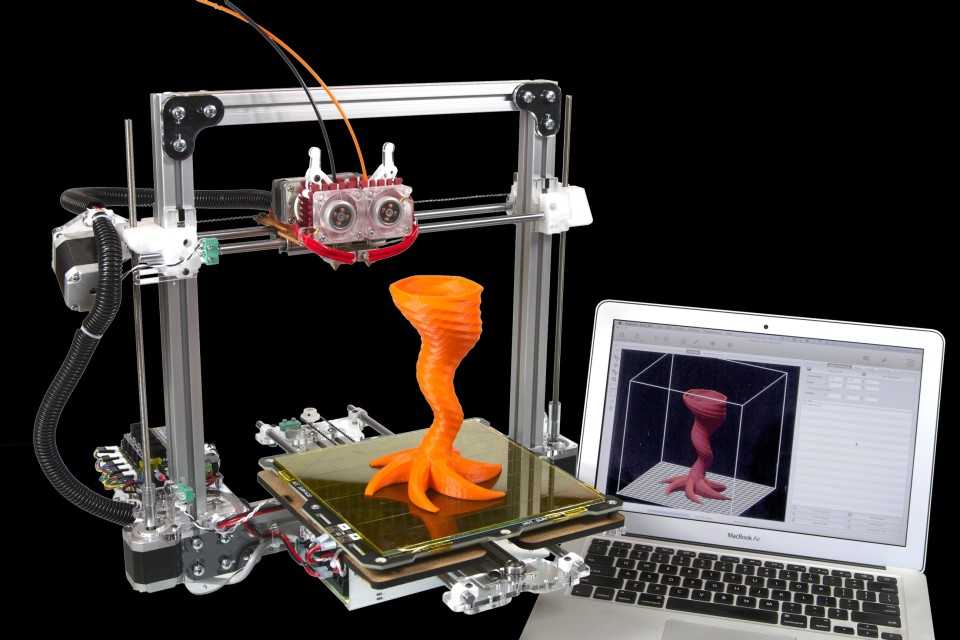
It’s frustrating how your attempt to print 3d prototype results in having the PLA filaments breaking off at the slightest touch. We know that PLA is widely used in 3D printing, but their tendency to go brittle has frustrated many hobbyists and professionals alike.
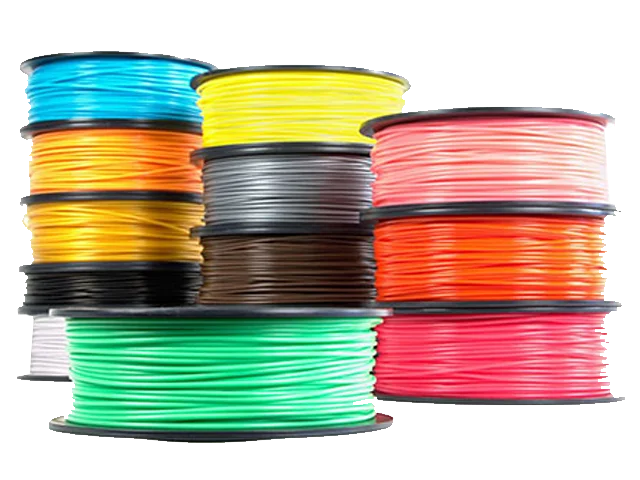
A roll of brittle PLA filament results in broken pieces reduces texture strength and causes uneven extrusion during the printing process.
Various theories have explained why the PLA filament keeps breaking apart during print. Users also seek ways to overcome the brittleness of the filament. Before we explore the available options, let’s dig deeper into the potential causes of such incidences.
Why PLA Filaments Get Brittle?
Often, PLA filaments’ complaints getting brittle arise when they are left idle for a few months. But there are also instances when a spool of PLA broke quickly after being used for just a few weeks. The obvious sign of such brittleness is the PLA filament breaking into pieces with the slightest contact.
Both experts and regular users couldn’t agree on the brittleness causes, with each holding on to their respective arguments. However, chances are, there is more than one contributing cause that makes the PLA filament brittle.
For a start, PLA, which stands for poly-lactic acid, is known to be relatively brittle. The property means that it is inherently brittle to a certain extent, particularly compared to materials like ABS. PLA is also known to degenerate rather rapidly, which explains why it eventually snaps off during printing.
The degeneration process of PLA could take months, but some conditions could further aggravate the material’s flexibility. A commonly circulated theory is the moisture adsorption by the filament. When placed in a humid environment, the filament absorbs moisture from the air and alters its physical properties.
Usually, the reel’s outer part starts getting brittle as they expose to moisture. To make things worse, the attempt to straighten a rolled filament applies mechanical stress beyond the tolerance of its altered flexibility.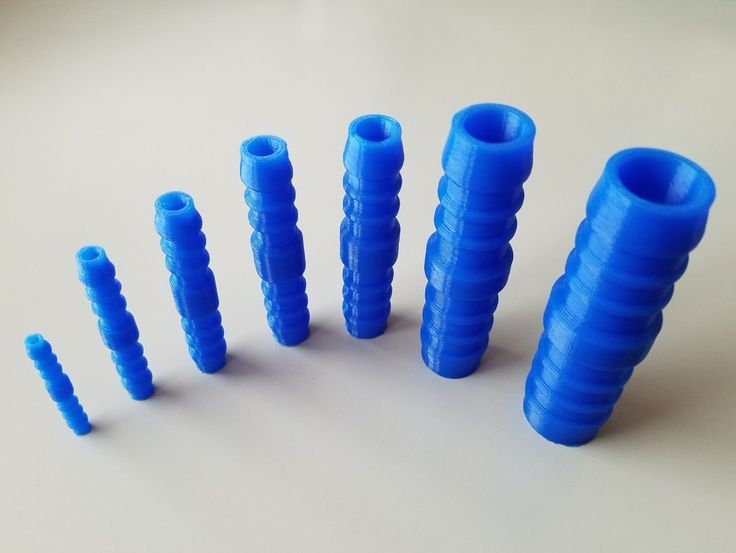 This can explain why the filament keeps breaking off when you tried printing with it.
In some cases, color additives that add to the filament may change its mechanical properties. For example, you may have black filament snapping off quickly while transparent PLA works fine in the same environment. Occasionally, it could be the quality of the filament itself that is the culprit.
Fixing PLA Filaments That Have Gone Brittle
Are there any fixes when the PLA filaments have gone wrong? There is a slight chance of getting the filament into its original form by applying heat to it. The theory that supports this suggestion is that the heat would cause the moisture to evaporate, leaving the PLA in its original structure.
Here are two ways of using heat to dry the PLA filament.
1. Heating PLA Filament Roll
In some instances, heating the entire filament roll may reverse its brittleness. This is assuming that the changes in its physical properties are still reversible.
Place it in an oven for 2 hours and check out if the flexibility has returned. You’ll want to ensure that the temperature does not exceed 50°C when you’re heating the entire roll of filament. You mustn’t exceed the suggested heating temperature as the whole reel may turn soft and rubbery.
Repeat the process if you feel that the brittleness has decreased but yet to reach the ideal level. After heating the roll of filament, you could check if it’s still brittle by bending the filament and see if it breaks off.
If these attempts failed, you could try cutting 2-3 meters of the filament off the roll. In most cases, only a short length of the filament is affected while the remaining is in its original condition.
2. Increase The Nozzle Temperature
If you’re having issues with brittle 3D prints, you could increase the temperature of the nozzle. This action ensures that sufficient heat is applied to evaporate the moisture and soften the PLA filament’s physical form. You’ll want to try a few different temperatures to get the outstanding value that works.
However, You should note that these methods may not be effective if the physical properties of the PLA are altered permanently. If the PLA material has gone through irreversible molecular changes, no amount of heat will fix its brittleness.
You’ll have to replace the brittle PLA filament with a new one if the above suggestions don’t solve the issue.
Prevention Measures In Handling PLA Filaments
When dealing with brittle PLA filaments, prevention is always better than cure. If you’re having regular issues with PLA filaments snapping into pieces, you’ll want to stop leaving the filament on the 3D printer after usage. Instead, ensure that the filament retracts into the reel after printing and is stored in a sealed pouch or container. If possible, place desiccant in the storage to ensure that excessive moisture is removed. This prevents moisture adsorption from weakening the structure of the filament.
Besides that, you could also cover the reel of PLA filament that you’re currently using with a plastic bag and puncture a hole for the filament to be fed to the 3D printer. This method minimizes the chance of moisture being absorbed into the material.
As mentioned, the physical properties of PLA alter by temperature, moisture, and additives. You’ll want to be diligent when ordering supplies of PLA filaments because improper handling may result in brittleness of the material. Try bending a new roll of PLA filament to ensure that it’s in proper condition.
Summary
There’s no quick fix to brittle PLA filament. Heating and drying may not always be successful. It is better to have a habit of storing unused PLA rolls in a dry environment and ensure that you’re getting the material from a reputable supplier.
How to Fix PLA That Gets Brittle & Snaps – Why Does It Happen? – 3D Printerly
The problem of PLA filament snapping isn’t one that goes unnoticed and it does affect many people. But the question remains, why does PLA filament snap in the first place? I’ve wondered this myself, so I decided to look into the causes and offer up some solutions too.
Why does PLA filament get brittle and snap? PLA filament snaps because of three main reasons. Over time, it can absorb moisture which causes it to reduce flexibility, from the mechanical stress of being curled up on a spool, then straightened out with pressure and generally low quality PLA filament.
Many people think it’s solely down to moisture absorption when it comes to PLA, but there are actually a few other reasons so keep reading to get the important details on why your PLA filament gets brittle and snaps in some instances.
If you are interested in seeing some of the best tools and accessories for your 3D printers, you can find them easily by clicking here (Amazon).
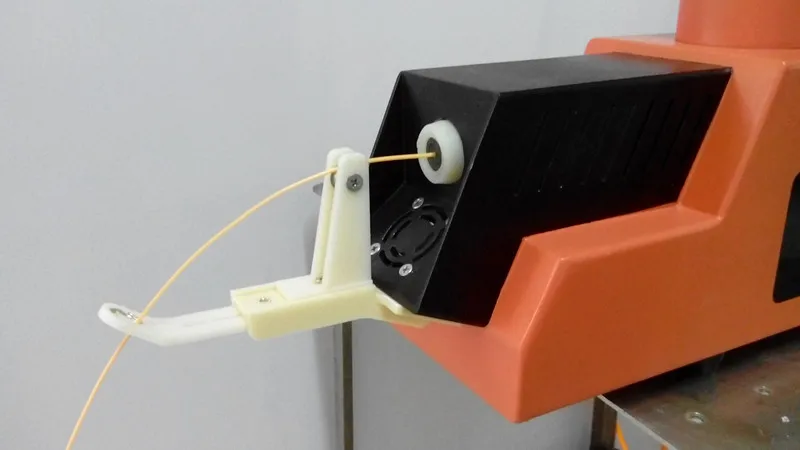
The video below shows you how to remove broken filament from your 3D printer’s extruder.
Reasons Why PLA Filament Gets Brittle & Snaps
1. Moisture
What many 3D printer users have done to save their PLA filament from snapping is to store the spool of filament in a big plastic bag which has a valve to suck out the air out of it, essentially in a vacuum-packing fashion.
They also use reusable moisture absorbing packs of silica beads.
If moisture absorption was the problem that made PLA filament brittle and snap, you would find that your filament would break along the parts of PLA which have exposure to the moist air, but it’s only the parts which are straightened that break.
This means that even when your PLA filament is sitting idle, it can contribute to the filament breaking so easily. Even if your filament doesn’t snap, moisture can still cause brittle PLA prints to be made, reducing the overall effectiveness of your models.
We know that there’s more to it than just moisture because some users have had PLA filament snap in very dry environments and ran a few tests to see whether holding the filament straight causes it to snap through the guide tube.
2. Mechanical Stress From Curling
Your spool of PLA filament has constant mechanical stresses of being straight after having been curled around a reel for a long period of time. It’s similar to when you ball up your fist then open your fist, you’ll find your fingers curling up more than its normal natural position.
Over time, the additional stresses applied to the filament can cause it to get brittle and this can be the case with many other filaments that are held on a spool. The ones that lack flexibility can be affected by this in the same way.
Sections of the filament which are held straight have a higher chance of breaking which is what makes it more fragile.
3. Low Quality Filament Brands
Depending on your brand of PLA filament, some will have more flexibility than others depending on the manufacturing processes so this curling stress of your filament may not be seen in some brands, but may be a common occurrence with others.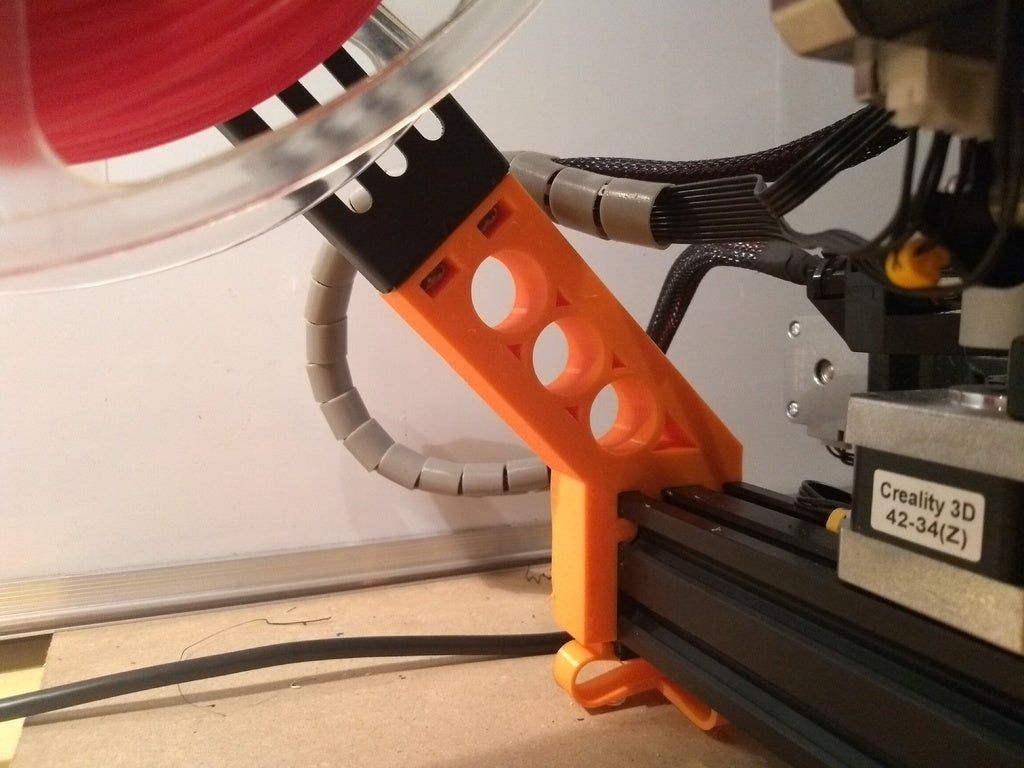
Fresh PLA filament seems to have a greater amount of flexibility and allows for a little bit of bending with snapping, but over time they just start becoming more prone to snapping.
So when looking at the overall picture, it’s mainly down to quality control issues. Low quality filaments that don’t have the same manufacturing care are going to be more likely to suffer from this issue.
It’s important to keep in mind though, quality filament isn’t always the more expensive one. It’s more so due to the reliability and trustworthiness of the brand of PLA. The best way to find this is to sift through online reviews and find one with consistent praise and high reviews.
I personally find the ERYONE Filament on Amazon to be a great choice and well-loved by thousands of 3D printer users. HATCHBOX is a big name in the filament space, but I’ve seen recent reviews saying that they have been having quality issues recently.
The takeaway here is that all factors working together is the most likely cause of filament becoming brittle and snapping.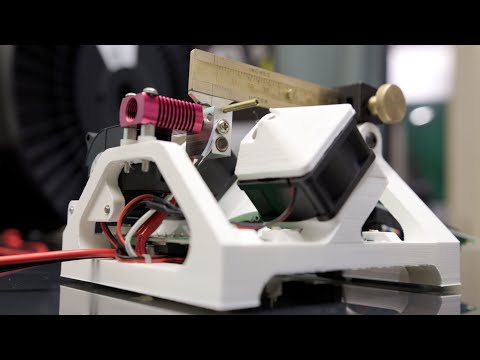
When just one of these factors are isolated, you’re less likely to suffer from this issue but when filament has absorbed moisture, been straightened out past its normal curvature and is of low quality, you’re going to experience this a lot more.
So if this is happening to you, follow the solutions outlined in this post and the problem should be solved.
How to Fix PLA Filament Getting Brittle & Snapping
1. Proper Storage
The best way to store your filament is in an airtight container or sealed bag with packs of desiccant (silica bags) to absorb moisture in the air around the container. This way you know that moisture won’t negatively affect your filament and will be ready for use in optimal conditions.
When you take the proper steps to store your filament, you can avoid a lot of the headaches that come with imperfect PLA filament.
A great pack of desiccant with great reviews on Amazon is the Dry & Dry 5 Gram Packs and it’s amazing for humidity control while being very easy to apply. Simply get one of the packs and throw it in the container and let it work its magic.
It can be annoying to have to re-spool your filament each time, but if it’s a hygroscopic filament (meaning it absorbs moisture easily from the air) it’s a necessary step to get the best printing results.
The reason this method works is that dry PLA is more flexible than moisture-filled PLA so it has less chance of breakage and being brittle.
It’s important to also keep your filament out of the way of direct sunlight and not exposed to temperature changes so in a location which is fairly cool, dry and covered preferably.
A vacuum bag is a great option for keeping the filament dry. A good vacuum bag includes a vacuum valve which makes sure to get all oxygen out of the bag using a vacuum cleaner.
These bags have the ability to protect the filament from water, odor, dust, and many other micro-particles.
The standard would be the SUOCO 6-Pack Vacuum Storage Bags from Amazon. You’re getting 6 16″ x 24″ bags along with the hand pump to easily compress your bag around the filament, similar to how it’s done before being shipped to you.
- They are durable & reusable
- Double-zip and triple-seal turbo valve seal – leak-proof technology for maximum air expulsion
- Can be connected to a standard vacuum cleaner for speed – the pump is great to use while travelling.
If you think you’ll be using vacuum bags consistently, the premium option are the VacBird Vacuum Storage Bags with Electric Pump.
The really cool thing here is the powerful electric air pump which makes it much easier and faster to draw air out of the vacuum bags. Operation just takes the push of one button to start/stop.
You can get yourself a perfect sized Storage Container from Amazon. Some people get one large container, while others get a few smaller ones to hold each spool of filament.
It’s a good idea to also use these desiccants to keep your filament dry.
I’d recommend getting the Dry & Dry Premium Silica Gel Packets from Amazon for a great price. They are widely popular and work really well for all your moisture-absorbing needs.
They can significantly reduce the moisture levels in the immediate environment and within the filament, but you’ll need a proper drying solution to take more moisture out of your materials.
This is where specialized filament drying/storage boxes come in.
2. Drying Out Your Filament
A good indicator of filament full of moisture is when it makes a cracking/popping or hissing sound when extruded or creates a rough surface on your prints.
The hygroscopic level of PLA, ABS and other filament can be the difference between how much moisture it will absorb from the air and even more so when in a highly humid environment.
Instead of living with the issue of filament breaking and being full of moisture, you can proactively dry out your filament with a simple method.
A specialized 3D filament box is a great option as it includes a heating and drying mechanism. You just have to set up temperature and heating time and it will dry up your filament properly.
These boxes are designed to resist high temperatures which ensure to dry your filament without damaging it.
Specialized 3D filament boxes of high quality can be found easily on Amazon.
These boxes have openable lids on the upper side, you can open it and place your 3D filament inside the storage box. These boxes could be expensive but the best thing about these boxes is that they not only protect the filament from moisture but can also cure it.
The premium option here that I would recommend has to be the SUNLU Upgraded Filament Dryer Box from Amazon. With the item beside you, say goodbye to wet 3D printing filament.
- Can dry filament and print at the same time
- Easy temperature settings adjustments according to filament type, humidity etc.
- Manually set your drying times (the usual is 3-6 hours)
- Compatible with most 3D printer filament out there
- Ultra quiet so it doesn’t disturb your environment
- Comes with a cool 2-inch LCD monitor to display temperature and time
You can also use your oven to bake the moisture out of the filament.
The ideal way to set the temperature is to set it below the glass transition temperature of the filament.
- For PLA, set the temperature at 104°F – 122°F (40°C – 50°C) and keep it in the oven for 4 to 6 hours.
- For ABS, set the temperature at 149°F – 167°F (65°C to 75°C) and keep it in the oven for 4 to 6 hours.
Some people have even used their printer bed set at a temperature of 180°F (85°C) then cover the filament with a box to retain the heat and it works just fine.
A less invasive, but still effective method of removing moisture from filament is to place the spool into an airtight container with packs of desiccant, rice or salt for a few days.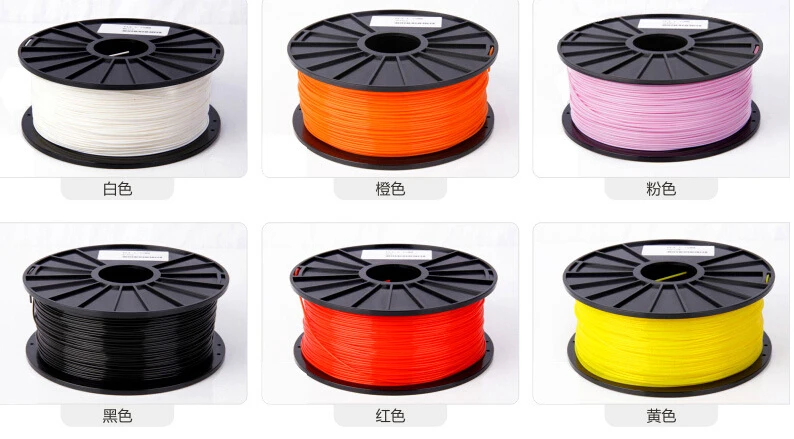
Many 3D printer users have used this method effectively and it does the job just fine.
After you’ve done this, you want to take advantage of the previous method above of proper filament storage.
3. Reducing Moisture in the Air
This method is great because we know the possible causes, and we take action before it negatively effects us in the first place. You can measure moisture in the air with a few devices to know if this is affecting your filament.
Once you’ve identified higher levels of moisture in the air you can take a simple step to reduce it:
- Get a dehumidifier machine
You have three levels that you can go for depending on the size of your room and how bad your moisture problem is. It doesn’t only translate to filament and printing but environmental health issues in general.
The first level is the Pro Breeze Dehumidifier which is cheap, effective for a small room and has great reviews on Amazon.
The second level is the Homelabs Energy Star Dehumidifier, a bestseller and highly efficient machine that removes moisture, prevents mold and allergens from affecting you and your property. It’s perfect for medium to large rooms and has a lovely modern design.
The third level is the Vremi 4,500 Sq. Ft. Dehumidifier, just an almost perfect device with an extremely high rating of 4.8/5 stars. This is for the professional 3D printer users who have a whole designated workshop space.
Many buyers of this product rave about it’s amazing product experience and it’s ability to remove continuous moisture with ease.
4. Buying Better Quality PLA Filament
As previously mentioned, the quality of filament you get can make a difference on how brittle your filament is and how likely it is to snap while printing.
The manufacturing process may be similar, but there are differences which set some brands apart from others so make sure you have a reputable brand that you regularly purchase from.
It’s always a good idea to try out a few different brands before being loyal to one so search on some highly rated Amazon brands and find your favorite.
After some trial and error with 3D printer filament brands, I’ve decided to choose the ERYONE PLA Filament brand because it’s competitively priced, and goes above and beyond for quality and customer service.
They are also rated highly on Amazon and have a history of great functional use.
It’s always a great feeling to open up your newly purchased PLA filament and see that it’s perfectly wrapped around the spool and gives off bright, vibrant colors.
If you love great quality 3D prints, you’ll love the AMX3D Pro Grade 3D Printer Tool Kit from Amazon. It is a staple set of 3D printing tools that gives you everything you need to remove, clean & finish your 3D prints.
It gives you the ability to:
- Easily clean your 3D prints – 25-piece kit with 13 knife blades and 3 handles, long tweezers, needle nose pliers, and glue stick.
- Simply remove 3D prints – stop damaging your 3D prints by using one of the 3 specialized removal tools.
- Perfectly finish your 3D prints – the 3-piece, 6-tool precision scraper/pick/knife blade combo can get into small crevices to get a great finish.

- Become a 3D printing pro!
Problems, defects, 3D printing errors and solutions
Often during the operation of a 3D printer, problems may arise due to which defects appear on the finished model. Or instead of a neat product, plastic noodles suddenly appear on the table.
In fact, the causes of defects can be conditionally divided into 2 types - these are physical and software.
Physical ones are those that arise due to problems with the mechanics or any other causes that can be eliminated physically. These include problems with printer mechanisms (belt tension, backlash), clogged or deformed nozzle, incorrect table geometry, etc. nine0003
Software - these are defects that occur due to incorrect slicer settings or, less often, errors in the printer firmware. For example, incorrectly selected print speed, retract settings, incorrectly selected temperature for plastic, etc.
Very rarely, the problem may lie in the wrong or “flying” printer firmware (although usually the printer simply will not start then), overheating of some boards during printing, etc.
These are rather special cases, so we will not consider them. nine0003
Model peels off or does not stick to the build plate
This is the most common 3D printing problem. Every 3D printer has had a case when the first layer treacherously rolls, clinging to the extruder, or the most offensive - when it tears off a partially printed model from the table. The first layer must stick tightly otherwise nothing will be printed.
Gap between table and nozzle 9 too large0023
This is the most common reason. You just need to set the correct gap between the table and the nozzle.
Modern printers often use an auto-calibration (auto-leveling) table system or an auxiliary table leveling program. To calibrate such printers, use the instructions. If there is no manual, it can be downloaded from the manufacturer's website.
If you have a simple printer without auto-calibration, a self-assembly or KIT kit, use a probe or a piece of paper folded in half to calibrate. The probe should be slightly pressed against the table by the nozzle. Before calibration, the table and extruder must be heated. Align the table surface over each adjustment screw (there may be 3 or 4) in turn, and only then check the center point. nine0003
If you're having trouble getting your table surface perfectly level, try raft printing. Raft is a thick substrate in several layers that is printed under the model. It will help smooth out the slight curvature of the table.
A small cheat sheet to determine the correct gap on the first layer
Plastic with poor adhesion
Some types of plastic, due to various reasons, such as large shrinkage, do not adhere well to the surface of the printing platform. In this case, try using stickers or special 3D adhesives to improve adhesion between the table and the first layer of plastic. nine0003
In the early days of 3D printing, there were experiments with different homemade 3D adhesive recipes. ABS diluted in acetone, BF glue, sugar syrup and even beer. Some experiments have been successful. Until now, some enthusiasts use some types of hairspray or glue sticks as 3D glue. But still they are inferior in their properties to industrial 3D adhesives.
Some types of high temperature plastics with a high percentage of shrinkage (ABS, Nylon, etc.) may peel off the table during printing. This is due to uneven cooling and “compression” of the model (the lower layers have already cooled down, but the upper ones have not yet). For such plastics, it is imperative to use a 3D printer with a heated table and a closed case. nine0003
Plastic temperature too low
The hotter the plastic is when it exits the nozzle, the better it will adhere to the print bed. It is better to print the first 5-10 layers at a higher temperature (+ 5-10 degrees) and turn off the blower fan.
Wrong first layer settings (speed and thickness)
A thicker layer sticks easier, so the standard first layer is 0. 3mm thick. With an increase in print speed, the heating block may simply not have time to heat the plastic to the desired temperature and it will stick to the table worse. Before printing, check the speed and thickness settings of the first layer in the slicer. nine0003
A lot depends on how the 3D printer prints the first layer. Try to control the printing of the first layer and only then leave the printer to work alone.
Plastic does not choke from nozzle
The printer has already begun to print, but the print table remains empty. Or part of the model did not print.
Clogged nozzle
In 3D printing, a nozzle is a consumable. The nozzles are clogged or worn out (frequency depends on the type of plastic). The simplest thing is to replace the nozzle. But if there was no spare at hand, you can try to clean the old one. To do this, there is a whole set of thin needles. Or you can heat a clogged nozzle above the melting point of the plastic and “burn out” the blockage. But later it is still better to replace the nozzle. nine0003
Low temperature nozzle
You need to increase the temperature of the extruder in the slicer settings or check the thermistor and heating block. Sometimes the thermistor may not read the temperature correctly due to a malfunction or incorrect 3D printer firmware settings.
If the problem occurs after replacing the thermistor - contact the manufacturer or read articles about PID tuning.
Empty extruder
As the extruder heats up, plastic begins to ooze out of the nozzle. Because of this, the extruder may start printing half empty. Because of this, part of the first layer is not printed. You can push the plastic manually by simply pushing the bar into the nozzle. Or solve this problem programmatically - in the slicer, add a contour print around the model (one line).
Some manufacturers and 3D enthusiasts add a line print on the edge of the table at the beginning of each GCode. This is done so that there is plastic in the nozzle by the time the model is printed. nine0003
Feed mechanism does not push through plastic
The plastic pushes the feed mechanism to the extruder - a motor with a special pulley put on the shaft. If for some reason the plastic is not pushed through (nozzle clogged, extruder temperature low, etc.), then the pulley “gnaws” through the bar. You need to push the plastic bar with your hands or cut off the damaged piece.
Elephant foot
The first layers of the model are wider and protrude beyond the boundaries of the model. This is due to the fact that the upper layers put pressure on the first ones that have not yet cooled down and flatten them. nine0003
High table temperature
Due to the too high temperature of the table, the lower layers remain soft for a long time. Try lowering the table temperature. It is better to reduce gradually (in increments of 5 degrees). You can try to turn on the blower when printing the first layers.
Small gap between nozzle and platen
If, when printing the first layer, the nozzle is too close to the table, then excess plastic will be forced out. After a few coats, this will not be as noticeable, but can lead to the effect of an “elephant's foot”. nine0003
Plastic re-extrusion
When too much material is squeezed out of the nozzle, the walls of the model are not smooth, but bumpy, with sagging.
The solution is software - in the settings of the slicer, you need to set the material feed rate (fluidity) to a lower value. The average value is 95-98%.
It is worth checking the diameter of the rod. If its size is greater than 1.75, then the plastic will be squeezed out more than necessary. nine0003
Plastic underextrusion
The plastic is squeezed out too little, because of this, gaps may appear between the layer. The finished model will be fragile and fragile.
Wrong thread diameter
Check the filament diameter in the slicer settings. Sometimes, instead of the popular 1.75, the default is 2.85.
Incorrect feed factor settings nine0003
Check the fluidity settings in the slicer. The average should be 95-98%.
Clogged nozzle
Something could get into the nozzle and partially block the exit of the plastic. Visually, the plastic will choke from the nozzle, but in a smaller amount than necessary for printing.
Hairiness or cobwebs on finished model
Thin threads of plastic protrude from the outer wall of the model (most often on one side). The defect appears due to the flow of plastic from the nozzle during idle movement. nine0003
Insufficient retract
A retract is a slight pull of a plastic filament from an extruder.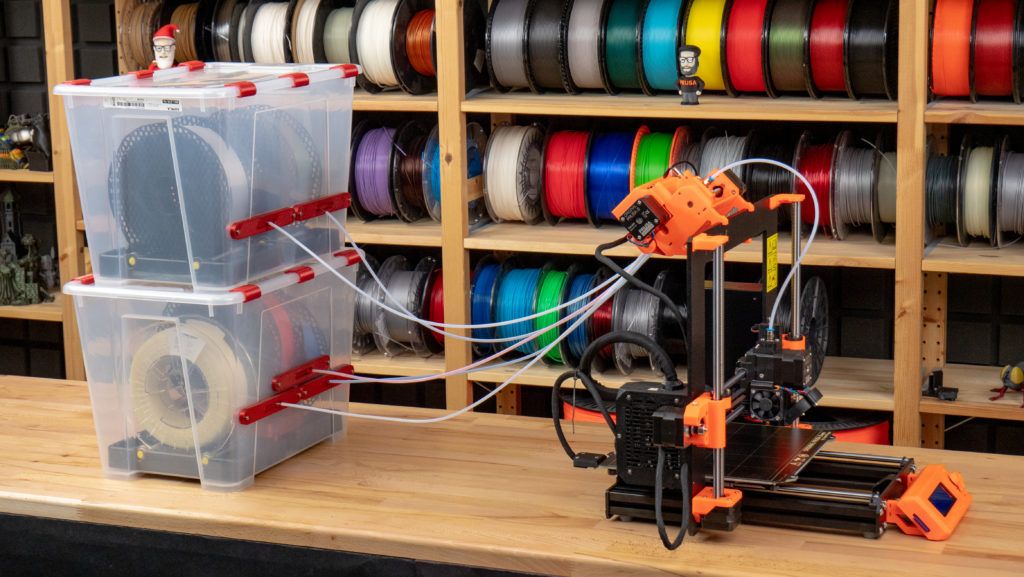 Due to the retract when the extruder is idle (from layer to layer or from model to model), heated plastic does not drip from the nozzle. For some flowable plastics (eg PETG) the speed and amount of retraction must be increased.
"Hairiness" can be easily removed by grinding or cutting off the threads with a sharp scalpel. nine0003
High temperature extruder
The higher the extruder temperature, the more fluid the plastic becomes. It is important to find a balance so that the plastic is not too liquid and sticks well in layers.
In the selection of the optimal extruder temperature, a test model - a tower - helps a lot. It clearly shows how plastic behaves when printed at different temperatures.
.
Temperature test nine0003
Top "perforated" or uneven
The top of the model is bumpy or with holes. The problem may arise if the top of the model is flat. For example, like a cube.
Insufficient airflow
When printing the top plane (cover), the plastic does not have time to cool down and remains too liquid. Because of this, the threads are torn and holes are formed. Increase the fan speed on the last layers. nine0003
Few top layers
The top of the print may be too thin and deform as a result. Check slicer settings. The number of upper layers is not recommended to be set less than 6.
Low percentage of filling
If the infill percentage is too low, then the top layer will simply have nothing to rely on. Increase the fill percentage in the slicer settings.
Model deformation
Some parts of the model seem to have melted in some places or on one side. The problem most often occurs when printing with PLA plastic. The defect appears due to the fact that the plastic does not have time to cool and deforms.
Insufficient airflow model
Turn the fans on to maximum. If their power is not enough (in some printers, the fan is located only on one side), you can put a regular desktop fan and direct it to the 3D printer table. nine0003
Small model
Small models are difficult to blow well. Try to print small items alongside larger ones, or place several identical models in different corners of the table. So the plastic will have more time to cool.
Layer offset
Layers shift along the x or y axis during printing.
Print head jam
Turn off the printer and try to move the extruder along the x and y axes with your hands. The extruder must move freely. If there are jams, check the mechanics of the printer. Bearing wear or the curvature of the shafts may be to blame. nine0003
Electronics overheating
Sometimes electronics problems can be to blame for misaligned layers. The most common cause is overheating of the drivers or too low current exposed to them.
Table top is loose
This is most often seen in 3D printers with glass. During printing, the nozzle may hit the model and move the glass slightly. Before printing, check if the glass or other printing surface is well fixed on the heating table. nine0003
Skip layers
Small holes are visible on the print, or the shell of the model is not continuous.
Teflon tube deformed
There are 2 types of thermal barriers - all-metal and with a Teflon tube. If overheated, the Teflon tube may deform. Plastic will pass through it, but in a smaller amount.
Low extruder temperature or high print speed
If the extruder is not heated enough, then the plastic will not be liquid enough and simply will not have time to be forced through the nozzle. The higher the print speed, the higher the extruder temperature should be.
Sometimes the outer walls print well, but the infill is “torn”. In this case, slow down the infill print speed in the slicer.
Model bundle
Cracks form on the surface of the printout during or after printing. Cracks can be large or very small. Most often, this problem occurs with plastics with a high percentage of shrinkage - ABS or Nylon. nine0003
Sudden temperature difference (if model delaminates during printing)
With a sharp temperature difference (for example, a draft), part of the model cools down faster. This leads to uneven shrinkage and incorrect distribution of internal stress. For plastics with low shrinkage, this is not critical. But if the shrinkage percentage is more than a few percent, the model may burst in layers.
For printing with such plastics, it is recommended to use a printer with a closed housing. If this is not possible, try to avoid drafts and sudden temperature changes in the room where the 3D printer prints as much as possible. nine0003
Print temperature
Due to too low printing temperatures, the layers may not “stick” well to each other. Raise the print temperature in the slicer settings.
Hardening (if the model cracks after printing)
Sometimes cracks appear on the model a few days after printing. This is due to uneven distribution of internal stress after cooling. You can try to “harden” the finished product. nine0003
For hardening, the model is placed, for example, in an oven, and heated to the softening temperature of the plastic. After that, the heating is turned off and the oven is left to cool slowly with the model inside. Due to this, the stress inside the print is distributed more evenly. But accuracy is very important in this method - if you make a little mistake with the temperature, the finished product can “float”.
Ringing
In places where the extruder changed direction, ripples are visible. Most often it looks like a shadow around the “sharp” protruding elements of the model. nine0003
Mechanical problems
Sometimes the problem occurs due to extruder play.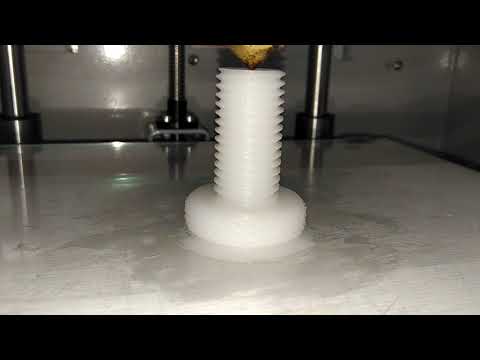 Check if the extruder mount to the rails is loose. Be sure to check the tension of all belts.
High print speed or high accelerations
Moving the extruder too fast can cause vibrations that cause ripples on the wall of the model. The lighter the weight of the extruder, the less noticeable the ripples will be. To get rid of ringing, simply reduce the print speed in the slicer settings. nine0003
Slits for thin-walled models (not solid shell)
The thin wall of the model is not solid, but consists of two thin walls with a narrow gap between them. This problem is often faced by fans of printing "cutting" for baking.
Left model with wall defect, right without
Wall thickness and nozzle diameter mismatch
If the wall thickness is 1 mm, and the nozzle diameter is 0.4, it turns out that for a solid wall, 2 nozzle passes are few, and 3 are already many. The result will depend on the slicer algorithm, but most often you will get 2 walls with a thin slot in the middle (the slicer cannot change the wall thickness). The solution to the problem may be a slight refinement of the 3D model or the use of a different slicer. nine0003
Algorithms for calculating 3D models are constantly being improved and refined, and now this problem is less common.
When modeling, take into account not only the thickness of the nozzle, but also the percentage of “overlapping” of lines on each other. If you have a nozzle with a diameter of 0.4 - make the wall in your model not 0.8, but 0.7 - 0.75.
Wrong model geometry
When instead of a circle you get an oval, and instead of a square you get a semblance of a rhombus. nine0003
The main reason is malfunctions in the mechanics of the printer. Be sure to check:
Belts
Check belt tension in x and y. Belts stretch over time and may need to be tightened or replaced. Each 3D printer has its own way of tightening the belt. If the belts are slightly stretched, you can tighten them with the help of a "spring".
Loose pulleys, etc.
Check if all bolts and nuts are tight. Are there backlashes. Pay special attention to tightening the pulleys located on the motors along the x and y axes.
Sagging of some parts of the model
Some parts are not printed, broken, or instead of a neat surface, a swollen plastic snot is obtained.
No support for overhangs
A 3D printer cannot print in the air, so if there are overhanging elements in the model, you need to set supports - supports. The slicer can set the necessary support itself, you need to check the appropriate box in the settings. nine0003
When printing with soluble support, you can set the gap between the model and support - 0. This will make the surface smoother. If the support material and the model are the same, you need to add a small gap. Otherwise, it will be difficult to separate the support from the model.
Split model
Sometimes the supports can take more plastic than the model. In this case, to save material and time, it will be more convenient to cut the model. If you have more than one 3D printer, then the model will print several times faster. nine0003
When cutting the model, you can leave grooves or mortgages so that the pieces of the model are connected without displacement.
Totals
In this article, we talked about the most popular 3D printing defects and how to solve them. Don't be intimidated by such a long list. Some problems are rare and you are unlikely to encounter them.
There is a list of problems that arise due to the design features of a 3D printer, so try to choose a printer that suits your needs. To do this, you need to understand what products and what material you need. nine0003
Problems associated with printing algorithms are quickly eliminated by software developers.
Do not be afraid of possible difficulties and each seal will be successful.
20 Most Common 3D Printing Problems (Part 2)
A continuation of the translation of the article Troubleshooting Guide to 20 Common 3D Printing Problems, Part 1 is available here.
3D printing issue #11: Layer misalignment
- Issue description
The top and bottom layers are displaced, creating a step effect in the printout.
Why did the problem occur?
There can be many reasons for misalignment of layers - even pushing the printer during printing can provoke it. Also, it can be affected by: bent or misaligned studs, a nozzle that hits the printout and moves it on the platform, etc.
Solution
- The printer must be placed on a stable stand. nine0023 Place the printer on a stable stand in a place where no one can accidentally push or move it. Even slight movement of the printer during printing can cause the layers to shift.
- Make sure the printer platform is secure. Some 3D printers use a detachable platform. This is convenient enough for taking printouts, and it saves the printer from possible damage. But we must remember that the screws and clamps loosen over time, which leads to the movement of the platform.
 Make sure you secure the printer platform properly so that it does not move when printing. nine0430
 - Check that the top layers of the printout do not warp. The top layers of the print can warp easily if cooled too quickly. When the layers deform, they rise and can create an obstacle for the moving nozzle. If the top layers of the printout are warping, try lowering the fan speed.
- Printing too fast. Printing time can be increased by increasing the temperature and flow rate. But this can affect the amount of filament released. If you hear a tapping noise while printing, the printer is running too fast. If you hear a knock, check if the filament is slipping (in the extruder) before setting the print speed in the slicer settings. Set Other > Default Printing Speed (mm/min)' to Simply 3D. In Cura, adjust the print speed in ‘Basic > Print Speed (mm/s). nine0430
- Check the belts. If the layers continue to shift, check the belts. To do this, simply tension the two belts at the same time.
 The tension should be the same, if not, tighten the loose belt until the tension is even. Rubber belts stretch over time (you can tell by the way they begin to slip on the pulley) and it's best to replace them with new ones. Too tight belts can also be a problem, but this problem only occurs if you assemble the printer yourself. Printers such as the Prusa i3 have screws that allow you to adjust the tension of the belts. nine0430
 - Check the pulley. Pulleys are usually connected directly to the stepper motor or to the main pin that moves the print head. If you carefully turn the pulley, you will see a buzzard. Twist it to secure the pulley.
- Check that the studs are clean and grease them. Over time, filament residue sticks to the studs, causing them to have more resistance, which in turn affects the free movement of the head and the displacement of the layers. Clean and oil the studs to fix this problem. nine0430
- Bent or misaligned studs. If you notice that the print head is oscillating, a bent pin may be the cause.
 This can be determined by turning off the printer and moving the print head through the X and Y axes. If you feel resistance, something is wrong. Check if the studs are straight and if so remove them and lay them on a flat surface. If they are bent, you will immediately see it.
Checklist:
- Make sure the printer is on a stable surface. nine0430
- Check that the platform is securely fastened.
- Be careful with warped top layers.
- Print amount may be too high for your printer.
- Check belts.
- Check pulley.
- Clean and grease the studs.
- Bent or misaligned studs.
3D printing problem #12: Clogged nozzle
Problem Description0002 You start printing, but nothing comes out of the nozzle. Reloading the thread doesn't help.
Why did the problem occur?
Small pieces of filament stuck in the nozzle after changing the spool, often when the filament breaks. When the new filament is threaded, the pieces of old filament that are left in the nozzle prevent the new filament from being squeezed out.
Also, the problem may be that the plastic has frozen in the nozzle and must be removed manually. Other reasons include: engineering plastics, old or cheap plastics, etc. nine0003
Solution
- Use a needle. If you're lucky, cleaning the nozzle will be easy. Start removing the filament. Then use the control panel to select “heat up nozzle” and heat up the nozzle by increasing the melting temperature of the cured filament. If you are using Ultimaker 2 go to Maintenance > Heat Up nozzle. For PLA, set the temperature to 220 degrees Celsius. When the nozzle heats up to the correct temperature, use a fine needle to clean the hole (be careful not to burn your fingers). If the nozzle diameter is 4 mm, use a thinner needle. nine0430
- Push in the plastic. If the nozzle is still clogged, try pushing through the excess filament with new plastic.
 Start in the same way as in the previous step, and then remove the Teflon tube from the print head. Heat the hot end to 220 C for PLA and use another filament to push the stuck filament out of the nozzle. As a rule, if the new filament fails to push through the excess, you can manually apply the necessary pressure. But be careful - do not press too hard, because. you can bend the horizontal studs. nine0430
 - When the end of the nozzle is clean, push the needle into the nozzle and clean it of excess plastic.
- Remove or rebuild the hot end. If after all the manipulations the nozzle remains blocked, you will have to make a small intervention in the structure of the printer and disassemble the hotend. If you've never done this before, describe or take a photo of the hot end to make it easier to assemble it later. Start removing the filament, and then following the printer's manual, disassemble the hot end. nine0430
If you're printing with the Ultimaker 2, it's easy enough. When disassembling the hot end, wear heat-resistant gloves, as hotend will be hot. Move the print head to the center of the printer. Disassemble the four screws on the top of the printhead and release the hot end and fans. Increase the temperature of the hot end to 220 C (for PLA) and wait for it to heat up. Then turn off the printer. While holding the fan, use tweezers to remove debris from the nozzle. Use a needle to push debris through and clear excess filament from nozzle. Turn off the printer and let it cool down. When the printer has completely cooled down, start it up with a new spool or filament. nine0003
Checklist:
- Warm up the nozzle and clean it with a needle.
- Remove the Teflon tube and try pushing the remaining filament through with new filament.
- Take the hot end apart and see if you can manually clear the blockage.
3D printing problem #13: Broken plastic
Description of the problem This problem is often found with printers where the direct filament feed is hidden and it is not always possible to replace what exactly the problem is. nine0003
Why did the problem occur?
This problem is quite common and has many causes. The most common are old or cheap filament. Most filaments, such as PLA and ABS, cannot be used for a long time because if they are stored in the wrong conditions (for example, in direct sunlight), it becomes brittle. No printer settings can help this.
Another problem is the thread diameter. It may depend on the manufacturer and batch of the product. Sometimes the filament is too tight on the spool, which can cause the filament to break during printing. nine0003
Solution
- Remove the filament. First, remove the filament from the printer in the usual way. If you are using an Ultimaker printer, select Maintenance and then Change Material. Because The filament usually breaks in the tube, you have to remove the tube from the extruder and hot end. Then warm up the nozzle to remove excess filament.
- Try another filament. If restarting the filament does not help, try a different filament.
 Perhaps the old thread is too fragile. nine0430
 - Release tension (feed pulley). If the new filament breaks, check the tension - the feed pulley on the extruder may be too loose or tight.
- Check nozzle. The nozzle may be clogged and you need to clean it.
- Check flow and temperature. If the problem persists, check the temperature of the hotend. Also check that the filament feed rate does not exceed 100%.
Checklist:
- Check that the filament is not damaged.
- Check filament diameter.
- Adjust the extruder feed pulley.
- Check that the hot end is clean and properly heated.
- Set feed rate to 100%.
3D printing problem #14: Filament stitching
Problem description
Filament stitching at any stage of printing and with any plastic. As a result, the hotend does not extrude the filament and interrupts the print. nine0003
Why did the problem occur?
There are many reasons for this problem, but they are easy to fix (wrong temperature, low voltage, dirty nozzle). As a result of the problems that have arisen, the extruder cannot properly extrude the filament.
Problem Solving
- Help the extruder push the filament. If the thread has just begun to grind, you can tell by the noise and the appearance of chips from the plastic. Press down to help the thread feed. This often helps to get the feed system working again
- Adjust the tension of the feed pulley. Start by loosening, thread and tighten until it stops slipping. The filament can vary in diameter, and although adjustment will remove some of the difference in diameter, some filaments require fine adjustment.
- Rethread the filament. In most cases, you will need to remove or replace the old filament and re-pass it through the feed system. Once the filament has been removed, cut off the filament that has the seam and re-thread the system.
 If the filament is cracked, it means that it is no longer usable. Try it again and if it cracks again, it's too brittle and you need a different filament. nine0430
 - Check hot end temperature. If you are using a new filament and the problem persists, check that the temperature setting is correct.
Checklist:
- Help the extruder push the filament.
- Adjust the feed pulley tension.
- Reload the filament.
- Check hot end temperature.
3D printing problem #15: Poor infill
Problem description
The internal structure of the model is missing or poorly printed.
Why did the problem occur?
There are many reasons why the internal structure of the model is not printed. One of the most common is incorrect slicer settings. It could also be a clogged nozzle
Solution
- Check the fill percentage.
 Check the filling density settings in your slicer. Indicators in the region of 20% are considered normal, if less, there may be problems with printing. For larger printers, you can increase this figure. nine0430
 - Filling speed. The speed at which the printer fills can affect quality. If the infill looks loose, reduce the print speed.
- Change the fill structure. Most slicers allow you to change the internal structure. You can have mesh, triangular, honeycomb or other content. Try different options.
- Check nozzle. Sometimes, these problems are caused by a clogged nozzle. This may not be noticeable when printing smoother outer elements, as the feed rate is much slower, and when printing internal elements at a high speed, this may affect the reproduction quality. nine0430
Checklist:
- Check and adjust fill density.
- Reduce fill rate.
- Try other fill options.

- Check nozzle for cleanliness.
3D printing issue #16: See-through internal structure
Description of the issue
Final print looks good, but outlines of internal structure are visible through the walls of the printout
Why did the problem occur?
The problem occurs because the plastic sticks around the perimeter of the model. This is visible when the printout has thin outlines. Also, the problem may arise due to the fact that the structure of the infill coincides with the perimeter line. However, contour printing is an important part of the printing process that helps the internal structure connect to the external walls. Fortunately, this problem is easy to fix.
Also, the problem may be that you have chosen the wrong wall thickness in relation to the nozzle size you are using. Under normal conditions, the ratio of nozzle size to wall should be directly proportional. If you are using a 0.4mm nozzle, the wall thickness should be a multiple of this value - 0.4, 0.8, 0.12, etc. nine0003
Solution
- Check the thickness of the model outlines. Make sure you select the correct model wall thickness, which is a multiple of the nozzle diameter.
- Increase the wall thickness of the model. The simplest solution to this problem is to increase the wall thickness. By doubling it, you will correct the defect.
- Change the print order. Most slicers give you the option to activate infill printing after perimeter printing. In Cura open Expert Settings and in the Infill section check the box next to Infill prints after perimeters. In Simply3D click on ‘Edit Process Settings’, select ‚Layer’ and under ‘Layer Settings’ select ‚Outside-in’ next to ‘Outline Direction’
- Check the printer platform. Check the model and if you notice that the effect is more pronounced on one side than the other, the problem may be platform miscalibration.
 Recalibrate the platform.
 - Use this to your advantage. Depending on the type of model being printed, you can use this problem to your advantage. When you start printing a model whose durability doesn't matter, select Print from Outside-in. if strength is paramount, select Print in Inside-Out and double the wall thickness. The difference is that when printing with Outside-in, you eliminate the possibility of overlapping, which leads to the infill showing through, but this also means that the tightness of the connection between the external and internal structure will be lost
Checklist:
- Check the wall thickness of the model.
- Increase the wall thickness of the model.
- Print infill after perimeter printing.
- Check platform calibration and recalibrate if necessary.
- Use this to your advantage.
3D printing issue #17: Gaps between infill and walls
Description of issue
If you look at the print from above or below, you will see gaps between the infill and the outlines of the print. nine0003
Why did the problem occur?
Gaps between the outline and infill used to be a common problem with many printers. Now the printing accuracy has improved, more materials are supported, and the problem does not occur as often. But sometimes when using new materials or not as common as PLA and ABS, the problem still occurs.
Gaps occur because the plastic used to print the infill and outline does not bond, but this is an easy problem to fix. Typically, the fill connection parameter is not set, or is set to 0. This means that the slicer tells the printer that the two elements should not touch. nine0003
It could also be that you have set the wrong outline and fill order. If you print the outline first and then the infill, this shouldn't be a problem.
Solution
- Check filler connection. This is one of the most common causes and is easy to fix. In the slicer, select Infill Overlap and increase the value. In Cura this is 15% by default, increase it to 30%.
 In Simplify3D select Edit Process Settings > Infill > Outline Overlap and increase the value. This setting is directly proportional to the width of the extruder, so the % value will depend on the % width of the extruder. Make sure that after adjusting the parameter, the value does not exceed 50% - this can lead to defects. nine0430
 - Printing infill before jumping. If you are printing a model with relatively thin walls, infill jumping may appear. If this happens, try changing the print order of the fill and outline layers. In Cura you can tweak this by checking the box 'Infill prints after perimeters
- Increase hotend temperature. Using some of the latest printing materials such as XT-CF20, increase the temperature of the hot end by 5-10 degrees. nine0430
- Slow down the print speed. Printing at high speeds often causes problems if the printer is not perfectly calibrated. If you need to print your model quickly, you can avoid the gap problem by slowing down the print speed of the top layer.

Checklist:
- Check fill connection.
- Print the fill first, then the jumping.
- Increase hotend temperature.
- Reduce the print speed.
3D Printing Issue #18: Non-Manifold Edges
Description of Issue
Printouts are missing or the final printout looks weak and falls apart despite the quality being broken. Sections of the printout don't look like the preview, or the final printout has confusing geometric errors.
Why did the problem occur?
This problem often appears in warped or strange (model) seals. Non-manifold edges are sides of the model that only exist in 3D space, not in the physical world. For example, if you have two cubes in the real world, and you try to cross them, then you will fail, because. two solid walls prevent two objects from crossing.
In 3D modeling, you can easily intersect two objects and they will still be two separate objects.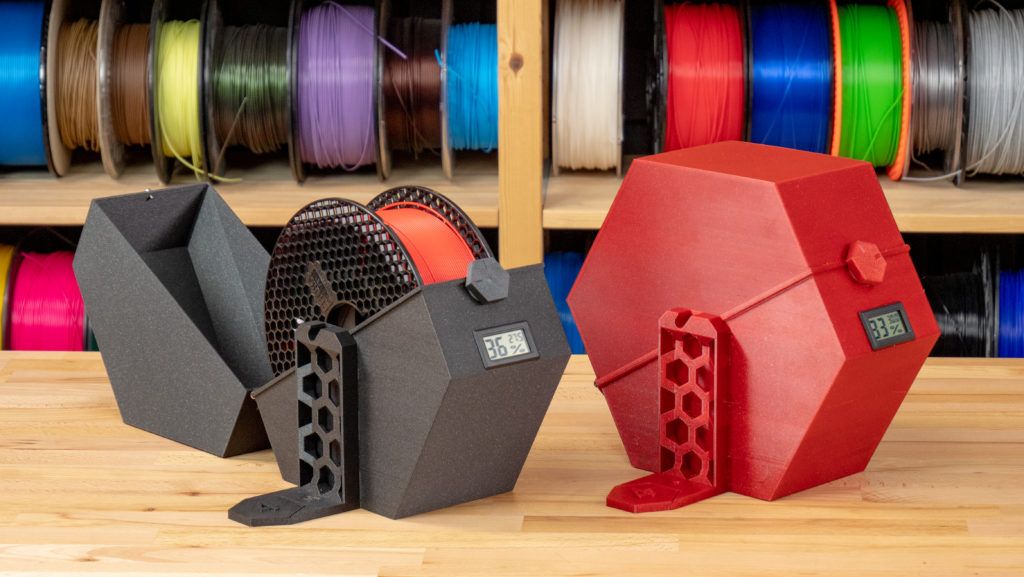 The software will also help them cross paths in the virtual world. In order to get two correctly printed objects, you need to connect them so that any internal walls are removed and the object has an undivided internal cavity. Among the common causes is the removal of object surfaces. This way you just get an object with a hole - it may look like an object with 5 sides, but it will only exist in 3D space, because there is no such object in geometry. nine0003
You can also see the outer contours in the software, these contours intersect in the same space along two axes. The third axis is the wall thickness and it is symbolic and has no real physical dimensions. When the model is sliced, the slicer algorithm will work correctly and in many cases it will remove holes, however, in complex models, the effect may be different.
Solving the problem
- Use the latest version of the slicer. Most recent software supports auto-correction of non-manifold edges, but it's still best to double-check that the model is properly created and ready to print
- Correct Cura's Horrible setting.
 Open the Expert Settings tab in Cura and make sure you select Combine everything (Type-A) in the Fix Horrible option
 - Fix the ‘ Non-manifold ’ option in Silmplify 3 D . In Process settings select the Advanced tab and select Heal next to Non-manifold segments.
- Use layer view. If your slicer uses layer view, check the model to determine where the problem is. nine0430
- Use the software to correct the problem. One of the easiest ways to fix this problem is to use custom software such as Blender or Meshmixer. Both programs will help you quickly identify model problems and fix them before slicing.
- Connect objects . It's better to fix the 3D model before you send it to the slicer. To do this, make sure there are two objects in the model that intersect or overlap. Select the desired Boolean function to intersect, merge, or split elements. nine0430
Checklist:
- Update the slicer to the latest version
- In Cura, fix the Fix Horrible setting
- In Simplify3D, fix the Fix Non-manifold setting
- Use the layer view to fix the problem before printing.

- Use Blender or Meshmixer to fix problems
- Merge objects.
3D Printing Issue #19: Model Sagging
Issue Description
You load the model into the slicer and everything looks fine. You start typing and find that some elements of the model print fine, while other parts look absolutely ugly. Model sagging is a typical rookie mistake. But the strangest thing is that even experienced professionals often encounter the problem of sagging and do not know how to deal with it.
Why did the problem occur?
Fusion printing requires each layer to be superimposed on the other. Naturally, if your model has an element with nothing under it, the filament will be extruded into the air and end up sagging or forming an incomprehensible mess. nine0003
Actually, the slicer should prevent this. But in most cases, the slicer will just continue to print without warning that the particular model needs more support.
Troubleshooting
- Additional support. The easiest and fastest way to solve the problem is to add support for sagging elements. With the help of a slicer, this can be done very quickly. In Simplify3D, click Edit Process Settings > Support > Generate support material and select quantity, schema, and settings. In Cura, just click Support type in Basic settings. nine0430
- Create support in the model. The support created by the slicer can be intrusive, so creating your own support in the model is a good idea. It takes some skill, but the result is worth it.
- Create a supporting platform. When you print a figure, the long distance movement of the print head causes problems. Using support from the platform can also create problems. For high supports that are fragile and easily removed, this distance is the root cause of all problems. Creating a solid block or wall (support) under overhanging objects (like under the arms on the model) and creating less support between the arm and the block (the main element of the printed model) can be a good solution.
 nine0430
 - Tilt the walls. Tilt the wall at a 45º angle so that it supports itself. At the same time remove any additional support.
- Print the element piece by piece. Another way, instead of printing the whole element at once, is to divide it into several elements. In some models, you can turn over the element whose sags and make it the basis. The only thing you need to find is a way to glue all the elements together.
Checklist:
- Add support.
- Add support to the model.
- Create a supporting platform.
- Tilt the walls.
- Divide the model into several small parts.
3D printing issue #20: Model is skewed
Issue Description Instead of being printed flat, the top borders are printed at an angle, but not all the way around the model. The angle of inclination can change on different layers.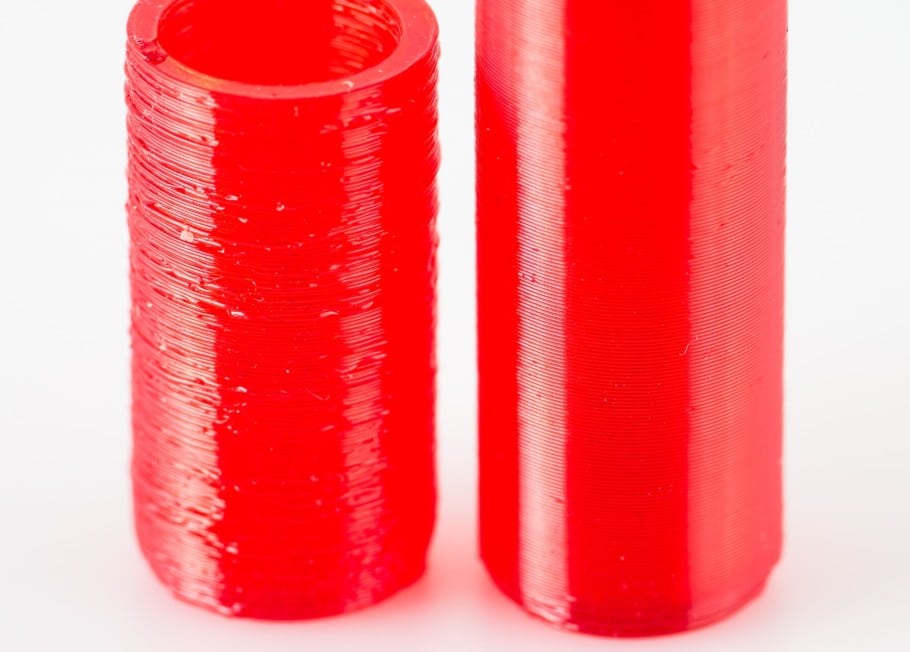 nine0003
Why did the problem occur?
The cause of this problem is very simple - one of the pulleys that attach to the stepper motor is loose (loose) or one of the belts frays something and prevents the head from moving completely. To correct this error, you need to make sure that the pulleys are securely fastened and the goosenecks are fixed in the right places.
Although this is a quick and easy way to fix the problem, finding and tightening the bellows is not so easy. Determining which of the pulleys is the problem and getting to it can take a lot of time. nine0003
Solution
- Check the X and Y axes. If your printout is skewed to the left or right, the problem is in the X axis. If forward or backward, the problem is in the Y axis. Once you have determined which way your printout is skewed, check the belts and pulleys. If you are using printers such as the PRUSA i3 this will be fairly easy as the steppers are attached to the main drive belt.

Learn more